A series of videos showing how to get the achievements in Jotun’s Valhalla Mode.
مقدمة
Here’s a series of videos where I go through how to earn the Valhalla Mode achievements in Jotun.
Apologies for being like 6 years late on this guide. I made the videos on Youtube, but both forgot and was too lazy to put together a Steam guide until now.
Much like the non-Valhalla videos, the general structure of this guide is a kind of “Show and tell”. I show a video of a good run I got, and if that’s all you need then you can leave it at that. If there’s anything in the video you don’t quite understand, I go into great detail on all the fights below each video.
Feel free to ask any questions in the comments below or on the Youtube videos! (Though I honestly probably don’t remember the intricacies of the game anymore.)
Perfect Valhalla (No Damage)
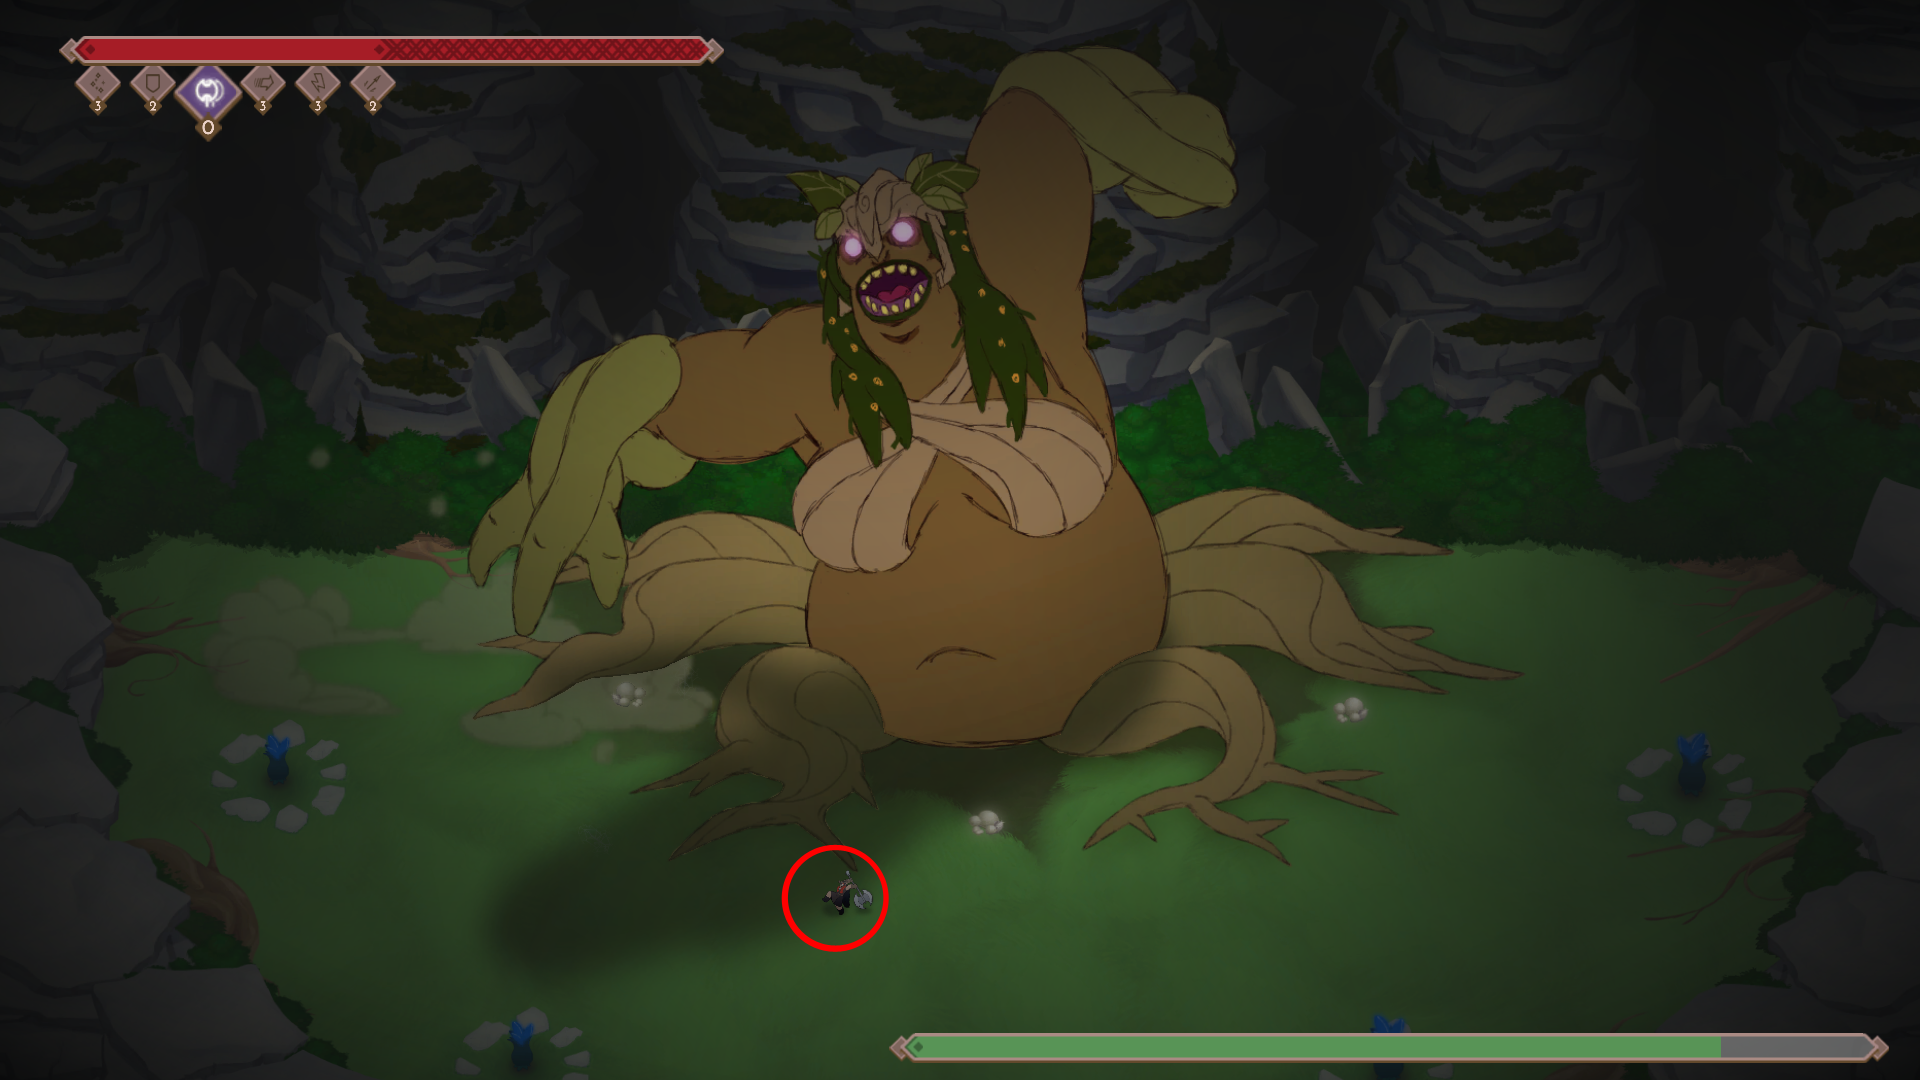
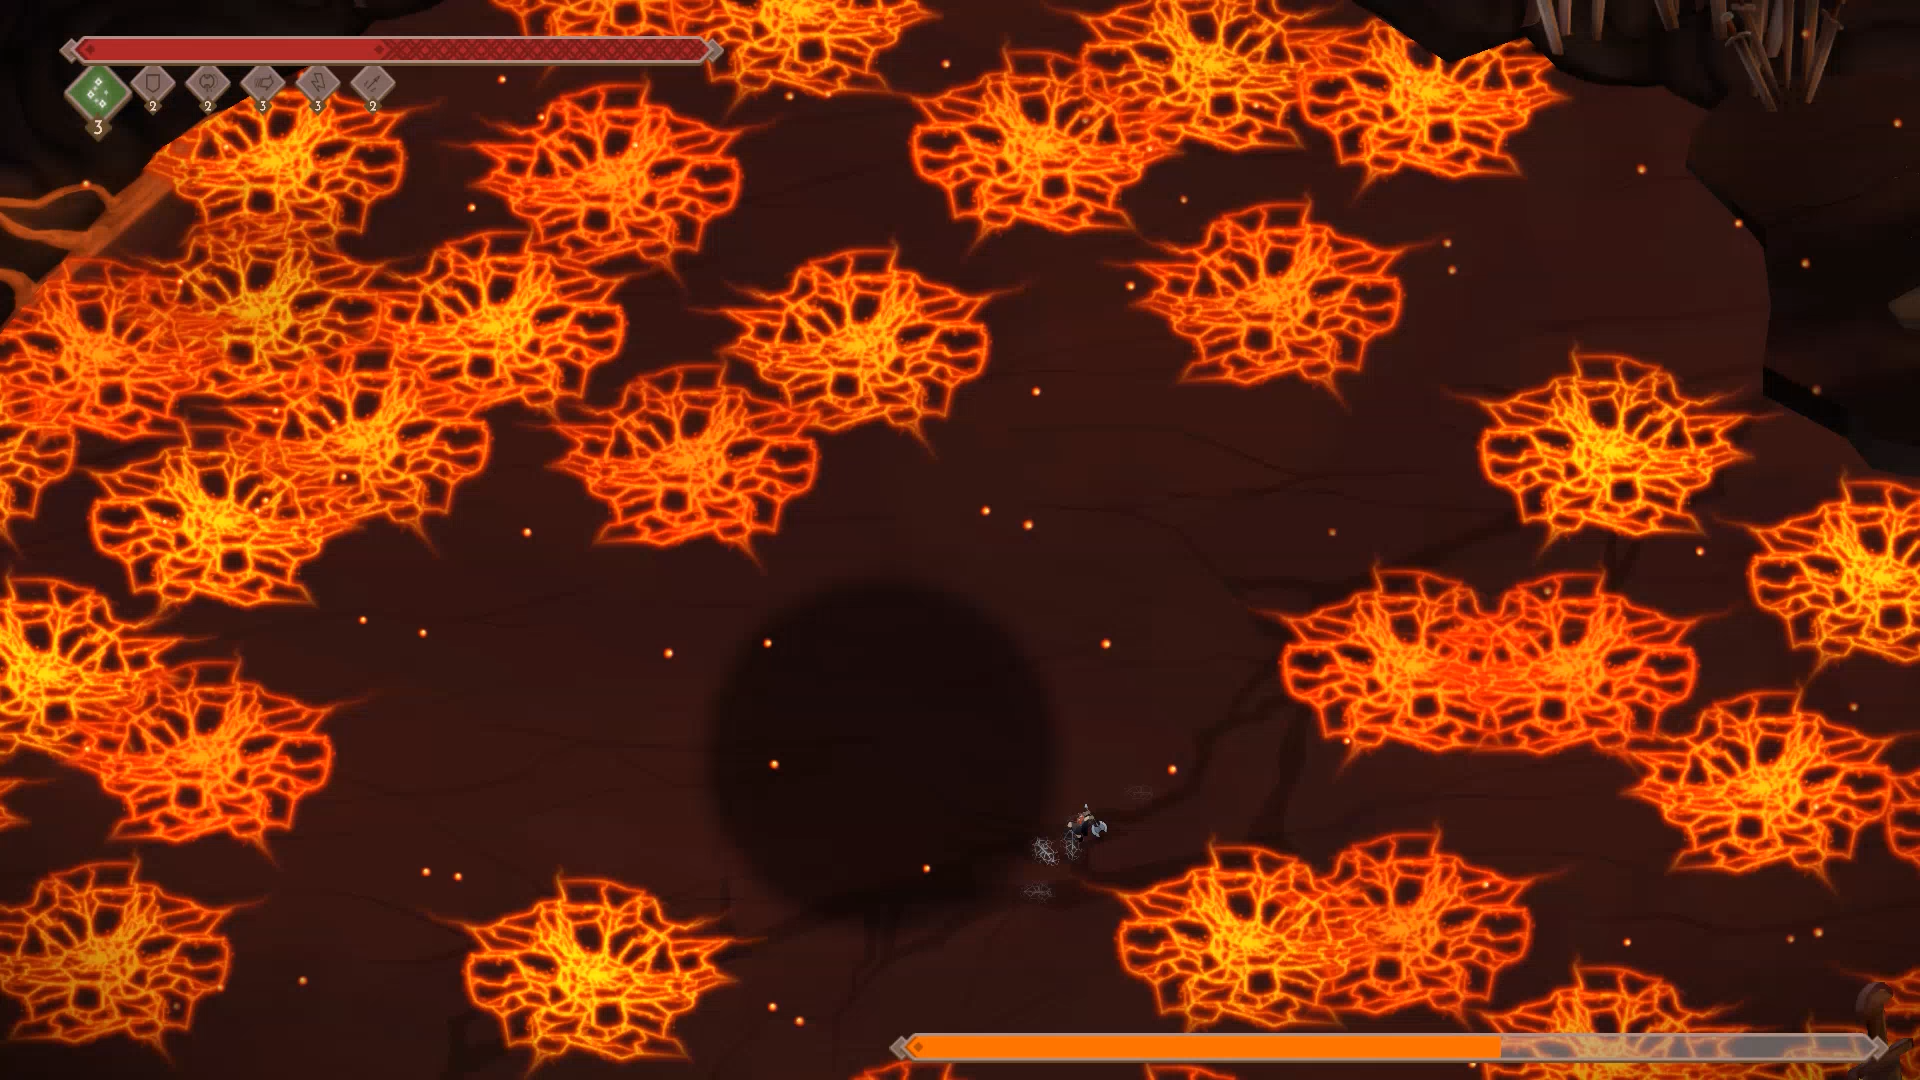
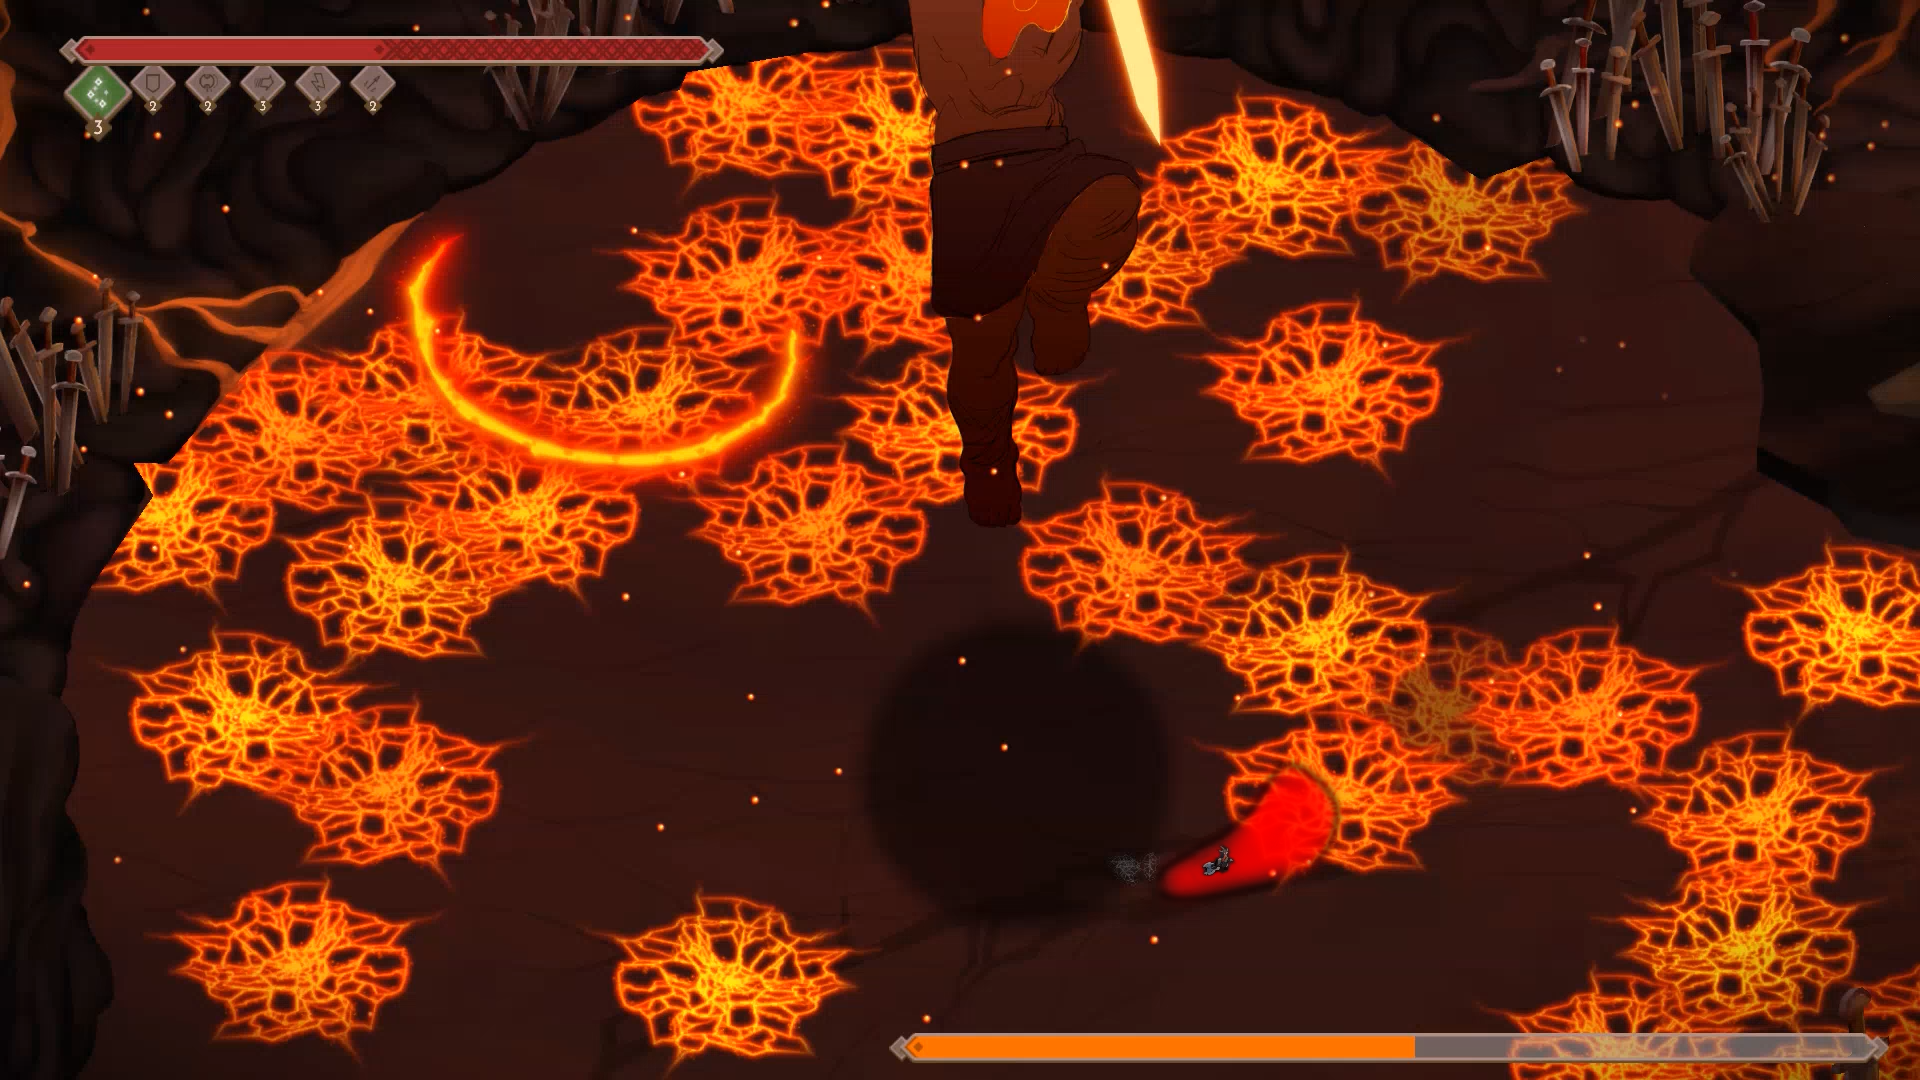
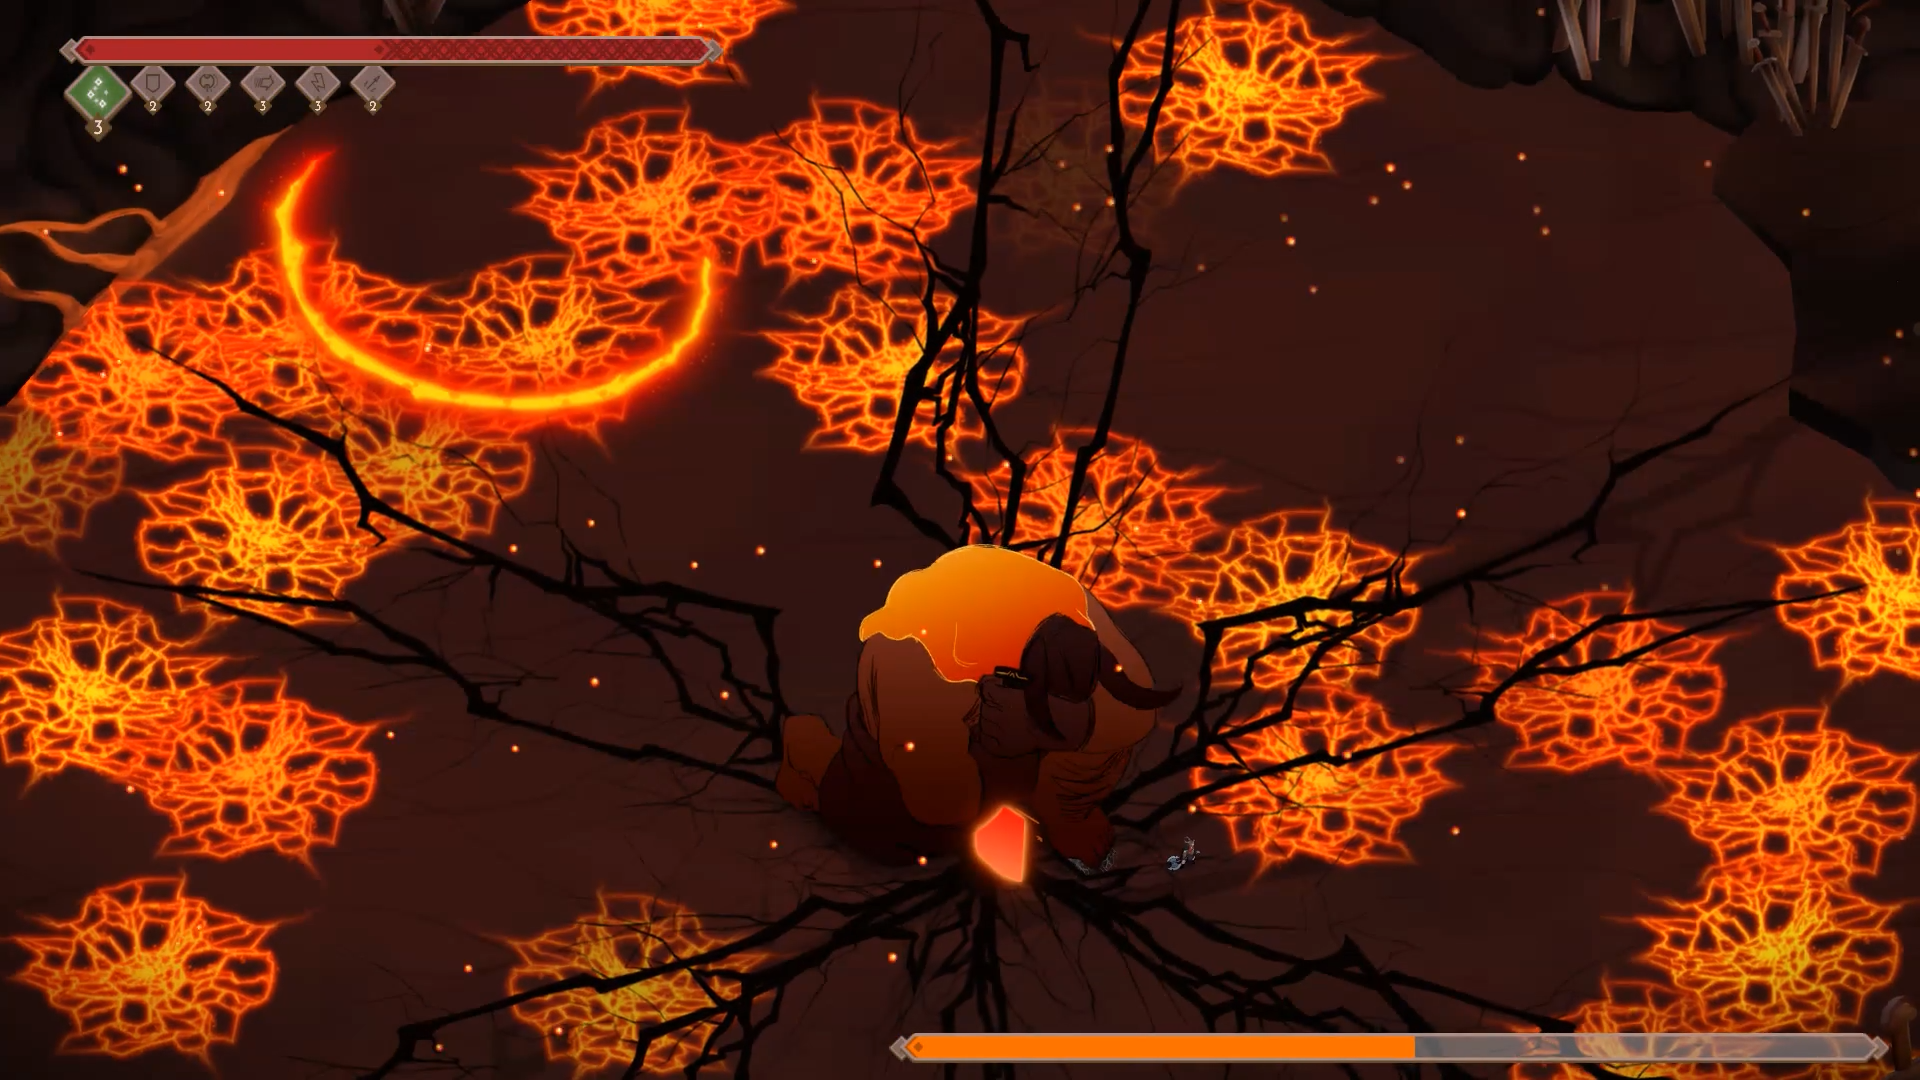
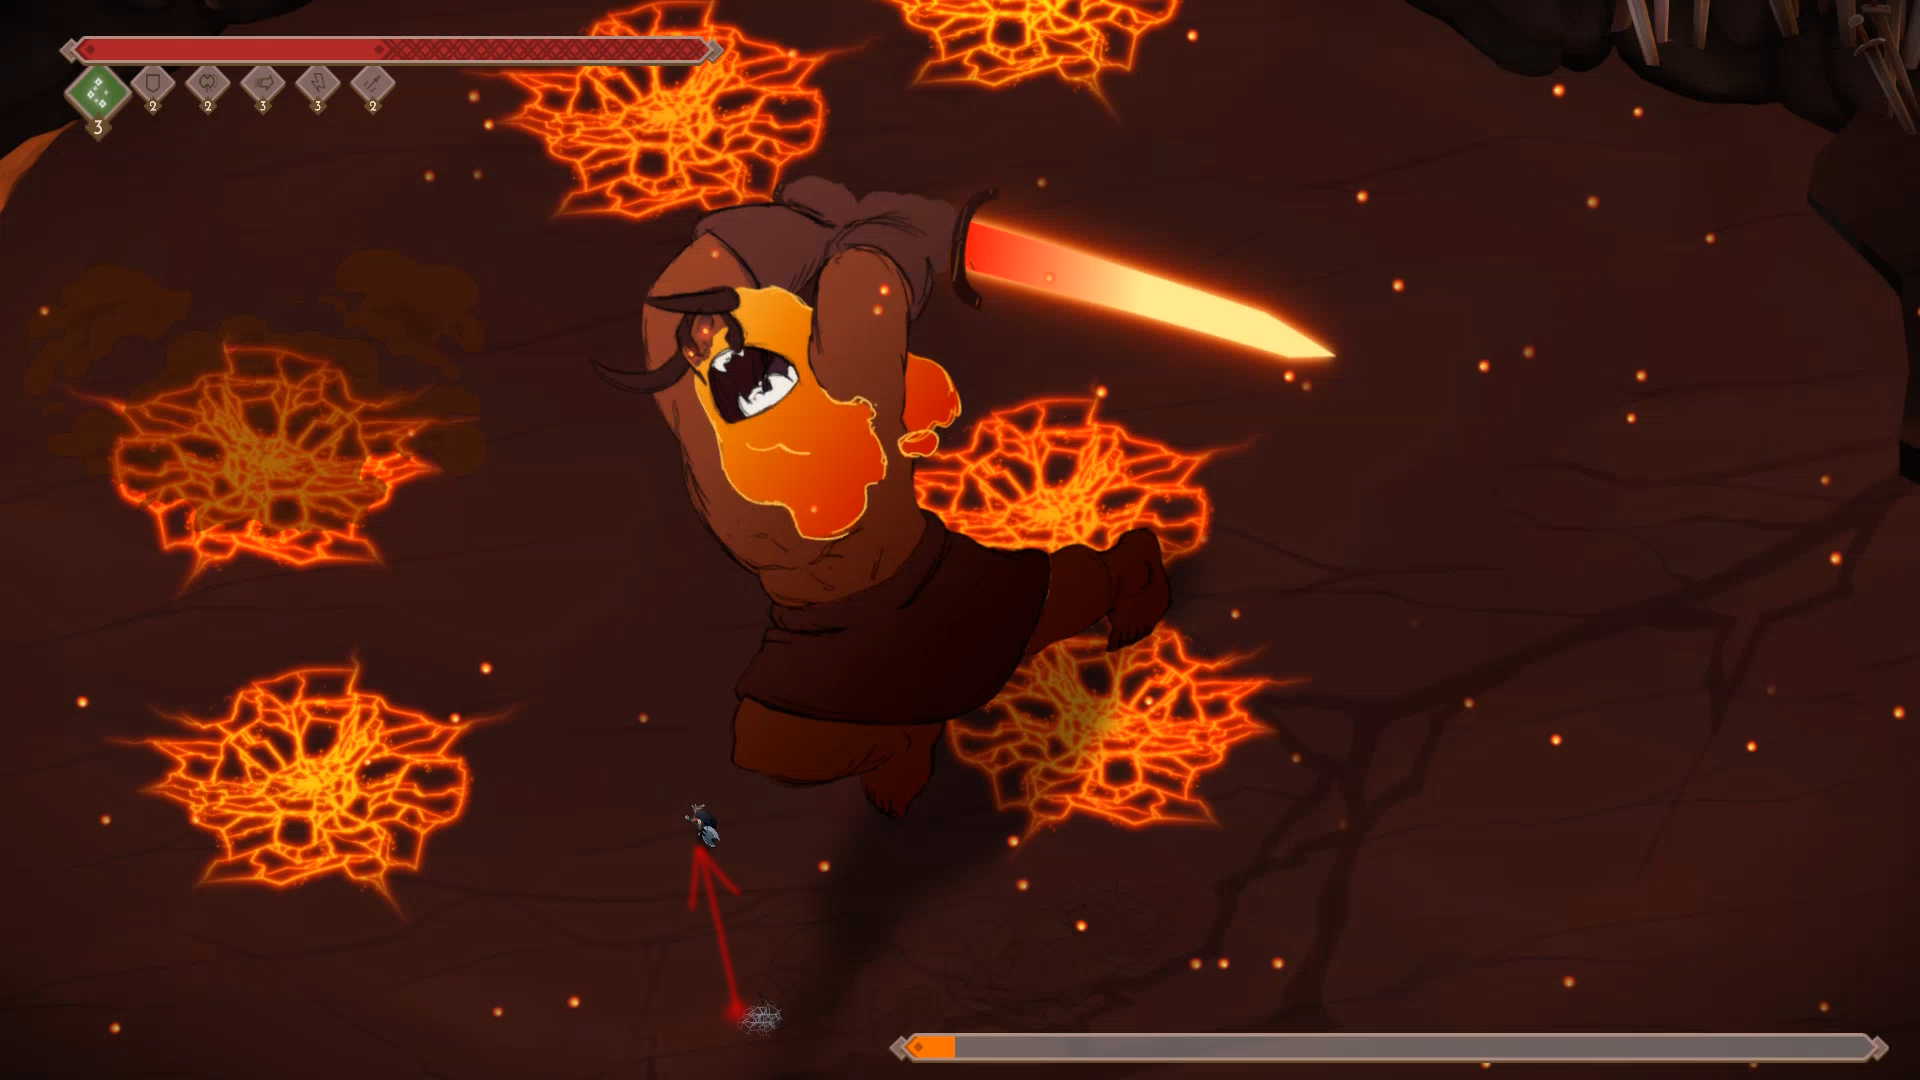
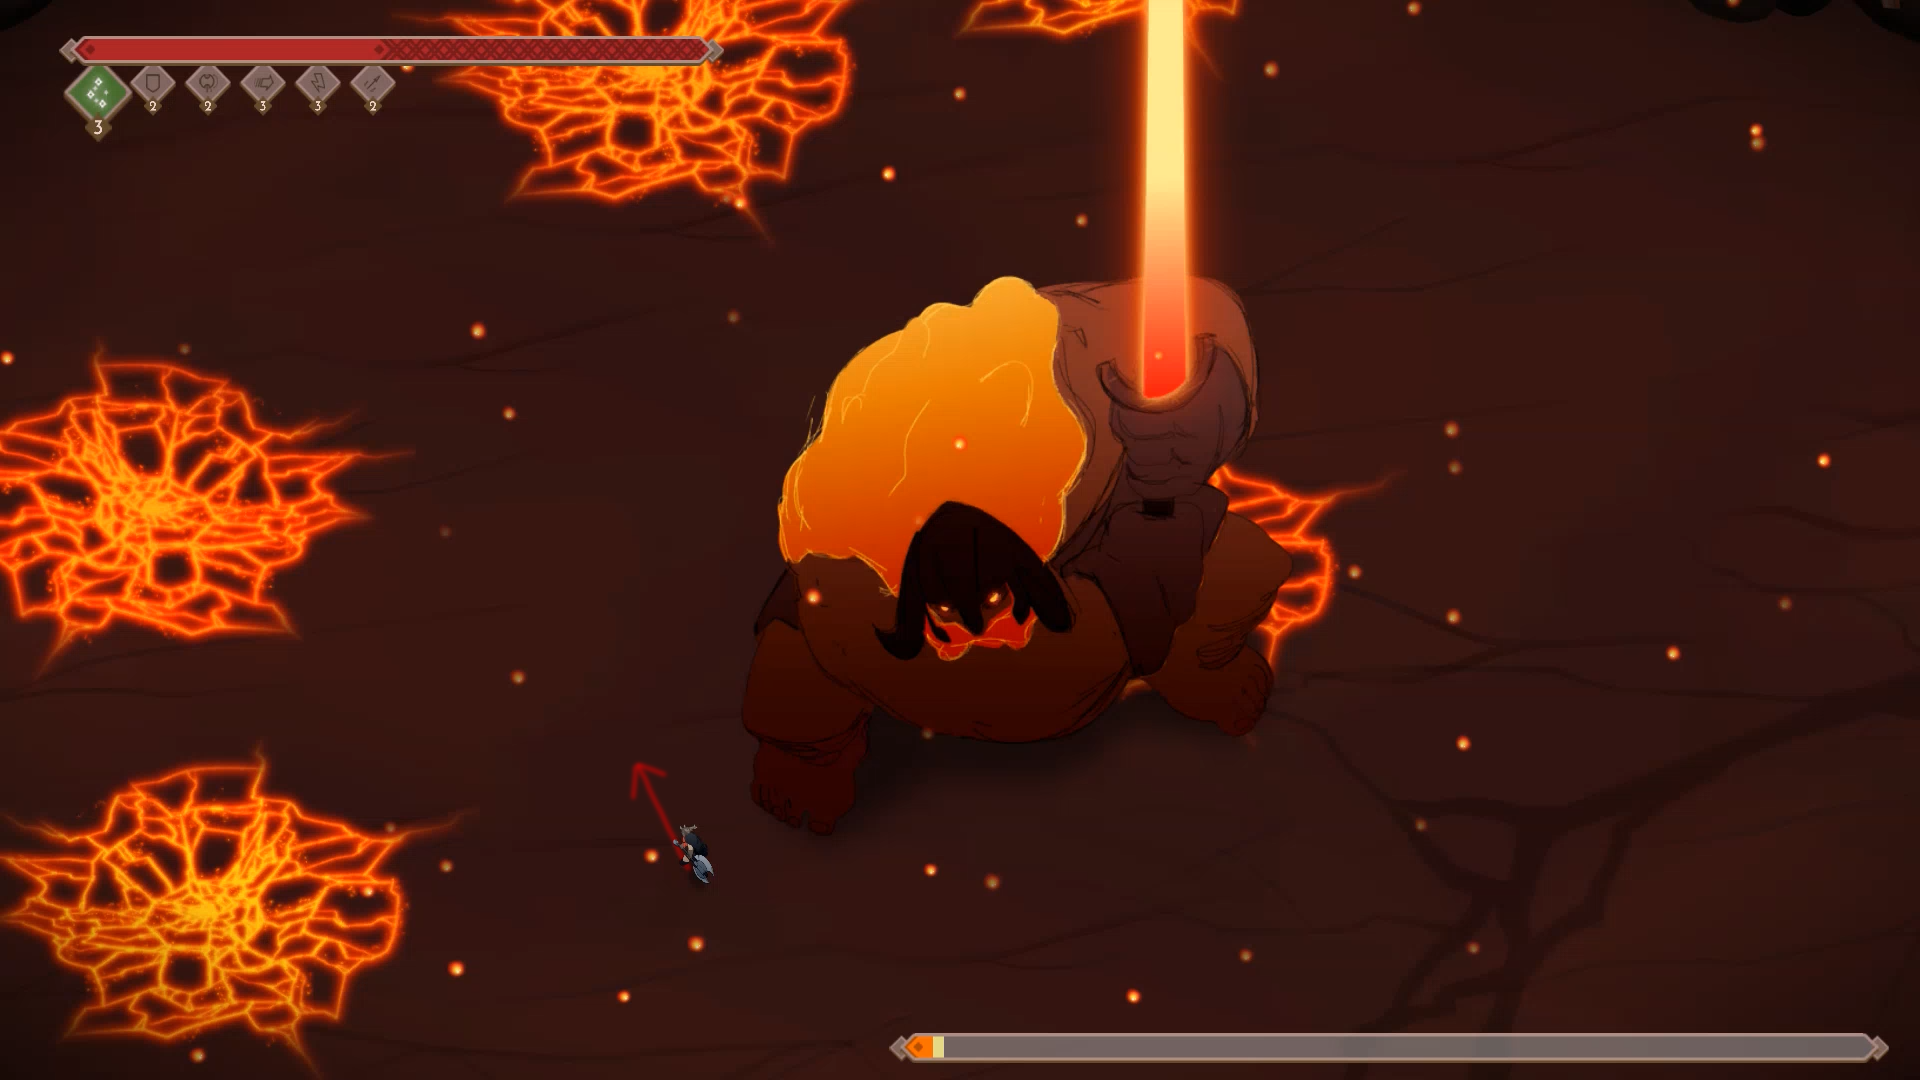
Jera – No Damage
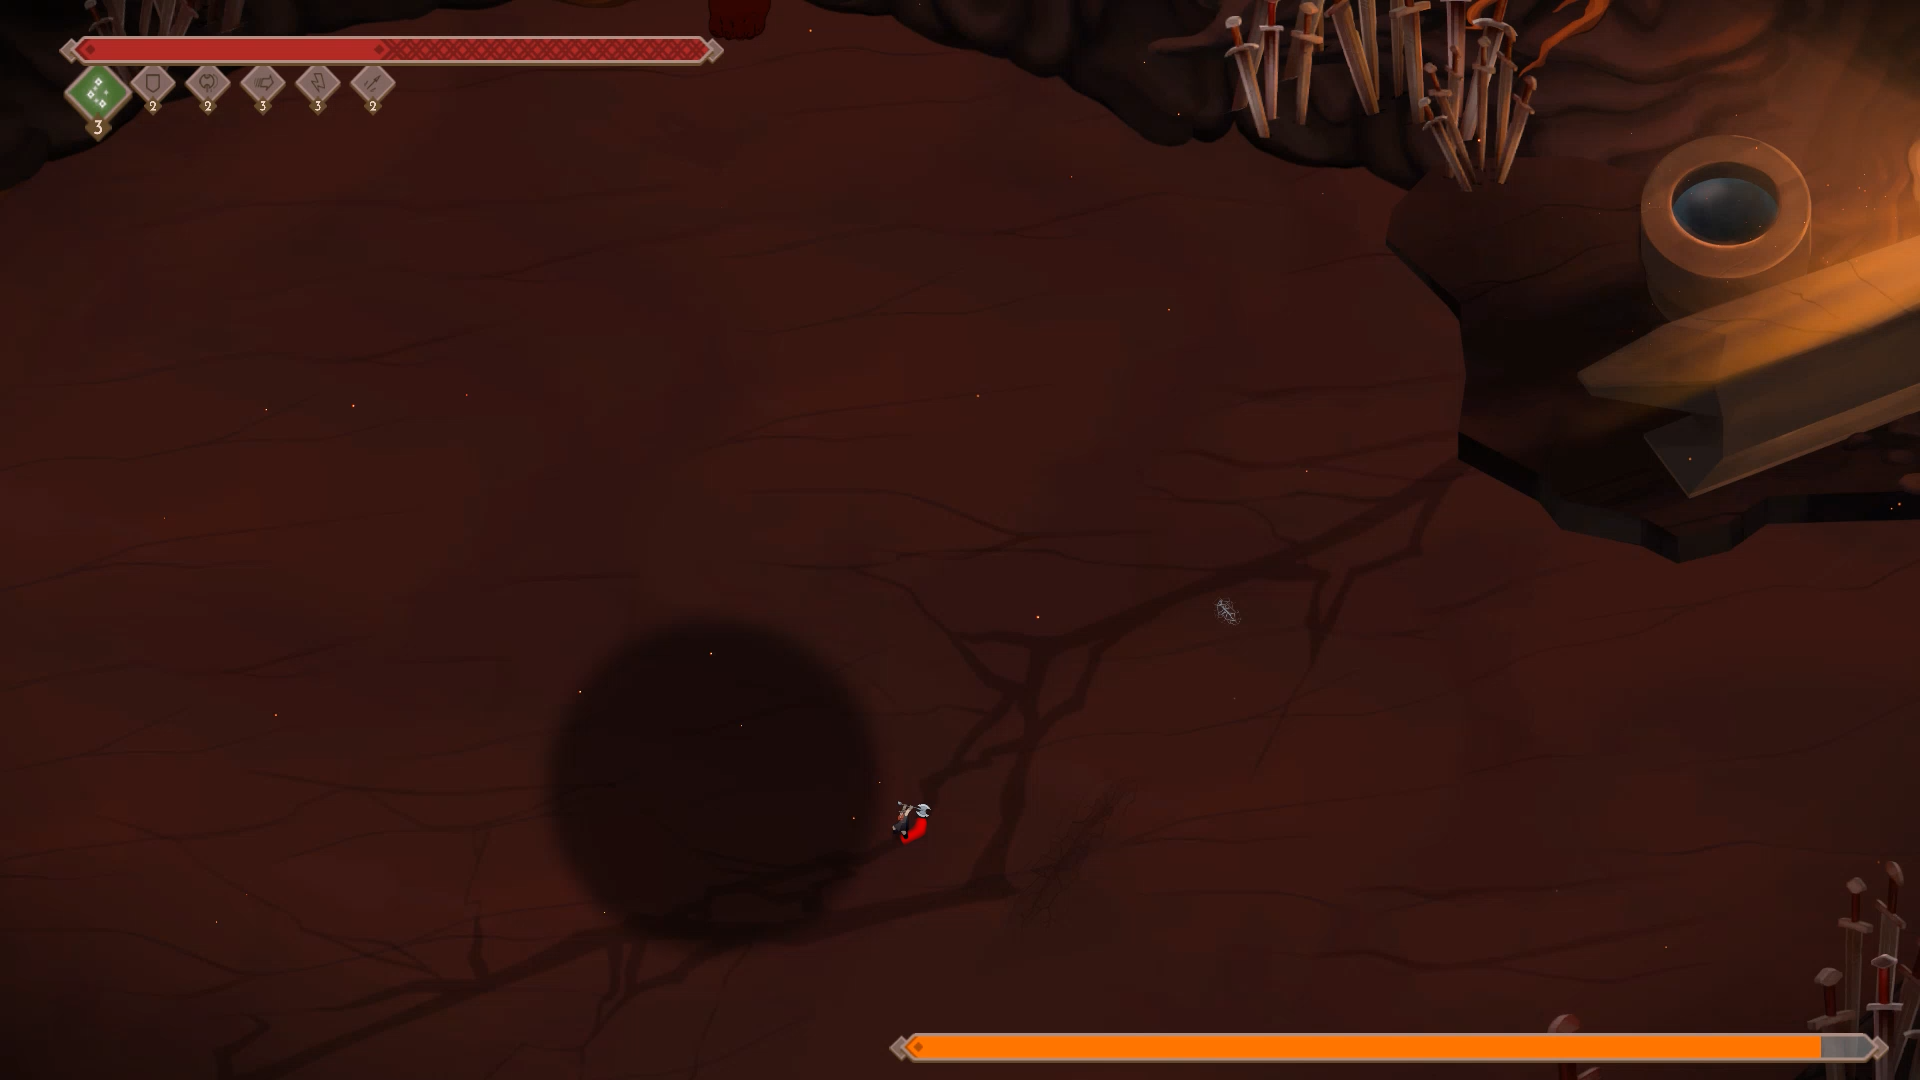
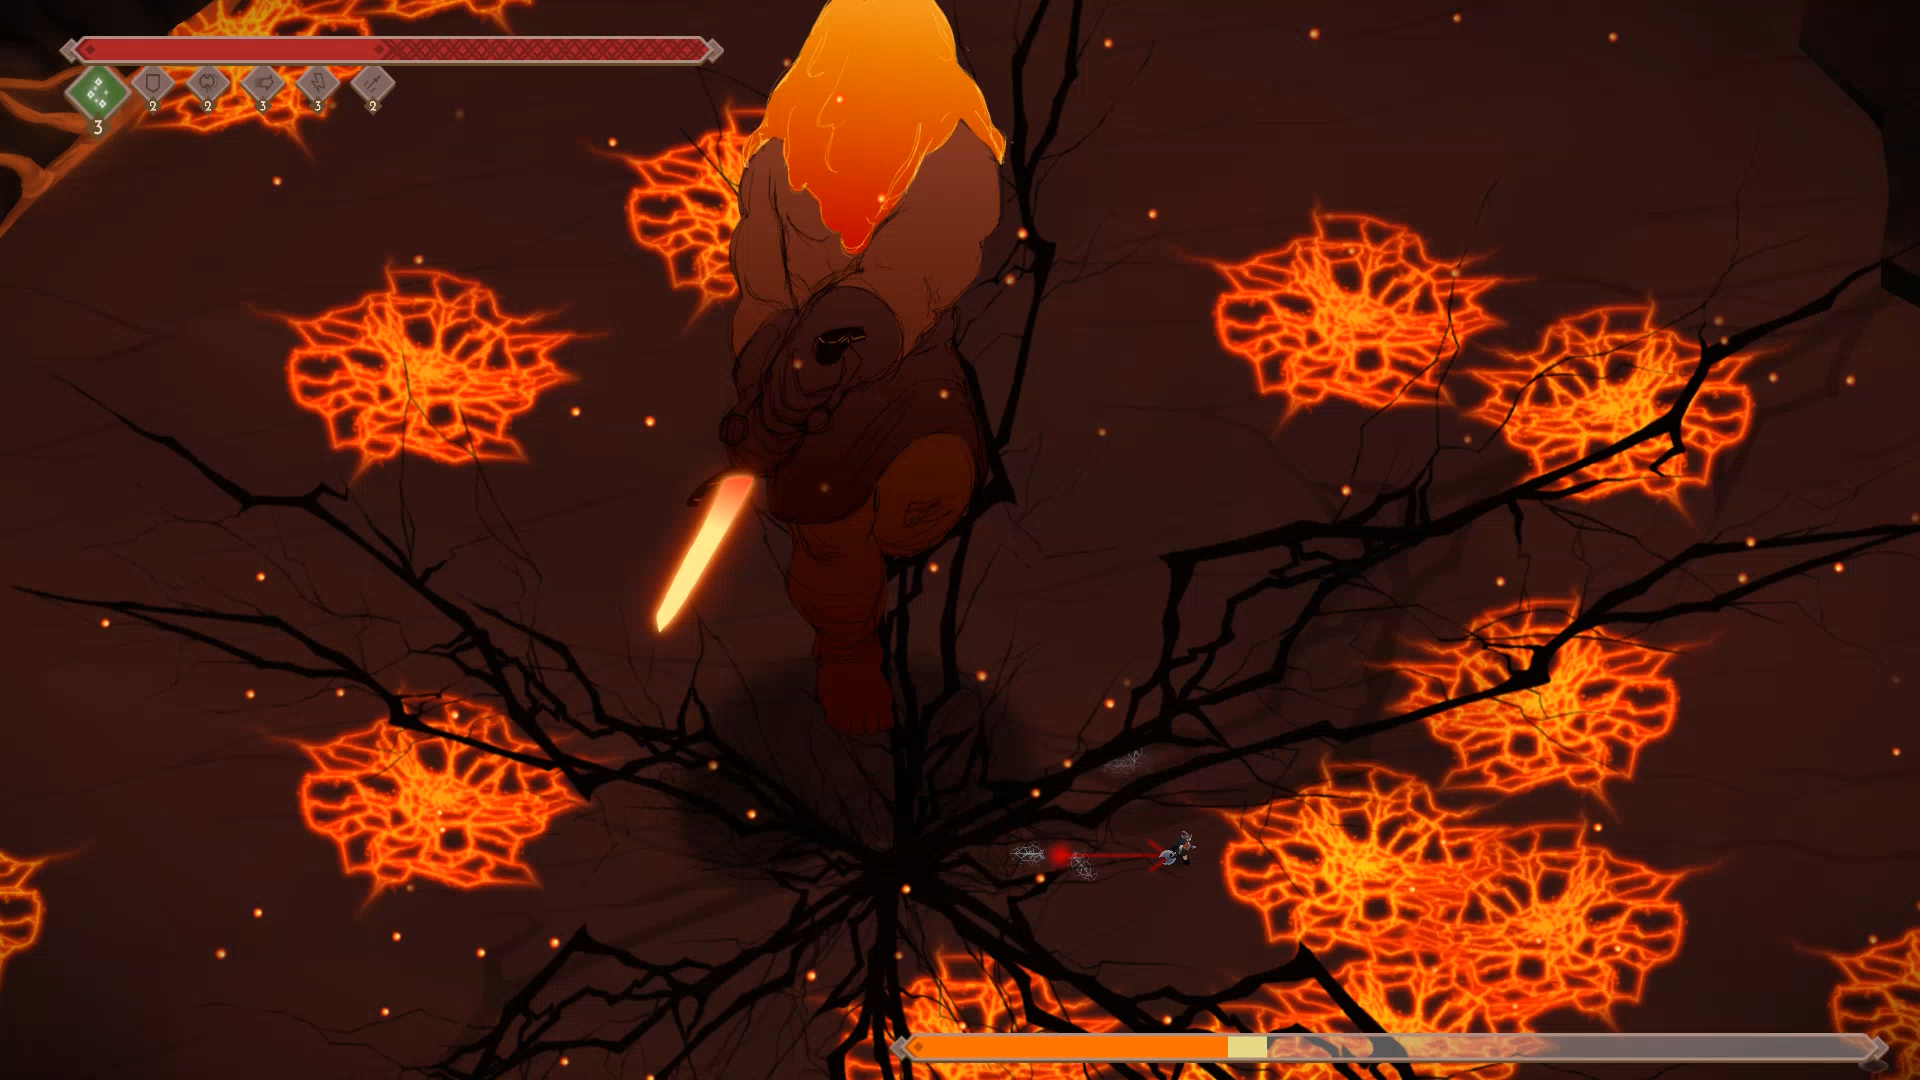
Starting off the Valhalla mode walkthroughs with Perfect Jera. This is a fight that I initially thought was insane and nigh-on impossible due to how hard it was to get any time to damage her. لكن, after learning that you can hit her arms during her slam attacks and figuring out the rest of this pattern, it’s actually the most consistent and calculated fight in the game. أدناه, I will literally write a step-by-step guide for how I defeat her, which works every time as long as you don’t make any major mistakes. Prepare for quite the earful.
1. Initiate the fight and run to the second flower on the left. Then wait until her head stops moving after that little “spin” she does when emerging. That’s my tell to start running on to her left arm, placing both my Loki powers and charging up a heavy attack. If you run too early, the poison sac will go off as you’re waiting for her health bar to appear, and too late means you don’t have time to place both Lokis and charge up a heavy attack before it’s too late.
2. After landing the heavy attack, roll down to the left twice to get out of the poison sac range and charge up another heavy attack to hit her arm as she slams right next to you. بعد ذلك, roll once towards her center and try to land a light attack on her arm as she slams straight down.
3. Run up and heavy attack her once on the stomach, and provided you did everything right, this should knock her down. Immediately roll out of the poison sac range and let it stop shaking before running back in, light attacking twice, then heavy attacking.
3ب. If you messed up and didn’t get the knockdown on the first heavy attack, simply retreat to a flower to avoid the poison mist, then bait out another slam attack. You can stand right below her left root to land a heavy attack on her arm during the second slam, كما هو موضح هنا:
بعد ذلك, knock her down with a heavy to the stomach, and proceed with the fight as shown.
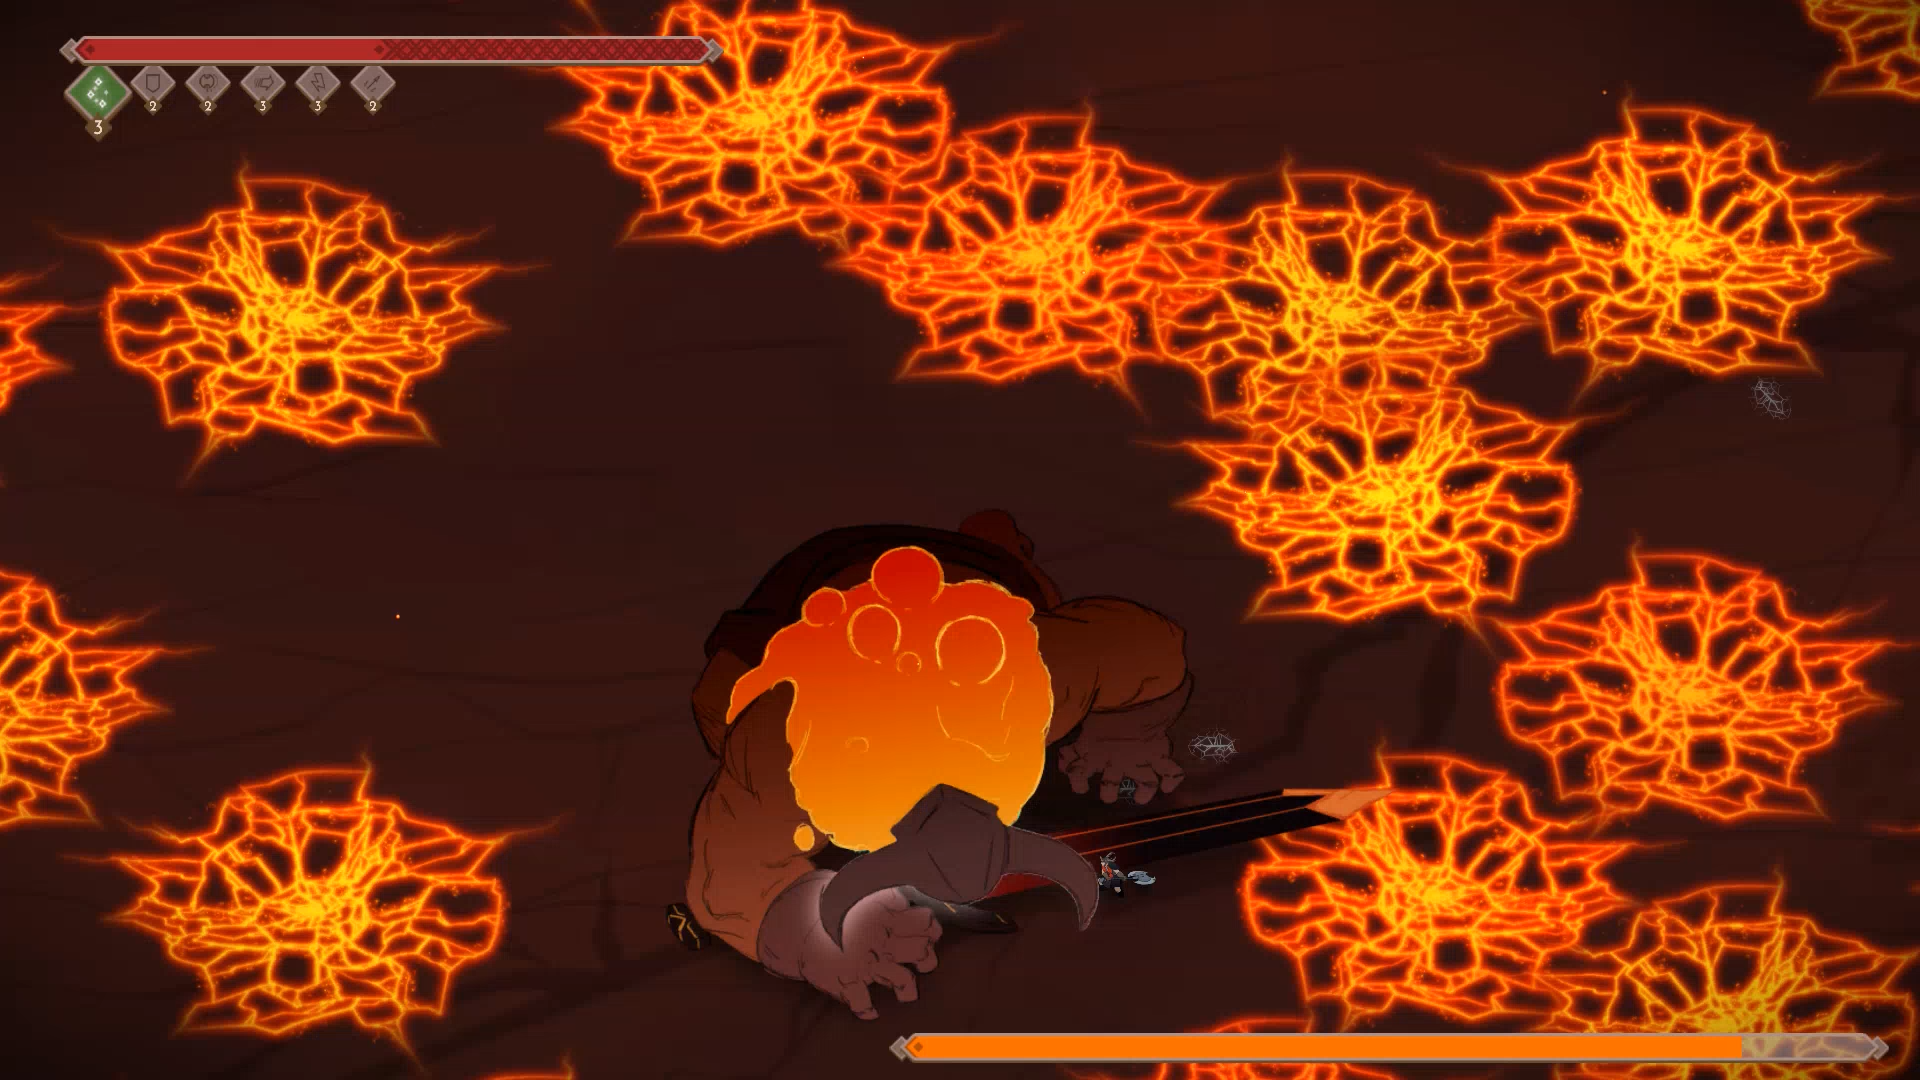
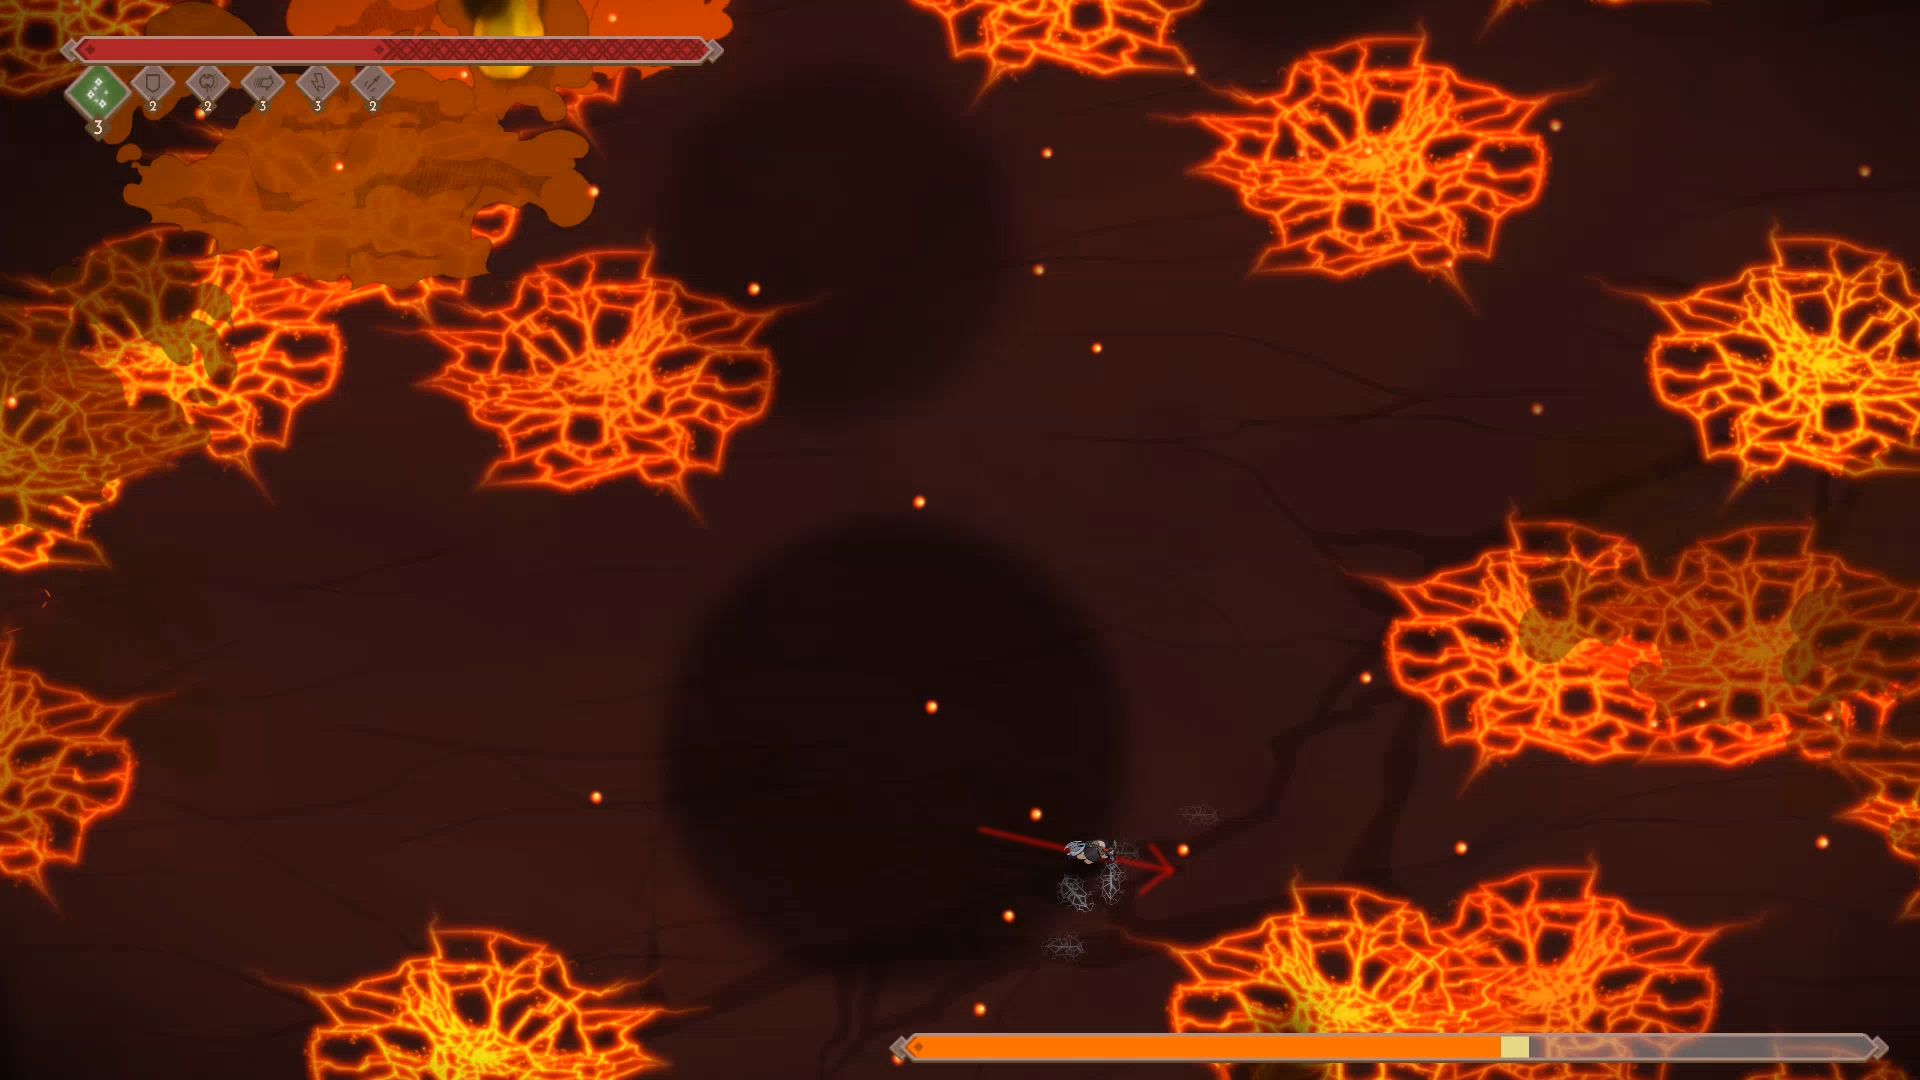
4. After the first knockdown, run straight down to the center flower. You want to try and keep the area around the flower clear of thorns, and make sure you have a path to her. You can kill a handful of thorns right away, but make sure you don’t stay too long near the flowers or she’ll skip her slam attack and go straight to the poison mist, followed by summoning thorns again.
5. Bait out the slam attack by moving towards her slightly, then run back to the bottom flower. If you position yourself immediately in line with (or slightly below) the flower, her slam won’t hit you, despite what the shadow would indicate. Release the heavy attack just as she slams down.
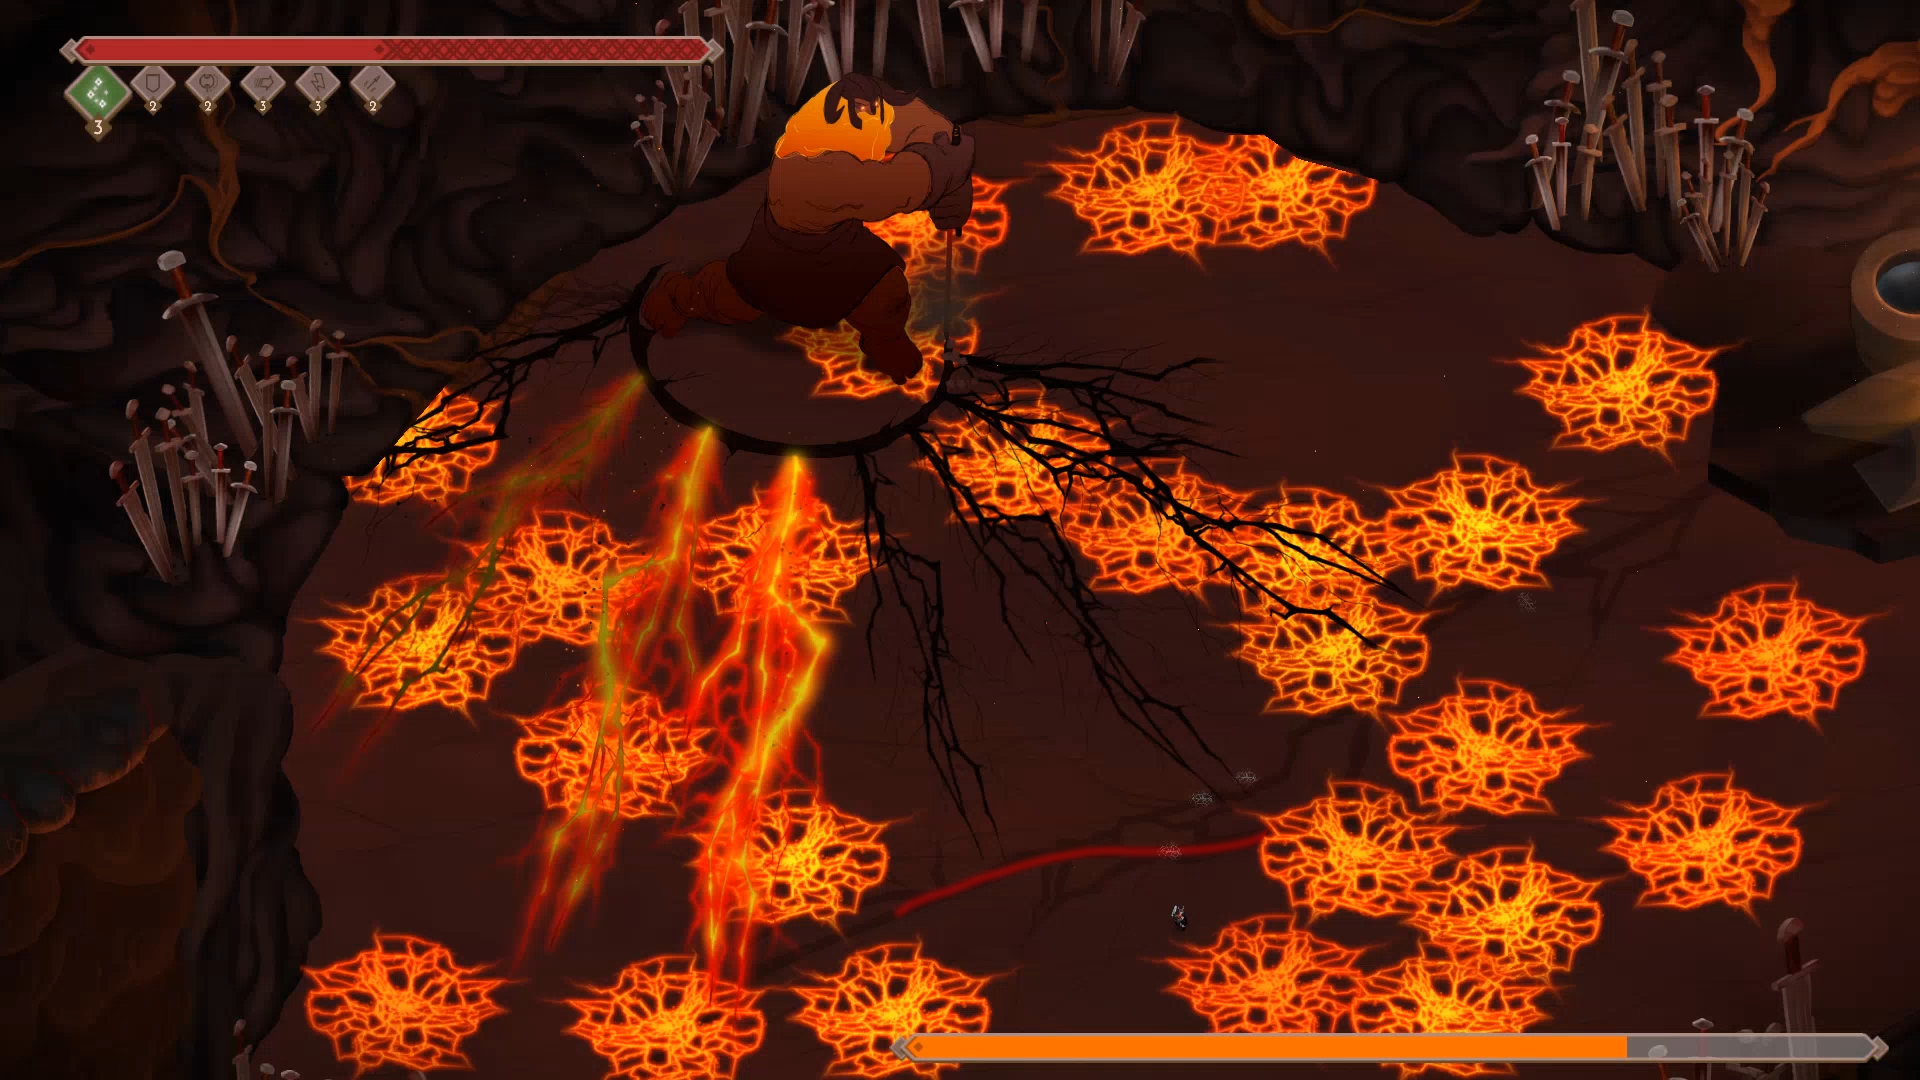
6. Immediately after that, pop a Freya, rush past any thorns and pop a Thor near her, both to do damage to her and to clear out any thorns around you. Get two heavy attacks in on her stomach, knocking her down, but make sure to roll away from the poison sac right afterwards, then wait for it to stop shaking before moving back in and landing a third Thor hit on her weak point.
7. You should’ve hit her 50% علامة, meaning she’ll extend her roots, but they don’t matter much. I usually take out the right root, since it can block you from landing the heavy attack on her arms, but it’s really not necessary. بعد ذلك, repeat what you just did. Clear out thorns, making sure to step towards her to bait out the slam attack. Land the heavy on her arms, Freya, run to stomach, Thor, hit stomach twice knocking down, wait for sac, Thor hit on weak point.
8. At this point she should be below 25%, and starting the last phase with yet another slam attack. Get back to the flower and land the heavy attack on her arms again, then Freya, run to stomach, Thor, hit stomach. عند هذه النقطة, you can just keep heavy attacking with Thor, and if you want to be safe, pop a Heimdallr shield or two.
That’s the basic gist of it. ثانية, very calculated pattern, so it might take a while to get it all down, but assuming you perform everything correctly, there’s very little that can mess you up in this fight. Don’t forget that you have shields and Odin spears to fall back on if you need them. فمثلا, if you heavy attack her stomach when she’s supposed to be knocked out, and she isn’t, just toss a spear and that should do the trick, letting you continue with the steps.
The only minor thing that can ruin the runs are the thorns. So despite playing perfectly, you may need a few tries to get good thorn luck, but you really only need to worry about the ones next to the flower and on the way to her stomach.
Fé – No Damage
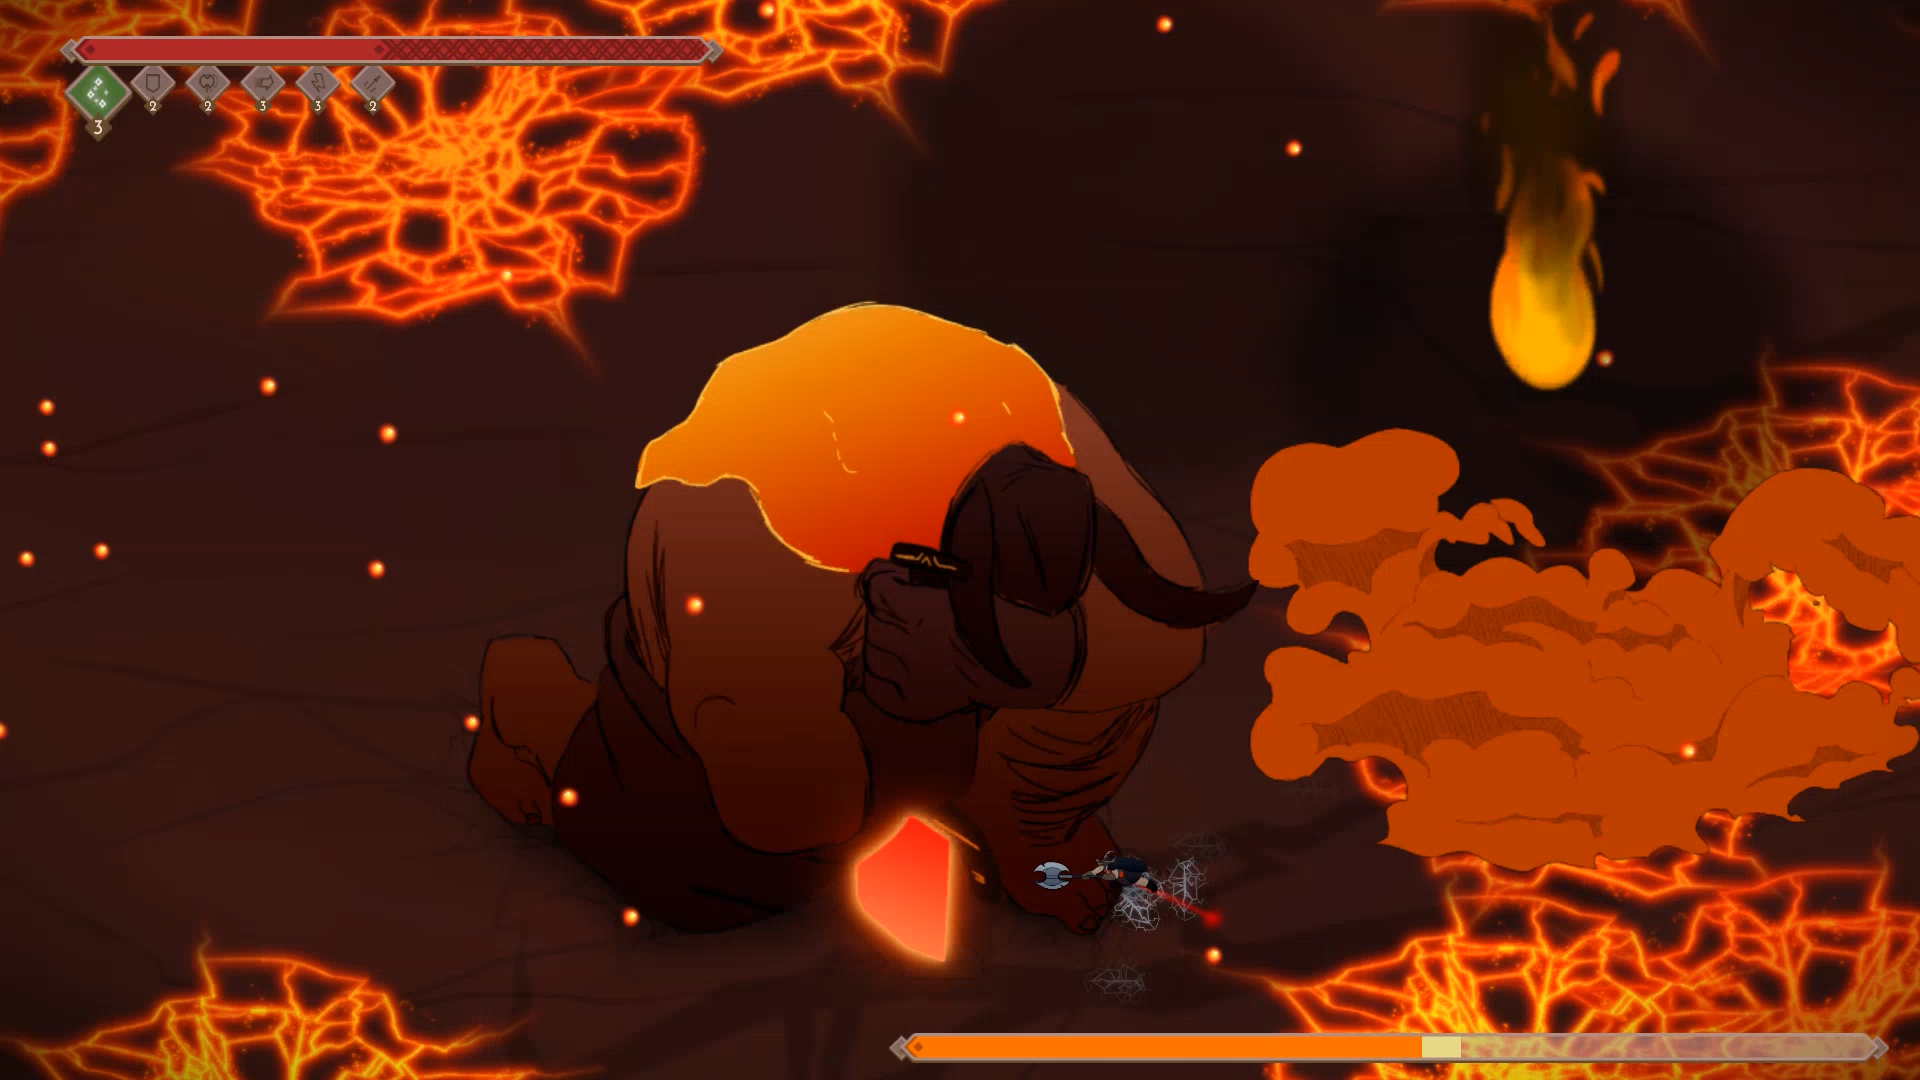
Good old Fé. This fight is similar to Jera in that it’s highly calculated, and I think I’ve optimized the strategy pretty well. Don’t let that fool you though, it is the complete opposite to Jera in terms of consistency. Despite how clean the attempt in this video was, it is by no means the norm to have a fight like this, even assuming you do everything perfectly. It is incredibly easy for a dwarf to spawn inconveniently, or a stray hammer to fly in from off-screen. لكن, with proper power usage you can eliminate a large portion of the RNG.
To start off with, you do not want to do much more damage than a heavy attack before Fé slams her shield the first time. If she’s taken about 2 heavy attacks’ worth, she’ll actually summon a handful of big dwarves along with the small ones, whereas if you do no damage or a small amount, she only summons the small dwarves.
هكذا قال, ideally you want to land one heavy attack and one light attack on her before she performs her first slam attack. This is entirely optional, but allows you to finish the fight cleanly with the last Odin spear like in the video. Make sure you don’t stay too close to her right at the start, or she’ll immediately slam with no time for you to hit her. Just start by staying a ways away and killing any immediate dwarves. If she slams before you can land any hits, don’t worry too much about it and just move on.
After the slam, you want to start using Freya and Thor to do damage to her, following as she moves either down to the right or left. Try to angle your Thor hits so that you hit both her and any dwarves coming close to you. Keep reapplying Freya and Thor (I’ll detail exactly how I do that later) until she slams her hand down to summon the pillars. في تلك النقطة, I perform one more Thor hit, use my last Freya, do another heavy attack, then use a Shield. This first shield is basically just a safety shield to make sure no small dwarves sneak in a hit on you, but if you’d rather use it earlier in the fight, that’s totally fine if you need to.
I use the second Shield after she performs her second shield slam, since she’ll summon quite a few big dwarves, and you want to make sure none of the hammers hit you. Make sure you roll away from the shield slam, أيضاً. Even though you wouldn’t take any damage, getting “stunned” and knocked back can be very bad. The same goes for hammers. Even though you’re shielded, you want to try and avoid getting hit by hammers, since they’ll cancel your heavy hit charge-up.
After shielding the second time, heavy attack one last time before dropping a Loki right before she screams, and start running either down to the left or down to the right, putting space between you and Fé. Place down your second Loki just as the scream is about to end, to make sure that’s the target for any hammer dwarves. Take a few extra steps back, then charge up a heavy attack and wait for the shield throw. You should be able to do this while still having your last Thor power active, but it really doesn’t matter if you don’t. It just makes it slightly easier to hit the shield. Try to hit it earlier than you think, or you might reflect it but still get clipped by it, ruining the run.
أخيراً, toss your two Odin spears. If you did everything correctly and had good luck, the last one should finish her off, but if you missed out on some early damage, it’s not the end of the world. Try to take out a few pillars. Hit back any hammers that come flying towards you with light attacks. Stay far away from Fé to bait out more shield throws, and you should be able to finish her off before she screams a second time. Just play it like the ending to a Shun the Gods run, since that’s essentially what it is at that point in the fight. Refer to my (upcoming) Shun the God Fé video for that.
Following is a detailed order for my attacks/powers. You don’t HAVE to do exactly this, but practicing this pattern is what felt the most reliable to me:
ثقيل – نور – (she slams) – Freya+Thor – Heavy x5 (the 5th one will be slower) – Freya – ثقيل – Thor – Heavy x3 – (she summons pillars) – Freya (last one) – ثقيل – Heimdallr shield – ثقيل – Thor – ثقيل – Heimdallr (after getting out of the shield slam AoE) – ثقيل – 1st Loki – Run away from her – Wait for scream to almost end – 2nd Loki – Shield reflect – Odin x2.
أوه, and if it makes you feel any better as you’re grinding this fight. It took me the better part of 3 hours of recording to get a run this clean and “calculated”, even when I knew what I should be doing, and practiced my pattern. Don’t get discouraged, and just keep grinding this horrible fight!
Isa – No Damage
Praise be to Isa. Bask in his simplicity and consistency, for the most part anyway. This is probably the easiest (pun intended) fight in Valhalla mode.
To begin with, wake him up with the icicles and stand a few steps below him. You don’t want to get too close or you might get shoved in a weird direction, and you don’t want to stand too far away or you get shoved farther back than you want. Then run back to him and stand next to his middle finger. You want to wait a second and place a Loki just as he pulls his right arm out of the snow, then roll southeast exactly three times before charging up a heavy attack to hit the icicles.
You can drop both Lokis at the start, something you might want to experiment with, but I find it’s safer to keep one for the end if you need it. I didn’t end up needing to use it in this fight, but I’ll explain how you want to use it later.
Hit 2-3 icicles into him with a heavy attack when he slams down on the Loki decoy. The reason we wanted to wait just a second before dropping the Loki is because you might otherwise hit the icicles into the Loki just as it explodes, which will knock away the icicles, doing no damage to Isa.
بعد ذلك, hit another set of icicles, either on your left or your right into him, and that should be enough to knock him down. When he’s down, just hit his head twice with light attacks, then a heavy attack. If there’s an icicle or two right in front of his face, definitely heavy attack those instead, as that’ll do far more critical damage than a heavy attack alone. I just wanted to show that either is fine here.
After he gets up, he’ll try to charge you. Roll to the side and avoid it, then wait a second before you chase him. It’s important to wait, because if you start running instantly, he might choose to not ice breath you, and to slowly lumber over to you for a slam instead. You want him to use the ice breath, so hold back until he starts turning around before popping the first Freya and running down to him. When you get close, use Thor and get three heavy attacks in on him to knock him down.
When he’s down, try again to get two light attacks and a heavy hit before the Thor power runs out, and be ready to instantly use another Freya+Thor. As soon as you land the heavy hit, he’ll enter phase 2, roaring and icing over the arena. While he’s doing that, get two charged Thor hits on him, then start running towards the direction that he’s charging before using a Heimdallr shield to avoid the damage. You could just sidestep it, but I find this makes him breathe ice more consistently. Roll twice when you get knocked back to reverse your momentum, then Freya when he starts his ice breath. Use the last Thor and another two heavy attacks should knock him down. (Be careful so he doesn’t fall on top of you as you’re slipping around on the ice.)
أخيراً, end the fight with another two light attacks, a Thor heavy to the face, and an Odin spear or two. This should kill him, but I occasionally find that it’s not quite enough because you might get an inconsistent amount of damage from icicles.
If he’s still alive, quickly swap over to Heimdallr (R1/RB twice) and use it to block his charge, then drop your last Loki before getting out of the way from the second charge. Putting Loki down should make him use the ice breath after he charges past, letting you run up close to him in order to finish him off.
I did have some troubles with weirdly inconsistent elements, like him getting knocked down and instantly getting back on his feet, and him just kind of “تجميد” for a few seconds before he gets knocked down the second time. For the former, I think it’s something to do with exceeding a damage threshold before he’s knocked down, and for the latter, I honestly have no clue. I did perform the method shown in the video a handful of times in a row though, so it seems like it’s pretty consistent.
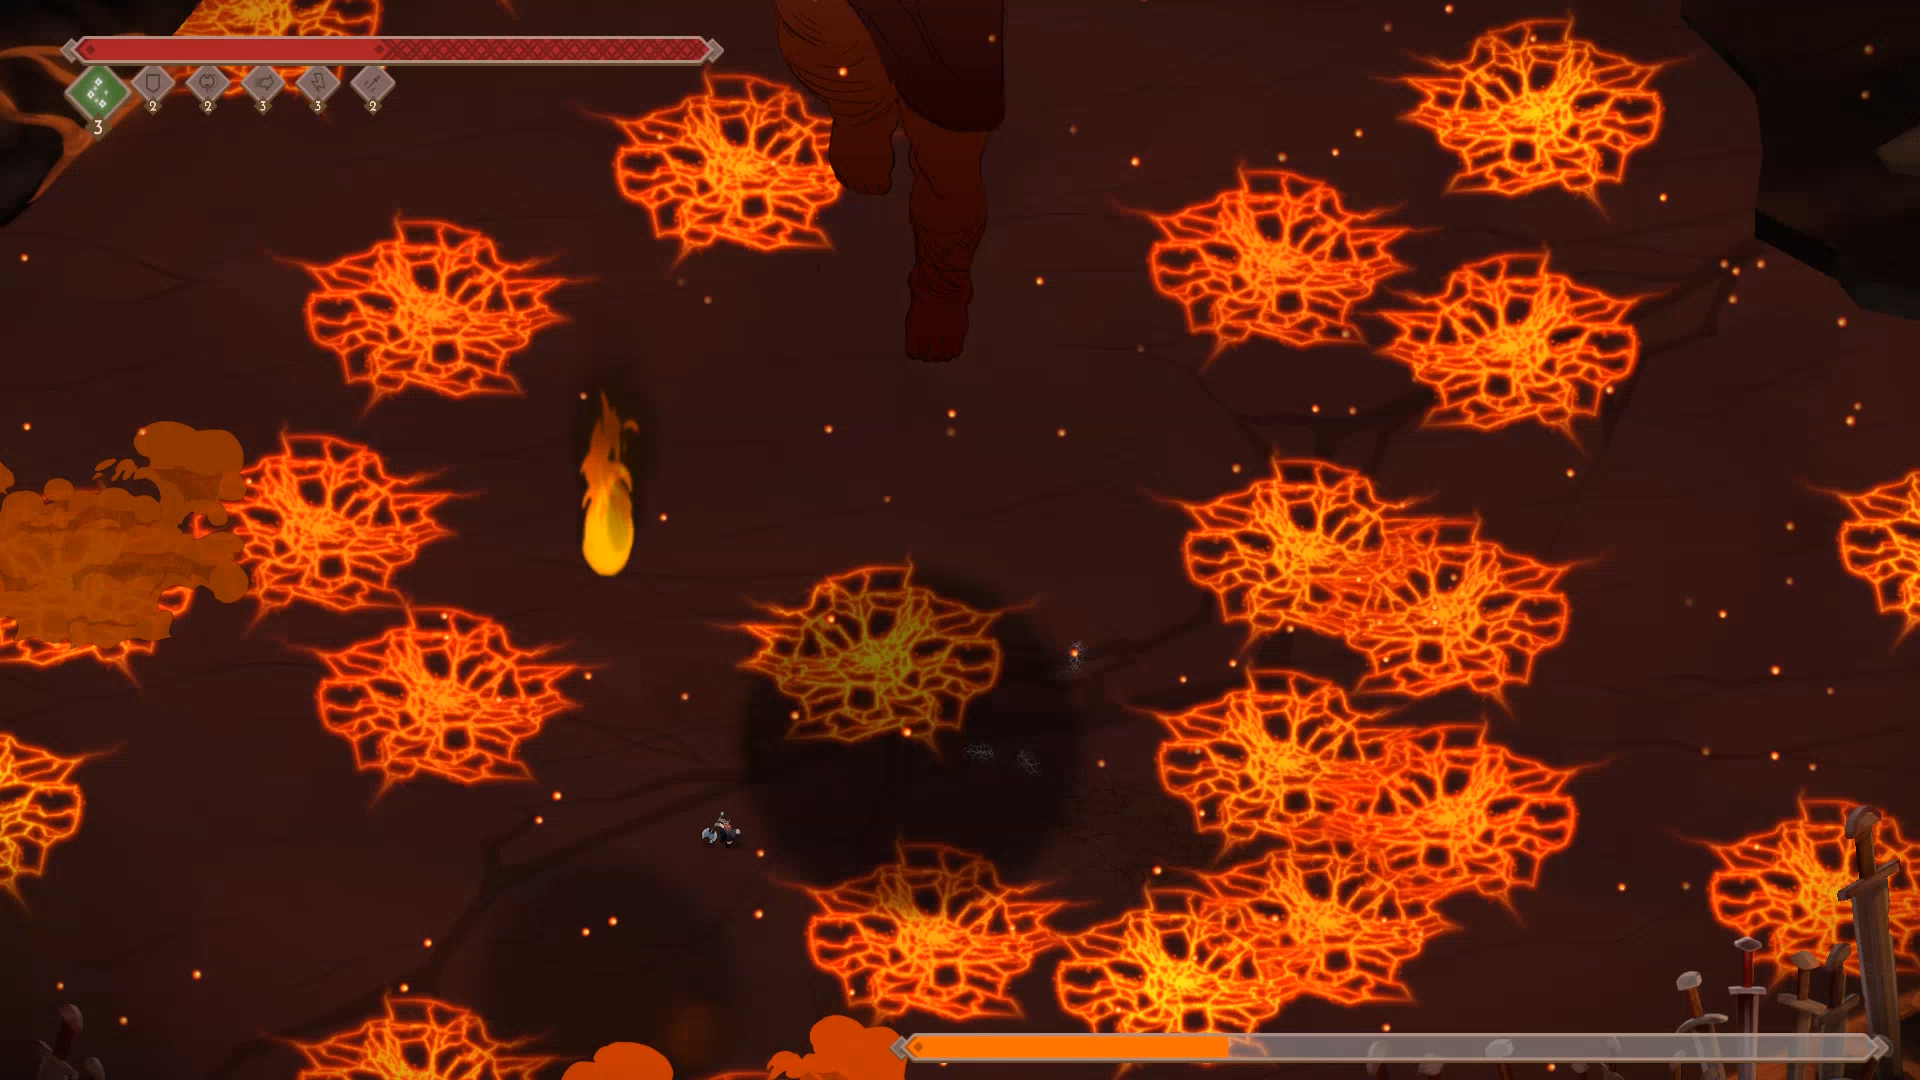
Hagalaz – No Damage
If you came here hoping that you wouldn’t need luck, then you’re all out of luck. لحسن الحظ, Hagalaz is one of the fastest fight in Valhalla mode, if you do it right. لذا… as a consolation you might save whole minutes over all the hours you’ll grind this!
Having said all that, this is by far the most reliable patterns I’ve managed to find (and that’s saying something), but it’s also by far the most punishing and difficult to pull off. The high-pace and precise power usage might be overwhelming, so I’ll note down a few additional strategies you might want to consider.
Start out by waking her up and standing roughly in the center of the “ن”. Charge up a heavy attack to hit her with as soon as you see the health bar appear, then immediately use a Thor power. Hit her with two more heavy attacks before using Freya; you want to make sure you have the speed buff active when she splits the first time, so that you land an extra hit during the animation.
After the split, throw both your Odins, which might seem odd this early, but it’s the most opportune time that I’ve found, and it’ll help you split her again much more conveniently. Make your way towards the bottom left as we perform the fight’s biggest coin flip! You have a 50-50 chance of one clone being either on the left or bottom. You don’t want them both in the top/right since that’s where the only lightning rod is active. If that happens, I would honestly just reset the fight and try again.
Rush to one of them (I prefer the top left if she’s there) and place down a Loki on the little bridge between the squares as soon as you see her start the thunder animation. It won’t block every single strike, but you don’t want to wait any longer since we want to start doing damage as soon as possible.
Position yourself DIRECTLY south of the lightning rod, and none of the sparks will hit you, use a Thor and perform a single heavy attack before you use Freya. مرة اخرى, we want to wait with using Freya so that you can land one final Freya hit as they split for the second time. Perform three more heavy attacks with Freya, and roll straight down to avoid the lightning if needed. Occasionally you have to roll after the second heavy attack, in which case roll down, heavy attack straight up, then roll up into the lightning rod again before performing the fourth heavy attack as they split again.
Now leave the corner you’re current in and head towards another clone. The reason you don’t want to stay in the same corner is because she’ll teleport out before attacking if you don’t move out of the square. If you see her start attacking like in this video, you can definitely just double-back and attack the same clone again. Just drop your last Loki and Freya over to her, then use your last Thor and whack her thrice for the kill.
Keep in mind that I never used Shield in this fight. You can adapt the strategy and use shields if you end up needing them, but you want to try and avoid it when possible, since every single attack (including sparks) in this fight will interrupt your heavy attack charge, even when you’re shielded. Since this strategy relies to heavily on minimizing RNG by maximizing damage, it can end up costing you the fight.
أخيرا, one trick that you can do if this is simply too stressful for you. When she splits the first time, don’t use your Odins. Instead just walk towards the corner that she spawns in, but wait “outside it” and avoid the first 2 lightning strikes before you use your first Loki. That will make sure that they’re all blocked before it expires. Then simply Freya+Thor like normal before she teleports away. You’ll have a bit longer before they split, but instead, start making your way around the arena, lighting up the rods with thunder strikes or lightning beams. Use shields to block sparks if you need to. When they finally get knocked down, you should only need a heavy attack to the head and possibly a few light attacks before they split.
في تلك النقطة, throw both of your Odin spears to start the last phase with a bit more damage, then complete the last phase just as described above. This strategy is a lot simpler to complete, but also leaves you at the mercy of the sparks for a lot longer, so it’s a tradeoff.
Kaunan – No Damage
يا ولد. After that nightmare last time, it’s only going to get worse from here, حقا?
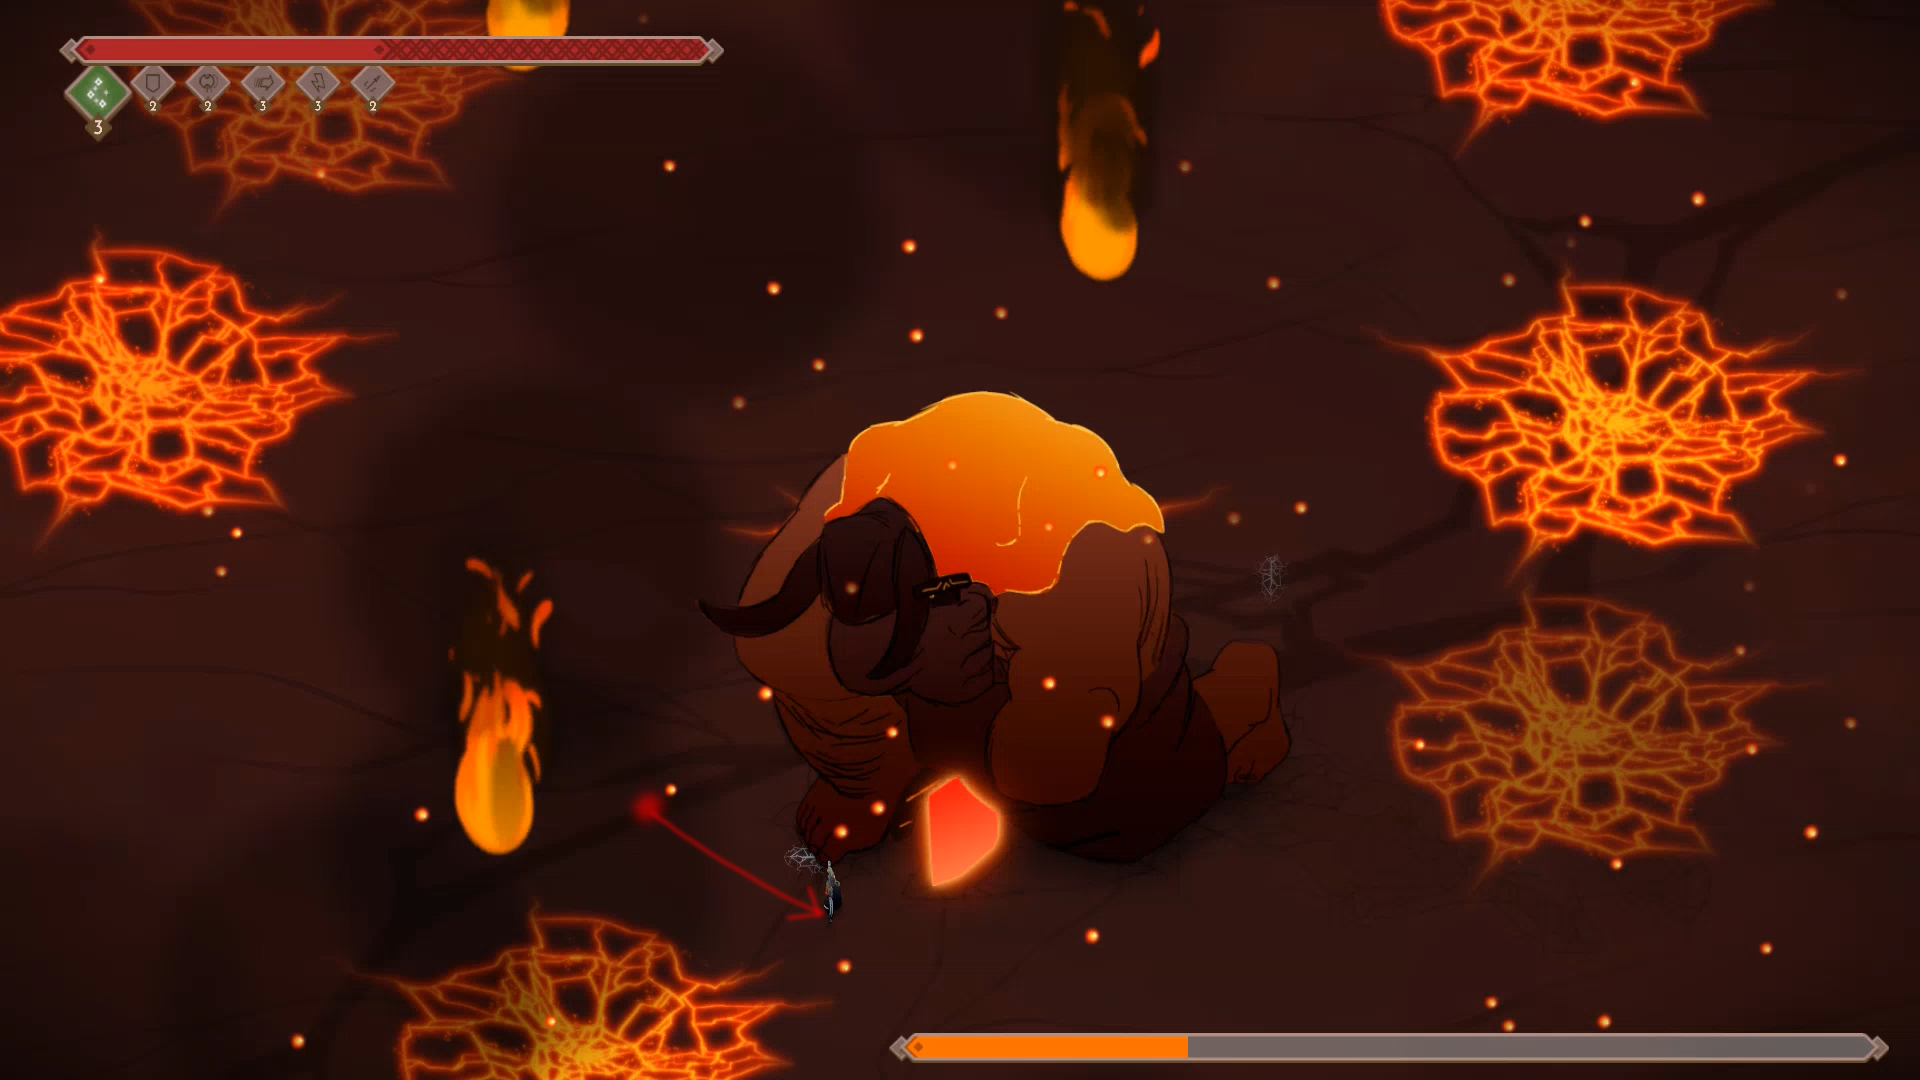
In a surprising twist, Kaunan is actually quite the pal, at least in No Damage (Shun the Gods is a whole other story). Despite the lava drops being random, this really quick and straight-forward strategy leaves only 1-2 places where it can actually matter, and they’re usually easy to account for even then. Let’s begin!
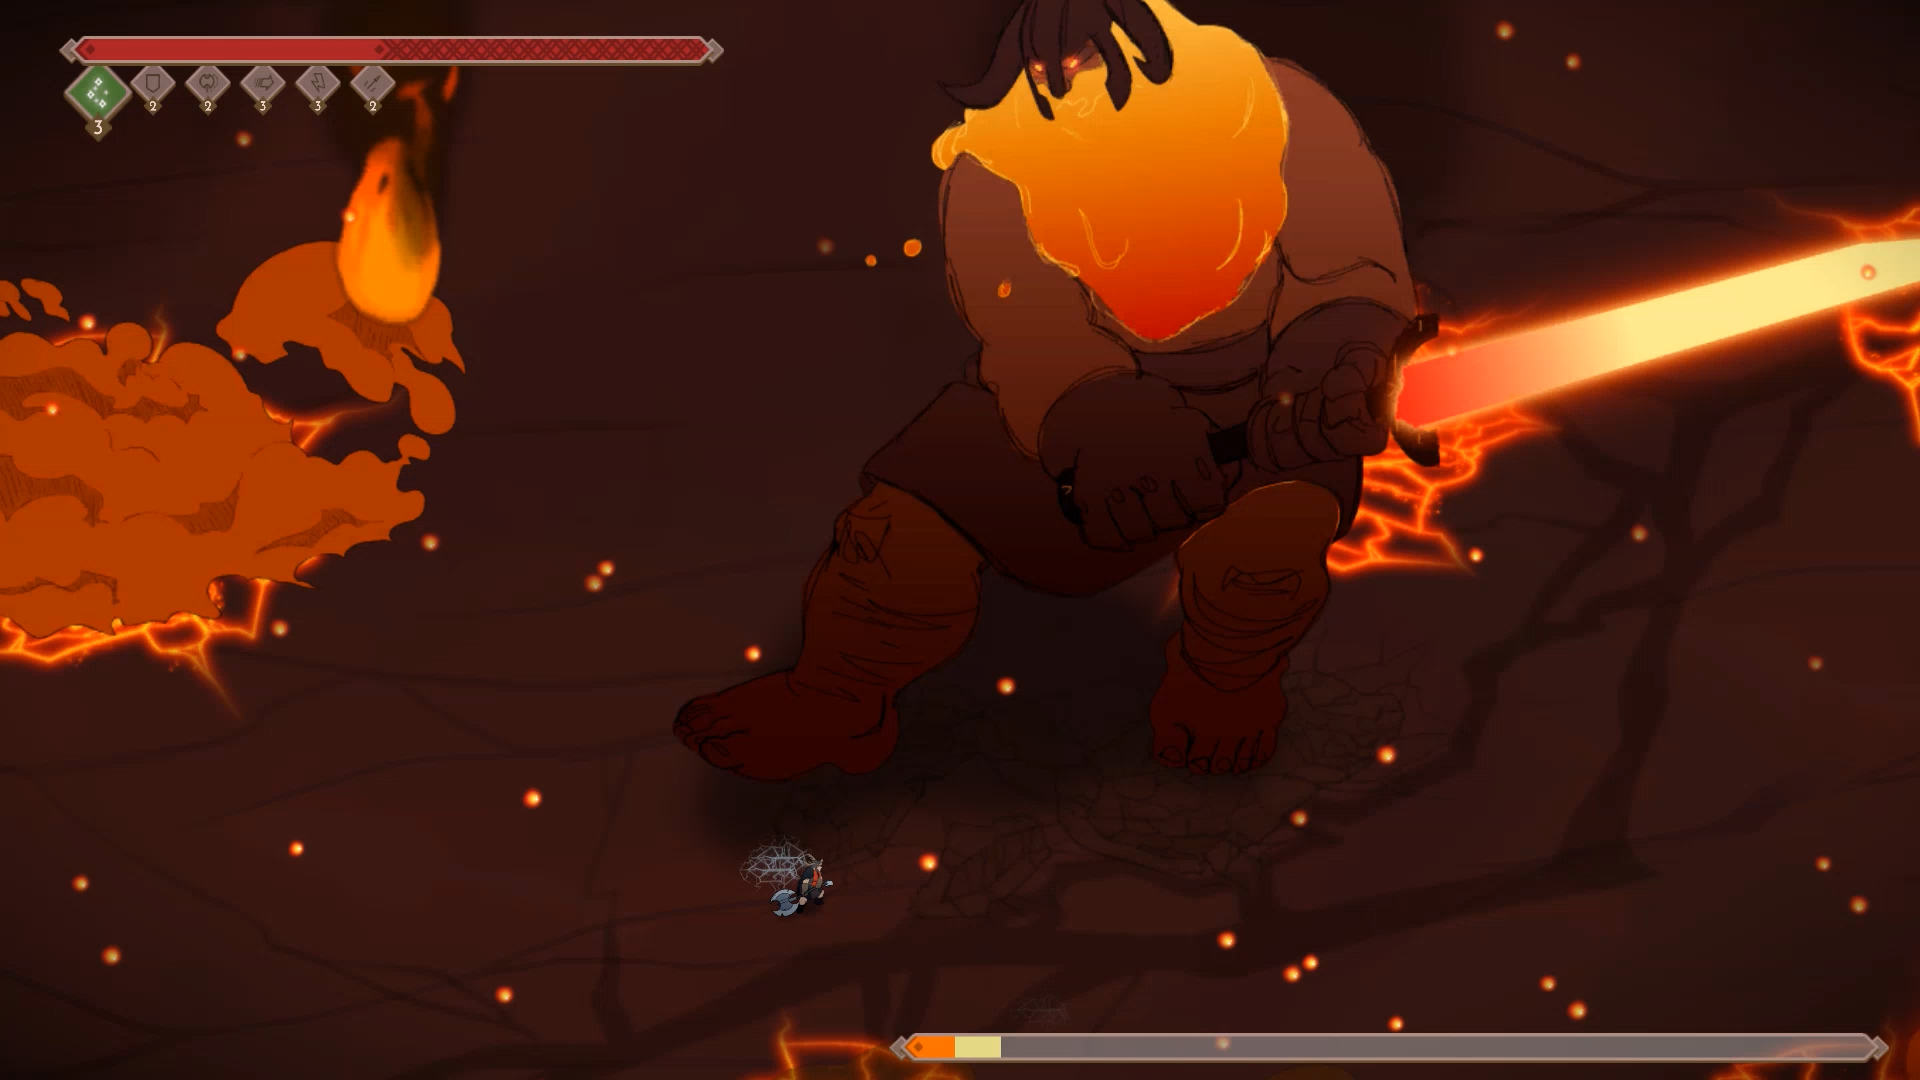
After walking up to him, hit his foot once to initiate the fight, then immediately start rolling down to the left. Roll four times until you’re below the small horizontal crack in the ground, then throw both of your Odin spears towards the top left. You want to curve them so that they hit his back/shoulders, because if you throw them too low they might curve into his sword, dealing no damage. Then charge up a heavy attack to release when he slams down his sword. Roll and follow it up with two light attacks before you start making your way towards the center.
Mind the hilt on his sword since you can get stuck on that. Roll straight down to get around it, then four more times towards the center before using your Thor and charging up immediately. We miss out on the explosion damage, but we want to make sure we get three heavy attacks in before he gets knocked down, so the tradeoff is worth it. Use Freya after the first Thor hit, and charge up two more while you roll towards his center point.
When he gets knocked down, you want to make sure to roll right into him (almost underneath him) to counteract the knockback, or he might shove you straight into a lava patch. This is a part that might feel like RNG, but as long as you roll right into him, the knockback should be mild enough to where it’s never a problem.
During the knockdown, charge up another Thor hit to land on his head for bonus damage, then another two straight up on his foot as he does his rage animation. This is why we wanted to hold off on Freya for the first hit, since without it you wouldn’t have time to get two hits in before he jumps away.. أظن.
As soon as you’re done with the 6th Thor hit, drop your first Loki. This will make him jump to a consistent spot for the first two jumps, so just walk to the left and position yourself so that you’re on the left of the circle, but slightly below the “equator”. This ensures that you’re in-between his hexagonal crack attack. It might sound more complicated than it is, watch where I stand in the video and you’ll get the feel for it in no time.
Use Thor and Freya before he lands the first time and charge up a heavy hit to hit him right as he lands, then charge up a second hit (no need to move) to hit him the next time he lands. This should knock him down the second time, leaving you with plenty of time left on your Thor to hit his head.
Kaunan’s head hitbox is so massive that you can stand completely to his side and still hit it past his arm, like you can see in my example. لكن, even if you should miss the headshot bonus, you’ll still have plenty of damage to finish the fight, so don’t worry about it.
Immediately drop your second Loki, and he’ll do a single jump to land on it. Thor + Freya before he lands as before, and just blast him with as many heavy attacks as you need. You have quite a long time to do so, so you really shouldn’t have any problems. The Loki power itself ended up finishing him off for me, but I almost got hit by a lava drop since I was playing dangerously, so you probably want to reposition out of any shadows you see.
Very refreshing fight after the last one. It’s quite lenient besides the timing on the first 6 Thor hits. If you can get the starting sequence down, he drops very quickly after that.
Odin – No Damage
Perfect Odin in Valhalla might seem difficult, but I tried showing pretty much the “worst-case scenario” in this video (getting both Kaunan and Jera to spawn) and how you deal with them pretty easily. This fight can go many different ways, but it really isn’t bad as long as you can get decent value out of your Thor+Freya and Loki powers. Not to mention the most helpful tactic, which is to destroy one of the three spears immediately when he throws them. If you can get that timing and positioning down, this fight is quite a breeze.
There’s this weird bug with the Restart function in the menu. For some reason, if you Restart, Odin’s behaviour changes at the start and he doesn’t let you get the initial heavy hit in, so I would recommend restarting by Returning to Ginnungagap every time you mess up. It’ll cost you a few seconds, but I’d say it’s worth it for the consistency.
As for the actual fight, the beginning is the only part I have set in stone, and I’d recommend you practice the part leading up to the first Jotun summoning, since that’s entirely consistent if you do it right.
The pattern for the start is to charge up a heavy hit, then roll straight up and do a light poke attack before he dashes south. The weird part here is that if you’re TOO fast in following him, he actually reacts quicker and you won’t be able to get the second heavy attack in. So you want to roll and poke after the first hit, even though that might seem sluggish.
Roll or run down to him, and start charging a heavy hit as soon as Thora is partially obscured by Odin’s arm. If your positioning is right, Odin should dash away to the left after you land the hit, so make your way straight to the left and try to time a light hit with his spear toss. Done properly, like in the video, you’ll immediately block the center spear that he throws, which is super helpful.
This gives you enough time to get down to him and do two heavy attacks before the other spears arrive. The one thing I’ll say about the timing for the spears is to start attacking earlier than you might think. All of Thora’s attacks have quite lengthy start-up frames, which means you might get hit after pressing the button, but before the attack is actually “خارج”. You should hopefully get the hang of the timing easily enough with practice.
حاليا, if you get 2-3 light hits in during the last two spears, he’ll be only a hit or two away from when he starts summoning Jotun, but we want to hold off on damaging him. If you do more damage at this point, he’ll dash straight to the center of the arena, making you waste a lot of time running to him. في حين أن, stay close to him to make him dash away upward, and immediately use a Freya to chase him, then use a Thor explosion to start the next phase. If you take too long he’ll throw another set of spears which can be a problem. Done right, you’ll have a good amount of time rushing up to the center of the stage to start charging your heavy attacks as he’s summoning. You should be able to get at least 3 hits in before he moves.
عند هذه النقطة, things start branching off a lot more. As I said, practice the first part of the fight until you have it down, then just learn to wing it a bit for the second half. Here are some basic guidelines depending on what he summons:
Jera – Might seem scary, but you can actually completely ignore her. If you use a Shield as I tried to show in the video, her entire poison cloud will pass without doing any damage to you, no matter how close to her you are.
Fé – Just kind of ignore her. Walk a bit to the side and she’ll miss.
Isa – Same as Fé, walk to his side and ignore him.
Hagalaz – Not as bad as she might seem, just make your way over to Odin and try to get at least one heavy attack off before you drop a Loki. That way it should catch all 2-3 spears (if you didn’t block one) and the rest of the thunderstrikes. Then use Freya+Thor immediately after Loki.
Kaunan – The only other “problem”. Sometimes the spears and Odin’s positioning can make it hard to get out of the shadow in time, so I’d say just blow a Shield power on him. بوضوح, if you CAN avoid the shadow, don’t bother, but don’t take any chances with Kaunan.
Beyond that, just try to stick to Odin like glue, finish him off with Odins spears if you need to, and you can use Loki for both summon cycles after 1-2 Thor hits in order to completely ignore the spears, but don’t forget to try and block one whenever possible.
P.S. نعم, I do try to time the ding of the heavy charge with his eye during the starting animation.
Shun the Gods – Valhalla (No God Powers)
Jera – Shun the Gods
We’re finally at the No God Power achievement for Valhalla mode. Starting off with Jera, who wasn’t really a big problem in No Damage, and who continues to not be a big problem in Shun the Gods.
This fight does take a while though. As you’ll see with some of these Shun the Gods fights, they really just come down to repeating the same pattern over and over, and playing extremely patiently. With a few exceptions, I’d actually say that Shun the Gods is easier to complete than No Damage. There’s no intensely calculated, precise sequence of moves that you HAVE to perform like my previous guides. So these are going to be a lot more generalized.
The key to this fight is simply to get a single heavy attack in wherever you can, and the two safe times that turns out to be are when she’s either slamming her arms down, and immediately following that.
Reiterating from No Damage, as long as you stand in line with—or slightly below—the southern-most flower, Jera’s overhead slam doesn’t hit you, despite what the shadow might seem to indicate. Charging up a heavy attack and releasing it JUST as she slams down is a reliable way to get some damage in.
في الواقع, if you really wanted to, you could spend the entirety of the fight in relative safety by just hanging around the flower, killing thorns around you, baiting out the slam attack every three attacks by moving towards her, and just getting the one heavy attack on her arms.
That is a little bit too slow for my tastes though, so I prefer trying to get a heavy attack on her stomach as well, right after the overhead slam. Provided that her stomach isn’t completely blocked by thorns, that is. If it is, just kill a few, then retreat back to the flower and repeat the pattern. بصورة مماثلة, there might be times were thorns ruin your chance for a heavy attack on her arms, so just skip that part of the cycle if you need to.
Keep in mind that you can only knock her out with attacks to the stomach, as far as I’m aware, which does help out with the damage a lot.
أخيراً, you’ll notice that I messed up quite a few things during the fight, getting hit by thorns, missing the attack on the arms, not being able to get to the stomach, accidentally triggering the poison sac. All of that is fine, and you only really need to make sure you don’t get hit by Jera’s slam attacks. The rest does such inconsequential damage that it’s not worth worrying about too much.
Fé – Shun the Gods
No God Power Fé can be easily described in 4 words:
Patience, Patience, Patience, and Patience!
That really is all this fight boils down to. You have to take things very slow, and mostly stay away from her, waiting for the shield throws. It’s all about landing heavy hits on her shield to knock it back into her, and maneuvering around so that you can do that without getting interrupted by Hammer Dwarves.
At the start of the fight, you have to land a few heavy attacks before she’ll start doing her Slam, رمي, Roar routine. Of course you don’t want to take TOO much damage from the small dwarves, but I think it’s worth getting a heavy attack in if you have 1-2 dwarves trying to hit you. خلاف ذلك, just try hitting them away before you go for the heavy hits.
Once she gets to the center of the stage and slams, just pull way back, and stay far away from her for most of the fight. If you get close she’ll mostly cycle between Slamming and Roaring, whereas if you stay far away she’ll mostly cycle between Slamming and Throwing her shield.
The shield throws are what you want the most. If you can make sure to either kill or run far enough away from any Hammer Dwarves, the shield reflects are by far the most reliable way to get damage on Fé in this fight.
Keep in mind that you can simply light attack the hammers away to kill the dwarf that tossed it, or even do a small amount of damage to Fé. Play it safe as much as you can, you don’t want to get hit by big dwarves if you can help it, and watch out for hammers interrupting you when you’re trying to reflect Fé’s shield.
As a final tip, I recommend not immediately running around and breaking all the pillars when she spawns them. The stalactites do a bit of damage to Fé, but they’re incredibly useful later in the fight when she summons 20+ Hammer Dwarves constantly. Breaking a pillar essentially “wipes the slate clean”, and gives you some breathing room. Don’t worry if you take a couple out while reflecting shields though.
Isa – Shun the Gods
While by no means one of the harder fights in Shun the Gods, Isa is actually quite a bit more challenging in Shun the Gods than No Damage. I don’t have any amazing patterns of specific sequences to perform in this fight, but I can offer a number of tips to make it more reliable.
Your best chances to do damage to Isa are by baiting out the slam attack by moving close, then rolling away twice, or staying relatively far away after he charges, which will normally make him do the ice breath.
After the slam attack, he creates a semi-circle of icicles that you can knock into him with a heavy attack for some decent damage. Keep in mind that a single icicle only does about as much damage as a heavy attack, but you can hit multiple icicles that all stack up in damage. So whenever possible, you want to try and hit 2-3 icicles into him, especially if you can do it after knocking him down. You can see how much damage I did on the first knockdown by hitting 3 icicles into his face for critical damage.
If you don’t have any icicles to knock into him when he’s downed, just do the classic 2 light this followed by a heavy hit to the face. It’s not worth running after a single stray icicle if there aren’t any immediately nearby.
Once he rages and turns the ground to ice, I would not recommend baiting out too many slam attacks, since they can be very hard to avoid while sliding around. في حين أن, move perpendicular to him to dodge the charges and try to keep up with his movement to not be caught out too far away from him, but you don’t want to get too close either. That should set you up for a heavy attack or two whenever he starts his ice breath. لكن, as you can see in the video, it’s not the end of the world if you get hit by the ice breath. Make sure that you immediately start running to his side to avoid the following charge when you get slowed, because it takes a while to wear off, and it’s not worth trying to attack while the effect is active.
If he charges past you and there’s a lone icicle very close to him, feel free to try and hit it into him. You only want to do this if it’s RIGHT next to you, since you don’t have time to waste running after icicles when he’s probably about to either charge again or breathe ice.
If he turns around after a charge and doesn’t do his breath attack, he’ll probably just start walking towards you, hoping to do his slam attack, but you can bait out the breath by simply making him turn once or twice. So just run in a wide circle around him to force him to turn, and he should start it fairly reliably.
Once you get him down to around 1/3 of his health, the snowstorm will pick up and the music changes. After this point, he’ll start chaining three charges in a row, but as long as you keep moving perpendicular to him, you shouldn’t have any issues avoiding them.
أخيراً, get the hang of the movement on the ice. Rolling is great for quick turns or complete 180s, but make sure you never roll when you’re moving in a straight line. Rolling slows you down on the ice, but has instant acceleration in whichever direction you direct it. So again, turning around or moving in curves is perfect for rolling, but if you just want to run in a straight line to get to him or avoid a charge, just run normally.
Hagalaz – Shun the Gods
While not as immediately punishing for every mistake as No Damage, No God Power Hagalaz might be my nominee for the most boring and tedious fight. You need to play this incredibly patiently if you want consistent success, and even then it does come down to quite a bit of RNG.
While the lightning rods do spew out sparks at set intervals, and in rough patterns, and Hagalaz does have a general cycle of moves, they do vary quite a bit and can mess with the fight a ton. Depending on things like when she decides to start attacking, when the lightning strikes the rods, or a whole host of other factors, there’s no set pattern for what’ll happen in the fight. I’ll try to just outline a few things to keep in mind as best I can.
The first third of the fight is pretty simple. Start out by standing roughly in the center of the “ن” while charging up a heavy attack. That’ll make her do a quarter turn before using her lightning beam attack to light up the top-right rod. في أثناء, you can get quite a few heavy and light attacks in, and once she starts her calldown attack, just move between and around her legs, poking with light attacks while avoiding the lightning strikes.
After she teleports away, she can be in one of three places. Going from best case scenario to worst case scenario: Any of the corner platforms, the three unlit middle platforms, and the top-right platform with the active rod.
Regardless of where she ends up, make your way over there and try to make the best of it. If she’s in a corner, you want to approach her from the side with the most unlit rods. If she’s in one of the middle platforms, just approach her straight on, and we’ll have to “fill in the holes” later. If she’s in the only active platform, you can still make your way in there, just wait for the sparks to shoot out before heavy attacking her, which should be enough to make her split the first time.
After the first phase, your main focus should be to move around the map, lighting up all the rods. Whenever they call down lightning, you should be able to just move in a straight line without being hit, however very occasionally she’ll “lead her shot” even more, forcing you to move around a bit more. You constantly have to focus and look out for where the strikes are being called down. If you’re unlucky and get trapped between lightning and sparks, you can sometimes be completely wombo combo’d to death in an instant.
The lightning strikes work based on your current trajectory. They’ll always try to be summoned ahead of where you’re currently moving. So the best way to avoid them if you just want to buy time is just more or less running around in a circle. Just watch out for sparks that can stun you into taking a lot of damage.
When you do knock them down, you have to act based on their positions. If they’re both very close together, and close to you, you can go for 2 light attacks on the head of one followed by a heavy attack, then make your way over to the second and do a heavy attack headshot. If they’re slightly further away, one platform in between them or so, skip the light attacks and try to rush to both of them to land two heavy attack headshots. أخيراً, if they’re further apart than that, just ignore one of them, doing 2 lights and a heavy on the closest clone, then attack her a couple more time as she teleports away.
One thing to note is that you should not immediately roll away after headshotting one of them, like I did in the video. I was trying to rush to the other clone, but it just made the first one start calling down lightning, so even if I did have time to land the hit, I wouldn’t have been able to. Always try to take a few steps toward them as they get up from the ground, since that usually forces them to teleport away, giving you time to run to the next one.
أخيراً, the biggest tip I can give you is to keep an eye on her health bar. Do not go for more knockdowns when they’re nearing 1/3 HP. You want to try and light up 6-7 of the rods, then attack them normally until the last phase begins. That way you can start it out with an immediate knockdown on all three clones. You’ll still need one more complete lightning rod rotation to finish them, and that’s where you need a lot of patience and luck. Try to light up the rods in a consistent sequence without leaving any holes, and make sure you focus on avoiding the strikes as much as possible.
Kaunan – Shun the Gods
Time for the absolute worst (designed) fight in the game. Unlike every other video in this series, I would like you to think of this one as more of a “عرض” than a Walkthrough.
While the falling lava drops seem entirely random, I managed to find a very specific pattern to manipulate Kaunan’s AI completely using my position, damage timings, and even controller inputs. This means that with good lava luck, these actions make the fight play out in the exact same way every time.
حاليا, I was very happy to succeed in this, but it’s far more work than you need to simply beat him. في حين أن, I’ll try to outline some more general guidelines.
If you do want to try your hand at this specific strategy, I have a way too thorough write-up with image references in the sections below.
To begin with, you want to charge up a heavy attack to hit him as he comes out of the steam. The position isn’t super strict. Either just roll four times in a row down to the left from his foot, or use the faint “كسر” in the ground to position yourself like I did.
After the heavy attack, do two light attacks and make your way towards the center of the arena. Charge up a heavy attack to hit him as he lands, then roll towards his center and charge up a second heavy attack. You want to try and land the second heavy attack before he gets up from his jump, so you don’t interrupt his knockdown animation.
Whenever Kaunan gets knocked down, try to position yourself roughly below him and roll into him as soon as you hear the knockdown sound effect. He’ll push you away, but you’ll stay near enough that you won’t get pushed into any lava pools, so it’s a good habit to get into.
While knocked down, try to land two light attacks followed by a heavy attack on his head. His “critical hitbox” is quite generous, and you can stand pretty far to either side, hitting the horns of his helm and still doing bonus damage.
After this point, I would recommend just playing it by ear. If Kaunan jumps back and does his lava wave attack, try to move away from him during it. After he’s done with the attack, he’ll jump towards the center of the map, assuming you’re far enough away from him.
If he’s closer to you or doesn’t jump back as far, he’ll probably do his sword attack. This is the one attack that I find incredibly inconsistent to avoid. Whenever he hops back or you think he’s going to do the sword attack, I recommend moving towards him as much as possible. The attack is a lot easier to avoid the closer you are to him. As you can see in the video, there’s one point where I have him do the attack, but because I’m close enough it goes past me completely, letting me get a few attacks in. If you do have to avoid the center of it, I’d recommend just running towards and around him, and as soon as he’s about to slam down, roll the opposite way. I have not been able to figure out any pattern to when he tries to lead his swing or not, but doubling back does seem to be the most reliable way to deal with it.
When you do get him to jump, that’s your cue to get some damage in. When he jumps from the outside of the map, he usually lands right in the center, so you can position yourself on the side of the shadow, slightly below the “equator” and charge up a heavy attack to hit him just as he lands. بعد ذلك, get as much damage done as you can.
When he rages, he’ll start shooting out lava cracks when he hits the ground, but they’re always in a hexagonal pattern, so as long as you try to position yourself on the lower portion of the shadow on either side, they should miss completely.
When you hear the music change, he’ll start jumping three times in a row, trying to land on you wherever you are. He will always lead his jump in the direction that you’re currently running, so all you have to do is hold a direction right as he jumps, then reverse to have him land right in front of you. The best way to do this is to run up and towards whatever direction he’s in, then immediately roll down the opposite way. That’ll set you up for a heavy attack on his foot as he lands.
You won’t have time to heavy attack him for every jump, but just make sure you’re mindful of your running direction, to have him land where you want him to. After the third jump in the sequence, he’ll sit still for a while again.
That’s about all I can tell you. كي تختصر: Sword attack, try to stay close. Lava wave, try to move far away. القفز, mind your direction and force him to land in convenient spots for you.
All of this is assuming that the randomly falling lava drops don’t screw you over, which they will. A lot.
Kaunan Step-by-Step Part 1 (RIP Imgur Album)
I used to have this write-up as an optional link to an Imgur album, but that was deleted for some reason. I was able to recover the text and images, so I’ll just post it here instead. I wanted to avoid clogging the walkthrough with this, because it’s WAY more detail than you’d ever need, so please skip past this section if you don’t want extremely specific tips and steps.
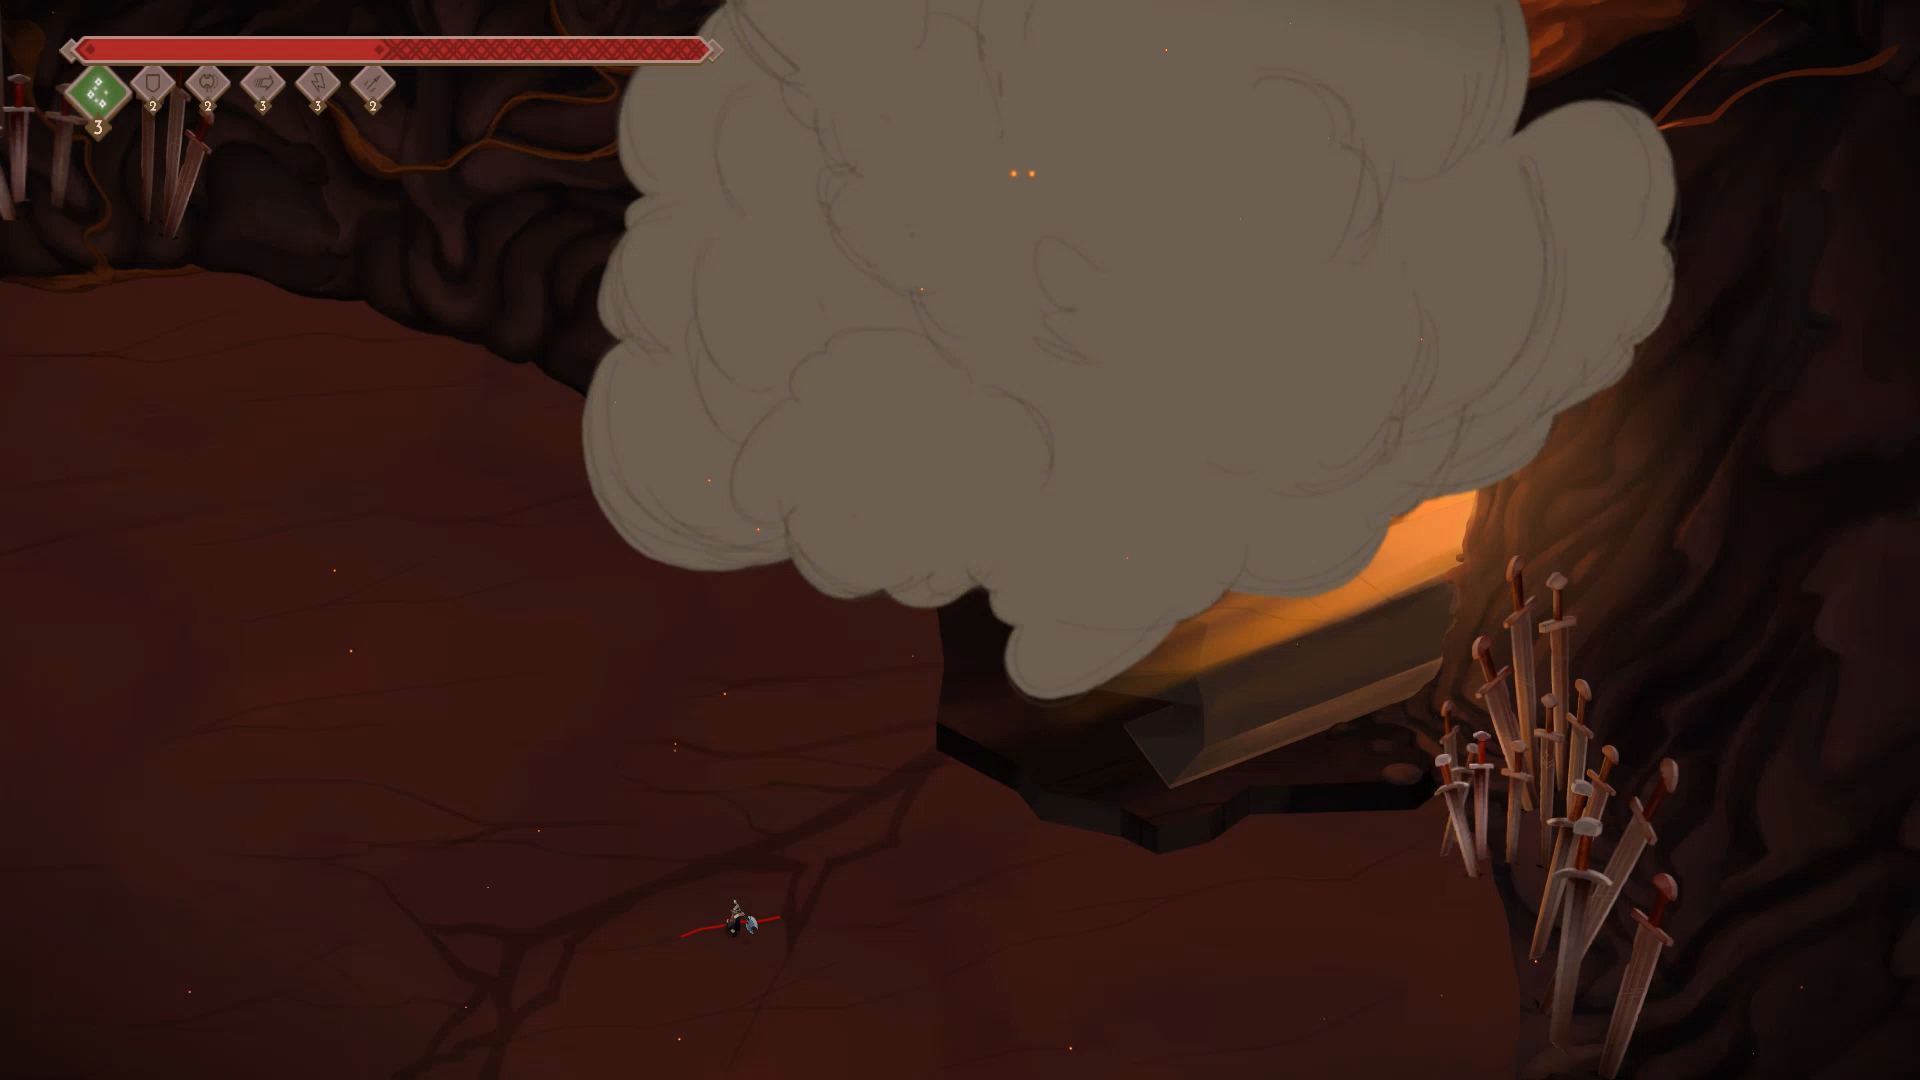
Start the fight by walking up to Kaunan’s foot and hitting it once. Then make your way down to the marked smaller crack branching off of the bigger one, as shown above. Land a heavy attack after he slams, then roll into him to the left and perform two more light attacks. Roll down once to get around the sword hilt, then make your way towards the center of the arena as fast as you can.
It’s not really necessary, but if you want a tell for where to start charging up your heavy attack as Kaunan is jumping towards the center, the area I generally try to aim for is this inner turn in the big crack. (We’re gonna use the crack as a reference point for a lot of things.)
Release the heavy attack as soon as you can after he lands, then roll once to the left towards his center, and follow it up with another heavy attack. The timing is quite lenient, and you really don’t have to rush. The only thing you want to make sure is that you land the second heavy hit before he gets up from the jump. If you don’t, he might get knocked down, then hit by your attack, cancelling his knockdown duration completely.
After the second heavy attack, roll up and to the left into him as soon as you hear the sound effect for him getting knocked down. This will push you outward, but since you’ll be so far underneath him it’ll only push you back out to about the spot you started in. If you don’t do this, he might knock you away into a pool of lava, which isn’t deadly, but it’s still a good habit to get into. Try to learn the timings for his knockdowns and always attempt to be roughly below him, rolling towards his centerpoint to counteract the push-back.
When you can move again, don’t hit him right away. Instead make sure you’re positioned right inbetween the horn of his helmet and his sword. Then turn to the left, perform two light attacks, and follow it up with a heavy attack for critical damage. The reason we want to stand right here is to manipulate his AI for the next step.

Kaunan will get up from the ground, after which you should quickly roll up and slightly to the right, so that you can land a roll poke attack on his toes. You don’t have to go too far to the right, but just angle it slightly to the right of being straight up. What this accomplishes is making him turn towards you and jumping back twice to the edge of the arena. If you don’t, he’ll usually only jump back once, following up with either a semi-close range lava wave or his sword slam attack. We want to make sure he uses the sword slam as little as possible, because I genuinely still have no clue how to reliably avoid that, if it’s even possible.
Side note: If you do know a reliable way to spot where his sword is going to hit, whether he’s leading your trajectory or not, and how to react to it regardless of your distance to him, please do let me know. It just seems wildly inconsistent, and is the most annoying attack to deal with.
After he jumps back twice, he’ll do his lava wave attack, but this early in the fight, it really won’t reach very far. You can just sort of position yourself anywhere below the big crack in the ground and you’ll be completely fine.

Right as the lava explosions are passing, make your way up to the crack in the arena. After lava waving from the edge, he always jumps back to the center of the arena. With a little practice, you can learn exactly where he lands based on visual tells. بصدق, this part is mostly for fun and style, you have plently of time to just eyeball it and wait for the shadow to stop before adjusting.
If you do want a reliable position though, what I normally do is stand anywhere within this sort of upside-down T shape in the dark crack in the ground. It’s a bit hard to see in this image specifically, but I’ve tried to mark the general area. The bottom thick part of the crack meets up with a vertical crack from the top part, sort of forming a sideways H.
Hit him with a heavy attack right as he lands, then another one to make him rage. Do a third one during the rage animation, and finish off with a rolling poke straight up before he jumps away.

He’ll try to land on you, but Kaunan always tries to lead the jump based on where you’re moving. Once you get the hang of it, it’s very easy to get him to do very small hops that are easy to avoid and set you up for a good few attacks. Simply run up to the left as he jumps…
… Then roll right and slightly down as soon as he disappears off the screen.
He’ll land basically right in front of you, leaving you plently of time to charge up a heavy attack onto his foot. Roll away from him to the right straight afterwards. It’s not really necessary, but it’s just to be safe in case the random-ish lava cracks extend a bit past his foot, which happens sometimes. Then make your way back to the left and heavy attack once more on hit foot.
Follow it up with a rolling poke attack right before he gets up, but make sure you sort of angle it towards the upper part of his toes. مرة اخرى, moving sort of up and towards his back makes him jump back twice towards the edge of the arena, rather than a single hop which can lead to the sword attack.
Move below the crack in the ground again and dodge the lava wave attack. Watch out though, since the cracks are much longer now, and can get you even in this “safe-zone”. You have plenty of time to react though, and it shouldn’t be hard to stand somewhere safe.
After the lava wave, once again he’ll jump right into the center of the arena. مرة اخرى, I have a visual indication for the area you want to be in, but this one is even harder to see since I got a lava drop obscuring most of it. If you look in one of the clearer images, like the second one of the album, you can see a sort of enclosed area in the ground crack, roughly shaped like a backwards L. Almost anywhere in this area is safe from the hexagonal lava cracks he spawns when landing, but if lava pools allow it, try to stay towards the bottom half of it.
Don’t go for any attacks as he’s landing, since a single heavy attack will knock him down at this point, and we want to make sure we’re below him both to have access to his head, and to not get pushed into lava.
Wait for the lava cracks to explode, then roll once to just below his foot, heavy attack him once, and roll up to the left into him when he gets knocked down.
Get the usual 2 lights and 1 heavy on his head before he gets up.
Kaunan Step-by-Step Part 2 (RIP Imgur Album)
عند هذه النقطة, the music will change to indicate his last phase, and he’ll start performing his triple jump attack. Set up another heavy attack the same way as before. Run up to the left as he starts his jump, then roll right and slightly down after he’s gone from the screen. Then charge up a heavy attack to hit him just as he lands.
His jumps are too quick to get a heavy attack every jump, so instead I just use the second jump for repositioning. Right after your heavy attack, roll to the right (lava allowing) and keep holding your stick to the right until he jumps.

Double back once he leaves the screen, rolling to the left. He’ll overshoot you completely. Then just keep running to the left until he’s about to jump for the third time.
Here’s probably where most of my runs died. It’s incredibly easy for one of the lava drops to fall in a super inconvenient location, costing you the attack as he lands, and messing up the entire pattern. لكن, here’s where I think you should just start improvising a bit more. Up until this point, I really do think you can, and should, learn the full pattern if you want the most success and consistency. After this though, you can still quite easily finish the fight despite missing out on some parts of the pattern. I can’t really help you too much with that though, and it’ll be up to you to adapt to his new patterns. Check the description for the Walkthrough video for a few generalized tips.

Before he jumps for the third time, make sure you’re running up to the right. This will make him land just shy of where you are, setting you up for a heavy attack. Roll away once more, this time to the left and slightly down, as he disappears.
Pray to Odin for lava drop luck, and charge up a heavy attack in the lower left of the landing shadow. Roll to the left to make sure you avoid the exploding lava cracks after you land the hit.
حاليا, instead of going straight to the right and heavy attacking him again, make your way down below him, since one more heavy attack will knock him down once more. Charge up once you’re past his foot, and roll up to the right towards his center as he gets knocked down. Yet again, use the old 2L1H attacks on his head/horns.

As he gets up, roll up to the left! This is very important, and once again manipulates his AI into doing the double back-hop rather than a single one. It should take him to the upper right edge of the screen, making him do the lava wave attack again.

Wait around a bit to avoid the lava cracks, then make your way up towards the center of the arena, as that’s where he’ll jump after the lava wave attack. The tell I have here for where to stand is a bit more obscure than the others. What I generally try to look for is this vertical “نقطة” in the ground crack, then imagining my position as the top of a rough equilateral triangle between the point, the crack on the right, and Thora.
Done right, you should be lined up for a heavy attack just as he lands, but this is one of the trickier setups. It might take you some practice to get the position right.
مرة اخرى, roll to the left to make sure you avoid the lava cracks when he slams down, then head back to the right and heavy attack him one more time. Then roll into him and do a rolling poke attack before standing completely still!
عند هذه النقطة, I have not been able to figure out a way to make him do the double back-hop far enough away. Because of where we are, he’s usually still too close even if he does it, meaning he can use his sword attack from its max range, which is incredibly hard to avoid.
في حين أن, I just stand still as he jumps back, making him stop after the first hop and setting up for a sword attack.
Right when he jumps back, start making your way straight up and around him. Since you’re fairly close, the sword swing should overshoot you completely, making it easy to avoid the exploding lava cracks, and getting a couple light hits in. You CAN get a heavy attack in here, but I feel like it’s not worth it since you won’t have enough damage to finish him off, and it’s better to make sure the last hit goes smoothly. Instead I just light hit him 2-3 مرات.
After the sword swing, he’ll try to triple jump you again. Once more, bait the jump by walking up to the left, then roll to the right and slightly down when he leaves the screen.
Since you’ll be on the wrong side of him, you have to be mindful of where you stand when you charge your heavy attack. His back leg lands a lot further up and back than his front leg, so make sure you’re standing a bit further up than normal, and aim your hit to the top-left. You can even get very close to the shadow, like you see in the video, but I came a little bit too close for comfort.
One last heavy hit when he lands should be enough to finish the fight, however if it’s not and you need more damage, you still have two more jumps to do it. Don’t go for a heavy attack on the second jump, but keep doing the same “top-left bait, bottom-right roll” pattern for the jumps, and go for a light hit when he lands. You then have time to set up a heavy attack once he lands for the third time. Usually he’d get knocked down one last time around this point, or even earlier, which should make it easy to finish.
مرة اخرى, this pattern is seemingly 100% reliable when it comes to you and Kaunan, and I could do it very consistently after hours of practice. هكذا قال, the lava drops really are an awful, awful mechanic, and make this fight the single worst one in the game.
It shouldn’t take you as long as it did for me though, since I was trying to get a run where nothing went wrong just to show off the “ideal pattern” in the walkthrough. Like I said before, normally I’d suggest just going for it as long as your luck holds up, then winging it from there.
ايضا, don’t be afraid to walk through some lava on the ground to get to his weak point or anything like that. Taking damage is completely okay, and most of his attacks would just one-shot you anyway if they hit you directly. So a bit of damage over time is entirely fine, or having a lava drop or two land on your head.
Hope this helped, if you’re actually insane enough to try and learn this specific “input pattern”. خلاف ذلك, just use the video for reference. هل حقا, the most helpful tips I have for this fight is to roll into him when he gets knocked down, learn the center of the arena position, learn how to bait the triple jump, and learn where to stand to avoid the hexagonal lava cracks from his jump attacks.
The rest really does have some pseudo-randomness to it, unless you know exactly what to do.
Odin – Shun the Gods
Last but not least, we have Valhalla mode Odin using No God Powers. A fight I despised back when I made my first set of walkthroughs, but have since learned a lot about. At this point.. I actually don’t think he’s that bad at all, and is one of the most fun fights in the game.
Don’t get me wrong, there are definitely some situations where you can just get completely destroyed, if two spears happen to line up perfectly, or coincide with the worst possible Jotun spawns and such. My point is that there are many things you can do to minimize the chances of that stuff happening, which I think I illustrate pretty well in this video, and didn’t understand at all back when I made the first videos.
To begin with, I’d recommend hitting the Return to Ginnungagap button every time you want to retry the fight, or after every time you die. There’s a bug (I’m assuming it’s a bug) which makes Odin behave differently if you start the fight after dying/restarting instead of coming straight from Ginnungagap.
The start of the fight—up until he summons the first Jotun—is always the same. Start off with a heavy attack, then roll into him for a light poke. He’ll dash down to the left, and should stay there long enough for you to roll down to him and land a heavy attack. You can start charging up as soon as Thora is partially obscured by Odin’s arm.
He’ll dash again to the bottom left and throw the first three spears, but if you start moving to the left after the heavy attack, you can get into position to light attack the middle spear just as he throws it. This gives you enough time to get over to him and do two heavy attacks in a row before you have to worry about the last two spears. I recommend just doing single light hits cancelled into rolls while waiting for the spears. This lets you react quicker, instead of being in the middle of an attack animation and not having enough time to start a new one to deflect the spear. If you see the screen shift over towards a spear and you just started an attack, roll away from it to buy yourself time.
I’ve said it before, but to emphasize.. When you’re trying to deflect the spears, make sure you start your attack much earlier than you probably think you have to. Thora’s animations all have pretty lengthy start-up, but they last for a long time once the attack is performed.
If you get 5 light hits on Odin while the last two spears are returning, he’ll immediately dash into the center of the stage and start summoning the first Jotun. (In total: 4 heavy hits and 6 light hits) If you miss out on a few hits, he’ll simply dash away and throw more spears. If this happens, I’d recommend just hanging around until you’ve dealt with the first two spears, then attack him and initiate the summoning phase.
حاليا, let’s do a very quick list of all the Jotun he can summon, and what you should try to do while they’re summoned:
Jera – Used to be the Jotun I thought was the most stupid, but I’ve realized that if he summons Jera among a bunch of other Jotun, the best way to deal with her is to simply.. لا. Just ignore the poison cloud unless she’s far away, it probably does the least overall damage of any attacks in the fight.
Fé – Should be easy enough to avoid by just walking around the map.
Isa – Should be easy enough to avoid by just walking around the map.
Hagalaz – Can be a bit annoying since she won’t let you get heavy attacks on Odin, but just stick to light attacks and know that all the lightning strikes will spawn in the direction you’re moving. Don’t be afraid to back off and wait it out while staying safe.
Kaunan – THE worst and most dangerous Jotun in the fight. Do not underestimate Kaunan. At any point you see or hear Kaunan spawn, make him your top priority to avoid. As soon as he jumps, he’ll try to land in front of where you’re going, so just double back and go the other way, even if that means walking back into a Jera cloud.
One small tip is that you can actually see the rune of the Jotun getting summoned, but it’s a bit unreliable since they can be hard to see. Might be useful to know if a Kaunan is about to appear, or a Jera is spawning right next to you.
I really cannot stress enough that the main thing you need to learn for this fight is how to deflect spears, and how to avoid Kaunan. The rest is either easy, or doesn’t really matter too much.
The basic “نمط” to follow is just to try and block a spear when thrown if possible, get 1-2 heavy attacks on Odin if you have the time, go for light hits when necessary, focus on avoiding Kaunan and deflecting spears, and ignore Jera if she’s right in the middle of everything.
Afterwords
Thanks for checking out these walkthroughs, and once again I’m sorry I didn’t get around to posting this version for 6 سنوات.
I know I might be a bit too long-winded and convoluted in my video descriptions, but I just figured I’d cram as much information in there as possible for anyone who’s struggling, and if people don’t need the elaboration they can just watch the video and be done with it.
Hope you enjoyed, I had a lot of fun playing this game and making these walkthroughs.
Thanks to Thunder Lotus for being awesome!
كما هو الحال دائما, feel free to leave any comments or questions below if you need tips or anything. Most of the writing was just copy-pasted from my videos, so please let me know if I missed any typos or weird formatting or anything like that.