So you’re a masochist and/or you really love the game, so you’re taking the difficulty as far as you can. Custom difficulty, with every setting cranked up to inconvenience you and your time in The Bunker. Here’s some tips gleaned from a few runs and a finish on “الأعلى” صعوبة.
Max Difficulty Settings
So what would it actually mean to bring the game to max difficulty? أساسًا, set anything good for you to minimum and everything bad for you to maximum. موارد, يحفظ, fuses, locker randomization, all odds stacked against you.

There are a couple sticking points that you can make arguments about, Trap Amount and Fire/Gas Duration.
More traps mean you might actually have more creative ways to deal with problems, as well as more or less infinite throwables if you manage to reach the wire cutters. لكن, every other door is now wired up, and you practically can’t go down any hallway without hopping over at least one trap.
Fire and gas, while they can’t necessarily force the Stalker to retreat, can help with area denial. You might be able to hold off the Stalker from an area you have to work in just a bit longer. That or fire and gas might just trap you in a closed off area for longer than you can survive.
Choose for yourself what you think might be harder; I personally went with upping all of their values.
Caveats
Some of these tips might help in a normal game, but a lot of them are skewed towards the reality of the starvation diet this difficulty imposes upon you. The simpler solution to a lot of this on lower difficulties might just be “use the resources the game gives you”.
You might approach the game completely different from me and simply disagree with how it should be played. Take the tips as suggestions to try out, preferably on a game you can save with. Maybe let me know if you have a better approach or think something simply doesn’t work. من تعرف, maybe we’ll both learn something.
The Resource Game
Minimum Resources really means almost to a minimum, there will be very few dynamic resource and ammo spawns. You’ll get very familiar with the permanent static spawns and your entire run will have to revolve around how you use them. Everything extra you find along the way is a miracle, crucial to getting you that much farther. The fact that you start with only 3 inventory slots is barely even a factor with so little items to find. مع أخذ ذلك في الاعتبار, here are some general tips:
- Don’t skip searching, even if nothing spawned there the first 5 times you played. You need everything you can get. For the longest time I thought nothing ever spawned in the Pantry, but lo and behold there was a piece of meat on one of the dining tables on one run. The small lockboxes and latched cabinets in particular seem to spawn items very rarely, but don’t forget to search them.
- Items very rarely can come out of broken boxes and barrels. Taking the time to block off a hole with a box might miraculously net you with a grenade or piece of meat.
- You’ll only need three of the fuses you’ll find, so make sure to save them for the relevant sections as you find them.
- If there’s only one rat chomping on a corpse, you might consider lingering nearby to see if it wanders off. You might get a free code without expending resources.
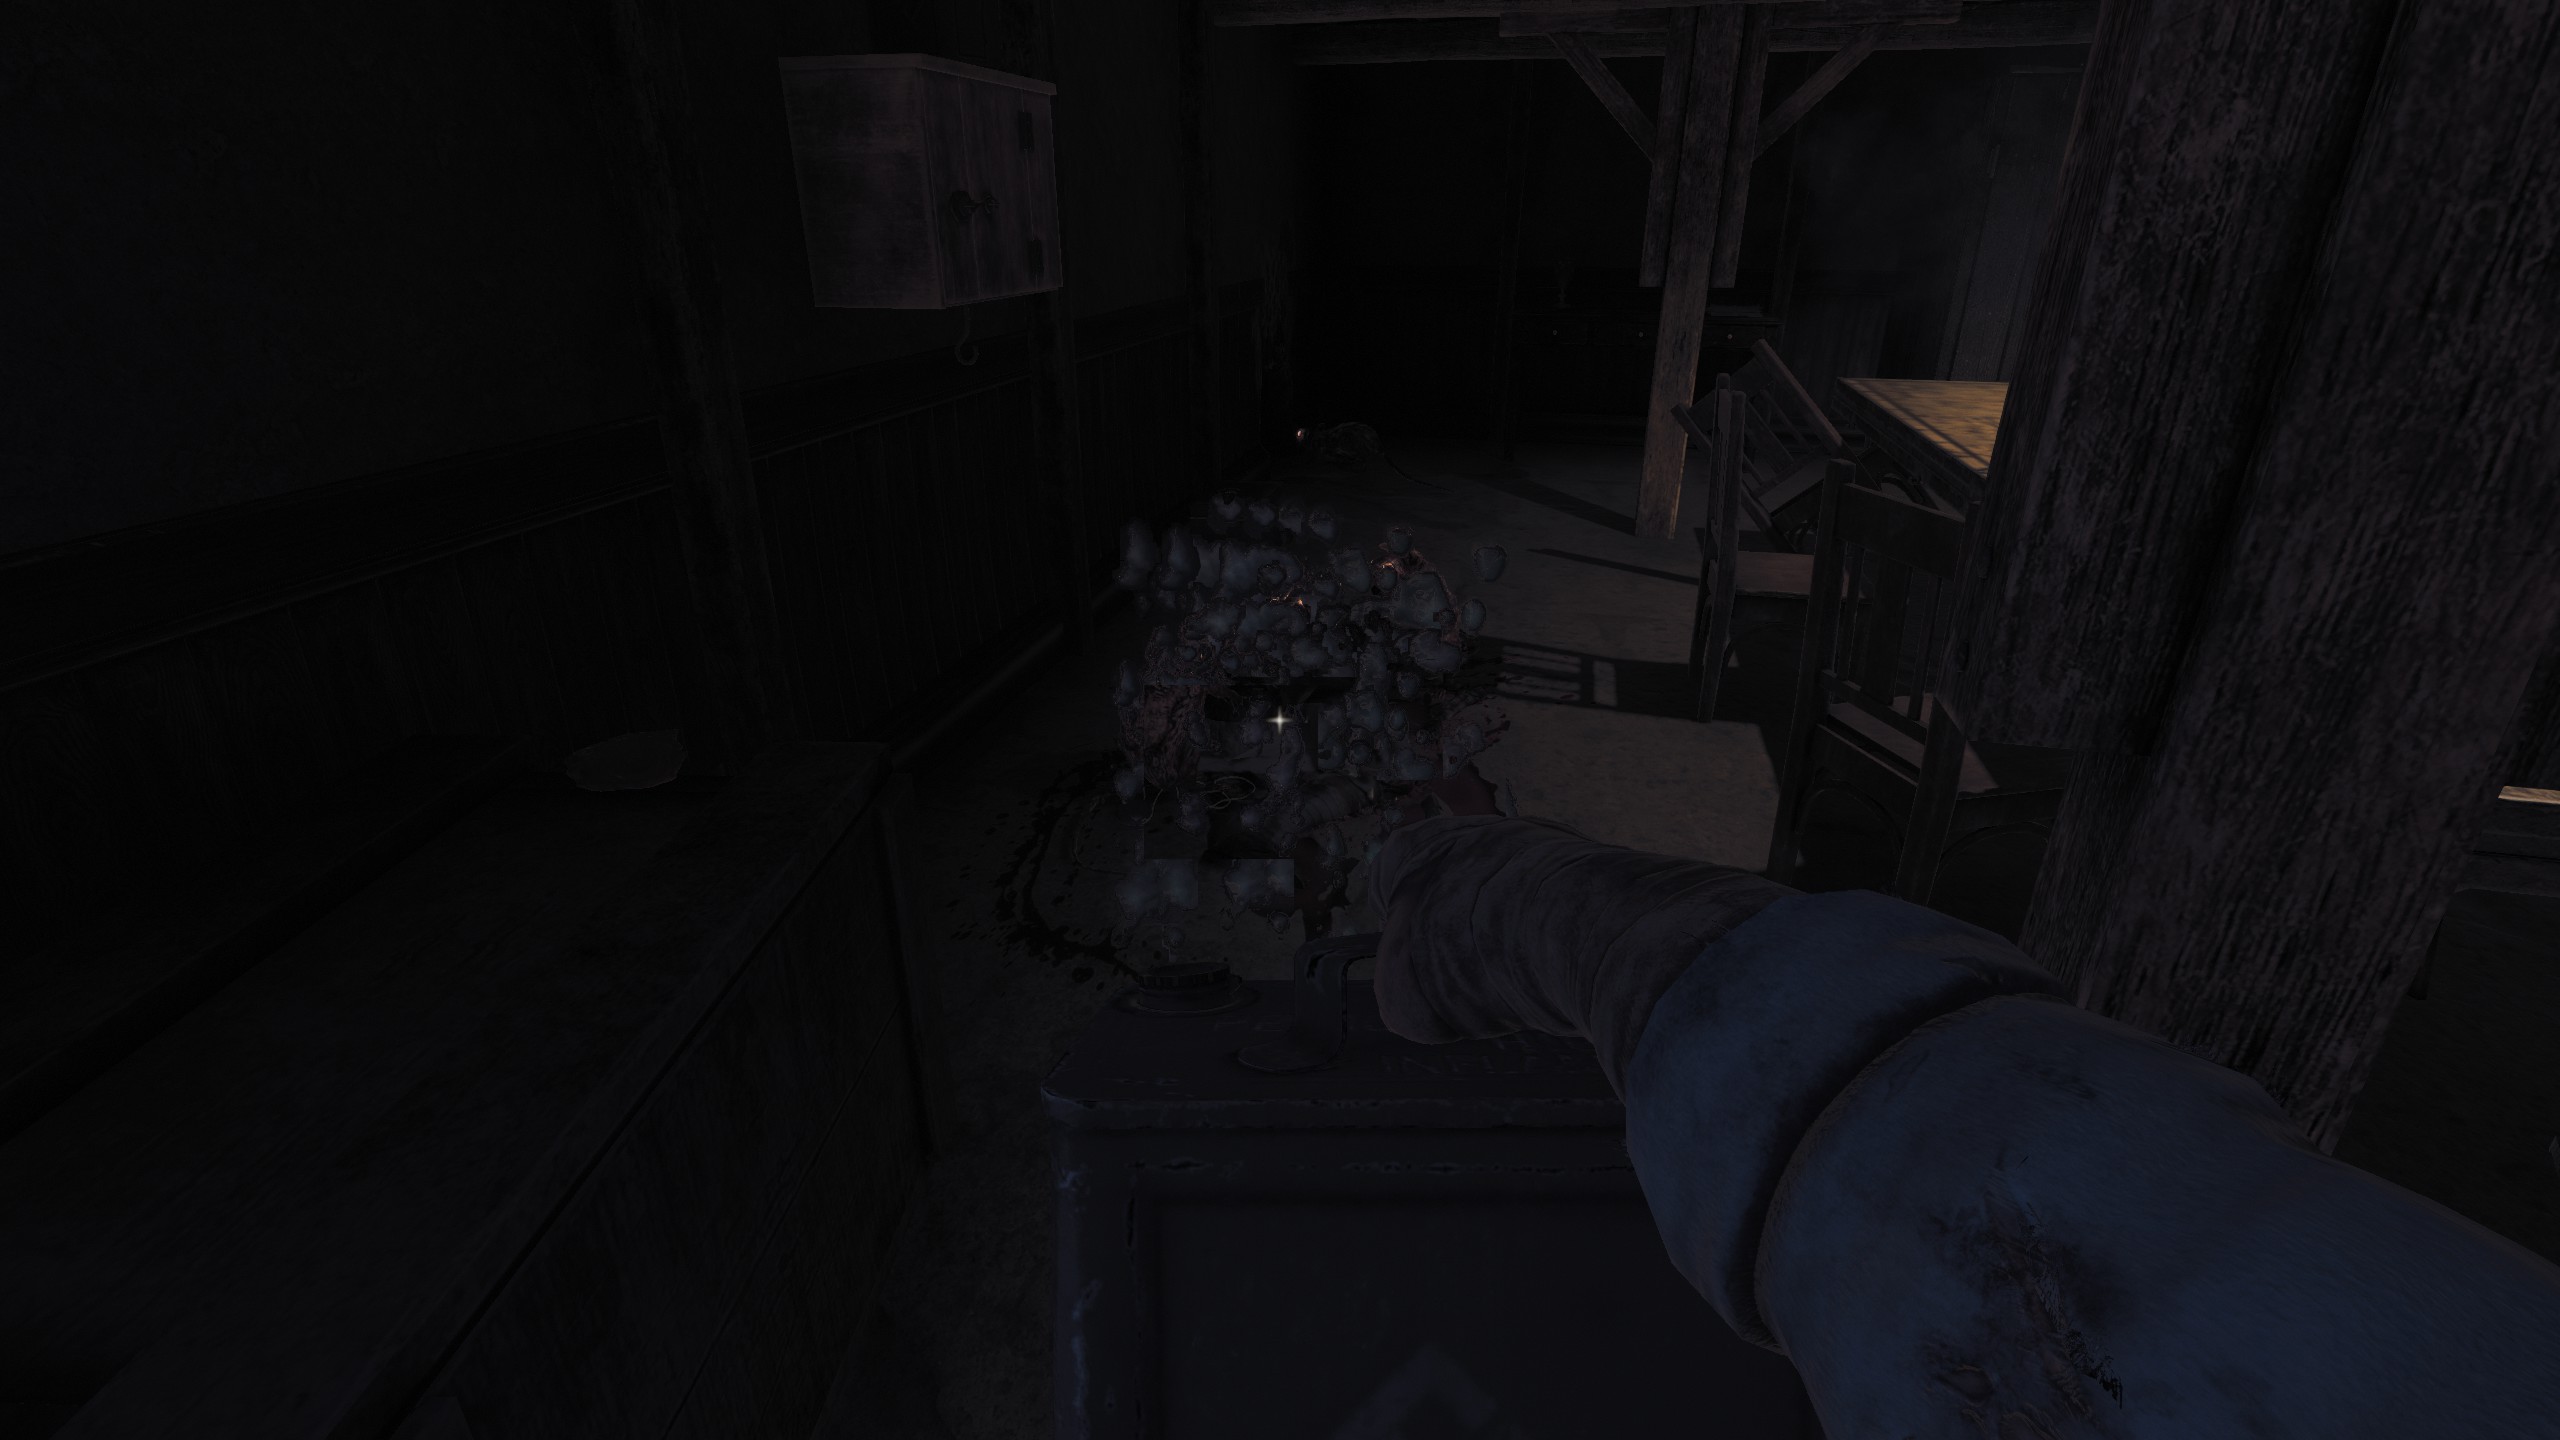
- Even cloth comes at a premium, so consider carefully what you’ll need it for. I find myself mostly using it for emergency bandages and the odd torch if I’m lucky. Using it for molotov cocktails could be a waste.
- Until you get right items, you simply do not have the resources to deal with every problem. If a rat corpse or barred door can be ignored, you’ll probably have to leave it behind.
- It’s almost never worth firing the revolver until you’ve gotten through the Roman Tunnels. Only use it if it’s your absolute last option.
- Given the lack of resources, getting hurt is almost never worth it if you have the choice. You really don’t want to try to play the game while half blind, stumbling, and trailing hungry rats. Without a nearby bandage or a lucky medkit, it’s almost worth restarting by choice if you get hurt in the wrong situation.
Fuel
- Fuel will be used almost entirely to burn rat-infested bodies. The generator is basically only there for mission progress. Fuel is too precious to use on light and time, and the Stalker basically comes out on the first few noises anyways. You’ll only need to fuel the generator three times, for the Arsenal code, the Wire Cutters, and the water pump. Everything else is a luxury.
- Focus your initial fuel usage on opening up access to every section, particularly Maintenance. Even if you don’t have the fuel code, there are three permanent static spawns of the two fuel cans in the Clerk’s office (the first barricaded room with dead rats in it), and the fuel bottle in the Foreman’s Quarters (the room up the stairs with the burnt body).
- Given how little cloth you’ll find, Fuel in can form can be more useful than in bottle form, so try not to put fuel in bottles if you can. The ability to spread out the fuel in a 3 splashes can help with setting off fires.
- A fire’s radius spreads quite a bit more than the fuel splash indicates. Keep this in mind when trying to set off fire near rat bodies safely.
Actually setting fires with no lighter or gun comes with its own complications, detailed in the Trap Tricks section further below.
Trap Tricks (and the Bucket Trick)
If you set the Trap Amount to maximum, running down a hallway in the dark and opening random doors with carefully checking can end badly for you. من ناحية أخرى, the multitude of traps can help save yourself the few loose resources you have.
- Shoving an explosive barrel in front of a Stalker hole and waiting for him to break it can cause an explosion if you place it right. It won’t stop the Stalker from emerging, but the explosion can set off fuel puddles, kill rats, and break down nearby doors. You might even consider pushing explosive barrels farther than you normally would if there’s a hole near anything exploding.
- Using the three splashes out of a fuel can to lead to a flare or frag grenade trap can help burn a corpse without having to expend any other resource.
- Remember that flare traps by themselves can repel rats long enough to grab a dog tag, though obviously they can’t burn a body by themselves.
- An exploding barrel in the middle of the store room area in the Prison can potentially break down every door at once if you place it right
The Bucket Trick
This particular trick has come in useful a surprising number of times, especially in the Central Bunker area where all the factors are likely to come together to make this possible. You’ll need a flare trap, specifically a door flare trap, and a wooden bucket. If you’re not sure what kind, there should be one right outside the saferoom, near the door leading to the Medical area.
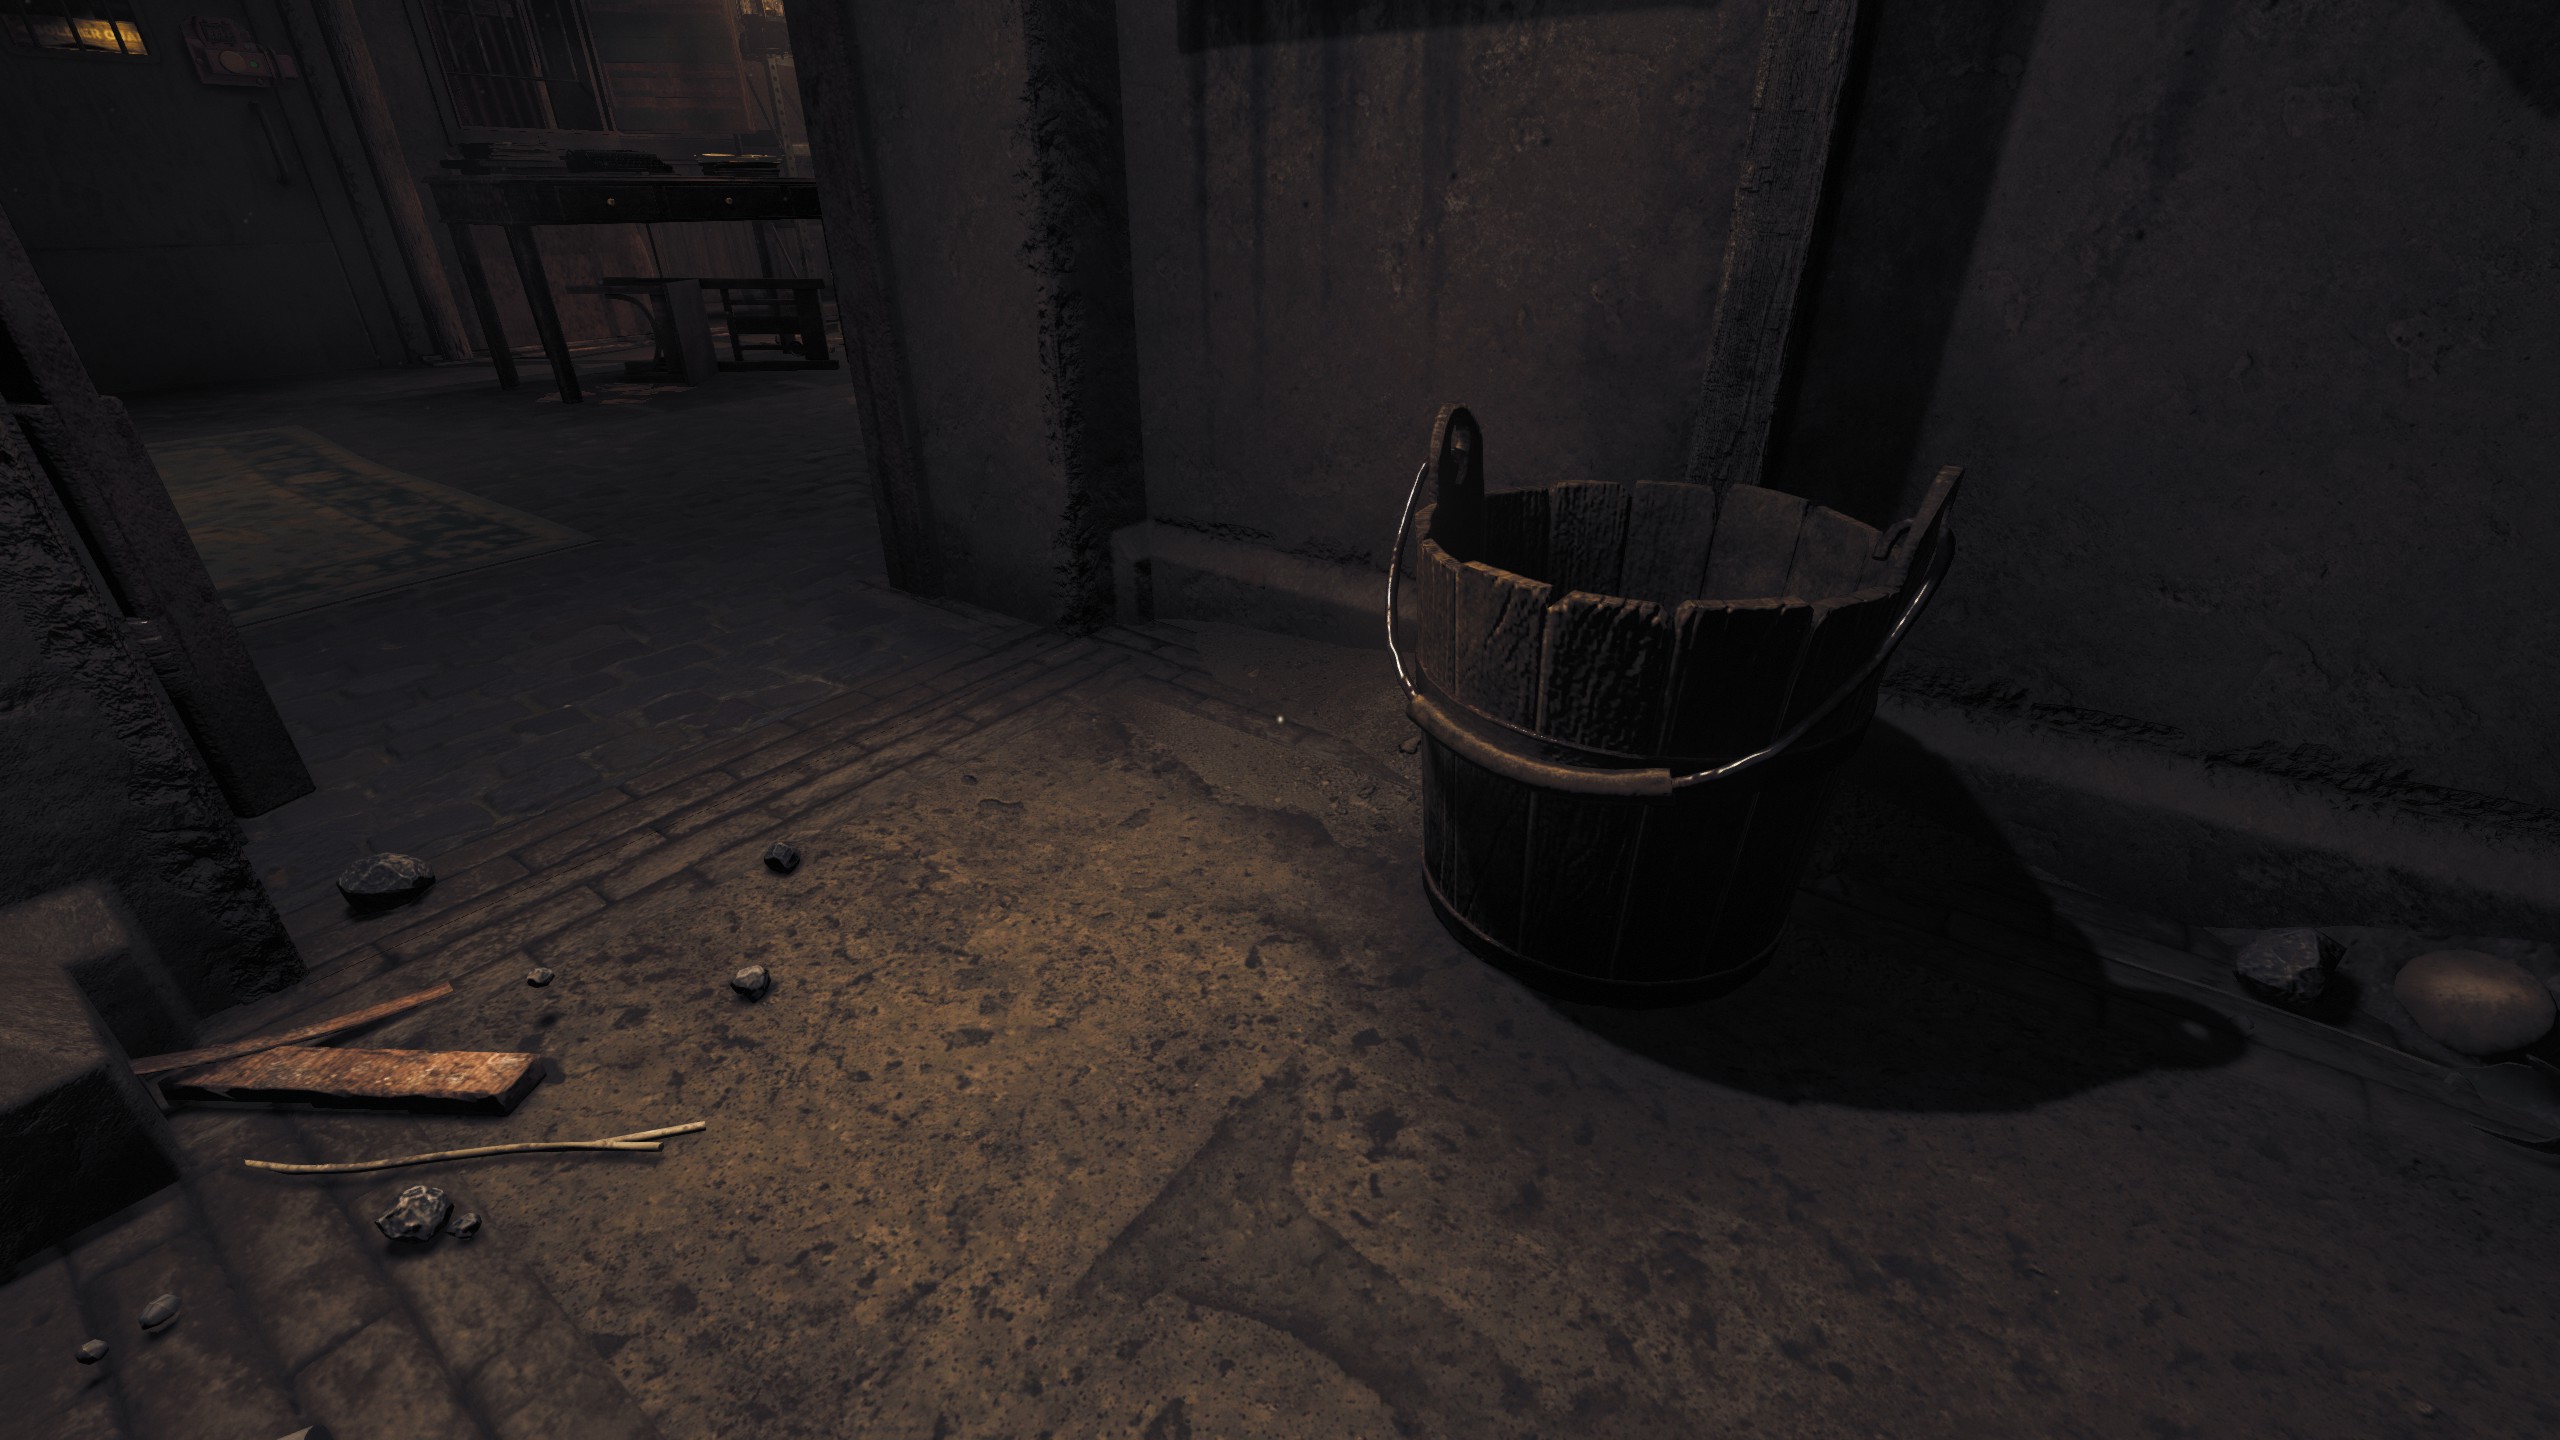
- Place the bucket at the door trap, directly under the flare. Use the fuel puddle to reference where it will drop
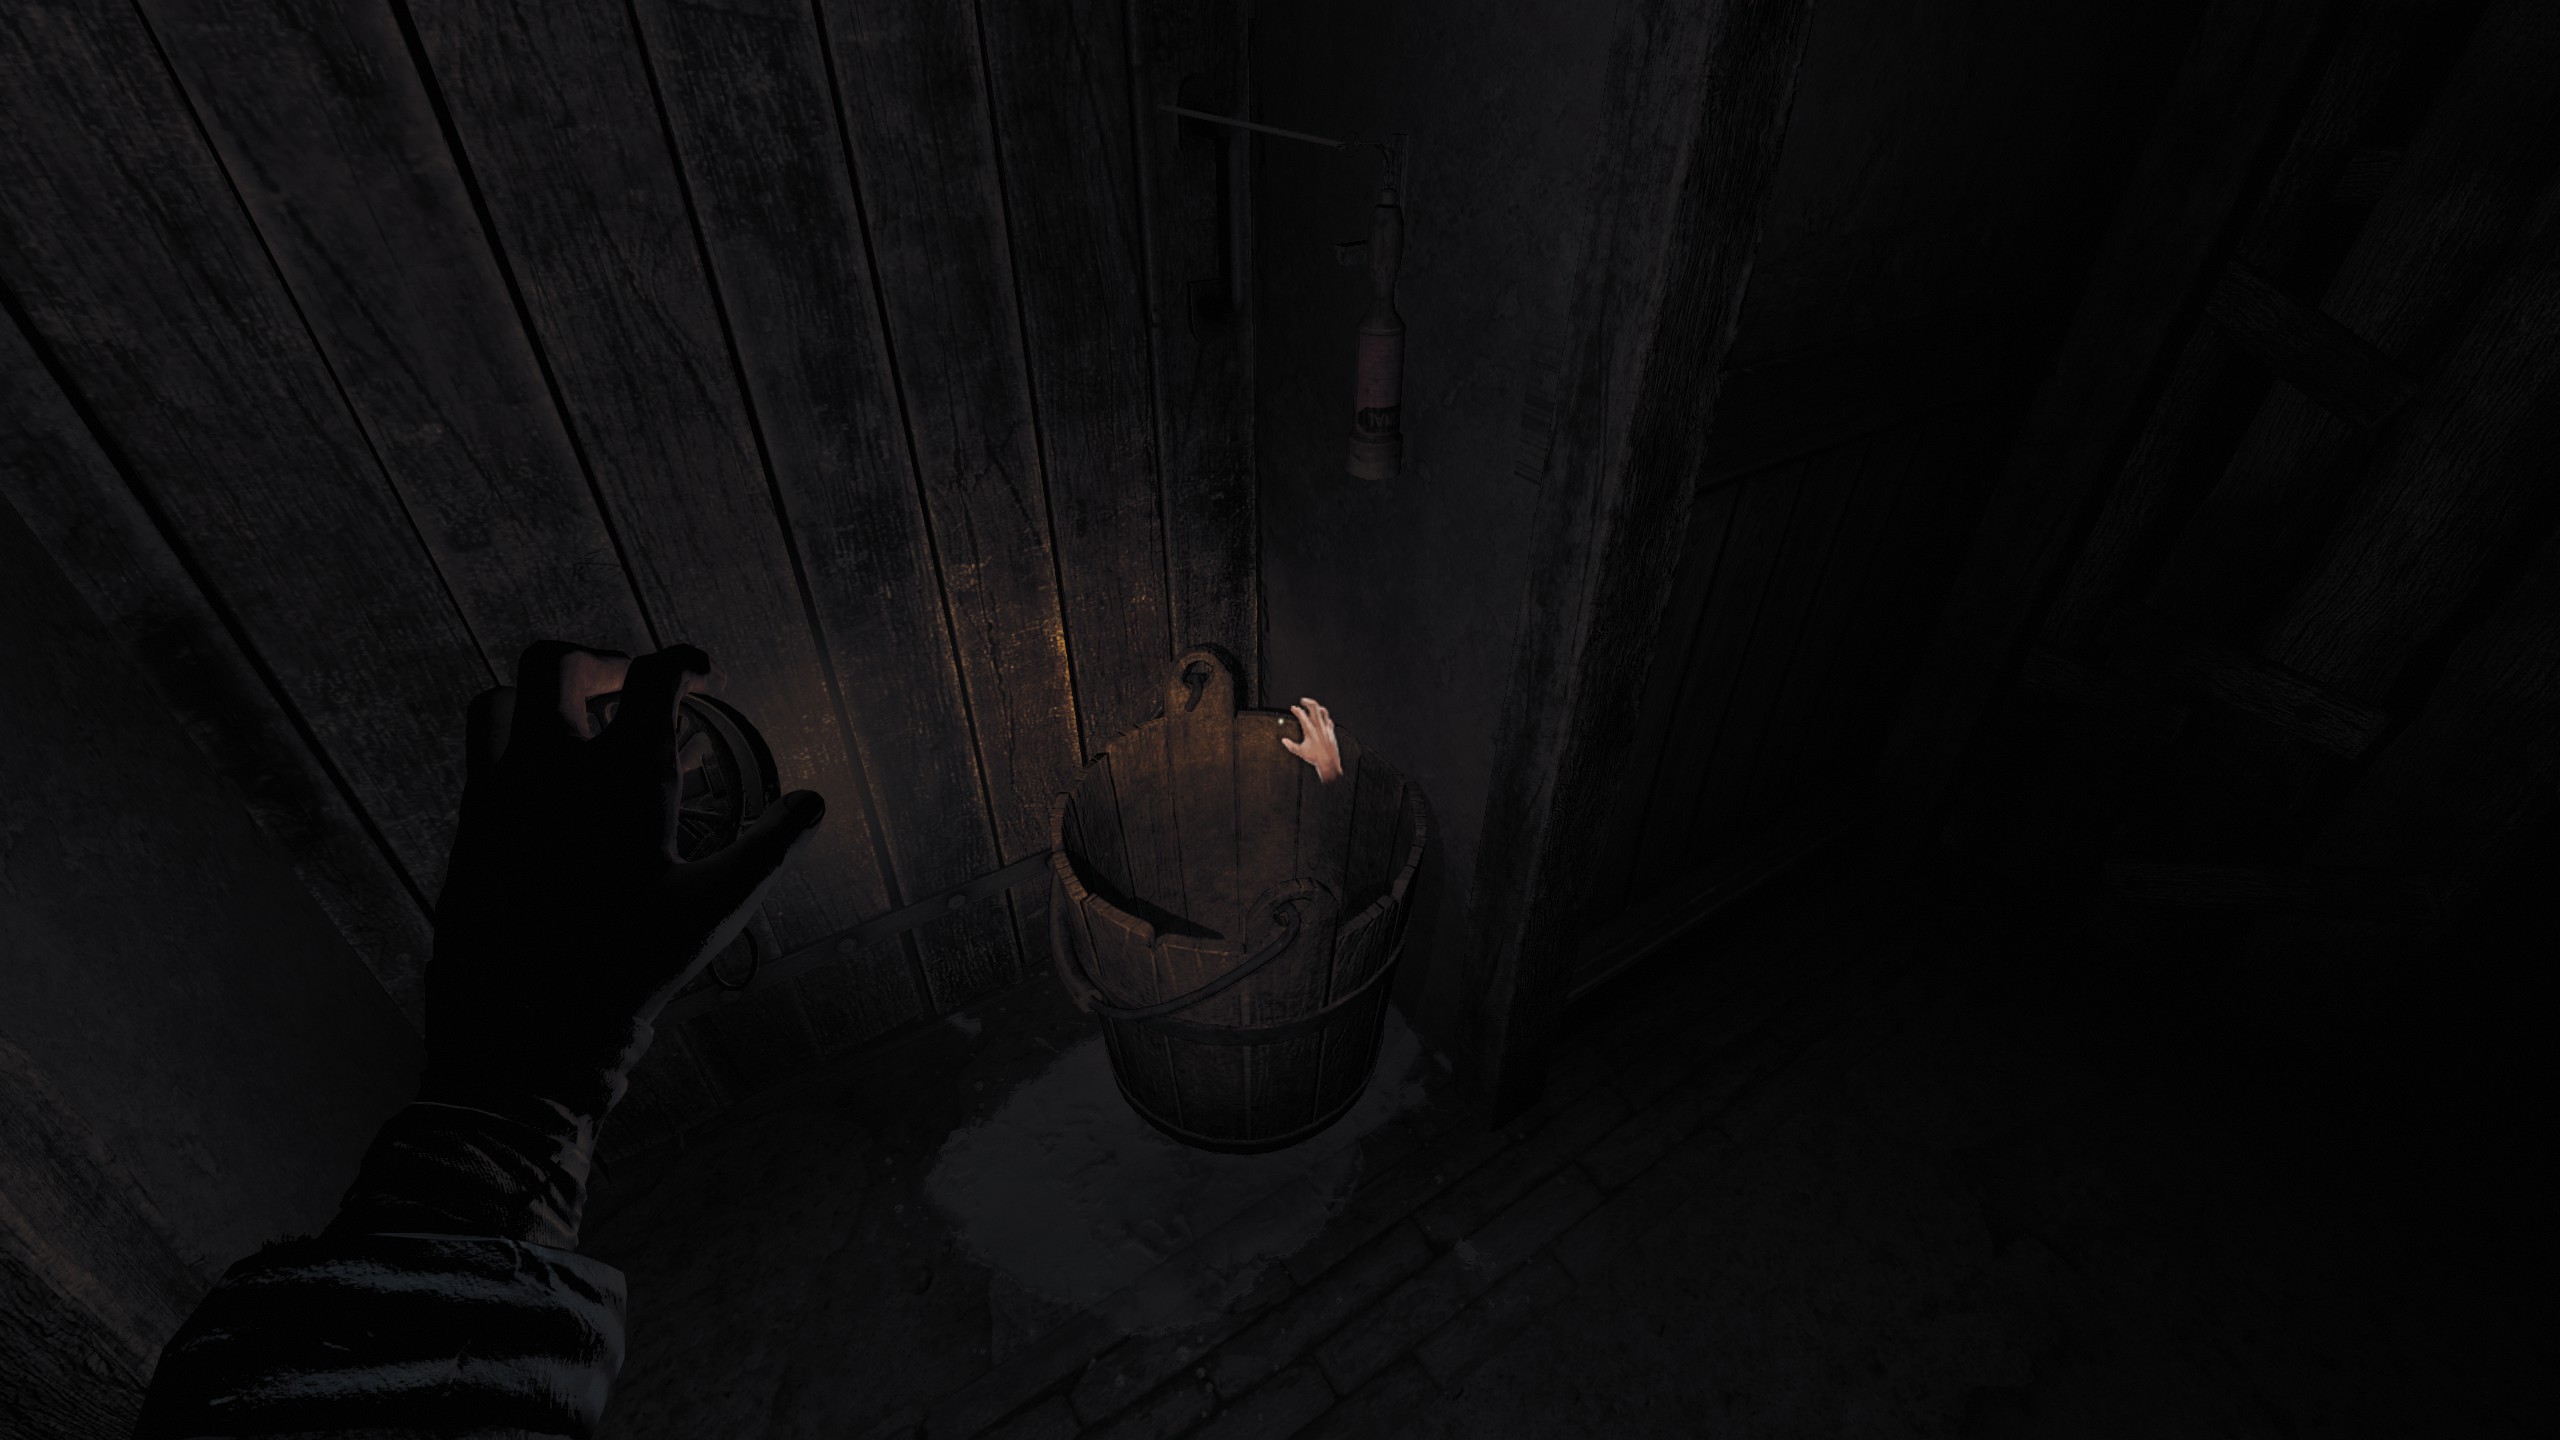
- Ready whatever you would need a flare for, most likely dumping fuel on a body.
- Set off the door trap, watch the flare drop into the bucket
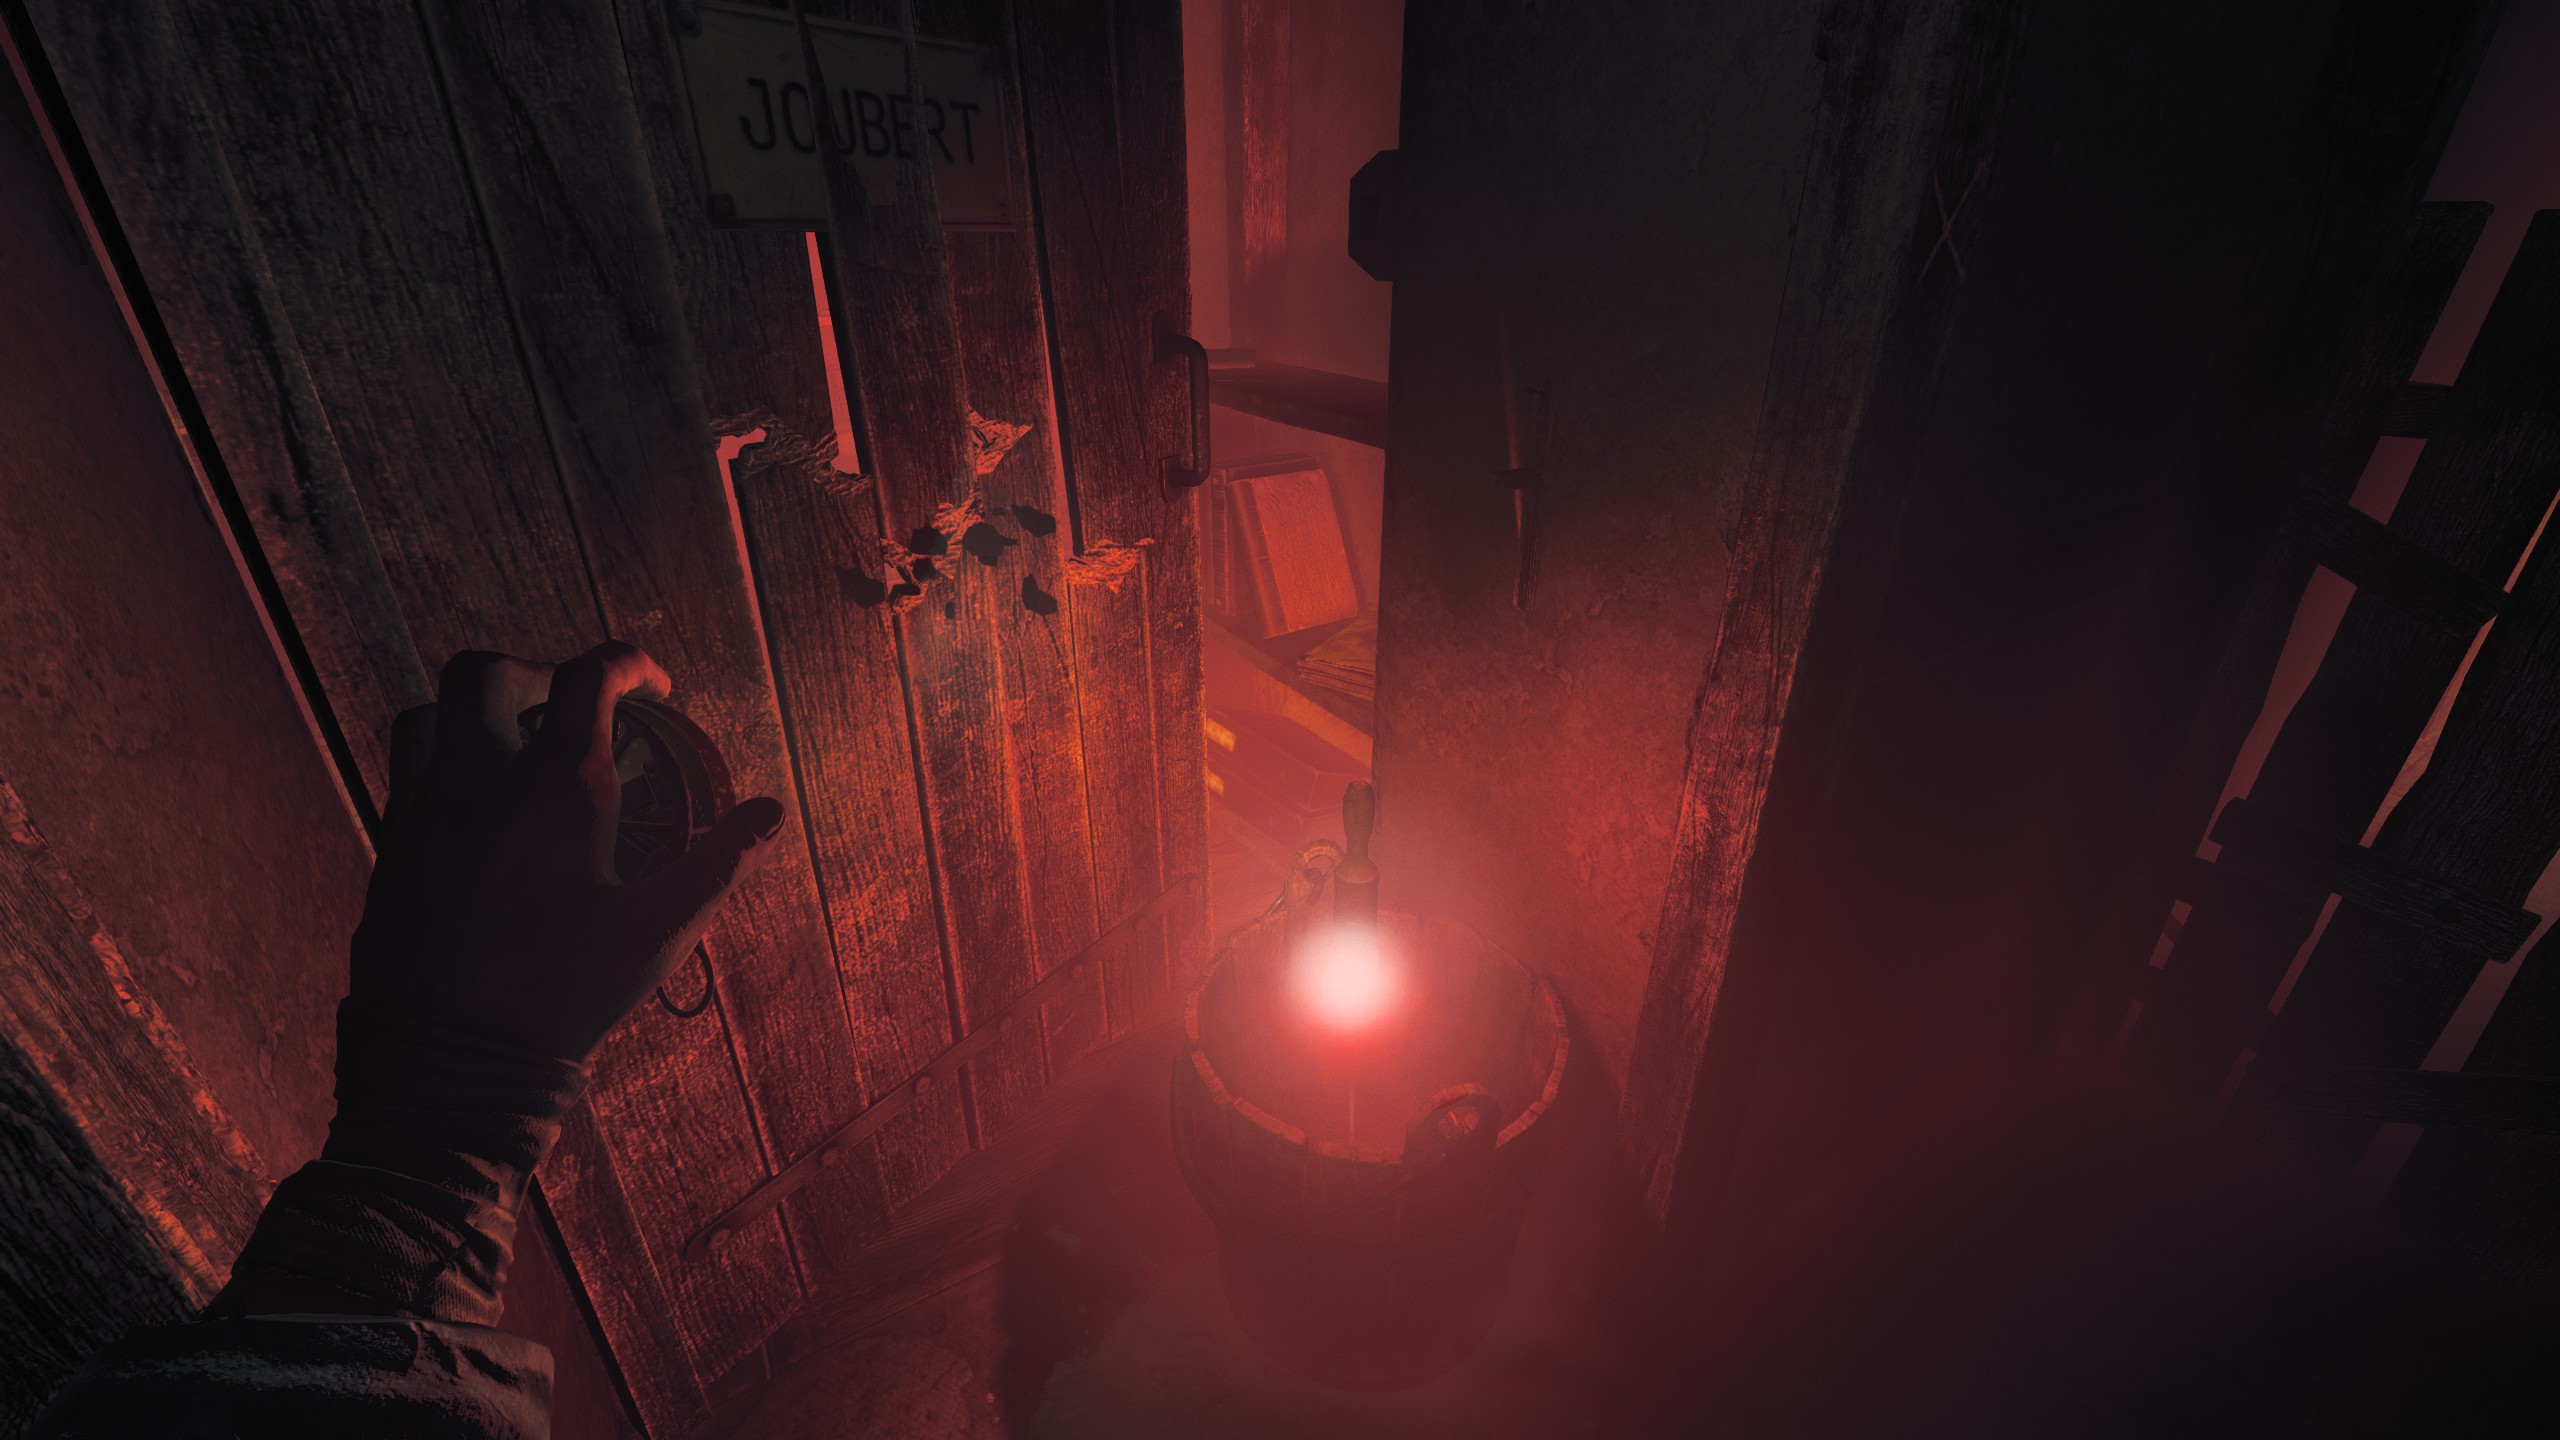
- Pick up the bucket and move before the fire hurts you
- Carry it off to whatever you need it for.

Place the bucket on a fuel puddle (reliable) or throw the bucket (less dangerous) to set a fire. Scare off rats from multiple bodies. You could even break through the rat tunnel this way. بالطبع, keep in mind you’ll bring over the Stalker doing any of this.
The Stalker
Your personal boogeyman, you’ll have to spend the entire game running from him, managing him, and wishing he would go away. More specific tips will be per section, but here are some general tips:
- The Stalker is simultaneously more and less perceptive than you might think. He’ll zero in on sounds from far away even while he’s spawned and out and about. (Simply opening and closing doors definitely makes a noise he’ll come check). He can in fact see you in the dark from fairly far away, farther than you can see with your flashlight. من ناحية أخرى, he’s prone to losing the chase fairly easy if you can break line of sight, he’ll waste time roaring, he doesn’t seem to perceive much when initially clambering out of a hole. You can spend quite a long time circling a shelf with him even if you’re charging the flashlight the entire time. Even if you’re spotted, finding a place to carefully loop around him can keep your survival rate pretty high.
- Get a good sense of the “loops” in the area, how and where you can circle around him and not get trapped. It may even be worth expending resources, burning rat bodies you don’t necessarily need to burn just to open up space to run. Places like the closed off section near the kitchen in the Soldier’s Quarters, or the Changing Room behind the padlocked door in Maintenance are good examples of this.
- Don’t be afraid to take a breather in the saferoom and wait for him to despawn.
- من ناحية أخرى, the saferoom music kicking in doesn’t necessarily mean he’s actually despawned, he might just be sitting around far away.
- You can sort of manage him by switching to a different area section with a level load, but a few different things can happen:
– He despawns immediately in the other area (you’ll learn to recognize the noise) and immediately clamber over to harass you in the next area, either by spawning as soon as possible near your position or by waiting in the walls for you to make too much noise.
– He’ll rarely spend some time searching the area you left, giving you a bit of a break. You won’t hear him immediately despawn, but the threat music will continue to play.
– He’ll straight up chase you into the next area. If you hear him still running, استمر في الجري. He’ll even come up and down the stairs to the Soldier’s Quarters if he’s close enough to your ass. - After a certain amount of progress, he’ll dig a hole through the sandbags near the detonator area and can just sit right outside the saferoom. On returning to the saferoom, don’t just run towards it blindly, listen and be ready to 180.
- As said above, gas and fire may not force him to retreat on max difficulty, but it can deny entry. This can save you if you’re lucky or plan ahead. I found this particularly useful when I dropped a gas grenade behind me when getting into the Arsenal’s explosive cage.
- I’m not sure why or when he does this, but he can in fact open doors quietly with the handle.
- If he’s nearby, you don’t know where he is, and you’re near the area entrance, he can in fact wander over almost to the next section. Don’t just blindly run to the area change or you might get caught.
- This might just be a placebo effect for me, but section distance from other sections does seem to matter for how long you have before the Stalker comes to bother you. If you’re having trouble in the Soldier’s Quarters, consider making some progress in Maintenance, that kind of thing.
متفرقات
- Discretion is the better part of valor on a no save run. If something feels risky, seriously consider putting it off or doing something else.
- Shop around. If you feel stuck or stressed by the Stalker in one area, leave and make progress in another.
- Bricks are not affected by lowered resources, keep searching until you find them
- The flare throws a bit lower than you think, might bounce off your cover if you’re unlucky
- At a certain point with your inventory size, it might be worth always carrying a bandage or medkit with you
- When they mean the grenade damage radius is high, they mean it. You basically have to be moving at a dead run in the opposite direction or get around a corner to not get wounded.
Central Bunker and Officer Quarters
Medical, the Safe House, and Mission Storage
- Don’t forget the static fuel spawn at the burnt bodies in the Doctor’s Office, I’ve ran past that unthinkingly a few times.
- Consider blocking off the Stalker emergence holes in the area with the couple of boxes in the Kitchen, you have all the time in the world so why not.
- While rare, meat may spawn in the Mess Hall/Pantry area.
- The Stalker will not activate until you specifically go down the hallway into the Officer’s Quarters (marked green on the map). That means you can screw about in Mission Storage or even the hallway to the Arsenal as long as you need. Take the time to search carefully, open the locker for the body in Mission Storage if you’re lucky, block holes, break the lockdown wheel, roll explosive barrels around, إلخ.
- Even if there’s a rat body near Mission Storage, consider leaving it alone for now until you secure enough fuel, you can skirt past and only get hissed at for your trouble.
Officer’s Quarters
- If you can’t open the barred metal door to Medical, the vent into the Delise’s room is the quietest way to loop around the monster. If you’re being actively chased, hopefully the area around Strategic Operations (the meeting room with the DnD DM’s blocking screen) is clear to run around.
- With maximum Trap Amount, this place will be extremely trap heavy, almost so that every optional door is trapped and 3 أو 4 trip wires around. Keep an eye out for door flare traps to try the bucket trick on.
- There will usually be at least one explosive barrel around, see if there’s a way you can use it to burn a body, like blocking the hole outside the Arsenal.
Soldier’s Quarters
- If you can get an explosive barrel blocking the very first Stalker hole here, you can break into the Clerk’s Office (the room with the very first barred door) for free if you’re lucky. You can sort of see through the bars if it’s worth breaking in or not.
- If the Barracks doors to the main hallway aren’t trapped, try to open them up first so you have space to run move.
- I find it not all that worth it to break into the Security room (with the note on the owner of the key), since you’ll generally want your bricks for other reasons
- The key can under a pillow or helmet, tucked under folded blankets, on the bedframes at the side of the mattresses, in the boxes with the name placards, and possibly even more. Don’t get lazy searching for the key or you’ll miss it and waste valuable time.
- Try to search the area systematically so you don’t end up searching the same couple of lockers over and over again
- Don’t forget to also search over the lockers and bunks for bricks and supplies
- If you find a brick, try to get it closer to the Mess Hall hallway, but you may want to focus on searching for supplies and the key first.
- Good spatial audio works wonders for knowing what room and hallways the Stalker is in
- If the Stalker is wandering about the Mess Hall area while you’re in the Barracks, it may be worth lingering while not making any noise in hopes that he’ll break through a door without your input.
- If you find the key and it’s safe, consider searching Communications even if you haven’t activated the switches yet.
- There will often be traps right next to rat bodies which can help with getting a free code.
- Once you commit to making progress down the Mess Hall hallway to the isolated breaker switch, consider doing it piecemeal, breaking down a door and running back down the hallway, coming back when it’s safe to break the padlock, إلخ.
- If you have excess fuel, burning the body in the corner of the hallway between the Mess Hall and the Break Room is definitely worth it for your survivability.
- The corner in the Kitchen might be the hiding place that saves your life if you’re trapped.
- Don’t forget Henri’s dogtag(the Clement one); you’ll definitely need the two revolver cartridges. If you can find the revolver.
- Absolutely make sure the isolated Utility Room breaker is thrown before you leave, you don’t want to be have to go back down there if you can help it.
- One unit of fuel is just enough time to sprint from the generator to the barracks radio room, get the code, and sprint back to turn off the generator if you aren’t stopped along the way. It’s worth doing because the tiny bit left counts as an entire unit fuel load when you get another can into it.
- Don’t forget the loot in the vent when you get the wrench, it’s definitely worth coming back down here for a couple bullets or inventory space. The vent in the Mess Hall is completely not worth it however.
Maintenance
- Getting to here and getting the three guaranteed fuels is crucial to the run
- If the Clerk’s Office door (the map room) is trapped, trigger it on your way out after searching elsewhere.
- Don’t take any risks here before you open up the rat tunnel, leave if the Stalker is in the main hallway
- There’s at least one easy dogtag in the Foreman’s Quarters with the burnt body, and there’s probably going to be the one in the main hallway a rat is supposed to accidentally burn with a flare trap.
- The Workshop (the room connected to the rat tunnel) has one good hiding space, under the table next to the tunnel entrance, though Stalker might destroy that anyways.
- If there’s a rat corpse in the Changing Room, consider burning it early before dealing with the rat tunnel.
- If there’s two bodies next to each other near the entrance to the rat tunnel, you might be able to get them both in one go with a fuel can and a well thrown fuel bottle.
- Try not to halfass the rat tunnel, go in with a solution and see it through, or you might get trapped.
- Try to go into the tunnel with a brick you toss along with the way, and focus on breaking the padlock to the door to the changing room before you do anything else. Then later you can bring it to the Pillbox door so you can break into Munitions Storage.
- Watch for traps before you get into the Chapel, and consider blocking the hole nearest to Fuel Storage
- The Stalker will only sometimes check into the Chapel when you grab the key. If he doesn’t check, he’ll often be wandering around the Storage Hub area directly in front of you when you try to leave the Chapel.
- Munitions Storage should have 2 أو 3 static grenade spawns, don’t forget to loot it
- Don’t hesitate to climb up the Pillbox and wait patiently for the Stalker to go away. He might even break into Munitions Storage for you.
- If the Fuel Storage door is trapped, you’ll have plenty of time to clear out before it goes off, just make sure to not be between the door and the Stalker.
- If you have to make repeated fuel runs, that makes it all the more important to clear out the routes in both directions out of the Storage Hub.
Prison
- You really don’t want to be in here without the wrench if you can help it, but it can be rewarding if you don’t die. The prison might in fact be the place to search of last resort if you’re absolutely out of options.
- Without opening the vent, you basically should leave as soon as you do any noisy action. Break the door or set off a trap and just run without waiting to hear the monster.
- There can be up to three ratless bodies here with dogtags. The one in the cells can be accessible without opening any cells.
- If you can break into Storage, the one reliable place to hide is behind the wheelbarrow of boxes in the corner.
- Once you open the vent, flip open all the cell door switches (except the prisoner if you’re nice) even before you have the generator on
- It’s actually completely possible to keep the prisoner alive without too much trouble, even when you can’t fight off the Stalker at all. If the Stalker hasn’t climbed to the area yet, open the cell door, immediately sprint out to the prisoner, crouch under the opening door and grab the wire cutter, then immediately sprint back to the door controls and close it again. If you’re fast enough, the door will close in the face of the approaching Stalker.
Arsenal and Tunnels
Arsenal
- Don’t forget that there might be a rat body to deal with before you even get to the Arsenal door.
- It’s worth checking the Arsenal area early even if you don’t have the code, you might be able to get a free code off the burnt body outside the locked door.
- If you’re lucky, the Stalker will spawn inside the Arsenal and break shelves before you can even get in.
- Right inside the Arsenal door should be some indestructible shelves to the left. That will be your main way of looping around the Stalker if it comes to that.
- إذا استطعت, be ready to burn bodies before you enter the Arsenal door.
- If you find a gas grenade, consider saving it for the Arsenal. If the Stalker is approaching your position when you get to the explosives cage, it might be the only thing that saves you from being trapped.
- The section with sandbags and barrels can be particularly killer, especially if there’s the rat body near a trap. If the Stalker is near, be as patient as you can, keep your ears open for what direction he’s going, and try not to over commit.
- It’s probably not worth breaking into the supply closest at the end of the Arsenal labyrinth, since it basically means you’re now trapped.
- Remain as patient as possible on the slog back. If you can find a good hiding spot, you might even consider just hiding and praying for him to despawn.
Tunnels
- I’ve stuck with one method that’s worked for me every time, no matter where the Shotgunner spawns. Once you enter his active area, make sure the door you entered in is all the way open, then hide behind it with your back to the wall, peek, and aim. Keep an ear out for his rhymes and your heartbeat to get a sense of where he is. Remain patient, and don’t move (and try not to shoot the hallucinations). He’ll fire about randomly, but he won’t know where you are. If you need to, try throwing a bottle or two into your kill zone. Don’t get impatient and don’t get out of cover. I might have been lucky 3 أو 4 times in a row, but for me he eventually wanders by, not noticing you. With a little luck you can take him out with a clean shot to the head.
- If you only hit him in the body, he’ll retreat and it might take a long time to convince him to wander back over. Just remain patient and wait for him to come back.
- Don’t forget the inventory slot and the rabbit doll
- If you can’t find the gun, uhhhhh good luck. Before you enter his active zone, try to set up the area so you can escape easily. Listen carefully to where he is as you move, and use whatever method you have to break down the door. There should be a brick somewhere here, and the Shotgunner might have blown down the door himself, but you really shouldn’t have come down here unprepared. Pick up the items (you’ll probably have to forgo the doll), and carefully sneak back out. You can actually stack up boxes and barrels to vault over the barricade in the middle of the entrance hall, but doing that while he’s active isn’t fun. الذي - التي, or maybe you can get lucky with a grenade.
The Colosseum
*Or whatever it’s called, the Ruins, the Abyss, the Arena, إلخ.
If you get this far, just remain calm and stick to what’s safe and what works, no need to get fancy and screw it up right near the end. Nothing below should be all that new to you, but I’m putting it here for completion.
- Like with the Shotgunner, I do the same thing every time, the plan only failed me if I failed the plan. Go in with the doll and as many grenades as you can carry. Throw the doll onto a wooden bridge section, then throw the grenade as the Stalker closes in. Throw it before he gets onto the bridge for best results.
- If you miss or mistime, you’ll have to go on a merry chase around the various bridge sections, desperately trying to throw the grenades at just the right time to not die and take him out. Be conservative and stick to running until you’re absolutely sure you have enough time to focus and time the throw.
- Try to plan your attempts and not box yourself in by collapsing the wrong bridges.
- That bridge section that gets rubble dropped on it from the ceiling when you first enter the area is still completely traversable.
- Even if you collapse part of a bridge section, there might be enough left to jump to the other side
- If you run out of grenades or were forced to spend it all just to get to here, you still have a chance of survival. Kite the Stalker around until you get enough space, then get to the exit, push the taller box close to the exit wall for as long as you dare. اهرب, kite some more, push some more, until the big box is close enough, then repeat the process with a smaller box. Jump out and away. If you somehow end up with more molotovs than grenades, consider starting with this plan and boxing the Stalker out with fire while you push boxes.
Jeu Terminé
And so you made it. To the end of the guide at least. I thought I was just transposing my single phrase notes from the Steam Notes thing into a guide, but suddenly my evening is gone and this happened.
All these tips could be more indicative of my personal playstyle than of any objectively better strategy, but I hope they help you see the game from a different perspective, and give you something that makes the game a little easier. Maybe you managed just a bit more progress, or maybe even finished the game. Maybe you play a more dead men’s aggressive playstyle, sprinting to the finish. Maybe you crouch walk everywhere and are even more cautious than me. If you have any personal tips on how to play at max difficulty, let me know and I’ll see if I can’t include them with crediting.
شكرًا لك.