This is a guide for unlocking the «MMOs that use a level system are unfair that way» logro, and for grinding to a high enough level to complete all of the post-game content.
Introducción
Nivel 200 is required to 100% el juego, como el logro «MMOs that use a level system are unfair that way» requires it.
The achievement description says you need Level 150, this is incorrect, como el logro descriptions are taken from the Vita version but the achievement criterios are taken from the PS4 version, leading to this mixup.
EXP Gain Mechanics
Primero, some background information on how the EXP mechanics work in Hollow Fragment.
Base experience gain from mobs is approximately 10 Exp, and is effectively irrelevant.

If you want to level up you need to fight enemies at least ten levels higher than you, as you get a 400 EXP bonus per level. This caps out at a 4000 EXP bonus, and this is essential to levelling up.

Use enemy radar and make sure all the enemies on the map are the darkest colour icon, which means they are at least ten levels above you.
You also gain a boost of up to 50% EXP on top of this by killing enemies quickly with sword skills, which means you want to finish off enemies with sword skills as much as possible.
EXP Boosts
The Experience charm (Piso 86 comercio), the Clover Ring (Piso 93 comercio) and the Fairy Cape (Piso 93 comercio) all have the «EXP Up» efecto, which increases EXP gain by 10%. This can be stacked twice, for a 20% increase.
Idealmente, you should equip the Infinity Ankh charm (purchased on Floor 76 after defeating the Floor 98 boss but before defeating the Floor 99 jefe) as it’s the most powerful piece of equipment for any of these slots, and then use the Clover Ring/Fairy Cape for EXP Up.
The Searching skill tree gives you two EXP boosts – 10% from the passive skill, y 15% from the active skill «Gain EXP».
EXP Flagons and Grand EXP Flagons give a temporary boost of 15% y 25% respectivamente, and are great for Method 1 as you’re rotating through mobs constantly.
Accuracy Boosts
Accuracy is crucial, because you will be attacking enemies far above your level and constantly missing your attacks.
Either Gae Bolg (spear) or Demonic Sword Gram (2H Sword) are ideal, as they have the True Strike effect and cannot miss. These are acquired through Implements, and Gram is effectively a requirement for efficient grinding due to the AOE power of the 2H Sword skills.
If you don’t have either of these, the Perfect Style skill from the Precision skill tree gives you temporary True Strike. ACC potions can also be purchased from vendors and will give you a longer True Strike effect.
General Gearing Advice
Arma – Demonic Sword Gram. 2H Sword skills are the best for AOE, and this weapon has True Strike meaning it will never miss.
Cabeza – Ace Pendant. Good stat buffs, no downsides.
Cuerpo – Legion Storm Jacket. This gives you the Attacker role (increased damage, decreased defence) as well as a big STR buffs and direct Attack/Damage Value buffs.
Arms – Crimson Gauntlets. These make your damage ignore enemy armor, in return for crippling your own defence, but the Attacker role has already put you at 0 defence so it’s basically free damage. As we’re attacking massively higher level enemies, this is a huge damage boost.
Piernas – Legion Storm Boots. These give the same STR/Attack/Damage Value buffs as the Legion Storm Jacket, and it also gives you the Soul Connect buff which is a combined movement speed/attack interval/recovery time/SP regen buff. These are the best boots in the game, and there is zero reason to ever use anything else.
atrás – Fairy Cape. EXP Up buff. If you don’t need the buff, use the Assassin’s Cloak for a significant damage increase and immunity to poison/paralysis/bleeding, in return for a massive defence decrease. Otra vez, this is irrelevant, as we already have 0 defence.
Waist – Assassin’s Shenti. This works the same way as the Assassin’s Cloak, and has no downside for our current build.
Encanto – Infinite Ankh, for a massive ATK/DEF buff and small increases to every stat in return for lowering the chance of critical damage for both you and your opponents, which is insignificant.
Anillo – Clover Ring gives us a second EXP buff, and the Resonant Ring increases all attributes by 5%.
General Ability Advice
Grito de guerra, Último recurso, Fortaleza, Vitality for ATK increases.
Soulful Stand to increase SP, and SP Charge to refill it.
Hyper Armor and Protective Armor for invulnerability.
Perfect Style for 100% exactitud (True Strike)
Gain EXP for personal EXP buff, Crime Servant to give your EXP to your partner.
Effect Booster to double the duration of abilities.
OSS Chains
Completing the «desbloquear – Multiple Sword Skill Chaining with OSS» implement allows you to chain more than two Sword Skills, y (opcional, but recommended) completing the Recast Reduction implements give you a combined 30% Reducción de enfriamiento.
Setting up an OSS Chain makes it easier to chain that specific order of Sword Skills by increasing the input window for the next Sword Skill, so it’s worth doing this.
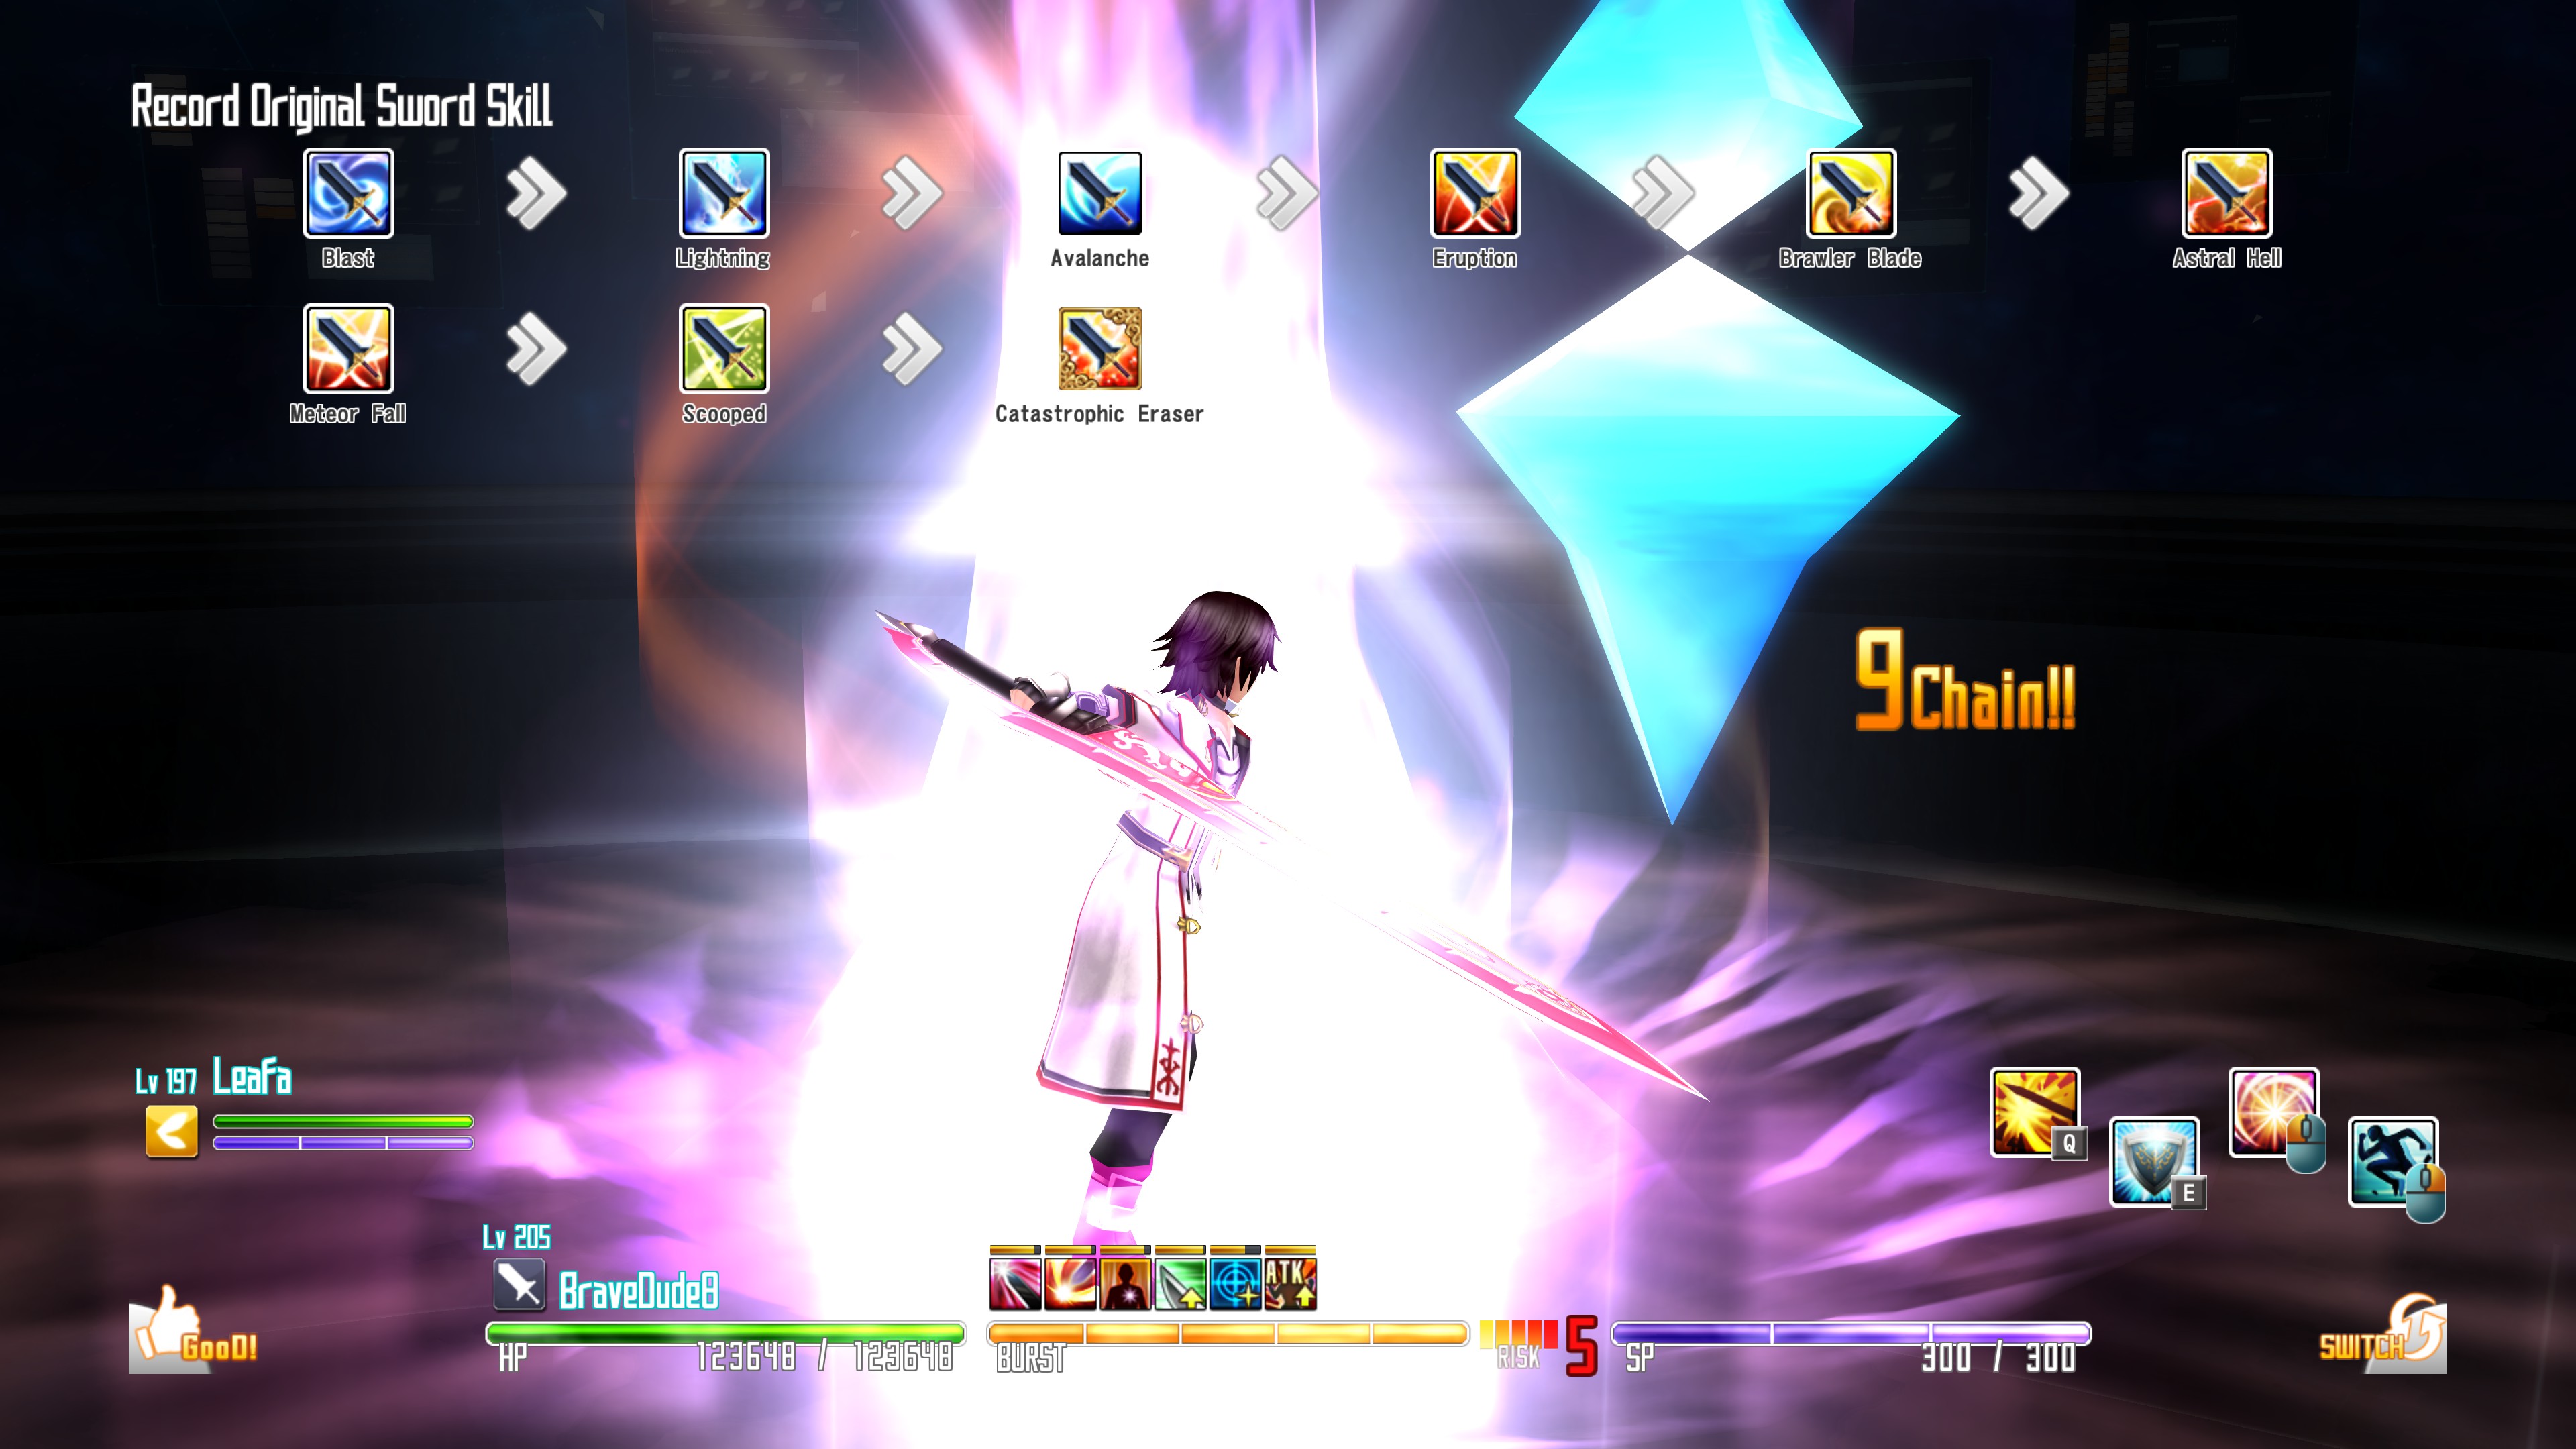
My preferred 2H OSS Chain is as follows;
Blast -> Lightning -> Avalanche -> Eruption -> Brawler Blade -> Astral Hell -> Meteor Fall -> Scooped
Practice this a few times in the training room to get the timing down, so you can consistently do it against enemies.
Multiplayer Difficulty
Playing Multiplayer (even in solo mode) will increase all enemy levels by 20 and each difficulty increases enemy levels by 50, meaning you can increase enemy levels by 20/70/120. This is useful, because it’s difficult to find enemies at a high enough level for efficient grinding in singleplayer. It also lets you bring three additional partners who will also gain EXP while grinding, and allows you to grind outfit unlocks for your main partner.
También, if you die in Multiplayer you don’t lose progress. Deaths in Singleplayer reset your progress to when you last changed maps, deaths in Multiplayer kick you back to the hub area with no penalty.
Método 1 – Beedance Sprawl (Nivel 100-200)
Normal difficulty sets all the mobs to approximately level 110, Hard sets them 160 and Death Game sets them to 210.
Look around the main square of the map, ignoring the dead ends as they have higher level enemies and there’s no point slowing down when the main enemies respawn faster than you can kill them.
The bees are capable of taking out half of your health with a strong attack, so the safest way to kill them is to target one at a time and OSS chain them to death.
You can also choose the Hollow Mission «Love is Light» and trigger it, allowing you to progress any rank 1 implement while EXP grinding.
Circle around the map for as long as you want, just remember to return to the hub area and exit multiplayer to save your progress occasionally.
Método 2 – Shrine of Frozen Obliteration (Nivel 190-290)
Normal difficulty sets all the mobs to approximately level 200, Hard is 250 and Death Game maxes all of them out at level 300.

Demonic Sword Gram is REQUIRED for this method, as well as the Protective Armor and Hyper Armor skills for temporary invulnerability. Pick the «Buffer» role in the multiplayer lobby to extend the length of the invulnerability skills. Refer to this guide to learn how to use the invulnerability skills efficiently.
Existen 17 golems in the area, in four groups. Run around and aggro all of them without getting hit by any of them (you will be stunlocked to death immediately) then use Protective Armor to make your entire party invulnerable, pull them into one spot, dash backwards to and start your OSS chain. The backdash takes you out of range of actually hitting your target, so you can complete the entire OSS chain and kill the rest of the mobs without worrying about it getting interrupted by the death of your target. Once they’re dead, exit the area to the west and teleport back to the hub area via the conveniently placed teleport stone ten meters away. This respawns all the mobs, and you can immediately teleport back and reenter the zone.
Each rotation takes about two minutes, and earns you approximately 150k EXP. At Level 200, you can gain ten levels in an hour if playing absolutely perfectly.
This strategy is very high risk, and you will die many times when you start out. if you trigger either of the hyperarmor skills while the other one is already active, it will not work, y morirás.
If you get hit by any of the golems, at any point, you need to spam a hyperarmor skill immediately. If it doesn’t activate, morirás.
If you are caught in a sword skill when your hyperarmor runs out, morirás.