This guide will teach you everything you need to know about effectively harnessing the power of your Rauser. Whether you’re stuck on some of the more challenging parts of the game, or just want to learn how to live longer and score higher, this guide is the place for you. Long live the Rauser!
Introduction
Alors, you’ve died to your thousandth battleship and want to learn how to effectively take them down with minimal risk? Or you’ve been divebombed by the hundredth ace, and you’re upset because they’re typically pretty easy to eliminate? Say no more, we’ve all been there pilot. What’s most important is that you learn from your mistakes, and become a larger threat because of them. In this briefing, you will learn the art of piloting, and how to best utilize the tools at your disposal.
How To Effectively Pilot Your Rauser
A Rauser is a wild beast, unlike like any “airplane” you’ve ever flown before. There are certain features equipped in certain Rausers that every good pilot should know of.
TAP TURNING
Do you love the speed the superboost engine gives you, but don’t like how poorly it maneuvers? Say no more. While accelerating and trying to turn the Rauser, tap the boost key repeatedly to negate the poor control. When done right, you should be able to take turns as smooth as the default engine, but with the speed of the superboost engine. Great for baiting enemies to shoot where you were never going to be.
ADVANCED GUNGINE
How about that gungine? Having a little extra firepower is nice, but the damn thing makes just moving a chore. Bien, here’s the solution to that age old problem: get the spread gun, and fire behind yourself while you’re flying with a REAL engine. It’ll propel you and have a much higher damage output! Nobody can trail the Rauser that leaves his own trail.
BOMB BUFFERING
The bomb hull is one of your most important tools for taking out aces and battleships. quelquefois, pourtant, you’re gonna miss your shot with that bomb. Happens to the best of us. But what if you stopped firing to ensure you have a bomb saved, and only started shooting when you’re certain that it’d hit? It works super well against aces, you can have one dead as soon as it flies in if you time that bomb right.
PRECISION LASERS
Il y a 4 turning speeds. When you’re not accelerating and not shooting, you turn fast. When you are accelerating and shooting, you turn very slow. If you set to the skies with the laser, you can fire while you’re turning, and start accelerating as soon as you start hitting something to have a lot more of precision.
PLASMA BUFFERING
This one should go without saying. Same as bomb buffering, but you use the plasma cannon. I find that this really works well with the Staff Pick build (plasma cannon, melee hull, suberboost engine). You’re free to fly right inside of your adversaries and detonate where they couldn’t possibly dodge.
Priority Targets
This section will teach you who you should be focusing on at what time, and how to annihilate them. Entries toward the top are high priority, entries toward the bottom are low priority. Whenever you kill an enemy, toutefois, there will be more that spawn, so you don’t have to follow this list to a T. Cela dit, if things are getting hairy and you’re not sure how you’re still alive, remember your priority targets.

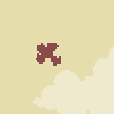
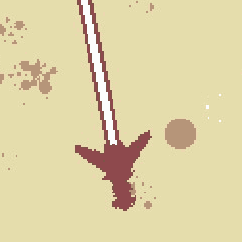
ACES
Aces are your highest priority whenever they appear. They stalk like a hunter, hit like a truck, shoot like it’s high noon, but die very quickly if you know what you’re doing. Their movement is very predictable, they’ll try staying in the same spot relative to you when they’re getting ready to fire. You can either track them with your gun, dive bomb them and drop a plasma cannon shot, or one close distance bomb should be able to take them out.
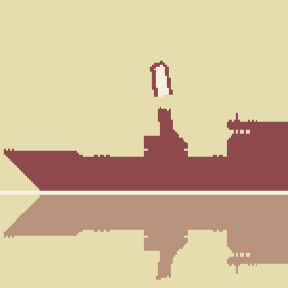
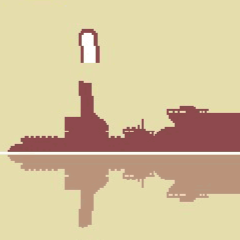
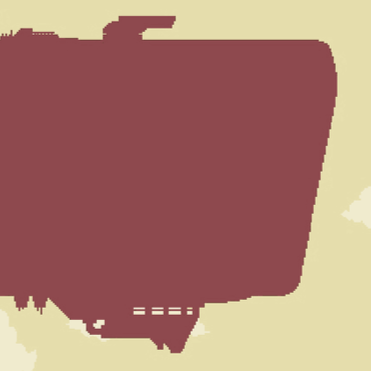
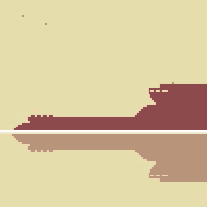
BATTLESHIPS
Battleships are among the harder things to destroy. Large sum of health, large bullet radius, and on top of that, they fire two columns of flak wherever they predict you’re going. There is a bit of a learning process to dealing with these beasts, but once you’ve got it, you shouldn’t have to worry about them ruining another run. You can bait them into shooting at their sides by flying close to the water next to them, and then fire at them from above. While you’re both firing, make your way to the other side of the ship to repeat the process. Alternativement, if you have the bomb hull, you can fly over them and time a few bombs to land on top of them. It’s reliable damage, and you don’t have to worry about them bringing you down. It’s a win-win for everybody (except the battleship).
ACEMARINES
This submarine variant is relatively easy to evade, all you have to do is stay directly above where it’s waving flak cannons can’t reach, and rain hell down onto it. After a few seconds of firing, it will submerge back down into the ocean where you can’t reach it. You do not want this to happen. Sinking an acemarine will give you more points than anything else in the game. It provides 1500 points with no combo (500 more than a blimp). Taking one of these down at a max combo is always grounds for a good run, as it will give you 30,000 points. If you’re not interested in getting a high score, toutefois, you’re free to ignore these. Once they go under, they’re not coming back up.
BLIMPS
The big one. There’s a reason this is such a low priority target. Blimps are by far the toughest common enemy to plague the skies, so it’s best you deal with them all on their own. They fire missiles, shoot flak in waves, and take a monumental effort to destroy. Cela dit, there are a few ways to go about bringing these giants down. The first strategy is to use the melee hull and slice through it, firing your gun as you do. Be sure to not stay inside of it too long, because it does spawn missiles, which are impossible to see overlapped with this beast. The second strategy is to shoot it with a plasma cannon and kamikaze with the nuke hull. The only reason you should ever have to do this is to complete the in game challenges, it’s not really worth doing if you’ve already piloted the URAUSER. Dernièrement, the toughest consistent strategy I’ve been able to pull off is firing at it from as next to it as you can get, only moving away if the bullets start getting close. Once the blimp starts dropping altitude, you’re free to fly over it and drop bombs on top if you have the bomb hull (and don’t worry, c'est difficile de rater), but be careful with the timing. You have to have surgical precision to take down a blimp with this method. Once you’ve destroyed it, follow it as it crashes into the ocean, and remember: you made that happen.
Miscellaneous Targets
These targets range from unessential to mandatory for a good run, but there isn’t an exact priority you should have with them. Listed in no particular order, I’ll describe what they do and when to destroy them.
FIGHTERS
Fighters are your average fodder. They don’t put up much of a fight, go down in 2 hits from the weakest weapons, their sole purpose is to make sure you keep your combo going. Finalement, there will be so many of them that you have to do something about it, but until then, only attack these guys if your combo isn’t at max (or is about to disappear).

JETS
Jets are just fighters with more personality and suicidal tendencies. These guys will actually devote themselves to keeping your combo going by diving head first into the ocean, some stray bullets, even you. They have no primary attack other than diving, and it’s not even enough to really hurt you. The only place where these guys become annoying is when you’re using the missile cannon, as they can take a few of your missiles off with them and live to tell the tale. This doesn’t happen very often when you’re using the missiles, even less if you don’t use the missiles, but it’s just about the only thing that they can do. These are the easiest ‘enemy’ in the skies.
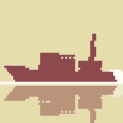
SHIPS
Ships are an easy target due to their lack of mobility, santé, and firepower, but they can become a bit dangerous if you let them pile up. If there are a few next to a battleship you’re attempting to sink, take them out. Autrement, keep these guys around for when your combo is dropping (or just kill them on sight; whatever works best for you).
SUBMARINES
Unlike their acemarine brothers, the submarine is not too much of a threat and not too rewarding to defeat. It functions the same as the acemarine to an extent; surfaces from the ocean, fires for a few seconds, then submerges back again. Where it differs is that it has half as much health as the acemarine, fires missiles as opposed to flak, and only rewards you a fraction as many points (1/6th to be exact). Still worth killing if you have a combo going or have a bunch of missiles spawned in, but if you’re not in a great spot, it’d be wise to not focus fire this thing.

MISSILES
Missiles are just about as dangerous as they sound. If you don’t take care of them or what’s producing them, they will devastate you. They’re slow moving, which will allow you to evade them for a while, but more will spawn. Finalement, you’ll have a big wall of these things that you can’t go through without taking damage. They fizzle out eventually, but they stick around just long enough to be annoying. They’re about four times as healthy as the normal fighters (which means that they take a conscious effort to destroy), only give five points, and are overall just not very fun to fight against. I recommend taking down whatever’s making them if they’re posing a major threat.
LASER ACE
Franchement, we’re not sure what to make of this thing. It’s an ace that tracks you with a laser, with near perfect accuracy. This abomination only has a 1% chance of spawning in place of a normal ace, but when it does, it will absolutely end you. Even if you’re able to kill it, it explodes into a screen wide laser that I’m convinced is impossible to dodge. And if that wasn’t enough, they spawn in pairs, absolutely ensuring your demise. If you see a string of text on your screen that says “HEADS UP, SOMETHING WEIRD COMING YOUR WAY,” go ahead and write your will, your run is over.
If anyone is able to find a way to reliable kill these monstrosities, s'il vous plaît, faites-moi savoir. I’ve fought at least a hundred, and they win every time.
Conclusion
Our briefing has completed, and you’re now well on your way to being a master pilot. Remember what you have learned here today, there may come a time where this knowledge will help you out of a life or death scenario. Cibles prioritaires, movement tech, battle strategies, it may seem like a lot, but the more you put these ideas into practice, the better you’ll get at thinking on the fly. À présent, go pilot! Display complete aerial dominance!