Semplicemente alcuni elenchi di cose che vale la pena trovare in Undead Horde 2.
Come sarà ovvio, Ho deciso di non utilizzare molti screenshot in questi elenchi. La mia speranza è che le descrizioni possano essere seguite senza creare qualcosa che si impantani con le immagini. Se qualcosa non è chiaro, let me know in the comments how it could be improved. Grazie.
My suggestion for using this is to hit Control-F and search for what you need.
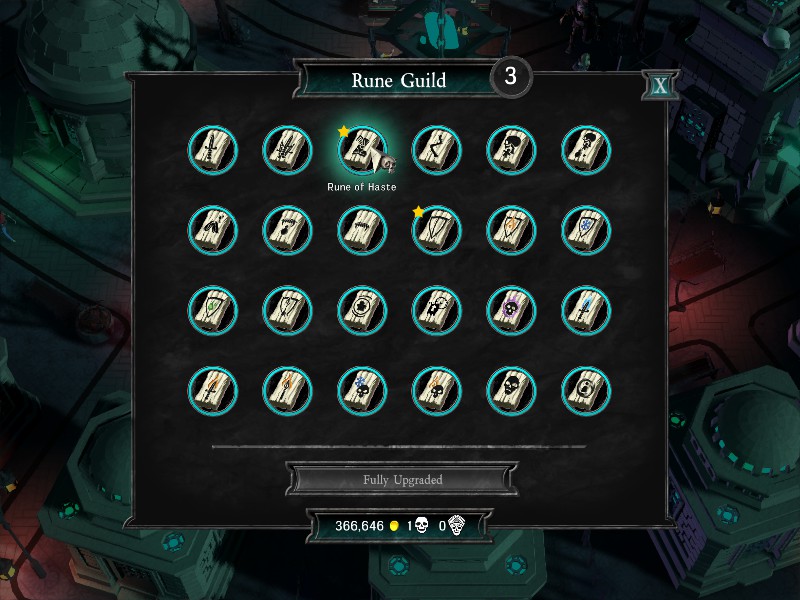
Rune
Thorns: Ruins of Bal’agor, bottom right-hand corner, follow-the-trail puzzle.
Vigor: Ruins of Bal’agor, kill kobold chief.
Isolation: Murder Cape, kill Helob (in basso a destra).
Brimstone: Elven Sanctuary, hidden chest just above south-eastern fountain of life.
Schermatura: Crystal Mine, bottom right-hand corner.
Smontare: Frozen Creek, North-east corner.
Gelo: from Frostbite Wilderness, kill the Beast of Carmague.
Dispel: Louhi’s Lair, by the Veinpoint portal.
Immolation: Orc Fortress, top wall, centre.
Haste: Skeleton Coast, top middle in a chest.
Vampiro: Last Resort, Louhi’stanza.
Energia: Forgotten Sanctuary, bottom left there is a collapsible wall. Kill the troll.
Berserker: Elven Fortress, right-hand wall.
Flames: Mount North (secret area from Solarfall).
Devouring: Fields of Sorrow, a sinistra in alto.
Chilling: Antarctica, a sinistra in alto.
Comando: Plunderer’s Retreat, footsteps far north, just above life fountain (dig).
Alimentazione: Smuggler’s Arch, SW corner, dig by footsteps in sand.
Bashing: Bootrock Ridge, top left corner, dig by footsteps.
Deflessione: Port of Citadel, chest on left-hand side.
Antidote: Prison Dungeons, bottom left-hand corner, raise Runeberg’S 3 companions to open an area with 3 runes.
Thawing: same area.
Extinguish: same area.
Appestare: Tower Keep, throw the 4 switches to access the treasury room key for room at bottom right.
Effigi
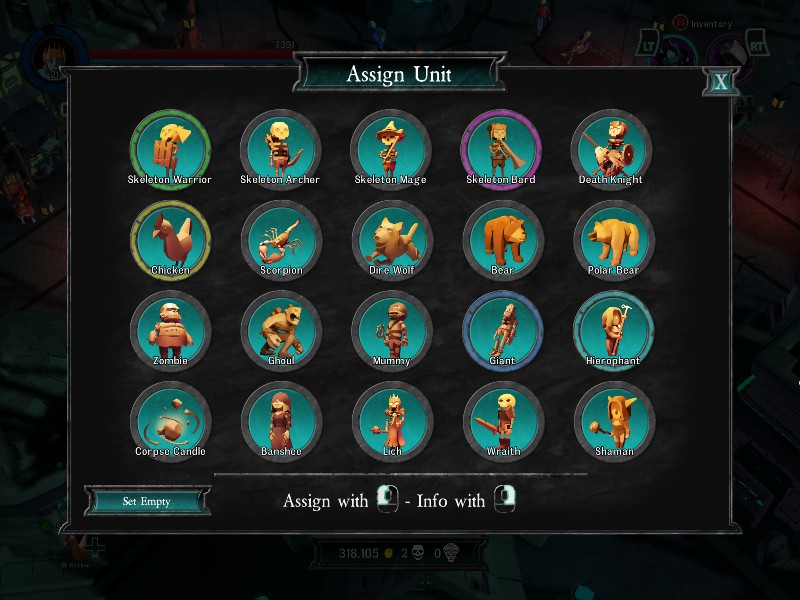
Skeleton Warrior: You start with this one.
Skeleton Archer: Early quest, you can’t miss it.
Zombie: Muddy Bog, in a chest.
Ghoul: Ruins of Bal’agor, kill kobold chief.
Corpse Candle: Forgotten Crypt, Pentagram room, raise from the tombs.
Banshee: Tomb of the Elven Queen, kill the queen.
Chicken: Misty Plateau, a sinistra in alto. Puoi’t miss the giant chicken.
Skeleton Mage: Small room at north of Elven Palace.
Bear: Serpent’s horn, Left-hand side, kill Ursa Major and Minor to get to the chest.
Dire Wolf: Frozen Creek, reassemble Ike.
Skeleton Bard: Frostbite Wilderness, kill Beast Master.
Scorpion: Scorpion lair, kill giant scorpion.
Mummy: Hidden Oasis, stand on the 4 pressure plates in order: By the big skeleton, by the oasis, by the small monument (you need chickens here) and then by the door.
Hierophant: Last Resort, get key from Janitor, chest on left of room unlocked.
Polar Bear: Solarfall, kill Bjorn.
Giant: Mountains of Might: Chest on right-hand side guarded by 2 giganti.
Spettro: Heart of Winter, frozen chest in Ravendark’s chamber.
Shaman: Plunderer’s Retreat: Raccogli il 3 Chester clues and dig up his chest.
Lich: Sandstorm Valley: 3 levers – passage from centre of western wall leads north then east to first; head east from that passage under a giant arch then northeast on another passage to the second; head north east from the Bootrock Ridge exit to a third passage with the last switch; follow the short passage north from the eastern life fountain to a chest with a map, go to the map point and dig.
Death Knight: Paladino’s Mantuary, in the locked chest in the treasury (key from killing boss of that level).
Segreti
Spazzini’ Bog: Destroy the 3 totems around the area to unlock a bridge in the centre of the area. Chest with Fire Axe in it.
Dark Woods: Half-buried chest to the left of the two towers.
Muddy Bog: Behind the 1-2-3 “puzzle” in the North-East corner.
Ruins of Bal’agor: Left hand side, above a destroyable wall (grey on mini-map)
Ruins of Bal’agor: Bottom right-hand corner, follow-the-trail puzzle, Rune of Thorns.
Murder Cape: Chest at far right over a totem bridge.
Murder Cape: Chest between 2 totem bridges, just South of centre of map.
Murder Cape: Helob’s chest, bottom right-hand corner.
Forgotten Crypt: Pentagram room, raise from the tombs, Corpse Candle effigy.
Misty Plateau: Top right-hand corner, chest above a statue.
Crystal Mine: Secret room on Southern corridor. Possibly triggered by lever at top right.
Elven Sanctuary: Behind collapsible wall by south-eastern fountain of life.
Elven Sanctuary: Behind that same wall, half-buried chest just above the obvious one.
Elven Sanctuary: Hidden chest just above that fountain. (Brimstone Rune)
Elven Sanctuary: Half-buried chest south of the group of buildings.
Elven Sanctuary: Right-hand side collapsible wall.
Elven Sanctuary: Follow the compound outside wall round to the north-east point. (Elf Reaper)
Tomb of the Elven Queen: Activate both pressure-plates at once, centre of the screen.
Tomb of the Elven Queen: Chest in the rubble, west of the queen’s resting place.
Tomb of the Elven Queen: Activate the switches in the bottom-right hand corner.
Tomb of the Elven Queen: Kill the queen (Banshee effigy).
Drifting Woods: Area X after killing the ranger you have the switch to open this area.
Drifting Woods: Only accessible after getting power to lift the barrier.
Serpent’s Horn: Frozen chest by entrance, use stick of fire to melt the ice.
Frostbite Wilderness: Melt ice by Louhi’s Lair entrance (Chicken Amulet).
Louhi’s Lair: Right hand wall, you can see chest in the ice.
Louhi’s Lair: Just above the witch trainee, harder to spot but again, melt the ice.
Louhi’s Lair: To the left of the noble soul pedestal.
Skeleton Coast: Left-hand side, turn left after the big archway.
Skeleton Coast: Top left, at the footprints in the sand (need shovel).
Hidden Oasis: Half-buried chest by the south-east entrance (Orc Reaper).
Hidden Oasis: Stand on the 4 pressure plates in order: By the big skeleton, by the oasis, by the small monument (you need chickens here) and then by the door (Mummy effigy).
Orc Fortress: Follow the bottom edge till you get to the footprints then dig (need shovel).
Last Resort: Rupert’stanza, bottom left.
Last Resort: Janitor’s hallway, top right of this room there is a buried chest.
Last Resort: Caretaker’stanza, to the right of the Veinpoint portal.
Forgotten Sanctuary: Collapsible wall, bottom left (Rune of Power).
Forgotten Sanctuary: Noble soul jar puzzle – have units on all pressure plates at once.
Elven Fortress: Accendi il 4 pressure plates at the top of the map (Fire Amulet).
Elven Fortress: Right-hand side of bottom enclosure, Petto (Berserker Rune).
Solarfall: Cave entrance to Mount North.
Solarfall: Second cave entrance to Mount North, sul lato sinistro.
Mount North: Chest encased in ice.
Mountains of Might: Left-hand side, cross the ice floes to kill the last bear.
Heart of Winter: Frozen chest in Ravendark’s chamber (Wraith effigy).
Plunderer’s Retreat: Dig at footsteps far north, just above life fountain (Rune of Command).
Plunderer’s Retreat: Bottom right-hand corner, chest against wall.
Smuggler’s Arch: Just east of the southernmost life fountain, swirl that transports you.
Smuggler’s Arch: Western wall, in the shade is a chest.
Smuggler’s Arch: South-west corner by footsteps, dig (Rune of Feeding).
Smuggler’s Arch: South-west of the northernmost life fountain, dig (Draugr Sword).
Sandstorm Valley: Dig at footsteps to east of northern life fountain (Staff of Necromancy).
Sandstorm Valley: 3 levers – passage from centre of western wall leads north then east to first; head east from that passage under a giant arch then northeast on another passage to the second; head north east from the Bootrock Ridge exit to a third passage with the last switch; follow the short passage from the eastern life fountain to a chest with a map, go to the map point and dig (Lich effigy).
Bootrock Ridge: Head South from the Veinpoint Portal and there is a passage on your left.
Bootrock Ridge: Keep heading South and there is a pile of boxes on the right with a chest under them.
Bootrock Ridge: Aim for the bottom right-hand corner then just on the left is a tiny passage with a half-buried chest.
Bootrock Ridge: Head west from there to some footsteps in the sand, dig.
Bootrock Ridge: Keep heading west and there are more footsteps at the bottom left corner.
Bootrock Ridge: Top left corner, more footsteps, dig for a Rune of Bashing.
Pirata’s Hideaway: Southeast corner, dig at footsteps.
Pirata’s Hideaway: Northeast corner, dig at footsteps.
Pirata’s Hideaway: Northwest corner, after throwing 3 switches in area (Ula Mula).
The Port of Citadel: Chest at bottom right-hand side.
The Port of Citadel: Cross the little bridge and round to the right is a short passage with a chest.
The Port of Citadel: Chest just south of the orc warband on the left.
Outskirts: Just to the right of the entrance from Port of Citadel is a gold chest, not very secret.
Outskirts: To the left of that entrance is a route south round the wall to a chest.
Outskirts: Right-hand side of the river is a passage leading to a chest.
Outskirts: Top of the area is a Noble Soul Jar and a chest, use chickens from the right-hand side to press a pressure plate.
Outskirts: Enter from Old Town, right hand side, demolishable wall has a chest at bottom.
Outskirts: Just left of there, attack the winch device to trigger the ship to be boarded.
Outskirts: 2 chests on that ship are each secrets (Leeroy’s axe).
Outskirts: Come sopra.
Paladino’s Mantuary: Top left-hand corner is a chest.
Prison Dungeons: First tiny room on the south wall is a hidden chest.
Prison Dungeons: Bottom left-hand corner, raise Runeberg’S 3 companions to open an area with 3 runes: Antidote, Thawing and Extinguish.
Prison Dungeons: North of the Veinpoint Portal, just past the water on the left.
Prison Dungeons: Top right-hand cell has a hidden chest.
Old Town: Directly west from the northern life fountain, there is a gate with a chest on the other side.
Old Town: Northeast corner, south of the water, hidden chest.
Old Town: South of the water against a wall, Petto.
Old Town: Southwest corner, by exit to Eastguard, demolishable wall.
Old Town: Just north of the veinpoint, tucked in by a wall is a hidden chest.
Old Town: Northwest corner, chest against the wall on the right.
Eastguard: Northwest corner, follow the west wall down to a chest.
Eastguard: Southeast corner, gold chest just past the gravestones.
Eastguard: Demolishable wall just above Tower Keep entrance.
Eastguard: Bottom left-hand corner, deep into the settlement, gold chest.
Arachness’ Cave: Southeast corner.
Westguard: Centre of south edge of area, collapsible wall.
Westguard: Middle of map is a moat round some chests, attack the 4 winches round the edge.
Westguard: Right-hand side, just above the Tower Keep exit.
Tower Keep: Top right, above Switch I.
Knightspire: Half-buried chest by northwest group of buildings.
Knightspire: Collapsible wall east of life fountain.
Knightspire: Northeast corner, to the right of a statue and behind a building.
Knightspire: Just inside the central group of buildings guarding the Cathedral entrance.
Knightspire: To the right of the cathedral entrance.
Cathedral: Bottom left of west wing.
Cathedral: Chest at northeast corner of final battle room.
Cathedral: Just to the right of entrance from Knightspire.
Cathedral: East wing, just north of veinpoint portal is a secret room, destroy the bookcase to access it.