
Considering the fact less than 2% of gamers have this achievement, it goes without saying that this is probably one of the hardest victories to achieve. I personally put it above Aestuant and Entheate, but that’s only because of Forlorn Blood (それについては後で詳しく説明します) and the fact Grail kinda sucks.
In saying that, it’s definitely not as hard as that < 2% would make you believe. For anyone who’s already beaten all three advanced legacies, you’ll already know that the best way to beat them is to have a plan, go fast and know how to handle your immortal enemy.
今, assuming you know how to handle the last two, this guide goes into detail about exactly what you should be directing your attention to.
Word of warning, this guide contains massive spoilers and lists everything required to beat the advanced victory.
Overarching Goal
Winning the game requires you to work the Rite Intercalate,

とともに (finished) seven graces,
Chalice Murmurous,

Unceasing Mysteries (14 Heart lore),

An Incarnadescence,

The Host and the Guests,

and the Savorous Blood.

Once you’ve performed the ritual with these components, それでおしまい, you win. While this guide will discuss obtaining each item individually, we will first start with a rough early-game guide and mid-game strategies. If you’ve already beat other advanced victories before, I’d advise you to simply skip to the mid-game section instead.
ゲーム序盤
After Working with Duty and Delight (which you should use as for first move), you’ll progressively unlock your other permanent actions in the order:
話 (Our Cause):
– Your cult from your previous victory (probably Grail)
– A Follower
– The Delight
勉強 (What do I recall):
– レベル 8 Grail lore
– 理由
– The first three Ways (The Wood, The White Door and Through the Stag Door)
探検 (A Place to Begin):
– Vitualation Recipe
– Temporary Headquarters
夢 (Distant Light)
– Second Passion
– Unleashes the Immortal Enemy ‘Action’
What you (should) do is Study with health the moment it’s avaliable and begin the process of leveling up your strength. As this particular Apostle, you’ll want to get level 4 in health as quickly as possible, which is why you want to avoid working with it as you’d then need to wait the 60 seconds for it to come back, which you CANNOT afford to dream away, because your first dream will need to go to your Forlorn Blood.
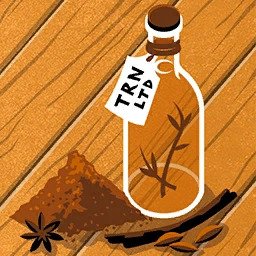
Dreaming Forlorn Blood with Delightful Blood turns it into Savorous Blood and also grants a Fascination card. This is a very important mechanic of the Apostle Obsonate legacy, because as long as you have Forlorn Blood on the table, you have a VERY high chance of having a season of sickness every 60 秒. Avoiding this is necessary, even if it means giving your ancient enemy a chance of increasing their strength through your Fascinations.
Once you have level two strength and you’ve dealt with your Forlorn Blood, your first objectives are to get Passion, Health and Reason to 4 (レベル 3 強さ & 理由, レベル 2 情熱), recruit every follower and establish every acquaintance by Talking with your Grail lore and finally exploring until you’ve found the Oriflamme’s Auction House and Morland’s Shop. I cannot stress enough how important recruiting is in this run, especially pawns, which will have a VERY important role later in the run.
Starting with your traits, unless you get a restlessness, you should work with your strength card until you get to level 4, converting Vitalities into lessons learned and dreaming with exhausted health. While you’re working to increase Health and Passion, Dream with The Way: The Stag’s Door with your one reason. You need to start getting level 6 と 8 ancient histories while you can, as they make up quite a bit of the mid-game of this run.
If you go to the painted river, you have a chance at receiving Erudition: A lesson learnt. もし、するなら, decide then if you want it to downgrade to an erudition so you can continue upgrading passion and health, or double down and study reason to get it to level 2 早い, before returning to get your four health and passion cards. In saying all this, it’s probably best to avoid the Painted River since there’s a chance to get a Fascination.
During this time, if you ever get above 10 Funds you should visit Morland’s Shop because you need to clear out their stock to eventually get them as a headquarters, not to mention its possible to get the Viennese Conundra, which corresponds to level 6 Moth lore that’ll likely become necessary for the later acquaintance grind (Unless you want to go for the Wreck of the Christabel and obtain the Frangiclave). You want Morland’s Shop primarily so that you can use the library aspect to skip two of the three trials required to combine level 12 Secret Histories Lore later, meaning all you need to do is prepare a glimmering for the process.
So recap, before you can even talk vaults you need to begin recruiting followers & acquaintances with Talk, find Morland’s Shop and Oriflamme’s Auction House by Exploring with either Health or a follower, begin buying out Morland’s shop and get Reason, Passion and Health to 4 cards each. This should all happen with your immortal enemy doing whatever in the background. If you weren’t aware of this, the immortal enemy becomes stronger the more you attempt to resist them. Realistically the most you should do to hamper their progress is place a couple of hirelings as spies and forget about them. Actively resisting them will only make their attacks stronger.
With your new stats, your next job is to get a position at Glover & Glover up to ‘Eligible for Board of Directors’. For both Mr Alden and the younger Glover, you should use a Grail follower to seduce them, because failure produces no negatives, unlike Edge and Moth which produce notoriety upon failure. Eligible for Board of Directors pays 3 funds after 70 seconds and decays to ‘A Difficulty at Work’ 後 90 秒, making it incredibly valuable for currency production. You can use these funds to finish buying out Morland’s Shop. Any book you buy which isn’t a language or one of the one’s listed in the next section is safe for you to sell.
書籍, Languages, Rites & Tools needed for mid game
Thanks to your immortal enemy, there simply isn’t enough time to worry about combining lower level lores to reach level 6 in all of them. Said lores are necessary to respond to all your acquaintance’s commissions to get the currency necessary to repeatedly repair the mirror(s) until you get the necessary secret lore for the vaults, or get lucky and find the Wreck of the Chistabel which circumvents this grind.
– 6 Heart lore: Obtain it through “Rapt in the King” from Morland’s shop.
– 10 Lantern lore: Obtain it through “The Sky, the Soul” from Cave of Candles. (Needed to ascend to The Way: The Spider’s Door and The Way: The Peacock’s Door)
– 10 Forge Lore: Obtain it through “The Burning Woman” from The Kusnetsov Endowment (Necessary to summon King Crucible for Deep Mandaic)
– 6 Knock Lore: Obtain it through “The Encircling Tantra” from The Kusnetsov Endowment
– 6 Moth Lore: Obtain it through “The Viennese Conundra” from Morland’s Shop
– 6 Winter Lore: Obtain it through “STRUMM!” from Oriflamme’s Auction House (STRUMM! also contains the Sunset Rite, which will be used for all summons in this guide)
– 6 Edge Lore: Obtain it through “The Account of Kanishk at the Spider’s Door” from Cave of Candles.
今, onto Languages.
– 言語: Latin
- Needed to translate “Those Indignities Perpetrated By the Deceitful Faternity of Obliviates”
勉強 “Glibersleeve’s Latin Grammar” from Morland’s Shop
– 言語: Aramaic
- Needed to learn Deep Mandaic
- Needed to translate “The Encircling Tantra”
Study with Dr Ibn al-Adim with an iron spintria
– 言語: F u c ine (Steam censorship is fun)
- Needed to translate “The Scar in the Sky”
勉強 “The Journal of Alessandro LaCroce”, which can be obtained from “Strathcoyne’s Residence”.
– 言語: Deep Mandaic
- Needed to translate “Commandments For the Preservation of All That Exists”
Study with King Crucible.
次, ツール. I don’t feel the need to go particularly into depth about the tools required to win the game, because realistically the only other tool you need which isn’t part of the final ritual is a mirror, any mirror. The easiest one to obtain is the Wildering Mirror, which you can get the cracked variant from Keglin’s Scratch that can be repaired with a bronze spintria via a forge follower.
ついに, onto the rituals. You technically only need one to win, Rite Intercalate can be obtained by reading “The Scar in the Sky” from St Tentreto of the Deep Door. でも, another book from this same vault titled “Commandments For the Preservation of All That Exists” can also be read to learn 14 Heart Lore, but it’s written in Deep Mandaic. The surefast and easiest way to obtain this language is to summon King Crucible, and the easiest ritual to do that is arguably the Sunset Rite from the Book “STRUMM!”.
To summon King Crucible with the Sunset Rite, place a level 5 Knock Cultist, A Restlessness Card and 10 Forge Lore together. When your seriously considering this ritual, you should probably ignore Glover & Glover entirely and focus on completing commissions instead. You’ll probably have around 100 funds at this stage anyway, and a plethora of books and other worthless tools to sell off to stay afloat.
With all of that out of the way, time to summarise which vaults you actually need to clear to obtain both the ingredients, tools and lore actually required for the final ritual, as well as the ones required to sustain the final acquaintance grind later on.
Necessary Vaults
Strathcoyne’s Residence

レベル 2 Secret Histories,
Not Cursed,
Take Edge/Grail.
Contains:
– Language Book “The Journal of Alessandro LaCroce”
– 本 “The Locksmith’s Dream: Stolen Reflections” (Unnecessary, but is early 6 ランタン & Moth Lore, but also a Fascination)
Keglin’s Scratch

レベル 4,
Not Cursed,
Take Edge/Knock.
Contains:
– (Cracked) Wildering Mirror
Orthos Wood

レベル 6,
Not Cursed,
Take Forge + Grail/Edge.
Contains:
– Ingredient Leathy
Cave of Candles

レベル 8,
Not Cursed,
Take Forge + Knock/Edge.
Contains:
– 本 “The Account of Kanishk at the Spider’s Door”
– 本 “The Sky, the Soul”
The Kusnetsov Endowment

レベル 8,
Not Cursed,
Take Lantern + Grail/Edge.
Contains:
– 本 “The Burning Woman”
– 本 “The Encircling Tantra”
St Tentreto of the Deep Door

レベル 14,
呪われた,
Take Knock/Lantern + Edge/Moth + Heart/Winter.
Contains:
– 本 “Commandments For the Preservation of All That Exists” (14 Heart Lore)
– 本 “The Scar in the Sky” (Rite Intercalate)
– Tool Watchman’s Glass (Not mandatory, but is another mirror)
Fort Geryk

レベル 14,
Not Cursed,
Take Forge + Edge.
Contains:
– Ingredient True Blood of St Januarius
Raven Isle

レベル 14,
呪われた,
Take Heart + ランタン.
Contains:
– Tool Chalice Murmurous
As a recap, 最初 5 vaults (with the exception of Orthos Wood) contain lore and tools necessary to facilitate your advance to the final three vaults. Orthos Wood and Fort Geryk are related to one of the seven main components of the final ritual, the Seven Graces, while Raven Isle contains Chalice Murmurous and St Tentreto of the Deep Door contains books which grant the final ritual and 14 Heart lore. Most of this run is just this vault rush and once it’s done, you can move onto obtaining the last ingredient for the Seven Graces and the last two components.
(Finished) Seven Graces
It’s entirely possible to obtain the unfinished seven graces the moment you’ve accrued enough funding early game, and have a vial of your Delight’s blood handy. All you need to do is put the vial up for auction at Oriflamme’s Auction House and then raise each time when prompted until the spices are in your possession. This typically takes 7 funds, which can pretty easily be acquired soon after obtaining the ‘eligible for board of directors’ position at Glover & グラバー.
This ingredient should be obtained before ditching Glover & Glover around the time you summon King Crucible and dedicate all your time to acquaintance commissions, as your funding will be more consistent.
When it comes to actually ‘finishing’ the Seven Graces, all you need to do is Work the Seven Graces with three additional ingredients.
これらは:
- Leathy
- True Blood of St Januarius
- Amaranthine Nectar
In the previous section, I already spoke about how to obtain Leathy and the True Blood of St Januarius. Amaranthine Nectar meanwhile is best obtained through The Red Church as a one in 5 チャンス. So it’s best to farm the Red Church while going through The Way: The Peacock’s Door until you’ve obtained this ingredient while farming 12 Secret Histories Lore. When you have it, it’s probably best to switch back to farming The Worm Museum instead, as you not only have a higher chance of obtaining the secret histories lore (1/3 それ以外の 1/5) but also because The Worm Museum contains dread cards instead of Fascination cards, which are easier to deal with than Fascinations, and can also be used to clear fascinations as well.
The Host and the Guests
The Host and the Guests is a component of the final ritual which you can complete a part of around the time you intend to ditch Glover & グラバー. The reason for this is because initiating this step will cause Sulochana Amavasya to become unavaliable, meaning she cannot be used to pause your work timer anymore, in the event you’re trying to complete additional commissions/unskilled labour without losing your position.
Talking to Sulochana about the Vitulation Recipe will grant you the card ‘Our Lady of Wires is En Route’, which after 180 seconds will decay into Marienette, Our Lady of Wires.

Marienette has a unique aspect called Approval, which can number 1-7. For her to assist the Apostle (あなた), her Approval must have a value of 7. This can be achieved by Talking to Marienette and providing her a follower to consume. This is where Pawns come in handy, as the process will not generate a notoriety, unless you feed her a hireling.
With this step completed, you can leave her alone until your ready to fully assemble the Host and the Guests. This process can be started by Talking about the Vitulation Recipe, creating the First Fragments of the Hosts. While you are creating the fragments, they will begin to decay after 120 seconds unless you provide them a Mystique with the Talk verb.
If that isn’t possible, you can delay the timer by just talking to them, which will reset the timer to 60 秒. 関係なく, once you have repeated the process seven times and reached ‘The Host, Assembled’, Talk to them again with Marinette, as long as her Approval has reached seven. When she is added, the card will become ‘The Host and the Guests’ and will no longer decay.
An Incarnadescence
By far and away the easiest way to obtain this influence is by visiting the Red Church through The Way: The Peacock Door and getting lucky. If you get this influence while farming for Amaranthine Nectar, don’t bother trying to keep it. The Worm Museum is better for farming Secret Histories 12 Lore, so you shouldn’t attempt to obtain this influence until you already have the 6 other ingredients and the Rite ready.
Final Ritual

Once you’ve assembled and prepared the 6 items/lore necessary to complete the final ritual, Work the Rite Intercalate with the 14 Heart Lore, the tool Chalice Murmurous, の 15 Grail Influence An Incarnadescence, the finished Seven Graces, the Host and the Guests and the Savorous Blood to finish the game.
At which point, you can congratulate yourself, as less than 5% of the people who’ve played this game have ever completed this process successfully. I’ll be the first to admit that this guide is very much incomplete. I haven’t spoken much about how to deal with the Immortal Enemy and I never explained the early-game method of getting level 10 Grail cultists before you even visit Strathcoyne’s Residence.
It’s probably best that you work it out for yourself, as it’ll be far more fulfilling to learn it that way than from my incoherent ramblings.