This guide will be showing you the complete The Heart of Darkness walkthrough guide and some additional tips and tricks.
一般的なヒント
– Don’t play in Challenger Mode (talk with red monument at the start of the game) if you are not prepare to waste your time in this game. There is no option to change difficulty later.
– Don’t bother buying weapon from the old man, and remember to sell items.
– The old man at Ends and Odds also sell material items for crafting.
– If you feel struggle with monsters, level up your party.
– You don’t need to renovate estate or craft Alma’s clothes until your party are all lv 10.
– Level up are expensive in early-mid game. So just stuck with 3 same member and change member only if you can level up new char enough.


– 夜明け (the tank, 1 の 2 starter souls) is so bad and get outclassed in every ways by Marx and (later) Sylvan. So don’t spend resource on him much.
– Farouk (the mage, 1 の 2 starter souls) is a good all rounder with fire dmg and heal. He is only outclassed by Novak (which unlocked at 2nd-last boss) and can be used until late game.


– Marx and Matra are probably the best and easiest combo to rush boss and mobs in the game. With both AoE damage, 癒す, and poison to damage boss while Marx stall with defense and taunt ( and occasionally Bleed).
レベル 1 : Path of Awakening
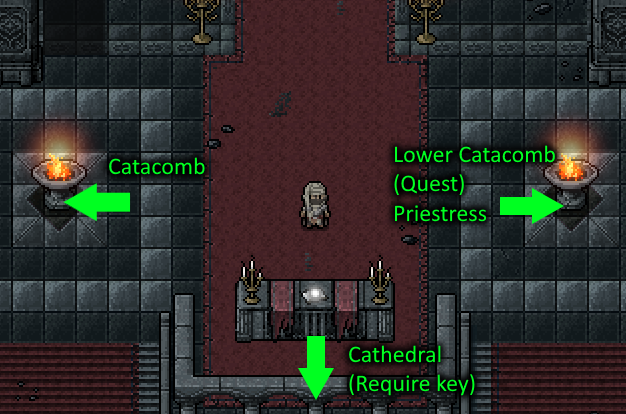
– Go to Catacomb zone, get Small Room Key inside the “treasure”
– Use the key on the door right outside of the lever room
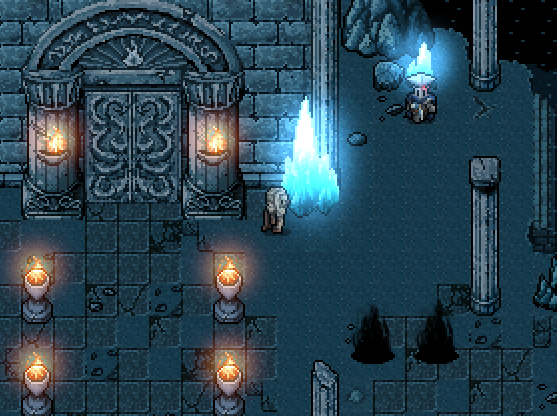
– Bridge to the church area will drop, go in and fight your first boss : Maghan the Collector
– After defeat him : you will get called by Alma. Unlock lv up your main character. Also you get the key to Cathedral.
– Accept the quest to find Aristocrat’s Emblem from travern, go to the right side this time.
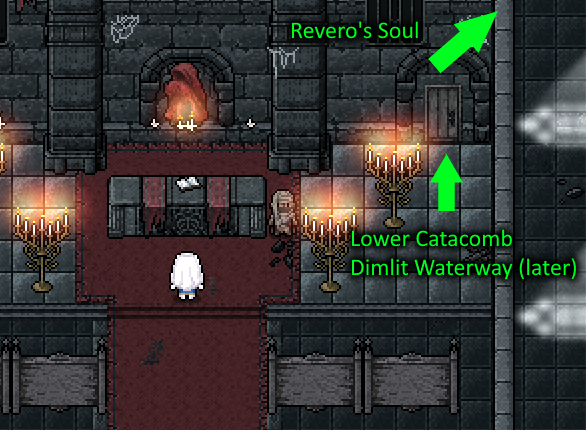
– Speak with Priestess Alaine till she run out of dialogue.
– Get Revero’s Soul by using the ladder, then go to lower catacomb to get Aristocrat’s Emblem, get Rubies and unlock hairstyle for Alma by turning in quest. ( If you use the lever and go to Dimlit Waterway area, you have gone too far. Turn back.)
– Go to Cathedral area, fight your second boss : Suffering Protector. She’s weak to magic so just keep bombard her with fire. After defeat her, you will unlock 1st bedtime story with Alma.
– Use stair behind the glowing skull statue to go to the next level. Meet with Rafale and Ewan(knight captain).
レベル 2 : Garden of the Pruners
– Start at the Garden Center, the map split to left (赤いバラ) そして正しい (Blue Rose) 側.
Left Side
– Defeat boss : Twin Fruner Hazel in the middle of the garden.

– Defeat 1#Knight (drop weapon Pike) at the bottom section of the garden. You need to defeat ALL of these guys to advance priestess story.
– Go inside building at top section, go left at Floor 2 and walk along the wall. There is a bonfire after you go down the stair.
– Defeat Guardian of the Garden in this side then pull the lever, took the elevator back to the start.
Right Side
– Defeat boss : Twin Fruner Iris in the middle of the garden.
– Get Aristocrat’s Emblem (Quest Item) at the bottom section.
– Go inside building at top section, go right at Floor 2 and walk along the wall. There is a bonfire after you go down the stair.
– Defeat Guardian of the Garden in this side then pull the lever, took the elevator back to the start.

– After you defeat both fruners, the souls will combine into Rose Maiden Soul. Unlock more bedtime story and this door.
– 中に入る, get Rondillion the Mad Lion’s Soul.
– Walk until the end, talk with old man 2 回, you will get Ring of the red/blue rose for your magic character.
– Go back and walk down the garden center, you can enter the next level now.
レベル 3 : Ullamvarna, City of Longing
Dead town with few things to do
– The priestess : talk until she run out of dialogue
– Eluna the Moonlit’s Soul : inside the well in front of the priestess
– Alley top left of the priestess : get Ewen (Knight Captain) 1st CG.
– Euheim(hunter) : in front of the ruin, talk to him until he tell you to hunt wendigo in forest.
Don’t forget to light the bonfire, then go down to next level.
レベル 4 : Groaning Valley
– In the 1st tower floor 3, を殺す #2 騎士 (drop item : Temple Knight’s Armor)
– In the connector between 1st and 2nd tower, you can climb down the chain and reach new area : Abyss of the Dead. There is only a bonfire there and a boss : Blazing Husk Cumbica. After you defeat him you will get Cumbica the Silent Beast’s Soul.
– On the top floor of 2nd tower, you will find Aden (glasses guy).

– On the top floor of 3rd tower, you will find Hilda locked in the cage. She say that Aden locked her here and ask you to retrieve the key for her.
If you rescue her :
– Go back to 2nd tower. You will find Aden “successfully” created his sister doll. You will need to fight them both at the same time. Target Aden first.
– After defeated them, you will get the key to unlock Hilda’s cell. After release her you will get CG and advance her story.
– If you travel back to Doll’s Repose, Mel will create Primera for you. She can craft advance weapons and armors.
If not rescue :
If you decide not to defeat Aden ( or defeat him but not release her before you reach Basin of Decay) she will become red soul in the boss room.
– You can still get Primera if you decide not to defeat Aden before reaching Basin of Decay. If you come back to Aden after that, you will find Aden has disappeared (most likely got eaten by his sister) making the fight easier.
– After exit the tower, continue onward until you meet Blanton (Cat in Armor), there is a bonfire right side of him.
– Defeat boss : The Winged One. It drops Ghasly Feather and Wing Maiden Soul. (Unlock more bedtime story)
– You can walk back and talk to Blanton, he will reward you with Wine because he is a good boy.
– You can give Ghasly Feather to a man in a cave. (左側 ,before crossing the bridge to Blanton) He will rush to boss area and die and you can loot Nightsong from his corpse.
– Continue onward to next level.
レベル 5 : Crystal Lake
This level is a big f*cking map.
– Defeat Protector of the Ember. He is immune to fire so use other attack type.
– You need to lit 4 ember in each corner to unlock the main building. Do it in clockwise order ( TopLeft TopRight BottomRight BottomLeft) and you will finish close to the building.
– Get Aristocrat’s Emblem (Quest item) from the path between TopRight and BottomRight goblet.
– Matra the Blighted’s Soul is on the top floor of main building.
– 敗北 #3 Knight on the right of main building (drop item Serving Shield)
– Use Lakeshore Key to unlock door to boss area. (the door is locate between path to TopRight and BottomRight goblet you lit)
– On the path to the left before you unlock the door, if you defeated all 3 knights, you will find the priestess inside the building and advance her story. Talk to her until she walk off.
– Onward to boss area, defeat Olivia, Queen of the Deep. She will start attack in second phase.
– Cross the bridge to next level, Basin of Decay. There is a bonfire on the left side.
– Teleport back to Crystal Lake again. Go inside the building behind the TopLeft goblet. It’s unlocked now.
– Continue onward to new area : Forest of the Blackbeast.
レベル 6 : Forest of the Blackbeast
– From the Forest Edge bonfire, walk to the right until you meet #4 騎士 (drop item : Large Crystal Clot)
– Defeat Two-Headed Blackbeast.
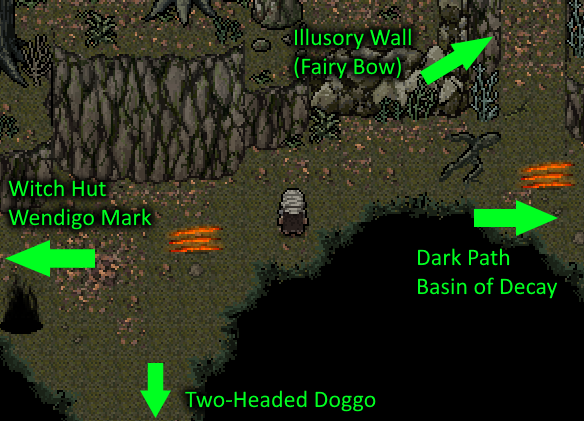
– Go to the left side first, examine Wendigo Mark and go inside the witch’s hut.
– You will find Lona the Witch inside the hut. She will give you the quest to defeat some guy that threatening her. He’s in Dimlit Waterway (レベル 1 : Path of Awakening -> Lower Catacomb (Use secret lever) -> Dimlit Waterway)
Wendigo Quest
– After you examine the claw mark, report back to that hunter guy in Level 3 町. He will give you more reward if you go back to where you find the claw mark again.
– Go back to the same place, unlock CG and fight the wendigo boss. Get Bowheart the Umbral Marksman’s Soul.
Witch Quest
– Go to Dimlit Waterway, find the Marx guy in top right section of the map. He will tell you that Lona deceived you and she’s the one who make him like this. He told you to kill the witch instead. You have to choose who to trust.
If you choose to kill Marx
– After you defeated Marx, go back to Lona to unlock CG. Lona will now sell rings and items.
If you choose to kill Lona
After you defeated Lona, you will get Marx the Pale Knight’s Soul.
– After you finish both of these quest, go to the Dark Path and to Basin of Decay.
レベル 7 : Basin of Decay
– You should come in here from the forest side (Connecting Bridge Bonfire) so you don’t have to wander around in poison swamp.
– Talk to the priestess until she run out of dialogue.

– On the topside of the rooftop area (before enter the building with armored cat) ある #5 knight (drop Guardian’s Greatshield)
– Go into the building with cat armored guy. はしごを上ってください, use the lever to unlock area to the right of Cat guy. Unlock bonfire of Sunken Building area.

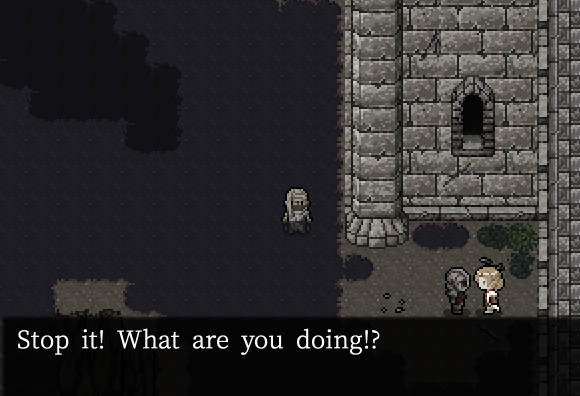
建物 , go down the plank into poison swamp and go to the left map. Walk down from the warp point, you will encounter Ewen(knight captain) 話. You can choose to help her or not
If choose to help
She will thank you and advance her story. You can find her again in next level to unlock her 3rd CG.
If choose to watch
Unlock Ewen 2nd CG. Her story end here and you can loot her weapon.
– Walk back up the plank and go to the right side, until you will find manor with glyph ” I can’t take this..” in front. In the deepest room you will find Rafale. Defeat him and open chest to get stuffed bear (unlock Alma 3rd CG).
– Go back to Sunken Building bonfire, go to the right map this time. The boss and bedtime story you will get are different depend on whether you save Hilda or not.
If you save Hilda
You will find her in front of the boss room. After you defeat the boss, 彼女は消えてしまうだろう, leave behind her weapon. Her story end here.
If you not save Hilda
You will find her as the boss. Alma’s bedtime story will feature Hilda instead.
– その後, continue on to the next level.
レベル 8 : Fortress of the Midnight Sun
– After going down first stair, before second stair, ある #6 Knight on the top path, in front of the elevetor room.
– In the area with defeated Giant, if you help Ewen in Basin of Decay, you will find her on the right side of this area (Unlock 3rd CG , end of her story).
– Get Aristocrat’s Emblem (Last quest item) in the southwest area of the castle entrance.
– Castle of the Midnight Sun 1F : there is a bonfire in the backroom.
– Castle of the Midnight Sun 2F : Left side lead to the library. Right side lead to the barrack.
Library Side
– Keep going until you find the bonfire outside of the library. You need to go up the ladder and enter from the upper floor because the main door is locked.
– 中に入ると, go down the stair from the left side. There is a hidden switch that will make the darkness circle disappear.
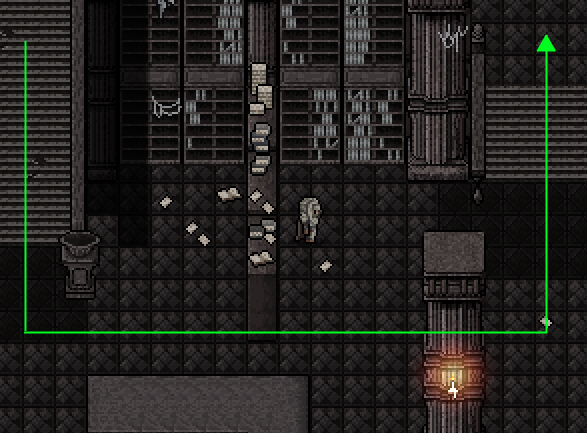

– があります #7(最後) Knight before you going downstairs to the lower floor.
– On the lower floor, top side, check for illusory wall at the bookcase near the glyph.
– Go to the next area : Cruz’s Gaol.

– If you defeated all 7 騎士団, you will unlock 2nd Priestess CG in the boss map.
– Defeat the Torturer boss, then go in the door in the back.

– Get Astael’s Soul then go back to the Castle. Go to 2F right side this time.
Barrack Side
– Keep going till you find the Barrack bonfire, you will find Sylvan of the Silver Wings’ soul in the next map.
– Next to Sylvan’s Soul map, go upstairs to the room at the topleft corner, you will find knight boss guarding the chest, defeat him and open the chest and you will get proof to unlock Castle 3rd floor.
– Insert the proof to altar in front of 3rd floor door. You will find a bonfire in the throne room and the armored cat inside.
– Defeat Cess, Knight of the Aurora. She will open the path to the Cursed Saintess Amrita.
– There is no other enemy inside the last area. Only the Saintess.
– She will tell you that she is the reason the darkness still not engulfs the kingdom, and the beast king want you to kill her because of that.
You can choose to
エンディング 1 : Kill the Cursed Saintess
– She’s pretty weak. You can finish her in 2-3 曲がる. After that the game will talk about the aftermatch, and the game is end.
エンディング 2 : Join Amrita and kill the beast king
– After you teleport back to Doll’s Repose, ignore the saintess and go to Hailard, Royal Castle. The soldiers are disappear and he is alone on the throne. After you defeated him, you will get 2nd ending. [気をつけてください, He is pretty tough]
エンディング 3 : Join Amrita and open the Sanctuary Door
– After you teleport back to Doll’s Repose, talk with the saintess in your room. She will tell you to get 2 items need to unlock the door.
1st Item : Groaning Valley : Abyss of the Dead
– The door at the top side of bonfire will be open, defeat the Man-Headed Insect boss and its second form. Get Royal Ashes.
2nd Item : Crystal Lake : Royal Family’s Passage
– 降りる 1 地図, there is a new glyph that tell you about Illusory wall. Go inside the door and you will find Ancient Crystal Soccerer boss. Defeat it to get Royal Clot, and also Novak the Eye of God’s soul.
– Talk with the priestess again to get the weapon Adamas Borealis.
– Go back to Sanctuary of Darkness. Open the door behind the saintess’ throne.
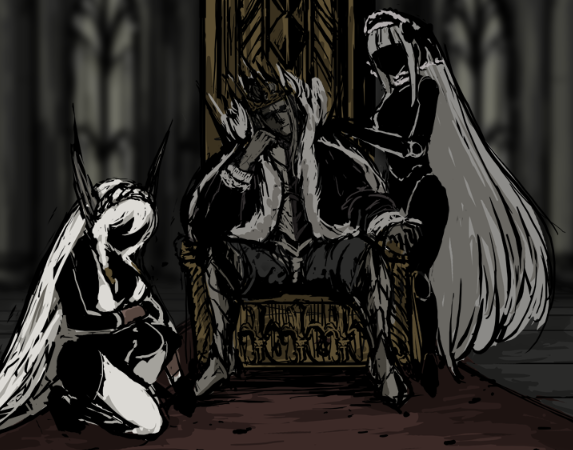
– 最終ボスを倒す : Mikalos, the Grave King to get the 3rd ending.
– The aftermatch is different for each classes, you can find the unlock classes ending at picture 3 in the room next to kitchen and bathroom.
Post Game Content

Unlock Masamune
– After clearing the game : Create a new save, create a character, play until you go into Doll’s Repose and save into new slot. Then load back the old save.
– Go to Path of Awakening : Sanctuary Entrance -> Lower Catacombs. Go up the stair at the bottom of the map. You will find Masamune’s Soul in the center of the room.
Auguste Whereabouts


0. Start the quest by talking to cat in Bronze Maiden, then you need to find Auguste 4 time in following location :
1. Path of Awakening : 大聖堂. Upper side.


2. Garden of the Pruners : Garden Center. Top right corner of Left Garden.
3. Ullamvarna : Statue Area (Above where you used to find the wendigo hunter guy)

4. Groaning Valley : Howling Cliff. Cross the bridge then go down.
5. In Cruz’s Gaol : Access from the Castle 2nd floor, 左側. The door is unlocked now. Get inside and fight the boss : Auguste’s Passion.
– Go to Ends and Odds, trade the painting with the old man’s recipe.
– Back to the cat. You can build the Torture Room and MIrror of Dream room.
– You can access Torture Room in Alma’s room by pressing switch at the fireplace.
– You can access Mirror of Dream room at the right side of your room.

Mirror of Dream
– Basically a Boss Rush mode, re-defeat old boss and progress to the next area.
– After you defeated all the boss, there are room which you will unlock Alma? CG and Broken Disk to unlock the Alma boss room. You need to trigger this 2 回.
– Insert both keys, defeat the doll boss, unlock extra position for Alma.
– Go to area with giant Alma, there is a new area at the end. Defeat the final boss and you will get
Small Hand Puppet.
– In the Soul’s room. You will get option to materialize shadow soul. Use it with Eluna, 政宗, and Matra to unlock Shadow Doll CG (need to be lv 10 to unlock this option.)
Shadow Souls
Farouk the Oracle
– Free Arm slot
スキル:
Lv 1 – Flaming Fingers : Fire Dmg
Lv 1 – Glimmer : Small Heal
Lv 2 – Arcane Arrow : Spell Dmg
Lv 4 – 精製 : Remove all status condition
Lv 7 – Flaming Arms : Bigger Fire Dmg
Lv 10 – Sage’s Wisdom : 復元する 40 SP to all allies.
Dawn the Redwood
スキル:
Lv 1 : Imperfect Defense : -Atk +Def
Lv 1 : シャウト : Taunt all enemy
Lv 3 : 充電 : Bludgeoning Dmg +%stumble
Lv 6 : Vicious Sweep : (全て) Dmg + %stumble
Lv 10 : Redwood’s Protection : +Def and Taunt

Revero the Nightingale
スキル:
Lv 1 : Stone Spray : (全て) Small Bludgeoning Dmg +%confuse
Lv 2 : Shadow Step : +Agi +Evasion
Lv 5 : 奇襲攻撃 : Piercing Dmg +%confuse
Lv 9 : Lifedrinker : Piercing Dmg + heal user
Lv 10 : Steel Flash : (全て) Slashing Dmg
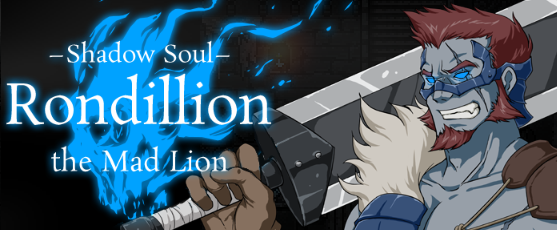
Rondillion the Mad Lion
-Free Arm Slot
スキル:
Lv 1 : Vicious Sweep : (全て) Dmg + %stumble
Lv 3 : スマイト : Bludgeoning Dmg +%confuse
Lv 6 : Helmet Splitter : High Slashing Dmg
Lv 7 : Infight : ++Atk -Def
Lv 10 : Mighty Blow : Higher Slashing Dmg, Low Accuracy
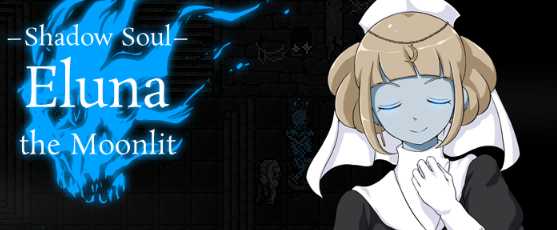
Eluna the Moonlit
スキル:
Lv 1 : ヒーリングタッチ : Medium Heal
Lv 1 : 精製 : Remove all status condition
Lv 3 : Purifying Wave : (全て) Remove all status condition
Lv 4 : Suffusing Light : (全て) Medium Heal
Lv 6 : Quiet Miracle : 復活する
Lv 10 : Pillar of Light : (全て) フルヒール
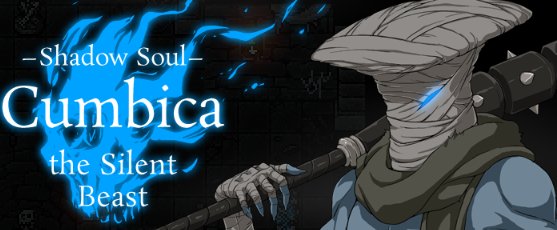
Cumbica the Silent Beast
スキル:
Lv 1 : Conflagration : Fire Dmg
Lv 1 : Returning Slash : 2x Slashing Dmg
Lv 2 : スマイト : Bludgeoning Dmg +%confuse
Lv 3 : Flame Serpent : (全て) Fire Dmg
Lv 5 : Pyroclasm : Fire Dmg
Lv 7 : Soft Glow : (全て) Small heal 3 曲がる
Lv 8 : フレイムダンサー : (全て) High Fire Dmg
Lv 10 : Cataclysmic Burst : High Magic Dmg
Matra the Blighted
-Free Arm Slot
スキル:
Lv 1 : Toxic Perfume : (全て) High chance poison
Lv 2 : Poison Spine : Magic Dmg + 毒
Lv 4 : Iron Mold : +Def to target
Lv 6 : Explosive Spore : (全て) Magic Dmg , lower Accuracy
Lv 8 : Healing Mold : (only in battle) (全て) 癒し
Lv 10 : Gangrenous Cloud : (全て) High Magic Dmg, -Def

Bowheart the Umbral Marksman
スキル:
Lv 1 : Disarming Shot : Piercing Dmg , -Atk
Lv 3 : Bundle Shot : 2x Piercing Dmg
Lv 4 : Blinding Shot : Piercing Dmg , -正確さ
Lv 6 : Killing Field : (全て) Piercing Dmg
Lv 8 : Penetrating Shot : Piercing Dmg %bleed
Lv 10 : 速射 : 4x Piercing Dmg
Marx the Pale Knight
スキル:
Lv 1 : Shadow Sweep : (全て) Slashing Dmg + %stumble
Lv 3 : Cutting Blow : Slashing Dmg + %出血
Lv 5 : Guardian Stance : +Def and Taunt
Lv 7 : Steel Flash : (全て) Slashing Dmg
Lv 9 : ペネトレーター : Piercing Dmg
Lv 10 : Swarming Thrusts : 5x Piercing Dmg

Astael the Hundred Stars
-Free Arm Slot
スキル:
Lv 1 : Line Formed : (全て) greatly +Def
Lv 3 : Encroaching Fire : (全て) greatly +Atk
Lv 5 : Tiger Bows : (全て) heal but -Atk for 1 振り向く
Lv 7 : Truth or Lies : (全て) Confuse , -正確さ, – 回避
Lv 10 : Pawn Sacrificed : -Hp, greatly -def and -evasion

Sylvan of the Silver Wings
スキル:
Lv 1 : Battle Cry : (全て) +Atk
Lv 2 : Guardian Stance : +Def and Taunt
Lv 4 : Triad Slash : 3x Slashing Dmg
Lv 6 : Arcane Shield : + Def
Lv 8 : Arcane Greatsword : (全て) High Magic Dmg
Lv 10 : Supreme Strike : High Slashing Dmg
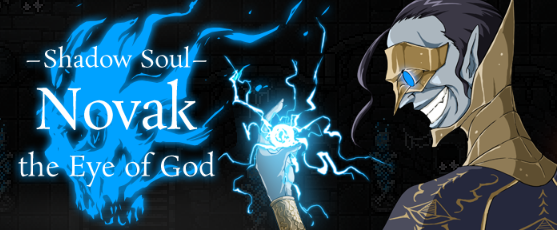
Novak the Eye of God
-Free Arm Slot
スキル:
Lv 1 : Arcane Arbalest : Magic Dmg
Lv 1 : Arcane Shield : + Def
Lv 3 : ヒーリングタッチ : Medium Heal
Lv 4 : Annihilation Field : High Magic Dmg
Lv 5 : Arcane Greatsword : (全て) High Magic Dmg
Lv 6 : Incinerating Flame : (全て) High Fire Dmg
Lv 7 : Arcane Lance : High Magic Dmg
Lv 8 : 集中 : + 理由
Lv 9 : Arcane Barrier : (全て) + Spirit
Lv 10 : Incantation of Ruin : (全て) Higher Magic Dmg
Masamune of the East
-Free Arm Slot
スキル:
Lv 1 : Futatsuki : 2x Piercing Dmg
Lv 3 : Kotezaki : Slashing Dmg , -Def
Lv 5 : Katsumipou : 癒し
Lv 7 : Kagebuyou : +正確さ, +回避
Lv 9 : Kamikaze no Jin : ++Atk, ++Def
Lv 10 : 十 : (全て) 2x Slashing Dmg