This is a universal guide on how to change game icons (not steam library icons though)
Creating an Icon
이를 달성하기 위해, I utilized the TF2C icon featuring small red, 파란색, 녹색, and yellow elements. I obtained these elements by extracting the icon from the resource folder in the game files. 기후, I proceeded to modify the icon accordingly. 하지만, in order to proceed, I needed to convert it to PNG format using Convertio, although the process itself was not particularly noteworthy.

Compiling the Icons back together
After completing the coloring process for all the icons (어느, indeed, there are multiple), the next step is to reassemble them. 하지만, the conventional method of simply placing them back together can be cumbersome. 이 문제를 해결하려면, I employed the following approach:

If the previous explanation is not entirely clear, let me clarify the process. 본질적으로, I gathered all the recolored PNG files and imported them into GIMP (GNU Image Manipulation Program), where I merged them together. The purpose of this merging step is to enable automatic resizing of the final icon.
I personally opted for GIMP as it provides a cost-effective alternative to Photoshop, which can be quite expensive at around $28 per month. 하지만, it’s worth noting that this method should also work in Photoshop.
Exporting as a .ICO file
Once you have merged the icon PNG files back together, the next step is to export them as a single .ico file. 이것을하기 위해, 으로 이동 “File” menu and select “Export As.” Save the file with the name “game.ico” (commonly used for game icons, although some games may have different naming conventions). Proceed to export the file.
Replacing the Icon
지금, you can simply drag and drop the resulting .ico file into the game files, and you might think you’re done! 하지만, there is a crucial aspect that needs to be addressed. .exe files actually contain their own embedded icons and do not automatically use the icon from an external .ico file. 그러므로, the purpose of creating the .ico file was to tackle this particular issue.
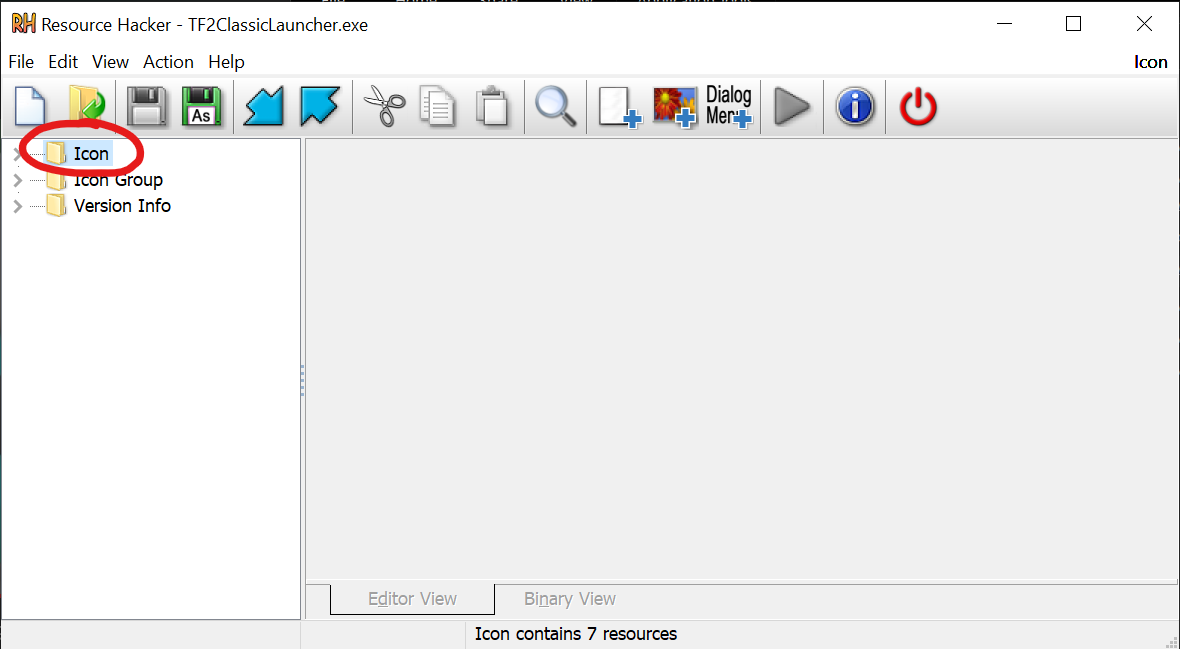
Hacking into the .EXE file
To replace the .ico file within the .exe file itself, we can make use of a tool called Resource Hacker. You can find it at “angusj.com/resourcehacker” (if the link is removed, replace the first space with a dot and the second space with a ‘/’). Once you have installed Resource Hacker, locate the installation directory and launch the program.
After opening Resource Hacker, navigate to the location of the game you wish to replace the icon for, and select the corresponding .exe file. 예를 들어, in this example, I will be using TF2C.
메모: Please ensure you have the necessary permissions and legal rights to modify game files before proceeding.
ACTUALLY Replacing the .ICO File
Now comes the most crucial step, which I have already completed and modified. 하지만, it is absolutely vital to double-check the number of icons present. Overestimating or underestimating the number of icons could potentially lead to complications, necessitating a restart at some point.
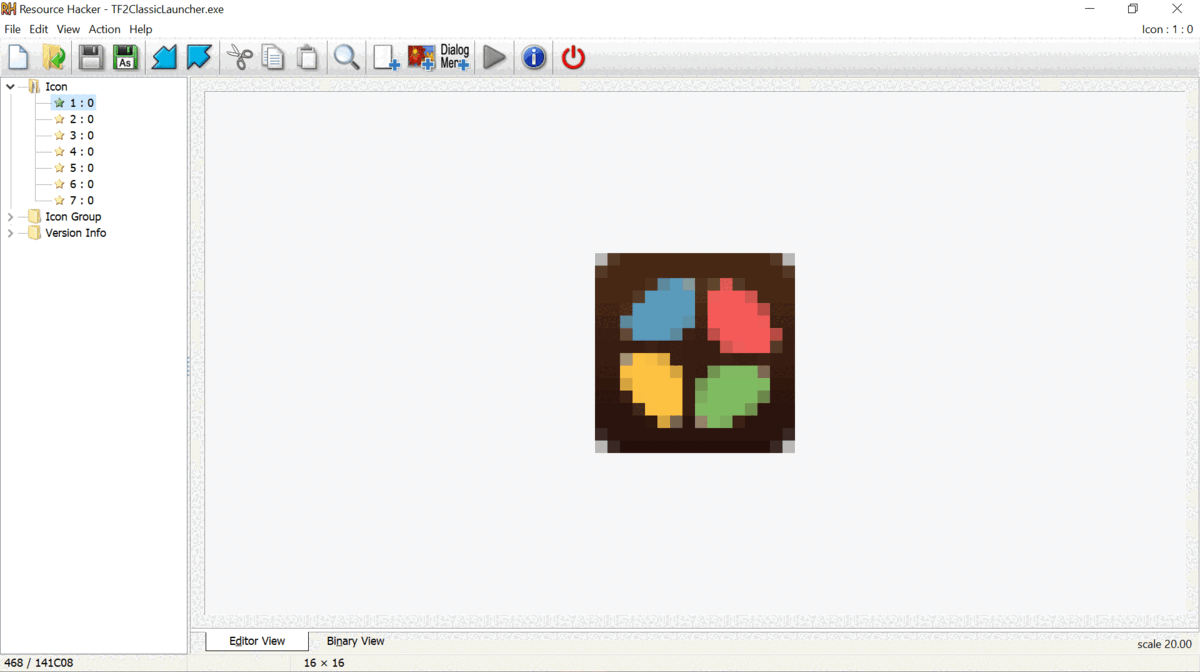
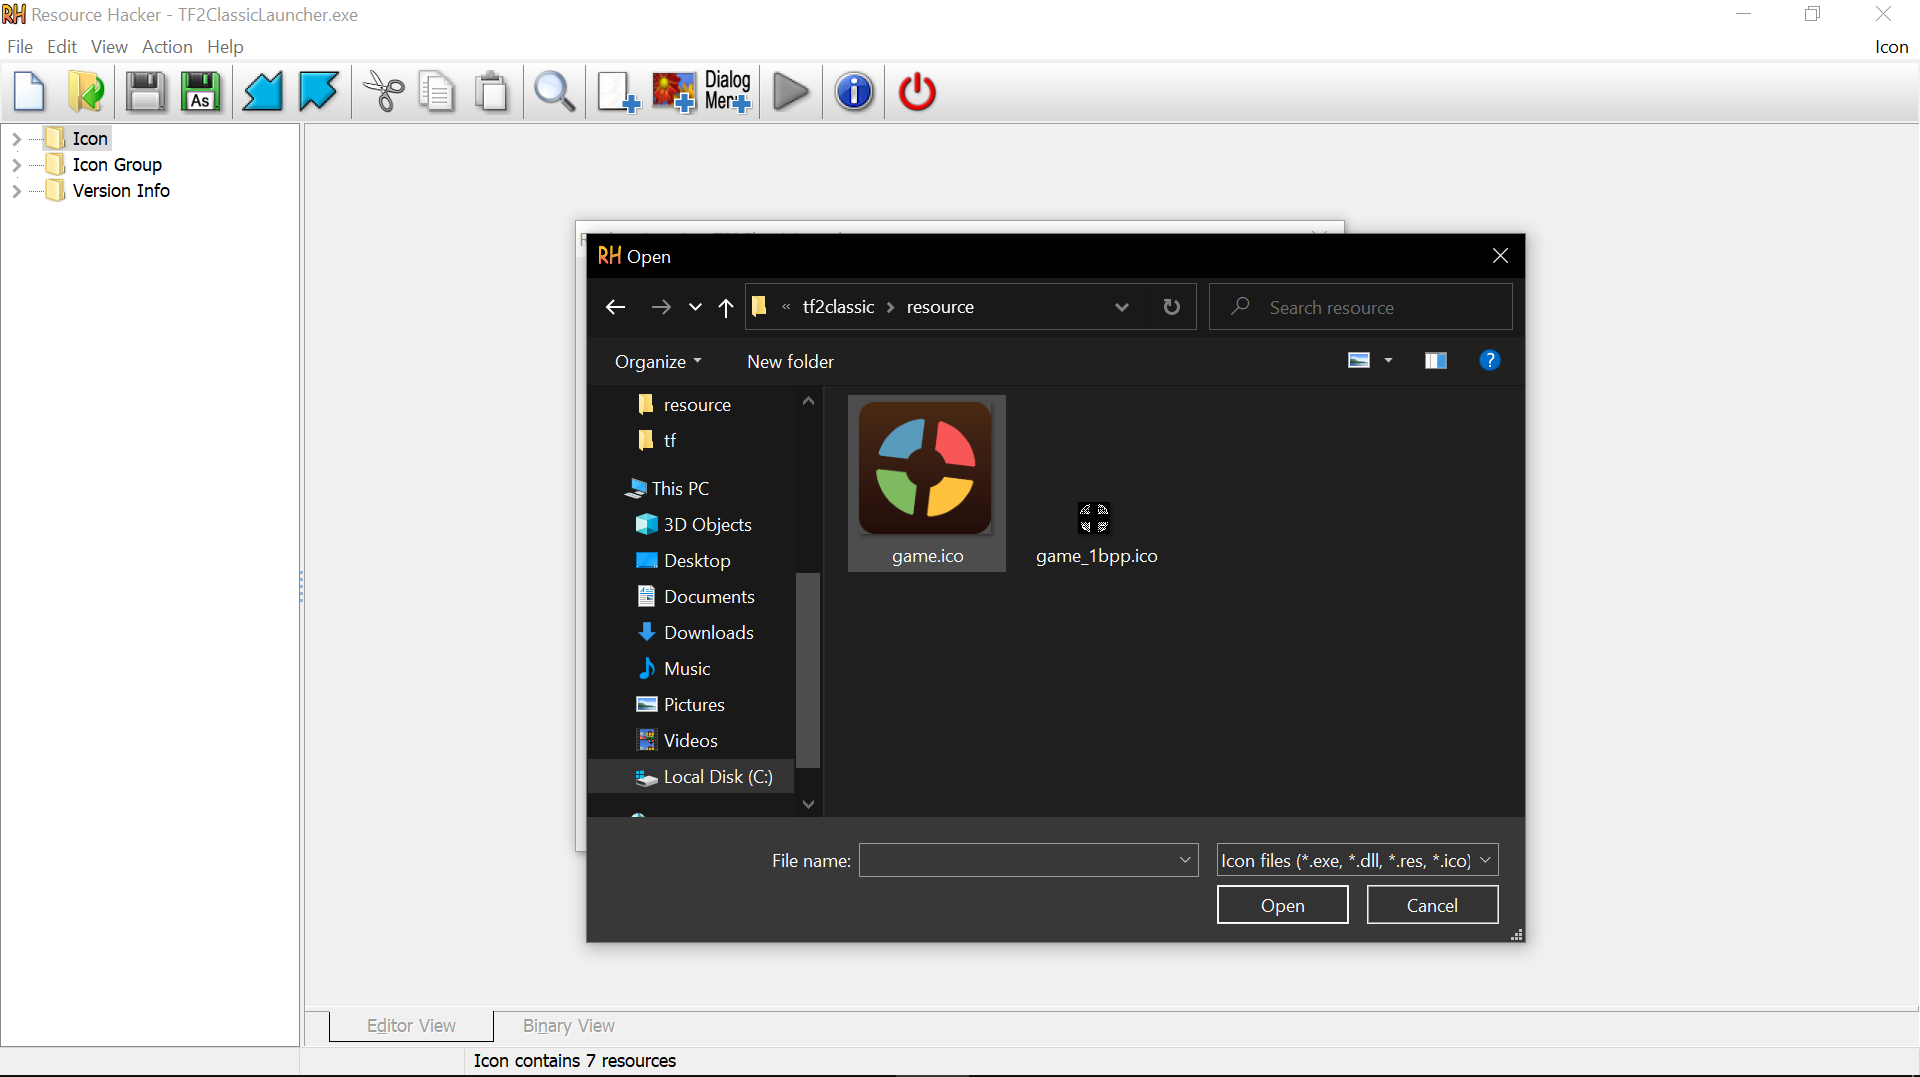
For TF2C, 총있다 7 icons, each with different sizes ranging from 16×16 to 256×256 (the maximum size). To proceed, navigate to the ‘Actions’ tab located at the top of the window and click on ‘Replace Icon’.
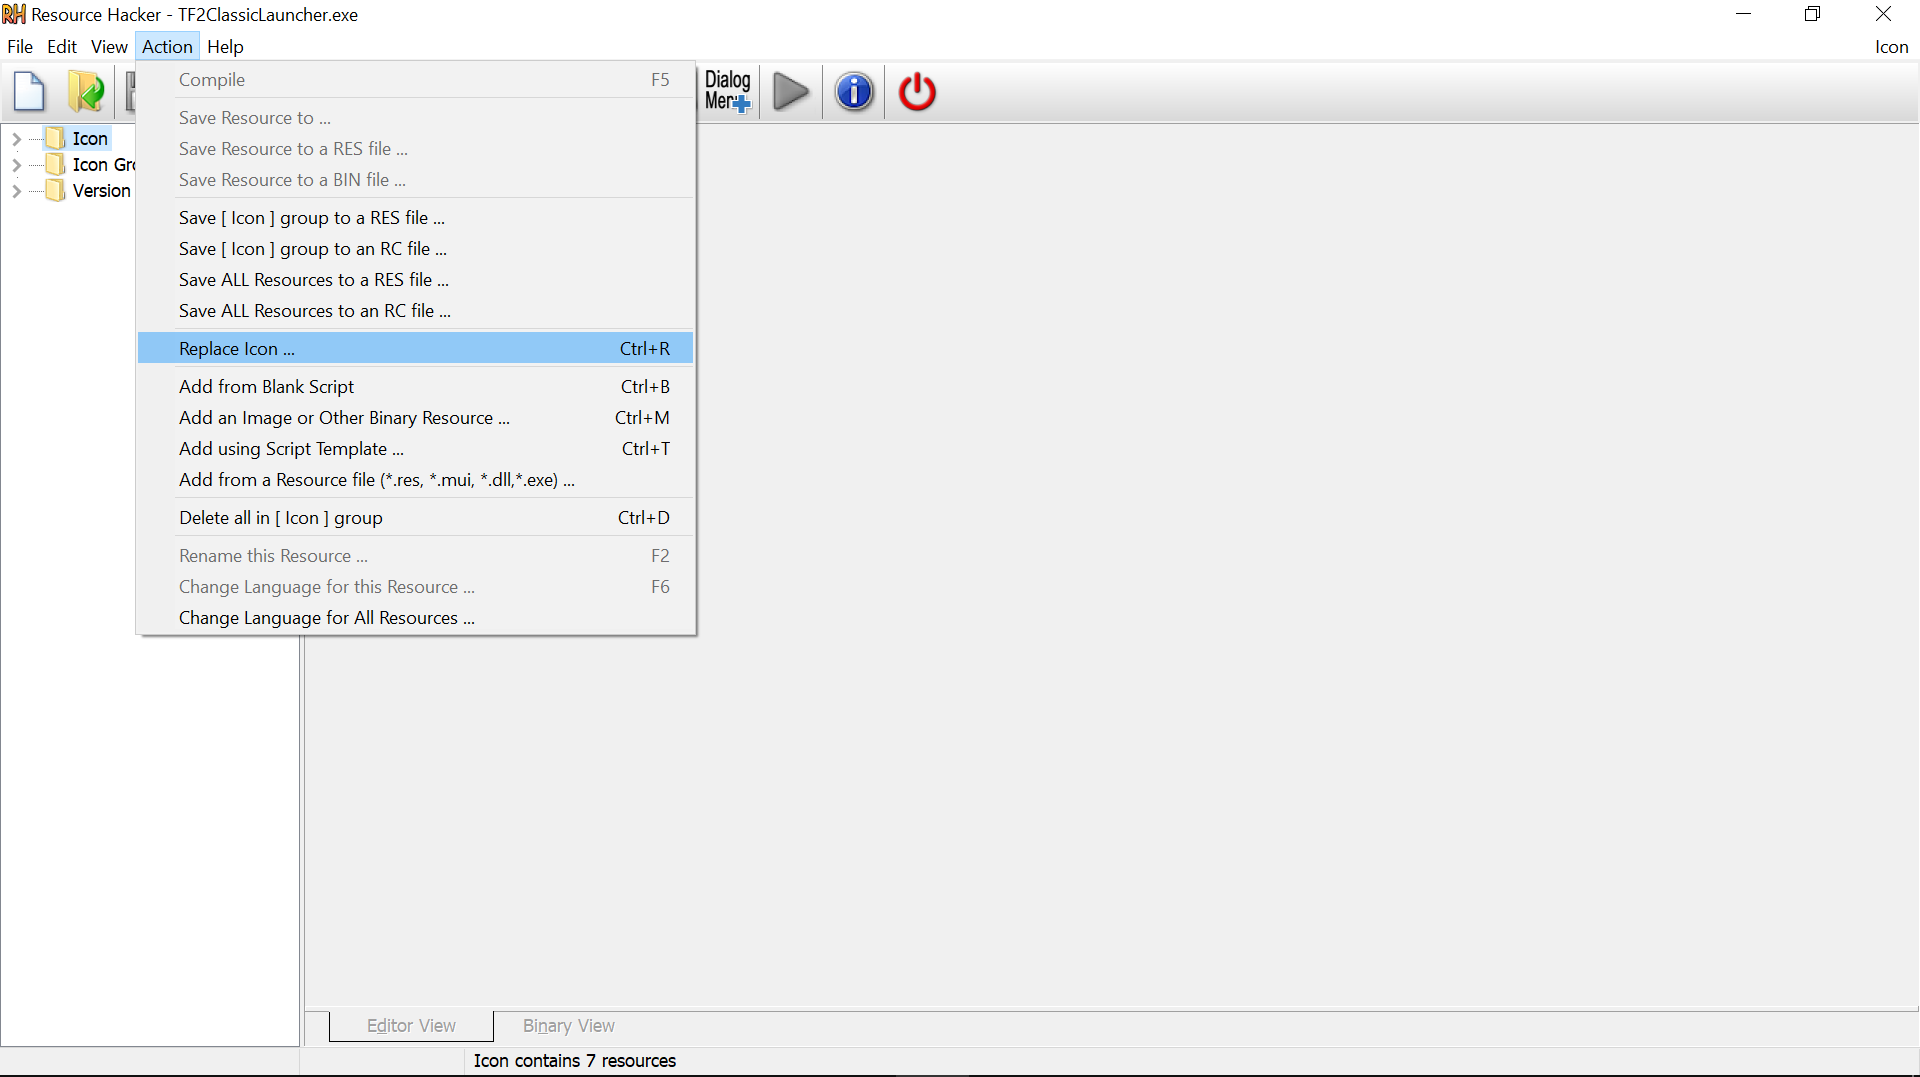
and select your file.
after you’ve done that, click replace, and save.

Checking if it Worked
To verify if the icon replacement was successful, simply open the launcher of the game you modified. The icon displayed in the taskbar should now reflect the changes you made.
As for replacing Steam library icons, this method does not apply. 하지만, I can assist you with finding alternative approaches to replace Steam library icons if you would like. Just let me know!