
How to use displays and time sensors to create a timer. To learn how to switch, just look up how to enter a beta on steam (or you could just wait for the update to come out).
Required Items
You’re gonna need these things for the timer to work:
- A time sensor
- An input for the time sensor (in this guide we’ll be using a button)
- And a display
I recommend putting these close to each other.
Wiring
We’re going to need to hook these up, so if you already know how to do that, you can skip ahead. But if you’re new to sensors and stuff, you need to pay attention.
So here we have our 3 core blocks. (also, since this is the beta, it’s going to look REALLY ugly)
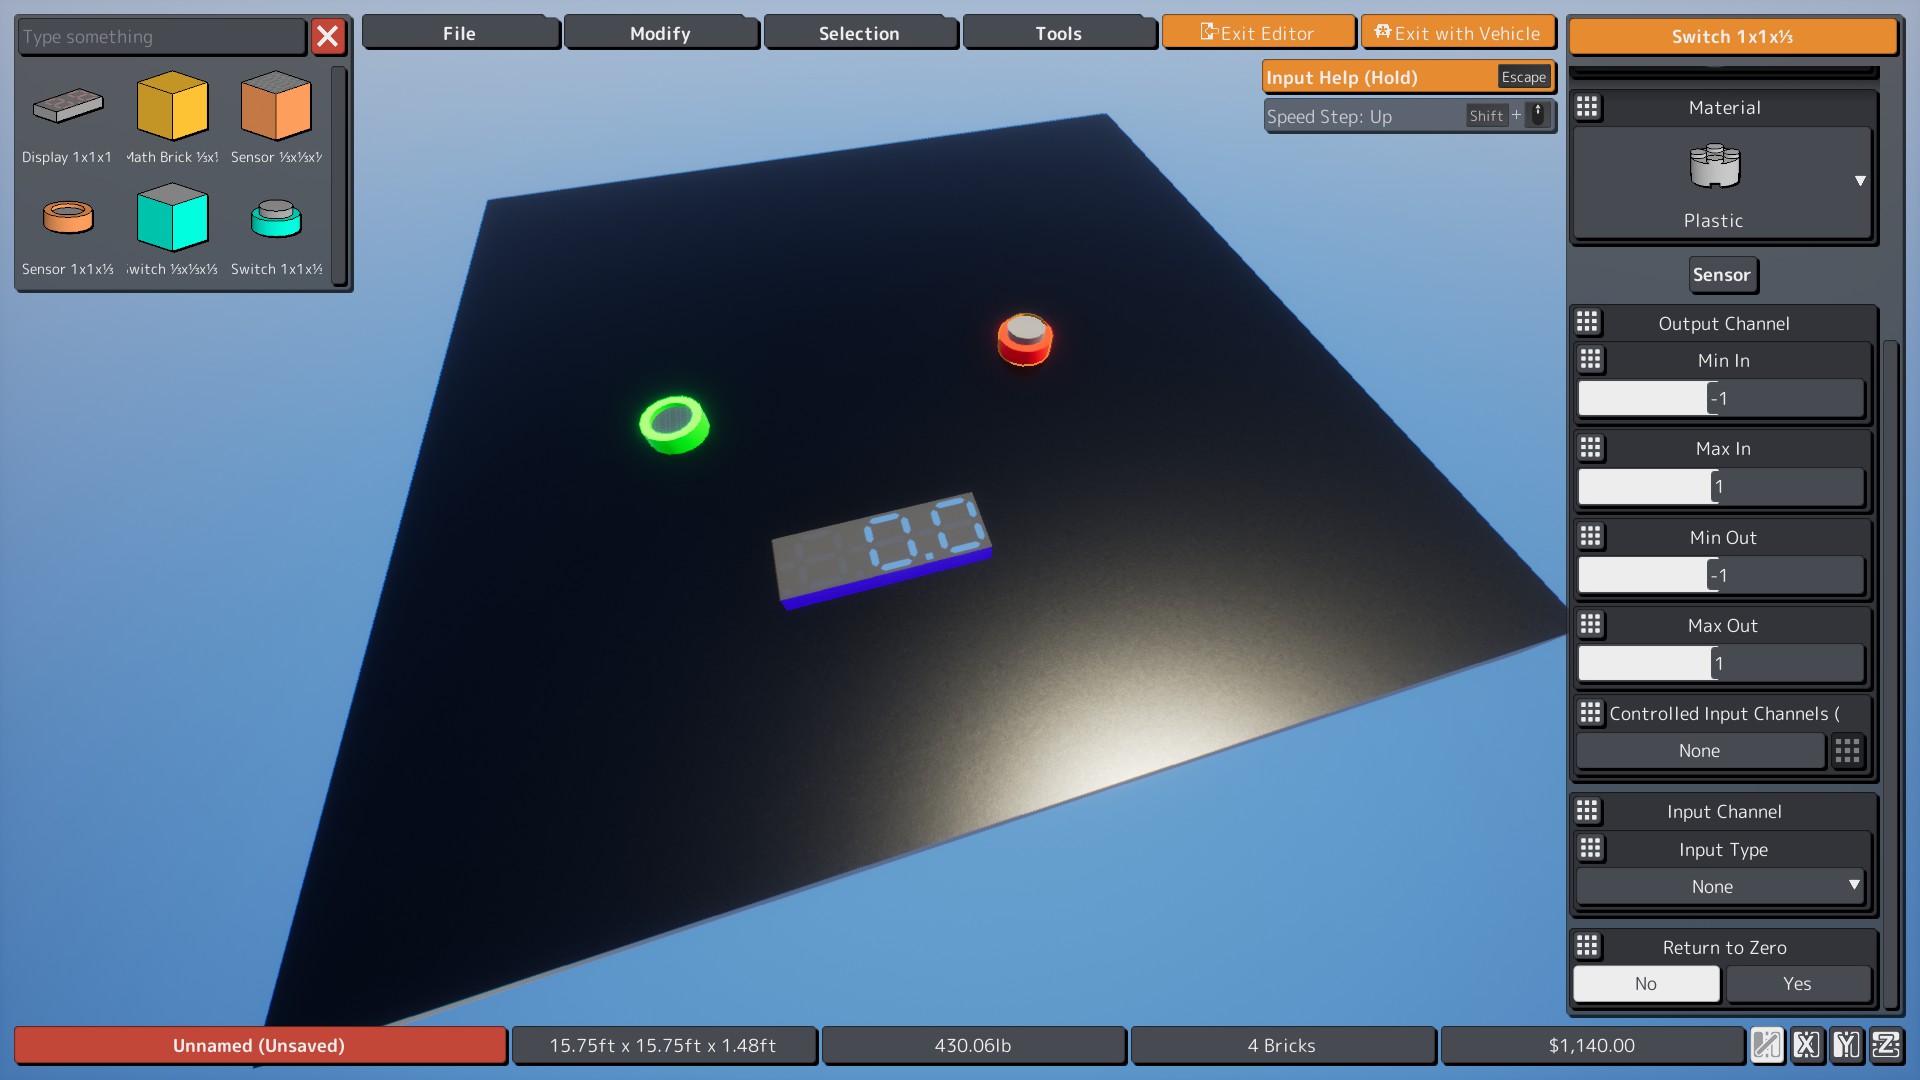
So first you have to select the sensor (go all the way down to where it says “속도” and change it to Time if you haven’t already), go to Input Type and change it to Output Channel. Then go to Source, 클릭 “없음” (this part is important), click on the switch and then press Enter.
It should look like this
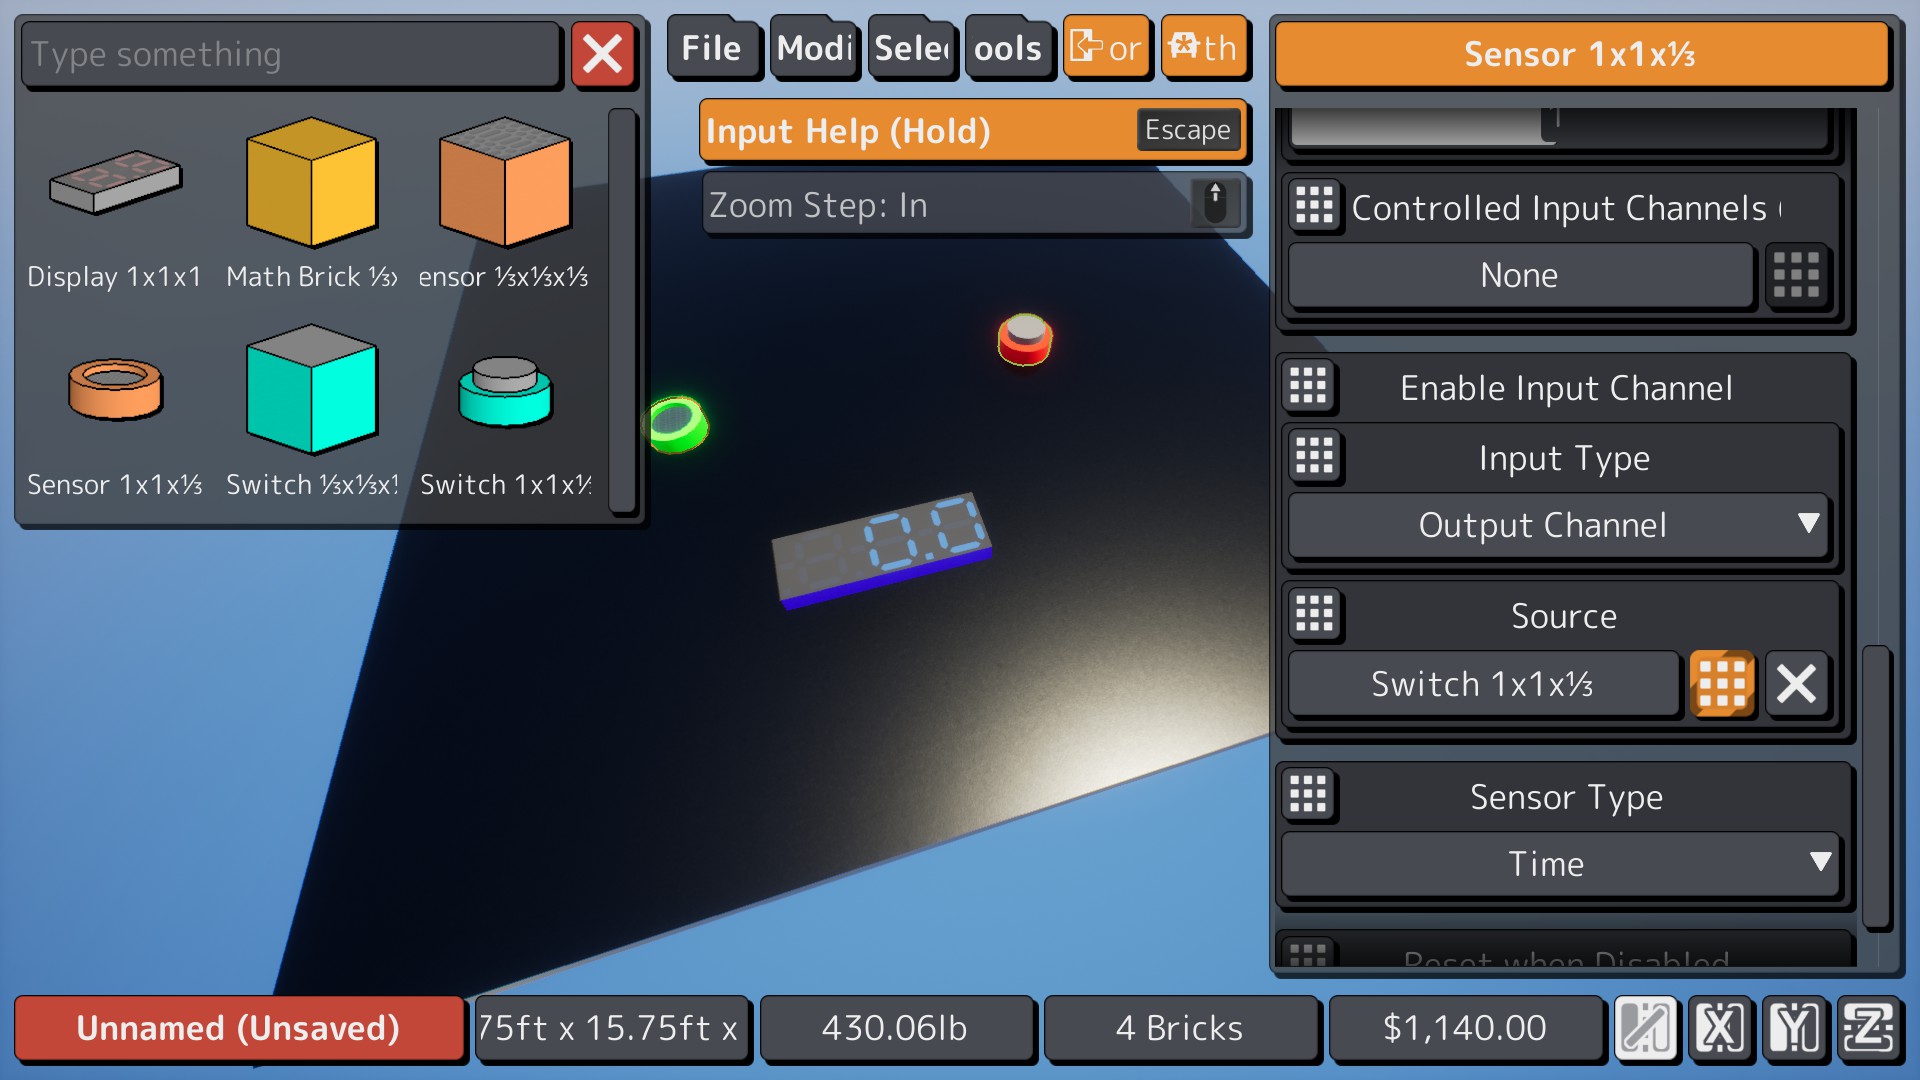
이후, go to the display and do the same thing EXCEPT instead of selecting the switch, select the time sensor.
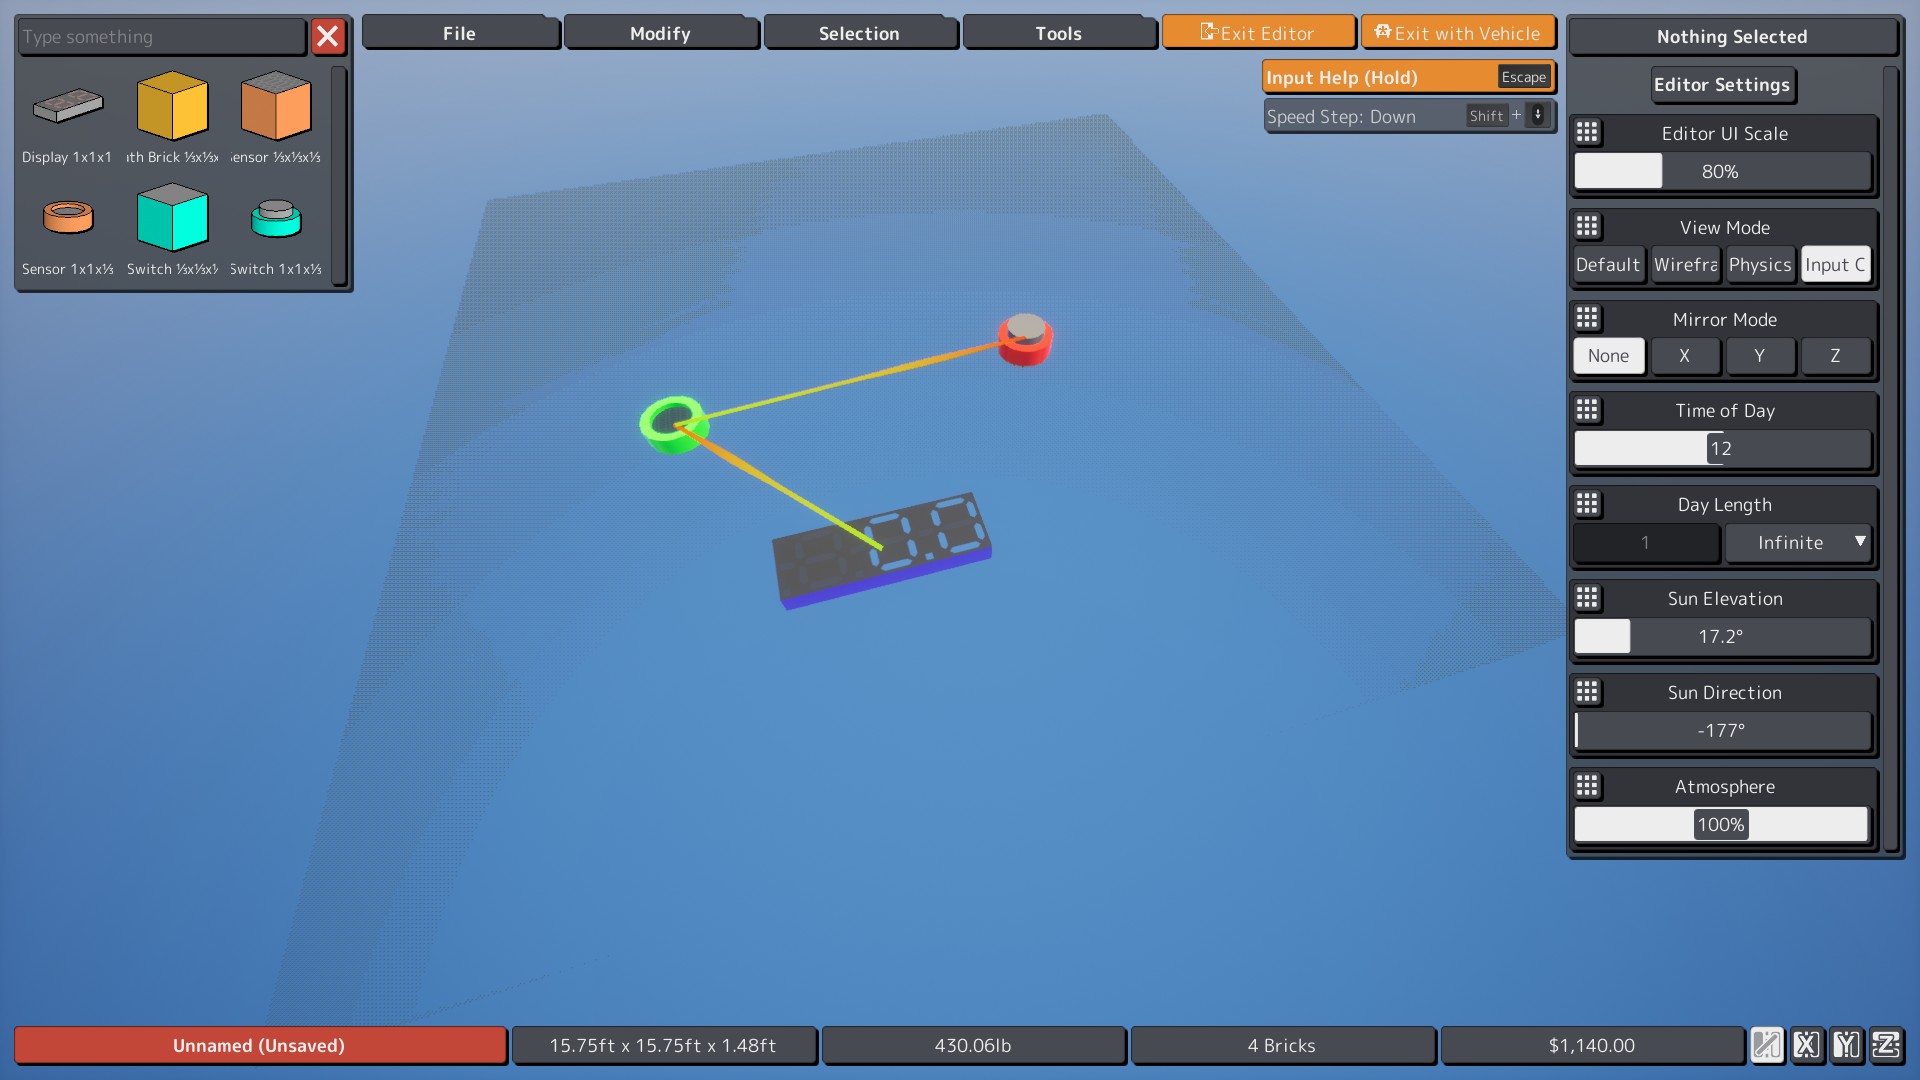
Now you might be wondering if you did it right, 괜찮아요, there’s an easy way to tell. Deselect any blocks and then go to “보기 모드” 그리고 누르세요 “Input Channels”.
If you followed the tutorial correctly, it should look like this.
Configuration
Go back to the Time Sensor. Set the minimum input (Min In) and the minimum output (Min Out) 에게 0. Then set the maximum input (Max In) and the maximum output (Max Out) to the desired time (they MUST be the same), for this guide we will do 30 초.
If you followed this step correctly, it should look like this.

And you’re done! 예, 그게 다야, that’s all you have to do.