A simple guide created to answer the question about Alfred’s room. Based on a question I saw a few hours ago and decided to turn into a guide since there isn’t one available.
Let it be known that this might detract from the fun of discovering the solution yourself. 당신은 경고를 받았습니다.
문제
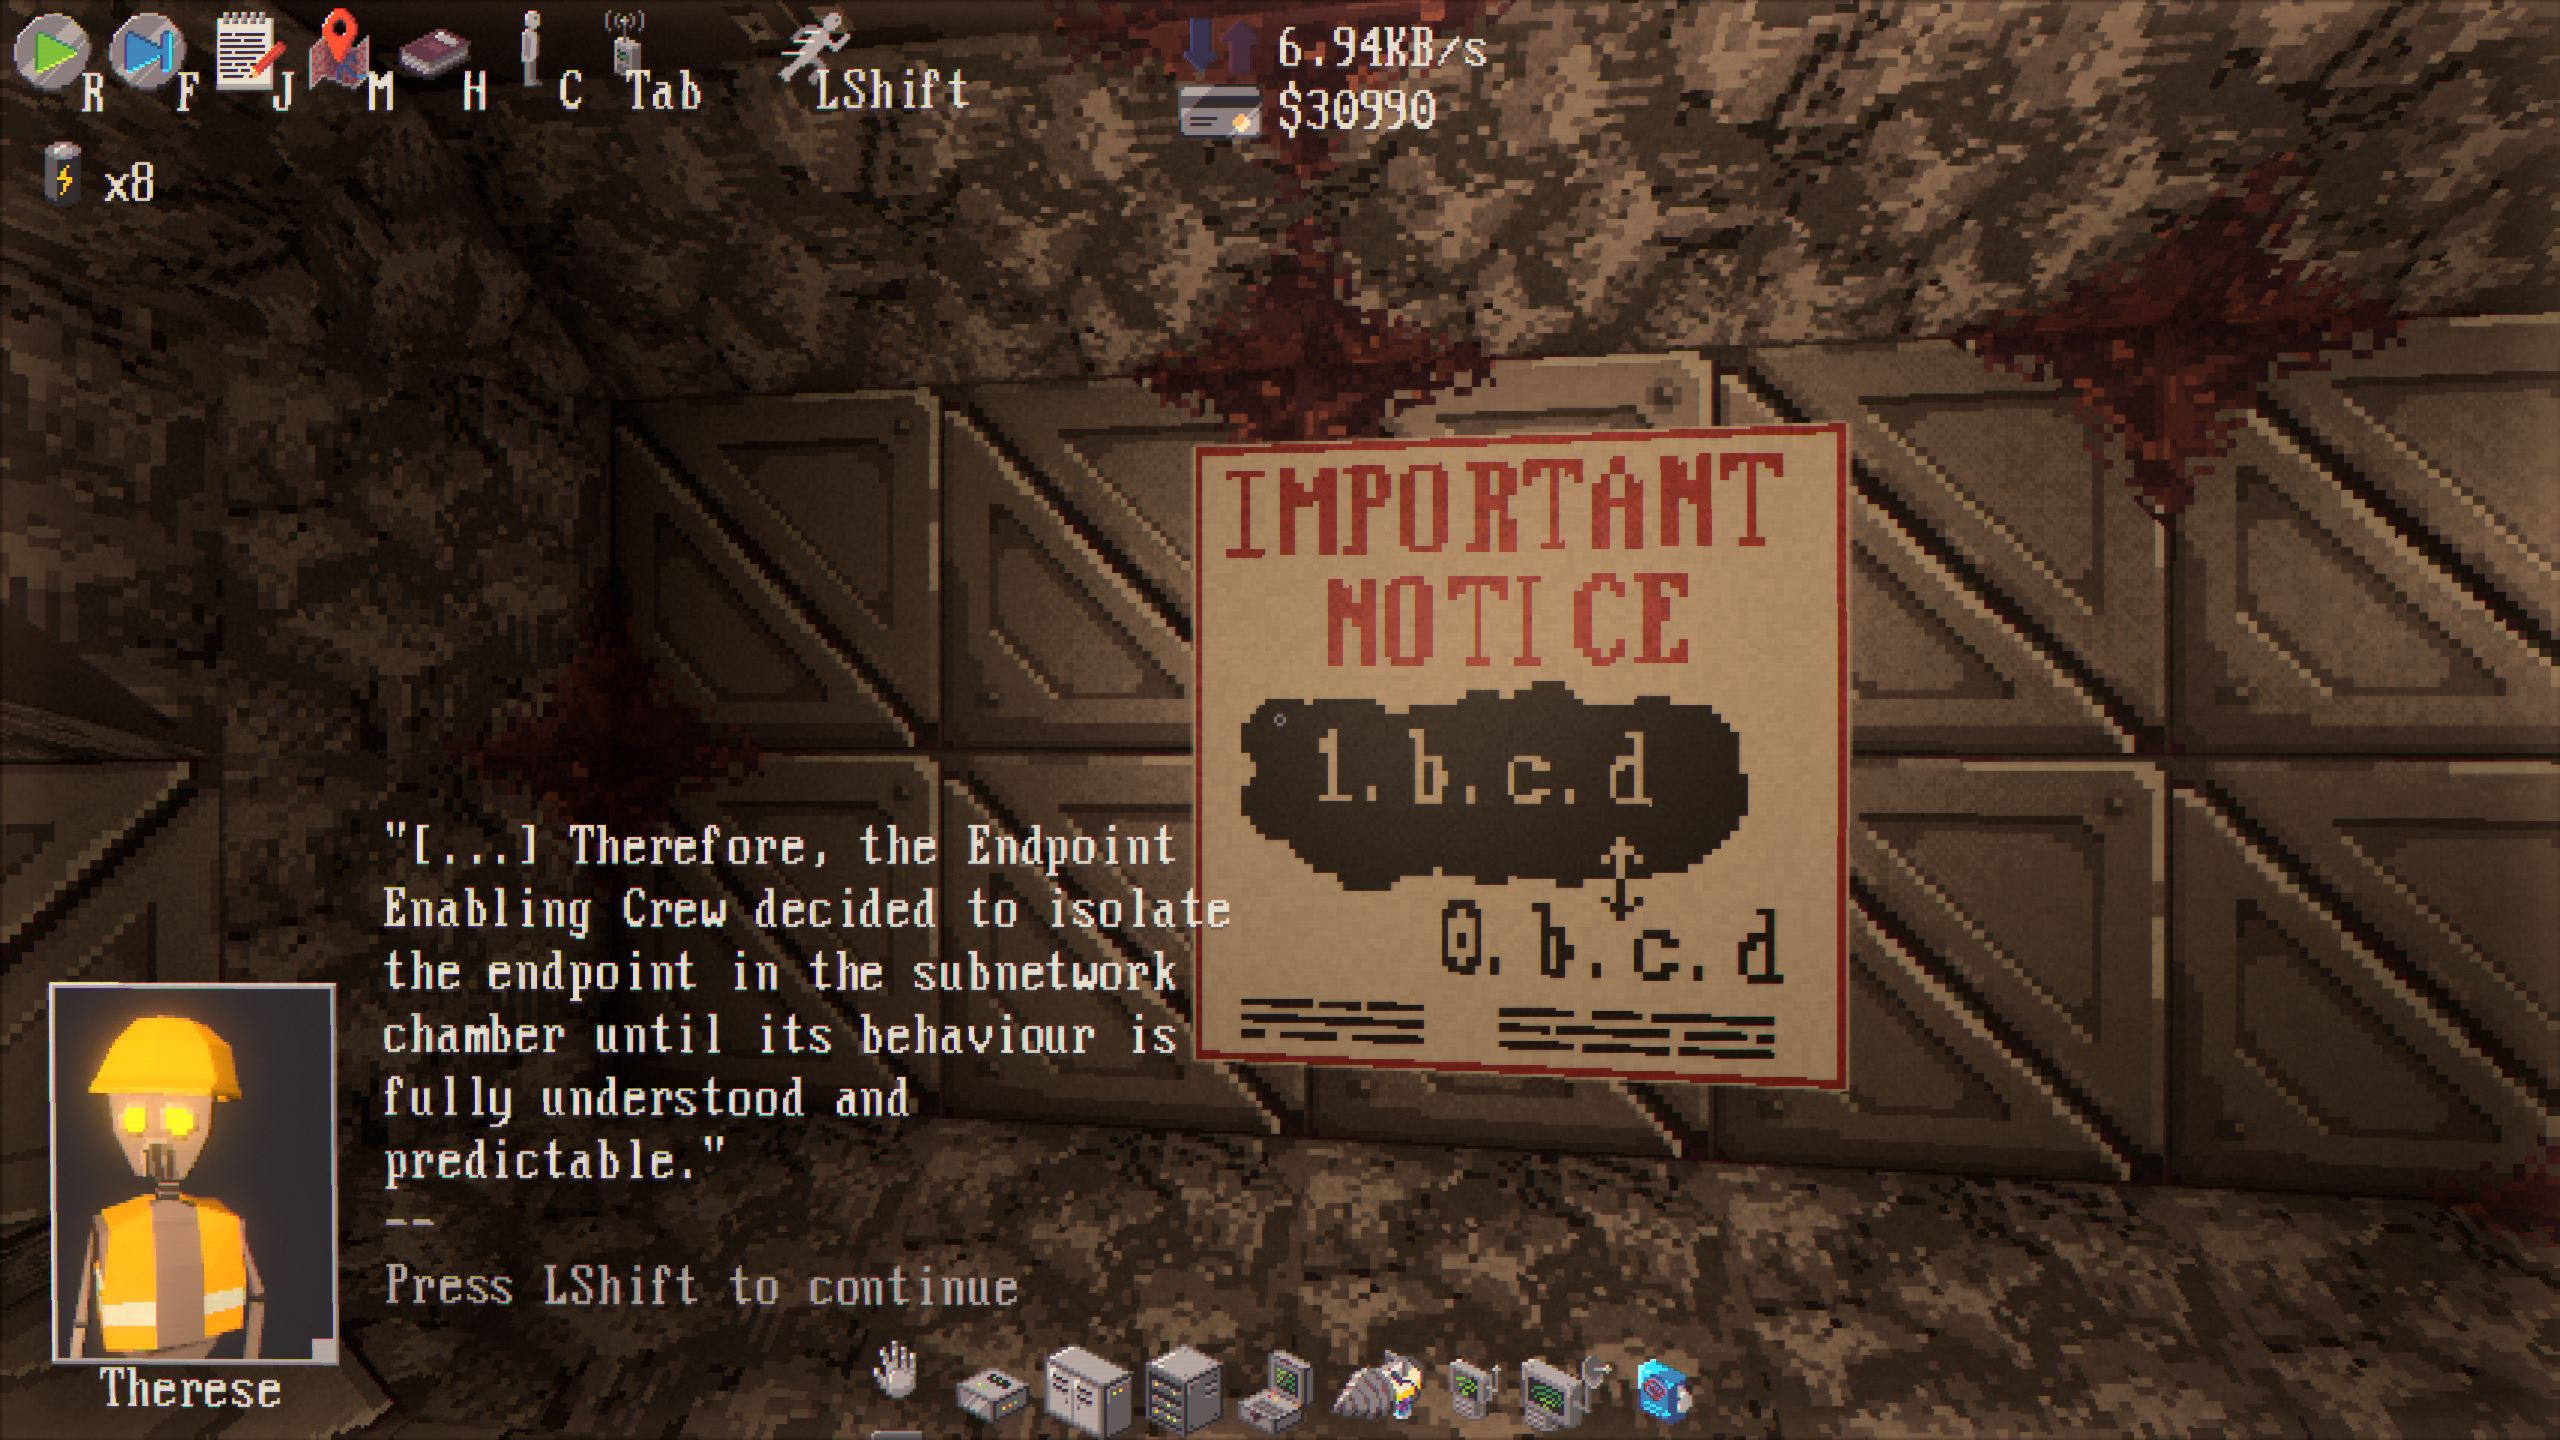
As you know, the subnet or whatever it is forces you to use the bridge on the door to Albert’s room or Chamber 4, as it passes by, which can be found near the starting lab, to even interact with the endpoint. The bridge converts the 0.0.1.0 address to 1.0.1.0, which creates the puzzle. I believe it has something to do with a subnet, but I’m still learning myself and don’t know for sure. The poster in the chamber tries to tell you about it.
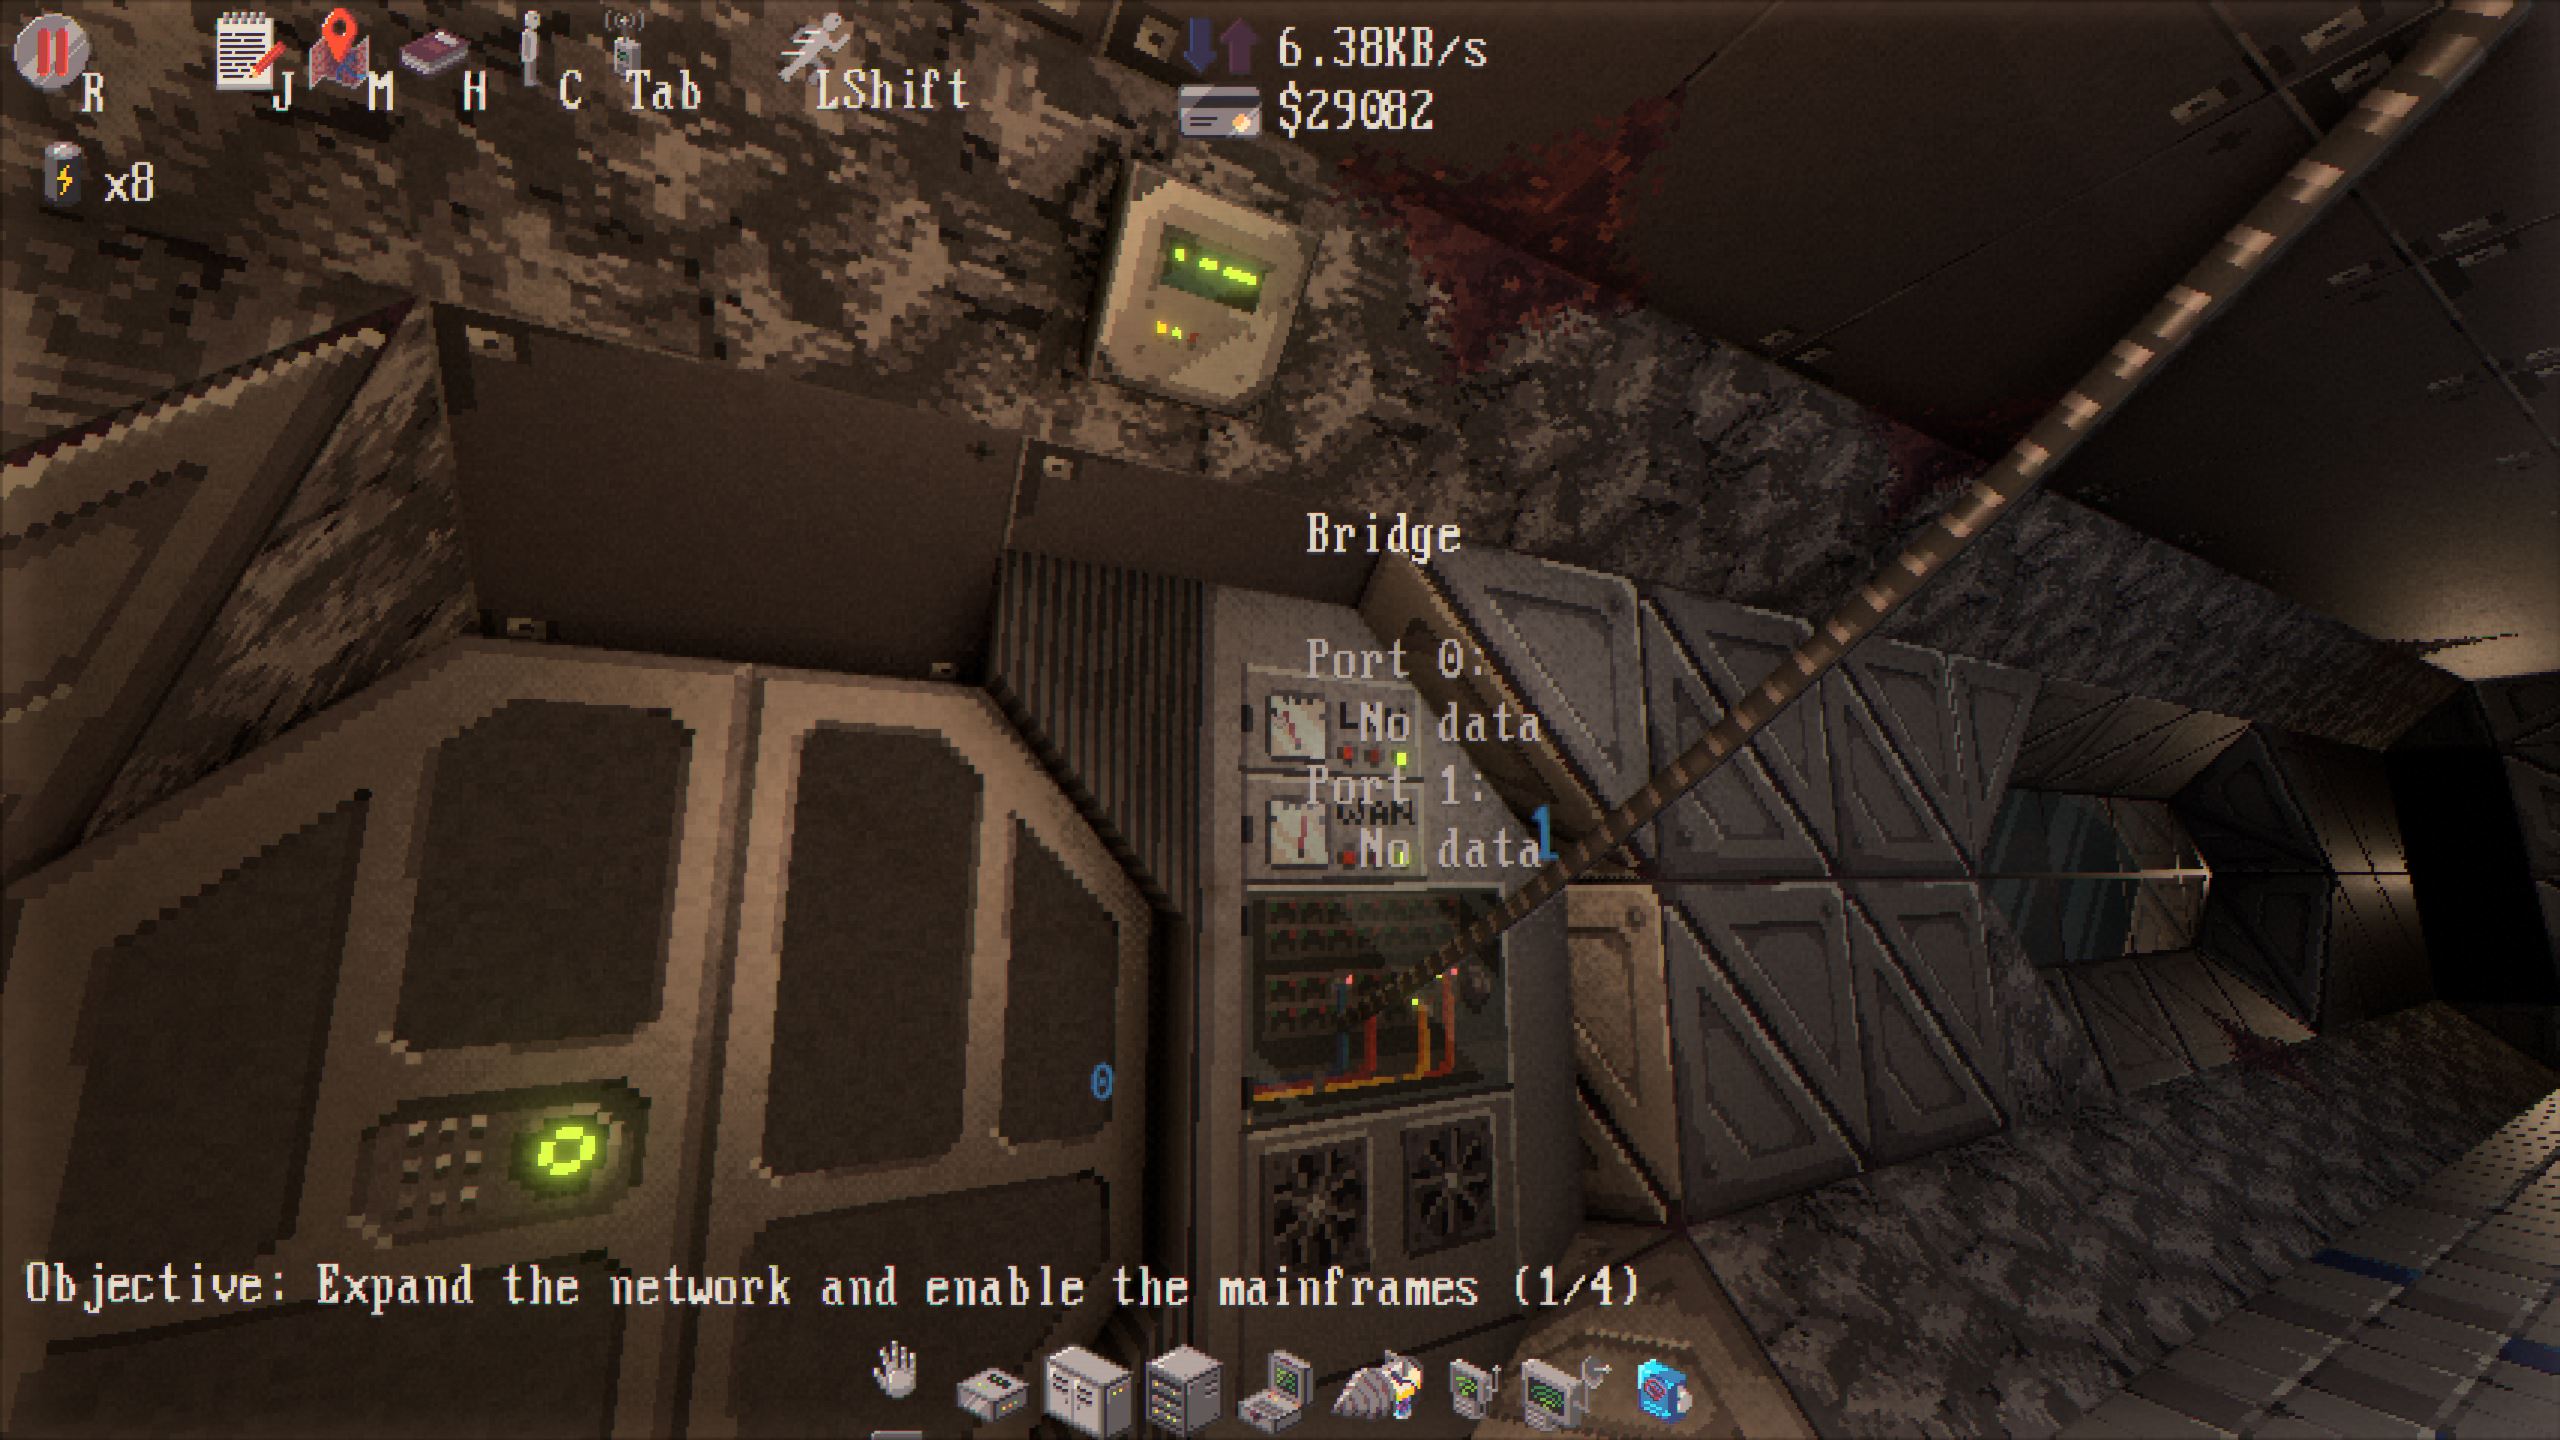
That said, Albert’s room has one hub and two filters that are all pre-placed, which can’t be removed and are non-configurable except for the hub. I don’t think it is supposed to do or mean much practically as it might as well not be there in the end, but it’s likely more so to teach you, as it’s one of the first few endpoints you will find.
The following text will be important to read with the imagery in mind as it’s a major crutch my explanation leans on.
Said images are marked as 1 에게 4 in the top left and under the images in a header.
My apologies for it being a mess.
해결책
As you might have noticed, the bridge on the door is the only way for the address to be corrected so that the endpoint, Alfred, will accept it and not reject it because it’s not addressed to him. His endpoint is 1.0.1.0, ~ 아니다 0.0.1.0. 몸소, I know nothing about subnets, so I can’t really explain, but you have to route it through the bridge on the door to convert it to the endpoint’s address. That fact, in turn, forces us to use the darn bridge with no way around it.
다리
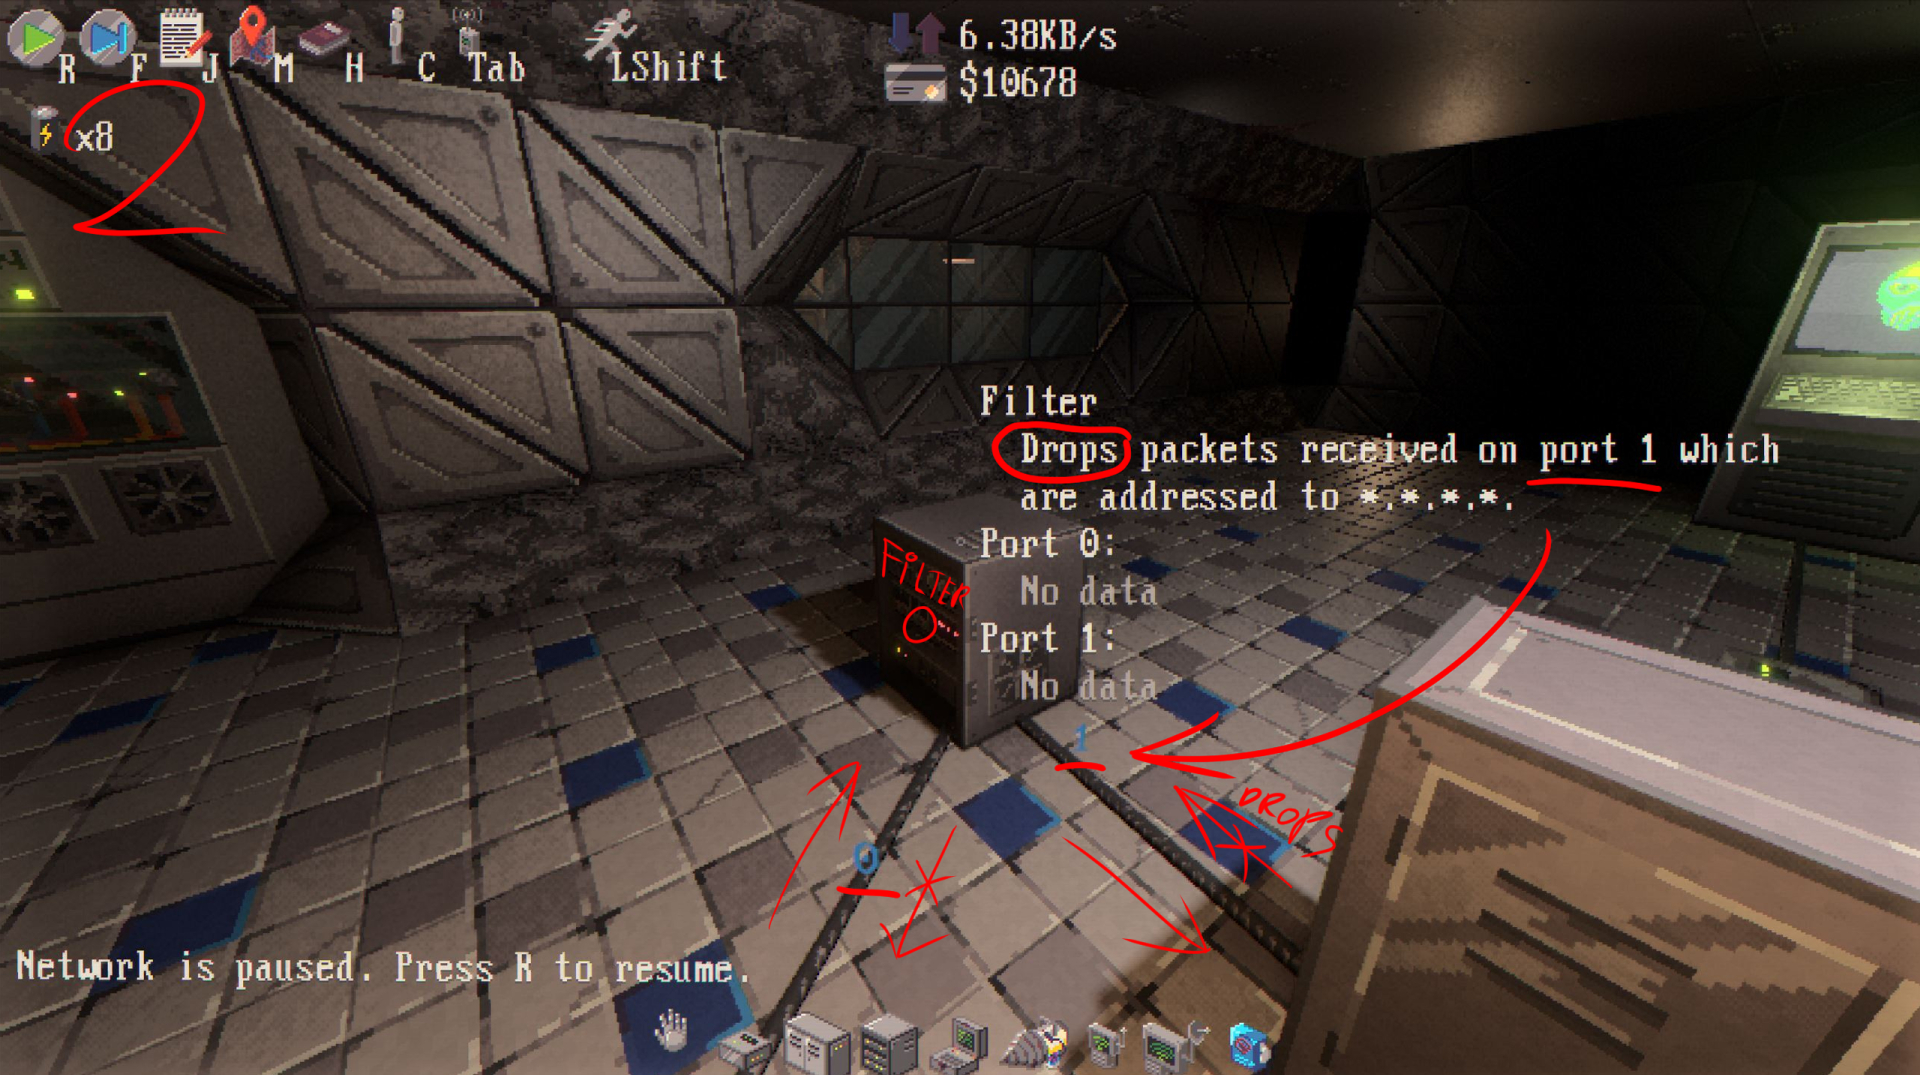
Not to Fred though, I have a solution from which you can learn if you don’t yet understand filters and hubs. The main hub has port 0 connected to the bridge, which will act as the input and output of the chamber.
I reconfigured the hub to send incoming traffic to port 2, which then goes to the left filter. Since the right filter would drop our packet, I will dub the left filter “filter 0” and the right one “filter 1”.
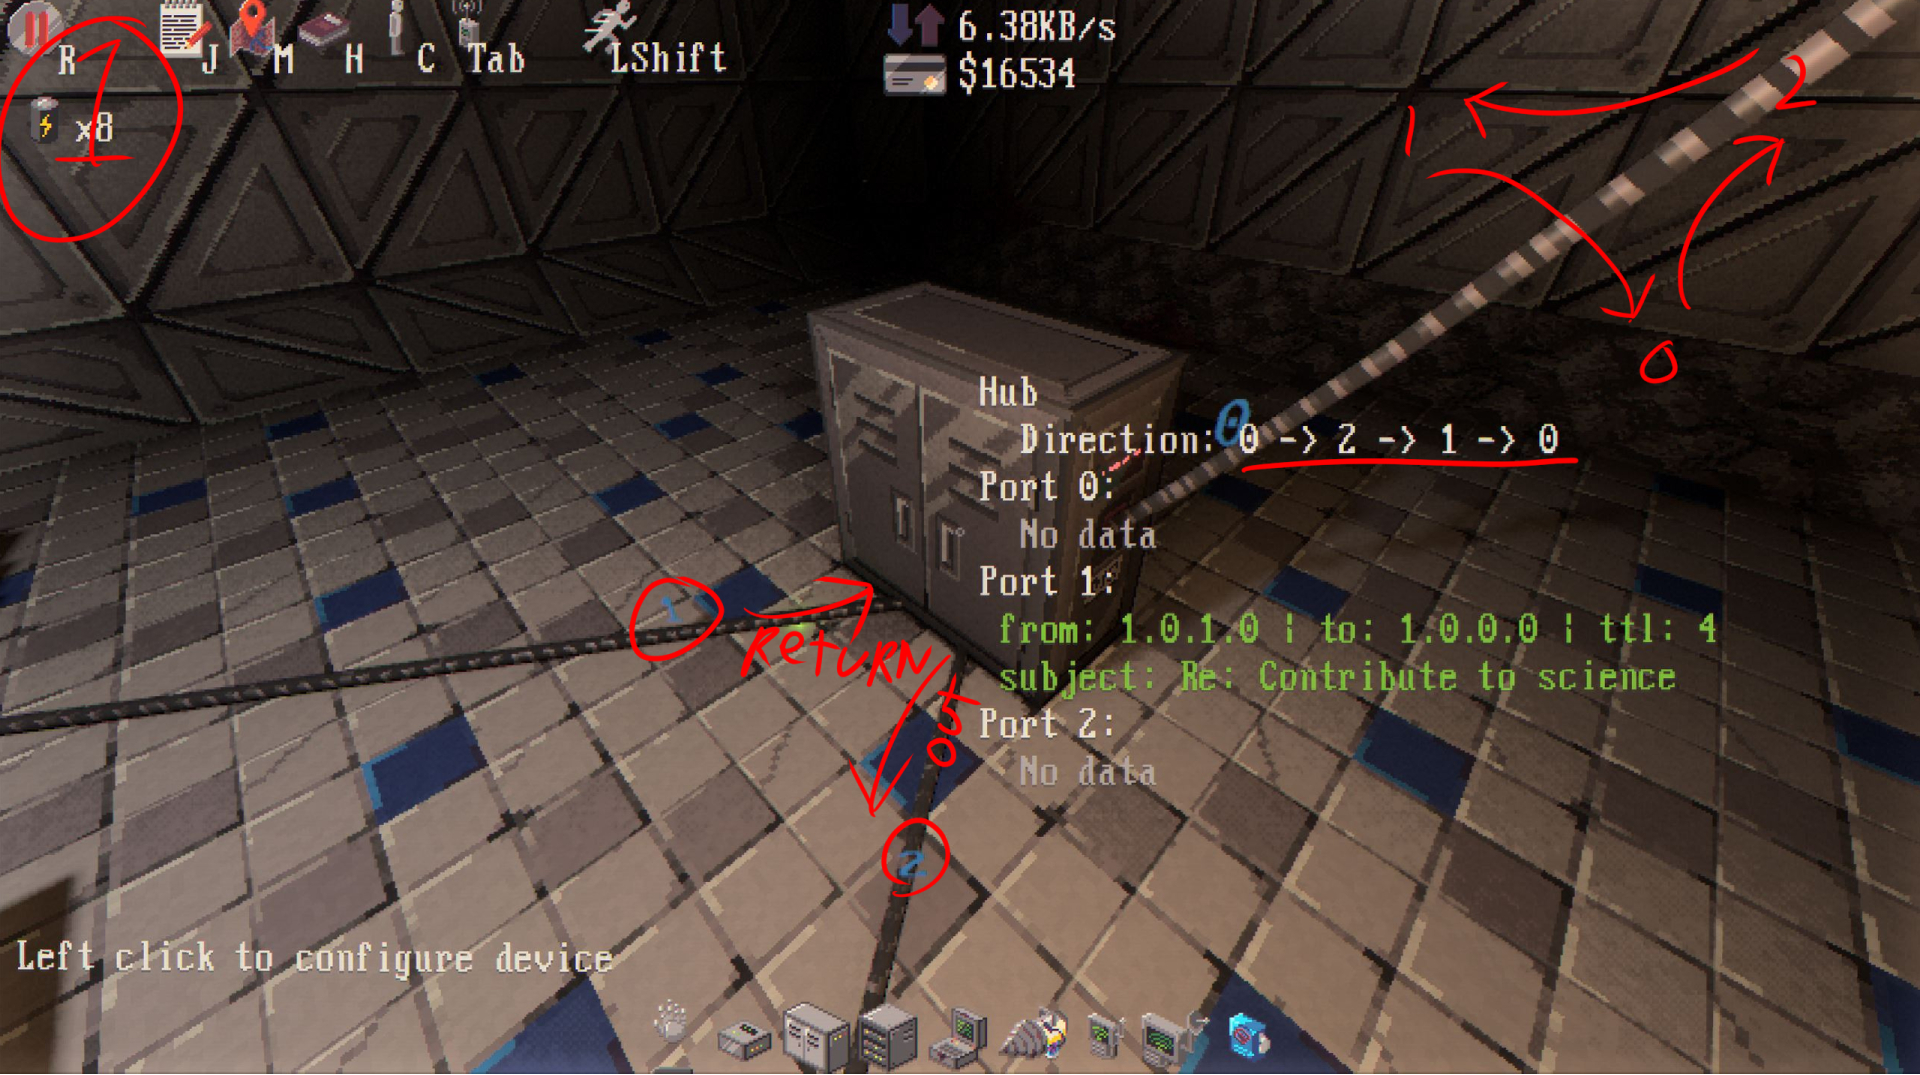
As our packet comes in from the hub’s port 2, it will arrive at filter 0’s port 0, which shall not be dropped as the filter only drops packets from its port 1. 따라서, our packet continues to the hub I placed between the filters.
지금, our packet has arrived from filter 0 at the second hub’s port 2, which in turn goes to its port 0 and to our good friend Alfred!
From him, packets will go to the hub and to its port 1 to filter 1.
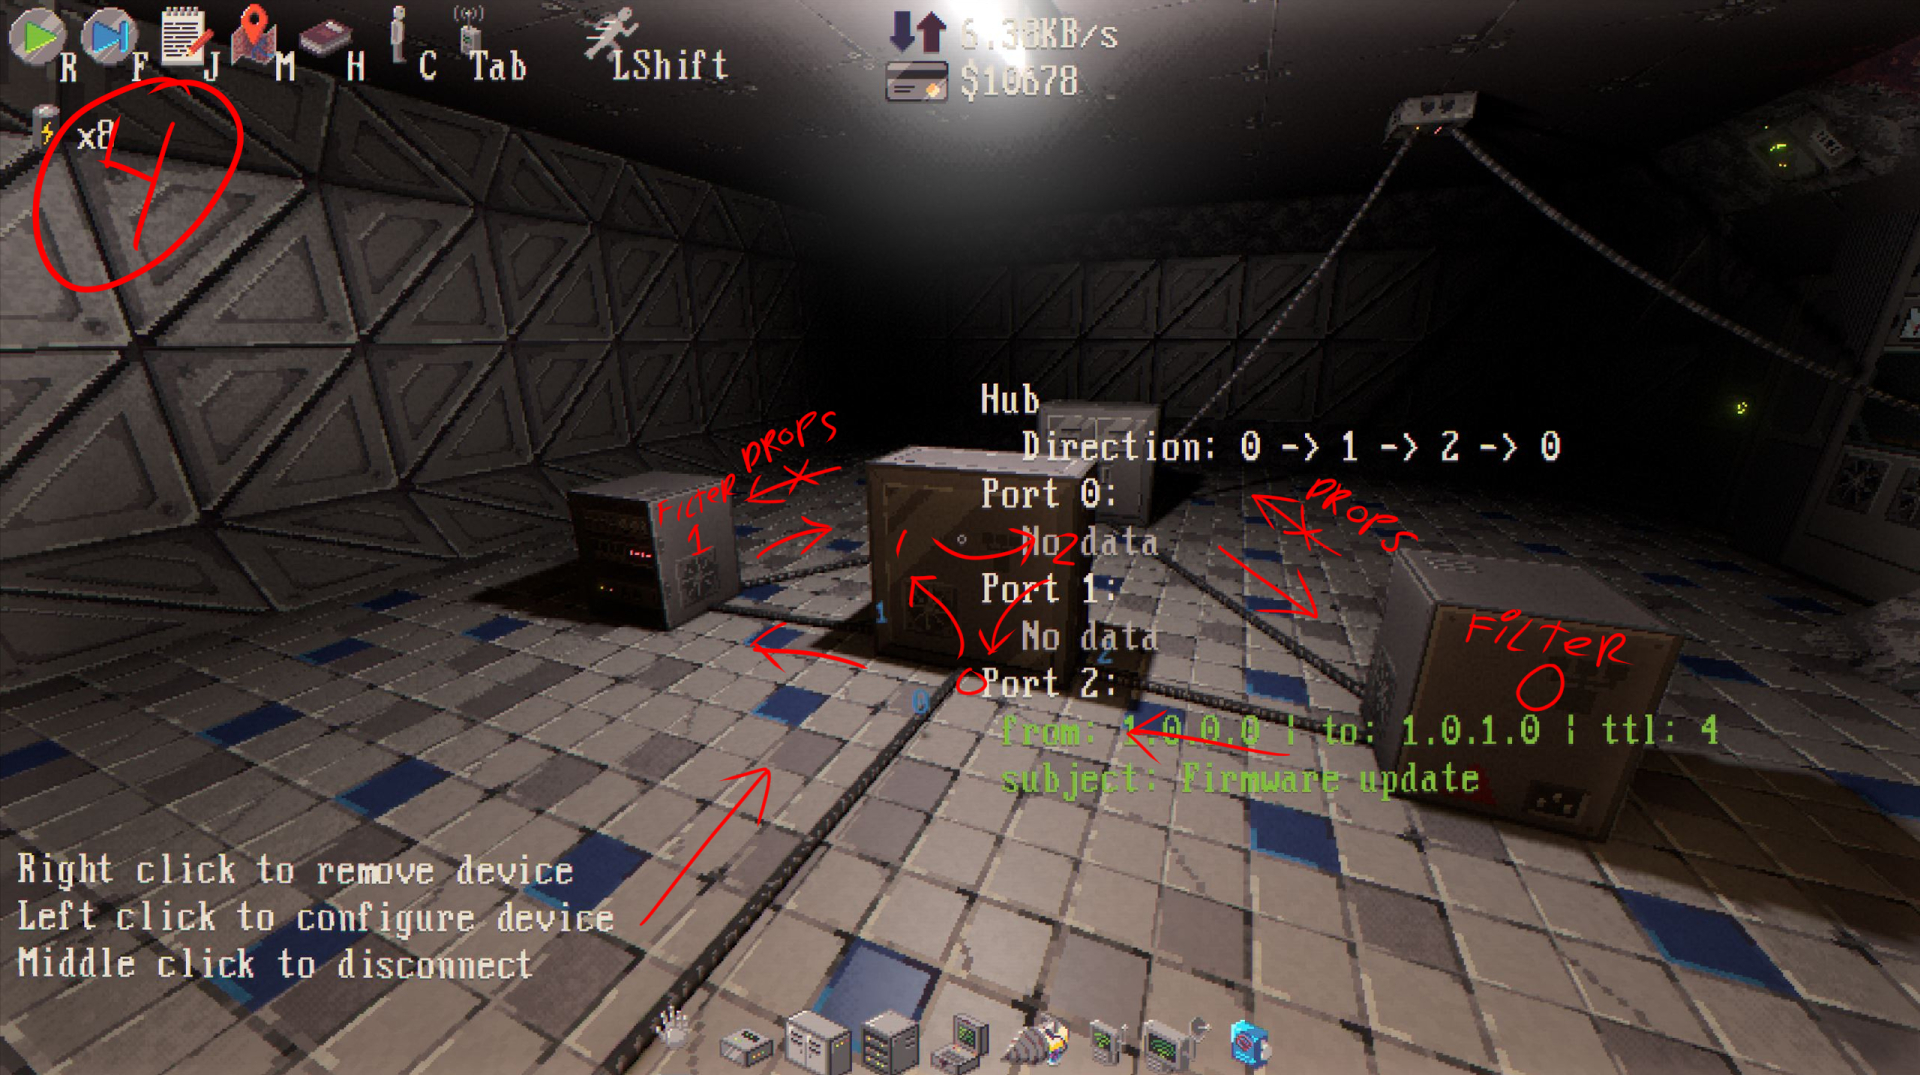
You likely have now caught on and see the pattern I’m trying to lay out.
We can’t send packets through one way through the filters, so we go the way that isn’t being filtered at all, which I also illustrated in the images. 그래서, 예, I do believe this entire puzzle is to teach us about filters and their uses.
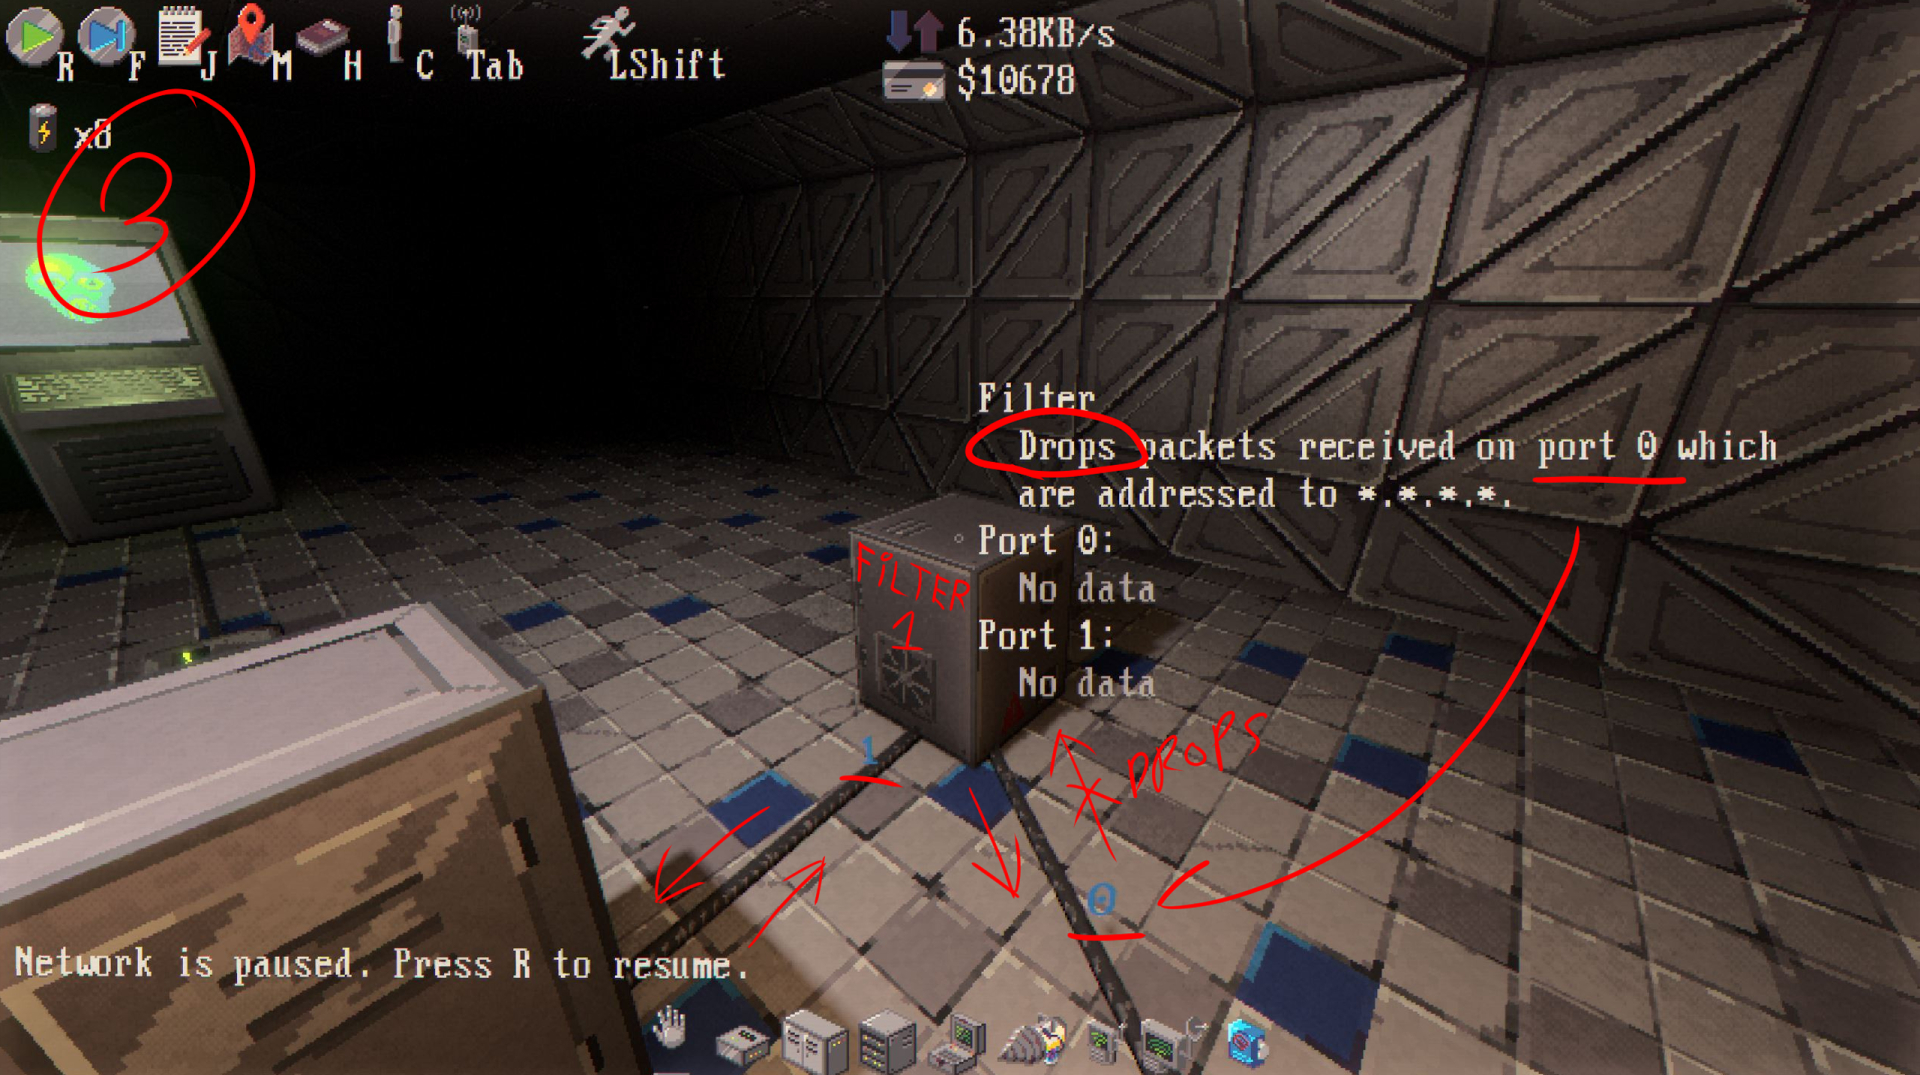
지금, as our packet arrives at filter 1 via its port 1, it won’t be dropped and continues to its port 0 and back to our beginning hub, for which you can reference the image.
As you see, our packet arrived at port 1 from filter 1, and this package will go directly to the hub’s port 0 because of the configuration. It then leaves for the bridge to be converted to address 0.0.1.0 and on to your network to cry for help, receive and send replies to updates, and the like.
Please be careful while digging; you can glitch out of the map and die. Besides that, I hope this helped you understand how the mechanics work a little more. And remember to read the posters and notes, even if they make no sense at first! They explain quite a bit, to be fair, but it only tends to make sense afterwards.