This guide provides a wealth of information for Urbek City Builder players. You will find a range of helpful advice, such as tips and tricks, suggested layouts, effective strategies, methods for progressing your city, and even guidance on how to win a Path.
일반 팁: Food and Work

The Food-Work Cycle
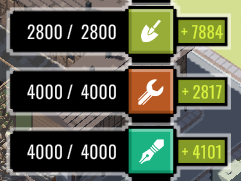
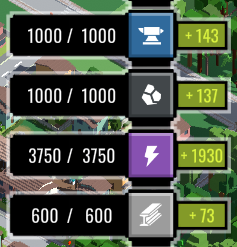
Maintaining a healthy balance between food and work is crucial in Urbek City Builder. Resource management is a fundamental mechanic in the game, and players must pay close attention to the food and work numbers displayed on the upper right UI.
게임 시작 시, players will have more work (약 2000) than food (~에 대한 200). 이 문제를 해결하려면, it’s recommended to first build fields, followed by housings, and then repeat this cycle.
As a general rule, when you have a surplus of food, focus on building more housings to generate additional work. 거꾸로, if you have an abundance of work, prioritize constructing farming-related buildings to generate more food. This cycle of balancing food and work is the key engine that propels the growth of your city.
It’s essential to always maintain a decent surplus of both food and work to address any developmental requirements.
Producing Food
In Urbek City Builder, players have four main options for generating food: farming, fishing, orchards, and research centers. While different maps may offer variations – such as the Center Pivot Irrigation taking the place of farms in desert maps – all food generation methods fit into these four categories.
게임을 진행하다 보면, you will gradually unlock more efficient buildings and upgrades for each food generation category.
농업

- Farming Becomes available from the very beginning of the game, being the most basic method for Food generation. 반면에, it occupies a lot of space and needs heavy planning.
- 업그레이드: 필드 – Farm House – Grain Silo – Modern Grain Silo – Farm Shed – Food Plant.
어업

- Reaching 1050 Population allows the players to place Docks, which will turn nearby waterfront Housings into Food-producing Fishermen’s Houses. They provide a large amount of Foods with a very small space footprint, yet require natural bodies of water to work.
- 업그레이드: 독 – Fishermen’s House.
Orchard

- Reaching 7000 Population unlocks Orchard. It requires less space, although it needs more Skilled Work and should be free of Pollution. The Research Center route is also locked behind this route, asking players to develop extensive Orchards.
- 업그레이드: Orchard – Fruit Processor.
연구 센터

- Research Center unlocks after having 5 Fruit Processors and 33000 Population, and needs additional Offices in its proximity. It unlocks VERY late in the game (you can already win the game after reaching 33000 Pop.), consumes a LOT of resources, while being the most effective route of producing Foods – 9000 Foods in a two-square space or 21000 Foods in a four-square space.
- You won’t really need it for most of the playthroughs, but very helpful if you need to reach 35000+ population and already run out of spaces for other Food-producing methods.
- 업그레이드: (Faculty of Botany) – Food Research Center – Advanced Food Research Center.
Generating work in Urbek City Builder is a simple process – all you need to do is construct more housing and provide additional services. As you expand your city, your labor force will gradually increase in size.
There are three levels of workers: unskilled, skilled, and high-skilled. Different buildings and services require different types of workers, so it’s important to keep this in mind as you plan your city layout.
Housing will automatically upgrade or level up as more services are provided. Higher-level housing will provide both lower- and higher-level workers. It’s recommended to upgrade most of the housing in your city to the downtown level for maximum efficiency. For more details on housing, please refer to the housing guides below.
Keep in mind that schools do not directly generate workers. 대신에, they increase the maximum amount of workers you can accumulate.
일반 팁: 에너지, 석탄, and Iron
Energy and Coal
전기, represented by the purple symbol, is an essential resource for nearly all buildings in Urbek City Builder, starting from the early game.
At the outset of the game, wood is the primary source of energy for your city. 당신이 진행함에 따라, you will transition to coal, and eventually nuclear power. Throughout most of the game, your city’s energy needs will be met by coal plants and heavy coal plants.
In the early and mid-game, the most efficient way to produce coal is by surrounding a coal mine with housing. All street-facing housing units within a 5-square radius of the coal mine will transform into coal miner’s houses, which will eventually upgrade into 3-story coal miner’s houses. 경기 후반에는, you can replace these structures with deep coal mines.
Iron and Steel
In Urbek City Builder, two critical buildings are needed to upgrade housing units to the downtown level: schools and bus stops. Both of these structures require iron (blue symbol) and steel (grey symbol). Steel is produced by combining iron with steelworks.
경기 후반에는, factories become one of the primary sources of science but require one steel per square if you’ve selected the science-producing policy.
Similar to coal, the most efficient way to produce iron is by surrounding an iron mine with housing. 게임 후반부에는, you can also replace these structures with deep or open pit iron mines.
일반 팁: The Parking Lot Trap
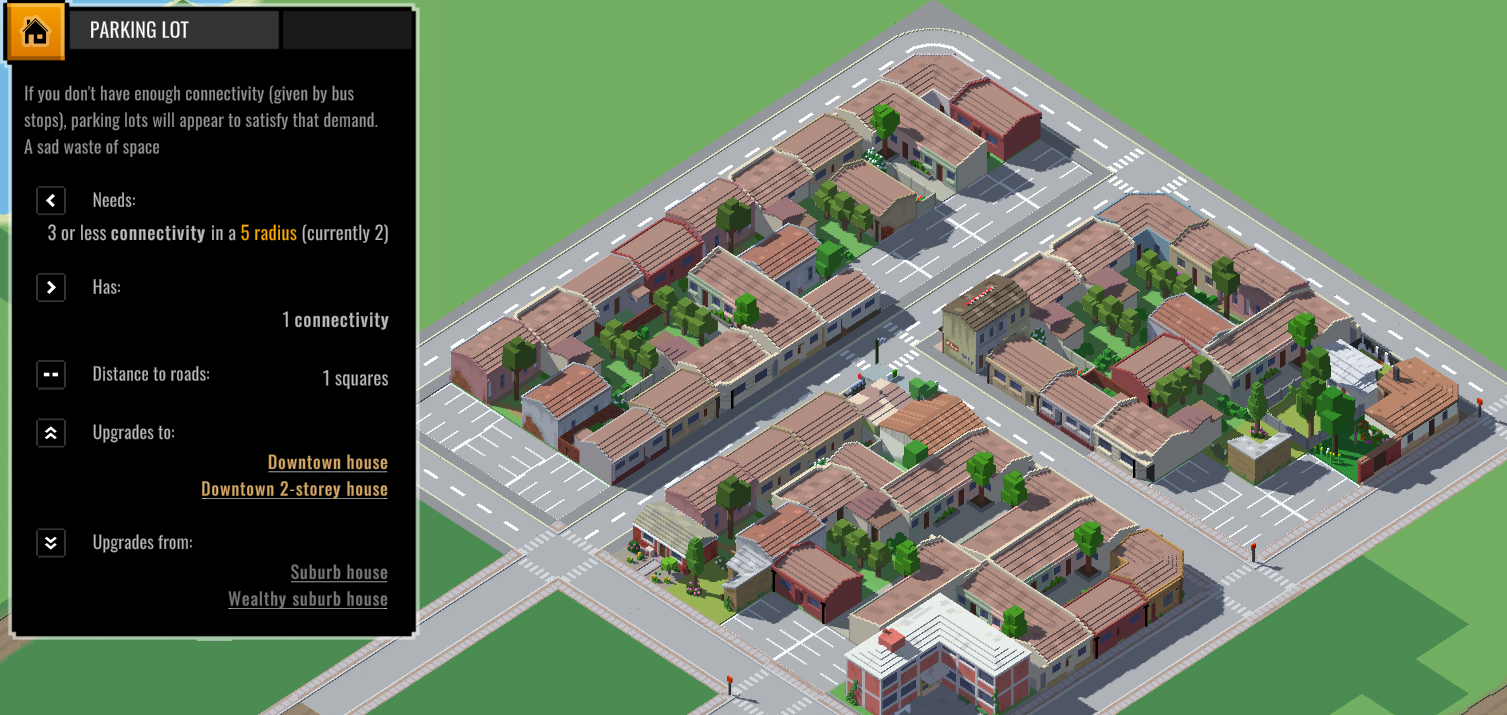
Once you reach a population of 5500 in Urbek City Builder, your existing highest level housing, Wealthy Suburb Houses, will be upgraded to Downtown Houses if you have a high school and a repair shop nearby. 하지만, this population milestone also unlocks Parking Lots. Downtown Houses require 4 Connectivity, and if there isn’t enough nearby, housing units will be replaced by Parking Lots to meet the demand.
This can lead to a severe Work shortage in your city since Parking Lots don’t provide labor force. Without intervention, your city may fall into a Work shortage deadlock where you can’t build anything to reverse the situation due to a lack of labor force.
The only way to prevent Parking Lots from spawning is to build Bus Stops, which provide the 4 Connectivity required and force Parking Lots to upgrade back to housing units. It’s essential to note that Bus Stops require Steel.
요약하자면, it’s crucial to prepare for the Parking Lot Trap by building Steelworks and ensuring a steady Steel income when your city approaches 5000 인구. Begin constructing Bus Stops on every other street to avoid a potential Work shortage deadlock.
일반 팁: Food Consumption
In the mid-game and beyond, upgrading the Housing structures in your city can result in a significant increase in the amount of Food consumed, particularly when constructing higher-level buildings.
It is advisable to maintain a surplus of at least 2000-3000 Food in the mid- to late game, as this will serve as a cushion against sudden spikes in Food consumption.
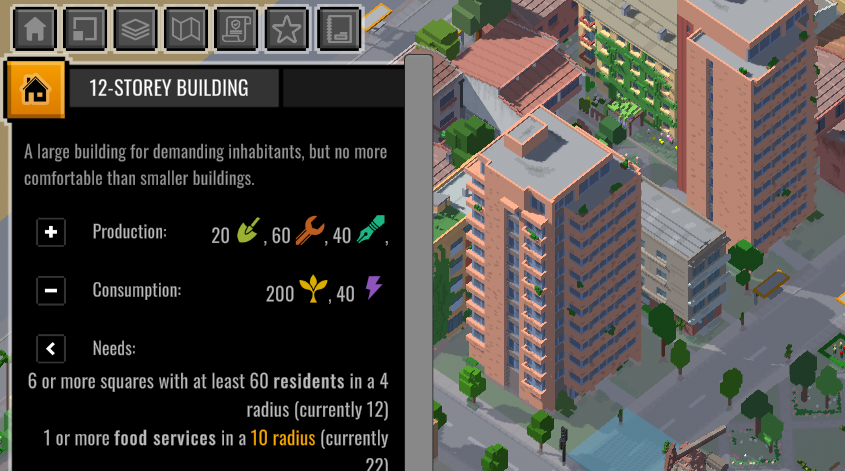
The 12-Story Building, which is one of the most advanced Housing structures, requires a staggering 200 Food to produce 60 Highly Skilled Workers (most Housing structures require less than 100 음식). Although this building trades Food for Highly Skilled Workers, it is not a worthwhile investment of Food resources until the late game when Research Centers enable you to convert Highly Skilled Workers back into Food. To avoid wasting Food, consider lowering the Healthcare number in your city below 3 or constructing Banks to prevent 12-Story Buildings from appearing.
Another significant source of Food consumption in your city is the Iron/Coal Miner’s Houses. These buildings trade Food for Iron and Coal, which can put a strain on your Food resources. If you are facing a critical shortage of Food, consider replacing these structures with Deep Coal/Iron Mines, which do not consume any Food.
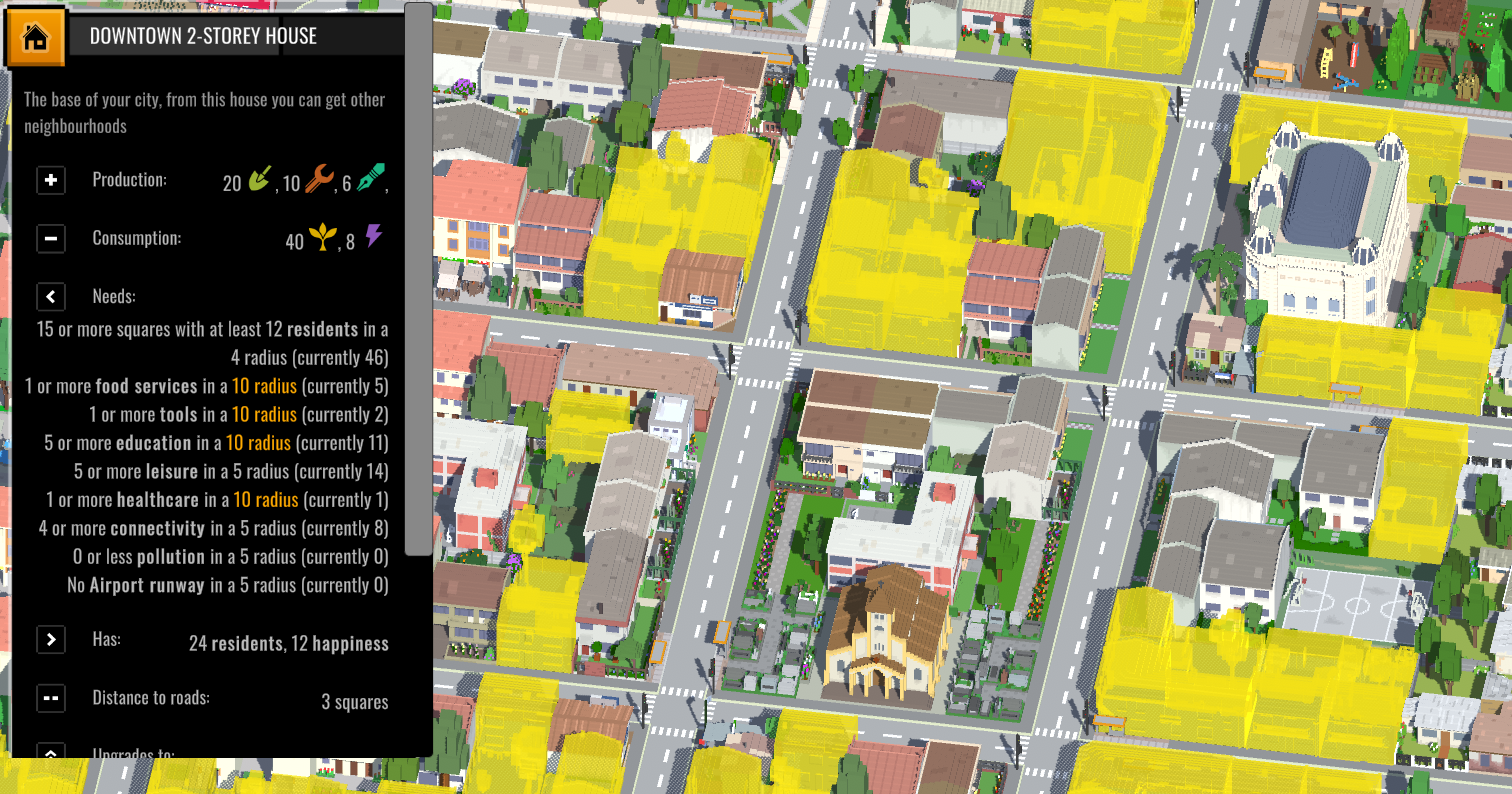
주택: 도심
With below requirements fulfilled near your Housings, you will get Downtown-type Houses:
- 15 Residents in a 4 sq. radius – 이것은 의미합니다 “density,” or large street blocks full of Houses.
- 1 Food services in a 10 sq. radius – This means Food Market or Fish Market.
- 1 Tools in a 10 sq. radius – This means Repair Shop or Hardware Shop.
- 5 Education in a 10 sq. radius – This means High School.
- 5 Leisure in a 5 sq. radius – This means Bar and/or Cabaret.
- 1 Healthcare in a 10 sq. radius – This means a Clinic.
- 4 Connectivity in a 5 sq. radius – This means Bus Stop.
- 0 Pollution in a 5 sq. radius – This means at least 5 tiles away from an Industrial building.
Downtown Houses will produce most of the city’s Skilled and H. Skilled Works. 추가적으로, all the various neighborhoods, as well as high-level Housings, need to be upgraded from the Downtown 2-Story Houses. 요컨대, it would be better to have at least 1/2 of the urban area in your city dedicated to Downtown Houses.
With better connectivity services (지하철) and Retail services, Downtown Housings could be further upgraded to higher-level buildings. These high-level buildings fall into two types,
Residential 그리고 Mixed.
- Mixed Buildings necessitate the presence of nearby Banks, but they require only a small amount of Healthcare. 대조적으로, Residential Buildings require better Healthcare, but they do not function well when there are Banks in close proximity. Both Mixed and Residential Buildings require Retail structures.
- Mixed Buildings have the ability to provide Retail, 도구, and Food Services on their own. Once you have established an area with a concentration of Mixed Buildings, it is no longer necessary to build Food Markets and Hardware Shops in the nearby street blocks.
The 12-Story Building is the most advanced Residential Building and produces the largest number of Highly Skilled Workers (20 Unskilled, 40 Skilled, 그리고 60 Highly Skilled Workers) compared to other Housing structures. 하지만, constructing a 12-Story Building requires a significant amount of Food resources (200 음식).
Downtown Houses have the potential to upgrade to 12-Story Buildings if there is a Hospital nearby and ample Leisure facilities available.
The 8-Story Mixed Office-Commercial Building is the most advanced Mixed Building and offers the widest variety of services (30 Unskilled, 27 Skilled, 그리고 35 Highly Skilled Workers) along with Retail, 도구, and Food Services. It also requires relatively less Food to construct (120 음식).
Downtown Houses have the potential to upgrade to 8-Story Mixed Buildings if there are Banks and Metro Stations nearby, as well as an Airport and Airport Runway in the city.
The 8-Story Mixed Building is the only Housing structure categorized as an Office and is essential for placing Research Centers to produce Food in the late game. It is recommended to have at least one area in your city filled with 8-Story Mixed Buildings.
Note that all Downtown and higher level Housing structures are either 1×1, 1×2, or 2×2 in size.
주택: Downtown Variants
Downtown Houses can also upgrade to two variants: Artist Neighborhood and Night Life Neighborhood.
Artist Neighborhood
Downtown 2-Storey Houses with turn into these by having Bookstores, Libraries, 그리고 1 Sculpture nearby.
Compared to normal Downtown Houses, they provide more (13) Happiness and 2 extra Cultures per sq.
Night Life Neighborhood
Downtown 2-Storey Houses can be upgraded to Artist Neighborhoods by having Leisure Buildings and at least 1 Cool Park in close proximity.
In comparison to regular Downtown Housing, Artist Neighborhoods provide more Happiness (13) and two additional Night Life options per square. 하지만, they also consume Goods, which makes the upgrade cost of Night Life Neighborhoods considerably higher than that of Artist Neighborhoods.
Strategy Note: Both Artist and Night Life Neighborhoods are pollution-resistant, whereas Downtown Houses cannot withstand pollution. 따라서, you can build up a region to Downtown level, upgrade it to an Artist Neighborhood, and then develop Industries in its vicinity instead of maintaining a 5-square buffer zone between your residential and industrial zones.
주택: Shanty Town/Social Building
Shanty Town – Blocks
If there is pollution in the vicinity of Housings, often caused by Industries, they will deteriorate into Shanty Town (slums) with significantly lower Happiness levels.
Groups of Shanty Towns will result in Rebel Houses, which are the earliest forms of Self-Organization in the game. Sufficient Self-Organization will unlock buildings such as Anarchist Bars (higher Night Life), Self-Managed Bookstores (higher Leisure), and eventually Anarchist Communes (higher Happiness for residential areas).
Shanty Towns can also be upgraded to Blocks if provided with Food Services, which can accommodate more population while still maintaining very low Happiness levels.
Social Buildings
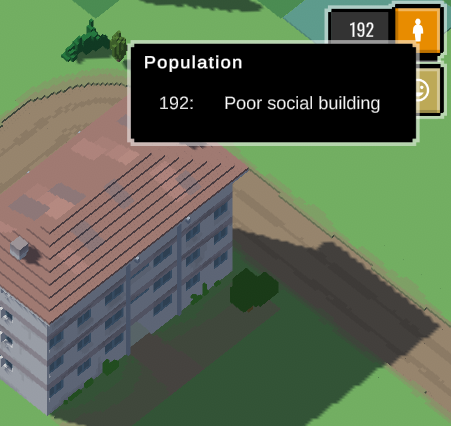
When your city’s population reaches 8000, you will unlock Social Buildings, which are a type of social housing. These buildings can house a lot more people than Blocks and are capable of withstanding Pollution. Each Social Building can accommodate up to 192 residents, although the UI only shows 48.
If you want to optimize your city, it is recommended to replace all Shanty Towns and Blocks with Social Buildings eventually. These buildings are also useful for filling in the edges of your urban areas, where only basic Wooden Huts would normally appear due to the lack of neighbors. 추가적으로, Social Buildings can trigger nearby Houses to upgrade by providing high-density neighbors, and they don’t have any density requirements.
High-Level Social Buildings
When given Education, Food Services, Healthcare, and Leisure, Poor Social Buildings can be advanced into Medium and Comfortable Social Buildings.
The Comfortable Social Building is significant for Path of Leisure success because it has a conventional Happiness value of 10 and can tolerate Pollution.
주택: Happiness Housings
Two routes of Housing upgrades have much more Happiness than others, although they have specific requirements.
Villa – Mansion
The Villa becomes available in the early stages of the game, while the Mansion is only unlocked once a player reaches a population of 6500 and a happiness level of 10. These upgraded housing options are obtained by constructing green areas such as parks in the vicinity of the basic wooden huts.
It is noteworthy that the Villa has a unique feature that allows it to exist without any other housing within a 4-square radius. 비슷하게, the Mansion requires no other housing in a 1-square radius. These upgraded residences offer the highest level of happiness attainable in the game, ranging from 13 에게 14 happiness points. 하지만, they come with a trade-off, as they are low-density structures and offer fewer opportunities for skilled work.
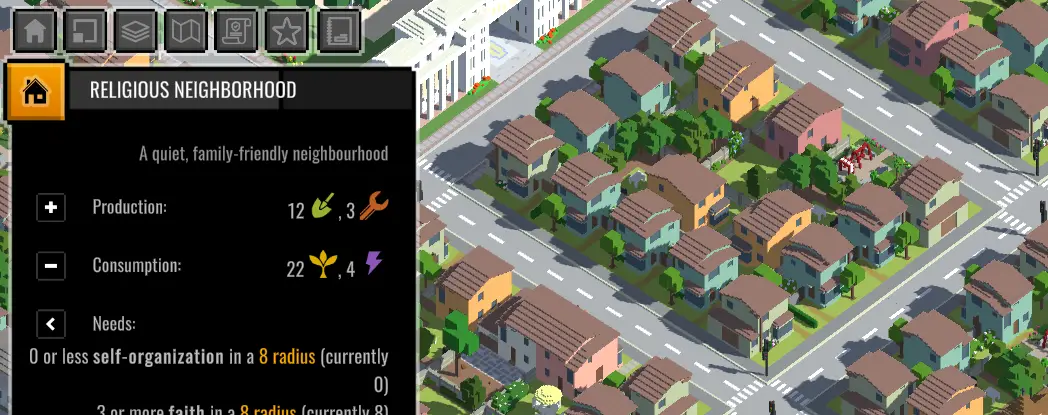
Poor Suburbs – Religious Neighborhood
Once a player reaches a population of 2200, they will unlock the Poor Suburbs, which can be obtained by having basic housing units with a 1 square condominium nearby. Poor Suburbs provide a cheaper way to acquire unskilled labor, with each unit offering 14 unskilled works at a cost of 10 음식. This option is particularly useful in the early stages of the game.
It is important to note that Poor Suburbs can only be upgraded to Religious Neighborhoods. In order to achieve this, players must construct a Police Station (unlocked with 6 Faith and 8000 Population), as well as chapels or churches in the vicinity of the Poor Suburbs. Once these conditions are met, the Poor Suburbs will upgrade into Religious Neighborhoods.
Religious Neighborhoods offer a significant increase in happiness, with each unit providing 14 happiness points compared to the standard housing units, which offer 10-12 happiness points.
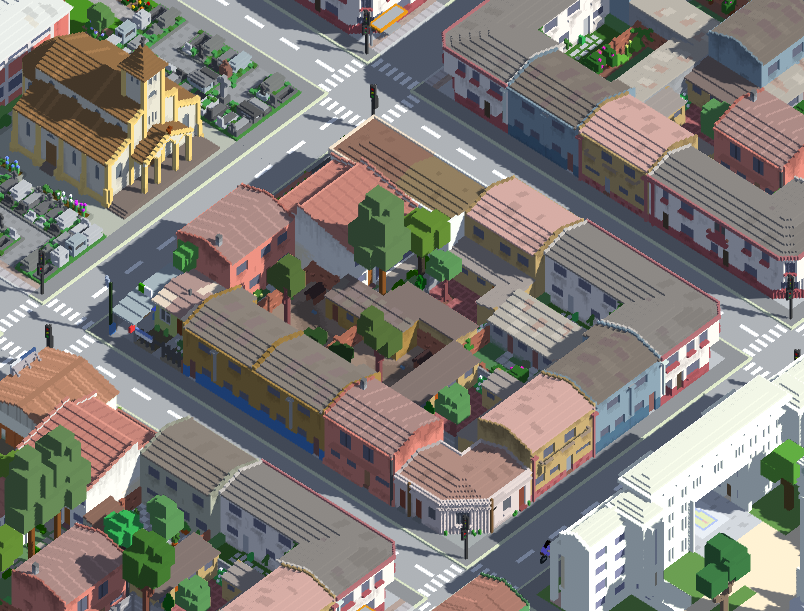
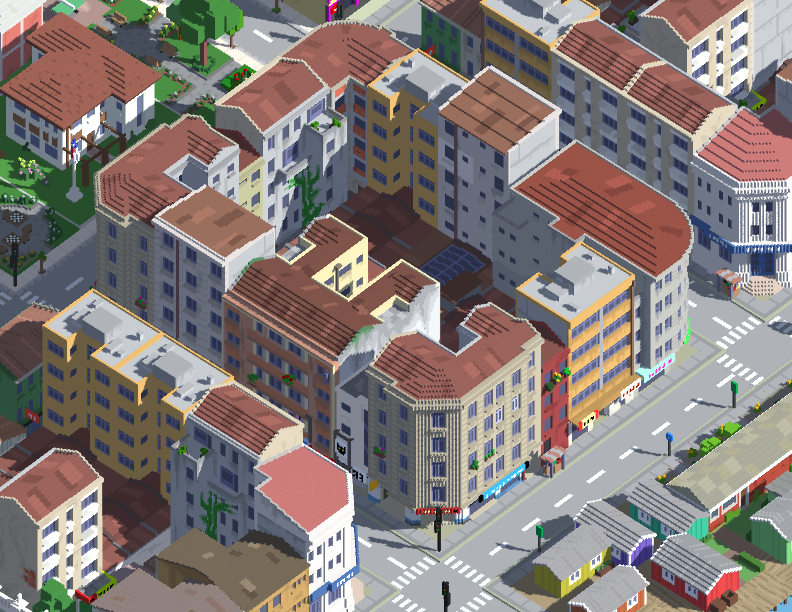
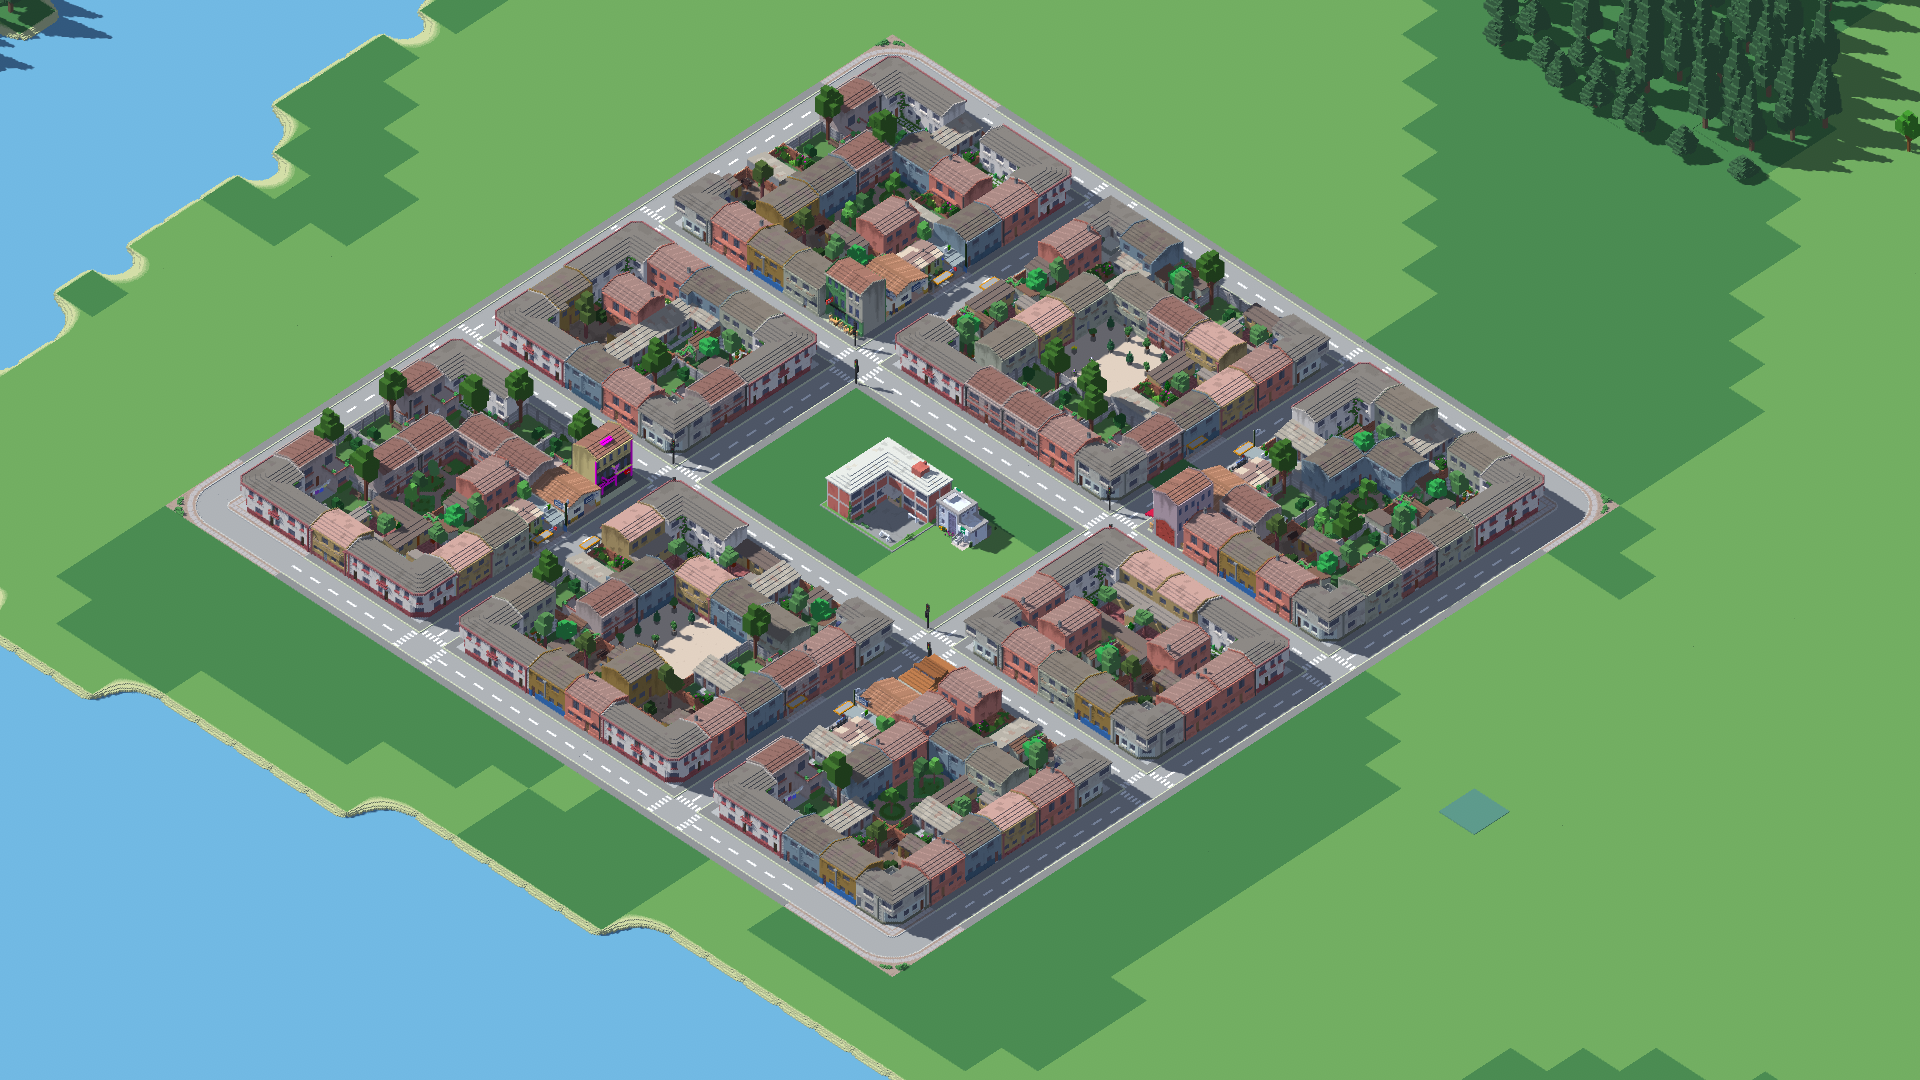
Layout: 도심
Implementing this layout throughout the city should be the most prevalent approach. By strategically placing service buildings in the vicinity, players can upgrade all housing units to their desired type, including high-level residential, high-level mixed, or Downtown variants.
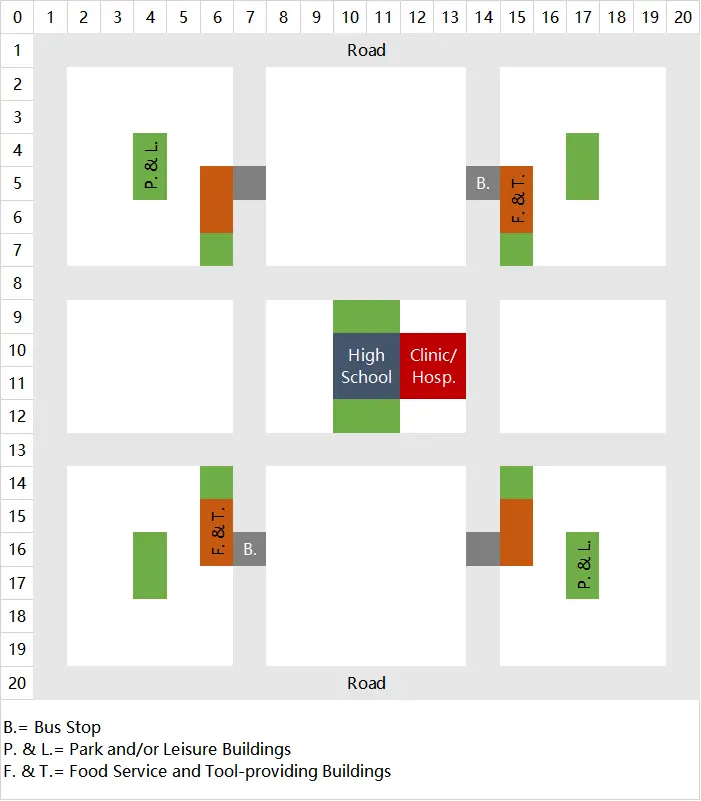
The layout is centered around the coverage of the High School, with all housing units within the designated area falling under the school’s and clinic’s coverage. This approach ensures that the residents receive the necessary education and healthcare services.
Here’s an example of the layout with a fully developed Downtown:
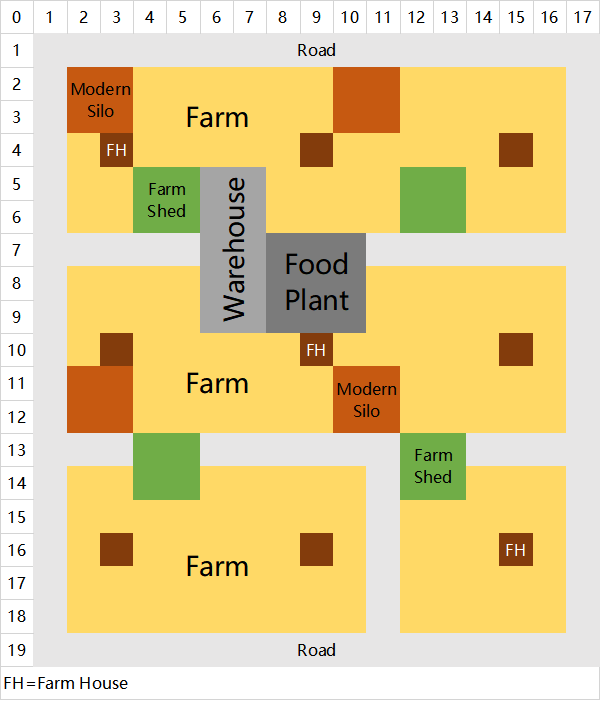
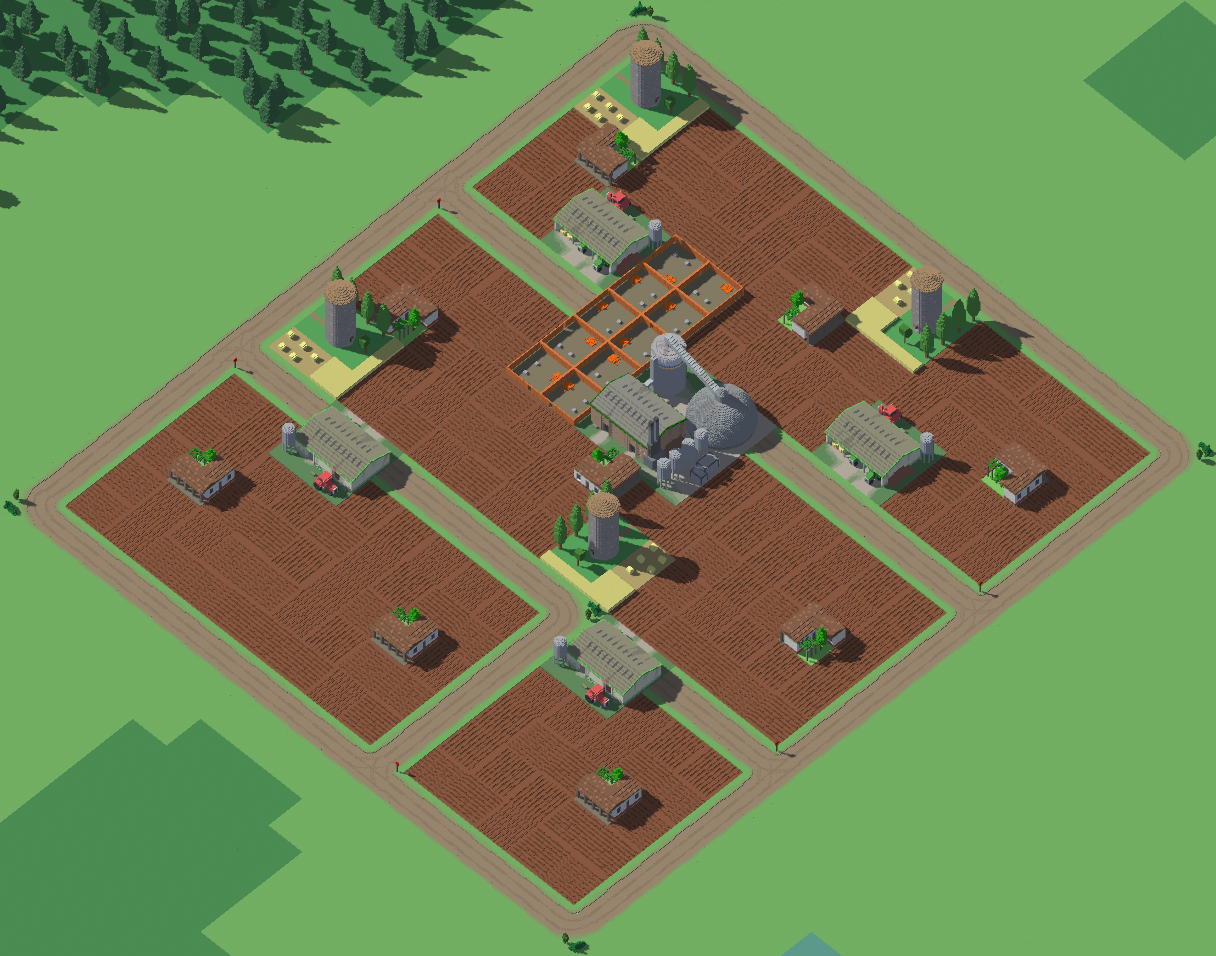
Layout: Farming and Orchard
There are two basic farming layouts that can be applied to different maps with varying terrain features and methods of food production. Despite these differences, the fundamental principles behind these layouts remain the same.
농업
Orchard
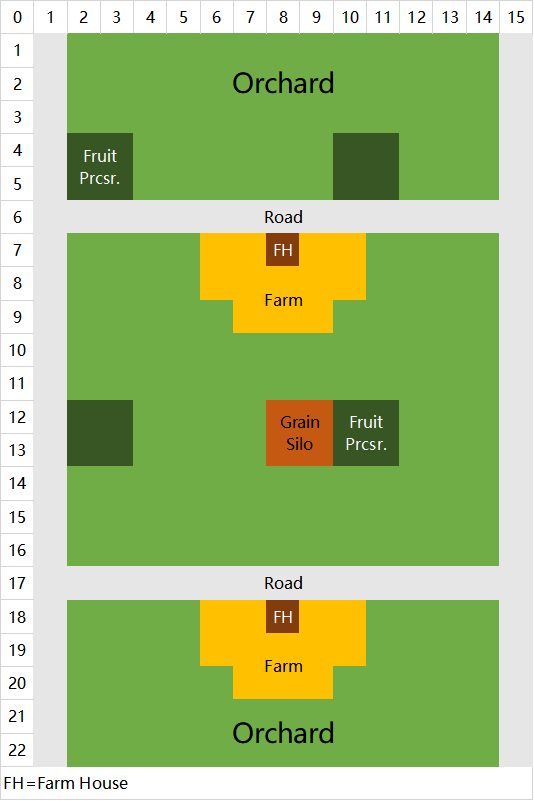
An example of the farming layout:
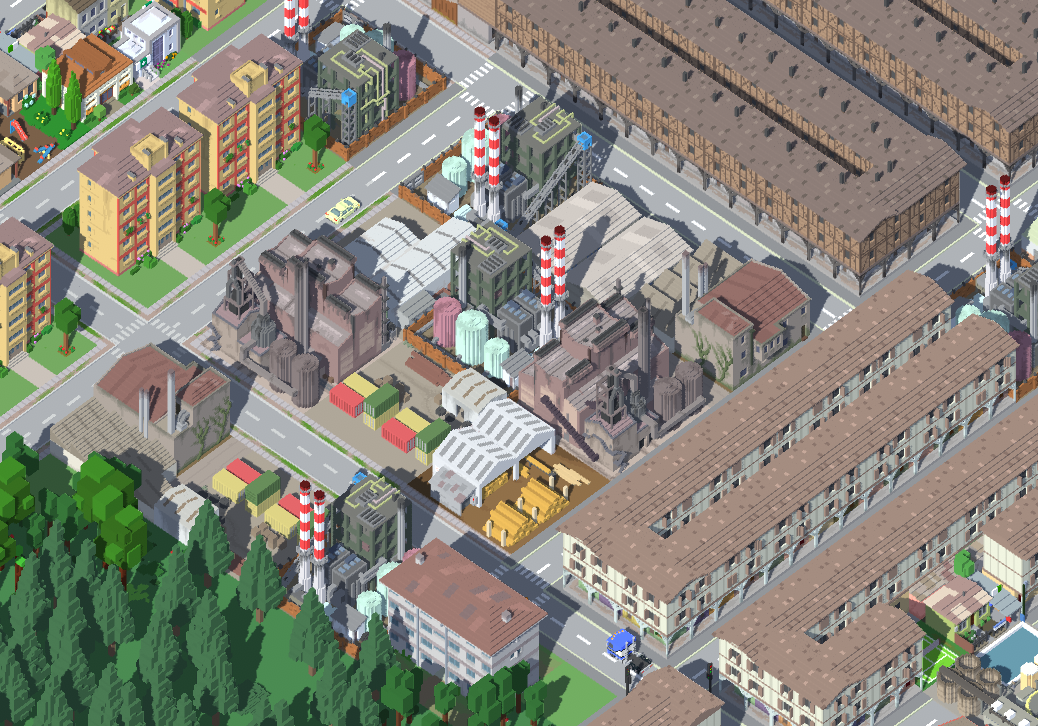
Layout: Industrial Zone
The Pollution layout.
Some industrial buildings, such as the Coal Plant and Steelworks, require nearby residents to function efficiently. 그러므로, this layout includes housing units in the vicinity. 게다가, certain industrial buildings can be upgraded to better versions when warehouses and residents are located in close proximity.
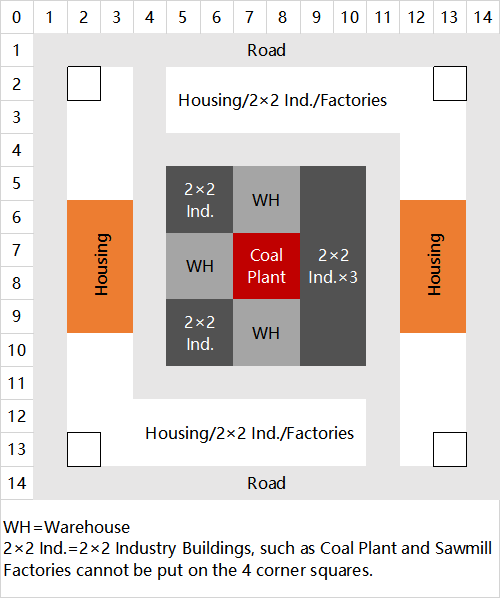
The layout in practice, with Coal and Iron Miner’s Houses acting as nearby residents – these two types of Houses can withstand Pollution, while having good density.
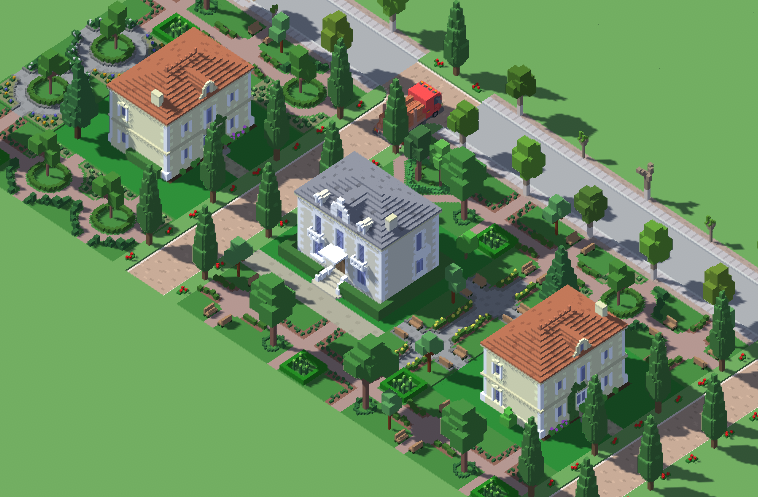
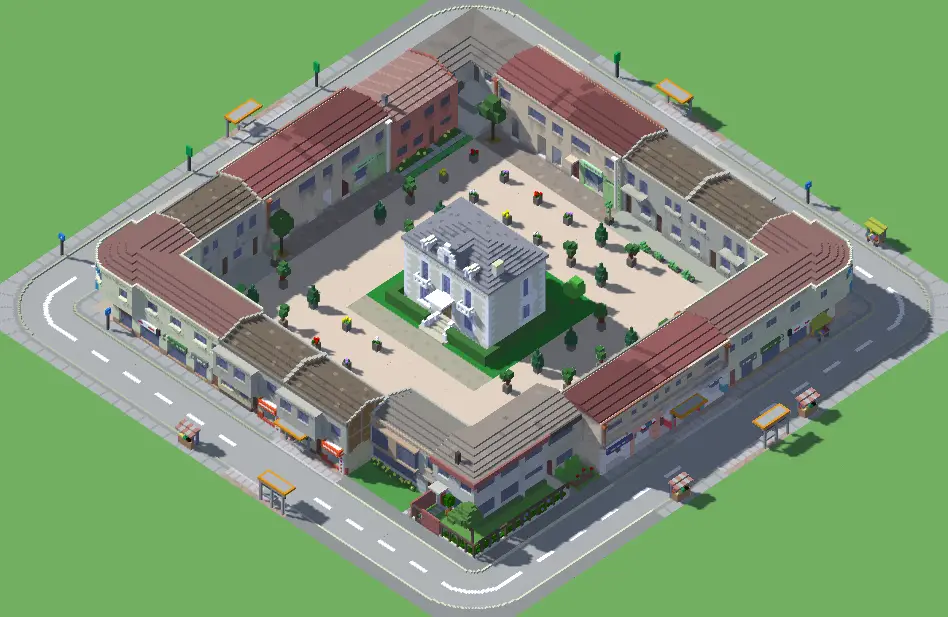
Layout: Mansion
Repeat this layout and get high Happiness en masse.
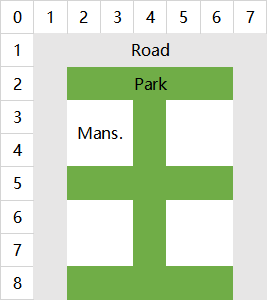
You can also do interesting stuffs with Mansions like below:
Policies
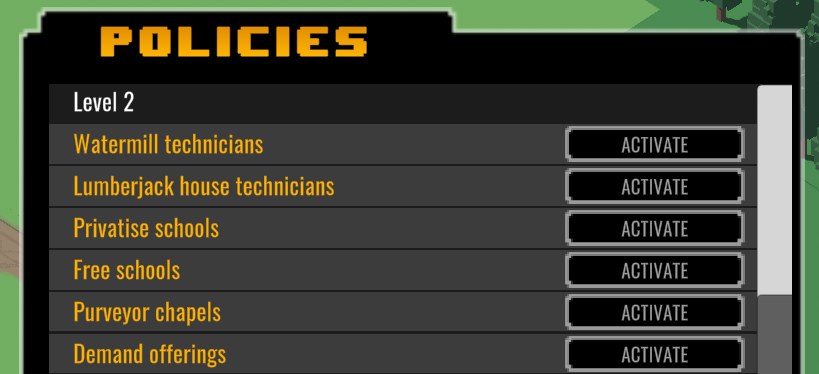
Placing the three policy buildings – Neighborhood Council, City Council, and City Hall– will unlock the ability to pick and change Policies. Higher level policy buildings will also unlock lower level Policies, so you don’t need to build all three.
Almost all Policies have an upside and a downside.
Choosing Policies based on your needs. If you are on the Path of Production or Wealth, then trade Happiness for Food or Energy; if you are on the Path of Leisure, then trade Food or Unskilled Labor for Happiness. Never trade Science until very late game, 그렇지만, as for the most of the time you will be lacking Science.
Notable Policies
- Watermill technicians, Lumberjack house technicians – Nice way to increase Energy production in early and early-mid game. Best for all victories.
- Pay miners in tokens – Decent increase in Iron/Coal production if you don’t care about Happiness.
- Festivals – Raise Happiness with minimal cost.
- Industry R&디 – Important source for mid- to late game Sciences. Best for pursuing the Path of Productivity.
- Neighbourhood life – This Policy doesn’t have a downside if you don’t rely on Supermarkets and Malls. Raise decent Happiness, best for pursuing the Path of Leisure.
- Eating insects – Good for late-game Foods production if you don’t care about Happiness.
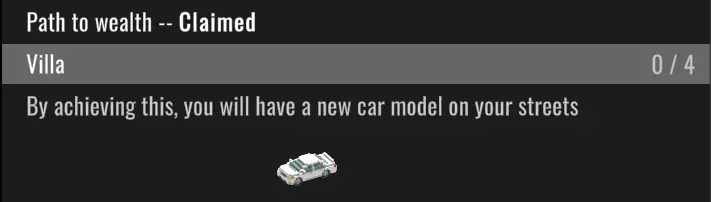
Career Path, or How to Beat the Map
It is possible to “win” every map by completing the achievements associated with one of three career paths: Path of Wealth, Path of Productivity, and Path of Leisure. Once a player has completed all eight achievements for a particular path, their city will be scored for that playthrough.
It is important to note that once a player has completed the initial requirements for a particular path, their playthrough will be locked into that path, and they will not be able to choose a different path. 그러므로, players should plan their strategy carefully at the beginning of the game.
추가적으로, it is essential to use the specific building types mentioned in the achievement requirements. Upgraded versions of the buildings will not fulfill the requirements, so players must use the appropriate building types specified in the achievements. 예를 들어, if an achievement calls for Grain Silos, using modern Grain Silos will not count towards it.
Path Requirements:
- Villa ×4
- Wealthy Village House ×60
- Wealthy Suburb House ×80
- Modern 2-Storey House ×40
- Mansion ×3
- Mixed Commercial-Residential ×10;
5-Storey Residential ×10 - 5-Storey Mixed Commercial-Residential ×10;
은행 ×5 - 8-Storey Mixed Office-Commercial x30
This is the easiest Path to achieve.
All the requirements can be met naturally when developing your Downtown to higher level.
The only notable obstacle is the prerequisite for the final requirement (8-Storey Mixed) – the Airport – which means reaching 33000 Population. Grow your city to 33000 Population and you will win this Path.
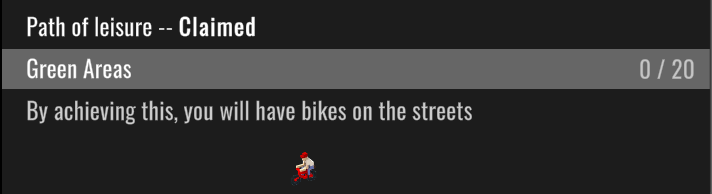
Path Requirements:
- Green Areas ×20
- 스포츠 ×20;
Multisport Court ×3;
Village Bar ×3;
Village Bar 2-Storey ×3 - Green Areas ×40;
Chapel ×10;
교회 ×5;
Floral Park ×3 - Bookshop ×5;
2-Storey Bookshop ×10;
도서관 ×10 - Artist Neighborhood ×15;
Religious Neighborhood ×15;
Happiness ×11 - Night Life Neighborhood ×15;
Happiness ×12;
Population ×12000 - Comfortable Social Building ×15;
University ×2;
Happiness ×13 - Green 5-Storey Residential ×50;
박물관 ×3;
Happiness ×14
This is the medium-level difficulty Path.
Most of the requirements are fairly easy to meet, just that you need to go out of your way to build a variety of buildings (who would normally build 10 Chapels or 3 Museums?).
반면에, Happiness is not that hard to raise, if you can carefully upgrade/replace your low-Happiness Houses to higher Happiness variants, and further employ Happiness-raising Policies. Religious Neighborhoods will be your best friend.
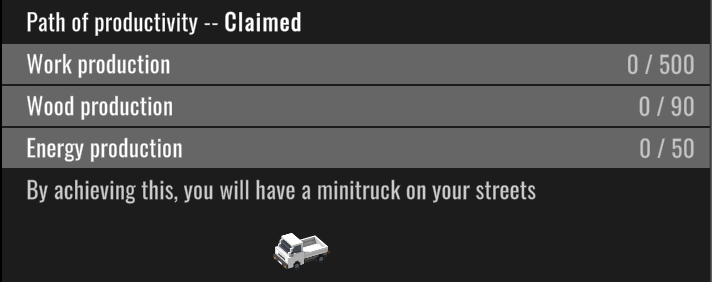
Path Requirements:
- Work production ×500
Wood production ×90
Energy production ×50 - Food production ×1000
Wood production ×200
Energy production ×300
Grain Silo ×5 - Work production ×1500
Skilled Work production ×200
Modern Grain Silo ×5
제재소 ×1 - Energy production ×4000
Skilled Work production ×500
High-Skilled Work production ×500 - Steel Production ×100
High-Skilled Work production ×1500
Goods production ×200
Factory ×15 - Orchard ×100
Food production ×30000
Poor Social Building ×10 - Population ×25000
Energy production ×8000
Solar Plant ×20
Wind Turbine ×10
Biomass production ×60 - Population ×50000
Science production ×300
Even though the game’s tutorial guides you to complete this Path, this is actually the hardest Path. The requirements asks the player to produce a variety of stuffs, which further requires lots of Energy, Population, and/or Sciences.
가장 중요한 것은, the final requirement calls for 50000 Population, a massive Population number that needs tons of Foods to achieve; the focus of your playthrough after 33000 Population will be entirely dedicated to raising more and more Foods.
게다가, this Path is very Science Heavy, and Science is always hard to come by. The Industry R&D policy plus Factories will be your best friend.
Two Hotkey Tricks

영형: The copy button.
G: This is essentially a search button. Select a building and press G, all same buildings in your city will be highlighted.