This guide covers starting out and how to play the game. I am making this guide out of respect for how cool this game is. I want more people to play and enjoy it and a guide just seemed like a simple way to help. I will try and update the guide as I play. Please feel free to comment anything I missed or anything you think may be helpful. This is very WIP
시작하다
Well here we are a new Early Access Game. Lets see what we can find shall we? You start out in the tutorial but I am skipping that to start this guide.
- 첫 번째, gather some friends… You can not play this game solo. I mean you can but lord have mercy its not worth your sanity. IF no one wants to buy the game there are plenty of public lobbies. Make sure your microphone works in the settings first.
- 두번째, You will need to realize that levels in this game are everything. You can not build anything except the absolute basics your first run through. But do not worry you gather levels pretty fast.
- 제삼, Just have fun and carry on.
Your First Adventure
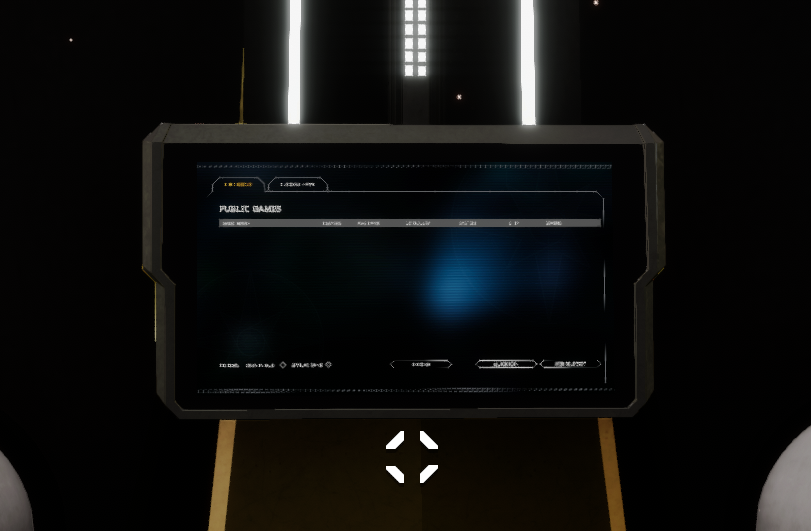
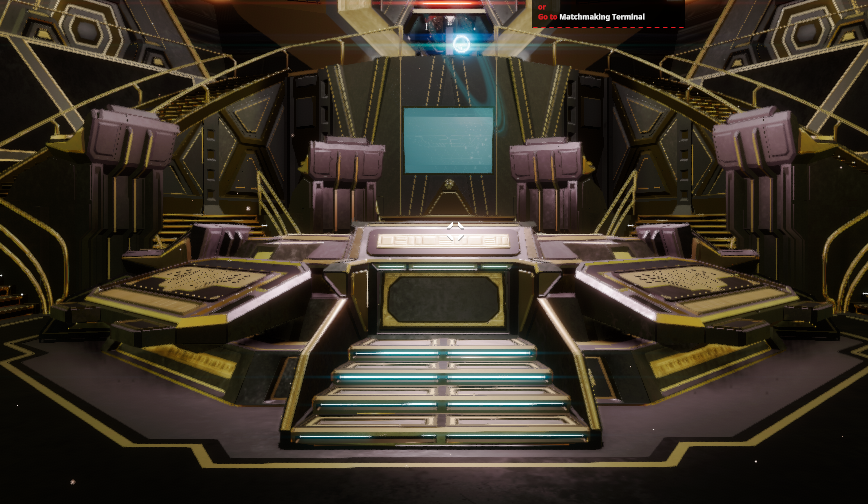
먼저 첫 번째 것들, Join a Group. A reminder to what I said earlier this game is nearly impossible solo. so keep that in mind. Enter the server manager as soon as you leave your pod it is to the left or right. See the image below for what it looks like. Also remember to blame your teammates when all else fails. The instructions of our overlords are absolute.
 ⠀
⠀
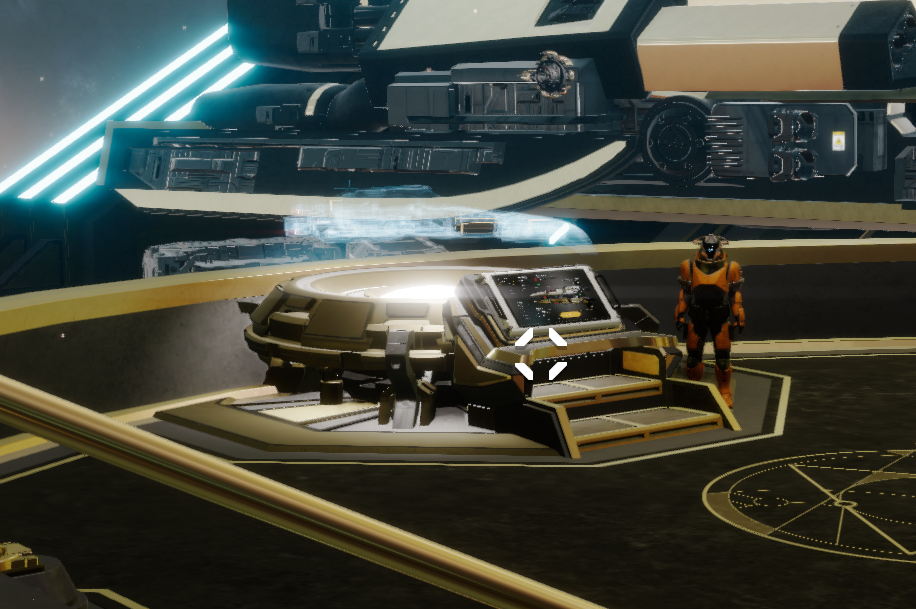
두번째, Pick a Ship. If you are the host you will need to pick either a 2-3 person ship or a 3-4 person ship. Once you exit your pod and enter the large room with the map the terminal will be on your left. The top set of ships contain the 3-4 person ships and the bottom set of ships contain the 2-3 person ships. This heavily effects game play so pick the right kind for your team.
 ⠀
⠀
제삼, Select Your Mission. If you are the host you will need to now pick a mission in the center of the room. Enter the terminal and we can go over the mission types in the next chapter.
 ⠀
⠀
⠀
마지막으로, Once you select your mission you and your team of spacemen will proceed to the doors in the rear of the room and take your seats GTFO or DRG style. 
Mission Types
그래서… You want to hear a story, eh? One about treasure hunters? Well you have come to the wrong place. We are on our pilgrimages.
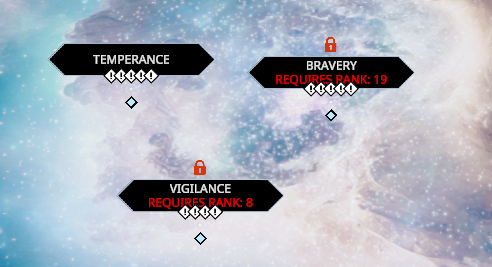
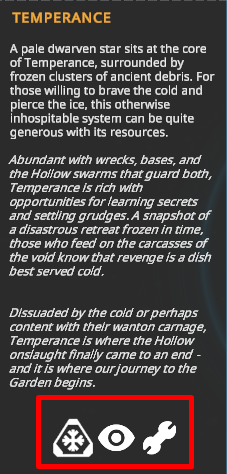
있다 3 Main zones to Helios at this time. (I can not see into Vigilance or Bravery yet but will update once I can)
- Temperance – Starting Level 0
- Vigilance – Starting Level 8
- Bravery – Starting Level 19
You may choose a mission that only has one of these mission types or multiple. I have seen missions of up to 3 types so far in my game play. You gain XP and Cosmetic Loot boxes for completing missions. No pay to win and I hope it stays that way.
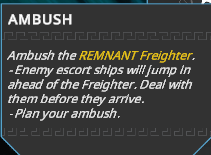
Ambush – A Skull
Ambush is exactly what it sounds like. During the mission you will have an Ambush encounter. During the encounter you will lure a ship in and destroy it gaining loot for your ship. This loot converts into XP at the end of the mission and does not carry over.
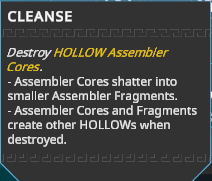
Cleanse – A Geometric Globe
Cleansing is an interesting one. Your mission is to just destroy fragments floating around in space. But be warned its not all sunshine and rainbows you will be attacked.
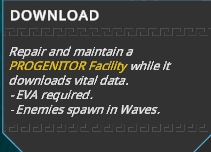
다운로드 – A Satellite Dish Broadcasting
Download missions are fun. It requires someone to go out and repair a large satellite spire while the rest of the crew defends it. There are many puzzles and repairs that need to be done to the dish but you have a limited amount of time so be quick.
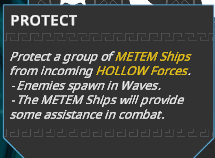
Protect – A Shield
Protection missions require you to protect allied ships. Think of them as escort missions except without the annoying walking speed of half your running speed. It is wave based defense.
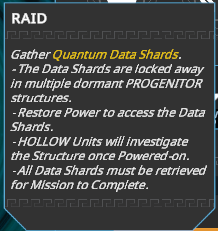
Raid – A set of Hands Stealing a Box
Raid missions involve gathering resources from inside derelict structures while having to repair those structures to get in. Similar to the download missions there are many puzzles and repairs that need to be done to complete them.
Zone Modifiers
Each zone has a set of modifiers inside. I am not sure if these change or remain the same as of writing. Please leave a comment if you notice them changing.
You can find the modifiers at the bottom of any of the zone pages. I have included a screenshot example of Temperance during my play.
Current Modifiers
Ice Shard Storms

These little monsters will mess you up if you are outside or mess up parts of the ship. They come at random intervals and are just not fun to deal with.

Limited Visibility

Limited Visibility messes with your system sensors and reduces how far out you can see. This can be scary when dealing with ships but I do not think it is a major scare factor.

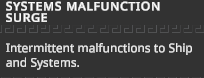
Systems Malfunction Surge

This one is painful. It causes a static like fuzz around your screen and makes things hard to see/use. It can also cause some systems on your ship to malfunction like power. We had our power go out and overload because of this modifier once and it was not a good time.
Ship Mechanics (Startup)
The in game ship mechanics are long and pretty complex to deal with. You need to familiarize yourself with each ship before beginning your adventure. You will want to press
TABso you can get way point markers.
Medical
You start out within your Medical Pod. This pod can heal you and even reconstruct your body in the event of rapid deconstruction. You will notice a Biomass Storage indicator, this shows you how much matter you have to re-spawn with and heal with. You can find more out on your adventure.
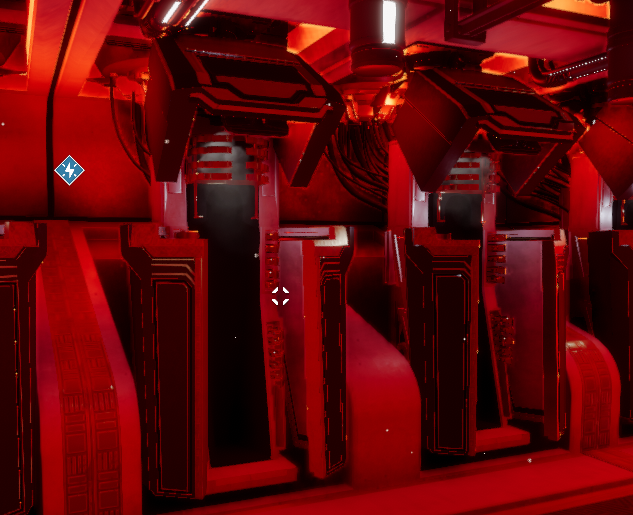
Voice of Metem/Homonculus
Grab the Homonculus.
Computer Terminal
Find the computer station and insert the Homonculus. After inserting the Homonculos start the ship via the switch below the terminal.
Ship Mechanics (Defenses) (WIP)
방패
Shields are just shields. As long as no one uses a bass cannon I think you will be fine. The shield generator is fairly simple compared to everything else…
Power Up
Flip the Switch on the left. Then activate all switches on the inside panel. You will need to hold the activate button for a bit till the levers click in. The basic shield does not cover the rear of itself. 그만큼 3 sides it covers are based on where it is placed. If it is placed on the left of the ship only the Rear, 왼쪽, and Front will be covered on the basic tier shield.
More Boooooooost
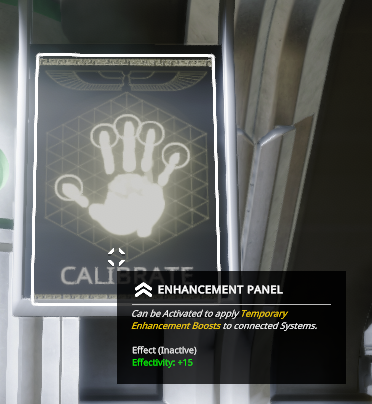
You can boost the shield generator by throwing energy cells into the right slot. This increases the recharge rate by a good margin. You will need to have energy cells unlocked by leveling up first and charge them inside the energy room. (See Power Mechanics)
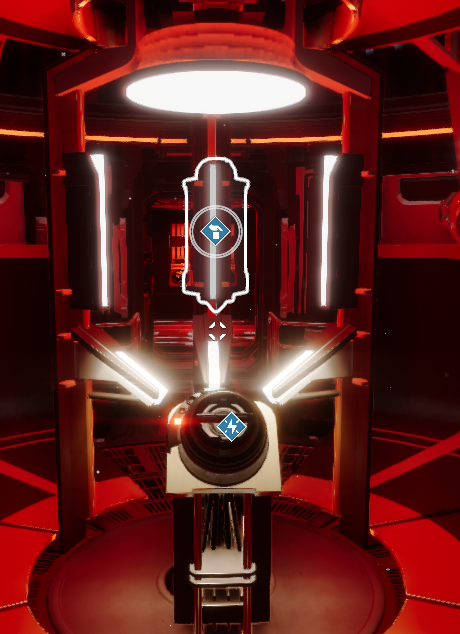
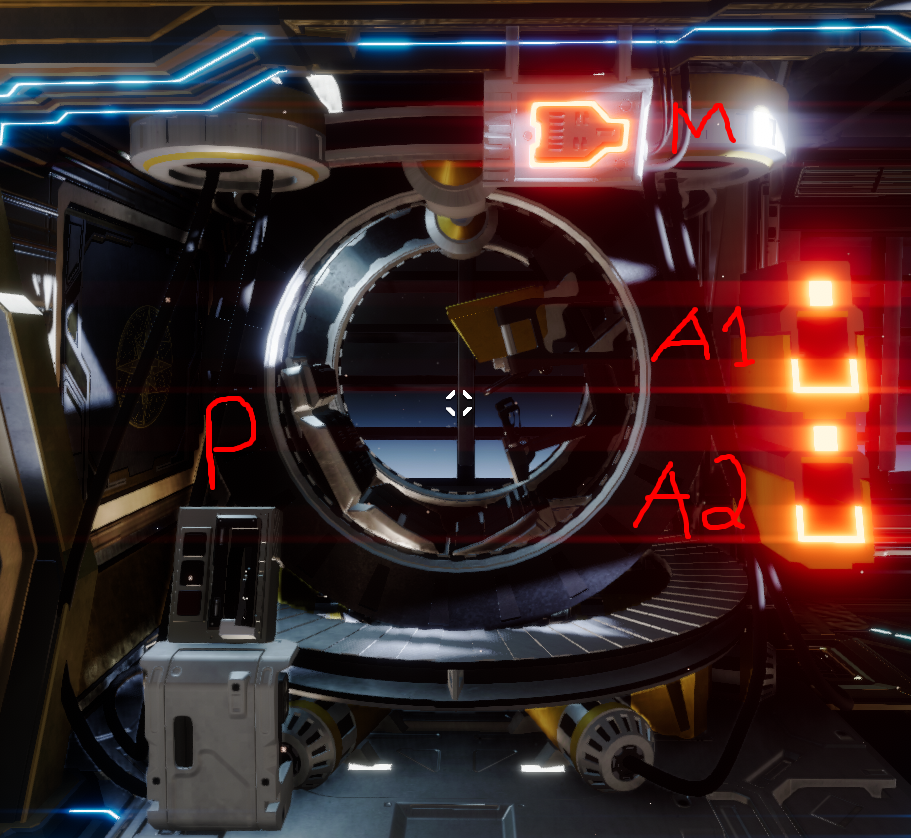
Point Defenses
Point defenses go brrrrrrrrrrrrrrr. Each ammo box grants them 1000 라운드. These things fire like madmen. These things take out missiles and projectiles like its a fire sale.
Point Defense Slots
CA = Current Ammo in the Module
P = Power Status
A = Ammo Slot for adding ammunition
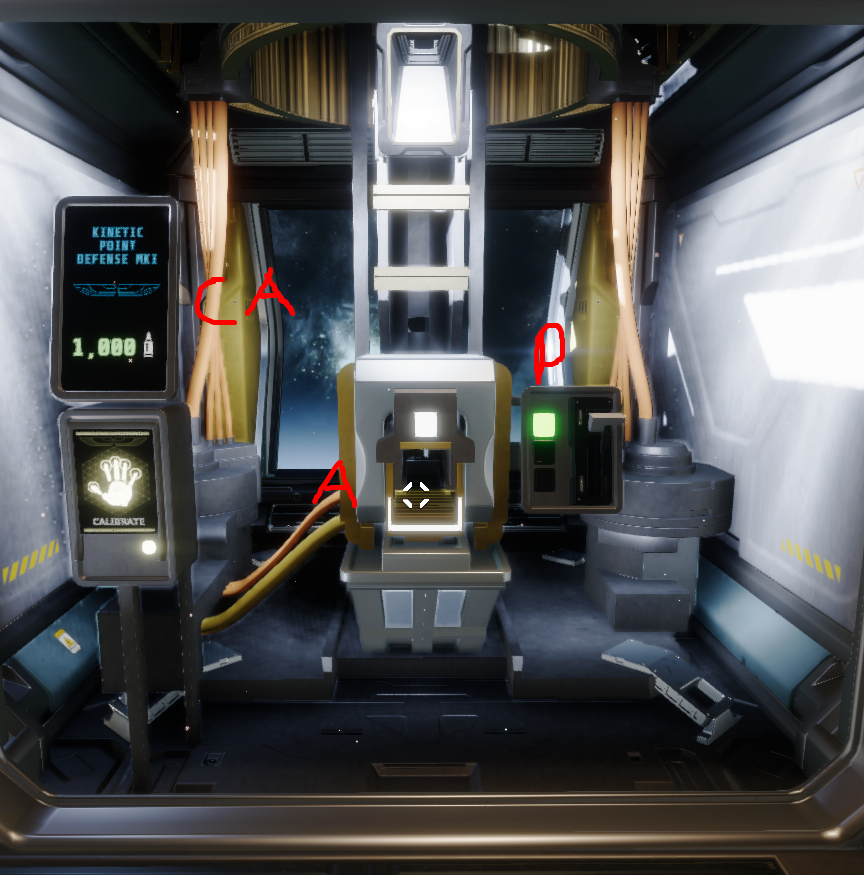
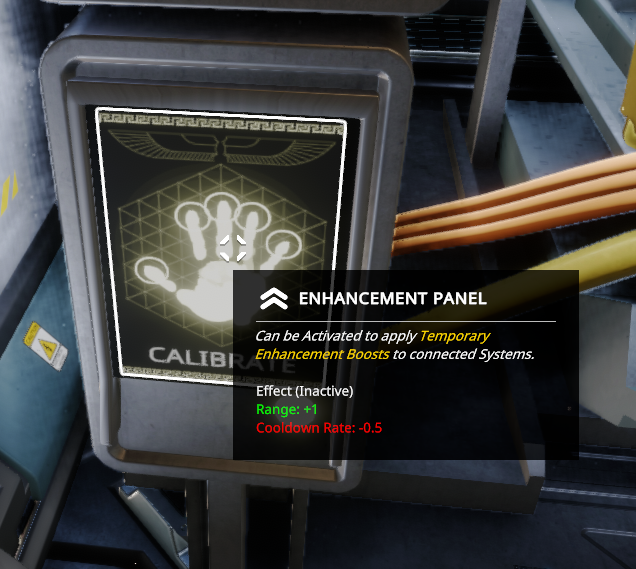
Point Defense Enhancement
Running the enhancement adds some range to the interception.
Ship Mechanics (엔진)
The Engines are a critical part to any ship. Without them you are a sitting duck and are as good as dead. We will cover the warp drive, thrust boosters, and the trim mini game. The engines can be boosted by the Auxiliary Terminal but that is covered in another section.
Void Drives
The Warp Drive/Void Drive allows you to travel between distant star systems in the matter of seconds. Make sure you are inside the ship and seated during warp travel otherwise you can either take large amounts of damage or die. This will result in the loss of Organic Matter which we do not want. *Slaps hood of the void drive* Plenty of Void in this bad boy. Be glad it does not explode.
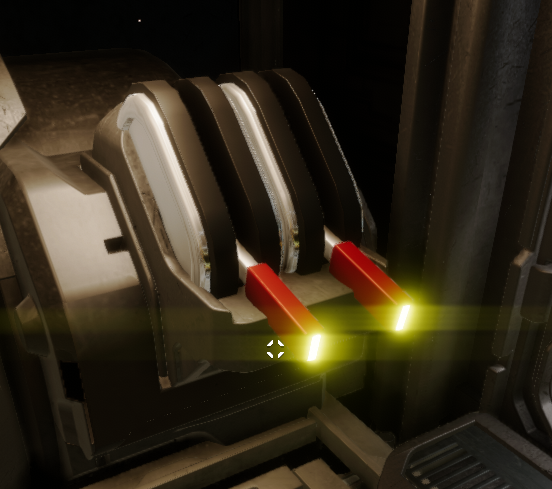
Void Drive Charging

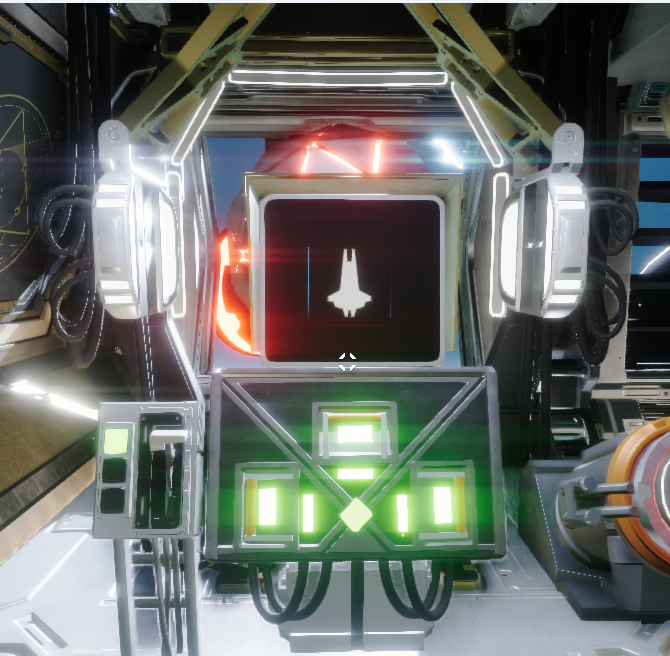
To charge the void drives you must activate both charging switches (pictured above). This will start the charging of the void drive. It is recommended to have two players in the rear and activate both switches at the same time for a faster charge. 하지만, in some circumstances you can just charge it on your own by activating both. Once charged the pilot can activate the drive (See Pilot Seat Section) after someone selects the destination on the world map (See World Map Section).
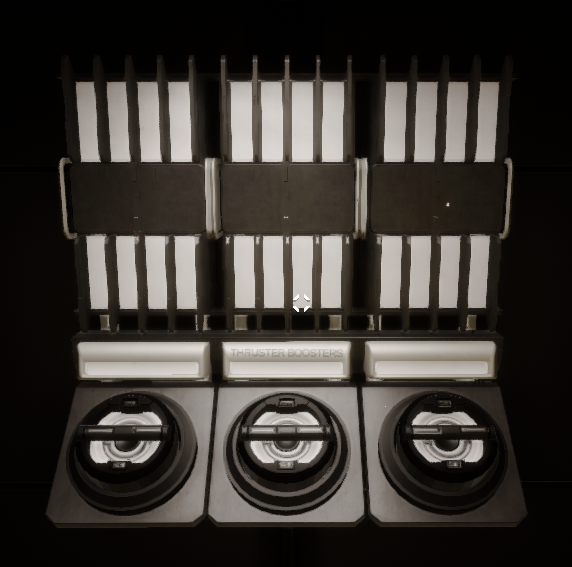
Thrust Booster
Near the engines will be a set of engine boosters. These each grant an amount of extra thrust but have a limited duration. They can be recharged infinite times after usage.
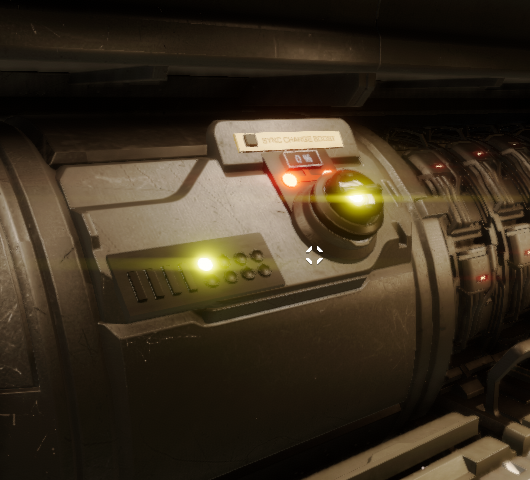
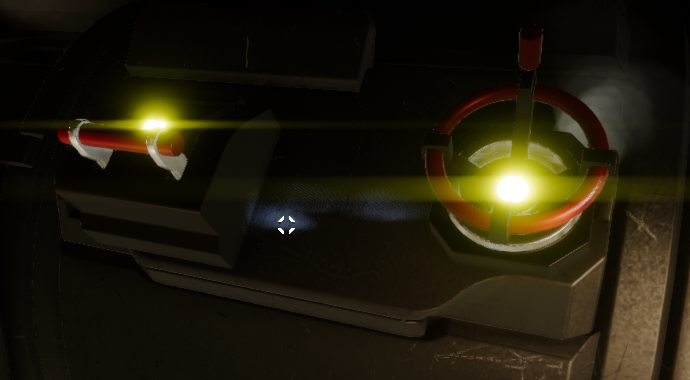
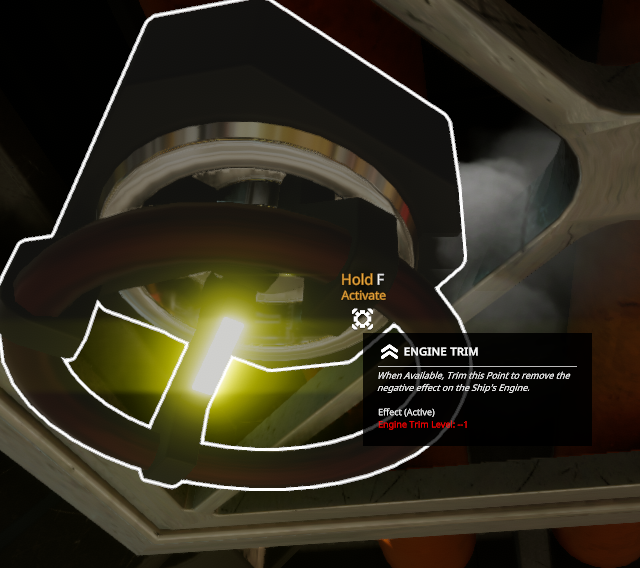
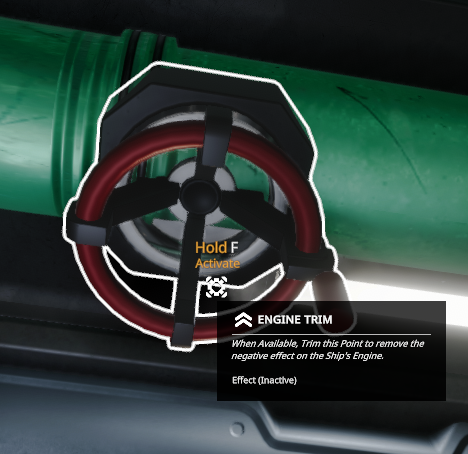
Trim Minigame
If I did not tell you that this mini game is exhausting I would be lying. This is a true mini game inside the game and you will find out for yourself.
In the engine room and throughout the ship you will find Valves, Switches, and Levers. These all control what is called Engine Trim. The engine trim effects how fast you can go and slows you down rapidly if not taken care of. If one of these activates you will need to run up to it and repair it. You will hear an audible hissing noise coming from it as well as a flashing yellow light. The Pilot is notified whenever the engine trim has a negative impact and can tell you how many items need to be repaired. You can find which side the trim items are on or what trim items need work via the trim panel. Usually located near the engines. Lines are Levers and Switches, Circles are Valves.
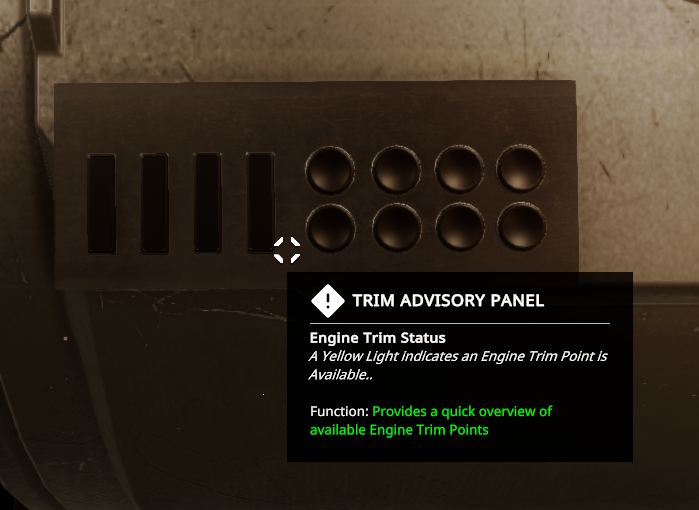
Needs Repair
Repaired
Ship Mechanics (Fabricator)
Ah yes the Fabricator our crafting table of the stars. This bad boy can craft anything from nano alloys. These alloys apparently make the entire world and are used in every single item in the game.
Fabrication
Fabrication can be broken into 2 부속. Resources and Mods
Fabrication Resources
Resources can be anything ammunition crates (for higher tier weapons), Animus crates (building blocks of modules, power cells, hull repair modules, and Data Shards for calling in support ships.
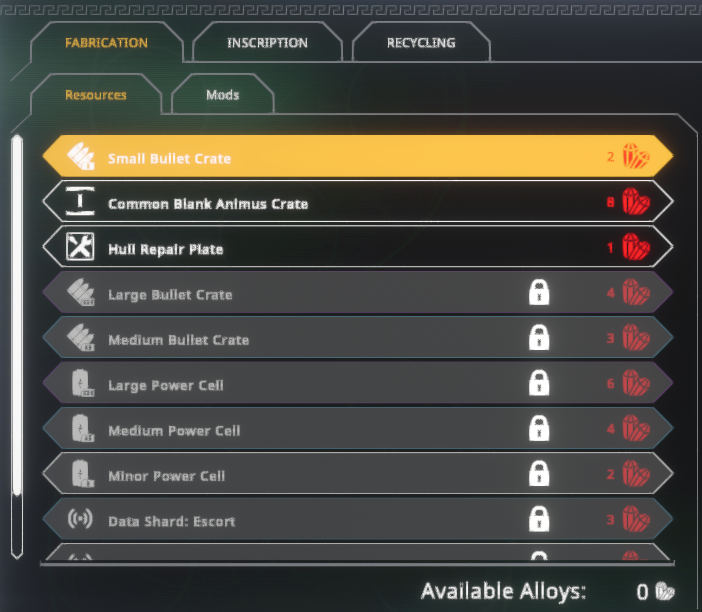
Fabrication Mods
Mods are entirely used for upgrading your weapons. See the Ship Mechanics Weapons section on installing mods and what each mod does.

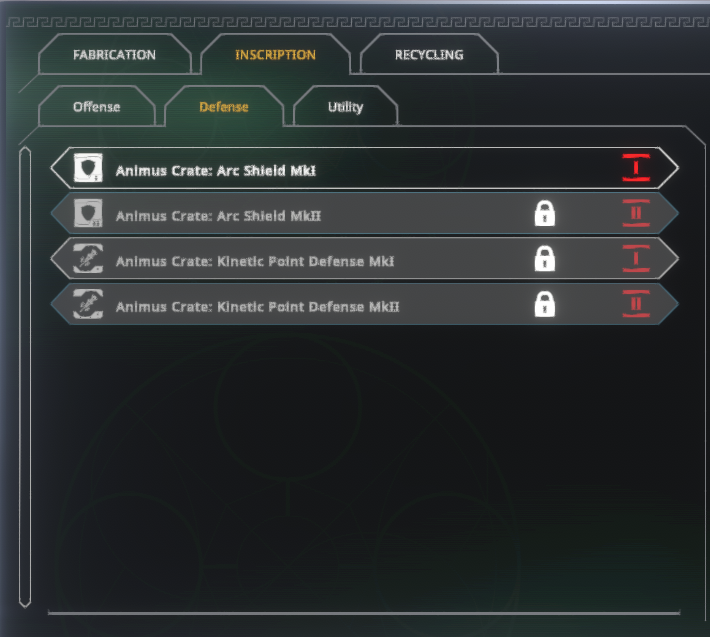
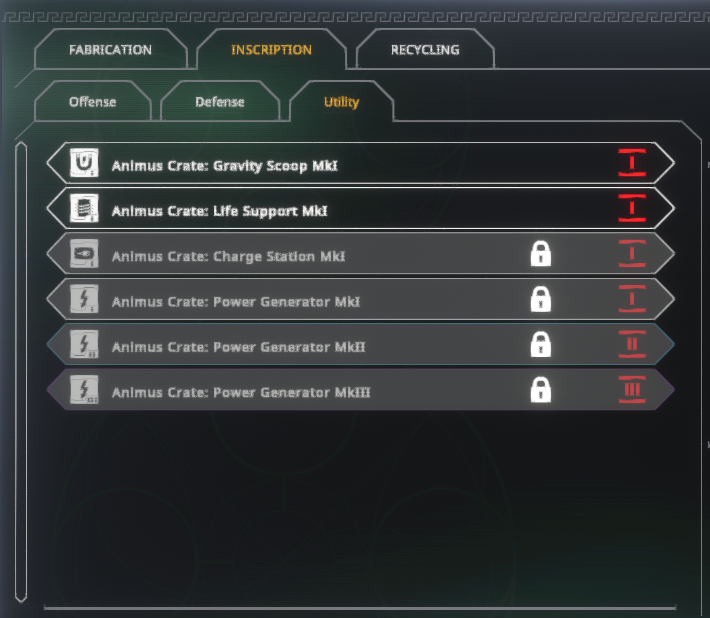
Inscription
Inscription can be broken into 3 sections. These are all modules that you can install on the ship giving you new modules or replacing broken ones. 위반, Defense and Utility.
Inscription Offense
These are all of the weapons modules you can place on your ship.

Inscription Defense
These are all of the shields and antimissile modules you can place on your ship.
Inscription Utility
These are all of the generators, life support, and gravity scoop modules you can place on your ship.
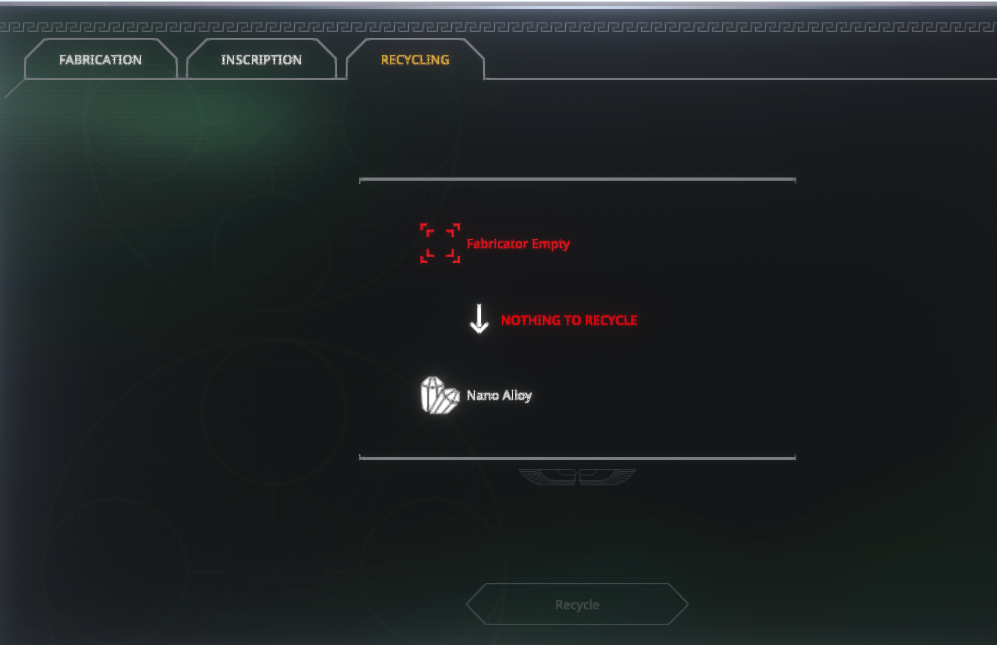
Recycling
Reduce, reuse, recycle, and most importantly let it grow.
This menu allows you to recycle scraps you find in your travels into alloys.
Ship Mechanics (Life Support)
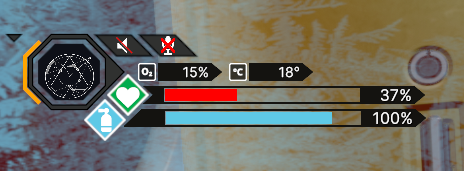
I mean its life support. It makes the breathable juice that we all need and crave. Turn it on. Nuff said. The booster increases its O2 generation by 15% ~을 위한 5 seconds for a small puzzle. Have not needed it.
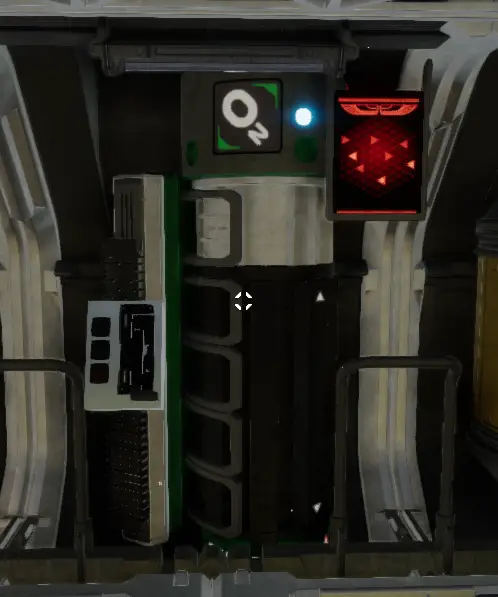
The Status bar shows a temperature and O2 level. This sometimes bugs out and does not update.
Ship Mechanics (Power and Auxillary Terminal)
Power Consumption
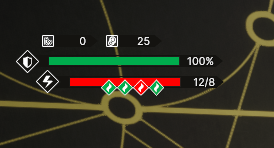
Power is a fun thing to manage. But really you don’t need to manage it if you have enough players :디. You can produce 1.21 Gigawatts easily with this bad boy and never run out. Just make sure your breakers are always reset. You can see the breakers statuses on the energy bar.
Power is good no fear of breaker overload.
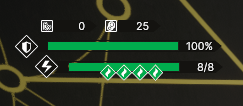
1 breaker popped too much power draw.
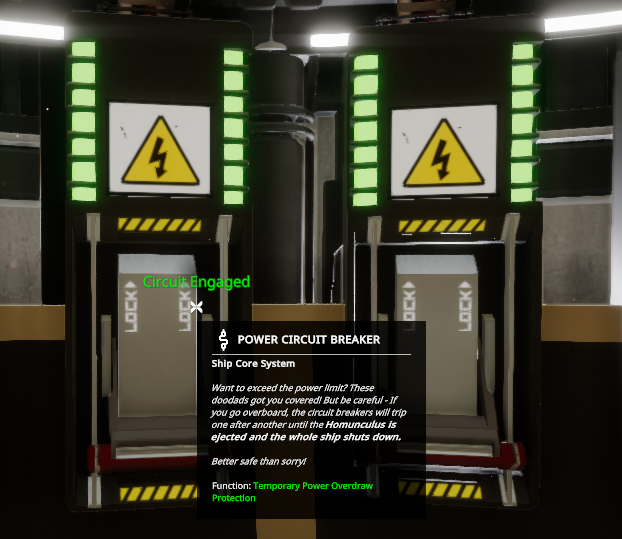
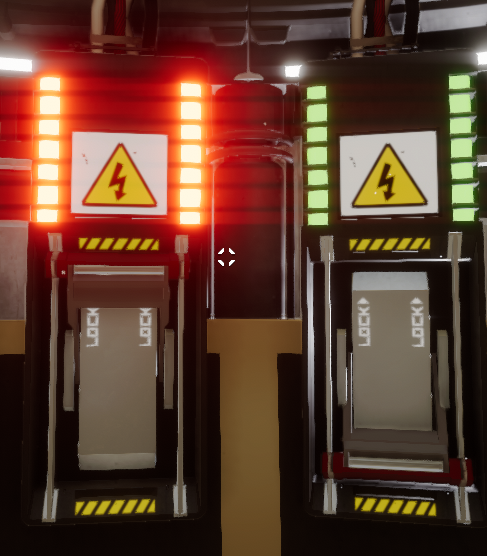
Main Breakers
The main breakers can be found inside the power room. These allow you to overload your power for near infinitely as long as someone keeps resetting them. Each breaker will pop after a certain amount of time being overloaded. Once all breakers pop and energy consumption continues the Homonculous will pop out and you will need to restart the ship. If someone keeps resetting the breakers though it is near infinite time.
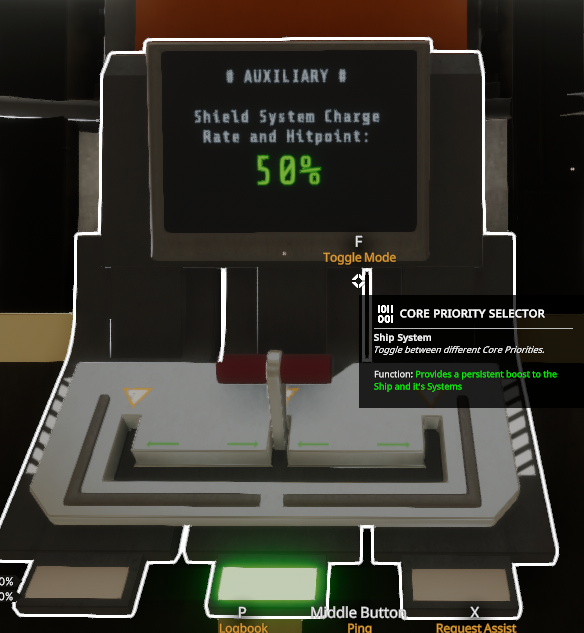
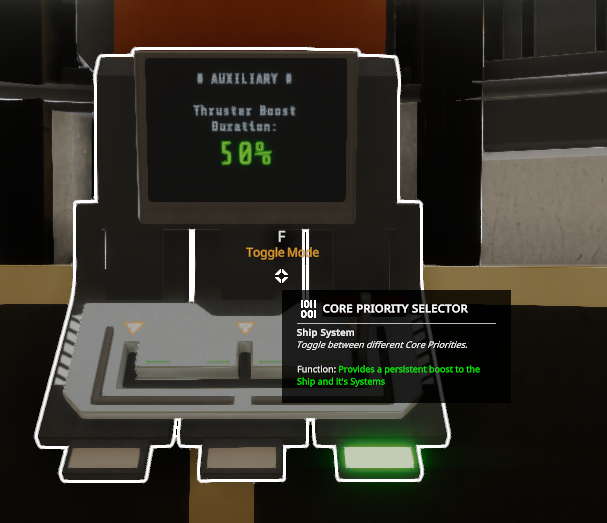
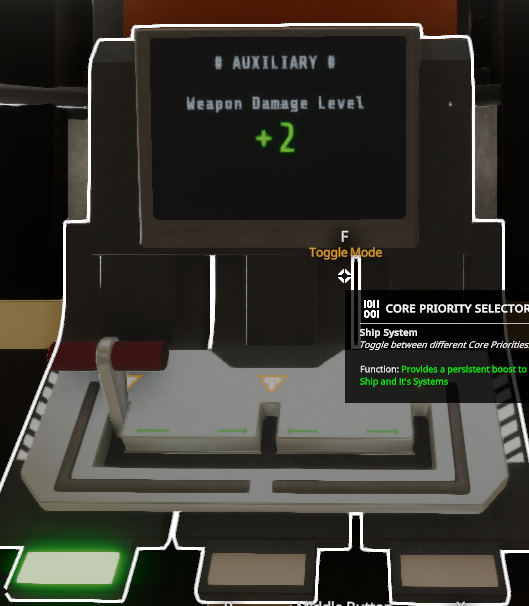
Aux Terminal
Some ships do not have an Aux Terminal. Inside the power room is a small terminal for Auxiliary Power. This terminal can grant 3 specific buffs to the ship that do not run out or expire.
Aux Shields
Auxiliary Shields increases the charge rate and the hitpoints of your shields by 50%
⠀
Aux Thrusters
Auxiliary Thrusters increase Thruster Boosters (See Engines Guide) duration by 50%
⠀
Aux Weapons
Auxiliary Weapons increases Weapon Damage Level by 2 포인트들
⠀
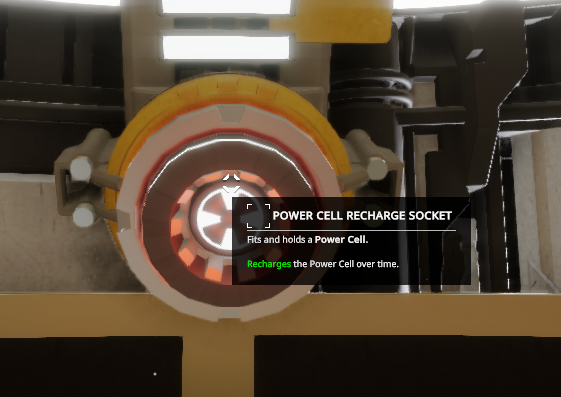
Power Cell Charging
Once you unlock power cell crafting you can charge the cells inside the power room.
Ship Mechanics (무기) (WIP)
있다 5 main types of weapons in the game. I hope to get stats for each eventually.
Beamcaster
A giant fricking laser beam. Good at long range and very accurate. Good at breaking shields.
Only 1 버전
Cannon
A normal old pirates cannon. Medium to Long Range.
Comes in 3 versions. Single, Dual, and Quad Barrels.
Minigun
Minigun go brrr. Really good and destroying fighters. Medium Range.
Comes in 2 versions Single and Dual Barrels.
P = Power Status A1 = Ammo Slot 1 A2 = Ammo Slot 2 M = Upgrade Module
Carronade
Haven’t unlocked it. I am bad. Medium Range
Comes in 3 versions. Single, Dual, and Quad Barrels.
Energy-Gatling
Haven’t unlocked it. I am bad. Medium Range
Only 1 버전.
The Friends That Helped Along the Way
Good Smelling Fluffy One – Corrections in the Engines Guide regarding thrust boosters being reusable. 감사해요!