This guide will show you how combat works in Blackout Protocol.
Enemy Alertness
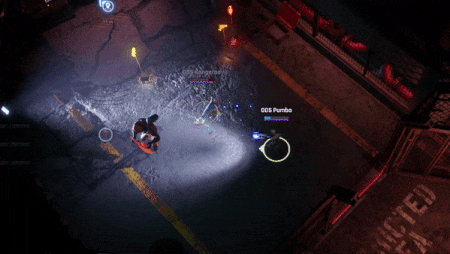
- Enemies can track your location in various ways, and most will attack the instant they locate you.
- Noise is the easiest means of getting detected, including from a long distance. Movement makes noise, and so does firing many weapons.
- Some weapons come with a silencer. In the right hands, a silencer can change the rules completely, allowing a cunning Agent to pick off enemies one by one.
- Enemies can also detect Agents on sight. Every enemy has a different sight range, and most will prioritize nearby foes currently in their vision.
- Certain enemies have a narrower field of view, making them easier to sneak around. Experiment with different enemies to learn their behaviors.
- Finalmente, enemies will instantly detect any Agent who deals them damage, and the more damage an Agent deals, the more priority a foe will give them. If your allies become cornered, try drawing attention by inflicting some harm.
- Enemies who take damage can also alert one another, even when using a silenced weapon, so pick your shots carefully.
- Monsters are hostile to ALL humans, not just S2P Agents. You can use that your advantage when battling human enemies.
Ammunition
- Ranged weapons can contain a limited number of shots in both their current clip and surplus ammo.
- If you’re not careful, it’s easy to find yourself out of ammo in the middle of combat, so don’t forget to resupply any time you come across a yellow ammo kit during a mission.
- Ammo kits replenish your weapon’s surplus ammo, but not your current clip. The best Agents reload BEFORE picking up ammo.
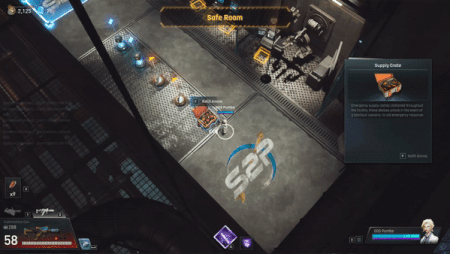
- Supply Crates fill both your clip and surplus, and can be interacted with as many times as you like.
Friendly Fire
- In Squad mode, friendly fire is always on. Use aim to see where your shots will land, and avoid shooting your fellow Agents in the back.
- You’ll also have to coordinate positioning and lines of fire. In narrow corridors, be careful about spraying wildly. In wide spaces, flank your opponents and attack from all sides. When an area is being swarmed, delegate who will cover each entry point, and don’t forget to take advantage of how the level is laid out. Cooperation is vital to success.
Injuries and Revival
- In Squad mode, an Agent is downed upon reaching 0 HP.
- While downed, Agents slowly accumulate Injuries, reducing their maximum HP. If one of your allies goes down, revive them as quickly as possible.
- You can revive a fellow Agent by moving near them and HOLDING the E KEY.
- To alleviate Injuries, you must use the Medical Equipment in a Safe Room. With enough Injuries, it’s possible to die to a single attack, so the more you have, the more cautiously you should play.
- If all Agents fall, the mission ends.
- While playing alone in Rogue mode, you can revive yourself using the Self Starter enhancement. (Just don’t forget to activate it!)
Damage Types and the Panic Gauge
- There are three types of damage: Physical, Psionic, and Fixed.
- Physical damage is the most common type. It reduces an opponent’s HP to kill them.
- Psionic damage reduces the Panic Gauge, which is the purple below an enemy’s HP gauge. When an enemy’s Panic Gauge reaches 0, they will enter Mental Break status.
- While under the effects of Mental Break, any Psionic damage will convert to Physical damage (meaning weapons that deal both will do more). Some enemies also take increased Physical damage.
- Fixed damage is a specific amount of damage that bypasses enemy resistances and immunities.
Panic (Agents and Human Enemies)
- When an Agent’s Panic Gauge falls to 0, they become Panicked.
- While Panicked, Agents suffer from constricted view, longer reloads, and longer cooldowns on rolling.
- Panic also applies to human-type enemies, who will suffer from slower attack intervals, less efficient movement, and generally dumber AI.
- Panic lasts a finite amount of time. When it ends, your Panic Gauge is immediately and fully restored. So when the Panic sets in, it’s best to retreat, defend, and wait until you can catch your breath before plunging back into the thick of it.
Mental Break (monstros)
- While under the effects of Mental Break, monsters suffer a variety of unique effects, often including some degree of paralysis.
- With special abilities generally lose them while Mentally Broken. Por exemplo, Sentinels use a ranged weapon. When their Panic gauge hits 0, they immediately drop their weapons (and can never pick them up again). Exploiting Psionic damage is pivotal to making tougher enemies more manageable!
Specials and Passives
- Every Agent has a unique Special ability.
- Specials are powerful but tend to have a long cooldown, so time them wisely.
- Specials can be modified and enhanced via Passive Abilities, which can be acquired from a Dimensional Mirror… if you can find one.
Efeitos de status
- Both Agents and foes can be afflicted with various status effects. The most commonly encountered is the Injured status, which reduces max HP.
- Stunned targets become immobile. Nerve Damaged targets take Psionic damage over time. Scentmarked targets have their location revealed to enemies.
- The Sleeping status exclusively affects enemies and drastically reduces their ability to detect targets, allowing them to be bypassed with a little stealth and cunning. Use this to your advantage in dangerous areas.
Este guia sobre Blackout Protocol Foi escrito por
ODS Pumba.
Você pode visitar a publicação original neste link.
Se você tiver alguma dúvida sobre este guia, por favor, não hesite em contactar-nos aqui.