Guide to get BeamNG Multiplayer/BeamMP working on SteamOS
Protontricks Setup
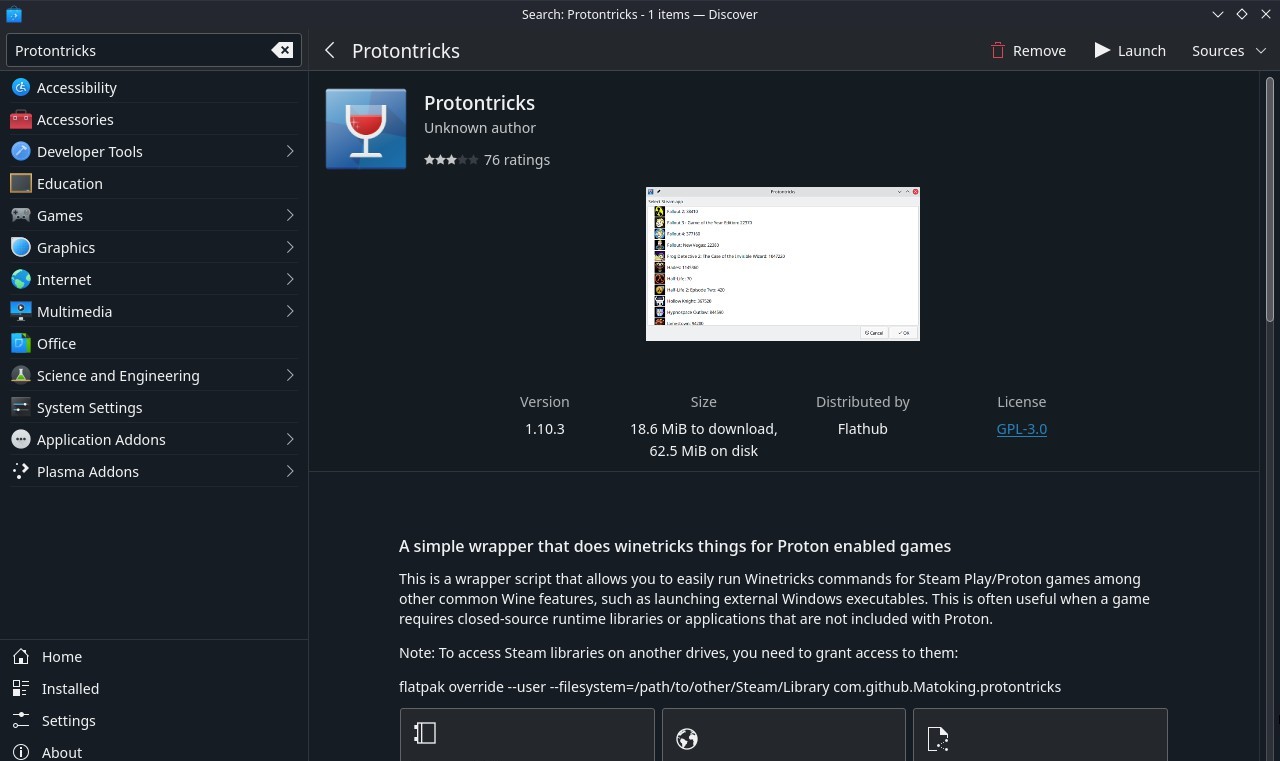
You will need Protontricks, if you already have that installed you can skip this entire section after reading this.
Open up Discover and search for Protontricks then install it.
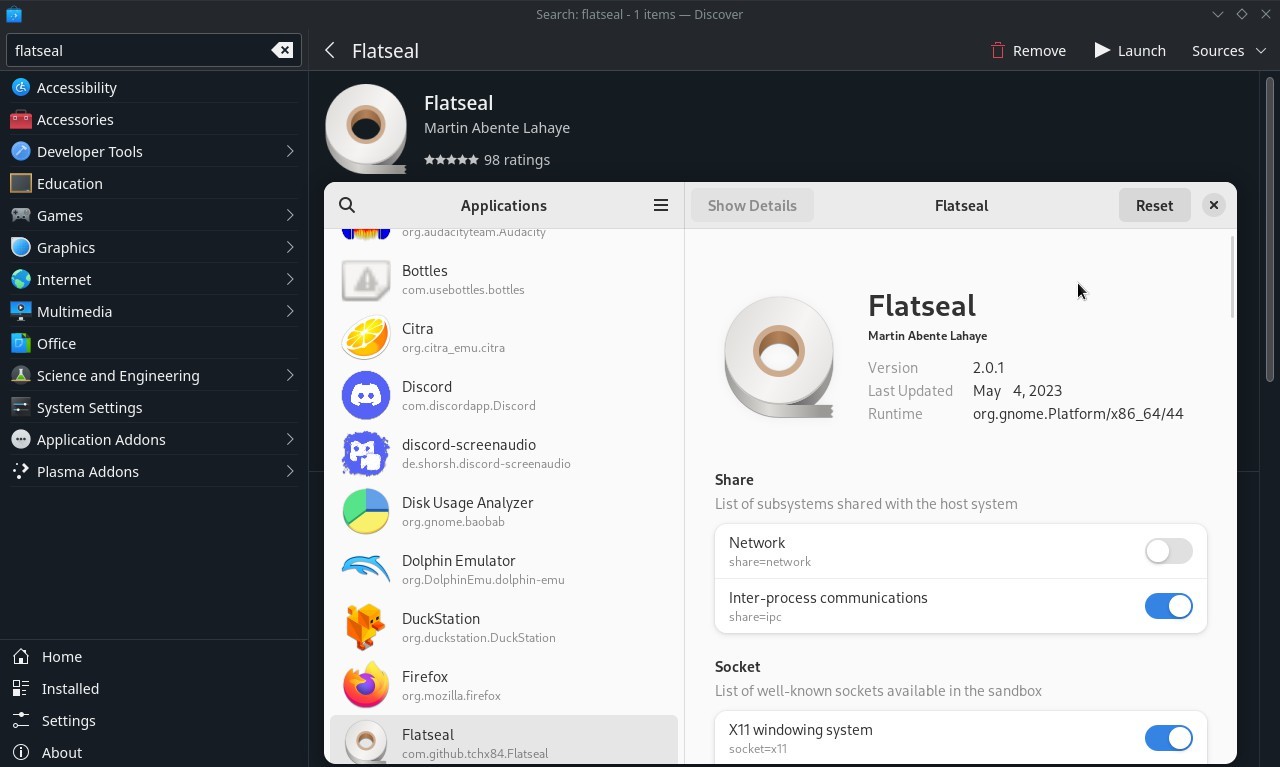
After that, search for Flatseal then install and open it.
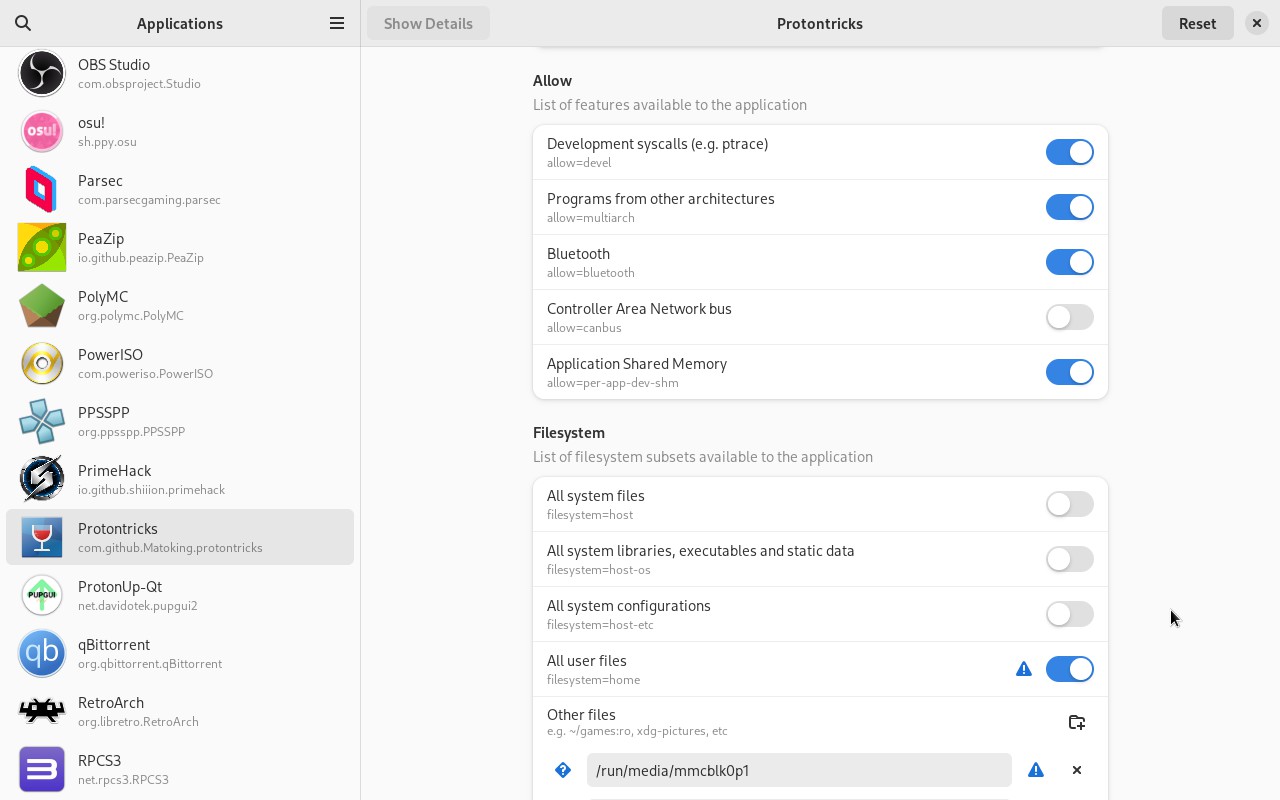
Click on Protontricks on the left, scroll down to Filesystem then click All user files and give permission to /run/media under Other files.
What is Flatseal and what exactly am I giving access to?
Flatseal allows you to review and modify permissions from your Flatpak applications, we are giving Protontricks access to any external drive (like a MicroSD card) you may have in case the game is installed there.
BeamMP Setup
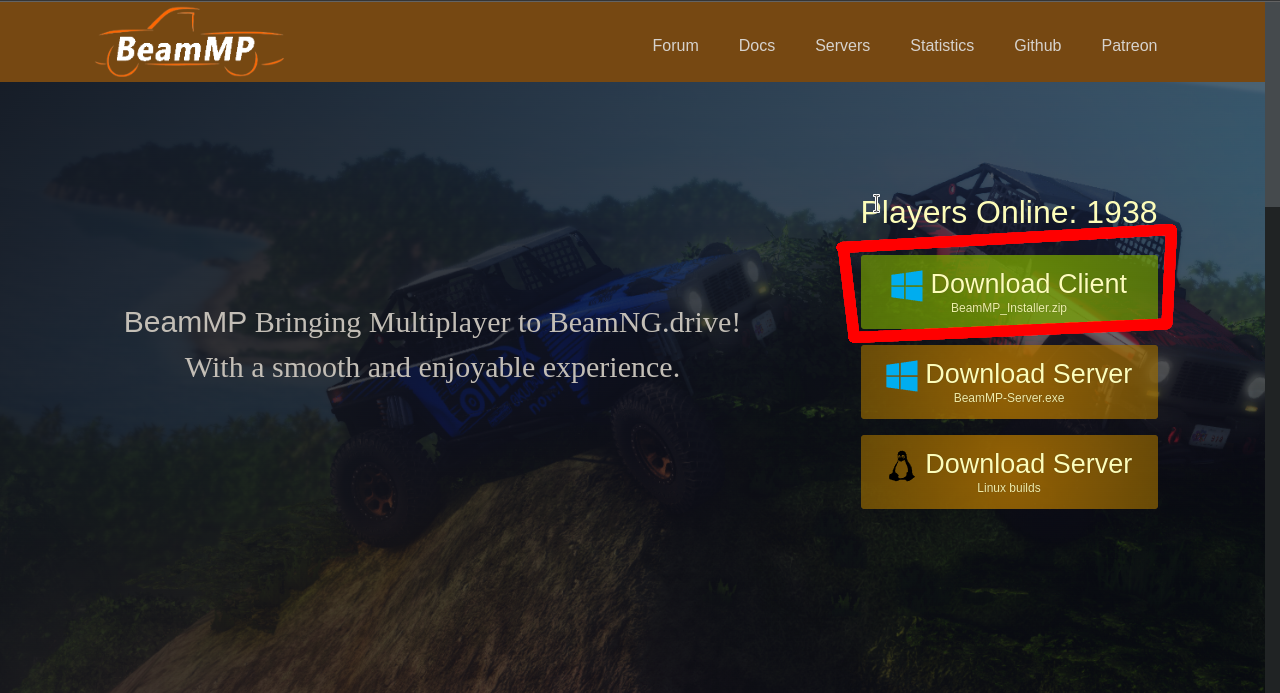
Download BeamMP from the official website. Make sure to download the Windows Client Version.
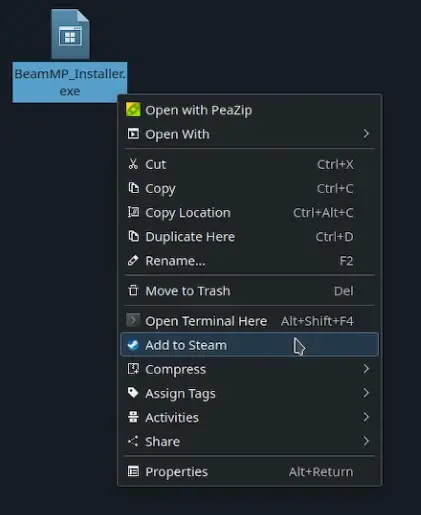
Extract the file anywhere, Right Click on it and Add to Steam.
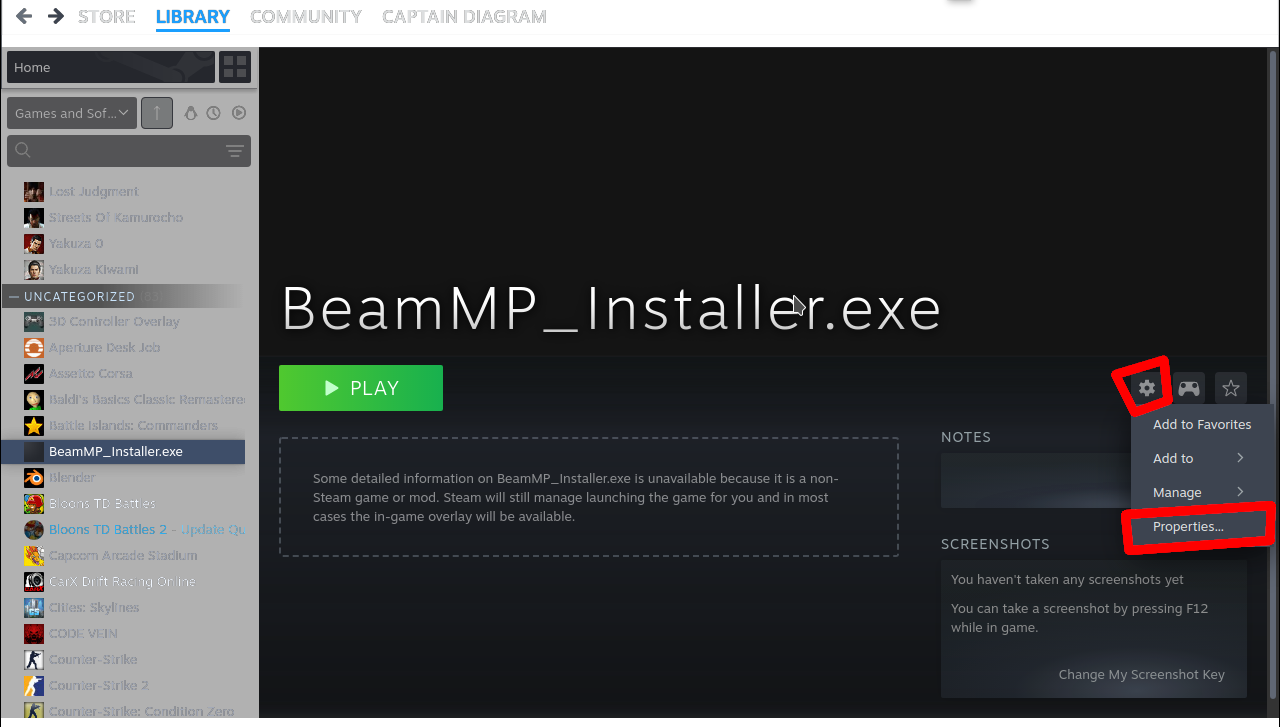
Find BeamMP in your Steam Library, click the Gear Icon, and go to Properties.
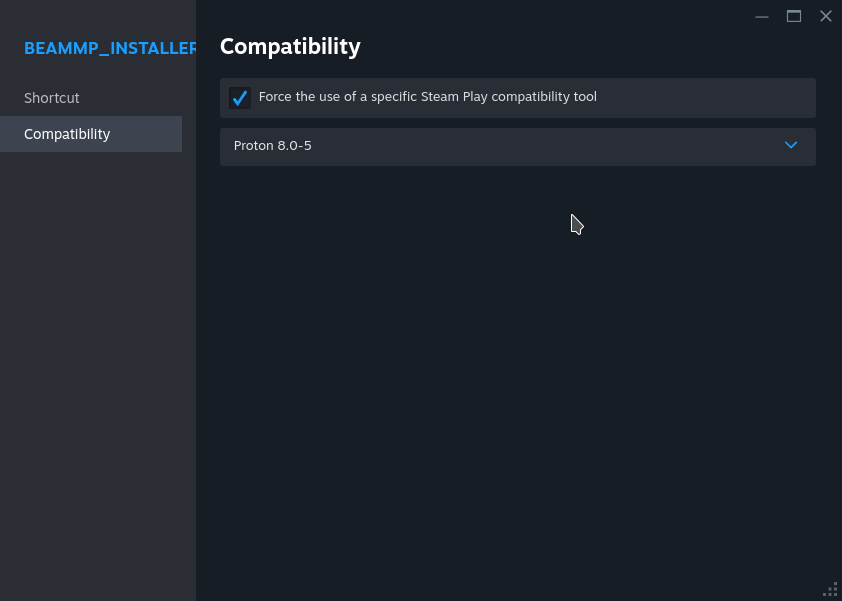
In Properties, set the Proton Compatibility to Proton 8.0-5.
Close Properties and launch BeamMP, go through the setup and install it.

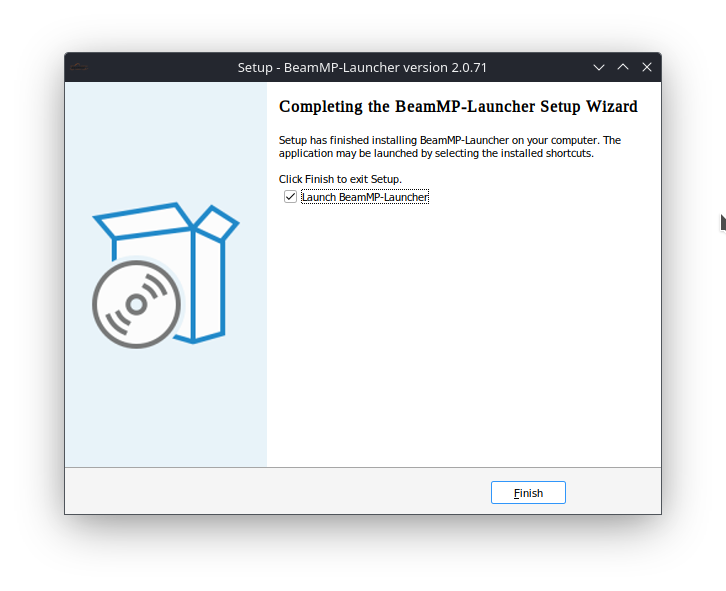
Once installed it should fail to boot, which is normal.
Helping BeamMP find BeamNG
Now you need to find where BeamNG is installed on your Steam Deck, we’ll need this location for later. The fastest way is to navigate to BeamNG in your Steam Library, click the Gear Icon, Manage, and then Browse Local Files.
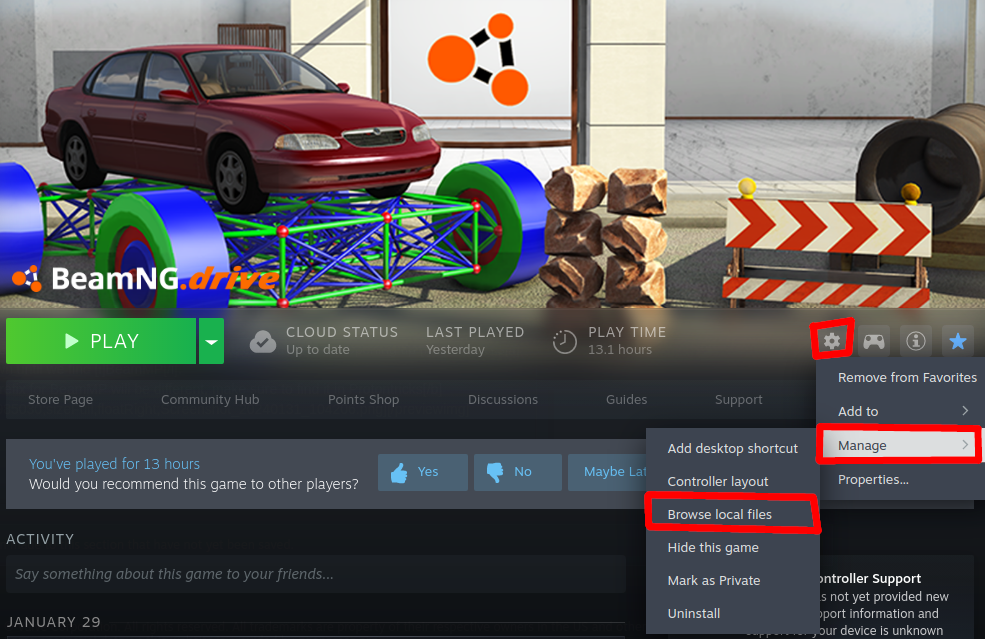
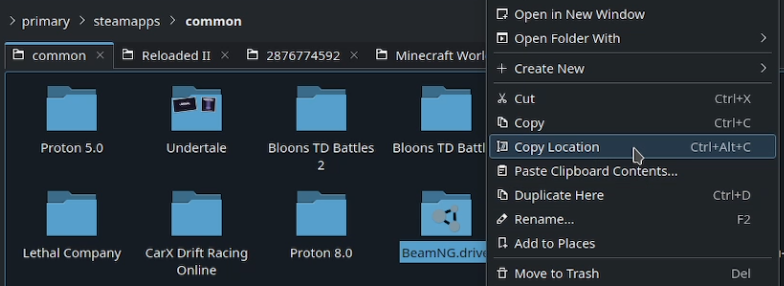
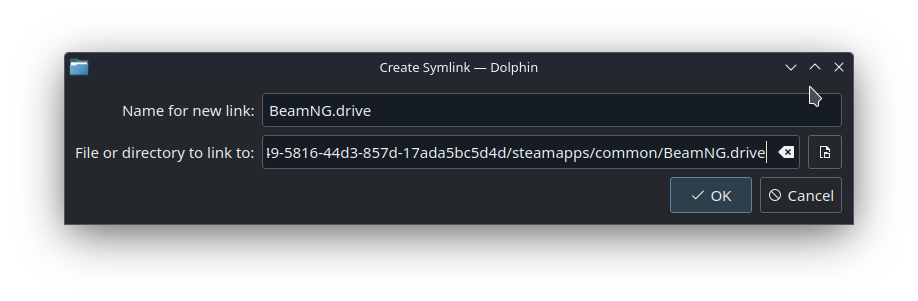
It will open the folder where BeamNG is installed, towards the top you need to click common, then Right Click on the folder named BeamNG.drive and click Copy Location.

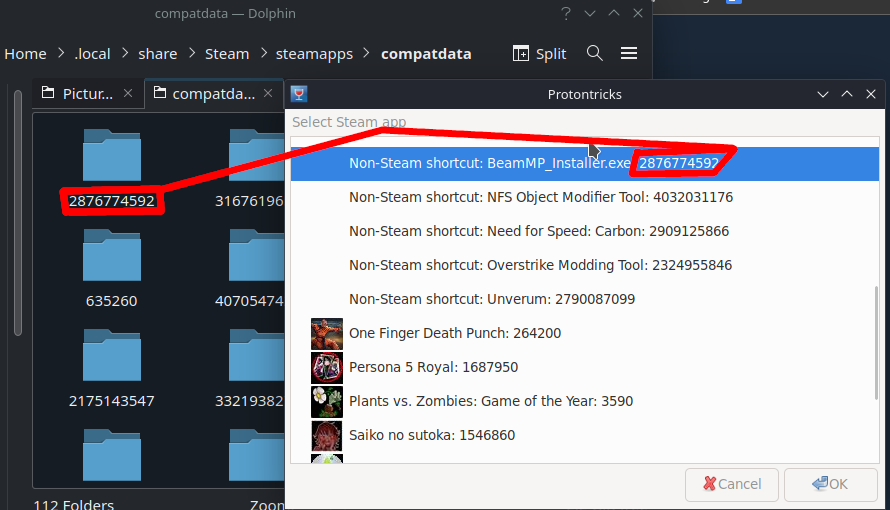
Now go to /home/deck/.local/share/Steam/steamapps/compatdata
We need to find BeamMP’s proton prefix, which we can easily do by opening up Protontricks and scrolling down until we find BeamMP.
Your Proton Prefix for BeamMP will be different, make sure to find it in Protontricks
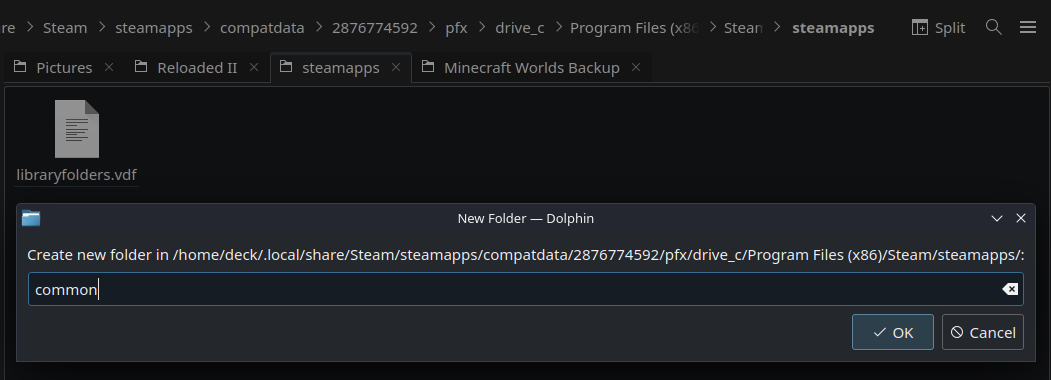
Once you find it, enter BeamMP’s proton prefix folder and navigate to /pfx/drive_c/Program Files (x86)/Steam/steamapps
Right Click and create a new folder named common
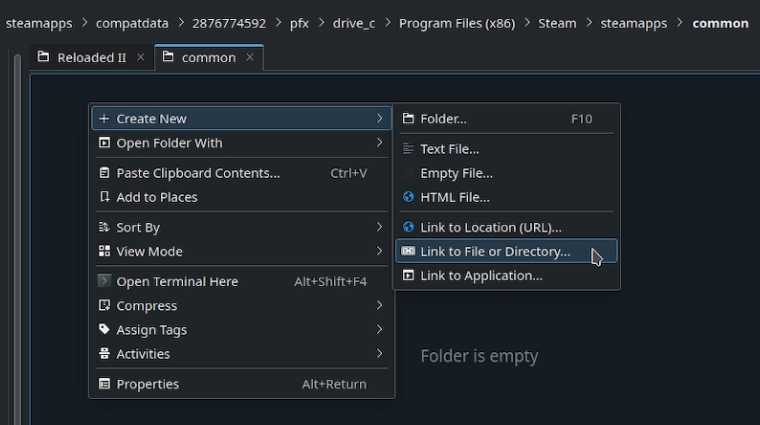
In the common folder we just created, Right Click in the empty folder, Create New, Link to File or Directory
In the bottom box, paste the location to BeamNG.drive we copied earlier then hit OK.
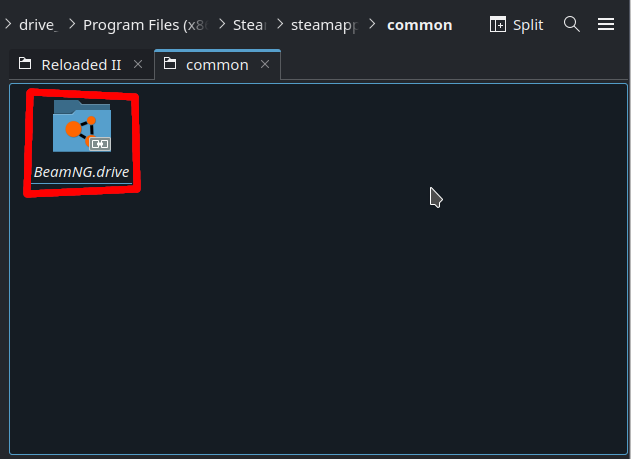
Open the BeamNG.drive folder we just created, Right Click on BeamNG.drive.exe then Open With Protontricks Launcher.
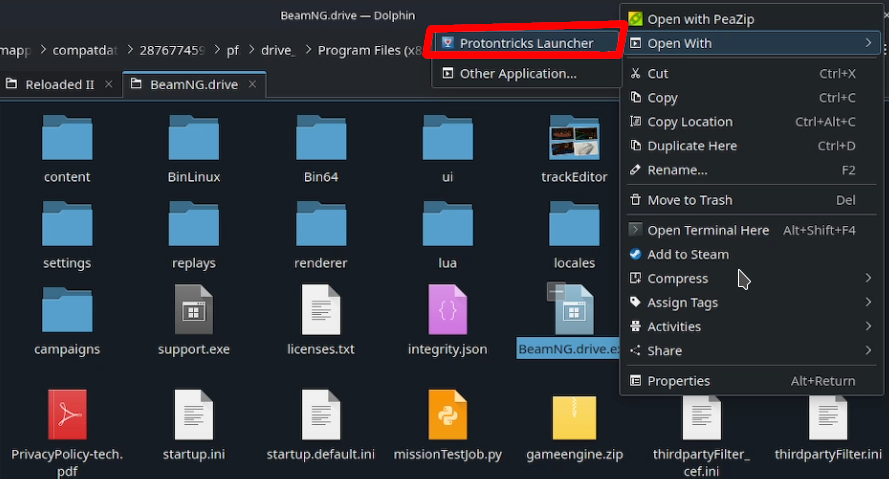
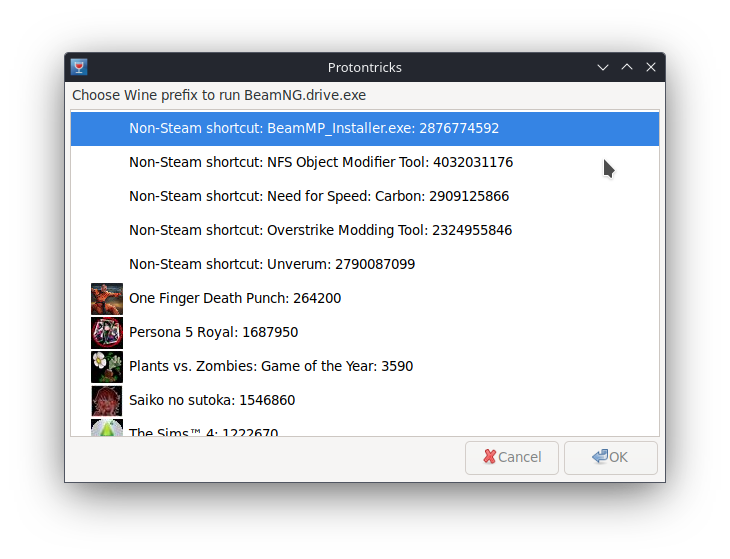
In Protontricks, scroll until you find BeamMP_Installer.exe and click on it.
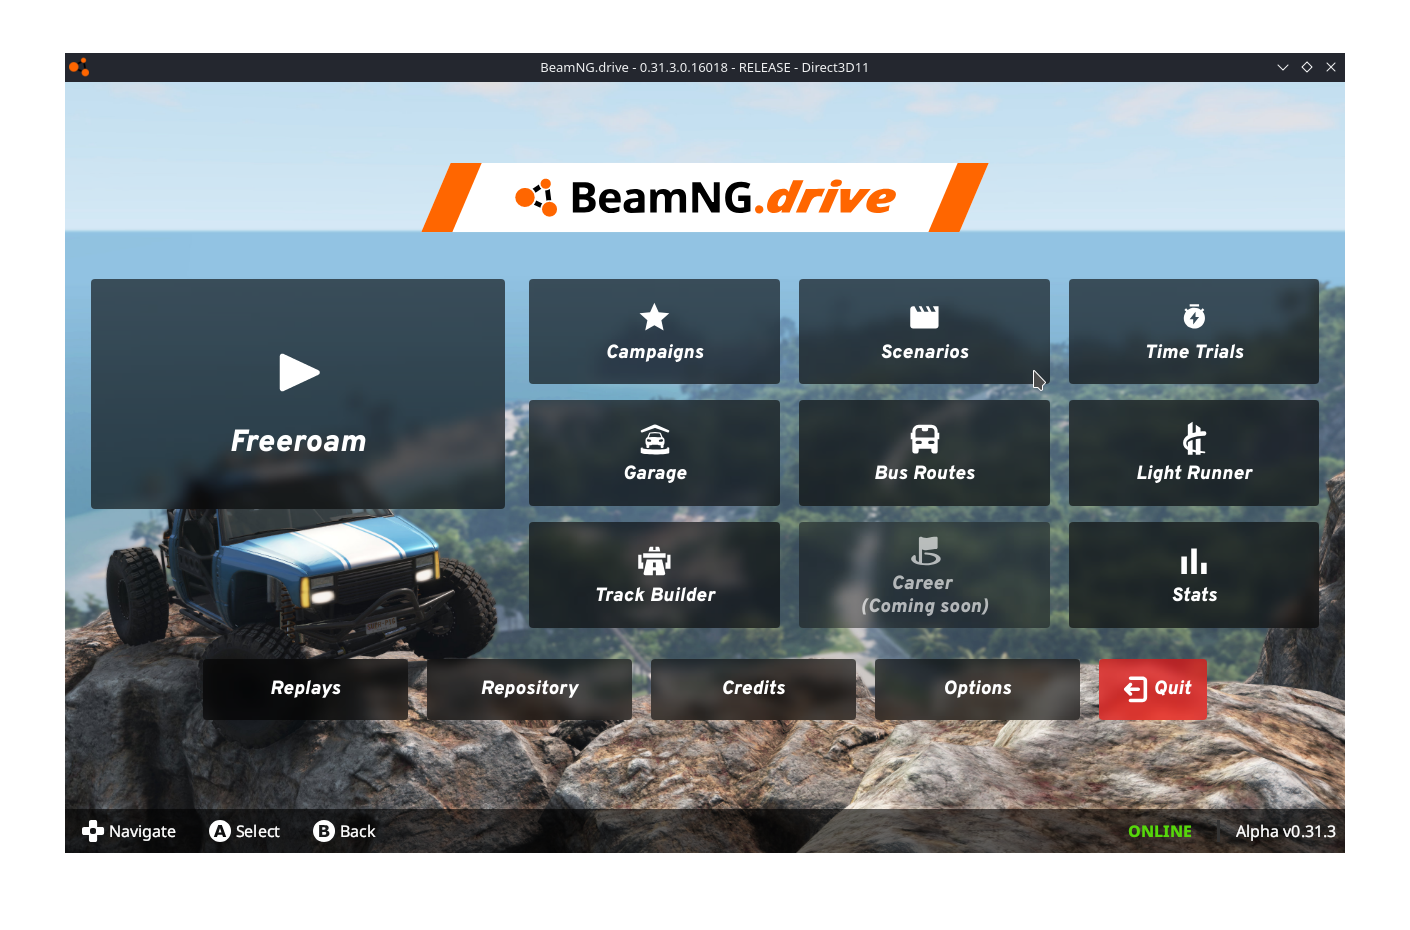
BeamNG should boot and once it does, close the game.
Return to the folder containing BeamMP’s Proton Prefix
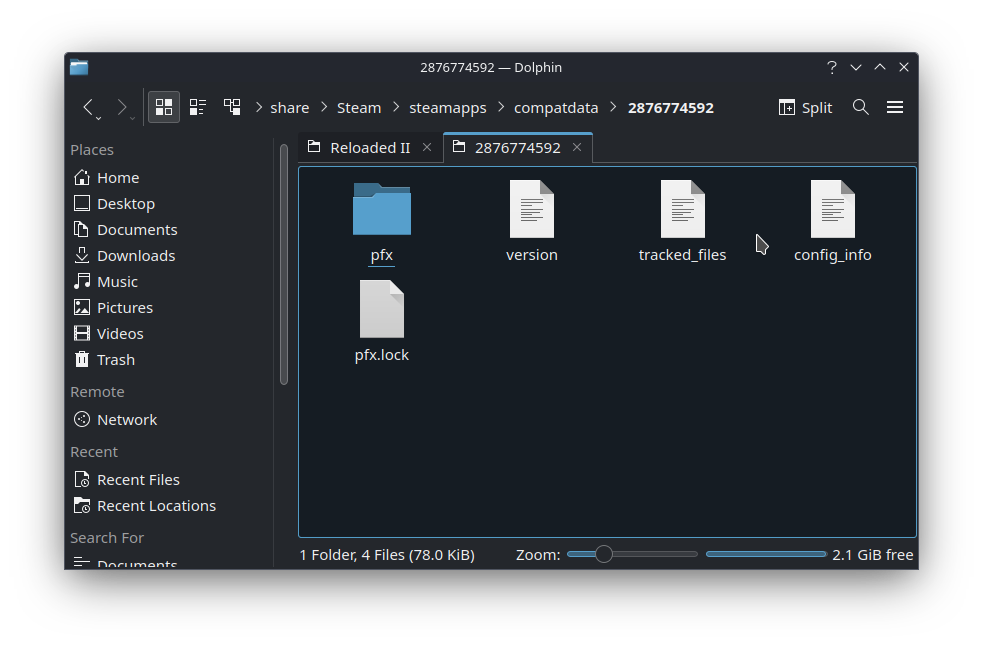
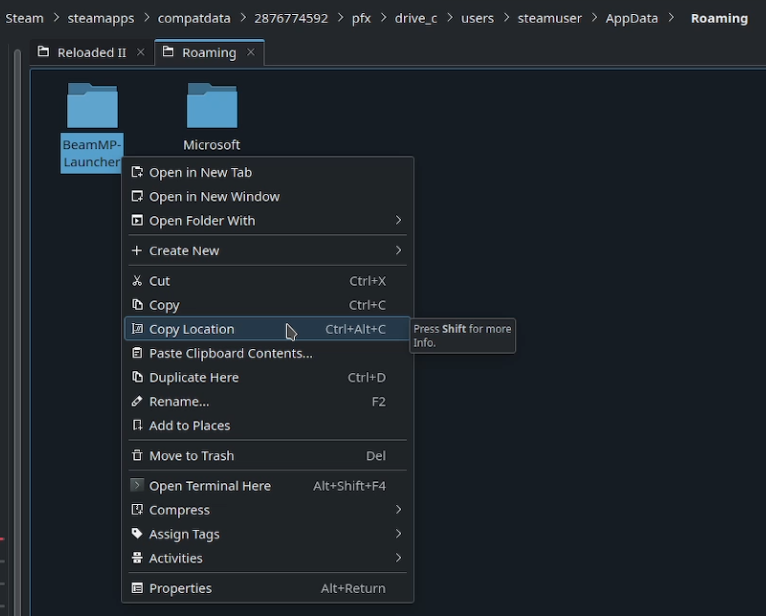
Go to /pfx/drive_c/users/steamuser/AppData/Roaming
Right Click on the BeamMP-Launcher folder and click on Copy Location.
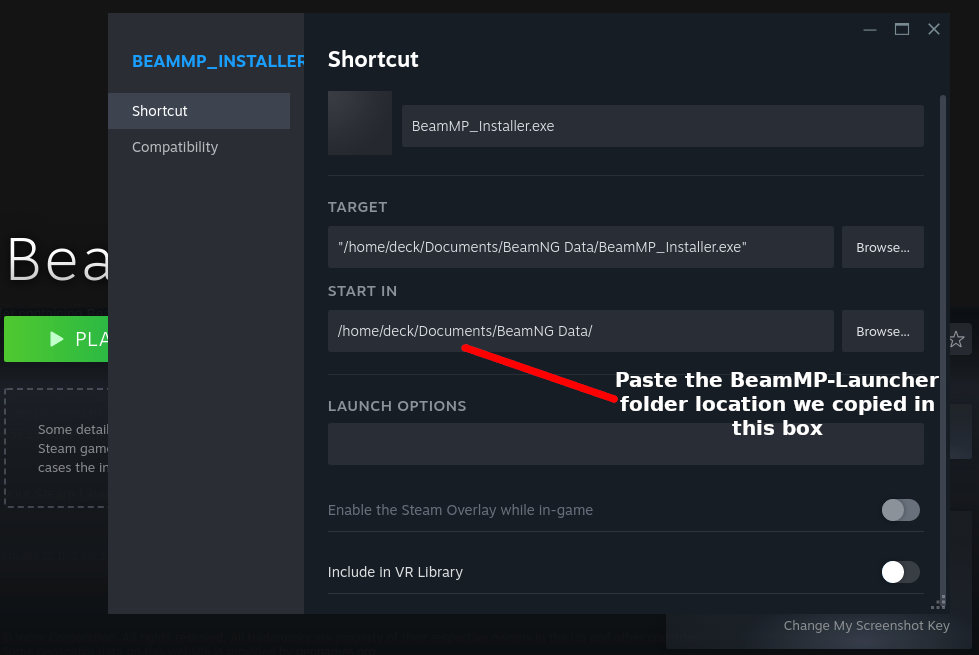
Navigate back to BeamMP in your Steam Libary and go to Properties. Under Properties paste the location we copied in the Start In box.
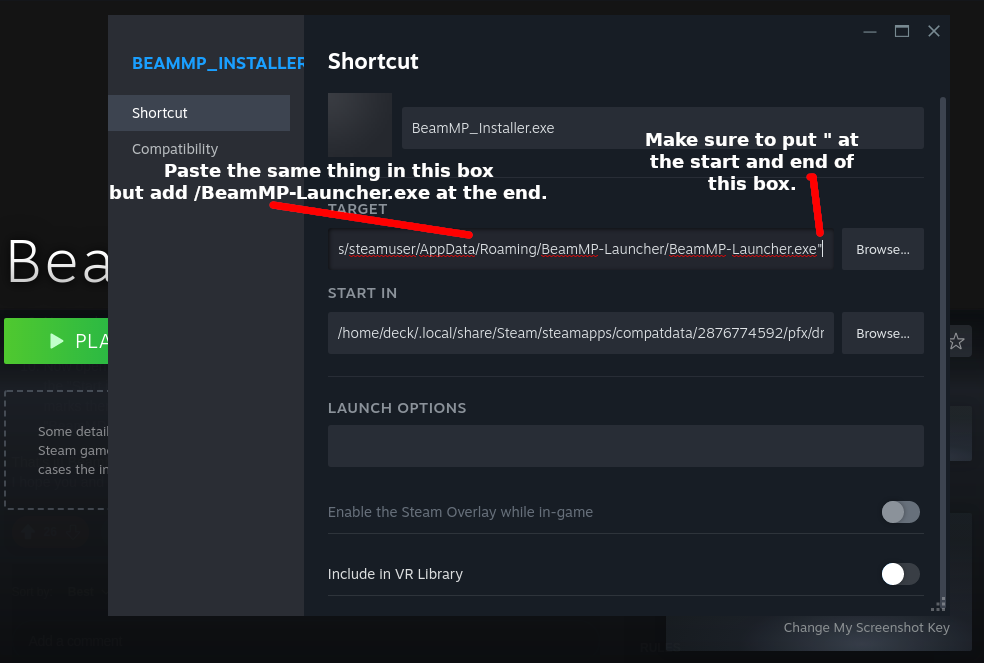
Paste the same in the other box but add /BeamMP-Launcher.exe at the end. Ensure you keep the quotation marks at the front and back.
Launch BeamMP in Steam and make sure everything works. If it instantly closes when trying to boot, you messed up on the previous step.
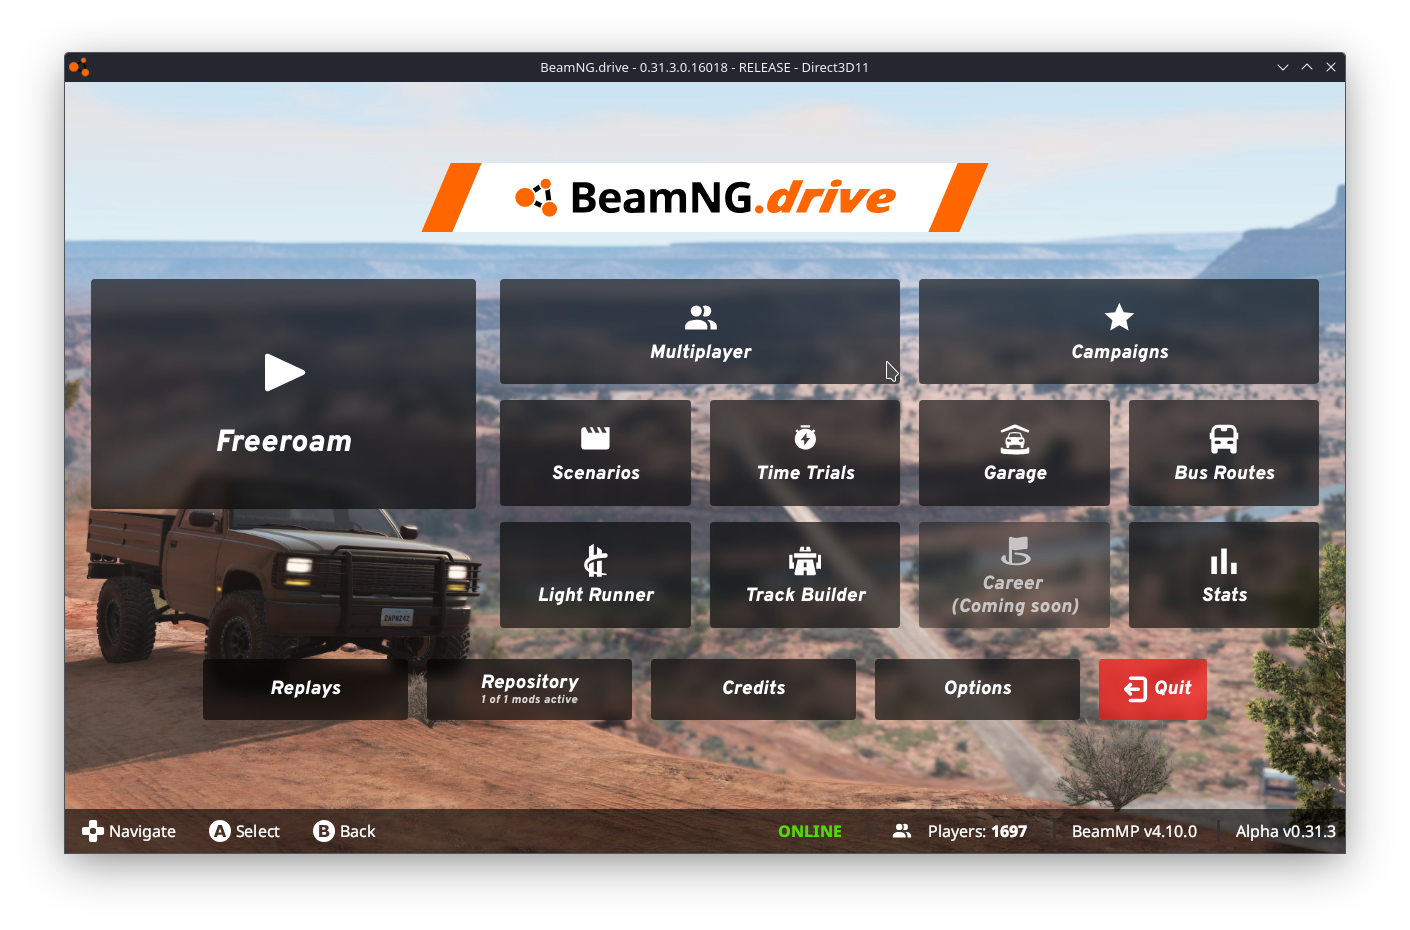
You should finally be done. At this point, you can rename BeamMP and add custom covers if you want. Make sure to configure your controls for the game in Steam.