A guide to walk you through the story from start to finish, gathering as much as possible.
Opening notes
This guide will take you from start to finish with all major information being outlined. This includes where to find any Chats, Party Banter conversations, Parallel Chronicles, Heart-to-Heart conversations, loyalty scenes, books, Purity/Corruption choices and any other necessary info to get the full experience out of the story.
While the locations of the Chats will be outlined, any choices or emotional response options within them will not, as they are not crucial to the story, but merely add more to it. It is advised that you read through them and/or make your own choices regardless. Likewise, the Parallel Chronicles are not necessary for completion, though, again, they add more to the story.
With any Heart-to-Heart conversations, you must view them in order. If you’re in an area that should have one, but it doesn’t, you’ve missed the previous one. These conversations are required to earn the loyalty of your party members. With Valessa and Sovy, you must have their loyalty before the final Act for them to survive the final battle.
Also, you are not limited to only choosing Flirty/Romantic options with only one party member. In fact, there are a couple Party Banters that you can only get if you flirt with Ulric or Valessa while already dating Fortaime.
One last thing to note. With important choices, spoiler tags have been used to cover up whether the choice increases either Purity or Corruption, for those who want to make the choices themselves, rather than based on leaning one way or the other. Also, some of them contain spoiler notes for the final battle. It is up to you as to whether or not you let these spoiler notes determine the choice you make, as something different will happen later in the story if you opt not to.
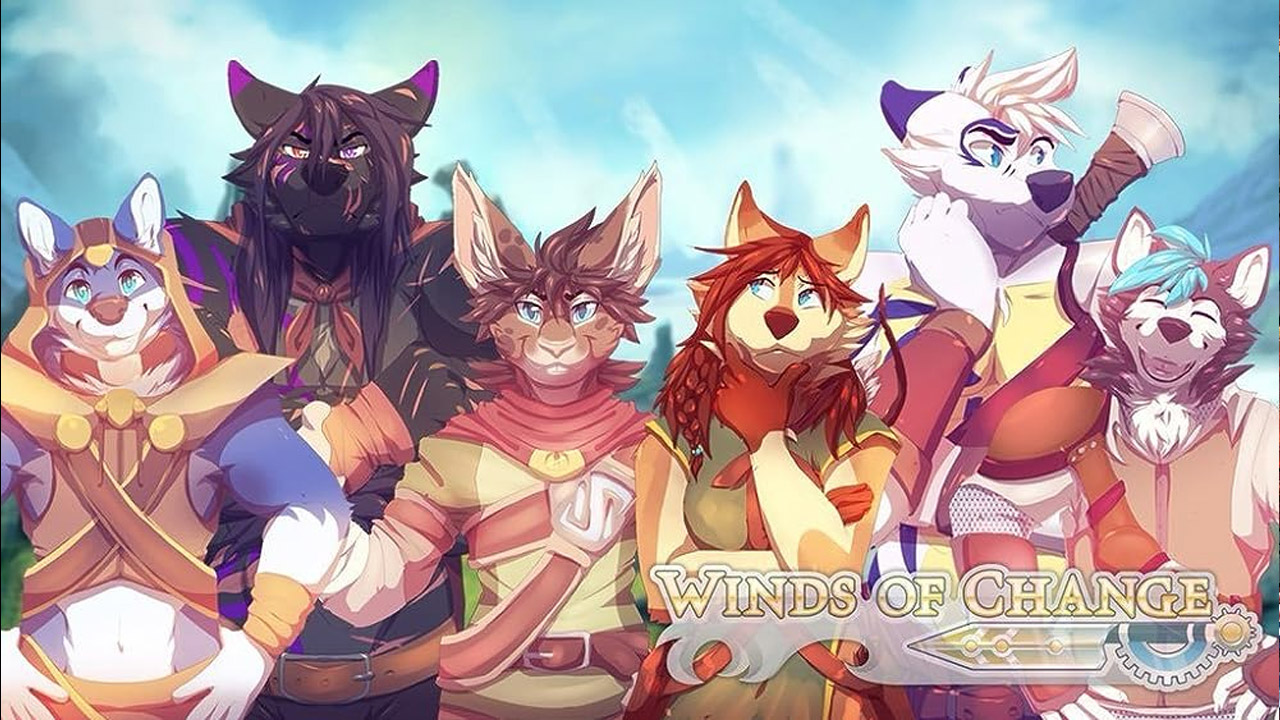
With all that being said, you’re now ready to begin your journey through Winds of Change.
Prologue
Vision: Valinorth Forest
Title: Seer or Seeress This determines your gender.
Choice: “Focus on lives. Go to The Grand Tree.” or “Focus on information. Go after Mylus.”
Chat: Ulric and Valessa These show up in the area you pick regardless of the choice you make.
Mylus’ Note on right side if you chose “Focus on lives. Go to The Grand Tree.”, or on bookshelf on left if you chose “Focus on information. Go after Mylus.”
After the vision, you end up in Valinorth Village: Your House
Act 1
Valinorth Village: Your House
Choose your name and clothing.
The True Reach of Spirits on chair on right
On Scribes and Visions on bottom left
On Alestia’s Creation on top of dresser beside bed
Chat: Fortaime currently unavailable
Go to Map: Valinorth Village then to Main Street
Valinorth Village: Main Street
After initial chat with Fortaime, go back to Your House and view Chat: Fortaime before continuing
Visions and Paintings at Fortaime’s house on right
Chat: Valessa Currently unavailable
Go to Map: Valinorth Village then Town Square
Valinorth Village: Town Square
After initial chat with Valessa, go back to Main Street and view Chat: Valessa and newly available Parallel Chronicle “Pro 1” before continuing
Parallel Chronicle “Damek 1” and “Sovy 1”
Mysterious Mazeo on lower right side of water tank
Go to Map: Valinorth Village then Mylus’ House
Valinorth Village: Mylus’ House
Parallel Chronicle “Damek 2” and “Sovy 2”
Chat: Valessa and Fortaime
Valinorth’s Line of Seers on table on right
IMPORTANT: On Valinorth’s Bloodleaves on table in middle
Go to Map: Valinorth Village then Great Tree
Valinorth Village: Great Tree
Instructions from Mylus Automatically found in second area
Choose left handed or right handed.
Parallel Chronicle “Shane 1”
Party Banter: Valessa and Fortaime
Go to first area then Map: Valinorth Village then Town Square
Valinorth Village: Town Square
Party Banter: Valessa and Fortaime
Go to Map: Valinorth Village then Main Street
Valinorth Village: Main Street
Party Banter: Valessa and Fortaime
Go to Map: Valinorth Village
Map: Valinorth Village
Parallel Chronicle “Sovy 3” and “Damek 3”
Go to Exit (takes you to Map: Valinorth)
Map: Valinorth
Go to Eastcrown
Valinorth: Eastcrown
Mysterious Journal on ground near lantern
Go to Map: Valinorth then Valinorth Forest
Valinorth: Valinorth Forest
Parallel Chronicle “Damek 4” and “Halin 1”
Party Banter: Valessa and Zamira and Fortaime and Zamira
Chat: Valessa and Fortaime
Go to Map: Valinorth then Sauleberg
Valinorth: Sauleberg
Party Banter: Fortaime and Valessa
Go to Map: Valinorth then Peregrino
Valinorth: Peregrino
Parallel Chronicle “Damek 5”
Party Banter: Fortaime and Ulric
Chat: Ulric
Go to second area
IMPORTANT CHOICE: [Convert Peregrino into a barracks.] is +10% Corruption or [Let Peregrino stay as it is.] is +10% Purity
Parallel Chronicle “Sovy 4” and “Gryz 1”
Party Banter: Zamira and Pro and Zamira and Ulric
Party Banter: Airen and Zamira This party banter is affected by your choice for the tavern
Chat: Pro
Click shields above fireplace for more info about the tavern This isn’t necessary for the story, but you need it for one of the Steam achievements
Go to third area
IMPORTANT CHOICE: “Fortaime, I elect you as Valinorth’s Elder.” is +10% Corruption or “Valessa, I elect you as Valinorth’s Elder.” is +10% Purity
You are briefly sent to Triumvirate Castle Chamber during a dream. Click the idol to progress the story. Afterward, you wake up back in Peregrino.
Heart-to-Heart: Valessa 1 and Fortaime 1
Go to second area then first area then Map: Valinorth then Outlook
Valinorth: Outlook
Parallel Chronicle: “The Triumvirate 1”
Go to marker near hill (takes you to Map: Mazeo) then Mountain Pass
Act 2
Mazeo: Mountain Pass
Knowledge from a Book: “Many Alestians see it as an ill omen.” This only appears if you read On Valinorth’s Bloodleaves at Mylus’ House
Parallel Chronicle “Gryz 2”
Party Banter: Pro and Fortaime
Chat: Ulric
Go to Map: Mazeo then Main Gate
Mazeo: Main Gate
Parallel Chronicle “Damek 6”
Party Banter: Pro and Valessa
Go to Map: Mazeo then Town Square
Mazeo: Town Square
Heart-to-Heart: Fortaime 2
Chat: Damek
Go to Map: Mazeo then Mazeo Tavern
Mazeo: Mazeo Tavern
Heart-to-Heart: Ulric 1 and Pro 1
IMPORTANT: Alarinthia’s Civil Conflict found on shelves on left
Go to Map: Mazeo then Mayor’s House
Mazeo: Mayor’s House
Go to second area
Party Banter: Valessa and Lillith and Fortaime and Lillith
The Blurred Lines of Piracy Found on table on left
Go to third area
IMPORTANT CHOICE: [Point to the paper containing Alex’s demands.] is +10% Purity or [Point to the paper containing Nada’s demands.] is +10% Corruption
Party Banter: Fortaime and Gryz
Go to second area then first area then Map: Mazeo then Docks
Mazeo: Docks
Parallel Chronicle “Sovy 5”
Chat: Valessa
Go to Map: Mazeo then Church of Mazeo
Mazeo: Church of Mazeo
Party Banter: Fortaime and Ulric This only appears if you have a relationship with Fortaime but also flirted with Ulric
Parallel Chronicle “Gryz 3”
Chat: Pro
Go to second area
Party Banter: Valessa and Fortaime This only appears if you have a relationship with Fortaime
Parallel Chronicle “Sovy 6”
Chat: Fortaime
Go to marker on door (takes you to Map: Rebel HQ) then Tunnels
Rebel HQ: Tunnels
Heart-to-Heart: Damek 1
Go to Map: Rebel HQ then Main Entrance then The Library
Rebel HQ: The Library
You should have read 12 books by now, if you are following this guide. You can reread any books you find on your journey by returning here.
Go to Main Entrance then The Barracks
Rebel HQ: The Barracks
You should have all 16 Party Banter conversations on the first page by now, if you are following this guide. You can listen to any Party Banter you find on your journey by returning here.
Go to Main Entrance then Map: Rebel HQ then Personal Quarters
Rebel HQ: Personal Quarters
Shane’s Journal found on shelf on back wall
Go to Map: Rebel HQ then Crew Quarters
Rebel HQ: Crew Quarters
Heart-to-Heart: Valessa 2, Fortaime 3, Ulric 2, Pro 2, Damek 2 There is a sixth room for another crew member, Howl, whom you’ll meet later.
Go to Map: Rebel HQ then War Table
Act 3
Rebel HQ: War Table
IMPORTANT CHOICE: [Let Gryz sacrifice himself.] is +10% Corruption or [Tap into the idol’s power yourself.] is +10% Purity If you don’t choose [Tap into the idol’s power yourself.], Pro will not survive the final battle in Act 5.
IMPORTANT CHOICE: [Create an army of Seers.] is +10% Purity or [Create an army of Monarch Vessels] is +10% Corruption
Knowledge from a Book: “What about Vivien and her army?” This only appears if you read Alarinthia’s Civil Conflict in Mazeo Tavern
IMPORTANT CHOICE: “Damek will advise me, as he always has.” is +10% Purity or “Howl, I wish for you to be my advisor.” is +10% Corruption
Parallel Chronicle “Sovy 7”
Go to Map: Rebel HQ then Crew Quarters
Rebel HQ: Crew Quarters
Heart-to-Heart: Howl 1 is now available in the sixth room.
Go to Map: Rebel HQ then Exit then first area then Map: Mazeo then Docks
Mazeo: Docks
Go to marker in water (takes you to Pirate Ship)
Act 4
Pirate Ship
Heart-to-Heart: Damek 3, Howl 2, Pro 3, Valessa 3, Ulric 3, Fortaime 4 Fortaime’s loyalty scene unlocked
Party Banter: Mylus and Howl
Go to second area (takes you to Map: Alarinthia) then Docks
Alarinthia: Docks
Parallel Chronicle “Sovy 8”
Party Banter: Damek and Pommy
Chat: Ulric
Go to Map: Alarinthia then Desert
Alarinthia: Desert
Party Banter: Ulric and Pro This banter involves something that happens later in the Act
Chat: Fortaime
Go to Map: Alarinthia then Oasis
Alarinthia: Oasis
Party Banter: Fortaime and Seer Army This banter only appears if you chose to make an army of Seers
Chat: Valessa
Go to Map: Alarinthia then Gates
Alarinthia: Gates
Party Banter: Valessa and Monarch Vessels This banter only appears if you chose to make an army of Monarch Vessels
Chat: Howl
Go to marker in archway (takes you to Map: Alarinthia City) then Town Square
Alarinthia City: Town Square
On Sixers found in market stall on lower left
Draycu’s Reign found on crates on right
Chat: Ulric
Go to Map: Alarinthia City then Tavern
Alarinthia City: Tavern
Parallel Chronicle “Sovy 9”
Party Banter: Valessa and Pro and Fortaime and Damek
Heart-to-Heart: Ulric 4 Ulric’s loyalty scene unlocked if you’ve viewed all four of his Heart-to-Heart conversations
Go to Map: Alarinthia City then Castle (takes you to Map: Alarinthia Castle) then Castle Front then Map: Alarinthia Castle then Throne Room
Alarinthia Castle: Throne Room
IMPORTANT CHOICE: “I want Alarinthia to stay the same.” is +10% Purity or “I want Alarinthia to change its ways” is +10% Corruption
Party Banter: Ulric and Pro and Fortaime and Draycu
Chat: Fortaime, Pro, Howl and Ulric
Go to Map: Alarinthia Castle then Ballroom
Alarinthia Castle: Ballroom
Parallel Chronicle “Halin 2”
Party Banter: Valessa and Ulric, Damek and Pro and Fortaime and Howl
Heart-to-Heart: Valessa 4 and Damek 4 Both of their loyalty scenes are unlocked
Go to Map: Alarinthia Castle then Private Room
Alarinthia Castle: Private Room
You are briefly sent to Balteus: Triumvirate Castle Chamber again during another dream. Click the idol to progress the story. Afterward, you wake up back in Private Room.
The Evolution of Tournaments found on bedside table on right
Go to Map: Alarinthia Castle then Exit (takes you to Map: Alarinthia) then Coliseum (takes you to Map: Alarinthia Coliseum) then Outside
Alarinthia Coliseum: Outside
Parallel Chronicle “Sovy 10”
Go to Map: Alarinthia Coliseum then Main Atrium
Alarinthia Coliseum: Main Atrium
Party Banter: Fortaime and Valessa This only appears if you have a relationship with Fortaime but also flirted with Valessa. (Credit to [FWKZT] Texas Man, who has informed me the same is true if you do the opposite as well.)
Heart-to-Heart: Howl 3
Go to Map: Alarinthia Coliseum then Private Room
Alarinthia Coliseum: Private Room
Heart-to-Heart: Pro 4 Pro’s loyalty scene unlocked
The Grand Library found under window
Go to Map: Alarinthia Coliseum then Arena
Alarinthia Coliseum: Arena
If you sided with Draycu, you will lose Ulric here. If you sided with Vivien, you’ll lose Pro here. You eventually end up at Alarinthia City: Docks
Alarinthia City: Docks
Regardless of which side you chose, your lost party member will return here
You eventually end up on Pirate Ship
Pirate Ship
IMPORTANT CHOICE: [Allow Sovy to assist The Rebellion.] is +10% Corruption or [Deny Sovy’s offer, and make him leave.] is +10% Purity This choice decides whether or not he joins your party
Howl’s fourth Heart-to-Heart is made available, and, if you allowed Sovy to assist The Rebellion, his Heart-to-Heart conversations are also available now. All currently unlocked loyalty scenes are available at Rebel HQ: War Table
You eventually end up at Mazeo: Dock
Mazeo: Dock
Fast travel to World Map then Valinorth Surrounding Region (takes you to Map: Valinorth) then Eastcrown
Valinorth: Eastcrown
Heart-to-Heart: Howl 4 Howl’s loyalty scene unlocked
If you allowed Sovy to assist, go to Map: Valinorth then Map: Valinorth Village then Town Square to start getting his Heart-to-Heart conversations. If not, skip down in the guide to Rebel HQ: War Table
Valinorth Village: Town Square
Heart-to-Heart: Sovy 1
Fast travel to World Map then Mazeo City (takes you to Map: Mazeo) then Town Square
Mazeo: Town Square
Heart-to-Heart: Sovy 2
Go to Map: Mazeo then Church of Mazeo then second area then Rebel HQ (takes you to Map: Rebel HQ) then Main Entrance
Rebel HQ: Main Entrance
Heart-to-Heart: Sovy 3
Go to Map: Rebel HQ then Personal Quarters
Rebel HQ: Personal Quarters
Heart-to-Heart: Sovy 4 Sovy’s loyalty scene unlocked
Go to Map: Rebel HQ then War Table
Rebel HQ: War Table
You will need to have completed all four Heart-to-Heart conversations with a character to access their loyalty scene
Loyalty scene: Valessa Must select “Keep them, Valessa. Make them your own.”, when given the chance, to earn her loyalty You need to earn her loyalty before the end of Act 4 for her to survive the final battle
Loyalty scene: Fortaime Must select [Let him win], when given the chance, to earn his loyalty
Loyalty scene: Pro Must select “Let them go, Pro. You have a true family with The Rebellion.”, when given the chance, to earn his loyalty
Loyalty scene: Ulric Must select [Remove the curse from Ulric.], when given the chance, to earn his loyalty
Loyalty scene: Damek Must select “Leave it. Move on from these painful memories.”, when given the chance, to earn his loyalty
Loyalty scene: Howl Must select “I believe you, Howl. It makes everything seem more clear.”, when given the chance, to earn his loyalty
Loyalty scene: Sovy, If you allowed him to assist Must select “Yes, Sovy. I trust you now. You’ve earned it.”, when given the chance, to earn his loyalty
Make sure you’ve completed everything you want to do in the story before continuing. There are 17 books and 27 Party Banter conversations to be found. There is one more Party Banter but it is locked out based on your army choice in Act 3.
Fast travel to World Map then Balteus
Act 5
You eventually end up on Pirate Ship
Pirate Ship
The choices you have made throughout the story up to now shape how this speech plays out, and will vary as a result
IMPORTANT CHOICE: [Kill Shane] is +10% Corruption or [Incapacitate Shane] is +10% Purity If you don’t choose [Incapacitate Shane], Damek will not survive the final battle at the end of this Act
You eventually end up in Balteus: Shack
Balteus: Shack
Go to second area
You eventually end up in Private Quarters
Balteus: Private Quarters
You can spend some final time with every loyal crew-member
Final time scene: Howl An IMPORTANT CHOICE needs to be made to either [Remove the spirits to empower the blade.] or [Leave Howl as he is. He’s too valuable.] This is not a Purity/Corruption choice, but if you choose [Remove the spirits to empower the blade.], Howl will not survive the final battle at the end of this Act
Final time scene: Damek, Ulric, Pro, Fortaime, Valessa, Sovy if you allowed him to assist. You can only get the final time scene with a party member whose loyalty you earned.
Move to first area
You need 90% morale, for everyone to survive. You get 30% just for playing through the story, and an additional 10% for every loyal crew member, Beyond this, you will also need to have met the following conditions:
Ulric: Always survives
Fortaime: Always survives
Valessa: Get her loyalty before the final Act
Sovy: Either don’t let him join, which removes him entirely, or let him join and get his loyalty before the final Act
Pro: Don’t let Gryz sacrifice himself, and instead choose to tap into the idol’s power yourself
Damek: Spare Shane
Howl: Either don’t activate their Final time scene or activate the scene, but don’t remove the spirits to power your sword
You eventually end up in Balteus: Triumvirate Castle
Balteus: Triumvirate Castle
IMPORTANT CHOICE: [Kill Halin] is +10% Purity or [Liberate Halin] is +10% Corruption
You eventually end up in Balteus: Triumvirate Castle Chamber
Balteus: Triumvirate Castle Chamber
Click the idol to progress the story
FINAL CHOICE: [Spare your life – cast away the idol temporarily.] or [Sacrifice yourself – destroy the idol for good.]
If you choose [Spare your life – cast away the idol temporarily.], the epilogue will consist of what happened with each of your party members’ lives and what they’ve done to aid you, with mentions of any relationships as well. If any party members passed away, you are told about what happened as a result of their deaths. You’re also told a bit about the lives of many of the others you met along the way. Afterward, several party members greet you and help to lead you out of the area, talking about the work you now need to do as Monarch.
If you choose [Sacrifice yourself – destroy the idol for good.], the epilogue will consist of what happened with each of your party members’ lives and what they’ve done in memory of you, with mentions of any relationships as well. If any party members passed away, you are told about what happened as a result of their deaths. You’re also told a bit about the lives of many of the others you met along the way. Afterward, you awaken back in your home in Valinorth, with your arm still missing but with history having been changed. You’re found by Fortaime, and it’s now the anniversary of your induction. He mentions Salus and Mylus having sent him and your parents waiting on you.
This guide will be showing you the locations of each of the four Heart-to-Heart conversations for each character. You must view them in order for the next one to show up.
Fortaime
1. Peregrino Area 3 (Act 1)
2. Mazeo Town Square (Act 2)
3. Rebel HQ Crew Quarters (Act 2)
4. Pirate Ship (Act 4)
Valessa
1. Peregrino Area 3 (Act 1)
2. Rebel HQ Crew Quarters (Act 2)
3. Pirate Ship (Act 4)
4. Alarinthia Castle Ballroom (Act 4)
Ulric
1. Mazeo Tavern (Act 2)
2. Rebel HQ Crew Quarters (Act 2)
3.Pirate Ship (Act 4)
4.Alarinthia Tavern (Act 4)
Pro
1. Mazeo Tavern (Act 2)
2. Rebel HQ Crew Quarters (Act 2)
3. Pirate Ship (Act 4)
4.Alarinthia Coliseum Private Room (Act 4)
Damek
1. Rebel HQ Tunnels (Act 2)
2. Rebel HQ Crew Quarters (Act 2)
3. Pirate Ship (Act 4)
4. Alarinthia Castle Ballroom (Act 4)
Howl
1. Rebel HQ Crew Quarters (Act 3)
2. Pirate Ship (Act 4)
3. Alarinthia Coliseum Main Atrium (Act 4)
4. Valinorth Eastcrown (Act 4)
Sovy
Sovy’s Heart-to-Heart conversations are only available if you allowed him to assist the Rebellion and join your crew
1. Valinorth Town Square (Act 4)
2. Mazeo Town Square (Act 4)
3. Rebel HQ Main Entrance (Act 4)
4. Rebel HQ Personal Quarters (Act 4)
Final Battle Survival Notes
You need 90% morale, for everyone to survive. You get 30% just for playing through the story, and an additional 10% for every loyal crew member, Beyond this, you will also need to have met the following conditions:
Fortaime: Always survives
Valessa: Get her loyalty before the final Act
Ulric: Always survives
Pro: Don’t let Gryz sacrifice himself, and instead choose to tap into the idol’s power yourself
Damek: Spare Shane
Howl: Either don’t activate their Final time scene or activate the scene, but don’t remove the spirits to power your sword
Sovy: Either don’t let him join, which removes him entirely, or let him join and get his loyalty before the final Act
Winds of Change Achievements Guide
Prologue

Foreshadowing
Unlocks after you complete the Prologue
Act 1

Time to Study
Unlocks by reading any book twice

The Scribe-In-Training
Unlocks after Fortaime joins your party in Valinorth Village: Main Street

Some Quality Time
Unlocks by talking to anyone in your party alone (which, at the earliest point, would be Fortaime in Valinorth Village: Your House)

The Scribe
Unlocks after Valessa joins your party in Valinorth Village: Town Square
Meanwhile…
Unlocks after viewing any Parallel Chronicle (which, at the earliest point, would be either Damek’s or Sovy’s in Valinorth Village: Town Square)
Among Friends
Unlocks after viewing any Party Banter (which, at the earliest point, would be Valessa and Fortaime in Valinorth Village: Great Tree)

Cold Shoulder
Unlocks after visiting Eastcrown

Where It All Began
Unlocks after visiting Sauleberg

The Rebel Brawn
Unlocks after Ulric joins your party in Valinorth: Peregrino

Might or Mirth
Unlocks after you make your decision on either turning Peregrino into a barracks or leaving it as it is.

The Handsome Swindler
Unlocks after Pro joins your party in Valinorth: Peregrino

So That’s What It Stands For
Unlocks after clicking the shields above the fireplace in Valinorth: Peregrino

Strength or Identity
Unlocks once you make your choice of who becomes Elder between Fortaime and Valessa in Valinorth: Peregrino

Taking Things Further
Unlocks by engaging in a Heart-to-Heart conversation with one of your party members (which, at the earliest point, would be either Valessa or Fortaime in Valinorth: Peregrino)

Corruption or Purity
Unlocks when you end up in Balteus: Triumvirate Castle Chamber after going to sleep in Valinorth: Peregrino

Fate of Valinorth
Unlocks after you complete Act 1
Act 2

A New Frontier
Unlocks after you have access to the town of Mazeo

General of the Rebellion
Unlocks after Damek joins your party in Mazeo: Town Square

Love Amongst War
Unlocks after you start a relationship with someone (which, at the earliest point, would be with Fortaime in Mazeo: Town Square)

Time To Unwind
Unlocks once you get to Mazeo: Mazeo Tavern

Fate of Mazeo
Unlocks after you make your decision on whose demands you choose to agree to in Mazeo: Mayor’s House

One Step Down
Unlocks after you get to Rebel HQ: Main Entrance
Scholar
Unlocks after you enter Rebel HQ: The Library

Catching Up
Unlocks after you enter Rebel HQ: The Barracks
Home Sweet Home
Unlocks after you complete Act 2
Act 3
Punishment or Redemption
Unlocks after making your deicision to either let Gryz sacrifice himself or to tap into the idol’s power yourself in Rebel HQ: War Table
Inauguration
Unlocks automatically after Damek’s speech where he steps down as leader in Rebel HQ: Main Entrance
Life or Death
Unlocks after you make your choice on whether you create and army of Seers or an army of Monarch Vessels in Rebel HQ: War Table
The Price of Faith
Unlocks automatically after the cutscenes in the Act, based on your earlier choices
Past or Present
Unlocks after you make your choice on either keeping Damek as your advisor or making Howl your advisor instead in Rebel HQ: War Table

Rage of The Monarchy
Unlocks after Howl joins your party in Rebel HQ: War Table
Fate of The Rebellion
Unlocks after you complete Act 3
Act 4

A Long Way From
Home Unlocks after you arrive in Alarinthia

Tradition or Transgression
Unlocks after you make your decision between wanting to keep Alarinthia the same or wanting it to change in Alarinthia Castle: Throne Room

Strength over Words
Unlocks after you make your decision to either attack before your opponent’s can retaliate or wait for the blindness to subside and fight as a team in Alarinthia Coliseum: Arena
Turning The Tables
Unlocks after you discover that Pro and Ulric staged the Coliseum fight in Alarinthia City: Docks

Lucky Number Seven
Unlocks after you make the choice to agree to let Sovy assist the Rebellion in Mazeo: Docks
Note: Choosing to do this locks you out of the No More Than Six achievement
No More Than Six
Unlocks after you make the choice to refuse Sovy’s help in Mazeo: Docks
Note: Choosing to do this locks you out of the Lucky Number Seven and Bonds Unbroken achievements
In Their Footsteps
Unlocks after earning Valessa’s loyalty by choosing “Keep them, Valessa. Make them your own.” during her Loyalty Scene in Rebel HQ: War Table
Reach For The Top
Unlocks after earning Fortaime’s loyalty by choosing [Let him win] during his Loyalty Scene in Rebel HQ: War Table
Left Behind
Unlocks after earning Pro’s loyalty by choosing “Let them go, Pro. You have a true family with The Rebellion.” during his Loyalty Scene in Rebel HQ: War Table
Ancient History
Unlocks after earning Ulric’s loyalty by choosing [Remove the curse from Ulric.] during his Loyalty Scene in Rebel HQ: War Table
Something Borrowed
Unlocks after earning Damek’s loyalty by choosing “Leave it. Move on from these painful memories.” during his Loyalty Scene in Rebel HQ: War Table
A Change in Perspective
Unlocks after earning Howl’s loyalty by choosing “I believe you, Howl. It makes everything seem more clear.” during his Loyalty Scene in Rebel HQ: War Table
Where It All Began
Unlocks after earning Sovy’s loyalty by choosing “Yes, Sovy. I trust you now. You’ve earned it.” during his Loyalty Scene in Rebel HQ: War Table
Note: This achievement is only obtainable if you allowed Sovy to assist The Rebellion
Bonds Unbroken
Unlocks after gaining the loyalty of all of your comrades.
Note:To get this achievement, you must have allowed Sovy to assist The Rebellion and you must have earned his loyalty along with your other party members.
Fate of Alarinthia
Unlocks after you complete Act 4
Act 5
Revenge or Reason
Unlocks after you make your decision between killing or incapacitating Shane in Pirate Ship
Below Freezing Point
Unlocks after you arrive in Balteus
Nom de Plume
Unlocks after meeting Algus Veileur in Baleus: Grand Library
Calm Before The Storm
Unlocks after you go to get some rest in Balteus: Private Quarters
Unforgettable
Unlocks after completing any party member’s full romantic subplot.
Note: This means selecting all Flirty options during the four Heart-to-Heart conversations you had with them, as well as completing their Final Time Scene in Balteus: Private Quarters
Liberty or Death
Unlocks after you make your decision between killing or liberating Shane in Balteus: Triumvirate Castle
Together
Unlocks after the final battle concludes, as long as all your party members survived.
Note: To ensure this, you need to meet the requirements listed in the ‘Final Battle Survival Notes’ section.
Strength in Unity
Unlocks after the final battle concludes, as long as all your alliances survived.
Note: To ensure this, you need to meet the requirements listed in the ‘Final Battle Survival Notes’ section.
Fate of Alestia
Unlocks after you complete the story
Closing notes
I played through the story multiple times, making different choices at different points, to allow me to see everything within it. By following this guide, you are guaranteed not to miss anything major in the story. I hope this guide was helpful to you.
I want to thank Klace for making this absolutely amazing visual novel. This was unlike any other visual novel I’d ever played through, and I thoroughly enjoyed reading it.
This guide may only be posted on Steam and GameNGuides. I do not give my permission for it to be posted anywhere else. If you wish to post it somewhere else, please be respectful enough to ask me first. Thank you.