A walkthrough for the second game in the Hapland trilogy, with contextual explanations along the way. This guide aims to encourage self-discovery by being divided into sections to help less confident players figure out what they are doing. It also describes incorrect solutions first, before correcting them later to avoid “spoon-feeding”.
Introduction
Welcome to this walkthrough of the second game in the Hapland Trilogy. Needless to say, this game is all about figuring things out for yourself, so please consider trying some things out yourself before reading this walkthrough!
Common objectives for all three Hapland games
In each level, the objective is to light the portal. The portal is lit when all of the level’s torches are activated. A torch is activated by allowing a character to reach one of the arched doorways.
We can only indirectly influence the events within the level by clicking on different objects and characters to see what they do. There is no dragging or keyboard input.
However, there is no indication of which effects are helpful or unhelpful, and some small, seemingly irrelevant actions are often revealed to be important later on. There are also several timed events in which a different outcome is achieved by clicking on items in a quick timed succession.
Good news! Timed events have quite a large acceptable timeframe. If you miss the window or are just a bit too early, chances are that was not the correct time in the first place. Adjust to a different timing cue.
CHAPTER 1: Hapland 2
Hapland 2 has a more complex solution and several more complex “red herring” states. In these states, it is still possible to interact with the level in a meaningful way, yet it has already been placed in an unsolvable state.
In the interest of promoting self-discovery, this walkthrough will initially describe incorrect solutions that still create progress in the focused area. These incorrect solutions will be corrected later on.
Best click score: 46.
Part 1: Clearing the upper landmine
The stickman inside the upper room of the castle needs to get to the lever two floors below him. However, there is a landmine in the way that we must clear beforehand. Just like in Hapland 1, we must destroy it with another object.
The objects we need would be the rocks underneath the bird on the castle roof. Click on the lamp to point it at the rocks, then click on the nearby switch to turn it on. If you were to click on the bird now, it would pick up one of the rocks, fly across the level, and drop it off on the roof of the house at the right. But we could use the rocks somewhere much more helpful.
What we need to do is click on the bird, but then click on the second cloud at the proper moment. This will interrupt the bird’s flight, causing it to drop the rock into the catapult on the roof of the structure in the middle. Focusing on this building, click on the sign to flip it to the green arrow, then click on the activation arrow underneath it. The stickman walks over to the catapult, ready to fire.
If you were to click on this stickman now, he fires the catapult with the rock. However, the rock is intercepted by the flag hanging off of the castle, instead of hitting the landmine. In order to get the rock past the flag, we must light it on fire.
Click on the left cloud three times, and watch carefully at what happens. Notice that when it explodes, it briefly rains down some hot stuff. If we were to fire the catapult while the acid is falling, it gets through the opening and destroys the landmine.
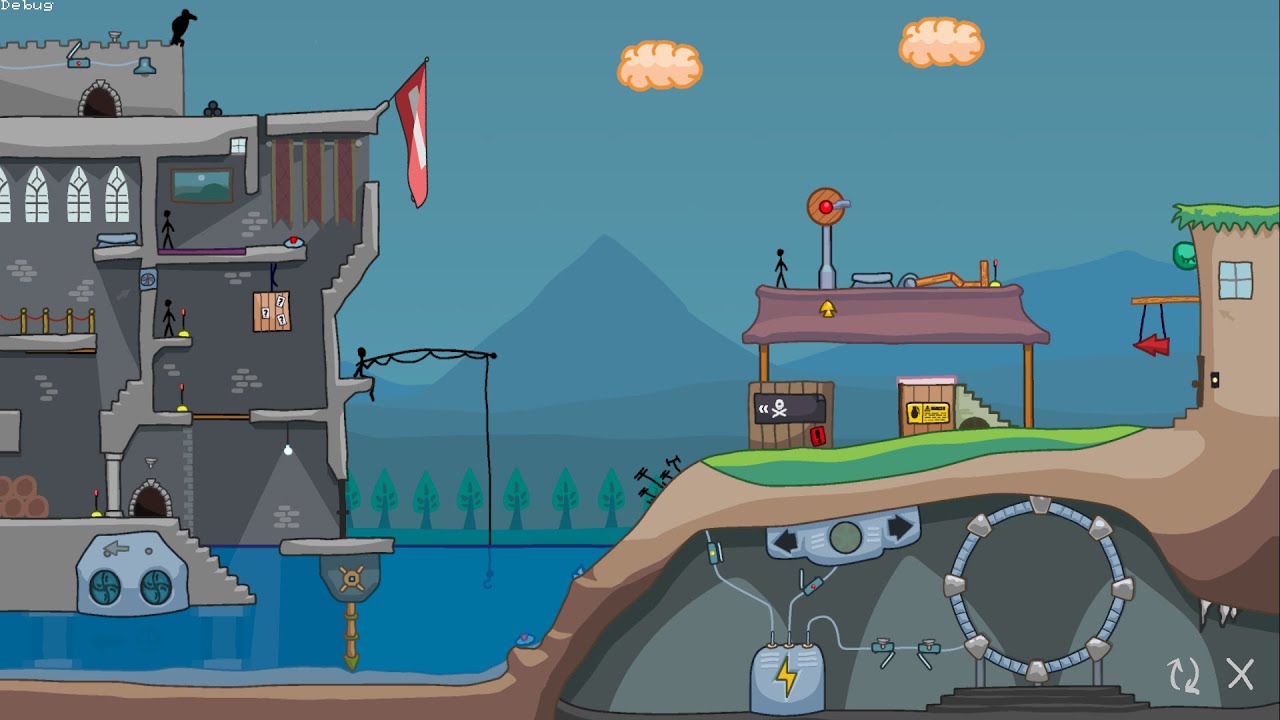
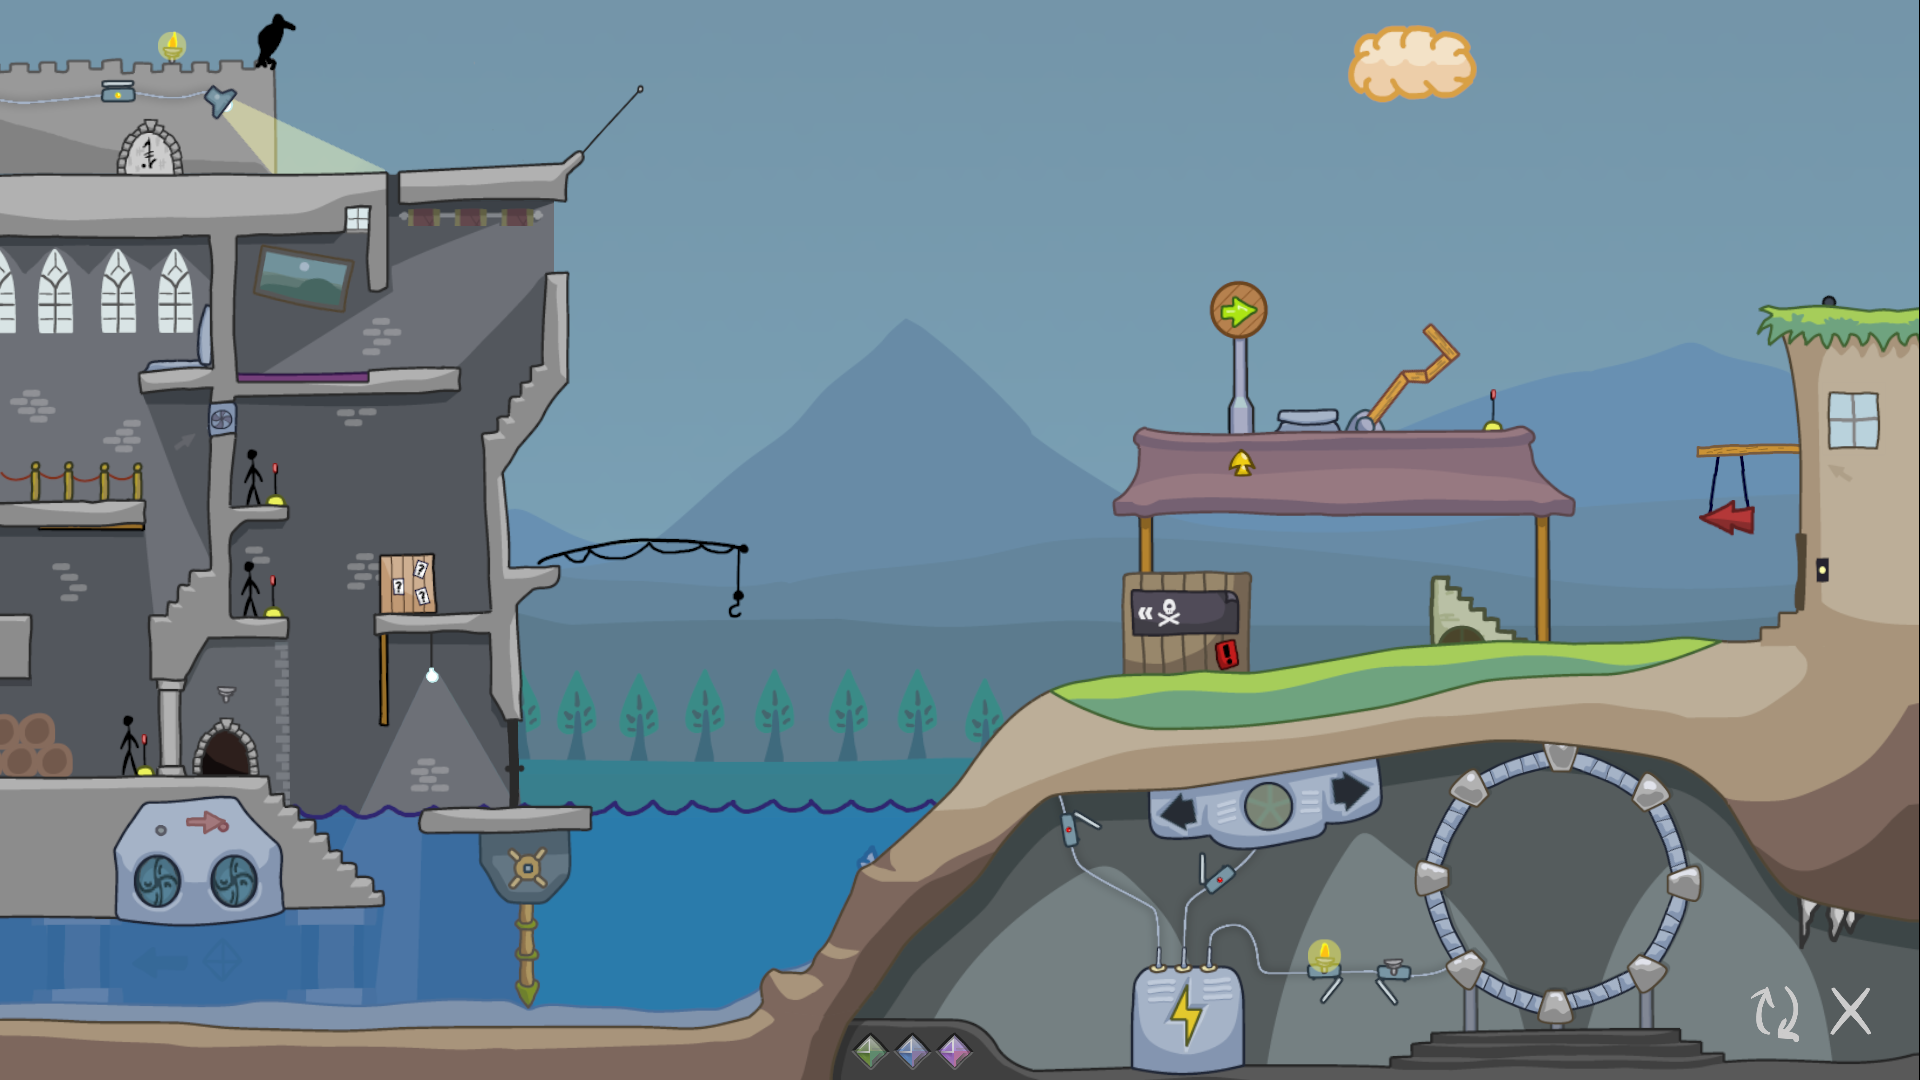
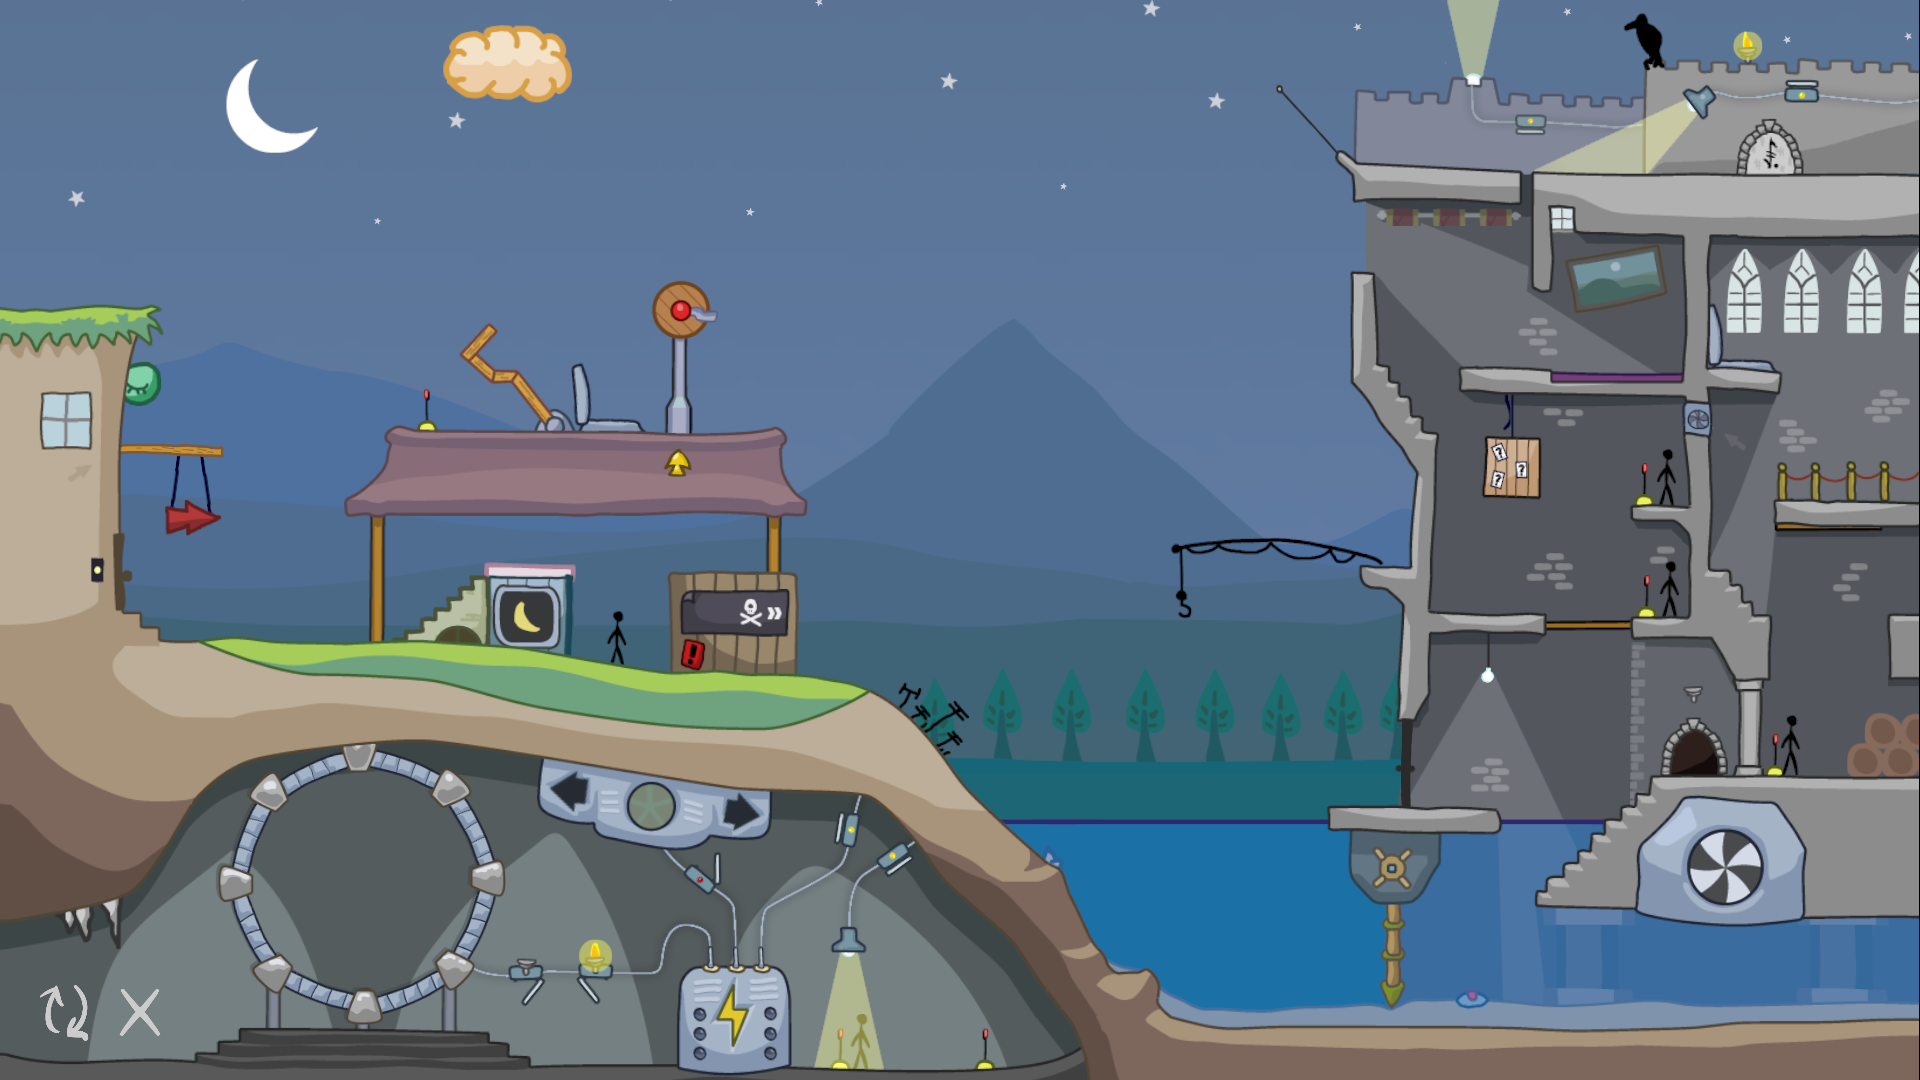
Here is what your level should look like after clearing the landmine:

Note that while this gets us to the next part, there is something we have already missed that was required in order to complete the level. However, I won’t describe it until we reach that point so that you have the chance to go figure it out for yourself!
After clearing the upper landmine, the next step is to get all the stickmen to their levers. Of course, this step has its kinks. In the next part, we’ll see how we can get this done without causing harm.
Part 2: Arming the crew stations
The fisherman sits patiently, awaiting something to eat. While there are unfortunately no fish swimming in the moat at this moment, there is a fish in the cargo crate hanging in the castle, the one with the question mark “?” symbols on it. Let’s see if we can get the fish all the way to the hook.
First, click on the stickman whose path you have just cleared. He drops down to the lower level. If you were to click on him again, he will try to reach his lever, but the upper stickman, being the mean person he is, yanks on his lever, dropping the crate on top of him (even if you didn’t click on him). In order to get our stickman to his lever, we need to distract the upper stickman to buy us time.
Click on the manhole near the top of the left-hand castle room. Out pops yet another stickman, accompanied by a fly. The fly briefly bothers the stickman before flying away.
But notice that there is a conveniently-placed fan vent positioned between the fly and the upper lever stickman. We can use it to suck the fly through, causing it to bother the stickman at the upper lever. This is exactly the distraction we need!
So what we need to do is click on the manhole, click on the fan vent at the right time, then click on the lower stickman while the upper stickman is distracted. Click on the stickman in the left room again, and he drops down to the lever below.
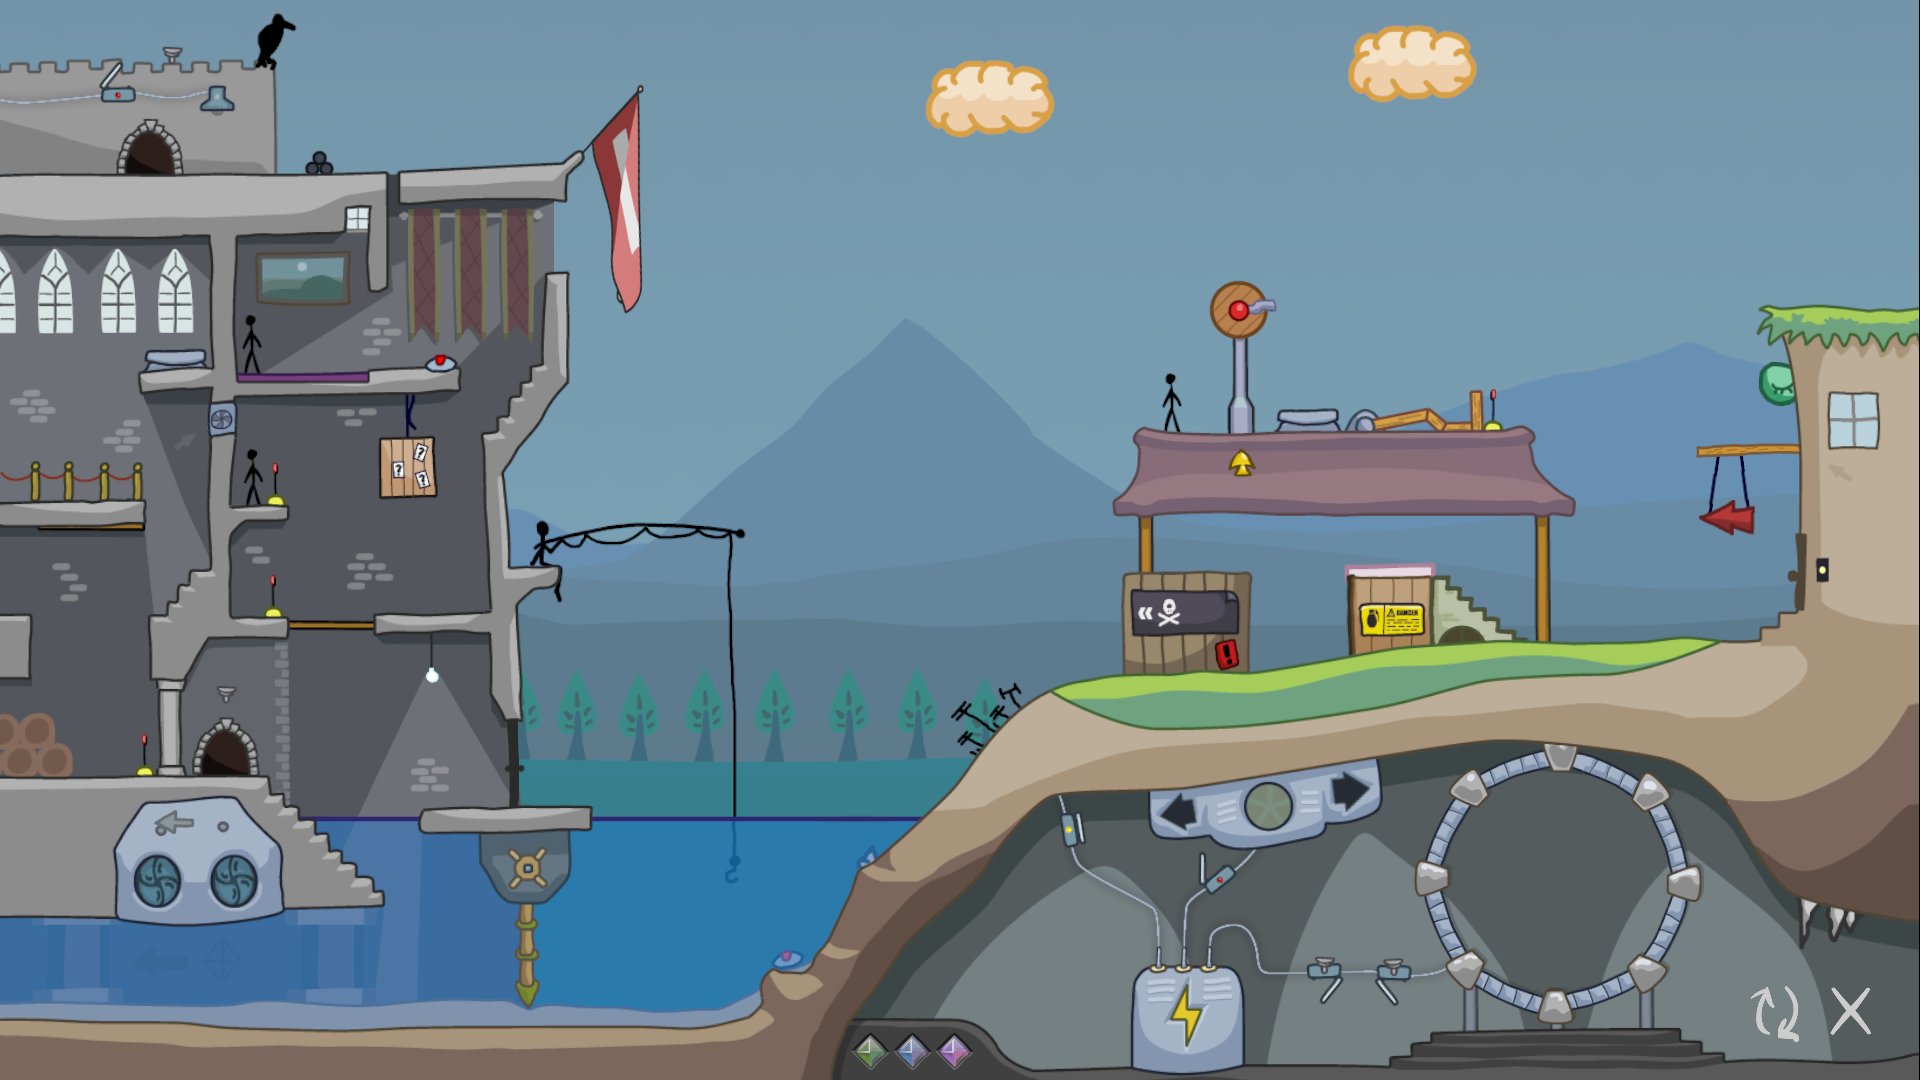
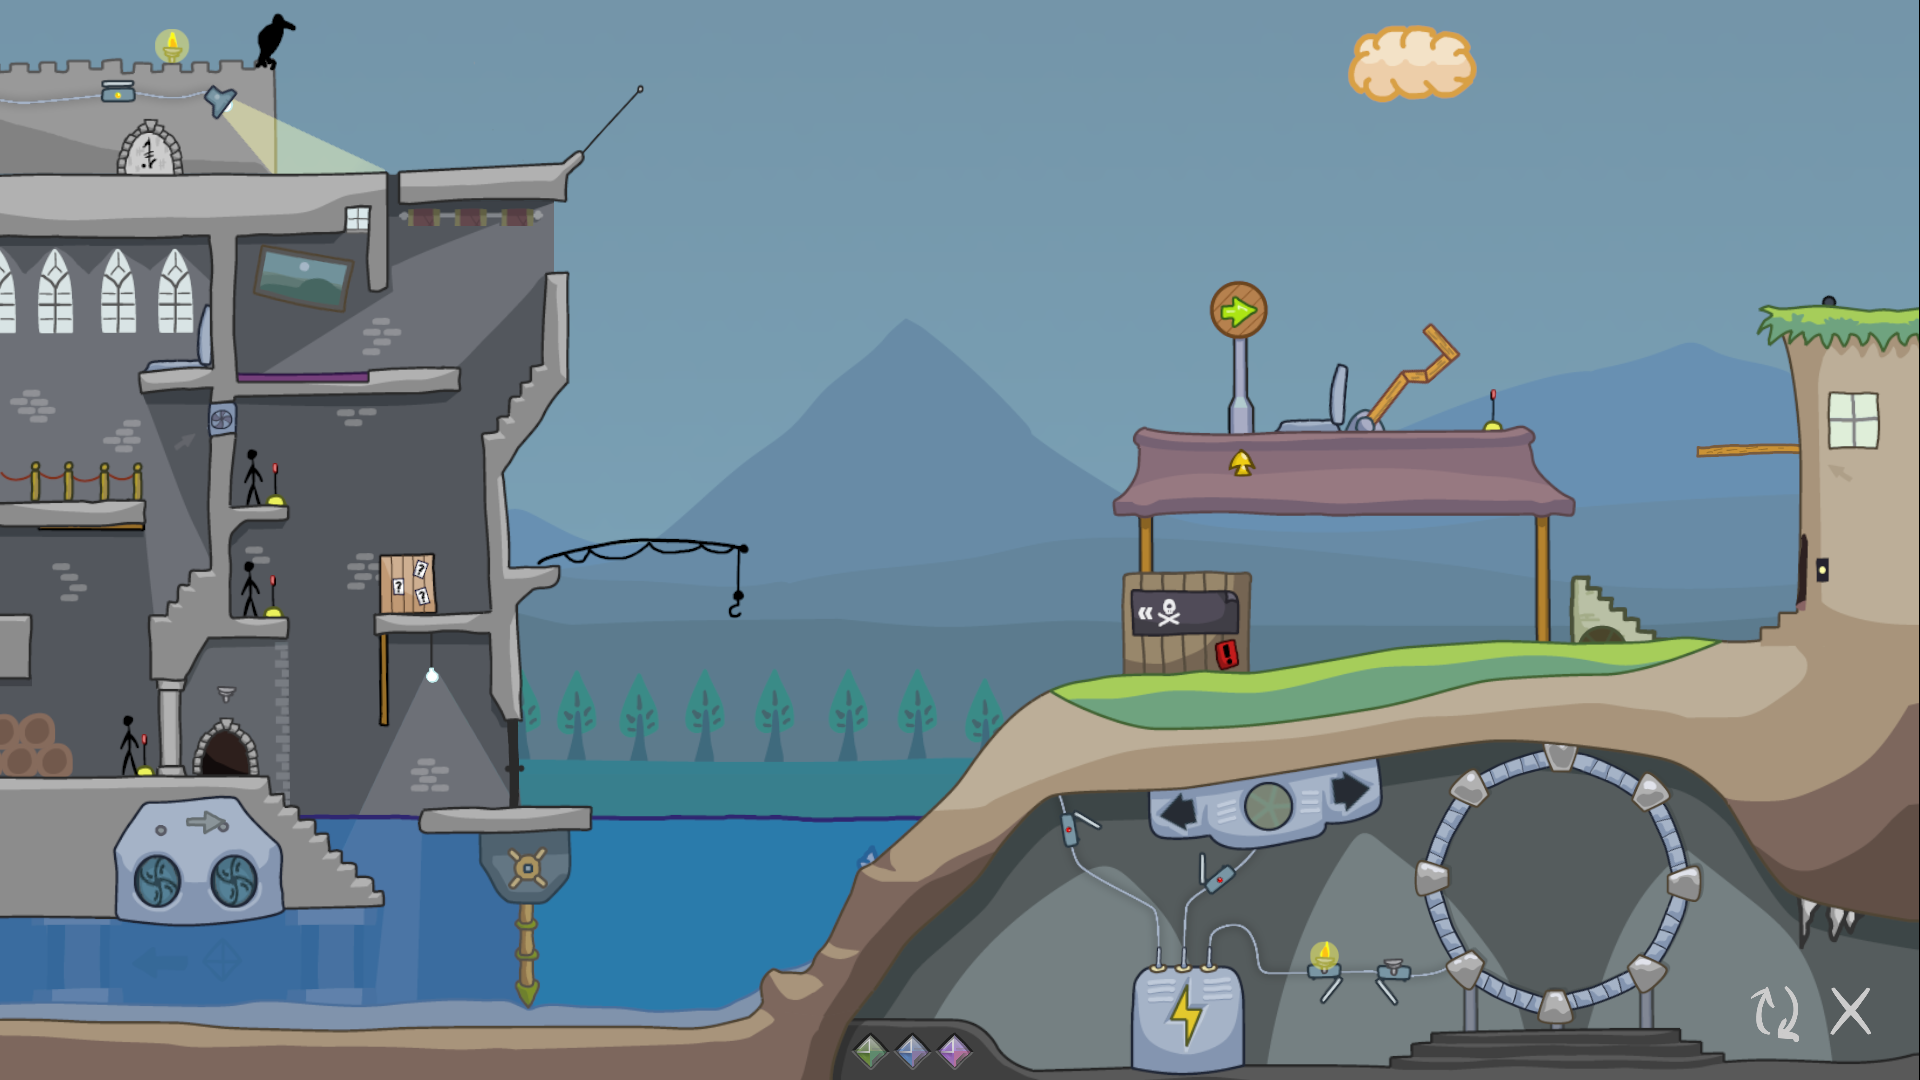
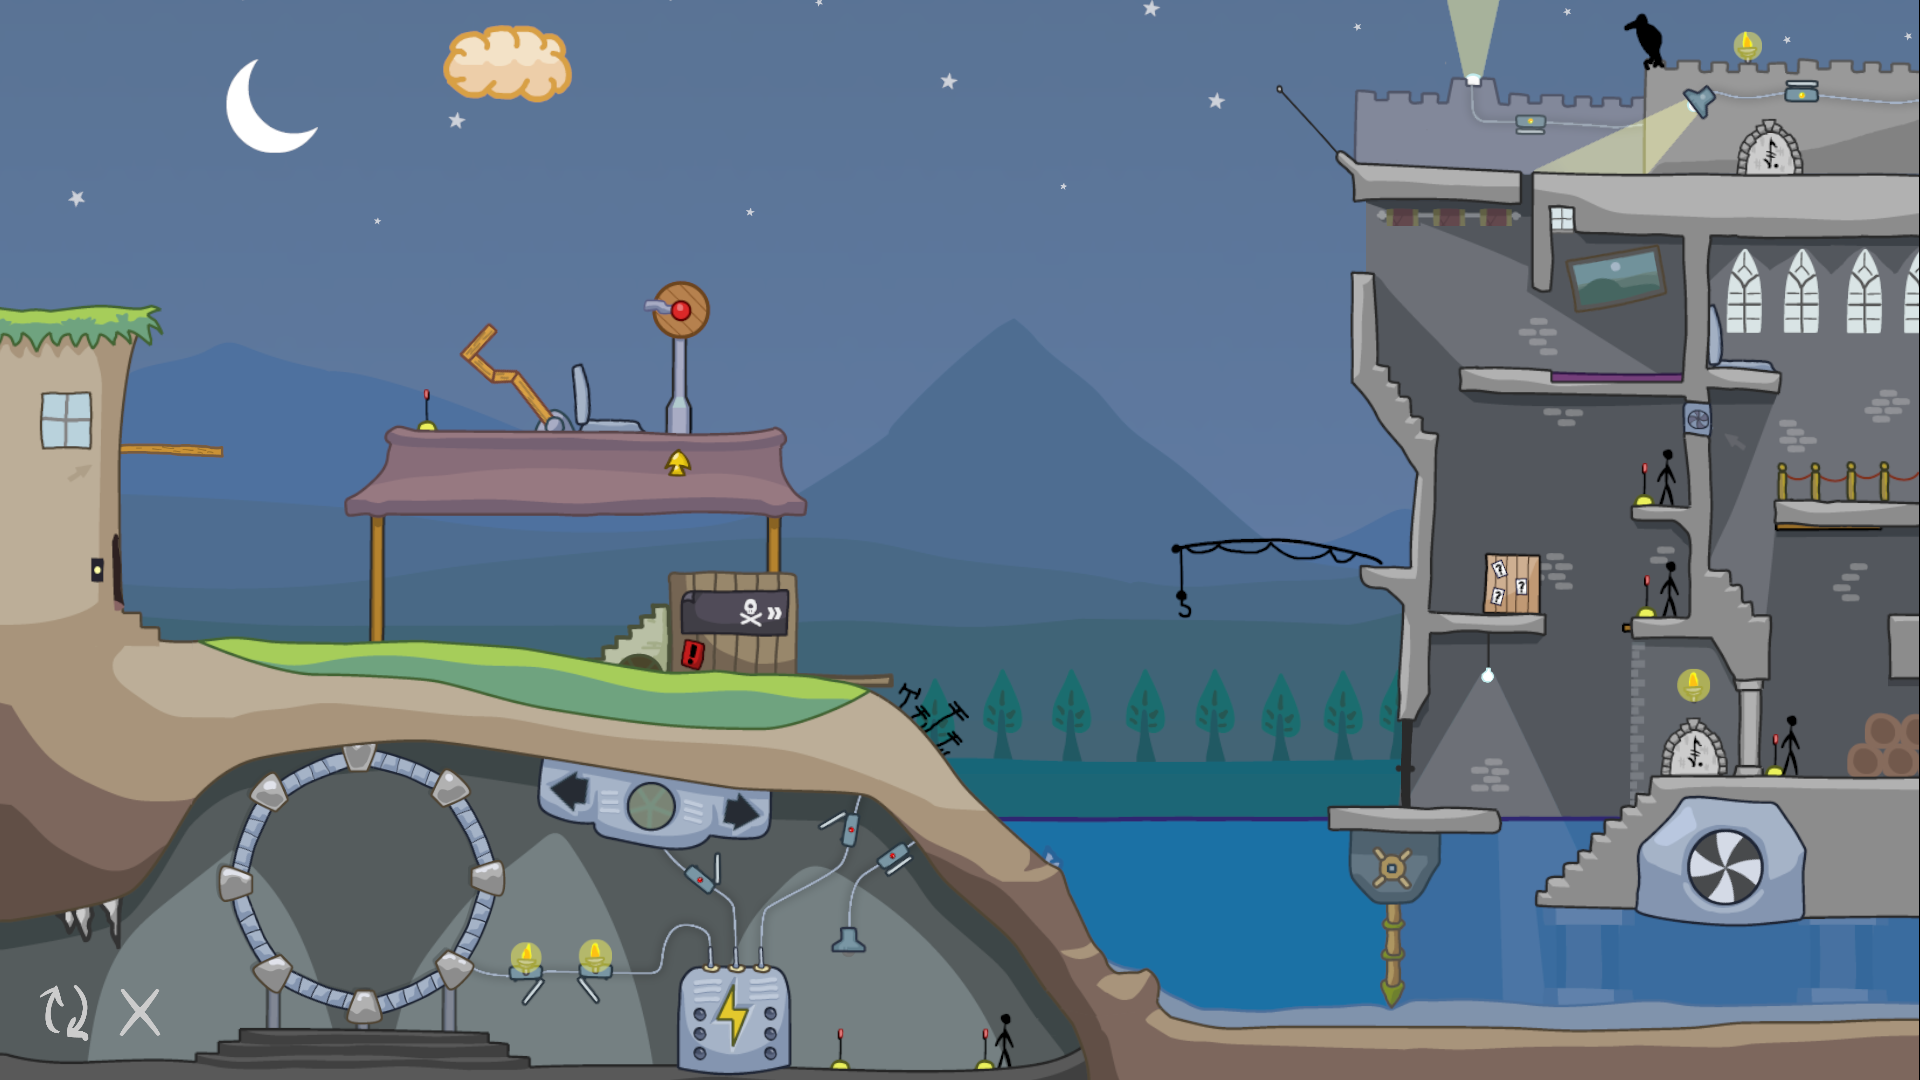
With all the levers armed, your level should now look like this:

Now that the crew stations are all armed, let’s see how we can use them to make progress. Onto part 3!
Part 3: Satisfying the fisherman
Click on the stickmen in the middle room to pull their levers, in any order. The lower one opens the hatch below, and the upper one releases the crate. A fish falls out and lands in the water, floating neutrally.
If you were to click on the stickman in the left room, he would start the water turbines, creating a strong current to the left. But a leftwards current is not what we’re looking for—it pushes the fish off the level to the left, never to be seen again. Instead, we want a rightwards current, which we can get by flipping the switch on the turbines before starting them. Now the fish is swept to the right, getting caught in the fisherman’s hook.
Stop the turbines, wait for the water to settle, then click on the fisherman to start the next sequence. After consuming his fresh catch, he bounces off his fishing rod onto the castle roof, satisfied. A few more clicks on him and he’ll enter his torch doorway, satisfying the first of two torches.
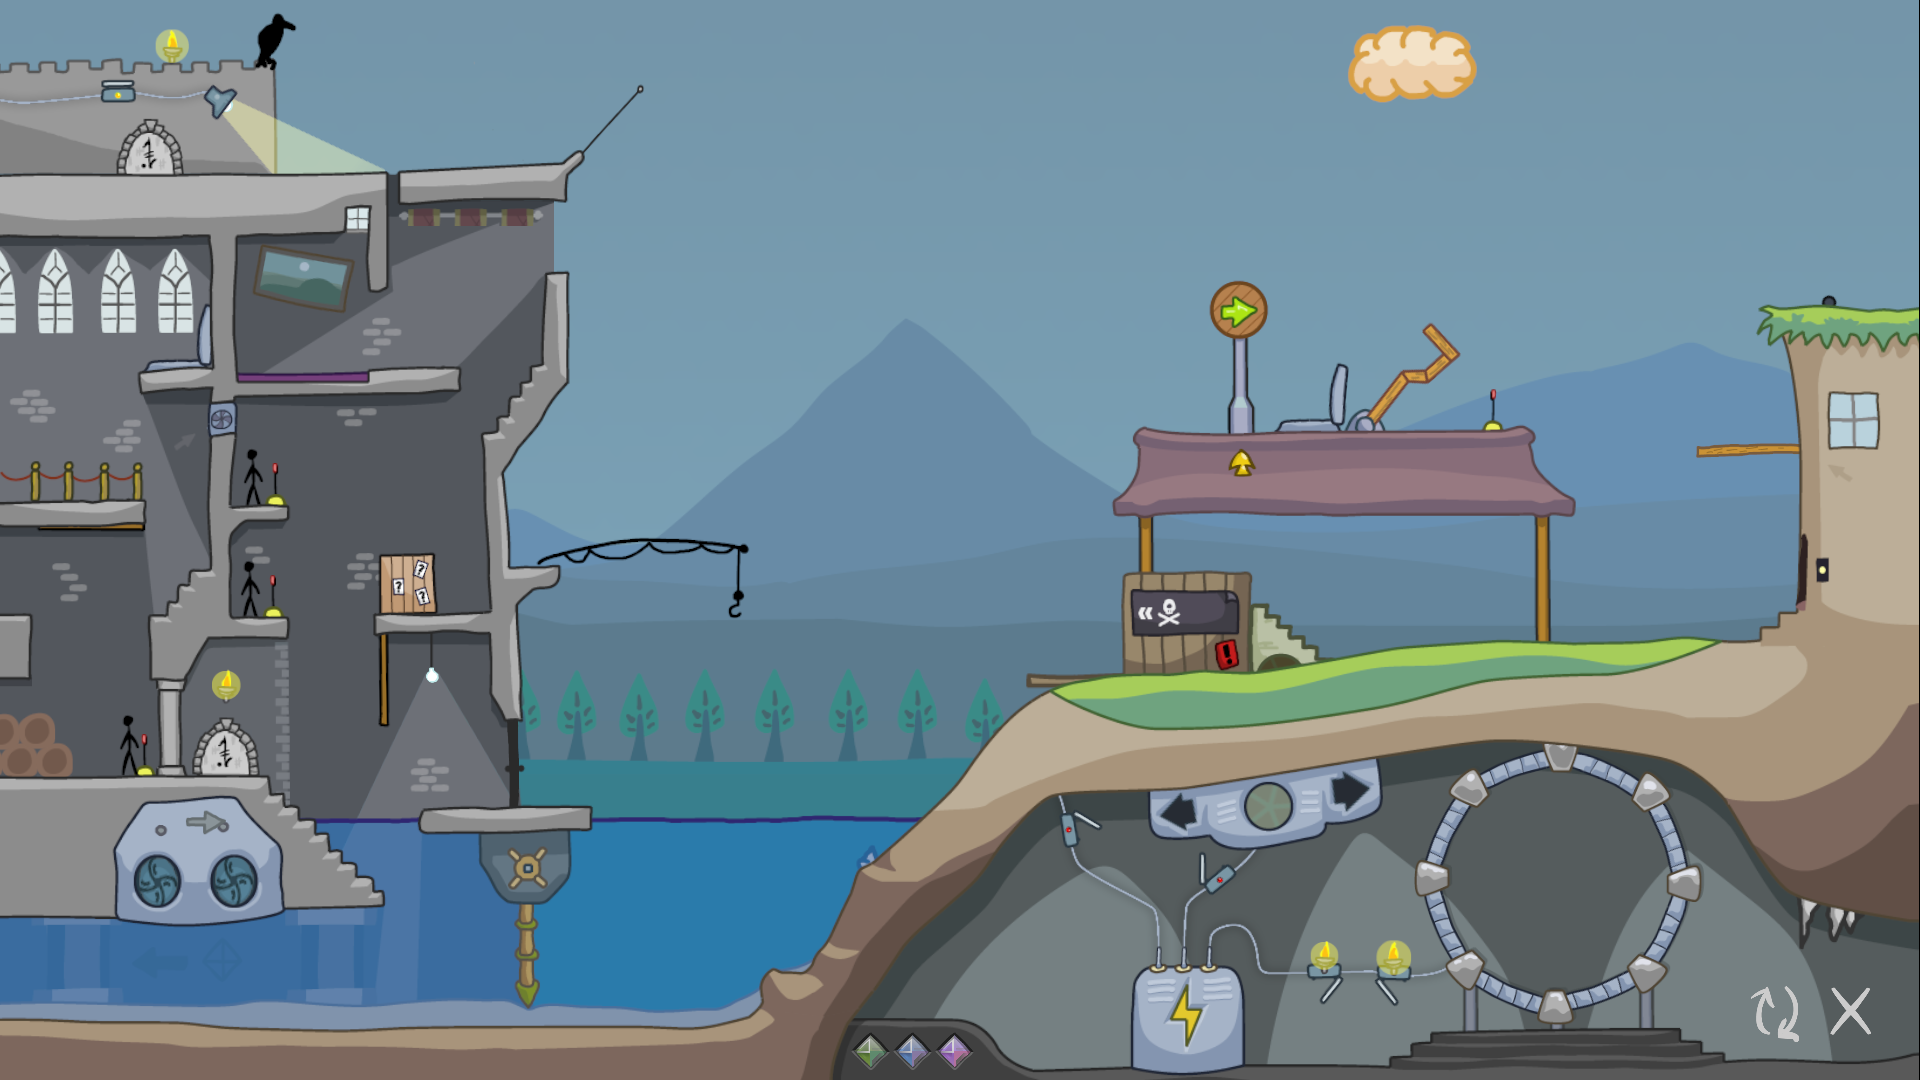
Here’s how the level looks after completing these steps:

If you’ve followed my walkthrough up until this point, do note that our level is now in an even more unsolvable state. In the next part, we’ll explore what mistakes we’ve made that prevent us from making progress, and figure out what modifications we can make to our earlier procedure to correct these issues.
Part 4: Fixing our first mistake
Let’s turn our focus back to the right-hand side of the level. Next to the house on the right, it’s another one of those red arrow signs! Using the power of arrows, let’s explore what we can do.
Remember that green arrow sign we activated at the start? Try activating it again. Watch as the stickman hops off the top of the structure, landing right under the red arrow sign. With the sign pointed to the left, the stickman follows it up the stairs, stopping on top of the box of bombs.
Now try turning the arrow sign to point to the right, and click on the stickman again. As he tries to enter the house to the right, he dislodges the door handle as well as the blob-creature above him, who promptly gobbles him up. Of course, we need this stickman alive, so we’ve already missed our chance of completing this run. But still, let’s explore what this blob does now that it’s awake.
Click on the blob, and it follows the arrow sign, just like the stickman! If pointed right, it just bashes on the door, which is unhelpful. However, point the sign to the left, and the blob promptly makes its way towards the moat, gobbling up the box of bombs on the way. However, it is promptly destroyed by the electrical wiring sticking out of the land. That blob was useful, so we need to clear those wires first.
First correction: Clearing the electrical wires
In order to clear the electrical wires, we need to use the bird and rocks. We used the second cloud to cause the bird to drop a rock into the catapult. If we do the same for the first rock, the bird drops a rock on the electrical wiring, destroying it.
We can only do this, however, before we explode the first cloud. Once the first cloud explodes, it is gone, and we can no longer drop a rock on the wires.
Reset the level, and complete parts 1, 2, and 3 again, but this time, use the bird and rocks to destroy the electrical wiring. Keep going until you’re about to click on the blob.
If you were to click on the blob right now, it would pass the electrical wiring and make it to the moat, but it then just stops unhelpfully in the middle. What would be great is if we could use the blob to clear an obstacle. And in fact, we can! Before we click on the blob, let’s start the water turbines again. When the blob enters the water, the current pushes it up against the second landmine, destroying it.
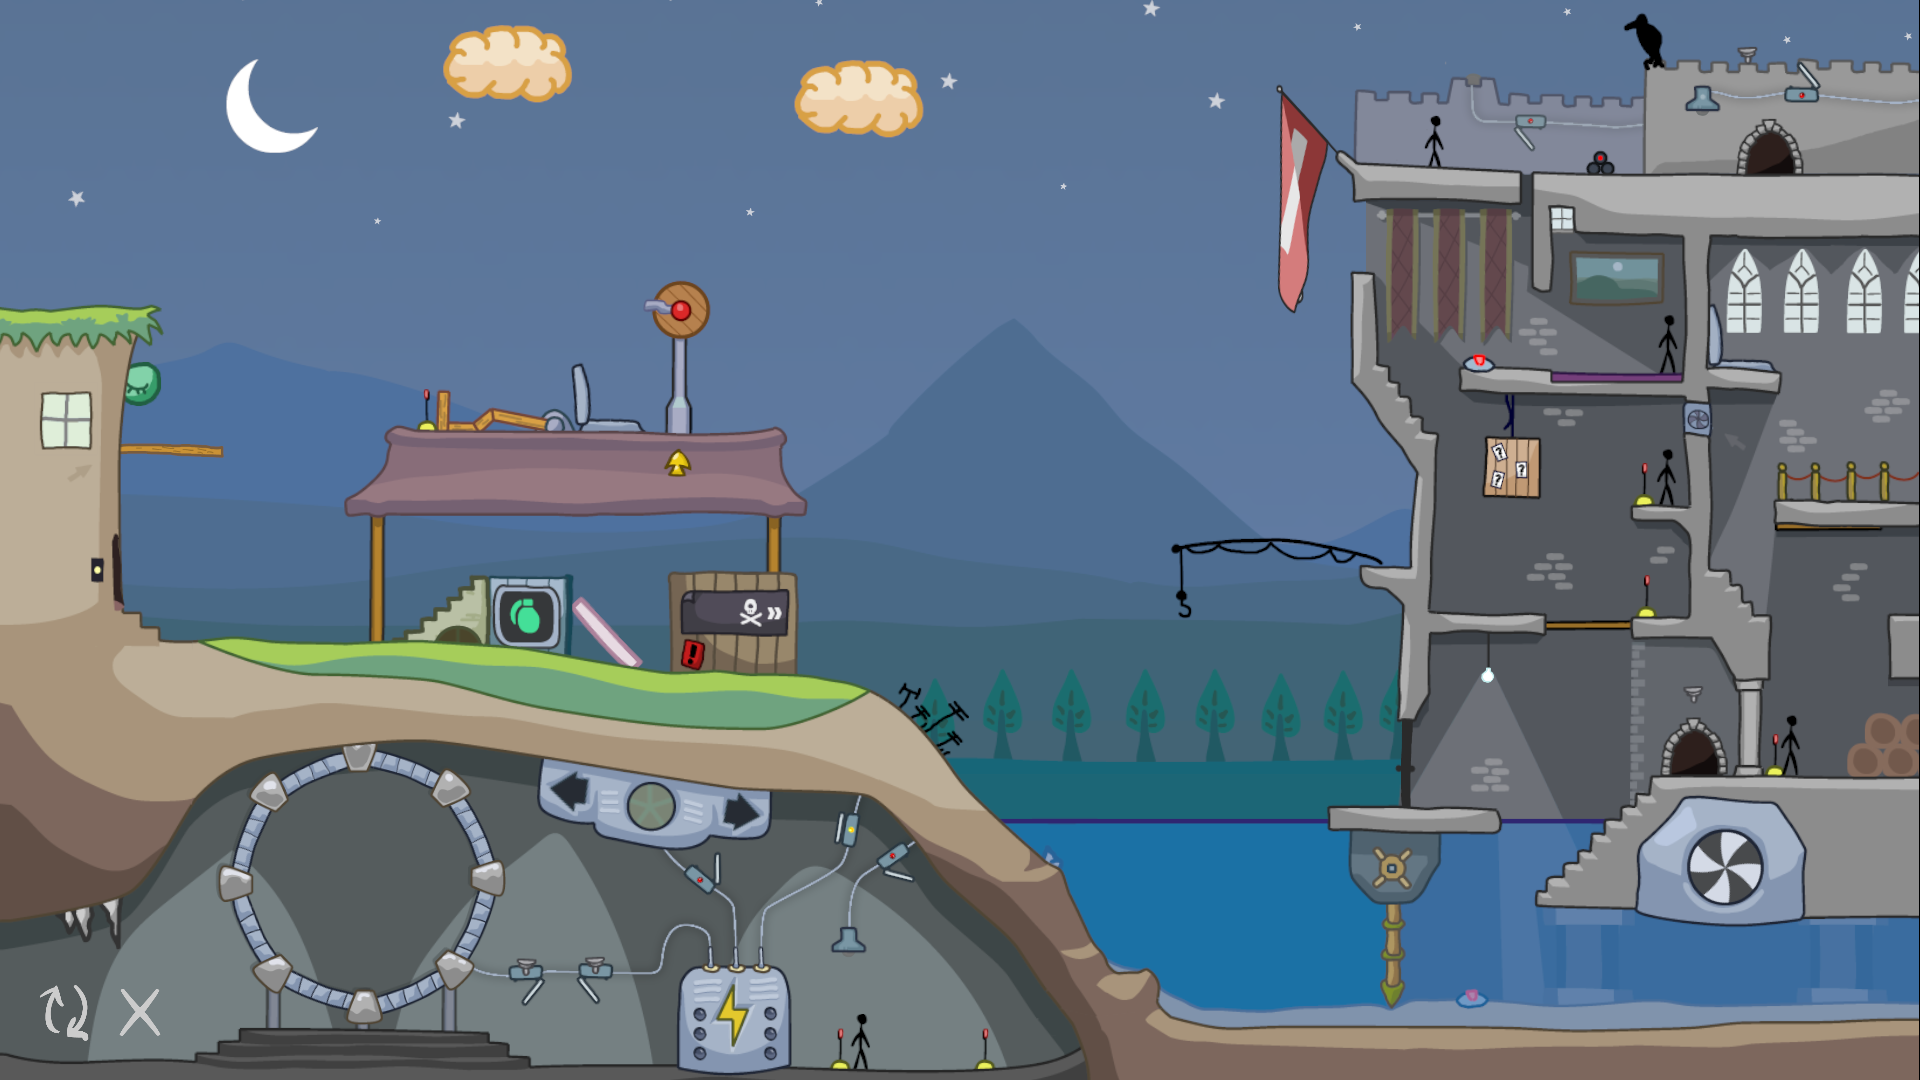
Here is how the level should look after having cleared both the electrical wires and the second landmine:
With both of those obstacles out of the way, we are fully in the clear for running the final gauntlet!
But wait, something’s missing… we have no stickmen with which to run the gauntlet!
We’ll need to correct our second mistake in order to save the stickman, which we’ll do in the next part.
Part 5: The final preparations
So far, we’ve figured out how to clear all the obstacles in the way of our final gauntlet. But we can’t run a gauntlet without someone to do so! Now, we must figure out how to stop the stickman on the right from being eaten by the blob, so that he is available to do the job.
Second correction: Creating our stickman’s “hiding place”
In order to be able to save the stickman, we need to do something different at the very beginning. Before you send him to the right for the first time, click on the nearby manhole cover to open it. Now, when you light up the green arrow again, he’ll fall through, landing in the space between the two boxes below.
Click on the box of bombs to the right, and it spits out a bomb. The stickman grabs it, panics, and throws it up through the manhole where it explodes. We can do something very useful with this bomb while it is in the air…
What we need to do is flip the sign back to the side with the red air bellows. Then, when the stickman throws up the bomb, we need to activate the bellows as soon as the “!” symbol appears above the stickman’s head. This causes the bomb to destroy the door of the house, creating a place for our hero to stay in while we work with the blob.
Having created this safe haven for our stickman, we can send him inside. Click on the pink board above the box of bombs to create a ramp, and click on the stickman. Traversing the ramp, box, and stairs, he enters the house and turns on the light.
If you were now to click on the window, the stickman would slam it straight shut again, but notice how the shock from the slam dislodges the blob. (Don’t ask me why the bomb’s shock would not do so; I don’t know and neither do the blob nor the stickmen.) This allows us to release the blob without killing the stickman! We can also click on the doorbell to tell him to come out of the house.
The next thing we need to do is figure out how to get him back up the catapult from the lower level. This is where the machine underground comes in, which I’m sure you’ve played with several times before coming here. Click on the switch to turn it on, and click on the arrow pointing to the right. When you click on the stairs, they slide over to form a way back up, and when you click on the doorbell, the stickman will use them to climb back up to the catapult.
Armed with this new method, try completing the previous parts again, using the stairs and window to help you fire the catapult and release the blob safely. Remember to use the green-arrowed sign to send the stickman from the catapult back into the house. Once you’ve satisfied the fisherman, released the blob, and cleared the electrical wires and the second landmine, your level should look like this, with our hero safely tucked away in the house:
Part 6: Running the gauntlet
With all the obstacles clear and a stickman at the ready, it’s time to run the gauntlet.
To start, activate the moving stairs again, and slide them all the way to the left. The stairs press up against the mysterious box on the left and become stuck there, indicating that there is no turning back now.
When you ring the doorbell, our hero begins to walk the final path, walking up the stairs and descending towards the moat. But all of a sudden… surprise! Out of the box emerges our favourite enemy again, running over our stickman before promptly exploding at the gate. The bad news is that this enemy has of course ruined our run, but the good news is that this means we are almost finished!
Notice how our enemy looks a bit strange, this is a clue of what we need to do. Sure enough, if we click on the top of the box at the right moment, our stickman falls into the box before riding out on top of the enemy’s cart. Now, all that’s left to do is to raise the portcullis in time for the cart to pass, and our hero makes it through the gauntlet, alive!
What better way to celebrate your victory than by flipping the two switches next to the portal, lighting it up, and completing the game?
Additional notes
Here are some additional points not brought up in the walkthrough:
- The catapult can only be fired once! Make sure you choose wisely when to do so.
- Remember that the clouds explode on their third click! Be sure not to waste the first two clicks because you don’t want to kill the bird!
- When you send the fisherman into his torch doorway, he knocks the rocks away from the lamp, meaning you can’t use the bird and rocks anymore. Make sure you are finished with the bird and rocks before you send him in.
- Don’t click on the pink board to lower it until you’ve cleared the doorway of the house! Once the pink board has dropped, you can’t let any more bombs out of their box, and you won’t be able to destroy the doorway anymore.
Finally, there are three secret jewels that you can obtain by doing some very sneaky moves. I hope to be able to write another guide about them soon, but for now… good luck searching!
CHAPTER 2: Second Quest
Just like the first game, Hapland 2 also has a Second Quest level. Again, numerous mechanics have been changed to create an additional challenge. However, unlike the Second Quest of Hapland 1, there is no need to interact with objects in the background, and the weather change is not relevant.
Spoiler alert! It’s more fun to discover the Second Quest and its changes yourself! To play this level, you must have completed enough other levels. Need help? See my other guides.
Best click score: 61.
The changes
Upon experimenting, the following changes are notable within this level in comparison to the original:
- The first rock that the bird picks up is now a bomb, which has a timed trigger after being picked up or disturbed.
- There is a second light near the bird, pointed upwards. It can only be turned on one time, and it remains on for the remainder of the level.
- The electrical wires can be turned off.
- The first cloud no longer drops a ball onto the electrical wires nor destroys them.
- The cargo crate no longer contains a fish.
- There are an additional two levers and a stickman within the underground cave, near the power supply. One lever changes the direction of the sign, while the other configures the box on the lower level.
- The box of bombs can be configured with the other lever to dispense bombs or bananas.
- The turbine no longer appears to have any helpful effect on the water current.
The solution to this level is considerably different from the original, so much so that it requires its own set of sections. This guide will be written as an exploration, starting with incorrect solutions before adding onto them to make previous parts correct.
In order to solve this level, we must answer three big questions:
- How can we satisfy the fisherman if there’s no fish in the crate?
- What’s the best way to deal with the blob?
- How can we clear the second landmine if it’s behind the portcullis?
We’ll answer all those questions and more in the next parts of this guide.
Part 1: Experimentation
We have some experimentation to do in order to understand how this level works.
Let’s familiarize ourselves with the underground area. The lever at the bottom flips the direction of the sign, including the green arrow and the red blower. We can use this to direct our stickman both left and right, and we can also now blow the items from the mystery box left and right.
If we click on the switch connected to the underground lamp, the stickman moves over to the second lever. This lever switches the item that will come out of the mystery box between bombs and bananas.
Experiment 1: The bomb-rock
The first item the bird picks up is a bomb. Experiment with what the bomb does to see what options we have. Initially, we have these options before us:
What happens if we drop the bomb at the first cloud?
- It destroys the electrical wires. And what happens when the electrical wires are destroyed? We can no longer turn on the underground lamp to send the stickman there to the second lever.
What happens if we drop the bomb onto the catapult?
- It kills the stickman if he is near, but if not, it causes no harm.
What happens if we let the bird carry the bomb all the way to the house?
- It dislodges the blob creature instantly. Again, don’t ask me why the window and the red bomb dislodge the blob, but the green bomb doesn’t. I don’t know, and neither do the stickmen nor the blob.
What happens if we drop the bomb onto the catapult and then quickly launch it?
- It destroys the flag, but it does not clear the landmine in the castle.
What happens if we drop the bomb onto the catapult and explode the first cloud and then we launch the bomb through the fire?
- It explodes in midair as soon as it hits the fire.
Experiment 2: Launching items from the mystery box
Let’s direct the stickman up top to fall into the manhole, then start launching things out of the mystery box. Note that we cannot bring the stickman there back to the first lever, so you’ll need to restart a few times in order to figure out these:
What happens if we launch a bomb and blow it to the left?
- It destroys the doorway to the house, just like in the original level.
What happens if we launch a banana and blow it to the left?
- Nothing happens.
What happens if we launch a bomb and blow it to the right?
- We ruin our fisherman’s fishing session.
What happens if we launch a banana and blow it to the right?
- Our fisherman catches and accepts the banana as his catch!
And we’ve answered our first big question:
- Key insight #1: Instead of a fish, we need to get our fisherman a banana instead from the mystery box.
Experiment 3: The turbine
Let’s place a stickman down by the turbine lever, and give it a pull. It appears that the turbine is only powered for a brief time, and it’s kind of weak. Is there any change if we click it multiple times in a row?
Yes, in fact! We explodinate the power supply, and it is now broken. But, (and this is a big “but”), did you notice anything crucial?
Hint: Try dispensing a few things from the mystery box first…
Key insight #2: Overloading the power supply by running the turbines scares the stickman in the cave, making him go back to the first lever.
And furthermore, do that again, but a bit more slowly. You’ll find that clicking the turbine exactly four times scares the stickman without destroying the power supply.
This now means that you are now able to go back and forth between the two levers, which will be crucial as we go on.
Experiment 4: The new lightbulb
The new light switch near the bird can only be activated once. We need to figure out when this light will have a meaningful effect, because most times, it appears that switching it on doesn’t do anything.
Hint: A sudden burst of light is just as startling as a sudden burst of gas.
Key insight #3: The lamp can be used a maximum of one time, which will make the bird drop the item it’s holding before it even leaves the castle.
This lamp would not be useful on the bomb, because it just explodes and has no effect, and is a waste of the one-use of the lamp. Therefore, the correct way to use this lamp must be in conjunction with one of the other two rocks. But how?
We’ll get back to that one, but for now, let’s recall our three key insights from before:
- Instead of a fish, we need to get our fisherman a banana instead from the mystery box.
- Using the turbine lever four times scares the stickman in the cave, making him go back to the first lever, but clicking on it five times will destroy the power supply.
- The lamp can be used a maximum of one time, which will make the bird drop its item before it even leaves the castle. This is almost certainly going to be done with a rock, and not with the bomb-rock.
The ability to flip the green arrow sign gives us a lot more flexibility, as we can now direct the stickman to more places than we otherwise could. We also have reusable methods to get our underground stickman between both levers. Let’s see what progress we can make with what we have discovered.
Using what we’ve learned so far, can you:
- direct our stickman to the mystery box,
- deliver a banana to our fisherman,
- and use a bomb to destroy the door of the house?
Once you’ve done that, lower the pink board off the top of the mystery box so that the stickman can go into the house. Your level should look like this:
All good? Great! Now we’re ready to move onto our second Big Question.
Part 2: Making progress with what we know
Let’s recall our second Big Question: What’s the best way to deal with the blob?
With our next experiment, we’re about to find out.
Experiment 5: How helpful is the blob?
Just like in the original level, the blob can be released by clicking on the window while the stickman is inside. If we click on the blob again, it will begin its quest into the moat. Let’s watch what happens:
- It gobbles up the mystery box, and the pink board disappears along with it.
- If the electrical wires are active, the blob gets dissolved.
- If the electrical wires are not active, it comes to rest at the bottom of the moat.
Consider each of these events. Which of them are good, and which are bad? Experiment with this by yourself before reading on.
Using your answers from the previous part, now see if you can answer these questions:
- Do we even need to release the blob, or is it better to just leave it alone?
- If we do choose to release the blob, what should we do with it?
Looking at it, we see that:
- Concerning the mystery box, we do want it to be gobbled up, as that is the only way to get the stairs up against the demon box, allowing our stickman to hitch a ride. So the gobbling of the mystery box is good.
- If the blob were to come to rest at the bottom of the moat, then there is nowhere else for it to go! Because the turbines no longer create a current in the water, there is no way to further influence the blob at all, so it is just stuck there and in fact becomes an obstacle. Therefore, the blob coming to rest at the bottom of the moat is bad!
So this tells us that we need to release the blob, and that we need to dissolve it on the electrical wires.
Adding onto our list
So now, we’ve learned that we need to do all of the following, in order:
- Deliver a banana to the fisherman.
- Destroy the house door with a bomb.
- Release the blob, allowing it to gobble up the mystery box, but leave the electrical wires on so that it gets dissolved.
Doing all of those in order, your level should look like this:

We’re getting closer to the final solution, but we still have one more Big Question to answer.
Part 3: The second landmine
Now onto our third Big Question: How can we clear the second landmine if it’s behind the portcullis?
In the original level, the blob would do the job of removing the second landmine, with the help of the current from the turbines. But as we’ve established from the previous part, the blob no longer plays any helpful role in reaching or removing the landmine, as the turbines no longer produce any meaningful current.
So instead, we need to find some other way of removing this landmine. I’d like you at this point to experiment with it a bit before you read on, maybe you’ll find something.
Hint: The solution is very closely related to one of the Additional Notes I wrote above for the original level. See if you can figure out which one!
Solution: It’s the one about the fisherman tripping on the rocks after he makes it to the roof of the castle. Combine that with the additional lamp that we can use to scare the bird, and we have our solution!
Indeed, all we need to do is make the bird drop a rock at the lamp before we send the fisherman towards his torch doorway. Then, when the fisherman trips on the rock, the rock falls into the gap, landing on the upper floor of the castle.
This is very promising progress, as if we could get the rock all the way to the bottom, it just might clear that landmine. However, that does present us with one more challenge: we actually need to clear the upper landmine too, and bring the hatch stickman to his lever like we did in the original level.
So this adds two more things to our list of steps:
- Clear the upper landmine with a rock.
- Get the hatch stickman on the top floor to his lever.
- Deliver a banana to the fisherman.
- Destroy the house door with a bomb.
- Release the blob, allowing it to gobble up the mystery box, but leave the electrical wires on so that it gets dissolved.
Here comes a tricky part, though. Remember how we had to use a fly to distract the upper stickman so that the lower stickman could reach his lever? That still applies, too, and remember that the fly only appears once, before the turbine stickman reaches his lever.
So this means that we can’t use the turbines, and hence move the cave stickman back to the first lever, until the hatch stickman reaches his lever. Tricky, huh?
So we need to thread our steps in order carefully to make sure we won’t have to move the cave stickman back over until our hatch stickman is in position. This is possible if we do it in the right order:
- Get rid of the bomb-rock by dropping it in the catapult.
- Use the first rock to destroy the upper landmine.
- Use our new lamp to place the second rock to the left of the gap in the roof.
- Feed the fisherman his banana, and have him push the rock into the gap.
- Have our hatch stickman kick the rock down to the next floor.
- Use the fly to distract the crate stickman so that the hatch stickman can reach his lever.
- Only now can we bring the turbine stickman to his lever, resuming full control over the cave stickman’s behaviour.
Phew, that’s a lot of steps! If you did it right, your level should look like this:
Part 4: Putting it all together
So we’ve now got our full list of steps:
Before the turbine stickman reaches his lever, we have to:
- Get rid of the bomb-rock by dropping it in the catapult.
- Use the first rock to destroy the upper landmine.
- Use our new lamp to place the second rock to the left of the gap in the roof.
- Feed the fisherman his banana, and have him push the rock into the gap.
- Have our hatch stickman kick the rock down to the next floor.
- Use the fly to distract the crate stickman so that the hatch stickman can reach his lever.
- Only now can we bring the turbine stickman to his lever, resuming full control over the cave stickman’s behaviour.
Only after this is done, can we:
- Destroy the house door with a bomb.
- Release the blob, allowing it to gobble up the mystery box, but leave the electrical wires on so that it gets dissolved.
- Activate the crate and hatch stickmen’s levers, dropping the rock onto the second landmine.
All that is left to do is to run the final gauntlet. Once you’ve set everything up, simply run the final gauntlet the same way you did in the original level. Ensure that the electrical wires are turned back off, lest you destroy the demon cart before it even hits the water. With the second landmine gone, our hero makes it into the castle, completing the Second Quest of Hapland 2.
Video Walkthrough
Here’s a video walkthrough of Hapland 2 showing the full solution with all corrections included, in the proper order.
Spoiler alert: This video already has the corrections that you had to do at the beginning to complete the game. It’s more fun to figure out what you need to change by yourself! Consider reading the textual walkthrough first, as I’ve saved writing the corrections up until they are absolutely necessary.
https://youtu.be/9uqg1n6b_kw
https://youtu.be/zOD-SogdYrQ