Balatro に PlayStation ボタンを強制的に表示する方法に関する非常に簡単なガイド.
前提条件(s)
The only thing you’ll actually need to have is either 7-Zip or WinRAR. 個人的に, I recommend 7-Zip since it doesn’t ask you to buy it every time. If you’re into that sort of thing and aren’t a business that legally has to pay for WinRAR then by all means, grab that instead.
Locating Balatro
Once you’ve got either of those installed you’re going to navigate to Balatro’s Steam folder.
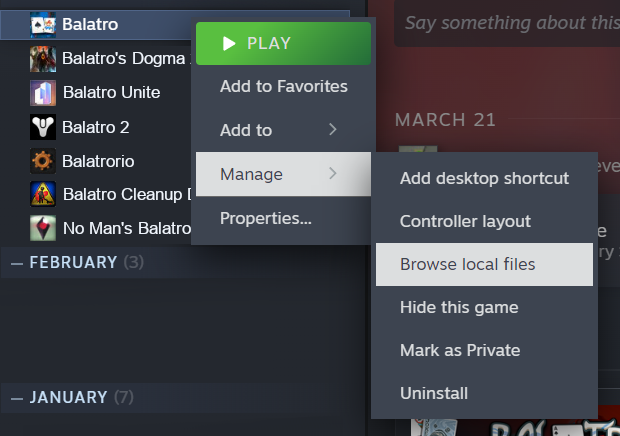
- Open up your Library on Steam and right-click Balatro on the left-hand side.
- Hover over Manage
- クリック “ローカル ファイルを参照する”.
Cracking Balatro Open
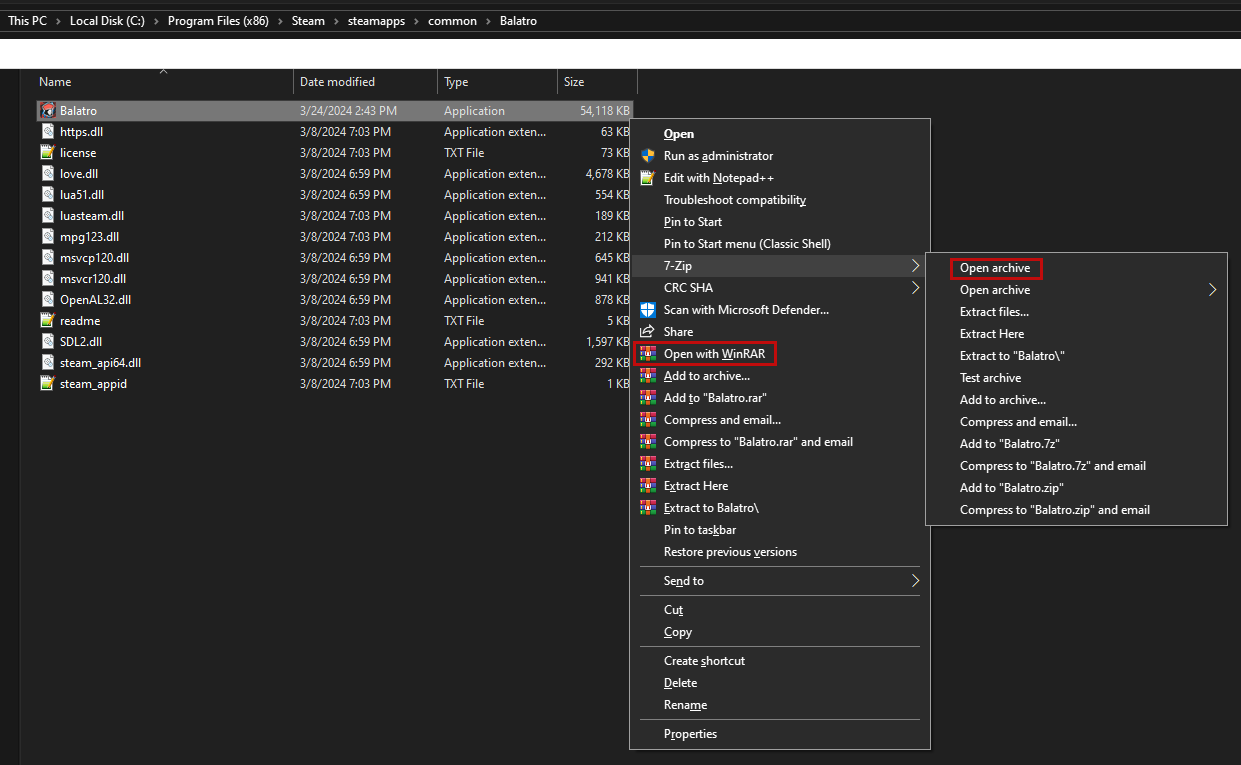
Now that you’re in the folder, select and right-click Balatro.exe.
If you’re using 7-Zip:
- Hover over 7-Zip
- クリック “Open archive”
If you’re using WinRAR:
- クリック “Open with WinRAR”
Editing Balatro
Open the folder labelled “資力” and do yourself a favor by creating a backup. ドラッグ “テクスチャ” folder into the same one as Balatro.exe; this will create a backup of the files we’re going to mess with, along with all the others. Keep this folder around just in case you decide to edit anything yourself or if you happen to delete the wrong file in this guide.
With your backup created, we’re ready to bless this mess. The remaining steps will be done in the archive, いいえ your backup folder.
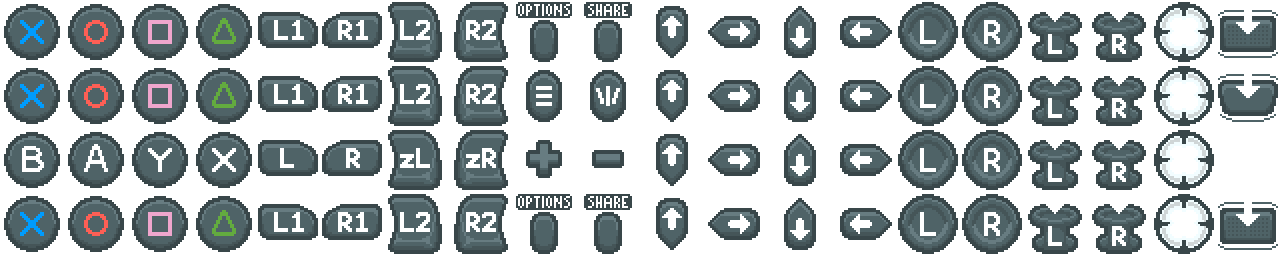
Open up the “テクスチャ” folder to find two more folders: “1バツ” と “2バツ”. These are the images that the game uses for nearly everything, both in 1x scale and 2x scale, for different resolutions. Don’t worry about which one you’re using, as we’re going to edit both.
開く “1バツ” folder and delete gamepad_ui.png, then replace it with the following image:

帰ります “テクスチャ” そして開きます “2バツ” フォルダ, then delete “gamepad_ui.png” and replace it with this image:
以上です. You’re all done. Go spin the Wheel of Fortune.