The grid tool claims “to create a perfect grid”. It’s certainly got exactly-90° angles, but is it really perfect? Let’s calculate what’s optimal.
Introduction
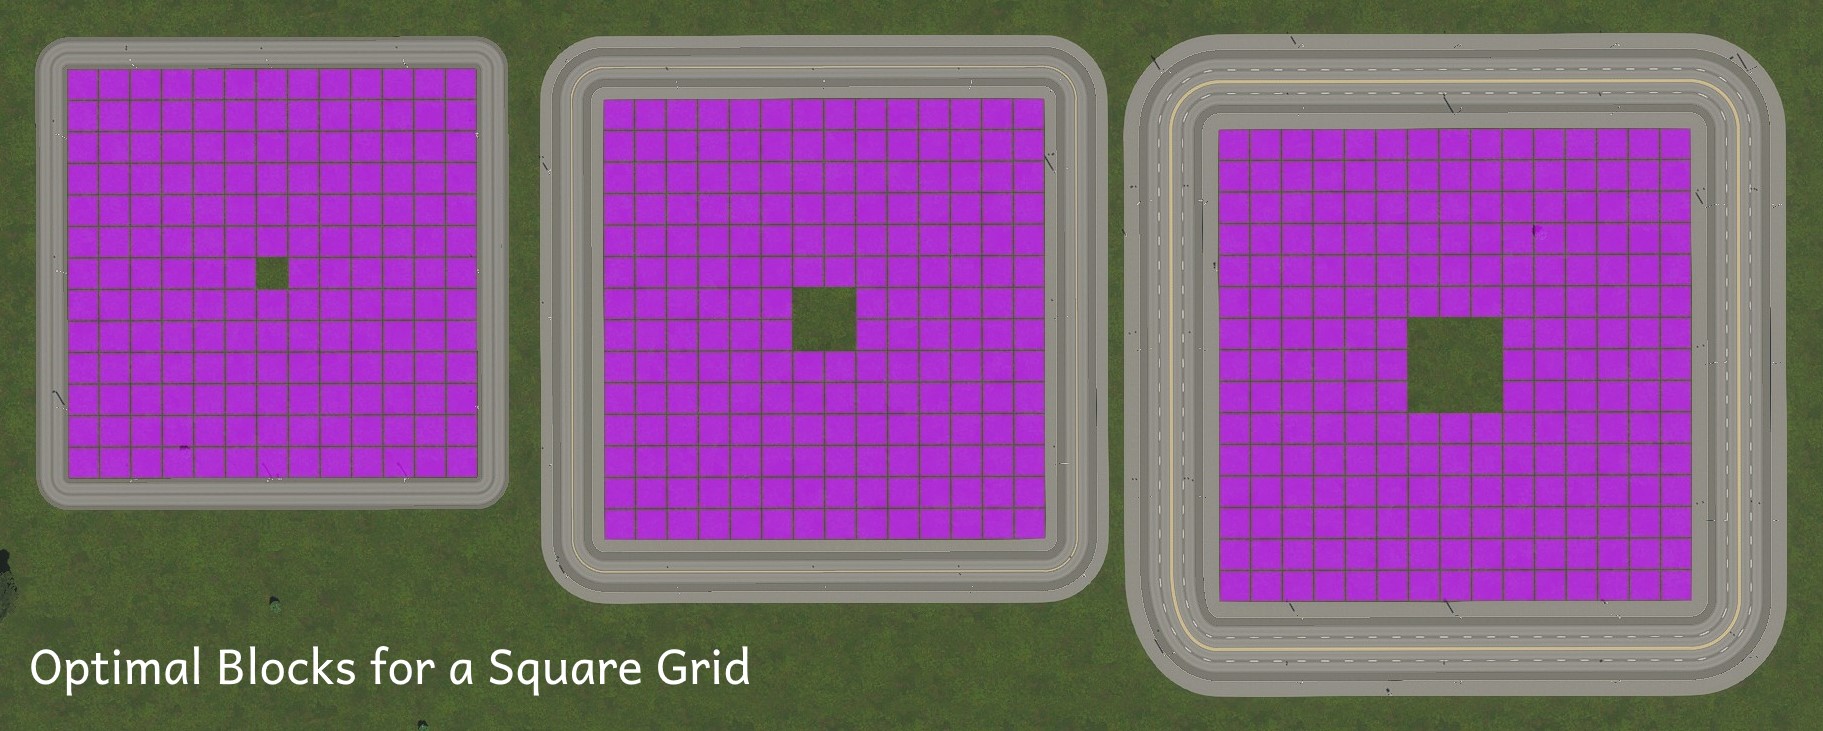
Which of the two square grids below do you think has more zoning cells?
Each covers the same footprint: 1008 metres for each edge road, about 100 hectares each.

The one on the left sure looks like the obvious choice. It leaves exactly 12 zoning cell widths between the roads, the most you can get without leaving a gap. That’s one of the easiest lengths to draw with the road tool, since you just have to line up the zoning circles. It even happens to be the widest width you can get with the parallel road mode.
But if you count them all up, the one on the right actually has more zoning cells despite the big holes in the middle of each block. The right is cheaper to build and maintain, too, since it has less roadway.
The left has 12²×9² = 11664 cells; the right has (16² – 4²)×7² = 11760 cells.
Can we do better? Let’s calculate it! (Spoiler: Yes, we can.)
Optimal Square Grids
First, let’s define some variables:
- x is the length of the road on one side of a block, as reported by the road tool
- z is the length of zonable frontage
- h is the length of the side of the hole in the middle of the zoning
- W is the width of the road being used
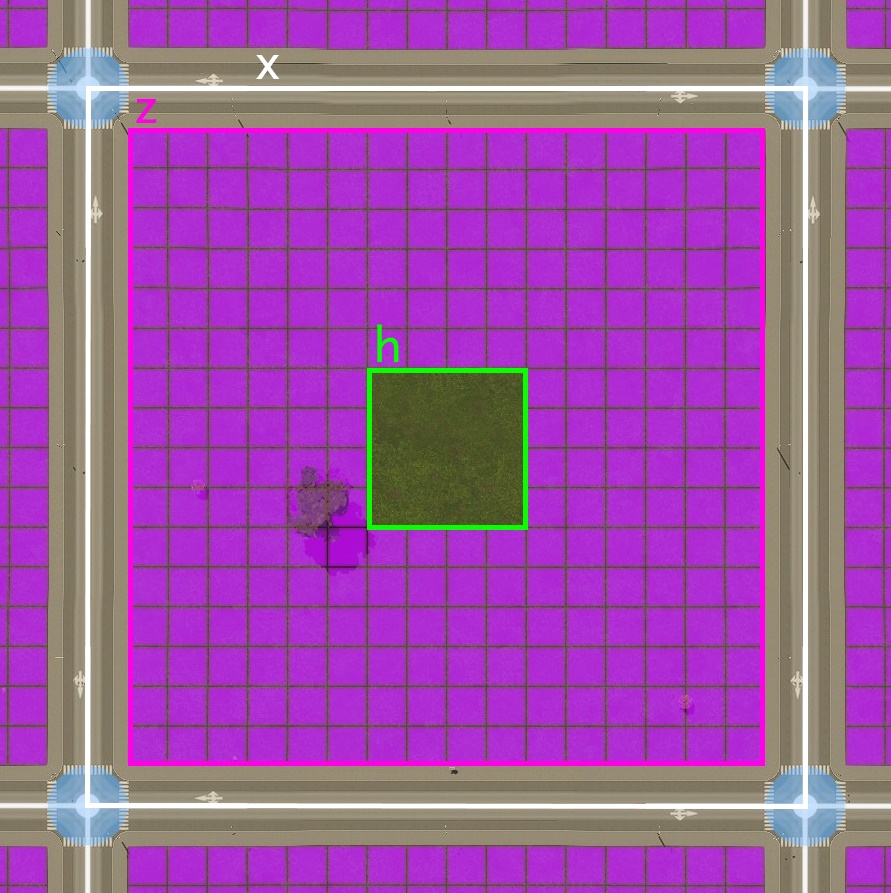
Using this, the zonable area in each block is the space inside the block (z²) minus the part too far from the roads (h²). But both of these are directly related to the block length, as the frontage is the block size minus the road width (z = x – W), and relatedly the hole is the frontage minus how far the zoning goes (h = z – 2 × 6 x 8m = x – W – 96m).
The density, which we’re trying to optimize, is thus
(z² – h²) / x²
= ((x – W)² – (x – W – 96)²) / x²
= 192×(x – W + 48) / x²
How do we maximize it? Calculus! The maximum is where the derivative is zero:
0 = d/dx 192×(x – W + 48m) / x²
0 = (384W – 192x + 18432) / x³
0 = 384W – 192x + 18432
x = 2W + 96m
Plugging that answer into the previous formula for the hole simplifies interestingly:
h = x – W – 96m
h = 2W + 96m – W – 96m
h = (2W – W) + (96m – 96m)
h = W
In other words, to make an optimal square grid, leave a hole in the middle the same size as the road you’re using.
So with 16m roads, by using the optimal square grid you get about 2% more zoning cells in the same area yet pay about 14% less for roads (both up-front and in upkeep), compared to the square grid without the hole in the middle.
Final answer
Thus for the best square grid, use a block size of
- 112m for tiny (8m) roads like the gravel road
- 128m for small (16m) roads like the two-lane road
- 144m for medium (24m) roads like the four-lane road
- 160m for large (32m) roads like the six-lane road
(But really, you probably don’t want to zone on the medium or large roads.)
Postscript
Thanks for coming to check out my guide! I was pleased that people liked the one I wrote for the first game, so when the new one came out with a different zoning depth, I knew it was time to revisit it.
Let me know in the comments what else you’d like to see. I’m excited to experiment more with rectangular grids, with other patterns like herringbone layouts, and to see how the new alleys work in practice. Hopefully that’ll turn into more sections here once I make a few more cities.