I have over 2,000 hours of experience playing Piecewise, and today I am here to write guides for it. This is the first guide, which simply explains how to get started with creating your first bot and getting it up and running. This guide aims to assist new users who may be confused by the program’s interface and layout.
Creating a New Piecewise Project and Workspace
Opening Piecewise
Congratulations on becoming a proud owner of Piecewise. It seems like you’re eager to start creating and launching your bot. If you’ve already opened the app, you may have noticed the wide variety of blocks available for exploration. Feel free to familiarize yourself with Piecewise before continuing with this guide.
When you open Piecewise, you’ll be greeted with a “Welcome to Piecewise” popup. By simply opening the app, you have already completed the first step towards getting your bot started. While the popup provides several templates to explore, this guide will focus on learning the basics of Piecewise, including dragging and using blocks, along with other useful features.
Adding Blocks
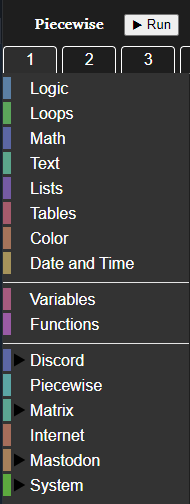
A fundamental aspect of Piecewise is dragging blocks. Piecewise eliminates the need to rely on your keyboard extensively. On the left side, you’ll find a large sidebar where your blocks are stored. Clicking on any of the options listed will reveal the corresponding blocks that you can drag. Simply hover your mouse over them, click, and drag.
Deleting Blocks
If you accidentally added too many unnecessary blocks, don’t worry! The trash bin is here to help. To delete a block, simply drag it to the bottom right of your canvas, and poof! The trash bin will take care of the rest. Alternatively, you can right-click on a block and select “Delete Block.” If multiple blocks are connected to the selected block, the option will say “Delete # Blocks.”
If you prefer a simpler approach with fewer movements and clicks, you can press the backspace or delete key to delete blocks on your canvas.
Moving Around
Over time, you may find yourself running out of space on your canvas. Or do you? Navigating is as simple as dragging down on an empty space and moving your mouse. The canvas will expand and adjust as you place blocks. Your task is to organize the placement of your blocks, and Piecewise will take care of the rest. If you need to zoom in or out of your canvas, you can do so by using the + and – buttons located at the bottom right of your canvas. In case the canvas becomes overwhelming, there’s a simple solution discussed in the next section.
Workspace Tabs
At the top, you’ll notice some workspace tabs. (If you don’t see workspace tabs, you may not be using the latest version of Piecewise.) These tabs are designed to help you organize your blocks as you build. Similar to coding, blocks can become messy and overwhelming. That’s where workspace tabs come in handy. Clicking on them will switch between workspaces with blocks. These workspaces allow you to isolate different functions of your project, helping you keep things organized while creating various events and functions for your bot. Variables, for example, do not communicate across workspaces, enabling you to work with new variables. Since variables don’t carry over from one workspace tab to another, you can reuse variable names. For instance, a variable named “table” on one workspace tab will not be linked to a variable named “table” on another workspace tab.
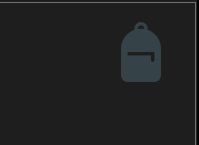
Backpack (Saving Blocks)
On the top right of your canvas, you’ll find a backpack icon. This handy tool is built into Piecewise to save blocks for later use. To use it, simply select the desired blocks and drag them into the backpack. Once saved, the backpack will retain your blocks indefinitely, unless you choose to delete them. This feature can be useful for reusing sets of blocks between projects or utilizing sets of blocks that you frequently use. It’s a highly convenient tool.
To delete blocks from your backpack, simply right-click on them and select “Delete.”
Using blocks does not remove them from your backpack, so you can reuse them whenever needed.
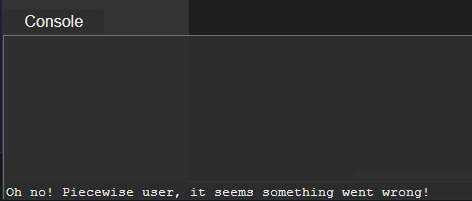
Console
The console is located at the bottom of your canvas. By default, it will appear blank until an error occurs with your bot. Yes, errors can occur, and checking the console can provide insight into what went wrong, helping you fix your bot. While Piecewise does a good job of preventing the connection of blocks that could cause errors, there may still be cases where connected blocks cause errors. When a console error occurs, the console button will display a number next to it, and the Piecewise taskbar icon will flash if you are running your bot through Piecewise.
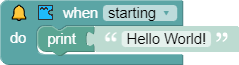
Hello World!
Now, let’s truly kickstart this process. You now have a basic understanding of Piecewise and how to navigate through it. Let’s print your first “Hello World!” to the console. It’s incredibly easy and only requires two blocks. Here’s how to do it:
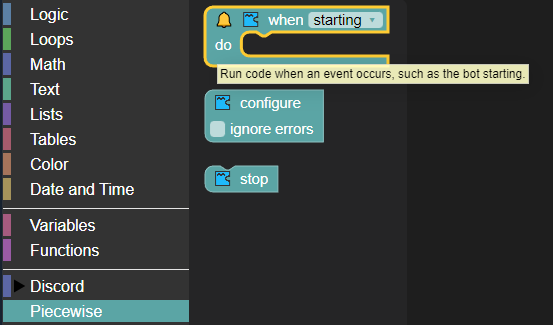
- Open the Piecewise category in the toolbox. This category is located on the left sidebar.
- Drag the “when starting do” block onto the canvas.
- Next, open the Text category in the toolbox and find the “print” block. Add it to the previous block.
- Replace the default “abc” with “Hello World!” and you’re all set!
To see the result, simply press the “Run” button at the top. If you haven’t already, you will be prompted to save your project. Congratulations! You have created your first Piecewise… well, not exactly a bot, but you have accomplished something, and that’s what matters! You now have a grasp of the basics of Piecewise and how to use it.