This guide describes how you at any level can install ship modules that are currently “unavailable” (grayed) due to additional requirements need.
Notes
Note that for this to work you must still follow the Space Ship class requirements for modules.
E.g. you can’t install a Class B module if you have a Class A Reactor etc.
Check your “Flight Check” messages (bottom right corner in the ship builder window) if you run in to problems.
Also remember to register your ship to be able to modify it.
Some modules will not be available until you reach a specific level.
Some modules require you to visit specific ship technicians to get access to modules.
Step by step
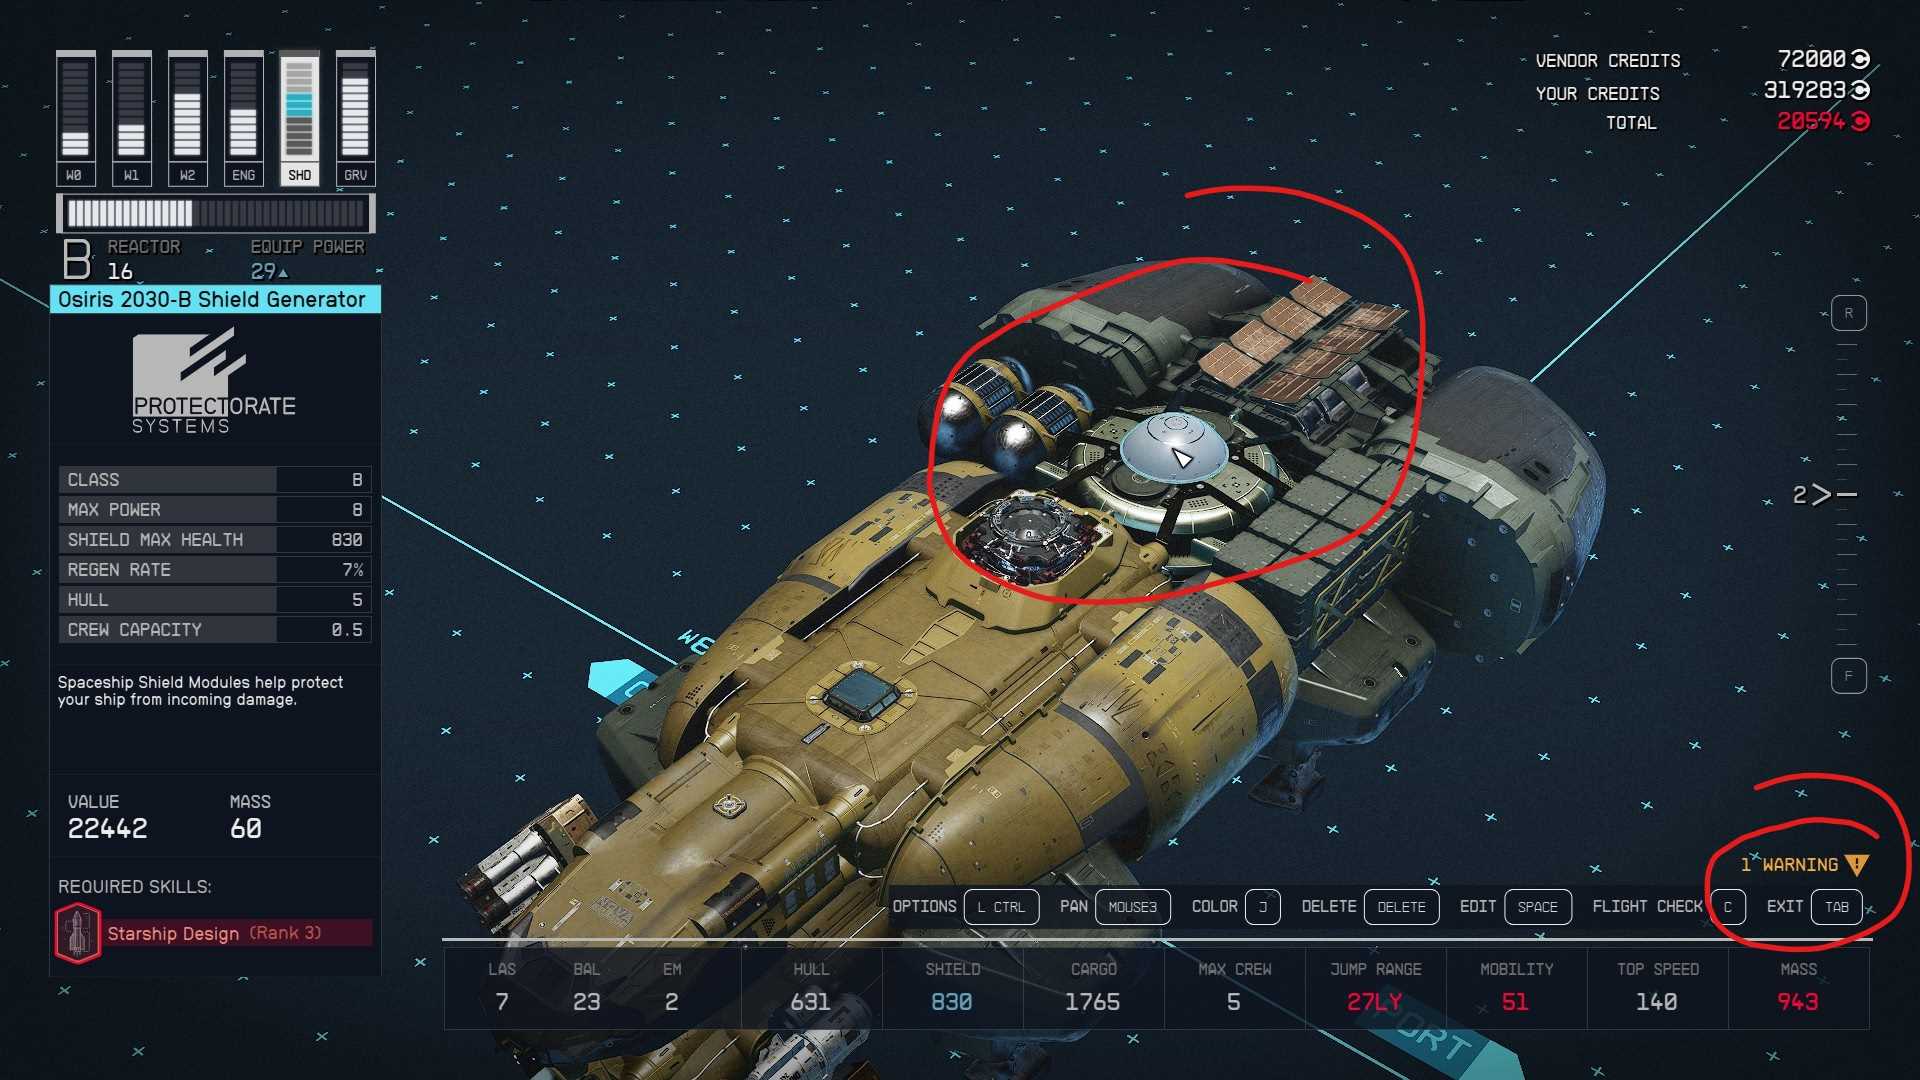
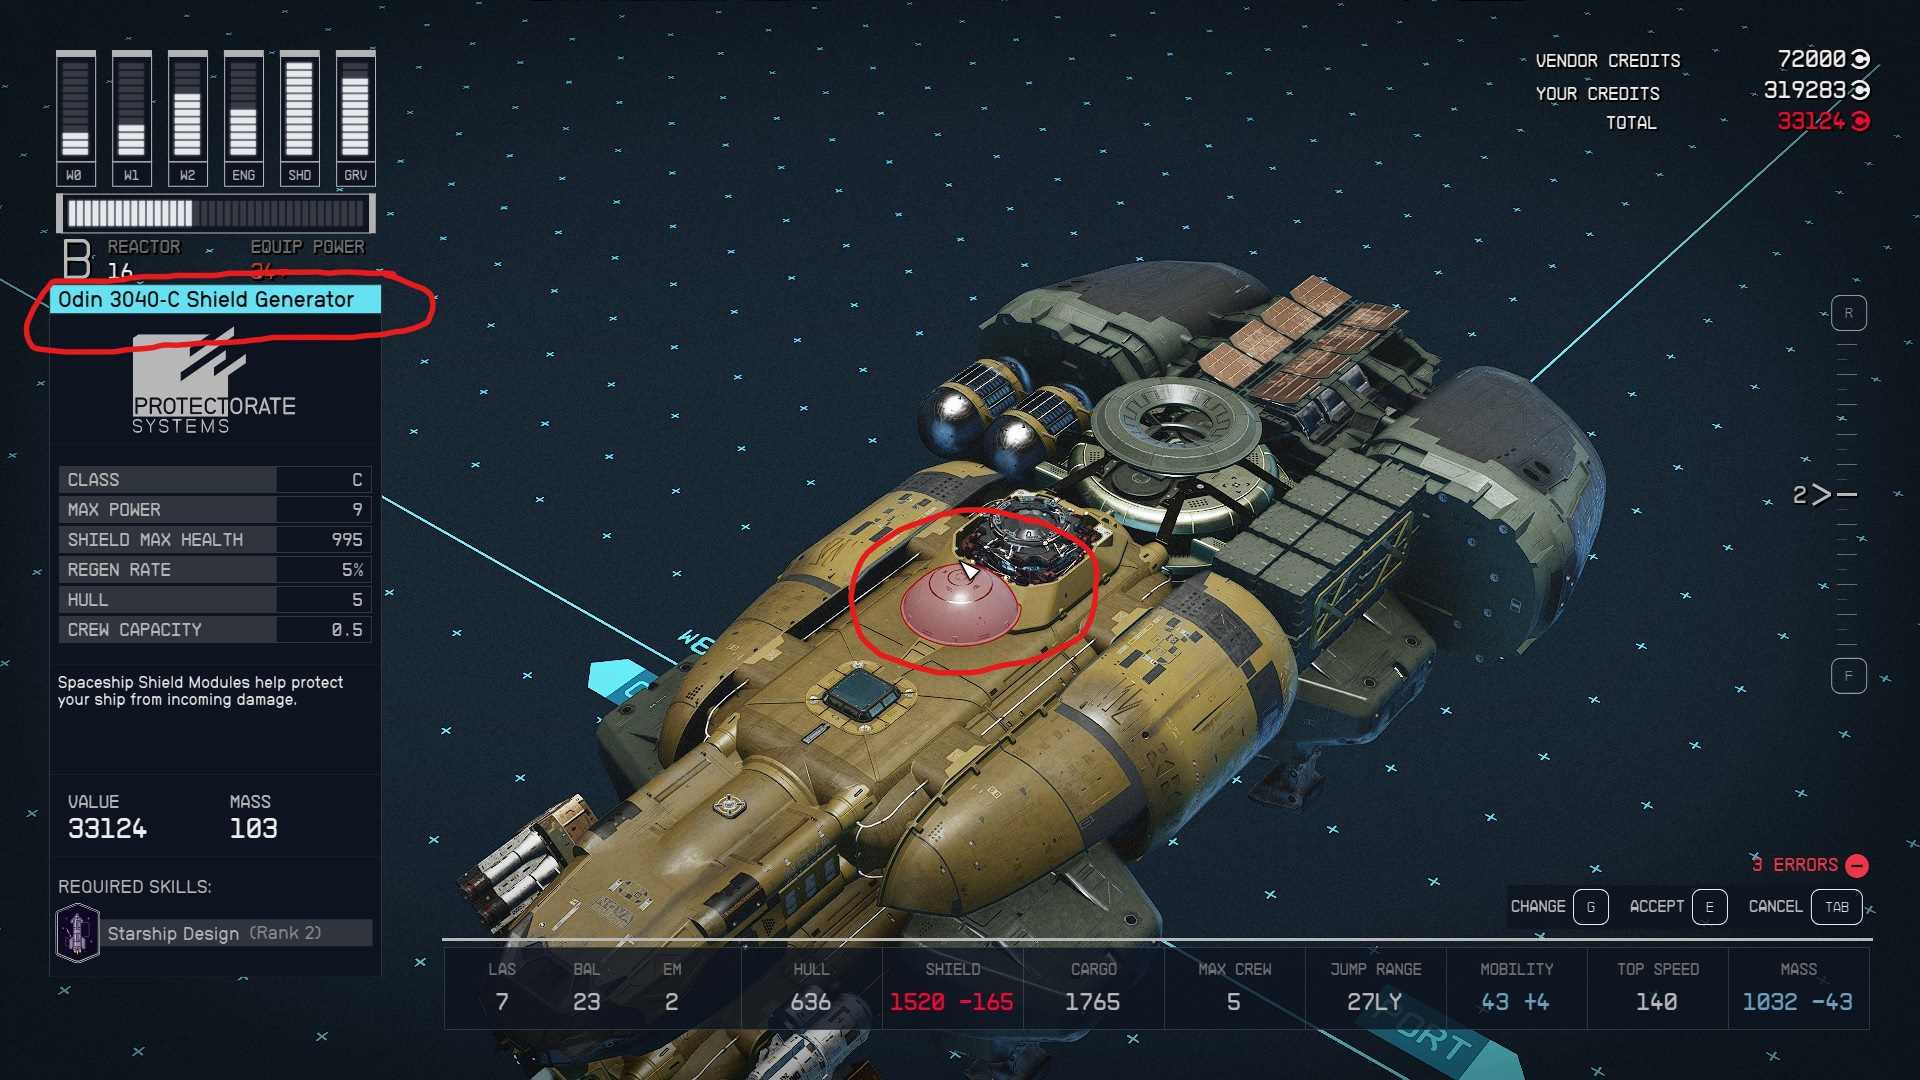
In this guide we are going to change the Shield module from Class B “Starship Design (Rank 2)” to Class B that require “Starship Design (Rank 3)” which I do not have yet.
Step 1. Look at the equipment list of what ship module you want to install. I want to install the “Osiris 2030-B Shield Generator” that require Starship Design (Rank 3). Note that requirement “Starship Design (Rank 3)” is not met.

Step 2. Select any other module that you can select (that you fulfill the requirements for) but place the camera/ view of the space ship so that the selected module is Red (so that it interferes with the ship and does not attach to anything), Select the module “E” on PC but do not snap/ place the module to anything. Ensure that you can still move the module around freely.
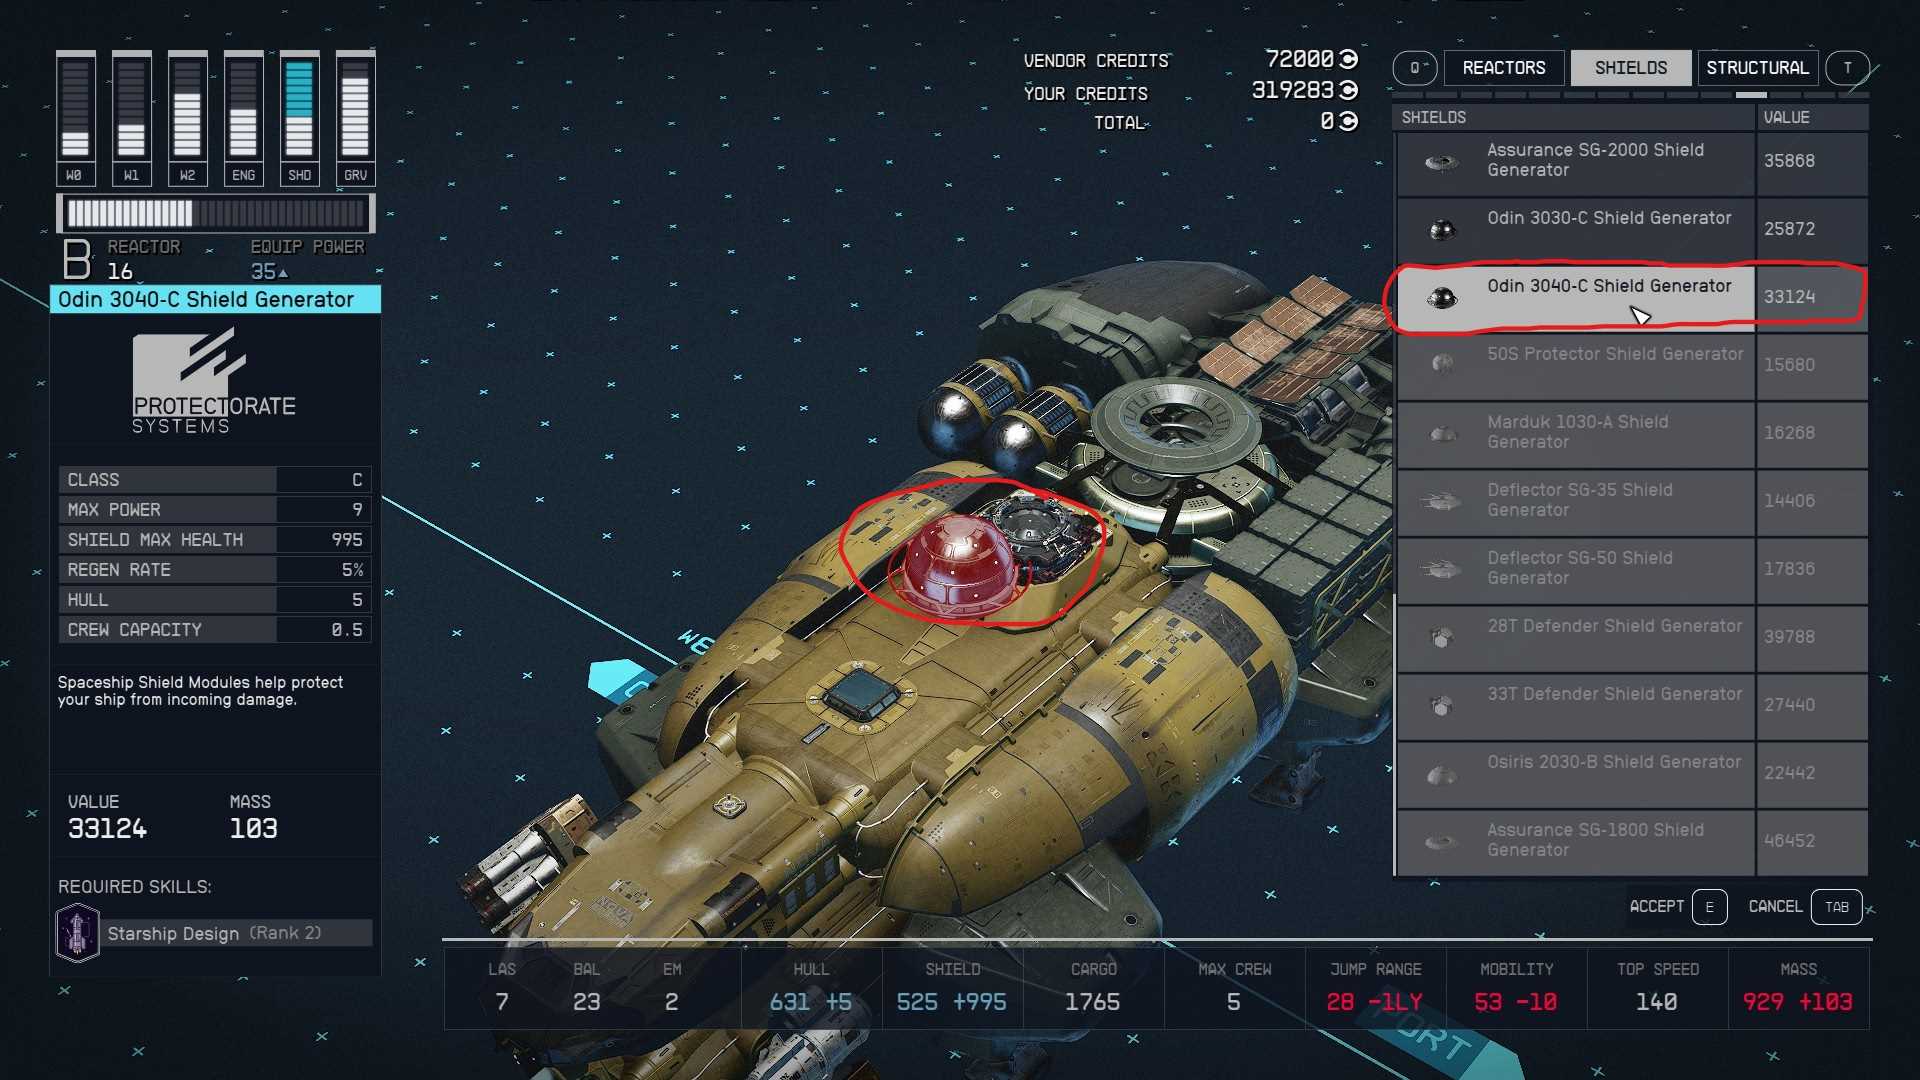
Step 3. On PC use “W” or “S” to scroll between the different modules and find your module of choice.
Step 4. When you have found the module you want, then you can left click to select or snap into place. You can also use “Z” on PC to swap between selected modules installation configurations (port/ starboard & forward/ backwards).