
A guide for you to help you setup a dedicated Palworld server using SteamCMD.
Server requirements
There are no official server requirements for Palworld at the moment, but the specifications below are recommended at a minimum.
Windows 10/11, Server 2016/2019/2022 & 64-Bit
Quad Core processor (requires up to 2 full cores)
Up to 4GB memory (currently uses around 1GB memory)
12GB disk space (install folder)
Download and install Steam CMD
1. Download the .zip file for SteamCMD for Windows using this link.
2. Create a folder for SteamCMD in your harddrive.
3. Place the .zip file within the folder and extract the file.
4. Double click on the steamcmd.exe file. The output should be something like this:

Creating a start.bat file for the server
1. Open a notepad and paste all of the below inside of it.
@echo off
echo Checking for updates...
steamcmd.exe +login anonymous +app_update 2394010 +quit

echo Launching server
cd .\steamapps\common\PalServer
start PalServer.exe -ServerName="ENTER YOUR SERVER NAME HERE" -port=8211 -players=32 -log -nosteam -useperfthreads -NoAsyncLoadingThread -UseMultithreadForDS EpicApp=PalServer
Here you can change the name of your server by changing ServerName. You can also remove EpicApp=PalServer if you don’t want to list the server in the public server list.
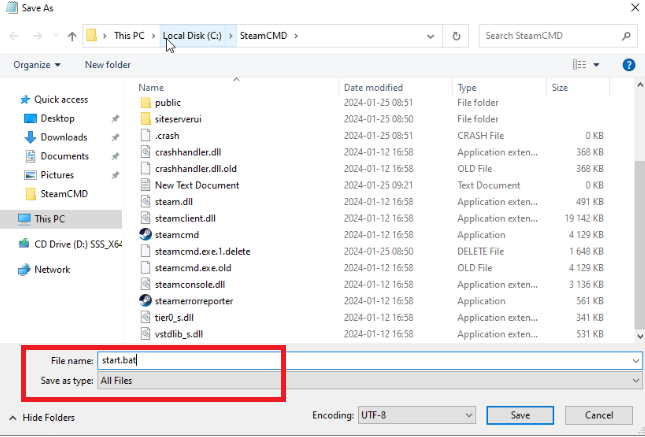
2. Click on File > Save as and make sure you fail the file with the file name start.bat and that you save is as type All Files. See image below. You can save this file where you’d like to, you will be using this file to start the server.
3. Run the start.bat file to let it create your server files. It will open a black window. This is completlty normal. Leave it open for 3-5 minutes, then close it. You will need to do some more configuration before your servers works, so please follow the next steps.
If you encounter any issues while trying to open the start.bat file regarding C++ RunTime errors, you can download all the Visual C++ Redistributable Runtimes with an All-in-One package using this download link.
Configurating the server
1. Navigate into steamapps\common\PalServer and open the file DefaultPalWorldSettings.ini using Notepad. Copy everything from (and including) [/script/pal.palgameworldsettings] to the end of the file. See below image.
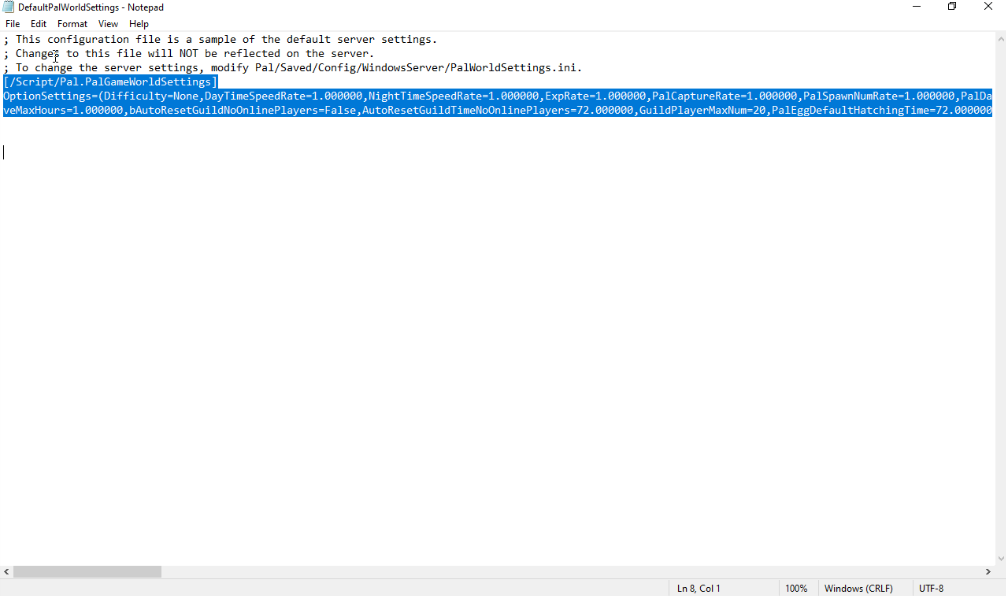
2. Navigate into Pal\Saved\Config\WindowsServer and open PalWorldSettings.ini using Notepad. Paste everything that you just copied, according to the image above, into this file. You will then need to configure some of these attributes in the file for your server to work. You MUST edit PublicIP=”” and enter your public IP-adress in the quotation marks. If you don’t know what your public IP-adress is, you can get it by visiting this site or by simply googling “What is my IP-adress?” and you will find it. The attribute should then look something like this: PublicIP=”83.253.33.215″
These attributes are voluntary to edit, but you might want to configure them to your likings:
ServerName, this changes your server’s name.
ServerDescription, this changes your server’s description.
AdminPassword, this changes the Admin password for your server.
ServerPassword, this is the password used to join your server. Leave blank for no password.
RCONEnabled, this enables/disables RCON. You can read more about it here.
When you are done editing this file, make sure you save it by clicking File > Save. When you have done this, your server is working and you can launch it by running the start.bat file. To shutdown the server, you type /shutdown in the command prompt. However, before you are done you will need to perform some portforwarding in order to make the server accessible from outside of your network. Follow the steps under Portforwarding with instructions on how to do this.
Portforwarding
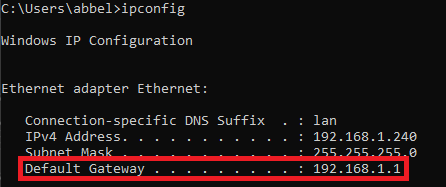
1. The first step is to access your router’s web-interface. You do this by opening your webbrowser and in the search field entering your router’s IP-adress. If you don’t know what your router’s IP-adress is, you can get this very easily by opening the Command Prompt on your computer and by typing ipconfig. The IP-adress after Default Gateway is your router’s IP-adress and it is this adress that you should enter in your webbrowser.
2. The next step is to identify the model of your router. This is usually shown at the web-interface of the router. If not, simply go and look at it in person to identify the model. Then go to this site and select your specific router model. You will then need to follow the instructions on how to open the ports on your specific router as this varies from router to router. You will need to open these ports for both TCP and UDP: 8211, 27015, 27016 and 25575.
If you have any problems or questions regarding your portforwarding, feel free to leave a comment here in the guide and send me a friend request and I will help you to the best of my ability.
Joining your dedicated server
1. Make sure that you have opened all of your ports according to the instructions under Portforwarding and that the start.bat file is running.
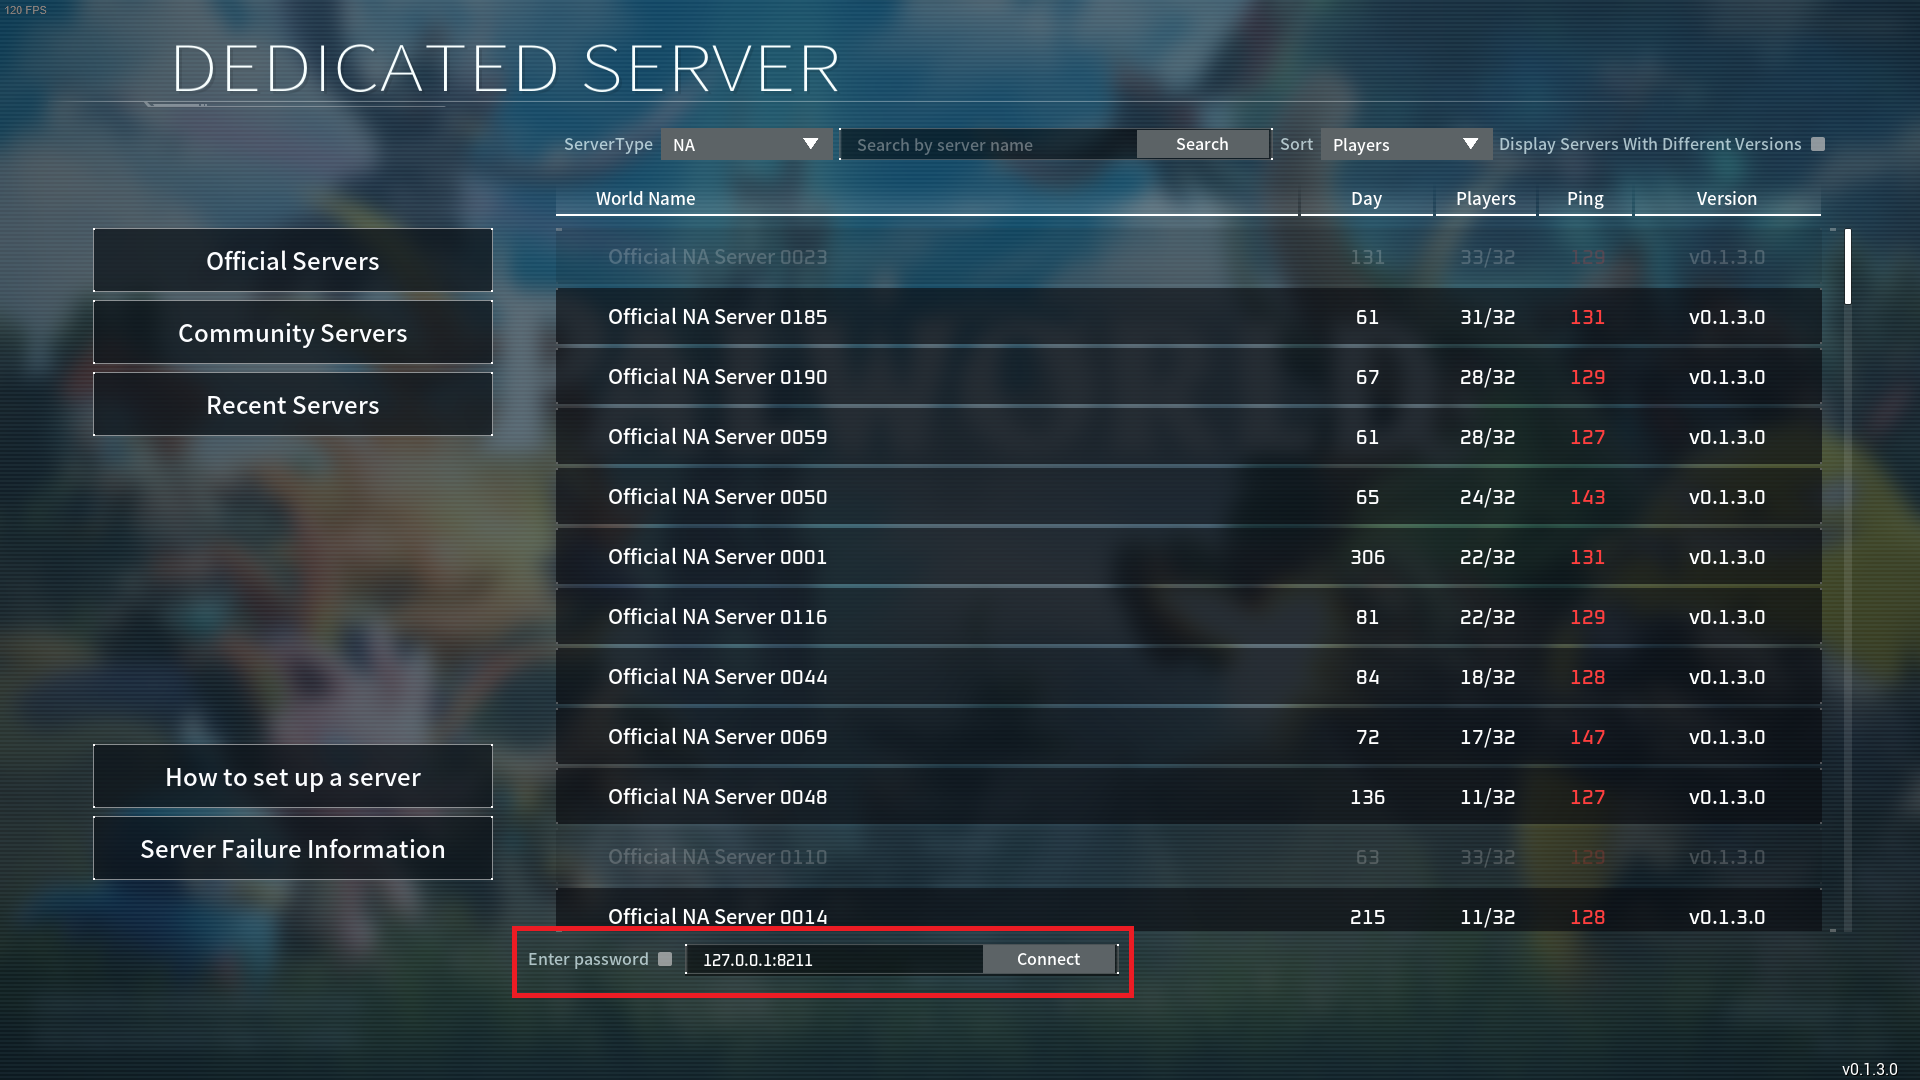
2. Launch Palworld and click on Join Multiplayer Game. At the bottom of the screen you can enter the IP-adress. Here you enter your Public IP-adress and :8211. The result should be something like this: 83.253.33.215:8211. This is also the IP-adress that other players connect with.
FAQ
Q: Do I need to have purchased Palworld in order to setup a server?
A: No, with these steps you don’t need to have purchased Palworld to host the server.
Q: How do I shut down my server?
A: Type /shutdown in the server’s command prompt.
Q: Do I need to open any ports on my computer?
A: Generally speaking, no. However if you are hosting this on a Windows Server OS, you will to create Inbound Rules and Outbound Rules for the specific ports. You can find these under the section Portforwarding in this guide.