I’ve played the game so many times and I’ve always gone down the same route so I felt it was time to write a guide for new players who want to get as much out of the game as possible. Feel free to deviate from the walkthrough if you wish but I’ll cover both good/evil choices
Welcome
Welcome to my very first guide. I’ve written this guide so you the player can gain as much as possible in Fable Anniversary during a single playthrough. I go through all the Silver Keys, all the Books, as many Legendary Weapons as possible and as many quests as possible.
I’ve done my best to give as much detail as possible on where valuable loot is, this guide also assumes you play on the Heroic difficulty although it still applies on normal difficulty.
Oakvale as a child.
This first part acts as a basic tutorial and teaches you about some of the many good or evil choices you’ll make throughout the game.
After the introduction cut scene you start the game in the peaceful village of Oakvale as a child, your father tells you that you need to buy your sister a birthday present because you’re the best brother in the world and totally haven’t forgotten and need three gold coins to buy the present. There’s two ways to do this. One is performing “good deeds” around town and your father will give you a gold coin for each one, or second is performing “bad deeds” and receive a gold coin for that.
There is however a third option, you could realistically get two coins per interaction and I’ll tell you how.
First you’ll notice a girl hopping around, talk to her and she’ll mention that she’s lost her teddy bear so we need to keep an eye out for that.
Next you’ll want to go behind the building on your right and you’ll see a man and woman in an embrace, talk to the man and he’ll say that he’s meant to be at work and his wife is at home looking after the children (naughty naughty) he’ll attempt to bribe you with a gold coin if you agree to keep quiet, take the coin and leave them to it. The game will then tell you that you’ve committed your first evil deed (one of many I’m sure).
Head down the hill into the main square area and go towards the woman standing outside a shop, talk to her and she turns out to be the man’s wife, she’ll start ranting about her husband and asks if you’ve seen him, surprisingly we have, so tell her that we have and she’ll thank us, the game will tell us we’ve performed our first good deed. She’ll then run off towards where we found the husband and she’ll call him all the names under the sun. Our work here is done.
If you followed the wife to listen to the ear lashing the husband got then head back to the main square and head to the left of the tavern, you’ll see three large farm houses. As you get close a man will run up to you and tell you that he needs to answer a call of nature and asks if you can watch his stock. You can’t decline this so just accept. For the good deed the game then places you in a spot that you need to stand still in for a certain amount of time. You’ll see a timer bar on the right hand side of the screen, when this empties the man will come back.
For the evil deed there’s a child that will tell us there’s barrels in the three farmhouses we can smash up, inside one of the barrels will be a gold coin but there are beetles in other barrels that you can ignore. If you’re quick enough you can smash the barrels, get the coin and get back to where you were standing in time for the man to return thus giving you both coins. The coin from the barrel and the coin from father for the “good deed”.
Now for the final interaction, from the farm house area head to the right up a small hill and you’ll see a small child being bullied by well a bully, now I could never find out how or if you could get both coins for this so you’ll have to actually decide which one you want to side with.
Siding with the small child is the good side, talk to him and he’ll say how he’s being picked on and that we’re strong to beat up the bully. This acts as a basic combat tutorial and how we can lock on to enemies (or innocents). Hit the bully enough times and he’ll run off, the small child will then thank you and give you the teddy bear the girl was looking for. So we can hand it into her but you may have to look around as she tends to wander about.
For the evil side we can side with the bully and hit the small child, he’ll cry a bit and hand over the bear, the bully will then give us a gold coin and to add insult to injury we could give the bully the bear too who will then wander off happy.
If you’ve been following this or if you’ve just done all the evil deeds then the guards will run up to you and tell you how bad you’ve been even going so far to list off the crimes you’ve committed. However being a child we just get a telling off. If you’ve done some good deeds then head back to father who will begrudgingly hand over some coins for the good deeds we did. Head back to the square and you’ll find a trader outside the tavern (he’s the one with the massive moustache). Buy the chocolates off him and turn right around and head up the path towards the gold marker on your mini map and talk to our sister who is standing in a field.
A cut scene will play where bandits will attack the village, after the cut scene you’ll see the everything is on fire, there’s only one path to take so take it back to our house and there’s yet another cut scene where we meet Maze and we get taken to the Hero’s Guild.
Hero’s Guild Training Pt. 1
During the cut scene we meet two other main characters. The guild master who acts as our mentor and will offer advice if we need it, the second is Whisper. I genuinely hate Whisper and I can’t even describe why. After the cut scene we need to meet the guild master who’s outside, when we go outside there’s a couple of things we’ll want to do before starting our training.
First you’ll notice a couple of guild trainees having a debate on who’s the fastest in the guild, talk to the one and he’ll brag about how he ran to the Demon Door and back in 50 seconds. If you’re unsure of the layout of the guild grounds then I recommend having a look around first but the Demon Door is a giant talking stone door so it’s hard to miss. You can take the guild member up on his challenge and attempt to beat this time, if you don’t succeed the first time then you can try as many times as you want as it won’t cost you any gold. When you succeed you’ll get a nice 25 gold for it.
Next is another cut scene, from the racing duo you might notice a tower to the right of you with some stairs, head to the top of the stairs and you’ll see Maze talking to a almost skeleton person in robes, this is Scythe and we won’t be seeing him again until we hit the Lost Chapters part of the game which is mid-way but it’s an interesting cut scene to watch.
After this head out into the main ground area. On the ground you’ll see some red apples you can pick up, pick up 4 of these and then face the archery training area, head to the left of this and you’ll see a doorway on your right hand side, go inside and you’ll see one of the servants (this is what the game calls them, not me), talk to her and she’ll mention that she needs to bake an apple pie for the guild master and she needs 4 more apples. Agree to find them and talk to her again to hand them in, you’ll get a blueberry pie for your troubles. (I believe this is the only one in the game so I like to challenge myself to keep it until the end of the game)
Once your done go and talk to the guild master to progress, he’ll give you a more in-depth guide on melee combat and collecting experience. A cut scene will play where the guild alarm will ring and he tells you that there’s something loose in the woods, so his natural response is to send a poorly armed, poorly experienced kid in to deal with it. In the guild woods you need to kill 10 beetles, afterwards the Guild Master will give you some gold and give you the option to progress on to the next part of the training. Do so if you’ve done everything else.
Hero’s Guild Training Pt. 2
We wake up to the nagging sound of Whisper telling us we’re late…again and we need to meet the Guild Master. Head outside and talk to him for him to give us an actual weapon, the iron sword. Instead of hitting a dummy this time we get to hit Whisper (I mean she is a dummy anyway). This acts as a more in-depth melee combining attack and defence. Thunder then arrives who is Whisper’s brother, the Guild Master then gives us a mini test to see who has learnt the most. After this part the Guild Master then tells us to meet him over at the archery area.
Talk to the Guild Master and he’ll give us a Yew Longbow, follow his instructions and eventually you’ll get to the part where you have a minute to hit as many targets as possible, try to keep your score as low as possible, there is a reason why. You’ll basically have three instances where you do an archery contest, this being the first. The second is coming up very shortly and the third is a bit further on in the game. If you get your score too high in this first bit it’ll most likely make the next ones harder.
After the archery part the Guild Master will tell you to meet him by the waterfall where the Demon Door is for the Magic/Will training. Follow his instructions and pass the training. Well done! You’ve learnt all three combat styles in the game but don’t advance time yet! We’ve still got some work to do here. Tell the Guild Master you still want to play with Whisper.
After you pass each of the combat training you’ll notice a Guild Member dressed in black standing near the areas, there’s one outside the melee ring, one near the archery range and one near the waterfall. Talking to one will give you a test where you repeat what you did in the training. So for melee you fight Whisper again. They mention that you’ll get graded on performance and if you get an A+ you’ll get a special prize.
Doing the melee test you can’t let Whisper hit you more than once depending on difficulty. If you’re on Chicken difficulty she can hit you once but that’s it and if you’re on Heroic mode then she can’t hit you at all. Doing this will give us an Iron Katana which is better than the sword so get that and equip it.
With the archery contest you’ll want to get a decent score ideally near 200, if you aim at the back right and wait for the fast dummy to appear you’ll get it easily, getting an A+ gives us a Yew Crossbow, now in my opinion I don’t like crossbows but it’s down to personal preference.
For the will test you need to score between 18 and 21. I’m not sure on the exact number but anything over 18 will guarantee an A+ and getting this grade will get you a mana potion and again depending on game difficulty will get you a Resurrection Phial on Chicken difficulty, but on Heroic difficulty you won’t get the Phial as they won’t be in the game.
You can repeat the tests as many times as needed but I highly recommend getting these done especially for the Phial on Chicken difficulty as they’re pretty valuable. (I’ve made a section explaining the difficulty settings if you need to read it).
After completing the tests head into the Guild Woods where Whisper will spot some bandits across a very shallow pond and mentions there’s no way to reach them so the only way to kill them is to either use your ranged weapon or magic. After killing them make sure to get the green experience orbs, Whisper will be happy and run off out of the woods (Likely to claim all the credit). Leave the woods.
This next part is optional and only serves to give you some extra gold if needed but it also gives Evil Points so beware if you don’t want Evil Points.
There’s a Guild Member outside who after talking to him tells you that there’s some sparrows nesting around the Guild and he wants you to kill them, using either a ranged weapon or magic kill each one and for each one you kill he will give you 5 gold. If you kill them all he’ll give you a bonus amount of gold.
When you’re done with everything in this part, head inside the Guild and speak to the Guild Master in the map room to progress onto the final part of Guild Training.
Hero’s Guild Training Final
Welcome to the final part of your Hero training, this part is incredibly easy. The Guild Master will tell you to take your final test in the Guild Woods, why he calls it a test I’ll never know as you can’t fail.
Enter the woods and you’ll see Maze, in order to pass this segment you basically have to fight him using all three combat styles. First you hit him 7 times with a melee weapon, then 7 times with a ranged weapon and finally 7 times with lightning. Afterwards he’ll congratulate you for the thrashing and you’ll return to the Guild Master who will then lead you to the Chamber of Fate where the graduation ceremony will happen.
During the cut scene you’ll be shown how to spend your experience. If you’re following my guide then I recommend buying a level of Health under the Strength category and buy a level into Guile under Skill.
After this you’ll get a quest completion scroll, you’ll see one of these for completing most quests where it’ll show your rewards which is mostly gold, experience and renown. Sometimes you’ll get items as well such as this case where you’ll get a lamp, some food and some potions. Well Done, you’re now a fully qualified Hero and are free to wander the land but where do you start? Well read on and I’ll be your guide.
The first thing we want to do is open up the Demon Door near the waterfall in the Guild grounds. Go and speak to him and he’ll say that our path is dark and we’re not bright enough. It so happens we have the perfect solution to this, remember the lamp we got as a quest reward? Go into your inventory and find the lamp, I advise assigning it to your hot bar as we’ll need it again later on in the game, when you’ve got it on your hotbar press the relevant number to turn it on and the Demon Door will say we’ve worked it out and open up for us. Head inside.
Inside you’ll find a book on a table called “Making Friends” pick it up as we’ll need it for a quest. Also is a brown wooden chest which you can open, inside is an “Elixir of Life” these potions are great as it will fill your health bar and also permanently extend it by a little bit, save it for later if you want or drink it now, it’s up to you.
You can also search the bookcases to find a “Book of Spells” and a “Howl Tattoo” card. Head back to the Map Room and go through the giant wooden doors, it’s time to go exploring.
Getting Skorm’s Bow
This next part may take a couple of tries, I can never guarantee it works for myself but I’ll do my best to explain it in such a way where it will work. Skorm’s Bow is arguably the best ranged weapon in the game and if you manage to get it early on it will set you up for the whole game, even on Heroic difficulty.
Before we go on let me tell you what we should have in terms of our inventory for those following this guide. We should have the Iron Katana equipped, either a Yew Longbow or Crossbow (depending on preference) and the Villager outfit equipped. You should have bought one level into Health and one level into Guile, it doesn’t matter if you don’t have both but ideally you should have the Health level.
You should have 2 mana potions, 2 health potions, an elixir of life (if you haven’t drank it already), a blueberry pie, apple pie, Guild Seal, lamp and your money bad with hopefully 96 gold (this might differ if you did the sparrow killing activity) also you should have the “Howl Tattoo” card, “Making Friends” book and “Book of Spells”. Also if you’re on Chicken difficulty you’ll have a couple of “Resurrection Phials” but this guide is assuming you’re on Heroic difficulty.
Head out of the Guild through the wooden doors and you’ll come to Lookout Point. Continue up the path towards the statue and you’ll see a hobo being harassed by a bully. You can side with either but siding with the bully will get you evil points and siding with the hobo will get you good points. This interaction serves to show you about expressions and context sensitivity.
Expressions are basically how you interact with people in the world, some are good expressions and some are evil. You unlock more by earning Renown levels and having certain morality levels. The Guild Master will tell you when you’ve unlocked a new expression. So side with the hobo to earn some good points.
Before you move on you should see some brambles blocking a path, use your weapon to clear it out and you’ll find your first Silver Key! One down, 29 to go. Next you’ll want to head down the Southern gate to Greatwood Entrance. Upon entering the zone you’ll notice the map has more red spots than a teenager going through puberty. Ignore these for now and instead just run past them, run towards the South-Western area over a small wooden bridge and through the doorway to Greatwood Lake.
In this zone immediately to the right is a hill going up, go up and collect your second Silver Key then run across the zone, over the bridges and straight up the stone stairs into Greatwood Gorge.
In the Gorge, the Guild Master will tell you that some Bandits have set up a toll booth in the area, ignore this as we don’t have enough gold to pay and we’re not strong enough to kill them yet, this however starts our first Bronze Quest. One of the Bandits stop you to try and get you to pay but as soon as the conversation ends just run past him. This will aggro all the other Bandits but run to the right past the Demon Door and into Greatwood Cullis Gate.
In this zone you’ll want to head down the left path, down the stone stairs and then run straight ahead through the door into Greatwood Caves. Then from here go right into the cave entrance, Welcome to Darkwood.
As soon as you load into this zone the Guild Master will mention the “Chapel of Skorm” which is exactly where we want to go. Follow the path straight into Darkwood Marshes.
Follow the path again and you’ll see a wooden chest on your left, inside is a Jet, loot it if you wish. Beware here though as you’ll see some mushroom type things, if you get too close to one it’ll explode and hurt you knocking you down and if you’re really unlucky it’ll set off a chain reaction of them just exploding. Either use lightning or a ranged weapon to deal with them from a distance and head into Darkwood Lake.
From here just head straight through to the Southern doorway into Darkwood Camp and from here
go through the Eastern doorway to the Chapel of Skorm. If you’ve made it this far then give yourself a pat on the back, it was a hell of a run and even I died twice doing it.
Now we have the Chapel of Skorm discovered hold down the G key to charge up your Guild Seal and teleport to the Guild. Head back to the statue at Lookout Point and go to the North into Bowerstone. You’ll get a cutscene where a guard tells you how wonderful the town is (which it isn’t). When the cutscene finishes head into the tavern and find a body guard to hire. Before you hire him make sure it’s night time, if it’s not then there’s a free bed you can use near the blacksmith to sleep and wait until it’s night.
When you’ve hired him you can then hold down the G key again and this time teleport back to the Chapel of Skorm (recall) and then head up to the chapel, to the left of the entrance will be a chest containing an Assassin’s Shirt which you can equip if you so wish. When you’re inside the chapel don’t talk to any of the acolytes yet, you just need to wait until it’s midnight. You’ll know it’s midnight when the dial next to the minimap is right in the middle of the night time segment. I’d advise saving the game as this may take several tries.
Now’s a good time to explain how this works. The idea here is to sacrifice our follower in order to gain Evil points, if we get enough Evil points then we get Skorm’s Bow. There are several factors that will help us get this. First is the time of day, we get more points if it’s midnight. Second is morality, the more Good we are then the less points we’ll need which is why we sided with the hobo near the Guild and finally is our follower. I’ve heard that the bigger they are physically the easier it is as well as their own morality. Seeing as this is the only follower we easily have access to means this is our only real option.
The body guard will take some gold off use every minute (real time) this equates to an hour in game. The best time to start the sacrifice is when the body guard takes his money and then talk to the acolyte around 30 seconds later. This will start a cut scene that you won’t want to skip as the cut scene is about 30 seconds too. All going well you’ll get the bow, if not re-load and try again.
Our First Quests
Once you have Skorm’s Bow it’s time we put it to use. Teleport back to the Guild and interact with the map table. The map table is where we’ll be coming to pick up the majority of our quests and it’s where we’ll get our first one called “Wasp Menace” you’ll notice some other quests that are greyed out, we can’t ever take these ones because our Renown level is too low and they’ll be gone by the time we come back to the table.
Pick up the quest and leave the Guild, as you head up the hill a villager will come up to you and tell you that wasps are attacking the picnic area, follow him to the zone. When you load in you’ll see a cut scene where wasps are attacking people. After use your melee weapon to kill the wasps, they die in one hit so shouldn’t be a problem, don’t forget to collect the green orbs. When the final wasp is dead you’ll see another cut scene where the Wasp Queen spawns, our first really boss battle!
First kill off the smaller wasps she spawns, once they’re dead use Skorm’s Bow to damager her. She has one of those mechanics where you can’t kill her in one hit as she has to spawn more smaller wasps. Kill the smaller ones like before and then use the bow to hit her, this time we do more damage as the restriction has been lifted. Should only take two arrows to kill her.
Once the quest is finished you’ll get her head as your first trophy. You can use the trophy in your inventory to show it off to any civilians near by to earn some extra Renown, it is required for an achievement. Also on nearby picnic tables will be a “Standard Beard” card, a health potion, apple pie and some apples which you can take. Loot the area and head to Bowerstone.
Bowerstone South
Once in Bowerstone head to the outside of the tavern where you’ll see Maze, talk to him and he’ll mention that your sister may be alive and “encourages” us to replace our basic equipment (clearly he can’t see our bow through his ego).
It’s time to explore Bowerstone and pick up a couple of quests. First you’ll most likely see a young girl running up to you with a green outline, talk to her and she’ll get you to follow her, do so and you’ll talk to a mother who tells you her son found some mushrooms and asks you to talk to a witch in Bowerstone Quay. The witch then instructs you to collect 4 blue mushrooms which starts our first Bronze Collection quest.
Also in the Quay near the dock is a man sitting on a bench. Talking to him he’ll say that his daughter is keen to meet us but only if we have a certain look. This introduces the style card system. He’ll give us the “Pudding Basin” style card, head to the barber in Bowerstone and purchase said haircut. If you need more gold then sell off the yew crossbow and longbow at the blacksmith, return to the father in the Quay and he’ll then give you a “Mutton Chop” card, again go to the barbers, buy the beard and go back to the father who will give you the last one “Trader Style Moustache”. Go to the barber, get the moustache and go back to the father who will tell us that his daughter doesn’t actually exist and he just likes making Heroes like us look stupid. He’ll give us a “Fire Monkey” tattoo card, we’ll also get 100 experience and 100 renown. Not bad.
Next will depend on the time of day, if it’s day time then head down towards the main gate of Bowerstone, the shop to the right will be the tailor’s shop. Go inside and head upstairs onto the balcony and on there will be Silver Key number 3. Also search his bookcase inside for “The Repentant Alchemist” book. You’ll get 5 Evil points for this.
Right outside the shop you’ll see a market stall owner, talk to him and buy a single Red Rose and all his apples, pies, carrots, fish and red meat. If you can afford to then buy a shovel off him too, don’t buy the fishing rod as we’ll get a free one soon. If you can’t afford the shovel for now it’s not important. But buying the rose and produce is. You may notice some breakable barrels dotted throughout Bowerstone, while you can smash them and see what’s inside it’s advised not to during the day. Doing so will earn you Evil points and if anyone sees you doing it they’ll report it to the guards who will fine you.
Next if it’s still daytime then head up the hill towards the very top and head into the school on the right. Talk to the teacher inside and he’ll mention how the school is in need of books and asks if we could donate any we find on our travels. This starts one of the longest Bronze quests. Don’t hand any in yet but there’s 25 we need to get in total.
Now if it’s night time then head into the Quay and you’ll see a combat ring. Eventually a group of men will turn up and shortly after a rough looking man with a mowhawk will turn up, talk to this man and he’ll introduce the Fist Fighters Gang. There’s 4 of these in total and you have to do them in order, Bowerstone being the first. He’ll give you the instructions and after paying 50 gold he’ll let you take part. Complete this and you’ll get a certificate and cash prize. You’ll also gain access to the second group when we get there later on.
Final thing to do in Bowerstone for now is to get our first Hero Doll. Head into the tavern and find the game master who’s sitting down at a table. In each of the taverns in Albion is usually a games master who will let you play a minigame, in Bowerstone’s it’s a card memory game. You have to flip each card and try to match them. If you manage to do this in under 30 seconds then you’ll get the “Briar Rose” Hero Doll. When you collect your first one a child will run up to you and explain how his teacher is collecting the dolls, if you find them all and hand them in to the teacher he’ll give you his super rare doll. There are 7 to collect in all for the achievement.
Orchard Farm
Head back to the Guild and we’ll get a cut scene introducing Briar Rose, she mentions that all the best Quests have gone and will make some snide comment about the kitchens needing cleaning (Don’t rip up that doll). Interact with the map table and we get our first Good/Evil choice quest. You can either attack or defend Orchard Farm. When you select either one you’ll also get an option to boast. Boasts are basically wagers to complete quests under certain restrictions, such as with no armour on or using no weapons where as some boasts will be quest specific. I advise completing as many boasts as your confident with to earn as much money as possible.
Defend Orchard Farm
Once you select the quest and any boasts you wish to do, follow the gold marker on the map. You’ll get a cut scene where Whisper brags she’s going to take the opposite quest and see who comes out on top (spoiler alert, it’s always us). Go through Greatwood Entrance killing enemies as you go if you wish, continue following the quest marker through Greatwood Lake and into Orchard Farm where you’ll get a cut scene where the farm owner begging us to protect them from Bandits. There are three boxes you need to protect in the farm house, the Bandits will try to steal them and carry them away. You get some Guards to help you and the Bandits come in three waves of three enemies all coming from the same entrance. Using Skorm’s Bow makes light work of this. After the third wave, Whisper will turn up again asking if we know how to flourish. Flourish is basically a strong attack with a melee weapon that can break through an enemy’s block, if you see your weapon glowing purple then it means you can flourish using the right mouse button (default). After a small duel Whisper will admit defeat and give you her broach as a trophy, after a small chat with the farmer you’ve finished the quest.
Attack Orchard Farm
Once you select the quest an any boasts, head through to Greatwood Entrance and follow the marker through to the Orchard Farm entrance here. It’s slightly different compared to the Good side of this quest. When you arrive the Bandits will explain that they’ve been hired to steal these crates. Once they’ve blown the barricade you’ll want to charge in and attack the Guards. Using Skorm’s Bow makes light work of this. Once the Guards are killed, lead the Bandit to one of the crates and he’ll start carrying it off. Once he’s carried it off he’ll come back for a second and then a third. The Guards can spawn from two different areas so keep an eye on the minimap. After the third crate is gone, Whisper will turn up talking about learning new moves and wants you to hit her with a flourish. After the duel she’ll give up and gives you her broach as a trophy, the farmers will beg you to leave them in peace and the quest is finished.
Learning To Fish
Once you’ve finished the Orchard Farm quest head behind the farm house to find a chest with a Jet inside. After head back into Greatwood Entrance. You may have to clear the area of enemies first. After clearing out the enemies head through the Fisher Creek doorway where you’ll get a cut scene of a fisher trapped in his house by wasps. Kill the wasps and he’ll thank you giving you his fishing rod as a reward. He’ll also show you how to fish in fishing spots.
When you see a ripple in the water it means there’s something valuable to fish up, there’s one near the dock and then there’s 4 more next to the house. One of these will give you a Silver Key, another will give you 100 gold, a third will give you a “Standard Moustache” card and one will give you a Moonfish. Make sure to fish near the dock too for the Golden Fish.
There are two food items that can change the time of day, a Moonfish will turn day into night and a Golden Carrot will turn night into day.
Once you’ve fished everything, leave the zone and then immediately go back in. Talk to the fisher and he’ll talk about the Fishing Contest. What we want to do is go fish somewhere else and try and get a fish that’s close to 100g in weight. It’s purely RNG and it may take several tries but eventually you’ll get one. You don’t need to fish at a ripple, just find a body of water and the fishing icon will appear on your context sensitive bar. After getting a fish close to 100g, go back to the fisher and he’ll congratulate you on getting 1st prize, you’ll get the “Rod of Champions”, a Silver Key and a Fisher Hat. This should be your 5th Silver Key now. The Rod of Champions is significantly better than the normal rod and you’ll use it automatically when fishing.
Hidden Secret
Next comes a little secret. Head to the statue on Lookout Point and you might notice it very slowly turning on it’s pedestal. When you interact with it, it usually says “The statue points to nowhere in particular” however, at a certain time during the night it will eventually point towards Bowerstone. When you interact with it and it says “The statue points to Bowerstone” this unlocks a cellar door behind the tavern in Bowerstone. It’s near where the mom is for the Blue Mushroom quest. Head down into the cellar and loot the chest for a Leather Armour top. Equip this for an armour upgrade.
The statue also points towards Greatwood during the day, again interact with it and then head into Greatwood Entrance, to the left you’ll see a stone wall with two statues at either side. In between you should see a wooden chest containing a “Piercing Augmentation”. Augmentations are special stones you can put into weapons that enhance it with special attributes. However once you put an augmentation it you can’t take it out so be careful.
Wellow’s Pickhammer
So we’ve made a fair bit of progress already and it’s time to make some more starting with unfortunately a bit more RNG. Hopefully though it’ll be the last time for a while. To start with we’re going to need to find a certain trader. In the game there are several wandering traders as marked with a blue dot on the minimap. Each one could be selling all kinds of goodies. The one we need is selling produce.
The best places to look at the moment is either Greatwood Entrance, Greatwood Lake or Greatwood Cullis Gate, only downside is that there’s usually enemies attacking them so you have to be quick in order to save them from dying. When you get to trade with one make sure they’re selling produce, if it’s weapons, armour, hair styles or tattoos then walk away and try a different one.
The item we’re looking for is “Crunchy Chicks”. We need at least 10 of these to open up a Demon Door and get a really good early game melee weapon. So keep looking until you find a trader selling them then buy 10. Once you have them head to Greatwood Gorge where the Bandit toll is.
Now is a good time to clear it out so using Skorm’s Bow start picking off the Bandits. If you kill the Bandit leader then the rest will flee. The leader is the one with the flags on his back, very easy to identify. Looting the chests in the area will get you a “Flame Augmentation” and a “Steel Pickhammer”. Once you’re done head to the Demon Door and talk to him. He’ll say how he will only open if you perform an Evil act. So open your inventory, put your crunchy chicks on your action bar and get eating. By eating all 10 near the door he will be satisfied and open up letting you loot the chest for “Wellow’s Pickhammer” which already has augmentations in and is a really good melee weapon for early game.
Next let’s get us a couple of the Blue Mushrooms. First we head to the Guild, go to the Demon Door and on the stepping stones you’ll see a fishing ripple, fishing here will net you the first Blue Mushroom. Second head into the woods and you’ll find a man standing on his own here, talking to him he will say how he was at a party and met this gorgeous girl. He wants us to deliver a letter to her in Oakvale. We could do this later but if you’re in a hurry then you could always kill him now and he’ll drop the mushroom. I always take the letter and wait, it’s not like the comatose kid is going anywhere. Before you leave the woods there is a fishing ripple that contains the 6th Silver key. Third head to the picnic area where we fought the Wasp Queen and you’ll find a woman who wants us to make her laugh, the best way to do this is by doing to Cossack Dance expression, do this three times and she’ll give you her mushroom. Or again you could kill her but there is a Guard nearby. The final mushroom is a bit later on so again we need to wait for that one but we have either 2 or 3 already.
Leave the Picnic Area and immediately to the right you’ll see a fishing spot, fish it up and you’ll get an “Ages of Skill” potion, what this potion does is it will give you experience in that combat area but you’ll want to drink it when you have a good combat multiplier as it will give you even more! So save it for later.
Head back to the guild to spend some experience. At this point I bought all my strength and skill abilities up to level 2. I bought my magic power (which is the mana bar) up to level 2. Go to the map table and take the “Hobbe Killing Contest” silver quest, this quest can be annoying as it pits you against Whisper in a contest to see who can kill the most Hobbes at Orchard Farm. With the weapons and skills we have it should be pretty easy to beat, however if we don’t kill more than Whisper then we fail the quest and have to try again.
On the way to Orchard Farm, go through Greatwood Lake and open up the 5 key Silver Chest to get an Elixir of Life. Also in Greatwood Entrance go towards the Orchard Farm doorway and you’ll see a wooden chest to the left, inside will be a “Will Master Elixir” this works like the Elixir of Life but instead it extends your mana bar.
After the quest we can start pillaging the Orchard. At the gate near the Orchard proper you’ll see a chest, inside is a Treasure Clue scroll. There’s 6 of these in total but we can’t get them until much later in the game. Also scattered on the ground are loose apples to pick up, there’s also two fishing spots. One contains a “Coron Visor Tattoo” card and the other contains Silver Key number 7. There’s also a fishing spot near the farm house which has an Elixir of Life. Also at the side of the main house is a grave you can dig up if you have the shovel that gives you an “Upper Dress”.
Escorting Traders
Using the experience gained from the Hobbe Killing Contest quest, buy the first two levels of “Heal Life” spell. You may not need it for this quest but it never hurts. At the map table take the “Trader Escort” quest and any boasts if you wish then teleport to Greatwood Cullis Gate and head towards the doorway with the quest marker, before going through there’s a fishing spot on the right that will have a Moonfish.
Follow the quest marker into Darkwood Entrance where you’ll meet the traders you need to escort. You have to escort these two through all of Darkwood and into Barrow Fields on the other side. You can use the “Follow” and “Wait” expressions to get them to wait for follow and use the Heal Life spell to heal them if they take damage.
A bit further down the path you’ll find another trader in distress, he’s been attacked and bitten by something and asks if he can come along with you. You can decide on whether to let him or to leave him. If you let him come this starts an invisible timer, if you don’t get to Barrow Fields in time he’ll eventually turn into an animal and try to kill you and your traders. If you leave him behind you’ll gain some Evil points.
A useful tactic is to leave your followers in the zone you’ve just come from, move on into the next one to clear it of enemies then go back and get the traders to follow. This way the zone ahead is clear and you won’t risk your traders.
In Darkwood Marshes you’ll have your first encounter with a Balverine. Balverines are werewolf like creatures and are quite difficult to kill as they are nimble and fast. Ignore the Demon Door for now and move on past the exploding mushrooms.
Darkwood Lake will probably be the toughest part of this quest, Bandits will spawn almost out of nowhere and if the traders are with you then you need to ensure that no Bandit slips through and starts hitting them, it only takes a couple of well placed swings to kill them. At the left of the entrance will be a chest containing a pair of Leather Boots, put these on for more armour unless you’ve taken the “Do the quest naked” boast.
On the right hand side in the actual lake part will be a chest with 250 gold. You’ll also see a standing stone with a hole in it near the top. Take your bow and go into sniping mode, shoot an arrow through the hole and you’ll get Silver Key number 8.
At Darkwood Camp the traders will automatically get healed and there’s two chests to loot, one has a Steel Axe and the other a potion (This might be a Resurrection Phial for normal difficulty). There’s also some shop keepers if you need to stock up on food or potions. You could also sell any spare weapons you don’t need but don’t buy any. You’ll also see a Games Master but he isn’t required for the Hero Dolls. When you’re ready to move on just follow the quest marker.
In the Ancient Cullis Gate zone you’ll find a chest next to a small bridge, this will contain I think a Resurrection Phial. I say think because I’m playing on Heroic and I often forget what chest contains what. Also on this bridge will be a fishing spot with Silver Key number 9.
Darkwood Weir will be the last zone of the quest. As soon as you enter the water, follow it to the left and you’ll find a chest with a Lightning Augmentation. Back on the main path you’ll encounter what will most likely be your first Troll.
Trolls come in three varieties. Earth, Stone and Ice. The one here will be an Earth one, these are relatively easy to kill so long as you go for a ranged approach. All you have to watch out for are the projectiles they throw at you whereas if you go melee you’ll have more attacks to deal with. You can if you time it right knock back it’s projectile with a melee weapon. Whichever approach you take, kill the Troll and loot the ruby it drops. Go through the cave into Barrow Fields.
In Barrow Fields the traders will be delighted and run off ahead and finally the quest is completed. Give yourself a round of applause because this is the hardest quest you’ll have done so far.
As soon as you finish with the quest do a 180 degree turn and you’ll see an area off to the right, there’ll be a chest with a Sapphire in, a Demon Door we need to ignore for now and a fishing spot with a Moonfish.
Head to the green dot on the minimap and you’ll see someone selling a Blue Mushroom. You can either pay him 1,500 gold to buy it OR you could just take the mushroom and pay the 750 gold fine. You save half the money for a few Evil points. Now depending on if you killed the man in the Guild Woods you should have either 3 or 4 Blue Mushrooms, if you have all 4 then go hand them into the Witch in Bowerstone Quay whenever you fancy. There’s also a fishing spot near a scarecrow with 500 gold, so ultimately you only spent 250 gold. Now that’s what I call a bargain.
And now we get to head back home to Oakvale.
Homecoming
As soon as you load back into Oakvale you’ll get a cutscene where you bump into the lady who lost her teddy bear as a child before the raid. After this go and talk to Maze outside the tavern who will tell you that he hasn’t heard much about your sister but there’s a blind seer who lives among the Bandits.
Be careful in Oakvale, unlike in Bowerstone where they take your weapons off you, Oakvale and many other towns let you keep them equipped, taking a weapon out in a town is considered a crime.
Now we have a whole new town to explore. Oakvale is pretty much the same as it was as a child except we can go in the shops and the beaches have opened up. From where the cutscene ends on the beach, follow it to the right past the cave entrance and you’ll find a chest with a pair of Assassin Boots inside.
Head back into the main square off the beach and head to the right. Go past the area with the three large barns and you’ll see a wooden chest on your left, loot it for what I believe to be a Resurrection Phial.
To the left of this chest you’ll see a stone wall with a broken gate with a woman standing next to a well. This is the woman you need to give the letter to from Cyril in the Guild Woods (if you didn’t kill him). Giving her the letter will give you a choice, either claim it’s from you or tell her the truth. If you tell her the truth she’ll give you a letter to return to Cyril in the Guild Woods, if you tell her it’s from you then she’ll give you a letter and also some Evil points. Return to Cyril and give him the reply and you’ll get his mushroom but depending on if you lied to the woman or not you’ll get either Good or Evil points as well.
Head back to Bowerstone and give the witch the mushrooms, then head back to the mother to finish this quest.
Teleport back to Oakvale and from the Cullis Gate head into the town and go past the weapon shop following the path to the left. Where you see the chest on the left go to the right instead and talk to the man just in front of you. He’ll tell you that he’s having a ghost problem and wants you to sort it out. Go down the path behind him to the beach and talk to the ghost at the end. Turns out this ghost used to be a pirate and wants you to dig up his treasure to give to his widow. Before you leave, enter the hut just to the right and loot the chest for an Oak Crossbow, there’s also a free bed here if you need to use it.
Head back over to the other beach and go to the dock. Head just to the left of it and near the middle wooden support you’ll see a shovel icon in your context sensitivity bar, if you need to buy a shovel then the general shopkeeper in Oakvale sells one. Dig up the treasure and then head to the far end of the same beach to the lady standing on her own. Give her the gold you just dug up and head back to the ghost who will tell you that the rest of the treasure is buried in the local graveyard which is a new addition to Oakvale. Before you go to the graveyard, talk to the bald man you spoke to at the start to let him know the ghost is gone.
The graveyard is just behind the large gates, there’ll be a bodyguard standing just outside it, just past the gates you’ll see a grave just off to the right, dig it up to get 500 gold then go through the doorway into the Memorial Garden. You’ll see a large statue of a man with an axe, stand under the axe and you’ll see the shovel icon to dig up the treasure which contains Silver Key number 10 and an Obsidian Greataxe. While this weapon may seem like an upgrade it’s not worth using in my opinion. Keep hold of it though as we’ll need it later on.
Head back to the beach where the ghost was and talk to the man you spoke to earlier, he’ll introduce the best minigame in the entire Fable series “Chicken Kicking”. The idea here is to kick chickens into a scoring zone to earn points and win prizes. He’ll give you a run down of the rules and you’ll get a tutorial pop up as well.
You’ll want to get all three prizes here, at 50 points you’ll get a “♥♥♥♥ Call” expression. At 150 points you’ll get Silver Key 11 and at 250 points you’ll get a Chicken Hat. How far the chickens go depends on if we sprint before we kick them and our strength levels. At our current level the chickens won’t go too far so aim for the middle left or right 50 zones. With a sprinting run up you’ll easily get the chickens in the zones.
For the 50 points, just get one chicken in the zone and run past the line for the other 4 tries, going past the line counts as a foul or….fowl 😉 and you’ll lose a try. For the 150 just get 3 chickens in the zone and run out for the last two and for the 250 you’ll need to get all 5 chickens in.
At a minimum you’ll need to spend 150 gold as it costs 50 gold per game, it’s not like the fishing contest sadly.
Make sure it’s night time now as we can do the second group for the Fist Fighter’s Gang. Head to the area where the three barns are and you’ll see a similar combat ring, talk to the head man and do the same thing as in Bowerstone. Only you’ll fight extra guys before the leader and he’s harder to beat. Finish this to unlock the third group which is later on again.
Next head inside the tavern and talk to the Games Master to play what I consider to be the most annoying mini game “Coin Golf”. You have to shove a coin into a circle somewhere on the table. Much like normal golf, the lest “strokes” our hits you use the better. There’s 4 holes to complete and to get the doll you need to do all 4 in under 11 strokes. I would advise watching a YouTube guide for this, there’s plenty out there as it’s hard for me to describe how to do this in text format. But completing this in under 11 strokes will give you the Whisper Hero Doll.
Final thing to do here is to buy a set of chainmail armour from the weapon shop. It doesn’t matter if you can’t afford the whole set but it’s advisable to get it. if you need to then try and sell some of the spare augmentations. We don’t really need them and they do sell for a fair price.
When you’re done here teleport back to the Guild.
Hobbe Cave
From the map table at the Guild pick up the “Hobbe Cave” quest and any boasts you wish. Then teleport to Greatwood Cullis Gate and follow the marker to Rose Cottage. When in the area you’ll see a Demon Door to the left, go and talk to him and he’ll say how he’ll open up if he finds someone that loves him. Go in your inventory and find your Red Rose we bought a while ago, you can use it to gift the rose to the Door who will open up. Inside behind a dressing screen is a chest with the “Will User Bright” set.
Back outside head towards the cottage and to the left you’ll see a ring of flowers, in the middle you’ll find a dig spot, dig it up for Silver Key 12. Also nearby are some brambles you can cut with your weapon for a chest with 500 gold. Go to the front of the cottage and interact with the door. A little old lady will open the door and tell you her grandson has gone missing and is probably in a nearby cave, she’ll also give you a “Hexagonal Key” which we need for the quest.
Follow the marker to Greatwood Caves and you’ll see some brambles opposite the Demon Door. Cut them away and you’ll find a mana potion on the floor and a piece of Red Meat (yummy). Now prepare yourself and enter into Hobbe Cave.
In the Entrance you’ll notice several doors leading into different rooms, there’s a few Hobbes here but be warned. More will come pouring out of the other rooms so make sure you’ve killed them all while keeping an eye on your health as it could drop very quickly.
When the entrance is clear head into the first door just opposite the cave exit, you should hear someone crying out for help. Inside you’ll find more Hobbes, kill them all then you’ll get a cutscene where you free a Bandit. He’ll say how his friends were taken away and not seen again. He’ll give you the option of looking for treasure together, I’d advise agreeing to this, it’s an extra sword plus if you manage to keep him alive until the end it’ll make it easier later on.
Back out in the entrance you may have to fight some more Hobbes, then go into the door on the left. Oh look, more Hobbes. Kill the mage ones at the back first but watch out for the explosive barrels. You’ll find a Silver Key chest here you can open for a Will Master’s Elixir which the Bandit graciously lets us keep (Gee, thanks). Head back out to the entrance.
Follow the marker through the door into the Main Chamber, kill all the Hobbes here and loot all the chests. The Bandit will comment that he’ll want his share when you get out of the cave (Oh my sweet summer child).
You’ll then notice a strange looking door. This is where you need the Hexagonal Key. If you came in the cave before doing this quest (But why would you?) then you wouldn’t be able to get past this door. Which is why we need the key. Follow the passageway through the other door and head down the stairs to a cutscene.
This enemy is called a Nymph and they are more annoying than hard to kill. If your bandit friend survived then you have the option of trading the boy for the Bandit. As soon as you do though, Hobbes will begin pouring into the room. Plus the boy is able to be harmed now so you need to make sure he stays alive. The Nymph however isn’t aggressive which is good.
Once the Hobbes are dead you can either leave the room and leave the Bandit behind or if you took the “Kill the inhabitant of the cave” boast then you’ll need to kill the Nymph. Get your bow out and lock onto her, shoot her once and she’ll start flying around as a whisp. Wait for her to stay still while keeping locked on and shoot her again. She’ll go down in two arrows and your Bandit friend will be freed.
Facing the giant stone orb, to the right will be a ring of mushrooms, dig in the middle for Silver Key 13. Now comes the fun part, getting out of here while keeping the boy alive.
Make your way back though the Moonlit Tunnel, there may be more than one Hobbe here so play it cautiously. Through the Main Chamber it’ll be empty so head to the Entrance, This is where it gets tough, as soon as you load in just stay where you are. The Hobbes will come to you and there will be a lot, kill them as quickly as you can while keeping an eye on the boy’s health. If the Bandit dies then it’s no great loss. When the Hobbes are dead you can finally make your way out of the cave.
Keep an eye on the minimap though as sometimes a Hobbe or two might spawn behind you
Outside if the Bandit survived then he’ll want his share of the loot. Either give him the gold or just kill him. Take the boy back to Rose Cottage.
You’ll get a cutscene where the boy tells you it was his granny that got him to go into the cave. He decides to run away from home. Talk to granny to complete the quest.
You can also run inside her house and loot her bookcase for “A Hero’s Journey Part 2”. Also kill the granny if you wish, I never did approve of child abuse.
Now sigh a breath of relief, you’ve stared into the very depths of Hell and came out in one piece. Well done Hero!
The Blind Seeress
Now would be a very good time to check your food and potions stock, if they’re looking low then go to Bowerstone, Oakvale and the Guild shop to stock up on anything that will heal you. Also spend experience to buy Physique, Toughness and Health to level 4, Speed and Accuracy to level 4 and Guile to level 3. Then go to the map table to pick up the “Find the Bandit Seeress” quest and take any boasts you see fit. I’d advise against the sparing Bandits one as it will make the quest so so much harder. Then teleport to Oakvale.
Follow the map marker into the cave and you’ll get a cutscene. The way you’re meant to do this is by sneaking past them. I say bugger that. Just shoot them from a distance with your bow. They’ll go down in one hit. If they do see you then they’ll raise the alarm and shut the gate, then you’ll have to kill some Bandits and try again when the timer runs out.
Go through the large gates into another cutscene, you’ll overhear some Bandits talking about how Twinblade is getting jumpy, apparently only people wearing Bandit clothes can get into the camp.
There’s 5 chests dotted around this area, in each one will give you a piece of Bandit clothes. You’ll have to fight your way through this area looting the chests. Be sure to smash the barrels as well as you can get some potions from them, one will contain an “Ages of Skill” potion. Also don’t equip the Bandit armour as you loot it, it’s less armour than the chanimail and some of these Bandits are tougher than the ones we’ve fought before.
If you took the boast to kill as many Bandits as possible then eventually you’ll get a pop up to say you’ve completed the boast.
When you’ve looted all the chests and killed all the Bandits, you’ll see a Demon Door at the end of the path, ignore it as we don’t have all the items to open it yet. Instead you’ll see another chest on a small hill opposite it. Open it for a Resurrection Phial, then equip your Bandit armour (bandanna, chest, gloves, trousers and boots) and go through the doorway.
Talk to the guard and he’ll tell you that once you’re in you can change your armour, so once the gates open change back into the chainmail set.
Welcome to Twinblade’s Camp, truly a wretched hive of scum and villainy. The good thing is that they’re not hostile to us so we can freely explore. There’s some vendors that we can buy armour, weapons or produce from so stock up on food or potions if needed. They also sell Crunchy Chicks if you need them for the Demon Door.
Head to the giant tent at the back, there’s a Games Master here but we’ll ignore him for now. To the left is a chest with 500 gold, a barrel with an Ages of Will potion and a dig spot with Silver Key number 14. To the right of the giant tent is a Bandit we can talk to, turns out we need a pass to get into the next part of the camp. We can either buy it off this guy for 1,000 gold or kill him to get it for free. Show the guard at the top of the stairs your pass and he’ll let you through to Twinblade’s Elite Camp.
Head down the path and you’ll see a wooden chest next to a small pond, inside is a Resurrection Phial. Up the main hill near the giant gates is where you’ll find the third group of Fist Fighters. If it’s night time then feel free to do it now. Or if it’s day, then consider eating a Moonfish to turn it to night.
When you’re done with the Fist Fighters we have a new problem. Our pass won’t get us into the final part of the camp where Twinblade is, we have two options on how to overcome this. On a small hill you’ll find some tents and three hooded men standing around a campfire, these are Assassins and if we talk to one we can hire them to cause a distraction for 2,000 which is a steep price. Also near here is a chest with a pair of “Assassin Trousers” and a Steel Greatmace leaning against a tent you can pickup.
The alternate way to opening the gate is freeing some hostages. You’ll find an area tucked away in a corner with a large cage, inside are some hostages and there’s a Bandit Leader pacing up and down this path, killing him will get you the key to the cage, freeing the hostages will cause a distraction letting you in the gate.
Whichever you decide to do, it will open up the main gate letting you get to where Twinblade is, get ready for a boss fight.
Watch the cutscene as it will give us a clue on how to beat him, he’s heavily armoured at the front and will parry pretty much all frontal attacks, his back however is a different story. Almost no armour there, the way to do this is avoid his attacks which is easy as he’s quite slow. Eventually he’ll thrust his swords into the ground and get stuck. When this happens get to his back and start swinging, you’ll get about two hits in before he pulls his swords out and repeats the process. Don’t get too close to him when he plunges his swords as he lets out a shockwave which will knock you down. Also the Bandits watching the fight will swing their swords at you if you get close to them so stay in the middle if you can.
When Twinblade’s health is low enough it will trigger a cutscene. The blind seeress turns out to be your sister Theresa and you get to see how she came to be living among Bandits. You then get a choice, either kill or spare Twinblade. Before you make your choice take the time to loot the area, especially Twinblade’s tent where there’s several chests and barrels. There’s also a chest at the end of a slightly hidden path with a Diamond inside.
If you decide to kill Twinblade then just attack him again, this time it’ll be a fight to the finish, the same method applies but this time all the other Bandits get involved, Twinblade can damage the Bandits so use this to your advantage if possible. Eventually Twinblade will go down and you can leave the area with some Evil points.
To spare Twinblade you just simply leave the area through the gate. Don’t teleport out though. On the other side of the gates you’ll get the quest completion scroll.
Well done Hero, you’ve defeated a notorious Bandit King and found your sister in the process. Give yourself a pat on the back.
Trader Woes
Teleport back to the Guild and spend experience on buying Toughness level 5, then Slow Time and Berserk spells up to level 2. Then interact with the map table and take both “Trader Rescue” and “Trader Massacre” quests. These sound like another Good/Evil choice quest but you can actually take them both.
Trader Massacre
This is a purely Evil quest so if you don’t want Evil points then avoid this quest.
Teleport to Barrow Fields and you’ll get a cutscene where the Bandit Leader will tell you that some of his friends have already got stuck in so we should too. This quest is simple, we just kill all the traders and Guards in Barrow Fields. There’s 25 enemies to kill in total, the Guards get progressively difficult. They start out wearing the blue uniforms, then some in red start spawning and finally some in black spawn, the ones in black are the toughest Guards, even in towns. Once they’re all dead a cut scene will play where one trader tried to sneak off and the Bandits want you to kill him. You can either kill him or leave him but either way the trader will die. You’ll get the quest completion scroll after.
Side note – No traders will spawn in Barrow Fields anymore, it will literally become a ghost town.
Trader Rescue
Teleport to Twinblade’s Camp and you’ll get a cutscene where a Guard informs you that three traders have been taken hostage and the “Trader’s Union” have refused to pay the ransom. The Guard asks if you could recuse them. The first trader is just down the hill and easy to get to, when you’ve cleared the area of Bandits, talk to the trader and get him to follow you. Lead him back towards the Cullis Gate and he’ll make his escape.
The other two traders are in Twinblade’s Elite camp. Clear the entire area of Bandits as there’s a fair few of them. Find and grab the two traders and make your way back towards the Cullis Gate. Bandits may spawn so be careful. Once the last two are safe you’ll get a cutscene where one of the traders will thank you. Quest completed!
Extras
There’s a couple of extra things we can do. Teleport back to Barrow Fields and head towards the Demon Door. Talk to him and he’ll say how he wants to see a chunky Hero. So eat a load of Red Meat and Apple Pies and eventually you’ll get fat enough to be let in. Inside this Demon Door’s chest will be a Will Master’s Elixir.
Next head up towards the Cullis Gate and go through the doorway on the right, it’ll be the one surrounded by spooky dead trees, it’s hard to miss.
Head up the hill to the house and when you enter you’ll get a cutscene where a new enemy will appear – Hollow Men. These are basically the undead of the game and pretty easy to kill. They walk incredibly slowly so make ranging them easy. You’ll see a meter on the right hand side, we need to kill enough Hollow Men to fill this meter. It does decrease incredibly slowly (almost as slowly as Hollow Men walk) but when it’s full you’ll get a cutscene that shows a grave we can dig up. Doing so will get you a “Deathlion Tattoo”. Back inside the house loot everything you see and upstairs will be a 10 Silver Key chest with a “Sharpening Augmentation” inside.
Back outside go down the right path towards the Demon Door, there may be a couple of Nymphs to kill here but if you activate the fishing spot then the Nymphs can’t attack you. Fishing here will get you Silver Key 15. Halfway there!
Last thing we’ll do for this segment is something a little risque. Teleport to Greatwood Cullis Gate and then head into Darkwood and keep into Darkwood Marshes. If there’s enemies here then clear out the area and then talk to the Demon Door, accept his challenge and he’ll spawn several wave of Hobbes, kill them all and go inside to loot the “Dark Will User” set. Head onward to Darkwood Lake
Clear the area out and you should see a large brown wooden door. Near that door will be a 15 Silver Key chest. Open it to find “Arken’s Crossbow”. Then enter the large doors.
Welcome to the Darkwood Bordello. The seediest place in Albion where men come to spend money on women to forget their woes. Behind the building is a Demon Door who won’t open until we’ve slept with 10 people (not at once). Turns out we’re in the perfect place to do this.
Head inside and speak to any of the women who will tell you how much it costs to sleep with her (I feel wrong writing this). The most expensive being Hedwig at 2,000 gold. My personal favourite and cheapest is Pretty Polly at 50 gold a go. Either way sleep with the woman of your choice 10 times and you can open the Demon Door. You can check your progress in the stats page.
While you’re upstairs with your lady friend be sure to loot the blue cupboard, it’ll have a “Redhead Wig” inside.
When you’ve had sex 10 times go back to the Demon Door and he’ll open up letting you loot the “Pimp Hat”.
Back inside the Bordello talk to the man with the ginger beard, he’s called Mr Grope (yes I laughed too), he’ll tell you to watch out for Madame Minzche as she’s tried to get him drunk to spill where the deed is for the Bordello, we however can do better.
Go to the bartender and buy all the beer he has, then you can gift them to Grope (they’ll be on your context sensitive bar) and after about 6 he’ll go upstairs to sleep off his drunkenness, during the cutscene you learn that the deeds are under a tree.
Head to the tree and you’ll see a dig spot, dig up the deeds. There’s also a couple of fishing spots.
With the deeds in hand you can go back to Madame Minzche and give her the good news and now you have a choice, with the deeds you are technically the owner and all the girls will sleep with you for free or you could talk to Madame Minzche again to close the Bordello down forever. Keeping the deeds won’t give you Evil points but closing down the Bordello will give you Good points.
Head back to Oakvale and behind one of the houses on the hill you’ll find three Guards, talk to the one in the middle and he’ll hire you to kill an Assassin in Twinblade’s Camp. He’ll pay 1,000 gold when the jobs done. Agree to the job and loot the chest behind them for 250 gold. Teleport to Twinblade’s Camp and head to where you fought Twinblade. It won’t show as a marker on the map as it’s a Bronze quest.
Head towards the hooded Assassin and take your weapon out in front of him, he’ll tell you that he’s a bit jumpy. When the conversation ends do it a second time and he’ll realise that his brother the Guard has sent you to kill him. He’ll make a counter offer of 2,000 gold to kill the Guard. You can take the 2,000 gold and still kill the Assassin and claim the 1,000 gold off the Guard.
As this will probably be the first Assassin you fight they can be pretty tough. They tend to block a lot of attacks so either use flourishes or the Berserk spell. Once the Assassin is dead you’ll get his contract. Then you can return to the Guards for your reward.
Witchwood
Teleport back to the Guild and talk to Maze in his tower, he’ll ask you to take a quest to find his friend called the Archaeologist and tells us we can use the Cullis Gate to get to Witchwood. You’ll pick this quest up automatically so all you have to do is walk into the Guild’s Cullis Gate and select Witchwood Cullis Gate.
Welcome to Witchwood, where it rains non-stop and it’s plagued by Balverines. The Guild Master will pipe up saying that there’s a sword that only a true Hero can acquire and that there’s a temple to the God Avo. Cut the brambles and follow the main path, eventually you’ll come across a new enemy – Rock Troll.
Rock Trolls are a lot tougher than the Earth ones but the same tactic should apply, use range to kill it while avoiding it’s projectiles. Sometimes it’ll throw 3 rocks at once so keep an eye out for a gap. Once it’s head loot the Sapphire it drops and smash the barrel nearby for the “Guild of Zeroes” book.
Once you’re in Witchwood Stones you’ll find your first quest related Demon Door, these Demon Doors can’t be opened until you’re doing the relevant quest. Talk to it and it’ll tell us that all we need to do is spell out is name on the nearby stones. You can talk to another NPC to learn its name but I’ll save you the bother. There’s also a fishing spot next to the Demon Door with Silver Key 16.
Continue towards the four giant stones and you’ll see some brambles to the right, slash them and then loot the “Obsidian Greathammer” from the chest.
At the four stones, interacting with each one will give you a letter. To open the door we need to spell HITS. If you spell out ♥♥♥♥ then two Balverines will spawn.
Inside the Demon Door the Archaeologist will shout at you for uncovering his hiding spot. He’ll then wander off leaving you to loot the place. There’s several chests, barrels and books to pick up here. There’s also a 15 Silver Key Chest which contains a “Health Augmentation”. These are very useful as it’ll passively regenerate your health overtime, I wouldn’t put it in a weapon however unless you really wish to. Once you’ve looted the cave teleport back to the Guild and take “The White Balverine” quest from the table and teleport back to Witchwood.
Head back to Witchwood Stones and you’ll see one of two things here depending on your morality.
Good Morality
If you’re more Good than Evil then you’ll see two town Guards standing next to the Demon Door, further down the path a man will run up to you begging you to help as his wife is trapped by a Balverine. When you get near the stones it turns out to be a Bandit ambush, the two Guards will come to help you. When the Bandits are dead you can talk to the man who will give you a Resurrection Phial.
Evil Morality
If you’re more Evil than Good then you’ll see two Bandits standing by the Demon Door, further down the path a man will run up to you saying how there’s a trader waiting to be killed near the stones. When you get closer some Guards will ambush you and the other two Bandits will help you.
Follow the map marker to the Temple of Avo. To the right of the doorway you’ll see the actual temple, Much like the Chapel of Skorm you need to sacrifice in order to gain a weapon, you’ll be sacrificing you gold here. Depending on your morality you may have to donate more or less to get the weapon so the more Evil you are then the cheaper it will be. I’ve heard it takes around 100,000 gold to get this weapon so keep that goal in mind.
Up the hill to the left of the Temple you’ll see a group of men surrounding a sword stuck in a stone (Sound familiar?) the idea is to just simply pull it out. If your Physique level is too low then you won’t be able to manage it so come back when you level up some more. Naturally at max level you’ll have no issues.
In Witchwood Lakes you’ll see a Gargoyle statue that’s glowing red, digging here will get you Silver Key 17. At the lakes themselves you’ll find a fishing spot with a Will Master’s Elixir and a chest behind you with a Flame Augmentation.
The White Balverine
Heading into Knothole Glade you’ll get the quest start popup, the first part is to kill the Balverines that are outside the gates. Once you’ve killed 4 the Guard will let you in. The Chieftain then tells you that they’re being led by a White Balverine, which is currently attacking the town, all you have to do here is hit it 10 times, you can’t kill it now so once you’ve done the 10 hits let it run off.
The Chief then tells you that the last hunter they had died and his wife lives at the top of the hill. When you get close the White Balverine comes back. Hit it 10 times again and let it run off.
The wife then tells you that the White Balverine is in fact her husband who slowly became the Balverine after his last fight, she also gives us a “Silver Augmentation” which we have to use to hurt the Balverine.
Now because our Wellow’s Pickhammer already has it’s augment slots filled we have to use a different weapon, use either the Obsidian Greataxe or Greathammer and put the Silver Augmentation in and exit the menu. As soon as you do you have to damage the Balverine 5 times instead of 10 and you can use Wellow’s Pickhammer for this.
The Chief will then tell you to finish off the White Balverine down at Witchwood Lakes. Before you leave the area you should see a small path going up a hill to the right just before the wooden bridge, at the end of the path is a chest with an Emerald in.
At Witchwood Lakes you’ll find the White Balverine and this is the next boss fight. The White Balverine acts pretty much like a normal one, however during the fight when the White Balverine’s health gets down to a certain amount it’ll summon additional normal Balverines. I’d advise killing these as they come because the summoning happens at least 3 times during the fight and you can easily become overwhelmed with Balverines.
When the boss is dead you’ll get it’s head as a trophy and can return to the Chief to end the quest.
Well done Hero, you fought a pretty difficult boss and saved the people of Knothole Glade.
The Arena
Before we undertake The Arena we could do a couple of things before hand. FIrst few things is at Knothole Glade. Head into the tavern and find the Games Master, before you play his game cast the Slow Time spell as this will make this a million times easier. This game is Card Sorting and you need to sort the cards in ascending order so lowest to highest. An Ace is the lowest. If you get two cards of the same number but different suits then just click those in any order. Beat the game in under 30 seconds to get the “Scarlet Robe Hero Doll”.
Next head up to the houses on the top of the hill, in between two of them you’ll find a ring of bushes, dig in the middle to get Silver Key 18. Finally head down to the Demon Door near the main gates. All you have to do here is face the door, pull out your bow, go into snipe mode and shoot a fully charged shot at the door’s face and he’ll open up. If for whatever reason you don’t have Skorm’s Bow then to do this you need a bow that is Ebony or above otherwise it won’t work. Loot the chest inside for an Elixir of Life.
Next head to as many food shops as you can and buy as many Health Potions, Mana Potions, Apples, Apple Pies, Red Meat, Fish and Carrots as you possibly can because you’re going to need as much healing as possible.
While shopping at Twinblade’s Camp you can probably do the pub game here too. Cast Slow Time before talking to him. This game is Spot the Addition. He’ll show you several items and then will add one, you just need to click which one has been added. Each round adding more items. Beat this in under 30 seconds to get the “Twinblade” Hero Doll.
At the Guild spend experience to buy Magic Power Level 3, Speed Level 5, Guile Level 4 and Physique and Health to Level 5 then pick up the quest “The Arena” and only take the “Show no mercy” boast. Then head to Knothole Glade and follow the marker to the Arena. Talk to the Guard to be let in
After the cutscenes you’ll be in the waiting room, there’s a vendor here we need to talk to and from him buy the whole “Bright Plate” set including the Bright Chainmail Helmet. We need this for a Demon Door, also equip it for extra armour. With any money left over buy any food or potions you need. Then you can either talk to the other combatants or simply wait until it’s your turn.
This is the only time you’ll be allowed into this waiting room to buy things but if you can’t afford the whole Bright Plate set then you can buy it elsewhere later on. This is just the first place we can get it. The Games Master here is not required for the Hero Dolls so we can ignore him.
Eventually a cutscene will play where they tell you it’s your turn to enter the Arena and to talk to the Guard to enter. Prepare yourself Hero.
In the Arena you’ll fight 8 rounds of enemies with each round getting tougher and tougher, each round usually has up to 3 or 4 waves of enemies. You’ll see a meter on the right hand side with a clapping hand icon, this is just how entertained the crowd are, if they’re happy enough they may throw down things for you to loot such as gold, red roses or even potions. You’ll also see a tally of how many enemies are left for that wave. You’ll also see some circular traps in the corners, some are spinning blades and some are spikes. These can hurt your enemies but they can also hurt you.
The idea here is to stay in the Arena for as many rounds as possible to earn as much gold as possible. For each round you stay in you earn more gold at the end of each round with it resetting if you leave to the holding cells. After the second round Whisper will join you for the rest of the Arena and her only redeeming quality is that some of the enemies focus on her making it a bit easier for you. I’ll list the rounds below and how much gold should be in the prize pool. This guide assumes you stay for the whole 8 rounds.
Round 1 – Wasps – 100 gold
Round 2 – Hobbes – 600 gold
Round 3 – Balverines – 1,600 gold
Round 4 – Hollow Men – 3,600 gold
Round 5 – Bandits – 6,600 gold
Round 6 – Earth Trolls – 10,600
Round 7 – Rock Trolls – 18,600
Round 8 – Boss Fight – 28,600
Whisper Duel – 38,600 gold (only if you kill Whisper)
Whether you killed Whisper or let her live you’ll get a cutscene where Thunder will complain to Lady Grey saying you either cheated or you’re a murderer. Lady Grey will tell you how she’s impressed and she’ll invite you to call on her in Bowerstone North which we will definitely do.
A Guard will take you back through the Hall of Heroes where Jack of Blades will tell you about your mother’s past and how she was a fearless Balverine hunter called Scarlet Robe, he’ll then give you the Arena Seal which gives us access to Bowerstone North. A Bandit then tells us that Theresa wants to meet us at Grey House.
Well done Hero, you survived a truly difficult test for any Hero and emerged victorious, you also potentially killed one of the most annoying Heroes in the process.
Tips for the Arena.
The Balverine round will most likely be the most difficult, especially when fighting two White Balverines at once. Just focus on the White ones and hope some of the others have splintered off to Whisper.
Utilise the Berserk spell, it’s ideal for crowd control especially when you have a lot of enemies on you at once. The spell knocks them down with each hit giving you time to move away to heal if needed.
When fighting the Trolls, during the countdown run to one of the gates and wait for the trolls to spawn. They’ll spawn at opposite ends meaning you’ll be fighting one melee and one ranged, you can tank the one’s damage and it’ll block the opposite troll’s projectile. Once one is down use range to defeat the second.
Berserk will be your friend fighting Whisper, you can practically stun lock her by knocking her down with each hit. The fight will be over very quickly.
Shotgun Wedding
At this point I won’t tell you where to spend your experience, I’ll leave that entirely up to you and also I won’t mention when to stock up on food and potions. Now we’ve bought the Bright Plate set we don’t really need to save money for anything else.
Head to Grey House next to Barrow Fields to talk to Theresa. She’ll tell you that Jack of Blades was responsible for making Theresa blind and has your mother locked up in Bargate Prison, she also tells you that the Archaeologist knows of a way into the prison and makes a reference to a powerful Sword.
After this head to Bowerstone and head up towards the school, you’ll see a house you can buy, buy the house and fully upgrade it. Rent it out once you’ve done this. You’ll now start receiving an income but you have to remember to collect the rent every so often as it caps at a certain amount. You can also decorate any house you own with trophies you have to increase the value of the house. There is a house you can buy in Oakvale and Knothole Glade too if you so wish.
Once you’ve bought and upgraded the house head outside the tavern and you’ll see a stone staircase, talk to the Guard outside and he’ll say you’re famous enough to enter Bowerstone North – the upper class part of town. If you try entering before beating the Arena they won’t let you in. You have to have the Arena Seal to get in.
Once in Bowerstone North head to the General Store which is just to the left of you and buy a single Black Rose and the “Thunder Hero Doll”. Then talk to Lady Grey outside the manor.
She’ll talk about wanting to marry but has never found a suitable man, then she’ll ask for a gift from town. The only thing that works is the Black Rose so give that to her which should be in the context sensitivity bar.
Next she’ll want you to own a house. Thankfully we just bought one, even though you’re renting it out you still own it, so just talk to her again.
Then she’ll want you to find her lost necklace. She suggests talking to some of the people around town but the one person we want to talk to is locked up in the local jail which is basically just a very large cage. Talk to the man inside and he wants you to try and bring down Lady Grey because he thinks she murdered her sister. You’ll want to agree to help him and then he’ll tell you to go talk to Rhodri over in Barrow Fields. Before we do this, teleport over to Oakvale and head into the graveyard.
Once in the Memorial Garden you’ll see two men standing next to each other to your left, you’ll want to go into sneak mode and stand behind the wall that they’re standing next to, make sure you sneak there otherwise you can’t eavesdrop on their conversation. They’ll mention that they’ve hidden something between the two boats on the beach which is the right hand side beach. Go there and dig up Lady Grey’s necklace, go back to Bowerstone North and give it to her.
She will then want you to beat Thunder in a duel but first head to Barrow Fields and talk to Rhodri near the Demon Door. He’ll tell you how he and Amanda used to meet in secret in the Grey House cellar. He’d go to the stables and flash his lamp 3 times so that’s what we need to do.
At the Grey House stables which is near the entrance doorway just turn your lamp on and off 3 times to trigger a cutscene of Amanda’s ghost unlocking the cellar door which is where we need to go. Once inside Amanda will tell you that Lady Grey trapped her in the cellar and Amanda died when the air ran out. She implores you to take the letter and show the world what happened. Before you take the letter, loot the chest for a Will Master’s Elixir.
Take the letter and Lady Grey will turn up confessing what she did and gives you a choice. Either give her the letter and cover up the murder or keep the letter and reveal the truth. Sadly if you decide to keep the letter then you lock yourself out of a Silver Key and Silver Key Chest so the only REAL choice is the cover up the murder.
When you give Lady Grey the letter she reminds you about fighting Thunder. So head back to Bowerstone North and head through the doors next to the Jail which you’ll notice has a dead occupant (guess it’s a warning). Thunder will meet you on the bridge to challenge you to fight him at the Executioner’s Block which is in a couple of zones across.
You’ll see a chest on your right just after the bridge which contains a Piercing Augmentation and a chest further ahead on a raised hill which contains an Ebony Longbow.
At Windmill Hill there’ll be a fishing spot on your right with a Wedding Ring. Then start clearing out the enemies outside the house on the left. In the field next to the house you’ll find a ring of flowers, dig in the middle for Silver Key 19. Clear the Bandits outside the Windmill and then go to the left of it where you’ll see another ring of flowers. Digging here will get you Silver Key 20. There’s also a wooden chest with Treasure Clue 6 inside. Loot inside the Windmill and also up the stairs on the outside. Once done head through to Gibbet Woods. And then head through the left doorway to Headman’s Hill where Thunder will be waiting.
You can cheese the fight with Thunder by using Berserk, he’ll block almost all of your normal melee attacks so either Flourishes or Berserk will make this fight a lot easier, when he does a lightning attack try to get away from him, the lightning will expand outwards so you might get hit by that occasionally. At half health a cutscene will play where he’ll knock you both off the cliff where the fight continues.
Eventually a cutscene will play again where he runs off into a cave. Before you go in, there’s a fishing spot with Silver Key 21. Finish the fight inside the cave and you get his helmet as a trophy, although you can’t wear it, there is also a 15 Silver Key chest with a Mana Augmentation. Back outside the cave talk to the Demon Door who will open up. He is another quest related one who will only open if you defeat another Hero in combat. I mean we did beat Whisper but I guess she’s not really a Hero (hehehe). This Demon Door acts as a passage back up to Gibbet Woods. Make your way back to Lady Grey who will finally agree to marry you.
After the cutscene you’ll get 15,000 gold as a dowry and you can enter Bowerstone Manor, go into the bedroom and search the bed for Silver Key number 22. There is also a 15 Silver Key chest with the Katana Hiryu. You’ll want to equip this and replace the Wellow’s Pickhammer.
Final part of this segment is a hidden quest. Go to Orchard Farm and outside the house will be the farmer and his wife. Talk to him to learn that his mother was murdered on the way to their anniversary party and her spirit is restless. He wants us to see if we can put her spirit to rest. Go to the grave and talk to the ghost. She tells us that a Bandit attacked her and stole the necklace and if we were to get it and give it to the farmer then her spirit might rest.
Head to Greatwood Lake and you’ll see a single red dot on the minimap, head towards it and the ghost will tell you that the Bandit that killed her is there. Kill the Bandit and the ghost will thank you and tell you to return the necklace to her son the farmer. Return the necklace and then go to the grave. When you approach the ghost she’ll thank you and vanish. Quest completed!
The Archaeologist Returns
Side Quests
Before we rescue the Archaeologist there’s a couple of silver quests we can do. At the Guild pick up the quests “Lost Trader” and “Break The Siege” then teleport to Knothole Glade to break this siege. Upon entering a Bandit will tell you that the Chief has is leader locked up and the Bandits will burn the town to the ground if they don’t release the leader. The Chief however is adamant not to let the leader go. Our only option is to kill the Bandits.
We can recruit additional Guards if we wish to help us but when you’re ready talk to the gate Guard and he’ll open the gates. As soon as he does the Bandits try to rush in to free their leader. Using Slow Time spell helps if any Bandits make it into the town. Make sure none of them reach their leader and when they’re all dead the quest is completed.
Next teleport to Oakvale. It’s around this time that the Guild Master will tell you that either Twinblade has hired Assassins to kill you in revenge for his humiliating defeat. Or Bandits have hired Assassins in revenge for you killing Twinblade. The outcome is the same it’s just the dialogue that’s different. Either way in certain spots Assassins will spawn and attack you. We can’t finish this yet so ignore it for now. You’ll also learn of an Archery Contest near Knothole Glade.
At Oakvale head through the cave on the beach and head to the Abandoned Road (Where you looted the Bandit armour earlier). We have to go through Oakvale because if we try to get there via Twinblade’s Camp there’s a barricade blocking our path.
A trader will come up to you to tell you that his brother Thomas got lost and is deep in the woods, our job is to rescue Thomas and bring him back. The first part is easy, just kill your way along the path but keep an eye on the minimap as enemies tend to spawn behind you.
When you get to Thomas he’ll start following you and you just need to make your way back to his brother at the start. Bandits will spawn again so keep an eye on the minimap again. When you get Thomas safely back it’s quest completed and you’ll get Treasure Clue 2 as a reward.
Rescue The Archaeologist
Back at the Guild take the quest to rescue the Archaeologist and teleport to Bowerstone South, then head to Bowerstone North and then out to Bowerstone Jail where you’ll meet a new enemy “Jack’s Minions”. These Minions can be quite tough and come in two varieties. The red ones are melee ones and the blue ones are magic users. You’ll get some Guards to help you here but fight your way through the zones while following the map markers.
When you get to Windmill Hill one of the Minions will put up a barrier, you’ll need to kill this one to lower the barrier. Also the Windmill is the trigger point for one of the Assassin attacks so keep that in mind. Killing this Assassin will get you a “Doll of You” which isn’t needed for the Hero Doll quest.
At Gibbet Woods a Minion mage will spawn a Rock Troll, your best option here is just to melee it and tank the damage it does, with the Hriyu Katana it shouldn’t take too much damage to kill, then you’ll have to head down the right side path killing more Minions as you go.
Once you enter the Prison Path it triggers a 5 minute timer, you now how 5 minutes to get down the path and kill all the Minions on the dock to free the Archaeologist. Run Hero, run
In the ensuing chaos you’ll probably find another Assassin in the masses as this is another trigger point for an attack. When you get to the dock there will be a load of Minions here so cast Berserk and go to town on them. Once they’re all dead the Archaeologist will moan at you again as it was kind of our fault he got abducted. He’ll tell us that there’s a passage through Lychfield Graveyard to Bargate Prison. That’s our next stop. The chest on the dock also contains a Silver Augmentation.
Lychfield Graveyard
Follow the map markers through Headman’s Hill and go into Lychfield Graveyard where you’ll get a quest start scroll. Once in the zone head to the house on the right where a cutscene triggers. The graveyard keeper has found a set of armour and he’s buried the lot except for the helmet. Talk to the keeper and he’ll unlock the gates for you. Once he does go back into his house to loot “Nostro’s Helmet”. There’s also a cupboard with an Ages of Skill potion.
What we need to do now is brave the grave and dig or fish up Nostro’s armour set which includes the Helmet, Armour, Sword and Shield. Each will be in either a dig spot, fish spot or a crypt you can open up. The Hollow Men that spawn will continuously spawn so there’s no point in killing them, your best bet is just to run through them and check each grave individually and check for fishing spots.
One fishing spot has Silver Key number 23 and one of the crypts you can loot contains Silver Key 24 and a dig spot has Silver Key 25.
Once you have all 4 armour pieces go up to the gold marker on the map, enter the crypt and Nostro will tell you to retrieve his armour and he’ll open up the way. Just interact with the crypt again to return the armour opening up the Demon Door.
Follow the Old Graveyard Path and when you cross the stone bridge there’ll be a wooden chest on your right with a Resurrection Phial inside. When you get to the end of the path a larger Hollow Man with a tattered cape will spawn, kill this one to unlock the large doors. There’s a wooden chest to the left of the staircase which contains a Silver Augmentation, loot it and then go through the doors into the Circle of the Dead.
The idea here is to kill the Hollow Men but only the ones that are standing on the stone circle. All the other outside are transparent and can’t be harmed. For each Hollow Man killed a smaller stone circle will activate, once all of them are activated, three larger Hollow Men will spawn, kill these ones to unlock the hidden path to Bargate Prison.
Don’t go through yet as there’s a 10 Silver Key chest with a Piercing Augmentation and then teleport to the Guild for some Silver Quests.
Additional Silver Quests
The Bargate Prison segment is a pretty long one and we want to ensure we complete as many silver quests before we go in. Head back to the Guild and take the quests “Execution Tree Rescue”, “Darkwood Disturbance” and “Bounty Hunt”.
Bounty Hunt
Head out of the Guild and go towards Greatwood Entrance, a woman will show up saying that the Bandits we’re looking for have taken hostages. Enter Greatwood and the Bandits well talk among themselves about splitting up the hostages. Half have gone into Fisher Creek and the other to Greatwood Lake. Fight your way to Fisher Creek first.
After killing all the Bandits in Fisher Creek the first hostage will thank you and tell you the other hostage which is his sister has been taken to Greatwood Lake. In Greatwood Lake kill all the Bandits first but don’t go towards the leader. If you get too close to him he’ll kill the hostage and the quest will fail. Instead use your bow to kill him that way, try and get a headshot if you can.
More Bandits will spawn after but once they’re dead the hostage will thank you and the quest is completed and you’ll get Treasure Clue 1.
Execution Tree Rescue
Head to Bowerstone Jail via Bowerstone North and some Bandits will meet you, they want you to rescue their friend who’s about to be executed. We have about 3 and a half minutes to get to Gibbet Hill and kill the Executioner, you could either fight your way through Guards or run past them all through to Windmill Hill and then through to Gibbet Hill then find and kill the Executioner to finish the quest. Nice and quick.
Darkwood Disturbance
Teleport to Greatwood Cullis Gate and then make the long trek through Darkwood into Darkwood Lakes where we bump into Briar Rose who reluctantly accepts our help. She’s investigating a shrine they found and a load of Minions have joined the party. This quest is a two parter.
First part is simply to kill all the Minions in the area, once you’ve done this the second part starts where we need to protect Briar Rose as she performs some ritual to close what looks to be a portal. She’s quite tanky so don’t worry too much about healing her but everytime she gets hit it stops her ritual for a few seconds.
Once the meter is filled the quest will be completed.
Demon Doors
Before we head off to prison there’s a couple of Demon Doors we can open now, the first is at Greatwood Caves. To open this we have to have a high combat multiplier
This one used to give me so many problems but recently I learned of a much much easier way to do it. By now an Earth Troll should be spawning here. When it does head towards Hobbe Cave and stand behind one of the large boulders, standing here will protect you from any of the Troll’s ranged attacks. What you do is pull out your bow and charge up a shot, hold this shot for at least 2 minutes. When the 2 minutes is up, go and shoot the Troll. This should kill it in one go and give you a pretty high multiplier. When you do immediately go to the door to open it. Looting the chest here will give you “The Cutlass Butane”.
Next is the Abandoned Road. Teleport to Twinblade’s Camp and then to the Abandoned Road.
Talking to the Demon Door here it’ll tell you he wants to see his three friends. One was a Gallant Knight, then an Evil Wizard and finally a Bandit. If you’ve been following this guide then you should have all 3 already, if not I’ll list where to get each set.
Bright Plate – Arena shop (If couldn’t afford set come back to this door later)
Evil Wizard – Darkwood Marshes Demon Door chest
Bandit – Should have from quest already
Equip the Bright Plate set and he’ll recognise you, then equip the Dark Will User set and talk to the door and finally equip the Bandit set and talk to the door. It’ll open up and you can loot “The Dollmaster’s Mace”.
Finally teleport to Barrow Fields and go into Grey House. If you spoke to the Demon Door before this then it’ll say it wants you to marry someone with a title and the ONLY person in the entire game that fits this is Lady Grey. If you didn’t marry her then you can’t open this door. Once inside beware of exploding mushrooms and loot “Ronok the Axe”
There is also a 20 Silver Key chest in the Guild grounds that has “The Murren Greathammer”.
Now it’s time to prepare for Bargate Prison
Bargate Prison
When you’re ready to go to Bargate Prison teleport back to Lychfield Graveyard and then run through the Old Prison Path to the Circle of the Dead and then enter the doorway you opened during the quest.
When you enter the central room in the Underground Tunnel, the doorways will have barriers and you’ll need to kill the Hollow Men to proceed. Then head down the Northern passage being careful of the exploding mushrooms, run past the Nymph and Hollow Men and loot everything down here and then follow the map marker. The Hollow Men continuously spawn down here too.
At the Cliffside Path go out of the right hand door down into the water. To the right in a small crevice will be a wooden chest with a Dark Chainmail Helmet. Then follow the water to the right and you’ll see a small slope going up, at the top in a chest is a Sharpening Augmentation.
Go back to the door you entered the area in from and this time go through the other doorway. On your left you’ll see a small path with a chest and a ring of mushrooms. Digging in the centre of the mushrooms will get you Silver Key 26 and in the chest is a Lightning Augmentation. Follow the map marker again killing the Hollow Men when the barrier goes up. Enter the door when they’re dead.
In this Underground Passage you’ll be fighting the Prison Guards which won’t give you Evil points and they’re about the same difficulty as the normal Guards. You’ll also see a passage to the left and at the end will be a chest with a Resurrection Phial and two Health Potions on a desk, head towards the map marker and you’ll come to what looks like a store room. Clear it out and loot the place. One chest will have an Obsidian Katana and the other will have a Dark Leather Chest.
Once you enter the door you’ll be reunited with your mother Scarlet Robe. Once the cutscene ends interact with the lever next to her cell and it’ll open and she’ll follow you. Scarlet doesn’t have a health bar here so don’t worry about her. Just make your way out.
On the way out you’ll have to fight a couple of Guards again and when you get to the first central room a cutscene is triggered and in the words of Admiral Ackbar “It’s a trap!” turns out Jack has been watching our every move with the Arena Seal he gave us (I’m just glad we did the Bordello before the Arena) and in turn we get locked up in prison too.
You’ll end up in a cell with literally nothing on you, no armour, no weapons, no food or potions and we can’t use magic either. All we can do is wait in our cell and eventually a Guard will arrive to force us to race other prisoners. The race is incredibly easy as long as you hold down the sprint button while running. The Guards also point you in the right way with some words of encouragement.
At the end the Warden will take you to his chambers where he begins a poetry recital. Now you’ll see two meters on the right, the top one is the timer, if this fills you run out of time and will be sent back to the cells. The second meter is your noise level, if this fills you’ll fail the segment and will be sent back to the cells. If the noise level starts getting high then stop moving for it to decrease.
You need to go into sneak mode around the bookcases to the left and interact with the glowing paper on the board. This gives you a code for the diaries on the desk. With the code sneak over to the three glowing diaries on the desk and open any of them, you’ll never get the key on your first try so you need to try again later on.
You need to repeat the race and the Warden segment again, this time when you have the code and go back to the diaries you’ll get the key to the cells (just don’t ask where he hides it). Now it’s time to stage a breakout.
As soon as you get out of your cell you’ll see some barrels, inside one of them is a stick you can use as a weapon. You can also free some of the other prisoners if you wish, they do act as very good human shields. Out in the courtyard be sure to enter the other two cell blocks, Cell Block 2 is caved in but Cell Block 3 has a chest with Plate Boots in. Back out in the Courtyard go up the stairs to the left and through the door to the right,
You’ll be in the Prison Barracks. There’s chests in here containing a full set of Guard’s uniform and one of the chests will have all your belongings in. As soon as you loot this chest a Guard enters the room. Take some time to equip your armour, weapons and get your hotbars how you like. Then kill the Guard and exit into the Courtyard.
Follow the map marker into the Torture Chamber and release Scarlet from the cell, now she has a health bar so you know this escape is genuine. She’s pretty tanky so don’t worry too much about her health but keep an eye on it in case.
Now you need to head all the way back the way you came in. Killing the Guards and avoiding the Hollow Men. Towards the end you’ll be trapped in a room with a giant sea creature. Meet the Kraken!
This boss fight is straightforward. You’ll see 4 tentacles that will slam down onto the ground one at a time, when it does hit it with a weapon. It usually takes 2 hits per tentacle to get rid of it. When all 4 are gone you can start attacking the head. If you have the spell “Multi Strike” it’ll make the tentacle part easier as with the spell active you only need to hit each tentacle once.
With the head it’s better to use your bow here, lock onto the head and keep shooting the head while strafing to the left or right, this’ll help avoid it’s beam attack. When it gets to half health the head will submerge and the tentacles will reappear.
Rinse and repeat until the Kraken is dead and collect all the exp orbs and then exit the Underground Passage.
Back outside Scarlet will tell you that Jack needs to find a key to get the Sword and now he knows where it is. It’s in a place called Hook Coast and we can get there by a Cullis Gate in Darkwood.
Well done Hero, you rescued your mother and got an early parole all while not dropping the soap.
To Hook Coast
Before we head to Hook Coast there’s another Silver Quest we can do so head to the Guild and pick up “Bandit Spy Extraction”. Then head to Bowerstone North and near the jail cell you’ll speak to a Bandit Operative.
Tanya will explain that Otto is a part of a trader convoy and needs to be rescued which is our job, we’re also told by the Bandits that he has a large moustache. We get the option to hire additional Bandits to help but we want to leave them where they are.
Make your way through the area killing Guards as you go. As you go through Windmill Hill you’ll see some traders but none of them are Otto. You’ll also see three Guards with crossbows on the Windmill itself but you can ignore these as they don’t bother you. Head into Gibbet Woods and you’ll see Otto there, kill the Guards and then talk to Otto to get him to follow.
Now comes the hard part. Otto is the literal opposite of a tank, I think 4 hits from a Guard will kill him so Heal Life will be a saviour here. You have to fight your way back to Tanya in Bowerstone North, fighting through Guards as you go. Some of the traders will probably turn hostile too so you may have to put down a small peasant uprising.
At the Bowerstone Jail there’ll be about 6 or 7 Guards waiting for you so kill them quickly. Luckily the Bandits we left at the beginning of the quest have managed to distract some Guards though it’s unlikely they’ll last long. If any Guards do survive then shoot them from afar with your bow. Once they’re all dead head into Bowerstone North to end the quest.
Hook Coast
Make your way to Darkwood Cullis Gate, once you enter the zone the quest will start where you need to kill enough Hollow Men to power the gate up, like in Grey House the meter will slowly deplete but once it’s full the gate powers up and you can go to Hook Coast.
Once at Hook Coast head to the lighthouse and break the door down by attacking it. Inside will be two cupboards, one with Silver Key 27 and one with 500 gold. Head to the top of the lighthouse to open a 15 Silver Key chest for “The Murren Greataxe”, now head to the tavern.
This game is called “Shove a ha’penny” which could take a couple of tries, you just need to shove a coin into one of the scoring zones and you have 4 coins to do this with. Beat this with a score of 30 or above to win the “Maze” Hero Doll. The best method is to get the aimer to just below the bottom line
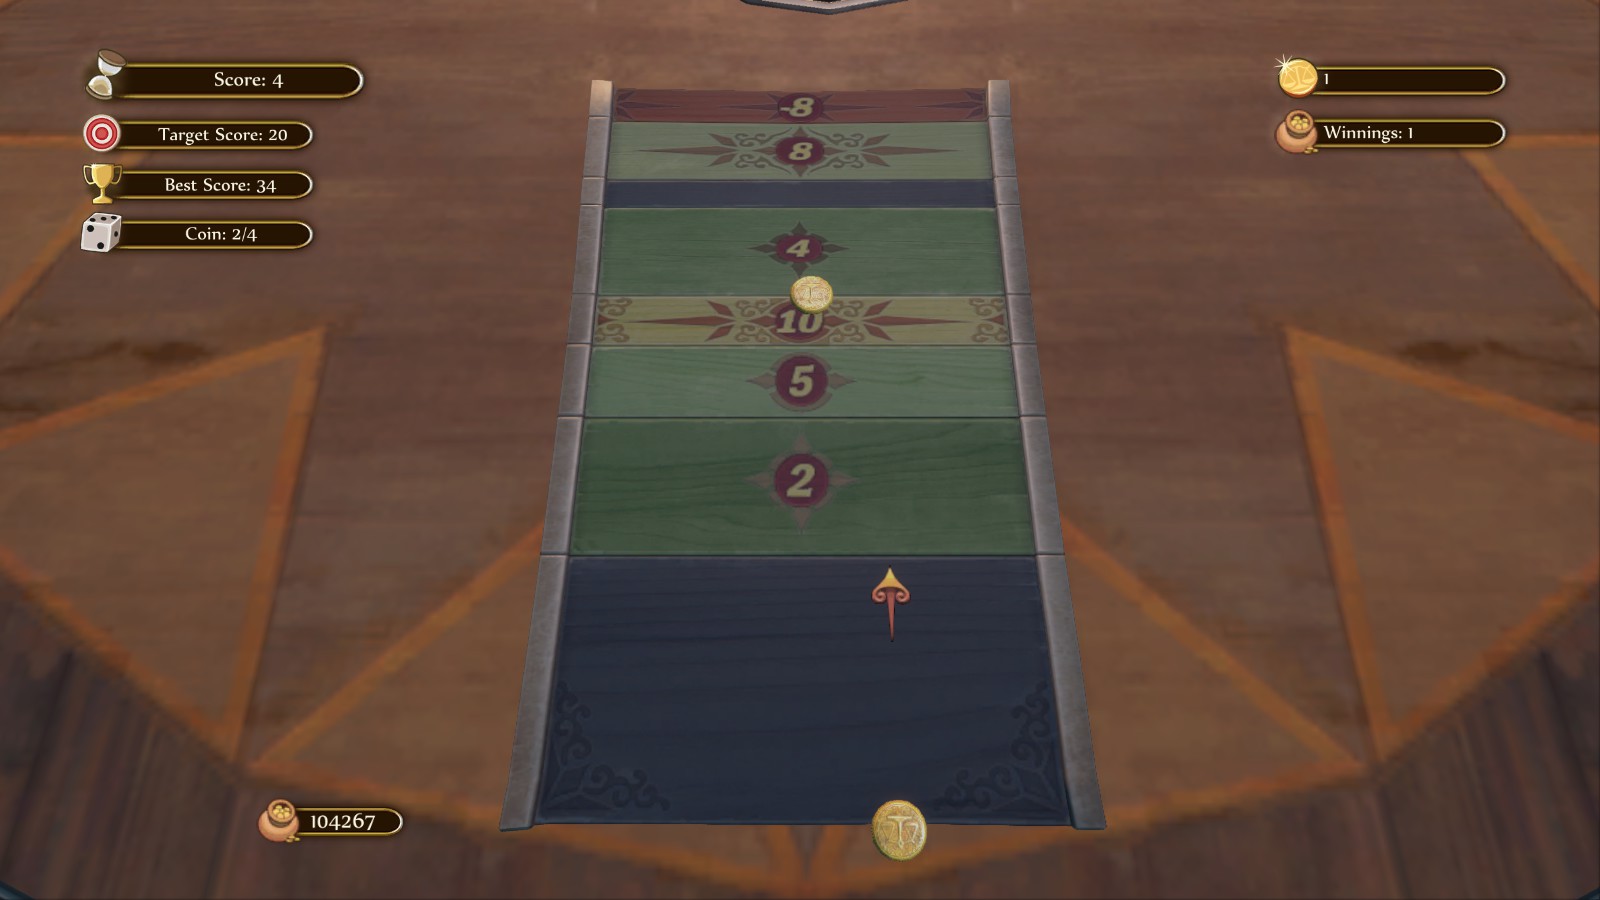
Now head to the gold map marker and Scarlet will tell you to return to the Guild. Once at the Guild go to Maze’s tower and Scarlet will be captured by Minions…..again. Take the open book that’s on the table and go to the Guild Master.
This next part is quite long and will end with us making our first ultimate choice. Prepare yourself Hero.
The Sword of Aeons
Talking to the Guild Master will start the next quest, he also tells us that if we take it we forsake any other quest we’re on so if you are in the middle of a Silver Quest for whatever reason then finish it first before taking this Gold Quest. I’m not sure if you lose it completely but it’s better to be safe than sorry. The Bronze Quests are safe though so don’t worry about those.
When you’re ready, take the quest from the Guild Master and head back to Hook Coast where this time you’ll see a new enemy called a “Screamer”, these are easy to kill but can do a lot of damage quickly, kill them as soon as you see one and head back to the barrier where the Guild Master will dispel it for you and enjoy this next cutscene.
You find out that Maze has been working for Jack the entire time and now it’s time to fight him for real. Using Berserk will make this so much easier but be careful when he casts “Physical Shield” this protects him from all damage for a short time. If you notice his health isn’t going down then that means he’s going to teleport away. When he does run to him quickly as he’ll hurl mortar like magic at you, also he’ll cast a surround fire spell if you get too close sometimes which hurts a lot so be cautious of that.
Eventually the fight will take you inside the Lighthouse, be careful here as his fire attack can quickly kill you. The fight will end outside the Lighthouse where you get to kill him once and for all.
When Maze is dead and the quest is over you need to go back to the Guild. The Guild Master will tell you that Jack is trying to activate the Ancient Focus Sites that are across Albion. Step into the Cullis Gate and you’ll teleport to Witchwood Cullis Gate.
All you have to do for this next segment is just run to the gold markers. Enemies will spawn but so will your allies. You can just run through these enemies and when you get to each Focus Site, Jack will activate it and move on to the next. Do this for all the Focus Sites.
Eventually you’ll end up at the Guild only to see it engulfed in flames. Talk to the Guild Master who’s badly hurt and he tells you to stop Jack at all costs. Get ready for one hell of a boss fight.
Enter the Chamber of Fate and you’ll watch Jack kill Scarlet to power the Sword of Aeons and now he has it.
This boss fight comes in three phases, the first phase is just fighting Minions, killing them all will trigger the second phase which is a melee fight against Jack. Using Berserk here makes it easier. The final phase requires you using range or magic.
You’ll see some rocks emerge out of the ground, these will be vital. Most of Jack’s ranged attacks can be avoided by strafing left or right while shooting him with a bow. When you see Jack point the Sword up towards the sky then run behind one of the rocks. This attack is basically like a flare and will drain your health too fast to heal. He’ll also spawn some Minions towards the end of the fight but just focus on killing Jack.
When he’s defeated you’ll be presented with a choice. Do you take the Sword of Aeons and kill Theresa? Or do you throw away the Sword forever?
Well little brother?
The Fire Heart
Welcome to The Lost Chapters part of the game, depending on the choice you made with the Sword of Aeons won’t affect the guide too much but if you did throw the Sword away then don’t worry, you’ll get an equally powerful sword.
Head back to the Guild and go to the Boasting Platform where you’ll meet the Guild Master and Briar Rose. Scythe will also be communicating and he tells us that we need to open the Primal Door and retrieve the Fire Heart to gain passage to the Northern Wastes (sounds lovely). Talk to the Demon Door and enter.
The Fire Prophets inside will tell you that to get the Fire Heart you must either free them from their prison or kill them. In order to free them you must turn the Moon symbols into Sun, and to kill them you must turn Sun into Moon.
Free The Prophets
Puzzle 1: Up, Down, Up, Up, Down, Up, Right, Left, Up, Right, Right, Right
Puzzle 2: Right, Up, Right, Left, Down, Up, Left, Up, Up, Right, Right, RIght
Puzzle 3: Up, Up, Right, Up, Down, Right, Up, Down, Right, Down, Down, Left, Left, Left
Puzzle 4: Right, Right, Right, Up, Up, Up, Left, Left, Left, Down, Down, Right, Up, Right, Down,
Down, Left, Left, Up, Up, Up
Puzzle 5: Up, Up, Up, Right, Right, Right, Left, Down, Up, Down, Down, Up, Down, Down, Up, Down,
Right, Left, Left, Left
Kill The Prophets
Puzzle 1:Right, Right, Right, Up, Up, left, Down, Left
Puzzle 2: Right, Left, Right, Up, Right, Left, Left, Up, Up, Right, Down, Down, Up, Up, Right, Right,
Left, Left, Right
Puzzle 3: Up, Up, Right, Up, Down, Right, Up, Down, Right, Down, Down, Left, Left, Left
Puzzle 4: Right, Right, Right, Up, Up, Up, Left, Left, Left, Down, Down, Right, Up, Right, Down,
Down, Left, Left, Up, Up, Up
Puzzle 5: Up, Up, Up, Right, Right, Right, Left, Down, Up, Down, Down, Up, Down, Down, Up,
Down, Right, Left, Left, Left
The Hidden Sword
If you kept the Sword of Aeons then you can ignore this next part but if you banished it then the Guild Master will mention Maze doing some research about a powerful sword hidden somewhere in the Guild. If you go to his tower and search one of the bookcases you’ll get a book called “History of the Guild” and will read several entries. After reading the 4th entry go outside to where you see the four graves nearby, interact with the stone tablet next to the empty grave and you’ll get the sword “Avo’s Tear” which is equal in strength and augmentations to the Sword of Aeons.
You now have the most powerful sword in the game with a Health Augmentation, Mana Augmentation and Experience Augmentation. The Sword of Aeons has these too. It goes without saying that you should equip this new sword.
The Northern Wastes
With your new sword in hand it’s time to undertake the final Silver Quest of the game “The Ransom Victim”. Take it and then head to Knothole Glade where the Chief will tell you that his son has been kidnapped by Bandits and he’ll give you the ransom money. He says that if you kill the Bandits then you can keep the gold, however the Chief’s other son tells you that he’d rather the kid get killed instead and wants you to bring the kid to him instead of the Chief, well before we decided we need to actually rescue him first.
Before you leave Knothole be sure to do the Archery Contest that’s just to the left of the gates. You have 60 seconds to score as many points as possible. If you manage to beat your highscore from the Guild Training days then you’ll get the Treasure Clue 4 as a prize and if you manage to beat your new highscore then you’ll get the Silver Arrow Trophy.
At the Temple of Avo if you’ve managed to max out your strength levels then feel free to stop off at the sword in the stone to pull it out and get “The Harbinger” and follow the map markers
Head towards the Demon Door to find two Assassins standing outside. I’d advise killing these two and then the leader inside as it’s easier to get the boy back to Knothole Glade this way as opposed to the Balverines that you’d have to deal with if you paid the ransom.
Back at Knothole Glade you can either take the boy to his older brother who is on the small path to the left near the wooden bridge for the Evil ending or take him to his father the Chief for the Good ending.
Either way congratulations on completing the last Silver Quest in the game, now it’s just Gold Quests and a couple of Bronze ones.
While in Knothole Glade it’s worth doing the final Fist Fighter’s group. This is the hardest group and the final leader is the Chief himself who is a tough fight in himself so this might take a couple of tries. The best option is just to block constantly and wait for an opening. Whittle him down with punches and eventually you’ll come out on top.
Off To The Northern Wastes
When you’re ready to proceed then teleport to Hook Coast where the quest will start. First you need to go to the very top of the Lighthouse and interact with the stone sign at the top, this places the Fire Heart but now a new enemy comes to try and destroy the Heart, Summoners.
These are one of the toughest enemies you’ll face in the game. When they start charging up a magical attack then keep away from it as it’ll damage you while it’s charging. Wait for it to shoot off the magic attack and then go in to damage it. You’ll have to fight 3 of these and there’ll be Minions too but you can ignore these. The Slow Time spell works really well here.
Once all 3 Summoners are dead the Fire Heart will have charged up and you’ll head to The Northern Wastes.
When you arrive at The Northern Wastes you’ll see a destroyed house on your right, there’s a chest upstairs with a Ressurection Phial and there’s a grave outside to the right with Silver Key 28 inside.
From the grave head to the right and you’ll find a fishing spot with an Elixir of Life, there’ll also be a 30 Silver Key chest which we can’t open yet.
Back at the dock head up the first set of stairs and there’ll be a chest to your left with a “Holy Warrior Helm”. Keep heading up the stairs and the hill until you meet another new enemy an Ice Troll. These are the most annoying Trolls to deal with as their ice spike trail can knock you down and knock you away, especially if you’re caught in a chain of them. Ranged is out of the question here so just use melee. Killing this Troll will get you a diamond.
Enter the Northern Foothills and you’ll find a skeleton on your left with the “Creatures of the North” book. Head to Archon’s Shrine and pass under the first giant stone archway, head to the left and keep following it to the left to find a chest with “Orkon’s Club”. Go past the giant archway and you’ll see a secluded path to the right, fishing here gets you an Elixir of Life. Follow the map marker to Snowspire Village. Just before going in there’s a fishing spot to the right with a Will Master’s Elixir.
At Snowspire you’ll meet Scythe and he’ll tell you we need to consult the Oracles. To do so we need 4 Glyphs of Inquiry which are in the nearby Necropolis. Before we do so we can get the final Hero Doll here, so head to the tavern and play another game of Coin Golf, this time you need to beat it in under 10 strokes and you’ll get the “Scythe” Hero Doll. This should be your last one so head over to the Teacher at the Bowerstone South school and hand them in to get the “Jack of Blades” Hero Doll.
Teleport back to The Lost Bay and make your way to the Necropolis. The Guards will let you in and now we need to dig up the 4 Glyphs of Inquiry. This next part is random for each person so the dig spots will be different for everyone. The goal here is to check EVERY grave for a dig spot in the hopes of getting a yellow glyph, if you dig up a red glyph then enemies will spawn.
Down by the river you’ll see a Demon Door to your left, this will be the very last one we open as we need to give it ALL our Silver Keys and we won’t get them back. There’s a fishing spot here with Silver Key 29. The last one we find in the world. Silver Key 30 we get from handing in 25 books to the School.
Across the river to the left you’ll find a 25 Silver Key chest, this contains “Archon’s Battle Armour” which as the highest armour rating, unless you have the DLCs and are using one of the armour sets bought from the store.
When you find 3/4 yellow glyphs you’ll notice on the minimap that there’s a single green dot towards the back. This is where the final glyph is but you’ll need to fight an Ice Troll first and then two Summoners and some Minions. Once they’re all dead loot the glyph and return to Scythe at Snowspire Village. When you speak to the Oracle it turns out Jack has cheated death and has a new form that we must defeat beyond the Bronze Gate. To open the gate we need to feed Archon’s Shrine with souls using Jack’s Mask.
You can use each of the Oracle’s emotions on the podium to learn more about the lore of the land such as creatures, locations and certain people. It’s worth checking out if you want to learn more.
Soul Searching
Head to Archon’s Shrine where Briar Rose will tell you that we need the souls of three Heroes to open up the Bronze Gate, each soul has a Good or Evil way to obtain them and I’ll explain how to do either. You’ll also hear Jack talking to you throughout this segment.
Arena King – Good
The first soul calls for the King of the Arena, Briar suggests talking to Thunder who’s at Knothole Glade, speaking to him, he’ll tell us to go to the Arena itself where we can find a soul. Head there and the Arena will be under attack by Jack’s Minions and Summoners so kill them all. Once in the Arena itself you’ll need to practically fight waves of enemies that Jack summons. Eventually though you’ll get the Arena soul and can return to Briar.
Arena King – Evil
Speak to Thunder who is a Knothole Glade and instead of going to the Arena simply start attacking him. The fight is exactly the same as when you fought him when you were trying to marry Lady Grey, using Berserk works well as you can almost stun lock him by knocking him down. When you’ve killed Thunder you’ll get his soul and can return to Briar Rose.
The Heroine – Good
The next soul calls for the Heroine and Briar mentions that your mother fits the bill. Teleport over to Oakvale and head into the Memorial Garden. Your mother will tell you that you can’t get her soul because Jack has sent Screamers to prevent it. You need to kill enough Screamers to fill the meter on the right. BE CAREFUL as there will be a load of them and they can and will drain your health quickly so keep an eye on it. If you see a Screamer with a ritual circle under it then kill that one first. Eventually you’ll get Scarlet’s soul and can return to the shrine.
The Heroine – Evil
Briar tells you to get your mother’s soul but Jack reminds you that Briar is a Heroine herself, attack Briar to start the fight. Briar is mainly a magic user but also attacks with melee. During the fight she’ll summon illusions of herself, you need to find out which one is the real one. When she’s dead you’ll get her soul but you have no way of knowing who’s soul is needed for the last one until Jack kindly translates it for you.
The Oldest Soul – Good
The last soul calls for the Oldest Soul which they haven’t figured out who it means, Jack then interjects and say it’s the Guild Master it wants, so teleport to the Guild. When you arrive a Guild Acolyte will say it’s Nostro’s soul and will instruct you to go to the Circle of the Dead. So teleport to Lychfield Graveyard and run through The Old Graveyard Path, you don’t need to kill the enemies as the Hollow Men and Jack’s Minions will be fighting among themselves.
When you get to The Circle of the Dead, Nostro will tell you that you must defeat him in combat to earn his soul. Again like earlier you can only harm Hollow Men on the Circle and for each Hollow Man you kill, you can hurt Nostro. Kill Nostro to earn his soul and return to Briar.
The Oldest Soul – Evil
Teleport to the Guild and a Guard will say that the Guild Master has gone to the Woods, when you approach it you’ll see some Guards protecting him, kill them and then enter the Woods. Inside you’ll see the Guild Master up on a rock and Guards surrounding him. You need to kill all the Guards but occasionally the Guild Master will protect one making the Guard immortal for a time.
When you kill all the Guards the Guild Master will make a final offer of teleporting you to Nostro’s grave to take his soul instead. If you refuse then you kill the Guild Master and take his soul.
When you have all 3 souls the Bronze Gate will open letting you fight Jack of Blades again for the final time. Ready yourself Hero
Dragon Slayer
As you approach the Bronze Gate you’ll see a chest on your right with the “Daemon Warrior Helm”. Once your ready enter the gate.
Here you’ll find Jack in his new form which is a Dragon. Despite the size of him the fight itself is pretty straight forward. Jack will spend a lot of time flying around breathing fire down on the arena you’re in. The only time you can really hurt him is when he lands.
When he lands use whatever you can to do as much damage as possible. He will do a biting attack that can cause a lot of damage. During the fight he’ll summon Minions and Summoners, these can also be hurt by Jack’s fire attacks so use that if you can to help.
When you defeat Jack you have one final ultimate decision to make. Do you throw away Jack’s mask destroying him completely? Or do you wear the mask and become Jack?
To destroy it just click the left mouse button or to wear it just wait, eventually you’ll put it on.
Well done Hero! You’ve either defeated the greatest threat Albion has faced or you just became the biggest threat, but we’re not done yet. There’s still a couple of things to do to wrap things up.
Finishing The Game
Well you’ve come this far so why not go a bit further and truly finish this game?
Assassin Attacks
You will have noticed Assassins attacking you for a while. Now we can put a stop to them. There are 5 in total and killing the last one will get you the last Treasure Clue as a reward. This can glitch sometimes so I find the best way to kill them is in this order.
Witchwood Cullis Gate at the Focus Site, go to the back of it and wait a few seconds
Knothole Glade. Across the bridge near the main gate
Windmill Hill, either go inside or on top of the Windmill
Prison Path, go down to the docks where you rescued the Archaeologist
Hook Coast, by the bell on the North side of town
When you’ve killed all 5 you’ll hear the Guild Master congratulate you and give the Treasure Clue. Now we can head over to Orchard Farm to get the treasure. Outside the barn you’ll find a stack of hay bales next to a lamp post. Stand in between the hay and the barn and then go into your inventory and use the shovel. You have to do it this way because there won’t be a context sensitive popup. If done right you’ll get “The Frying Pan” as a weapon. Now you could dig here at any point but if you do it before getting all the clues then the frying pan you get it useless. It does barely any damage and has no augmentation slots.
Book Collection
Throughout the playthrough you should have gotten a few books already, how many and which ones can differ for each person so below I’ll list all the books you need to donate and where to find them.
A Love Story – Heroes’ Guild
Creatures of Albion I – Guild
Creatures of Albion II – Guild
Creatures of Albion III – Guild
Eyes of a Killer – Bowerstone South
Jack of Blades – Guild
Making Friends – Guild
The Arena – Guild
The Balverine Slayer – Knothole Glade
The Dragons – Guild
The Guild of Zeroes – Bowerstone South
The Northern Wastes – Guild
The Oakvale Raid – Oakvale
The Old Kingdom – Guild
The Other Land – Guild
The Pale Balverine – Guild
The Repentant Alchemist – Bowerstone South
The Sock Method – Oakvale
The Tailor’s Tragedy – Bowerstone North
The Tale of Maxley – Guild
The Tale of Twinblade – Guild
The Trials of Aarkan – Oakvale
The Ugly Guide – Oakvale
Windbreaker Rule Book – Bowerstone South
You Are Not A Bad Person – Bowerstone South
As you can see most of them are in the Guild but for the others it will mean searching bookcases in homes or shops. This is best done during the day when everyone is out, just be careful no one sees you as you can rack up a hefty fine. With the Guild ones there’s a load of book cases near the Chamber of Fate entrance and also some upstairs where all the beds are. It’s ok if you get duplicates and you may also get books that aren’t on the list.
When you have the books go to the Teacher in Bowerstone South and start handing them in, when you donate your first 10 books you’ll get a Bright or Dark Will User’s Hat depending on if you donated Good or Evil books first, once you get the one hat you can’t get the other. And once you’ve donated all 25 you’ll get Silver Key 30!
With all 30 Silver Keys now we can go to The Lost Bay and open up the final Silver Key Chest with The Avenger inside. Now all that’s left to do is go back to the Necropolis and give the Demon Door all of your keys, before you open it use the “Middle Finger” expression to earn an achievement.
Once the door is open loot it to get The Bereaver.