A guide on how to beat the game on ironman difficulty without cheating.
Warning
This game is only interesting, if you play it without a guide. You are supposed to die, learn from your mistakes and try again. An adventure is exploring the world without knowing what’s going to happen next.
However, I admit that the “Fabled Lands” are pretty hostile. It is a direct “port” of a gamebook series from the 90s. Back in those days, games were much harder and people didn’t get discouraged quite as quickly. There were also much less options, so you simply had to “git gud”.
Anyway, there is no real “skill” in the game, aside from knowing where the good events are. So don’t feel bad about playing on the lowest difficulty. It is much better to do that, than to save before every roll and cheat yourself out of any risk.
In summary, you should only use this guide, once you’ve experienced the game yourself. Don’t rob yourself of making your own discoveries!
Goal and Roadmap
Goal
The aim of the guide is to get all achievements in a single playthrough.
This obviously excludes two of the four achievements associated with the Sokaran civial war.
It is impossible to get all four in the same playthrough.
The guide assumes, that you are playing on Ironman difficulty, in order to get Iron Adventurer. Further, it assumes that you do not want to abuse bugs and/or cheat.
(Note: Ironman was the only difficulty in the original gamebooks!)
Roadmap
The guide will first lead you towards the Iron Adventurer achievement. But it will pick up most other achievements along the way. After that, it will get the remaining achievements, that are somewhat out of the way.
If you are interested in which chapter a certain achievement is done, consult Appendix 1.
(Note: If you already have Iron Adventurer and are simply looking to complete a couple of specific achievements, then following this guide is probably ineffective. In that case, you should just look up the specific achievements in Kurufinwes excellent guide.)
Notes and optional paragraphs
The guide is riddled with notes and optional paragraphs. These contain background information and explain why the guide is proceeding the way it does. If you are not interested in this information, you can simply ignore all of it.
Optional: Why does the guide take such an inefficient route?
If you follow this guide, then there is no way that you will ever die. Even the worst dice rolls imaginable, will not result in death.
The guide will not be using the “resurrection” feature. Personally, I find that it kills immersion and goes against the concept of an ironman run.
(Note: Resurrection deals were also in the books. They are expensive by design and should ensure that advanced characters will not die as easily.)
Optional: Why does the guide not use blessings to reroll?
Blessings cannot ensure your survival, but leveling up your abilities can. Imagine an ability check with a difficulty of 10 while your ability is 8. Failing results in death.
Thus, you would only die, if you rolled 2 on a 2d6 roll. The chance of this happening is 1 in 36 or approximately 2.78%. If you have a blessing of the ability and also a blessing of luck, you could reroll the check twice.
The chance of getting “snake eyes” three times in a row is 1 in 46656 or around 0.0021%.
Clearly, you would probably not fail. However, there is a chance.
Once you increase the ability to 9, there is a no chance of failing anymore.
Spoilers
Spoilers
You should seriously consider playing the game on your own. This guide will pretty much spoiler everything. There will be no further spoiler warnings or spoiler tags.
Version
This guide is optimized for version 1.0.13 of the game. Thus, some things might be slightly different in the future. In a worst case scenario, this could result in the death of your character.
I will try to safeguard against upcomming changes as much as possible.
However, I obviously cannot forsee the future.
Mistakes
This is a long guide and there could be an oversight, that makes death possible after all.
I playtested the guide multiple times, but that doesn’t mean that it is flawless.
If you find a mistake or somehow die, then please post a comment.
(Note: I don’t care about spelling mistakes or grammer flaws. As I am not a native English speaker and there are probably hundreds of them.)
Chapter 0: Character Creation
Class
While this is doable with every class, the guide specifically uses the Warrior. Other classes would have to slightly change the order of things, due to starting with slightly different ability values.
(Note: Combat Skills are not tied to your class, but instead your base ability scores. Thus, if you want to, you can still use the fighting tips outlined in Appendix 2 and 3.)
Gender
As far as I am aware, gender does not make any difference at all.
(Note: In the books, there was at least one difference. Using the unicorn event in Uttaku, female characters could get +1 Magic and +1 Charisma. Male characters could only get +1 Magic. This is not the case in the game. Both genders get +1 Magic and +1 Charisma.)
Chapter 1: Goldfall
Isle of Druids
You start out at the Isle of Druids. Simply follow to the Obsidian Stones and teleport to Wishport.
Getting to Goldfall
Leave Wishport using the East Road. Nothing bad can happen here.
(Note: If you get the Knights of Nagil, then refuse to become an initiate. If you accidentally accept, then go to Metriciens and renounce your faith at the Temple of Nagil. This is free.)
Go to Haggart’s Corner and then to Whistling Heath. Always pick north and you will get a Fourleaf Clover. Keep going north to leave the area. Go to Tekshin Tavern and then to Goldfall.
Events at Open Country
From here head to Open Country. The event you want is “8-12 A country fair”. If you get the bull event, just flee. There is no penalty for that. Afterwards, return to Goldfall and try again.
At the country fair, there are three possible outcomes:
- 2 – 4: Lose all shards. This doesn’t matter.
- 5 – 7: You will lose half of your shards, which doesn’t matter. However, you will also gain some items. Pick up the Horseshoe. You don’t need the other two.
- 8 – 12: You get a Pirate Captain’s Head. Keep it.
Keep doing this event, until you have at least two Horseshoes and at least 4 or 5 more items. Whether you get additional Horseshoes or Pirate Captain’s Heads, does not matter. Depending on your rolls, this might take a couple of minutes.
Getting shards at Metriciens
After you’ve gotten the items, go down to Metriciens via Tekshin Tavern, Monastery of Molhern, Whistling Heath (north, north, north), Haggart’s Corner and East Road.
(Note: I will not write down all areas between Metriciens and Goldfall anymore. If you are unsure, just check above.)
Sell all of your Pirate Captain’s Heads and sell all your Horseshoes except for two. You should at least have 500 shards now. Go back north to Goldfall.
Beloved of the Three Fortunes
Enter the temple of the Three Fortunes and become an initiate (90 shards). If this is your first time initiated to a god, then you will get the achievement Higher Calling.
Afterwards you should start gambling. Join the sacred games for 20 shards each.
There are 6 possible outcomes:
- 1: Drop a Fourleaf Clover or your starting weapon/armor. If afterwards you only have the two Horseshoes left, go back down to Whistling Heath to farm more Fourleaf Clovers.
- 2, 4 or 5: Just retry.
- 3: You take 2 damage. Retry, if your stamina is 3/9 or above. If not, leave the temple and heal at the tavern before trying again.
- 6: This is what you want. It gives the title Beloved of the Three Fortunes.
20 rolls (400 shards) should be more than enough. However, if you are very unlucky, then you’ll have to get more shards using Pirate Captain’s Heads or Horseshoes.
(Note: The chance for not rolling a 6 in 20 tries is around 2.6%.)
Rabbit’s Foot Charms
If you have 60 shards left, then head to Rainbow River. If not, you will have to get one more Horseshoe or Pirate Captain’s Head from the fair and sell it at Metriciens.
Reroll Rainbow River until you are able to buy two Rabbit’s Foot Charms from event “2-6”. The other two events don’t do anything.
(Note: The hunter event can be used to get Large Potions of Nature.)
Make it Rain
Once you have two Rabbit’s Foot Charms, two Horseshoes and two Fourleaf Clovers you should participate in the preach at the temple in Goldfall. At the end, hand your items over to the woman and you will gain +1 Sanctity.
Now join the preach again but instead keep the items. This will reward you with 1999 shards and the achievement Make it Rain.
Chapter 2: Trading with the Trau
Preparations
From Goldfall travel south to Tekshin Tavern and south-east to Monastery of Molhern.
Enter the Whistling Heath and select the path “south”, “east” and “north”. You will be able to pick up the Key of Stars.
Now head west to Troilus’ Inn. Stop at the inn and pay for drinks (4 shards). This will allow you to skip a fight in near future.
To the forest
Leave eastward to Whistling Heath and select “north”, “north”, “north” to pass it again. From now on you can ignore the Fourleaf Clovers. You don’t need them anymore.
Head north to Tekshin Tavern and further north to Goldfall. Keep going north via Rainbow River to finally reach Forsaken Forest.
The hamlet
Enter the hamlet and you might contract Leprosy. This does not matter at all. Stay in the hamlet overnight and you will gain +1 Sanctity.
(Note: Now your base sanctity to 6. Diseases and equipment affect your final ability score but not your base value. This is an important distinction!)
The dwarf
Go along the path and select “You know what to do”. Take the Plate Armour and the Greatsword. Equip them and drop your starting gear, if you still have it.
The crypt
Continue along the path. Go left and enter the crypt. Wait to hear the suggestion. Go south and continue along the path to end up at the crypt again. Enter it and you will automatically hand over the Key of Stars. This will give you the achievement Twinkle, Twinkle, Key of Stars.
Quietly search the crypt and you will be able to pick to the Green Medallion.
(Note: This item will not get used for a very long time.)
Faery Mead
You will return to the intersection. This time go east. Ignore the warning and continue along the path. Wait and watch to trigger a thievery check.
You will most likely fail it, but the outcome does not matter. If you succeed, you will be able to loot a pot of Faery Mead immediately. If you fail, the game first checks your base sanctity. As it is greater than 5, you will get the Faery Mead as well.
This will return you to the intersection again. Repeat this process to fill your inventory with 11 Faery Mead. You can drop anything you are carrying aside from the Green Medallion.
Once your inventory is full, go south to the edge of the woods and leave the forest.
To Haggart’s Corner
Go south via Rainbow River, Goldfall, Tekshin Tavern, Monastery of Molhern, Whistling Heath (select north, north, north) and finally reach Haggart’s Corner.
The Trau market
Explore the city and ask about trade with the Trau. Go out to the standing stones and try to meet them. If they do not turn up, just try again.
(Note: The chance, that the Trau to arrive, is around 28% per attempt. The chance, that the Trau do not turn up in 10 tries, is approximately 3.9%.)
Sell the 11 Faery Mead for 900 Mithral each. You will end up with 9900 Mithral.
Buy the following items:
- Vulcanium Mail (1600 Mithral)
- Selenium Wandx4 (8000 Mithral)
- Were-boar Tusk (20 Mithral)
This leaves you with 280. Leave the market and pay the 1 Mithral fee to finally end up at 279.
Equip the Vulcanium Mail.
Chapter 3: Shopping at Aku
Ringhorn
From Haggart’s Corner go back south to Metriciens via East Road.
In Metriciens go to the harbour and take the passage to Ringhorn.
In Ringhorn go to the market and buy the passive skill Hot Pursuit (500 shards). Learn it.
(Note: Imo this is the best passive skill in the entire game.)
Road to Aku
From Ringhorn go west, then to Thurlings, Hall of Heroes, Farmlands and finally Aku.
(Note: There is a chance to get your charisma reduced at Farmlands, but it immediately gets reverted when you reach Aku.)
At the market, you should sell the following items:
- Greatsword (200 shards)
- Plate Armour (720 shards)
- Selenium Wandx4 (12800 shards)
You should now have at least 15000 shards. If you have never held 5000 shards before, you will also get the achivement Fortune Favours the Bold.
Now, buy the following items:
- Battle Axe +3 for 1000 shards
- Celestium Wand +4 for 8000 shards
- Centaur Flute (+3) for 800 shards
- Gloves of Sig (+3) for 1200 shards
- Gold Holy Symbol (+3) for 800 shards
- Sextant (+3) for 1200 shards
- Rope for 50 shards
- Lantern for 100 shards
- Climbing Gear for 100 shards
- Wolf Pelt for 100 shards
After this spending spree you will be sitting comfortably over 1500 shards. That means you never have to worry about small purchases like harbour passages or entrance fees. Thus, I will not be listing these in the guide.
Equip everything, except the Rope and the Lantern of course. You will unlock the achievement Top Gear.
(Note: Many players don’t realize, that you can equip the Climbing Gear and the Wolf Pelt.)
The guide assumes, that you always have these items equipped and also have a Rope and Lantern with you. Do not ever drop them off, unless specifically instructed to do so.
Chapter 4: Short round in Golnir
Preparations
Take the harbour passage to Metriciens and buy a house there (200 shards).
You will get the achievement Home Is Where You Hang Your Armour.
Stash the Green Medallion, you won’t be needing it for a very long time.
However, keep the Were-boar tusk on you. It will be used in the next chapter.
Clifftop
Move to Clifftop and investigate the fort. Open the right-hand door. You will gain 300 shards and two items. Pick everything up and leave the fort.
(Note: You should never pick the other doors and also never open the right-hand door again.)
Pipe music
Now move to The Hinterlands. Keep rerolling via Clifftop, until you get event “6-7 Pipe music at night”. If you get the burial mounds instead, just press on.
Once you get the event, move to Clifftop and go down to the beach. Talk to the villagers and continue along the beach. Wait for low tide and seek the piper. Make sure to take the shell. You will get +1 Charisma and the achievement Secrets of the Deep.
Starting “An Eye of an Eye”
Leave Clifftop and travel north-west to The Hinterlands, The Countryside, Castle Ravayne and finally the northern River Road.
Roll this area until you get the event “2-6 An eerie light in the dusk.” If you don’t get it, go north to Delpton and try again. Once you get it, go closer to investigate and accept the mission.
Magic Shield
From River Road head east to Chards Inn and Wheatfields. Then north to Endless Plains and north-east to Waterfall.
Stay and tell the spirits to show you the treasure. Take the left-hand cave, pick the copper chest and enter the word “magical”. Make sure to take the shield.
You will get the Magic Shield and the achievement Not Today. Equip the shield.
(Note: This is the only shield in the entire game.)
Advancing “An Eye of an Eye”
From Waterfall move south to Rainbow River, Goldfall, Tekshin Tavern and finally reach the Monastery of Molhern.
Stop at the monastery. If you fail the charisma check to enter, just go to Tekshin Tavern and try again. Once you get in, talk to the abbot and ask him about the man with the eyepatch. This will advance the quest.
Now travel south via Whistling Heath (select north, north, north), Haggart’s Corner and East Road, to finally reach Metriciens.
Housekeeping
Sell the Ringmail (90 shards) and the Compass (450 shards) you picked up at the fortress.
Stash, sell or drop the rest, if you randomly picked something up during this chapter.
Chapter 5: Starting out in Sokara
Preparations
At Metriciens renounce your worship at the temple of the Three Fortunes.
The items you should be carrying are Rope, Lantern and Were-boar Tusk.
Afterwards, take the harbour passage to Marlock City.
(Note: If you are wondering, not all harbour passages are save. Make sure to only take the ones that are specifically mentioned in the guide.)
At Marlock City
Start the following quests:
- “The Greatest Story”: Go to the tavern and pay for drinks.
- “The Lord of Thunder”: Visit the House of Priests and accept the quest.
- “The Golden Chain Mail”: Visit the Temple of Sig and talk to the high priest.
Also become an Initiate of Sig at the temple (50 shards) and gain +1 Thievery.
(Note: You lose this buff again, when you renounce your worship.)
Explore the city and visit the Street of Entertainers. Go over and pay 5 shards. Leave and follow the scholar. Chase the muggers off and help him up. You will get a Vial of Yellow Dust.
Leaving Marlock City
From Marlock City head to Shadar Tor and an event will play out. You will automatically pass the ability check. This starts the “Black Dragon Knight” quest.
At Yellowport
If you had contracted Leprosy in the previous chapter, then visit the Temple of Maka. You will have to pay 75 shards to be cured.
Start the following quests:
- “Book of the Seven Sages”: Go to the tavern and pay for drinks. (3 shards)
- “Sunken City of Ziusudra”: Go to the temple of Alvir and Valmir and talk to the high priest.
- “Rat Problems”: Go to the trade guild and visit the guildmaster.
Also start the quest “Seek Me Out” by exploring the city during the day. Go to the poor quarter and bless the beggar. If you fail the check, just try again. Once you succeed, it will start the quest.
Explore the city during the day again and select the poor quarter again. Buy the three lanterns for 150 shards and sell them at the market for 270 shards.
(Note: This can only be done once.)
Using the tusk
Take the harbour passage to the Isle of Druids. At the Trading Post, go to the shrine of Lacuna. Talk to the priestess there twice. You will hand over the Were-boar Tusk. The rewards are +1 Scouting and the achievement Pig-sticker.
The Oak Druid
Leave the town and go to the Forest. Try scouting your way through. If you fail, you will take 2 damage and move to the coast. If that happens, move back to the Trading Post and heal at the tavern. Afterwards, just enter the Forest again.
Once you pass the scouting check, try to persuade the tree. If you fail the charisma check, just leave the forest. In this case you will not take damage. Enter the Forest and try again.
(Note: The chance that you have to retry once is around 16%. The chance that you have to retry 5 times in a row is around 0.01%.)
Move to the City of Trees and see the Druids’ Leader. Accept his quest, take the quest item and teleport back to Yellowport via the Obsidian Stones.
The Willow Druid
Move north via Trefoille and Road Tavern to the Forest of Larun. Nothing bad can happen on the way. At the forest, seek the Willow Druid.
Failing the scouting check doesn’t matter, as you can just try again by reentering the forest from the Bronze Hills. You will then auto-pass a sanctity check. This will award you 50 shards and allow you to pick up the quest item.
Leave the forest and head back south to Yellowport. Use Main Road and Road Tavern. The worst possible outcome is hitting your head for 1 damage.
From Yellowport, take the passage to the Isle of Druids. Scout a path through the Forest again and you will be able to hand in the quest. You will get +1 Scouting and the achievement Cross-polination.
Once you are done, port back to Yellowport via the Obsidian Stones.
Chapter 6: Ranking up
Heading north-west
From Yellowport, head north via Trefoille, Road Tavern and Main Road to reach Caran Baru. The worst that can happen, is hitting your head for 1 damage.
Now, head west via the Bronze Hills to reach the Dragon Knights’ Castle. Seek out the Black Dragon Knight and choose to fight it.
This guide avoids most fighting. If you have to clear an encounter, the guide will tell you how to get through it, even if all enemies constantly roll critical hits on you. However, these explanations are lengthy and generally not necessary. I will do the explanation for this fight here, so you have an idea what to expect. In the future, the explanations will be in Appendices 2 and 3.
(Note: The guide doesn’t skip the fighting because it is badly implemented. In fact, the inclusion of skills is probably the greatest improvement over the gamebooks! However, triggering a fight on ironman is always a little risky and analyzing all outcomes can be tedious.)
Fight: Black Dragon Knight
The Black Dragon Knight is a very slow opponent with a reach of only 1 tile. It can not move and attack during the same turn. As such, it can never attack you, if you are not standing next to it.
Turn 1: Tactical Assessment, move towards the knight.
=> The knight will walk towards you.
Turn 2: Stunning Blow (3 damage), Attack (at least 5 damage)
=> The knight is stunned.
Turn 3: Attack (at least 5 damage), Attack (at least 5 damage)
=> The knight is dead.
Summary (worst outcome): No damage taken.
Your reward
Take the quest item and head back east to Caran Baru via the Bronze Hills. Turn the quest in at the tavern by asking about Yanryt.
Your reward is +1 Rank and the achievement Knightfall. You will also get the option to pick one out of three skills. You should pick Weapon Mastery and learn it.
(Note: You can also fight the rest of the Dragon Knights. However, there isn’t a reason to do so, unless you desperately need shards.)
Greatest Story
From Caran Baru go to Northern Road and north to Eastern Foothills. Climb up to reach a magic check. If you fail it, make sure to turn back. Then climb up again to get to the same check again.
Once you pass, talk to the Hermit about the quest. You will get +1 Charisma and the achievement This One’s a Tribute.
To the Blessed Springs
Head back south to Caran Baru via Northern Road. From there, move east to Coldbleak and finally south to the Blessed Springs.
Explore to enter the Holy Waters. Pay 35 shards and throw the vial in. As reward, you should pick +1 Thievery. Afterwards, accept the quest and pick up the Amulet of Protection.
(Note: You could fight the Gorlock here, but there is no real reason to do so.)
A Dragons Treasure
Leave and go back through Coldbleak, Caran Baru and Main Road, to reach Lake of the Sea Dragon. At worst: 1 damage.
(Note: If you go west to The Countryside instead, you could get lost and possibly get poisoned afterwards. It isn’t a big deal, as you can get rid of it in Yellowport, but going there is annoying. If you went south via Eastern Road, you could run into a fight against two pilgrims. The fight isn’t hard, but there is no reason to do it.)
At the lake, visit the market and buy a Silver Nugget for 165 shards. Now explore the area and hire a boat. Pay the fisherman 15 shards, hand the Silver Nugget to the dragon and grab its tail.
Since you have the Amulet of Protection, the thievery check does not matter and you can pick up the chest. There are also three other treasures. You should pick Plate Armor, Ebony Wand and 500 shards.
If you passed the thievery check, you still have the Amulet of Protection in your bag. As far as I know, there is no other use for it. Thus, you can just drop it.
Leave west toward Main Road. Then south to Road Tavern and Trefoille. Again, the worst outcome is 1 damage. Visit the wizard and you will get +1 Magic and the achievement Transmutation.
Go back north via Road Tavern and Main Road to reach Caran Baru. If the 1 damage rolls have been adding up, it is a good idea to heal at the tavern. Sell the Plate Armour (720 shards) and the Ebony Wand (800 shards) at the market.
Caran Baru
Buy a house in Caran Baru (200 shards) to get access to your stash.
From now on, the guide will make heavy use of ability potions. Thus, you should always have some in your stash. Now is a good time to stock up. The route Caran Baru, Coldbleak, Blessed Springs is very fast, since it does not require dice rolls.
Sell or stash everything but the Rope and the Lantern. Get the following items:
- 0 x Potion of Strength
- 2 x Potion of Comeliness
- 0 x Potion of Intellect
- 2 x Potion of Godliness
- 4 x Potion of Stealth
- 0 x Potion of Nature
All in all, this will cost you 500 shards. You should still have around 3000+ shards left.
Return to Caran Baru and stash all potions.
Book of the Seven Sages
Now, take a Potion of Stealth with you.
(Note: If you want to saveguard against missclicks, now is a good time to get Potions of Healing. However, if you follow the guide to the letter, you won’t need them.)
Make your way down to Yellowport via Main Road and Road Tavern. Afterwards move to Venefax. Heal at the tavern.
Make sure to buy Scorpion Antidote at the market for 100 shards.
Afterwards, move south to Scorpion Bight and a fight against two Scorpion Men will trigger. For information, see Appendix 2.
Summary (worst outcome): You are at 2/11 (took 9 damage) and are now poisoned.
You should not pick up the Scorpion Venom, as there is no use for it. Open your inventory and use the following potions:
- Scorpion Antidote, to get rid of the poison.
- Potion of Stealth, to get +1 on the next thievery check.
Select “Go for it now” and you will auto-pass a thievery and a magic check. This allows you to get the quest item. Once you are done, you will automatically return to Venefax.
(Note: Failing the thievery check means instant death.)
Heal at the tavern and return to Yellowport.
Turn in the book at the tavern and pick +1 Thievery. You will also get the title Illuminate of Molhern and the achievement Raider of the Lost Knowledge. This is all you should do in Sokara right now. Time to head back to Aku.
Chapter 7: Heretic
Renouncing Sig
From Yellowport, go to Marlock City.
At Marlock City visit the temple of Sig and renouce your worship (50 shards).
Now, take the harbour passage to Wishport.
Scroll of Ebron
From Wishport walk to Metriciens via East Road.
In Metriciens take the harbour passage to Ringhorn.
Explore Ringhorn to sail upriver past Castle Ravayne to Delpton.
Explore Delpton and head west. Select “Continue in Old Harkuna” and go to Old Harkuna.
Be advised, that there are two of these areas. The guide only ever visits the eastern one.
(Note: I am aware, that the western “Old Harkuna” is completely save, if you make the right choices. In fact, it is actually very beneficial to go there, as you can get the “Blue Skin” title and 2000 shards. However, the developer could decide to actually turn your avatar blue! I certainly wouldn’t want that, so this guide will be avoiding that area like the plague.)
At the eastern Old Harkuna, there are two noteworthy events:
- 2 – 5: This is what you want. Buy a Scroll of Ebron for 200 shards.
- 8 – 12: Your hair will be turned to gold. Having golden hair is slightly beneficial, as you will get some shards while traveling. However, if you don’t want it, you can just reroll the area via High King’s Seat, until you get this event a second time. Then, your hair will be reverted to normal. There is no visual representation of the golden hair in the game (version 1.0.13).
Reroll the area via High King’s Seat until you have the item and your hair is the color you want.
(Note: This is also the area where you can buy Faery Mead for 200 shards. This is useful if your sanctity is too low to pull off the farming in chapter 2.)
Going to Aku
From High King’s Seat head to Troll Bridge. Pay the troll (5 shards) and continue to Hall of Heroes.
(Note: Fighting the troll at the moment is very dangerous. Also, there is no significant reward and he will just keep coming back.)
From Hall of Heroes head to Farmlands and finally to Aku.
Initiate of Ebron
Go to the temple and enter the Hall of Ablution (50 shards). Go to the cathedral. Once you’ve handed over your Scroll of Ebron, you will become an Initiate of Ebron.
(Note: You can try to get close to a lord, but the combat check is pretty high. There is no penalty for failing, but the rewards are also insignificant. As the guide assumes the worst outcome, it assumes that you’ve failed.)
Reaching the audience chamber
Now head to the palace and pay 50 shards. Pay 50 shards again and a hidden roll will trigger. Depending on your luck you will have to pay between 0 and 200 shards to finally reach the court.
Becoming an author
Talk to the Master of Documents of Fable and accept his task.
Help the princess and quest for the egg. The outcome of the rank check does not matter. Most likely you will fail. Ignore the other two adventures (treasure and magic portal) and return to your writing both times.
Your book will win a prize. Choose +1 Magic. You also gain two court status and the achievement Neverending Story.
Becoming a heretic
Leave the audience chamber and the palace. Go to the temple of Ebron and renounce your worship. This is free but will mark a heretic in Uttaku.
Take the harbour passage to Metriciens.
(Note: Being a heretic is kind of dangerous. Certain parts of Uttaku that used to be save, should not be visited anymore. If you try to cross the border near Ringhorn for example, the border guards will now try to arrest you. This could result in your death.)
Entering Castle Ravayne
Take one of your Potions of Comeliness out of your stash. Do not use the potion yet!
From Metriciens take the harbour passage to Ringhorn.
Explore Ringhorn to sail upriver to Castle Ravayne.
Enter the castle. This will require a charisma check. If you fail, you will take 1 damage. Try again until you succeed. Obviously, don’t kill yourself in the endevour. Should you ever get down to 1/11, then sail back down to Ringhorn and heal at the tavern.
(Note: The chance for failing is about 17%. The chance for failing 10 times in a row is astronomically small.)
Once you are in the castle, try to enter the inner keep. You will need to convince the guards with another (easier) charisma check. This is where you should drink your Potion of Comeliness to automatically pass.
(Note: Failing this charisma check could potentially kill you!)
Talk to the baroness about the quest “Spying on her foes” and accept the mission. Talk to her again to finish the quest. The rewards is +1 Thievery, 100 shards and the achievement The Masked Singer.
Leave the castle and sail downriver to Ringhorn.
Take the harbour passage to Yellowport.
Chapter 8: Up north
Officer’s Pass
From Yellowport get to Marlock City.
Here become an initiate of Sig (50 shards). This gives you the +1 Thievery buff again.
Explore the Barracks area and trigger a combat check by returning the insult. This is not auto-passable, but failing will just reduce your stamina to 1. Both your shards and posessions will not be touched. You should not heal between tries. If you are at 1 stamina already and fail again, then there is no penalty at all.
Once you succeed, you will get an Officer’s Pass and 25 shards.
Make sure to heal back up at the tavern afterwards if you need to.
Heading north
Now, head north via Trefoille, Road Tavern, Forest of Larun, Bronze Hill, Northern Road and Eastern Foothills.
Finally reach Citadel of Valis Corin and enter it using the Officer’s Pass.
(Note: Avoid the Main Road near the Citadel. Otherwise you might have to fight wolves.)
Keep heading north via Beladai’s Camp, Gemstone Hills (the outcome of the magic check doesn’t matter) and reach Yarimura.
Joining the Brotherhood
Head to the market and buy exactly 1 Arrow, 1 Bolt and 1 Sling Ammo. Explore the city, Thieves Kitchen, streets and visit the Brotherhood.
This will trigger a thievery check. If you fail, discard one of the items you just bought. If you fail three times in a row, head back to the market and buy more ammo. Eventually, you will be able to get in. Apply for membership and get back to the city. You can discard or sell the remaining ammo.
Nightstalker
Buy a house in Yarimura (150 shards) to get access to your stash. Take a Potion of Stealth out and drink it. Double check that you have Climbing Gear equipped and that you are carrying a Rope.
Head to the palace and attempt the quest. If you followed the instructions, the you will auto-pass the check. Do not take the necklace or the alarm will sound. Instead just leave the palace.
Explore the city, Thieves’ Kitchen, streets, Brotherhood and turn in the quest. This will give you +1 Thievery, the title Nightstalker and the achievement with the same name.
Verdigris Key
Before going back south, take a Potion of Stealth out of your stash but do not drink it.
Then, take the harbour passage to Yellowport (65 shards).
Explore the city by night. Go to the wealthy area and you will auto-pass a thievery check. Accept Laurias offer and search the ground floor.
Using the Potion of Stealth here and you will auto-pass the check. This will give you a Verdigris Key. Go upstairs and leave.
The Isle of Mystery
Head to Trefoille, visit the wizard and use the Verdigris Key to access the portals. Take the third portal to the Isle of Mystery. Go up the mountain and, since you have the title Illuminate of Molhern, you can just enter the city.
Go to the tavern and pay for drinks to get some information about the Forest of Larun. Go to the Chief Mage and accept his quest, although you will not be doing it for a long time.
Leave the city on foot. This has three outcomes:
- 1 – 2 Towering Cliffs – Hitch a ride and you will end up in Yarimura.
- 3 – 4 Merchant Ship – You will end up in Yarimura.
- 5 – 6 A Bottle – Ask the genie to teleport you to Yarimura.
You will always end up in Yarimura. Now, take the harbour passage to Yellowport (65 shards).
Forest of Larun
From Yellowport head north via Trefoille and Road Tavern to reach Forest of Larum.
Venture deeper into the forest, use the password and auto-pass the magic check. Try the path to the sarcophagus and auto-pass the thievery check. When prompted, pick +1 Charisma.
Make your way to Caran Baru.
Advancing an Eye for an Eye
Take a Potion of Comeliness out of your stash. Explore the city and ask for the man with the eyepatch. Using the Potion of Comeliness you will auto-pass the charisma check. Pay 10 shards and try to ambush your target. The thievery check is an auto-pass and you will not have to fight. Take the quest item. You will also gain 25 shards.
Finishing an Eye for an Eye
From Caran Baru head west via Bronze Hills and Dragon Knights’ Castle to reach River Bank. Pay 1 shard to cross.
Leave Conflass and keep heading west via Monastery of Molhern, Whistling Heath (north, north, north), Troilus’ Inn, the northern Main Road and Chard’s Inn to reach River Road.
Keep reentering the area until you get the eerie light. Turn in the quest for 250 shards, +1 Sanctity and the achievement No rest for the Wicked.
As this is your 10th quest, you will also get the achievement Have Weapon – Will Travel.
Chapter 9: Some quests
Traveling around
The last chapter concluded at River Road. Go north to Delpton and pay for drinks at the tavern (3 shards). This will unlock some information on Castle Ravayne.
Explore the village and sail all the way downriver to Ringhorn.
Take the harbour passage to Yellowport and move over to Marlock City.
From there, take the passage to Wishport and move to Metriciens via East Road.
More information
Take a Potion of Godliness out of your stash, but don’t use it.
Explore the city until you get the important event.
- 2 – 4 Honey for a thief – Let it pass.
- 5 – 7 Political intrigue – This is the information you need.
- 8 – 9 Trade secrets – Don’t invest.
- 10 – 12 A bizarre tale – Useless.
Head north via East Road, Haggart’s Corner and enter the other East Road.
Optional: About East Road
This information isn’t really necessary. If you are in a hurry, then skip this section.
East Road has two events:
2-6 Seven Fools – This event tells six silly stories in a fixed sequence. As you will travel between this area and the southern Grimm Riverbank, ensure that you take the reward of the third story, a Large Potion of Comeliness. This item is unique and this is the only way to get it. However, the guide does not use Large Potion of Comeliness so you don’t actually need it.
9-12 A damsal in distress – This event is not important. Ignore the damsal, as she wants to be rescued by another person. There is a mini-quest associated with this event, but the reward is bad and there is no achievement for it.
Scarab Amulet
From there, head east to the southern Grim Riverbank. There are three noteworthy events:
- 2-4 An unusual wager – This is not worth the risk. Refuse the wager and reroll.
- 5-7 A night at an inn – This is what you want. If you get it, read below.
- 10-12 A chuckling in the woods – This triggers an auto-pass charisma check. Reroll.
Once you get the inn, enter it. Open the door during the night and go back to bed. Use the Potion of Godliness to auto-pass the sanctity check and loot the Scarab Amulet and the sword.
(Note: Should you somehow end up in this area again, if you are following the guide you should not, then do not enter the inn. Unless you have a blessing to poison/disease, you will instantly die.)
Heading to Castle Ravayne
Head west to East Road, Whistling Heath, Troilus’ Inn, The Countryside and reach Castle Ravayne.
Castle Ravayne (again)
You already know about the castle. Failing the check causes 1 damage. This is not problematic.
Once you pass, try to enter the inner keep. This requires another charisma check. As you gained skill, you will auto-pass. Now seek out the wizard and accept his mission. Talk to him again to hand in the Scarab Amulet. You will get +1 Magic as a reward.
Now seek out the baroness again and start the quest “Denounce a traitor”. Talk to her again regarding the quest and it will complete. You will get the achievement Cluedo. As reward you should pick the Cobalt Wand.
Leave the keep and leave the castle. Sail downriver to Ringhorn. At Ringhorn, sell the Tarnished Sword for 200 shards and the Cobalt Wand for 1600 shards.
Afterwards, take the harbour passage to Yellowport.
The Lord of Thunder
Travel to Marlock City. Here, buy a house (200 shards) and take a Potion of Godliness out of your stash, but make sure not to drink it yet.
Head north to Crustmoor. Mount the horse and hold on. You will auto-pass the sanctity check and get a Faery Mead and a weapon as rewards.
(Note: You should avoid Crustmoor from now on, as there is a chance to fight wolves there. The fight is not hard at all, but there is no reason to do it.)
Go north to Devil’s Peak and start climbing it. Choose the thievery-check and you will auto-pass. Now use the Potion of Godliness to auto-pass the sanctity check. You will get rewarded with +3 Stamina (permanently).
The Chainmail
Head north to Forest of Larun, Bronze Hills and reach Caran Baru.
Sell the Enchanted Spear for 400 shards and put the Faery Mead into your stash. You will need it much later in the game.
Make sure that you are at full health.
Now go to the temple of Tyrnai and try to steal the chainmail. You will auto-pass the magic check and also the subsequent thievery check. You will also auto-pass the following combat check and finally get to a last thievery-check.
This one does not matter, as failing only makes you take 5 damage.
Further, you will also auto-pass the following sanctity check.
(Note: Interestingly enough, this is one of the only checks that is detrimental to pass. If you fail this check, you do not get cursed! Sometimes ignorance is bliss.)
Lifting the curse
Heal in Caran Baru, if you took 5 damage and head south via Main Road, Road Tavern, Trefoille and reach Marlock City.
At Marlock City head to the temple area. Enter the House of Priests (10 shards) and you will get +1 Sanctity. Further, the achievment Eucharist will unlock.
Visit the temple of Sig and talk to the high priest to get 300 shards, +1 Thievery and information about the curse. Further, the achievement Blasphemous Burglary will unlock.
Head back north to Caran Baru and buy a cheap weapon from the market.
Make sure to equip it right away, so you don’t forget!
(Note: If you still have a random weapon laying around, that works too.)
Go to Coldbleak and then to Blessed Springs. Explore to enter the Holy Waters, pay the entrance fee (35 shards) and throw the weapon into the spring to lift the curse. Afterwards, don’t forget to reequip your Battle Axe +3.
Move back to Caran Baru.
Chapter 10: The White Sword
Preparations
Take your Officer’s Pass and a Potion of Stealth with you. Do not drink the potion right now!
Move south to Marlock City via Main Road, Road Tavern and Trefoille.
At Marlock City, visit the temple of Sig to renounce your worship (50 shards). Then, take the passage to Wishport.
Initiate of Nagil
Reroll the East Road until you get “9-12 Knights of Nagil” and accept their offer. Double check, that you are now an Initiate of Nagil.
Chosen One of Nagil
Head north via Haggart’s Corner, Whistling Heath and Monastery of Molhern to reach the northern Grimm Riverbank. Reroll this area until you get “9-12 River Wraiths”. If you get another outcome, make sure to stay west of the river.
Once you get the wraiths, get aboard their ship. At the next choice make sure to take “Approach the cowled figure.” or you will probably die.
Since you are an Initiate of Nagil you will get the title Chosen One of Nagil.
Going back north
When you come to, head east to Sokara. Go north via Devil’s Peak, Forest of Larun, Bronze Hills, Northern Road and Eastern Foothills. Nothing bad can happen.
Pass through the citadel using the Officer’s Pass and head to Yarimua via Beladai’s Camp and Gemstone Hills.
The Nomad Camp
Make sure that you are at 14/14 and have a Wolf Pelt equipped. Only enter the Nomad Camp west of the city under those two circumstances.
There are two possible events and you need both of them.
- 2 – 5 A gruesome punishment, read below.
- 8 – 12 Gathering of the tribes, read below.
2-5 Is easy to exaplain. Sneak closer and you will trigger a thievery check. Use the Potion of Stealth to automatically pass it. Free the prisoner and you will gain some information about the bronze gate. If you roll this event again, nothing interesting happens.
8-12 Is a little complicated. It starts with a tough charisma check. However, you get +3 from starting the quest “Seek me out”. Still, the success rate is only around 92% at the moment. If you fail, you will take up to 12 damage (the game rolls 2d6). Afterwards, there is also a scouting check for food, that you cannot auto-pass (the success rate is also about 92%). Failing that, you will take another 1 damage. Finally, if you didn’t have a Wolf Pelt with you, you would take another 1 damage.
In summary, with a Wolf Pelt, there is a maximum damage potential of 13, which you can just survive, if you only ever enter the area at full health (14/14). Thus, whenever you take damage, even only 1 damage, make sure to heal in Yarimura before rerolling.
Once you pass the charisma check once, you should explore the area. Your reward is 500 shards and the achievement Northern Hospitality. You can ignore the Potion of Nature.
(Note: The chance to fail the charisma check, roll 12 on the damage calculation and failing the scouting check is 0.019%. As such, you will probably never see it.)
The White Sword
From Yarimura head north to Village of Vodhya and west to Northern Mountains.
Investigate the cliff, recall the story and enter. Since you have the title Chosen One of Nagil, you get awarded the White Sword (+8). Make sure to pick it up, as there is no skip warning like there is for artifacts! You will also get the achievement The Right Hand of Death.
As you are an Initiate of Nagil, you are allowed to leave without an ability check.
Head back to Yarimura.
Chapter 11: Making a choice
Preparations
Equip the White Sword and put your Battle Axe into your stash. Take the passage to Yellowport.
From there, take the harbour passage to Isle of Druids. Go to the temple of Nagil to renounce your worship. Move to Obsidian Stones and teleport to Marlock City. Visit the temple of Sig and become an initiate.
Picking a side
The time has come to pick a side in the Sokaran civil war. Take note, that the guide will ensure that you can do both sides completely risk free. So feel free to make your own decision.
Optional: Possible considerations
– If you are missing the achievements for one side, the decision should be obvious.
– From a meta-gaming perspective, it is better to side with Nergan Corin, since this nets you an additional +1 Combat.
– From a lore perspective, Nergan Corin is more loyal to your character. He would help you, if you got kidnapped in Yarimura. Grieve Marlock would just let you die.
– However, siding with Grieve Marlock ends the civil war. Siding with Nergan Corin prolongs it. For the average Sokaran civilian it might be better if you sided with Grieve.
Option A: You want to kill Nergan Corin
Great choice! This is very easy.
Move to Yellowport and go to the Provost Marshal. Bribe the captain (5 shards) and accept the mission.
Move north to Caran Baru via Trefoille, Road Tavern and Main Road. Then head east to Coldbleak. Climb the mountain, talk to the guard, pick Nergan Corin and convince the captain. You will auto-pass the charisma check.
Make the attempt to kill the king. Pick combat and you will auto-pass. Loot the quest item and pick thievery to auto-pass again. Hurray!
Leave the mountains and head back to Yellowport, using the same route. Turn in the quest in at the Provost Marshal and you will get the following rewards:
- +1 Rank
- +1 Ability (pick +1 Magic)
- 500 shards
- Title: Protector of Sokara
- Achievement: Usurper
You can now skip to the next chapter.
Option B: You want to kill Marloes Marlock
Great choice! This will be slightly more difficult.
Move north to Caran Baru via Trefoille, Road Tavern and Main Road. Then, head east to Coldbleak. Climb the mountain, talk to the guard, pick Nergan Corin and convince the captain. You will auto-pass the charisma check. Accept the quest.
Afterwards, head south to Blessed Springs and buy a Potion of Stealth at the alchemy shop. Head back north to Coldbleak and west to Caran Baru.
Here, deposit everything you own into the stash. This includes all shards, everything you have equipped and everything you are carrying.
Take three things back out:
- 5 shards
- White Sword
- Potion of Stealth
Now head south to Yellowport via Main Road and Road Tavern.
At Yellowport, make sure that you have the White Sword equipped and drink the Potion of Stealth. Finally head toward the Provost Marshal. Use the 5 shards to bribe the captain and attempt to kill the marshal. Choose combat and you will auto-pass the check.
The following roll is purely luck based and cannot be influenced. Thus, there is a 42% chance to end up at the mines and potentially die, ending your ironman run.
Make the roll and if you get “2-6 Unlucky” make absolutely sure, that you drank the Potion of Stealth, before advancing the story.
If you get 7-12 Lucky
Move to Caran Baru and reequip yourself. Skip the next section.
If you get 2-6 Unlucky
You end up at the mines. This means, that you lose everything that you were carrying. Except, you were only carrying the White Sword. This weapon cannot be taken from you.
In the mines you will meet Lauria again. Do not go along with her plan. She will betray you again and you will lose one charisma point. Instead, try to escape on your own.
This requires a thievery check without equipment bonuses. Luckily, the buff from the Potion of Stealth makes this an auto-pass. Move to Caran Baru and reequip yourself.
Reward
Afterwards, head over to Coldbleak, turn in the quest and get the following rewards:
- +1 Rank
- +1 Ability (pick +1 Magic)
- 500 shards
- Title: King’s Champion
- Achievement: Assassin
Aftermath
Make sure to accept the follow-up quest for later, head west to Caran Baru and south to Yellowport. Thus, you end up at the same place as players doing Option A.
(Note: I am well aware, that a resurrection deal would have trivialized this whole endevor. But this guide will stay true to the ironman spirit and never let you die!)
Chapter 12: Some preparations
Going back to Aku
Time to go back to Aku, using the Delpton route, as the Ringhorn route is blocked to heretics.
From Yellowport move to Marlock City and from there take the passage to Wishport. Walk to Metriciens via East Road and take the passage to Ringhorn.
Explore the city and sail upriver past Castle Ravayne to Delpton. Explore Delpton and head west. Once you get to choose a location, pick Old Castle in the south.
The head west via Thurlings, Hall of Heroes, Farmlands and you will reach Aku.
(Note: This sounds complicated, but really doesn’t take long.)
The Slumlord
In Aku go to the market and buy a Potion of Stealth. You can drink it right away.
Explore the city and visit the slums. Try to see the Slumlord. Since you have “Nightstalker”, this does not require a check. You will automatically start the quest “A Thief’s Web”.
Do the same thing again. Explore the city, visit the Slums and seek out the Slumlord. Accept the mission. This will start the quest “The Spider Palace”.
Now head for the palace and attempt the quest. You will automatically pass a magic and a thievery check. As reward you will get 100 shards and two treasures. You should pick Silver Holy Symbol and Uttakin Telescope. You will also get the achievement Welcome To My Palace.
Shopping
Further, this will unlock the secret market. Buy a Witch’s Hand, a Parrot Fungus and a Selenium Ore there. This will cost you 1350 shards in total.
Now head to the regular market and sell Silver Holy Symbol for 360 shards.
Also, buy a Potion of Intellect.
Don’t forget to equip the Uttakin Telescope. It goes in the “Ring”-slot on your character sheet and increases your scouting by one.
Vade Mecum
Move between Farmlands in the north-east and Aku until you get the event “8-12 A wizard’s workshop”. Hand him the Selenium Ore and counter his spell. This will trigger a magic check, that you can auto-pass using the Potion of Intellect you just bought.
You will get 250 shards and three treasures. I recommend only taking the Cobalt Wand and the Selenium Ore, as the Amulet of Ebron is pretty useless.
On a second reward sceen you will get the Vade Mecum.
(Note: This can only savely be used at magic 12! So don’t use it right now.)
Back to Marlock City
Go back to Aku and sell the Cobalt Wand for 1600 shards. Afterwards take the harbour passage to Metriciens. From there, take the harbour passage to Marlock City.
Once there, renounce your worship at the temple of Sig (50 shards).
Sky Mountain
Move north to Caran Baru via Trefoille, Road Tavern and Main Road.
Here you should do two things. First, take your Verdigris Key out of your stash. Second, explore the city and go to the slave market. Buy the Mannekyn and set it free.
Now move back down to Trefoille, use the key and teleport to Sky Mountain (door 2).
If you have been following the guide, you will automatically pass the scouting check and also know Pikalik. The reward is a free resurrection deal (which I will not use) and the achievement One Of a Kind.
If you have never gotten a resurrection deal before, this will also unlock the achievement Death Is Just a Flesh Wound.
At Yarimura
Go back to Yarimura. Take Southern Plains, if you fail a scouting check here, you will take 1 damage and then Beladai’s Camp, Gemstone Hills.
Explore Yarimura and go to the Tower of Bakhan. Here, accept the quest. Go back there again to advance the quest. Go back there a third time to complete the quest. The reward is a Selenium Wand and the achievement A Helping Hand.
Explore the city again, go to Thieves’ Kitchen, explore the streets and visit the Brotherhood. This will reward you with 500 shards and the achievement Speak No Evil.
Leave the exploration area and return to the main city screen.
Go to the temple of Tambu and become an initiate (60 shards). Further, take your Battle Axe out of the stash, heal at the tavern and buy a Potion of Healing at the market.
Blessed of Tambu
Leave Yarimura and move westwards taking the southern route via Gemstone Hills, Beladai’s Camp, Southern Plains (1 damage, if you fail the scouting check), City of Ruins, to finally reach Strange Gully.
Investigate the gully and make an offering. Drop the Battle Axe and you will get the title Blessed of Tambu. Leave the gully and head north-east to Northern Plains.
Northern Plains
At Northern Plains there are three options. The outcome is pretty inconsequential.
- 2-5 A voice on the wind – Huddle down and take 1 damage. If you fail the scouting check after, you take another 1 damage.
- 6-7 No event – Results in an easy scouting check. Failing it causes 1 damage.
- 8-12 A band of nomads – If you fail the charisma check, there is a good chance to fail the tough scouting check after it. However, the result is only 1 damage. If you succeed in the charisma check, then you get some options that don’t matter at all. They are used for mini-quests that don’t lead to achievements.
In summary, the worst that can happen here, is losing 2 stamina.
Further west
Head north to Ruby Citadel and then west via Wastelands, Pyramid of Xinoc to reach the Stairway.
Rod of Teleportation
Before ascending the stairs, make sure that you are at 13 stamina or above. If you are below, use the Potion of Healing, that you picked up in Yarimura.
Once you are ready, keep ascending the stairs and at one point you will take up to 12 damage (hidden roll 2d6). You will not take damage anymore, so you don’t have to heal. Talk to the dragon and since you have the title Blessed of Tambu you will be able to go through.
(Note: You will lose the title Blessed of Tambu, but that doesn’t matter.)
Eventually, you will get +1 Scouting, the achievement Beam Me Up and a Rod of Teleportation. You have no other choice but to use one of its three charges to get back to Yarimura.
Scaling the cliffs
Heal at the tavern and make sure, that you are carrying your Rope. Move north towards Village of Vodhya and move west to Northern Mountains.
Investigate the cliffs and climb them to gain +1 Scouting. Descend back to the ground and go back to Yarimura.
Chapter 13: More preparations
At Yarimura
Make sure to take the Verdigris Key, the Rod of Teleportation and the Selenium Wand with you.
Also, you should renounce your worship at the temple of Tambu (40 shards).
Initiate of Lacuna
Now take the passage to Yellowport. In Yellowport take the passage to the Isle of Druids. Become an Initiate of Lacuna at the temple (30 shards) and teleport back to Yellowport using the Obsidian Stones.
Arena Master
Move to Trefoille, use the key and take the teleport to Isle of Mystery (door 3).
Go up the mountain, to reach the city.
Sell the Selenium Wand for 3200 shards at the market.
Explore the city and take part in the arena. Since you are not playing a mage, this requires a fairly difficult magic check (the success rate is only 42% at magic 11). However, this check can be triggered infinitely, without a real penalty (50 shards per try).
You should be able to pass in 10 tries (500 shards), but don’t worry if it takes a little more money.
(Note: The chance to fail 10 tries is 0.46%.)
Once you succeed, pick fire in the first round and water in the second.
This will net you +1 Magic, the title Arena Champion and the achievement Arkane Kombat.
Genie in a bottle
Leave the city on foot and do not take the teleportation offer.
You will roll a d6. There are three outcomes:
1-2 Towering Cliffs – If you get this, simply hitch a lift to Yarimura.
3-4 A Merchant Ship – This directly brings you to Yarimura.
If you rolled either of those outcomes, then use the Vade Mecum to teleport to Yellowport. From Yellowport, go to Trefoille, teleport to the Isle of Mystery and try again.
(Note: This is perfectly save, as your magic is now at 12. You shouldn’t need more than 10 tries. The chance of not getting the genie in 10 attempts is 1.7%.)
5-6 A Bottle – This is what you want. Ask for knowledge and select +1 Scouting. Now can try the next roll. However, if you fail, do not click on “Unlucky” or you will die. Instead use your Rod of Teleportation and you will end up in Yarimura.
(Note: I will not use the Rod of Teleportation anymore, as it is kind of cheating. However, there is no other way to ensure your survival in the genie event.)
At Yarimura
Go to the market and buy the skill Adrenaline Burst for 1440 shards and learn it.
Chapter 14: Castle Orlock
Getting to the castle
Use the Vade Mecum to teleport to Yellowport.
Get to Marlock City and take the passage to Wishport.
Summary
If you followed the guide, then you will have the following:
- Climbing Gear equipped
- Magic and Scouting at 12
- Initiate of Lacuna
The only thing you need to pay attention to, are the smugglers in The Haunt (event 2-6). When you get this event, stay hidden and move on.
Other than that, nothing at Castle Orlock or The Haunt can harm you. You can roll the event as long as you want to. (Note: Bad luck at the grimoire event is unavoidable.)
At the castle, there are three events:
- 2-5 An explorer’s book: +1 Scounting and +1 Rank (This is what you need.)
- 6-8 A magician’s grimoire: Either +1 Magic or -1 Magic. (You cannot gurantee the outcome.)
- 9-12 A cursed book: Does nothing if you are an Initiate of Lacuna.
Since you only need the +1 Rank and might skip the grimoire, there are three possible outcomes:
Best case: +1 Scouting, +1 Rank, +1 Magic
Good case: +1 Scouting, +1 Rank (Got the explorer’s book and stopped.)
Worst case: +1 Scouting, +1 Rank, -1 Magic
The guide assumes the worst possible (but unpreventable) outcome:
+1 Rank, +1 Scouting, -1 Magic.
You will be able to pick a skill. You should choose Cleansing Flame and learn it.
Finally, you will also get the achievement Bookworm.
Once you are done, move back to Metriciens via The Haunt.
If you care about maxing out the stats of your character to the fullest, then you might want to read the next paragraph. Otherwise, just skip to the next chapter.
Optional: Magic skill and Potions of Intellect in the following chapters
As you might have actually gotten the good outcome +0 Magic, or the best outcome +1 Magic, the guide does not reflect your magic skill correctly anymore.
This means two things:
First, you will never have to use Potions of Intellect again.
Second, the guide will pick +1 Magic when chooseing an ability score to increase.
You should instead pick +1 Thievery once, if you got the good outcome (+0 Magic). Or even twice if you got the best outcome (+1 Magic).
Optional: Rerolling castle Orlock
If you are “cheating” on ironman difficulty or playing on a lower difficulty and plan on reloading the event, until you get the best result, then be aware that the hidden roll determining the outcome is done before even entering Castle Orlock. Thus, reloading at the castle will not change the outcome. However, the result can change without completely restarting your character. Sadly, the exact reroll condition is unknown to me.
Optional: Exlaining Caslte Orlock
In my opinion, Castle Orlock is one of the most interesting parts of the game. In the next three paragraphs, I will explain The Haunt and Castle Orlock in detail. If you aren’t interested, then just skip to the next chapter.
Optional: The Haunt
The first challenge, is getting through The Haunt. It is unavoidable to roll events in The Haunt before entering or after leaving the castle.
There are three noteworthy events:
2-6 Smugglers: Stay hidden and move on.
8-9 A pitfall: As long as you have climbing gear, you will get through this event unscathed. With scouting 12, you can also just auto-pass the scouting check.
10-12 A coven meeting: This is the problematic event. Failing the magic check will teleport you directly to Haunted Hills. You will also be forced to roll an event there. Haunted Hills is one of the most dangerous zones in the entire game. It features one of the hardest fights (dragon), robbers that can potentially steal everything and a ghost that can instantly kill you.
(Note: If you fail a sanctity 14 check, the ghost has a damage potential of 18, rolling 3d6.)
As being teleported there could easily result in death, you need at least magic 10 to make it through The Haunt safely.
Optional: Grimoire event
The randomness of the grimoire event is the reason why you actually need magic 11 and not magic 10 before trying Castle Orlock safely. If you enter the castle at magic 10 and it gets reduced to 9, you could afterwards roll the coven event. Now there is a small chance to fail the magic check. As a result you could trigger the dragon fight, the robbers or the ghost!
(Note: You could also prevent this with a couple of Potions of Intellect.)
Optional: The monster of Castle Orlock
To make matters worse, there is also the monster. It will insta-kill you, if you fail a scouting check (difficullty 13), unless you have an Exotic Feather with you. The Exotic Feather is removed from your inventory, once it has been used. Thus, unless you have scouting 12+, you need to farm Exotic Feathers to gurantee survival. At worst, you would need a feather for every trip to the castle.
Chapter 15: Finishing Sokara
(Note: Now that you have acquired Cleansing Flame it is time to finish up Sokara. Sure, this can be done earlier, but now it is very easy to describe the fights. Also, I know that you can buy Cleansing Flame at Marlock City for 1440 shards. Why waste the shards though.)
The golden net
From Metriciens take the passage to Marlock City.
Move to Shadar Tor and examine the runes and you will auto-pass a magic check. Swim out to sea and eventually you will get another choice. Select “Rack your memory for a solution.” This will trigger a scouting check, that you will automatically pass. Now, pick up the quest item.
Move to Yellowport and turn in the quest at the temple of Alvir and Valmir.
You will gain 100 shards, a weapon and the achievement Retiarius.
Sell the Magic Trident at the market for 400 shards.
The sewers
Explore the city and go to the sewers. You will auto-pass a thievery check and trigger a fight. For information, see Appendix 2.
Summary (worst outcome): No damage.
Your reward is 15 shards. Enter the “thrown rum” and sneak in to assassinate the king. This will trigger a thievery check, that you will auto-pass. Pick up the quest item and open the chest with your thievery skills. You will automatically pass the check.
In the chest you will find 60 shards, a Mandolin, a Scroll of Ebron and a Potion of Healing.
Back in town, go to the market and sell the Mandolin for 270 shards.
Turn in the quest at the Tarde Guild. Your reward is 450 shards and the achievement Exterminator.
Lastly, explore the city and visit the sewers again. This unlocks access to your stash.
The Isle of Druids
Take the passage to the Isle of Druids and visit the temple of Nagil. Talk to the warden and accept the mission. Explore the trading post and you will automatically pass a magic check. You shouldn’t buy the ingredients, as they are not necessary.
(Note: You can buy the ingredients, if you really want to. While there is no use to it, as your sanctity is high, the item is unique.)
After proceeding, you will auto-pass two more ability checks and get to another choice. Select “Invoke the power of the gods.” and you will auto-pass a sanctity check. Pick up the quest item and return to town.
Return to the temple of Nagil and pick 500 shards as your reward. You will also get the achievement A Ghoulish Task.
Going to Nerech
Teleport to Yellowport via the Obsidian Stones. Move north to Caran Baru via Trefoille, Road Tavern and Main Road.
Heal to full at Caran Baru and visit the market. Buy exactly 1 Arrow, 1 Bolt and 1 Sling Ammo.
Now, move east to Coldbleak and to Fort Brilon. There are two noteworthy events there:
- 1 – 2 A Thief. If you get this, drop one of the items you bought at Caran Baru.
- 5 – 6 A peculiar find. This is what you want. Take the Manbeast’s Helmet.
Independent of the outcome, make sure to go to Fort Estgard next and accept the quest.
If you did not get the Manbeast’s Helmet yet, then reroll Fort Brilon. Now, if you are unlucky and did get the thief 3 times, then go to Caran Baru again and buy another 1 arrow, 1 bolt and 1 sling ammo.
(Note: The chance for getting the thief three times before getting the helmet is 12.5%. The chance for getting the thief 6 times before getting the helmet is around 1.6%. Thus, unless you are increadibly unlucky you will at most have to restock once.)
Finishing Nerech
Once you’ve gotten the helmet and accepted the quest, move north to Nerech and venture forth. Move to Uphill and select “Pull the manbeast’s helm over your head”. However, you don’t have to equip the helm on your character page.
Now you will auto-pass a sanctity check. You will be warned about the helmet, but put it on regardless. This will trigger a tough magic check. However, passing the sanctity check before will make it automatically passable.
As a reward for putting on the helmet and not dying, you will get +1 Magic.
Eventually you will trigger a fight. For information, see Appendix 2.
Summary (worst outcome): 12/16 (4 damage).
Pick up Naginata and Black Pagoda Seal. You will automatically return to Fort Estgard. At the fort you will get +1 Combat and the achievement Knight in Beastly Armor.
Returning to Yellowport
Move south to Coldbleak and west to Caran Baru. Now, move south to Yellowport via Main Road and Road Tavern.
Heal to full, if you haven’t done so already. Drop the Manbeast’s Helmet or stash it.
(Note: As far as I know, there is no use for it anymore.)
Stash the the Black Pagoda Seal.
(Note: As far as I know, there is no use for it at the moment, but there might be one in a DLC.)
Chapter 16: Cloaks and ships
Renouncing Lacuna
Take the passage to the Isle of Druids. Renounce your worship at the shrine of Lacuna (40 shards).
Now, go to Obsidian Stones and teleport back to Yellowport.
Going back to Aku
As your magic is at 12+ again, you can safely use the Vade Mecum. Thus, you can easily reach Aku. Sell the Naginata for 200 shards at the market.
Master of Nightingales
Go to the temple of Ebron and hand in your Scroll of Ebron to become an initiate.
(Note: Btw, even though you are now initiated again, the Soulwatch still thinks you are a heretic!)
Afterwards, go to the palace, reach the audience chamber and talk to the Master of Nightingales. This will start a quest. Now, leave the palace.
5 Potions of Healing
The next fight is probably the hardest in the entire game. Thus, you should get a large supply of Potions of Healing. If you need more space in your bags, you can access your stash in other cities by using the Vade Mecum.
Once you are done, buy at least 5 Potions of Healing and a Potion of Intellect. If you feel insecure on ironman, just fill your inventory. You really don’t need shards anymore.
The Singing Forest + Chameleon Cloak
Now move east past Farmlands and Hall of Heroes to Singing Forest.
First, no matter which event you roll, you will afterwards be able to catch a nightingale. To do this, set a trap and the scouting check will auto-complete. Then, take the quest item.
Now for the special events. There are two, but you only really want one. Neither event respawns, so you only have to deal with the unwanted event once.
2-5 Crashing in the trees: This is why you brought the Potion of Intellect. Use it to auto-pass a magic check. Then threaten the goblins. You can leave the Faery Mead, but the Potion of Restoration is a nice reward. After taking what you want, don’t demand more.
(Note: Or you can demand more. However, the chest this information leads to is cursed and the contents are pretty worthless.)
8-12 Something is watching you – This is what you want. You will auto-pass a scouting check. You will then engage two Giant Chameleon. For information about this fight check Appendix 2.
Summary (worst outcome): 1/16 and 5 Potions of Healing used (40 points of damage taken).
After the fight, you will automatically pass a magic check and be rewarded with one of the best items in the game. Make sure to take the Chameleon Cloak. You should equip it, replacing your Wolf Pelt, but still keep the Wolf Pelt in your bags from now on.
Go back to Aku and heal at the tavern.
Reward
Also return to the audience chamber and turn in the quest at the Master of Nightingales. You will get 300 shards, +1 Charisma, 1 Court Status and the achievement Silver-tongued.
Return to the city and sell the remaining potions or keep them. It doesn’t matter.
Buying a Ship
Teleport to Ringhorn using the Vade Mecum.
There, you should buy a barque (220 shards). This will give you the achievement Bring Me That Horizon. Upgrade your crew to excellent (140 shards).
Now go to the temple of Alvir and Valmir and buy a blessing (30 shards).
(Note: You could also buy a galleon. However, the unavoidable chance of a splitting mast is still there at 1 in 216 or 0.46%. While it is extremely unlikely, this can happen. It would randomly teleport you all around the world and into all kinds of events. It is too annoying for me to account for them all. A blessing gives 100% security.)
Set sail and head to the western Coastal Waters.
Coastal Waters
There are four noteworthy events:
2-4 Storm: This is the event you do not want. Use your blessing, return to Ringhorn, buy another blessing and try again.
5-6 Pirates: If you get it, just outrun them. They will never catch you.
8-9 Ship of Wizards: Sail on.
10-12 Mermaids: Sail on.
(Note: You want some of these events later. However, there is a small chance of failing checks right now. That could potentially lead to your death.)
Golden Locket
Once you don’t get the storm, travel south to Violet Ocean.
There are two noteworhy events:
2-5 A bottle drifts by: This will give you a map that is not important. Keep it or drop it.
7-12 A landfall: This is what you want. You gain 250 shards and find a locket. Refuse to give the locket away. This is important!
If you don’t get “A landfall” right away, you will have to return to Coastal Waters and try again. If you run into the storm event and use up your blessing, return to Ringhorn immidiately and get a new one. If you did not do that and instead head for Violet Ocean again, you could run into another storm on your way back!
Once you get the locket, make your way back north to Ringhorn.
Potions at Aku
Use the Vade Mecum to reach Aku.
Buy two Potions of Comeliness at the market.
Now, use the Vade Mecum to reach Yarimura.
Fighting Kaschuf
From Yarimura, move north to the Village of Vodhya. Visit the village and go up to the Keep of Kaschuf. Knock on the door and start the fight.
Summary (worst outcome): No damage taken.
However, after you beat him, you will take up to 6 points of damage (1d6).
You will then meet his butler and trigger a charisma check. Using the Potion of Comeliness, this is auto-passable. Now open the locket and leave the village. Reenter and restart the fight. You can easily beat him without taking damage.
The rewards are 750 shards, +1 Charisma and the achievement Heart of Darkness.
The Heist
Go back to Yarimura. You can stash or drop the Golden Locket. There is no use for it anymore.
Now, explore the city. Go to Thieves’ Kitchen, enter the tavern and engage the locals. Use the Potion of Comeliness to auto-pass the charisma check. Join them.
Leave Yarimura and go to Villa of Hordeth. Follow Lurec and a thievery check will auto-pass. Continue and a magic check will auto-pass as well.
As reward, pick the following three items Dust of Tranquility, Casket of Gems and 500 shards.
Now use the Dust of Tranquility and you will gain +1 Thievery and 850 shards. Move back to Yarimura.
Chapter 17: Masked Lord/Lady
Preparations
Take the Vade Mecum to Aku.
Enter the palace, go to the audience chamber and talk to the “Blender of Spices”. This will start a quest. Talk to him again to receive an Amulet of Ebron. Now leave the palace.
There is a chance to run into some unavoidable wolves multiple times. As such, you might want to stock up on some Potions of Healing. I recommend 4 or 5.
(Note: Of course if you are lucky, you won’t need any at all.)
Afterwards, leave the city.
The West Road
Head out north-west to West Road.
There are two noteworthy events:
2 – 5 An unexpected opportunity – Don’t try to steal. The reward is pointless.
8 – 12 Religious zealots – The zealots have a damage potential of 18 (3d6), as such they can kill you instantly if you fail the sanctity check. Thankfully it is an auto-pass.
(Note: You get a +1 bonus since you are an Initiate of Ebron.)
Going north
Head north to Kunrir and further north to West Countryside.
There are two noteworthy events:
2 – 5 A smoking crater – Just move on, if you get this.
8 – 12 A priest of Ebron – This is what you want. Reroll via Kurnir until you get it. Once you get it, intervene and this will be an auto-pass. You will get +1 Scouting.
(Note: You get a +1 bonus since you are an Initiate of Ebron.)
Time Travel
Head north-west to the House of the Unbidden.
Visit Holyamu, ask about the pool and give him the amulet.
You will auto-pass the scouting check. Take the quest item. A set of three magic checks follows, but you only have to pass the easiest one, which is an auto-pass. Thus, you will eventually make it back to the house.
Icicle Forest
Keep going north and reach Icile Forest.
There are two events there. As you need both, keep rerolling the area until you get each event at least once.
2 – 5 Something is watching you – You will encounter an ice-ghoul. As your skills are high, you will auto-pass two magic checks and a sanctity check to gain +1 Sanctity and a piece of Selenium Ore.
Sadly, if you roll this event again, you will have to fight 3 wolves. If you have bad luck, this could happen multiple times before actually getting 8-12. See Appendix 2 for fight details.
Summary (worst outcome): 11/16 (5 damage taken). Thus, engaging them below 6/16 is risky. Either use a Potion of Healing or heal in the tavern at Kurnir before trying again.
8 – 12 Frost Sprites – Ask them for information. Pay 10 shards. Follow his instructions. Your defence is 17, so you won’t take damage. This unlocks some information that you will need later.
Back in Aku
Take the route south. Ignore all events and eventually you will reach Aku.
Enter the palace, talk to the “Blender of Spices” and complete the quest. The rewards are 500 shards, +1 Scouting, two Court Status and the achievement Aoristic Park.
Now talk to the “High Convener of Chariots”. This will start a quest. Leave the palace and buy a Potion of Godliness at the market. Then leave Aku.
Going north
Go north to Farmlands. It doesn’t matter if your charisma gets reduced. Head further north to Crags of the Long Homes, but leave them alone. You will then auto-pass a scouting check.
Head further north to East Countryside. If you roll “2-5 Hangman’s Crossroads”, you will automatically move on. If you roll the other event “8-12 Thieves in the shadows”, hold one of them hostage. You will auto-pass the combat check and get some rewards.
Either way, move north to Troll Bridge. Pay 5 shards and move east to High King’s Seat.
High King’s Seat
Make sure to select “Visit the High King’s Seat” to fully explore the area. An old man will teach you a song. This will be very important later.
Since there is no easy way to check if you got the song, make a note somewhere, so you will remember later.
Spatterdash
Move north-east to Spatterdash and visit the village. Visit the graveyard and then the resting place of Kizil Irmak. Enter the tomb. Since you are a follower of Ebron, you can proceed.
Drink the Potion of Godliness to auto-pass the check, take the sword and leave.
Back to Aku
Take the shortcut back to Aku.
(High King’s Seat, Troll Bridge, Hall of Heroes, Farmlands and finally Aku.)
Masked Lord/Lady
Go back to the palace and turn your quest in at the High Convener. The rewards are +1 Combat, two items, 3 Court Status and the achievement Avenger.
As you have 8 Court Status now, you can seek an audience with the king.
This will get you +1 Rank and one ability point (pick +1 Charisma).
You will also get the title Masked Lord/Lady and the achievement The Masquerade.
Leave the palace.
Inventory Cleanup
Sell the Chain Mail for 180 shards, stash or drop the Uttakin Long Axe.
In general you should stash or sell everything you’ve gotten in this chapter.
Make sure to keep the Vade Mecum, Rope, Lantern and Wolf Pelt.
Chapter 18: A magical sword
The Black Diptych
Buy a Potion of Godliness in Aku. Then go east to Farmlands, Hall of Heroes and then south to Countryside.
The event you want is “2-5 Creatures of the night.” (Read below.)
If you get the other event “8-12 Laughter in the bushes”, then do not kiss her. Instead, keep running away. Nothing bad will happen. Further, the event will not respawn.
Once you roll the correct event, drive the vampires back with a holy word. This will trigger a sanctity check, which you will auto-pass using the Potion of Godliness.
Follow the vampires, but make sure to wait until morning before going to their crypt.
(Note: Otherwise you will die!)
A magic check with trigger, that you will auto-pass. Take everything from the crypt.
Inventory Cleanup
Go back to Aku, sell the Chainmail for 180 shards and the Ebony Wand for 800 shards. Stash the Selenium Ore. If you want, buy 4-5 Potions of Healing, as there is some fighting ahead.
The Sword of Water
(Note: In the current iteration of the game, I think that the Sword of Water is the optimal choice. This could eventually change. I might update this section then.)
Move north-east to Farmlands and further north to the Crags of the Long Homes. With the Black Diptych you can finally pick certain places to visit at this area.
Only one has a very good reward. So make sure to pick “The Seven Lords”.
You will auto-pass a magic-check and trigger a fight.
This fight is very easy. Look at Appendix 3 if you want.
Summary (worst result): No damage.
Pick “take the sword of water” and then “leave with the sword you have taken”.
(Note: If you try to take more than one sword, very bad things happen.)
Empowering the sword
The game will automatically take you to Lake of the Seven Needles, but you can return to Aku, to heal up and restock on Potions of Healing if you need to. There is another tough fight ahead!
In any case, make sure to start the next fight at full health. So if you don’t want to go to Aku, use Potions of Healing to heal back to 16/16.
Once you are ready, throw a stone across the pool. This will trigger a fight with a Water Drake. For advice, look up Appendix 3. Summary (worst result): 7/16 (9 damage).
After the drake is dead, swim out to one of the needles and attune the sword. For doing this, you will receive the achievement Primal Instinct.
The Sword of Water has the special property +2 Magic. Leave the lake and select “Journey on”. Go to Troll Bridge and pay the 5 shards. Go all the way south to Hall of Heroes.
The real monster
Enter the inn and talk to the innkeeper. Go with Misgee and ask Grindel why he eats people. Now fetch Misgee and throw him at Grindels feet.
You will auto-pass the charisma check and get the achievement Beowulf.
As rewards you should pick Cobalt Wand and Silver Holy Symbol.
Helping a shade
Heal to full in the Hall of Heroes and move northwest to Crags of the Long Homes. Leave the area and move further north to East Countryside. If you get the robbers, take them hostage.
Move on north-west to Central Grumes. Investigate the cave and help the shade. Move back to East Countryside and then to Crags of the Long Homes.
You will only get one option to enter this time. Take it. You will automatically pass a thievery check and you will trigger a fight against a wight.
This fight is very easy. If you want instructions, go to Appendix 3.
Summary (worst result): No damage.
Pick up everything except the bracelet. You know the purpose of the net. Return to the shade without investigating the passage. This will reward you with the achievement A Shade of Grey.
Return to Aku via East Countryside, Crags of the Long Homes and Farmlands.
Necromancer
In Aku, equip the Sword of Water and buy a Potion of Intellect at the market. However, do not drink it right away. Explore the city, visit the grand bazaar and set up in business.
Declare yourself a great wizard and you will auto-pass a magic check. If you still have the rewards from the Hall of Heroes on you, then use them. If you already sold them or stashed them, just pay the 2400 shards.
You will auto-pass the following sanctity check. The magic check will also be auto-passed once you drink the Potion of Intellect.
The rewarded items are good, but what you have equipped is better. Additionally, you will be awarded with the achievement Lazarus.
Heretic no more!
Finally, it is better to not be marked a heretic. Really it just isn’t save.
Go to the market and buy a Potion of Godliness and use it.
Now, explore the city and visit the Grand Bazaar. Set up in business and preach for Ebron.
Using the Potion of Godliness, you will auto-pass the sanctity check and be awarded a Spear of Retribution. More importantly, the Soulwatch will clear you of your comitted crimes.
Now you can walk around in Uttaku pretty savely again.
Inventory cleaning
You should keep the Rope, Lantern, Wolf Pelt, Vade Mecum and Sword of Water/White Sword on you.
Sell, stash or drop the rest of the items you have acquired in this chapter.
Chapter 19: Civil war (part 2)
Information
Now it is finally time to finish up the Sokaran civil war storyline and get to rank 6.
There were two options back in chapter 10:
If you killed Nergan Corin, follow path A. If you killed Marloes Marlock, follow path B.
Path A – Siding with Grieve Marlock
Using the Vade Mecum, teleport to Yellowport. Move over to Marlock City and enter the palace. Talk to Grieve Marlock and accept his quest.
Move all the way north via Trefoille, Road Tavern, Forest of Larun, Bronze Hills, Dragon Knights’ Castle to Western Foothills.
Investigate the cave, use the Wolf Pelt, climb the ladder, use the Lantern. You will auto-pass a scouting check. Now you have information on the caves bypassing the citadel. Go back to Sokara and enter the citadel.
Talk to the commander and accept the mission to kill Beladai.
Afterwards, make sure to tell him about the tunnels bypassing the citadel.
Now leave the citadel northbound and head to Beladai’s Camp.
Make sure, that you have the Sword of Water equipped, so your magic is 14.
Now make the assassination attempt. You will the auto-pass a thievery check and auto-pass a magic check. Since you told the commander of the citadel about the tunnels, you will automatically get away.
At the citadel you will be able to pick some rewards, pick whatever you want. The Cobalt Wand sells for the most, but you should be good on shards. Head all the way south to Marlock City.
(Note: Alternatively, you can head north to Yarimura, teleport to Yellowport using the Vade Mecum and move over to Marlock City.)
In Marlock City, go to the palace. You will gain 1000 shards and +1 Rank. Choose whichever skill you want. You will also gain the achievement The New Order.
This concludes the quest. In order to end up at the same place as path B, head to Yellowport and use the Vade Mecum to teleport to Yarimura. Now skip to the next chapter.
Path B – Siding with Nergan Corin
Using the Vade Mecum and teleport to Yarimura. Make sure to get your Officer’s Pass out of the stash and move south to Beladai’s Camp. However, do not enter the camp yet. Instead, go to the Western Foothills.
Use your Lantern and auto-pass a scouting check. This will unlock information about caves bypassing the citadel. Go back to the steppes and enter Beladai’s Camp.
Explore and visit the general. Accept the task and make sure to tell the general about the tunnels afterwards.
(Note: If you sided with the king, you should already have the quest to seek out Beladai. If you do not get the option in Beladai’s Camp, then you need to go back to Coldbleak and accept it.)
Make sure that you have the White Sword equipped. Your combat should be at 16.
Now leave the camp and enter the citadel using the Officer’s Pass.
Try to open the gates and you will auto-pass a thievery check and a combat check. Since you told the general about the caves, you get away without another roll.
As a reward you get +1 Combat and +1 Rank. It does not matter which skill you pick.
Further, you will get the achievement The North Remembers and 500 shards.
(Note: When making combat rolls, the quide will be ignoring this combat increase. This ensures, that the following chapters are doable, even if you sided with Grieve Marlock.)
Now head north to Yarimura.
Chapter 20: A round up north
In Yarimura
Visit the Temple of Nisoderu and talk to the high priestess. Accept her quest.
Pick up the Faery Mead you got all the way back in chapter 8.
(Note: If you somehow lost it, just buy some at the secret market in Aku.)
Pathfinder’s Gem
Now leave the city and move south to Gemstone Hills. You will auto-pass the magic check. Knock on the slab and hand over your Faery Mead. Head into the trau hole.
You will auto-pass a scouting check. Now select “Sing them to sleep” and you will auto-pass a charisma check, skipping a fight. Continue and pick up the Pathfinder’s Gem and 350 shards. Move on to pass another magic check and select “The Pyramid”.
This will bring you to the Pyramid of Xinoc. Continue on your way.
Another secret market
Travel between the Pyramid of Xinoc and Wastlands until you get the event “8-12 A tower in the air”. If you get “2-5 A tunnel in the snow”, do not investigate and move on.
Once you get the correct event, use the Pathfinder’s Gem to get access to the market. You will also get the achievement A Stairway to Heaven.
At the market, buy a Banner of the Shadar for 800 shards.
Bird-riders and a mirror
Before moving on, make sure that you have the White Sword equipped.
Now, move south into Horde of the Thundering Skies. There are two noteworthy events there and you want both of them at least once. Use the Strange Gully to reroll the area, since this skips a dice roll.
2 – 5: A rotting corpse – When you get this event for the first time, investigate the corpse and get the mirror. If you roll the event again, ignore it, or you might contract a disease.
8 – 12: Bird-riders – When you get this event, you will auto-pass a combat check. After that, you will auto-pass a following charisma check. This will give you some information for later.
Regal Scepter
After you have gotten both events, move south to City of Ruins. Explore the city and use the Banner of the Shadar, that you just bought. Visit the Cave of Bells and use the information you got at Icile Forest (chapter 17).
You will get the Sceptre of Kings, some treasure and 2000 shards.
The sceptre is the only important item. If your inventory is full, leave the rest. You really don’t need shards anymore.
Selling some stuff
Go back north to Horde of the Thundering Skies and Wastelands. Reroll the area until you get the market again. Sell the Sword of the Shadar (1600 shards), the Plate Armour (720 shards) and the Gold Holy Symbol (720 shards).
Now move west to Pyramid of Xinoc, River of Destiny (ignore both events) and Rimewater to Tiger Bay.
Another barque
Explore the area and rouse the sailors to action. You will auto-pass a charisma and a scouting check. As a reward you will get the achievement Siren’s Call and access to a barque.
Bird alert
Board and sail off into the waters just west. Unequip your weapon, as you want to fail the next check. (Note: Don’t worry about drowning, there are no storms ahead!)
You can only roll one special event and that is actually exactly what you are aiming for.
The event is “9-12 A black speck in the sky”.
If you pass the check or do not roll the event, return to Tiger Bay and try again. This might take some time but eventually you will fail the check.
(Note: The chance to get the event is only 28%. The chance to pass is 58%, if you sided with Corin or 42%, if you sided with Marlock.)
Once you fail the check, immediately equip your White Sword. A fight against two Young Rukhs will start. If you want some information about the fight, check Appendix 3.
Summary (worst outcome): 6/18 (12 damage taken).
You will be rewarded with 100 shards, a Silver Flute and the achievement Air Miles.
Back to Yarimura
Don’t use the Rope or you will need to replace it. Just climb down and you will be teleported to Southern Plains. Move east to Yarimura via Beladai’s Camp and Gemstone Hills.
Housekeeping
Return the quest at the temple of Nisoderu. As reward, you will get 150 shards, +1 Sanctity and the achievement Divine Reflections.
Stash the following items
- Pathfinder’s Gem
- Banner of the Shadar
- Sceptre of Kings
Use the Vade Mecum to teleport to Aku and sell the Silver Flute for 360 shards.
(Note: If you are running out of space, you can buy extra tabs if you want. You really don’t need to save your shards for anything else.)
Reward for the Bird-riders
Move north-west to the city of Kurnir. Make sure not to steal, if you get the option. Also don’t steal on the return trip later. Explore the city and stroll through the streets. There are three events, but two don’t really do anything.
(Note: You have to pay a small fine on the holy day. It doesn’t really matter.)
Eventually, you will get “8-12 A scholar”. Accept his quest and immediately turn it in. Choose +1 Magic. Your base magic is now 8. You will also get the achievement Fly, You Fools.
(Note: Select thievery, if you were lucky at Castle Orlock.)
Return to Aku on the same way you came.
Chapter 21: Dragonslayer
Preparation
Drop anything aside from your adventuring gear (Rope, Lantern, Wolf Pelt), the Vade Mecum and the Sword of Water. Have the White Sword and the rest of your gear equipped.
Now, buy at least one Potions of Healing. You will need them for a fight later. If you feel unsure about fighting the dragon, just take a couple more.
Marmorek
Teleport to Ringhorn. Explore and sail all the way upriver to Marmorek.
Buy a Parchment, a Pickaxe and a Leather Armor at the market.
(Note: You will need all three items shortly.)
Now move east to (fake) Tower of Despair and southeast to Endless Plains and finally Wheatfields. Here you should buy a house (100 shards) and deposit all of your shards.
Killing a Bull
Go to Open Country. (Note: You probably remember the area from chapter 1.)
Reroll the area until you get the bull event. This time, fight it.
The bull is very easy. If you need info, look at Appendix 3.
Summary (worst outcome): No damage.
Your reward for killing it is +1 Combat.
(Note: And you don’t even have to pay the farmer anything, since you stashed your shards.)
Go back to Wheatfields, heal, if you took damage and withdraw your shards.
Drawing a map
Move north-west via Endless Plains, (fake) Tower of Despair and north to Spine of Harkun. Ignore the plaque or look at it. In any case, a scouting check will trigger, if you have a Parchment with you. You will auto-pass it and now you have the first half of the map.
Now open your inventory and equip the Leather Armor instead of your Vulcanium Mail.
Move east to the other area called Spine of Harkun. There are two noteworthy events:
2-5: Hydra – If you roll this, select “run away”. This will destroy the armor you are wearing, but you won’t have to fight.
9-12: Mannekyn People – They tell you some information, that you don’t really need.
After rolling one event in the area, uneventful journey counts as well, you get the option to finish the map. The scouting check will auto-pass and you can take the Map of the Mountains.
Haunted Hills
Equip your Vulcanium Mail and move to Haunted Hills. To reroll the area use Waterfall just south of it.
Haunted Hills is probably the most dangerous area in the entire game. There are 4 noteworthy events, that are all dangerous in their own way.
- 2 – 4 A sulphrous cave: This is the dragon fight you are looking for. As it is somewhat dangerous, you might want to read about it in Appendix 3.Summary (worst outcome): 1/18 + one Potion of Healing used (22 damage taken)
After the fight, take the quest item. - 5 – 6 A prophet of doom: Lose all blessings and resurrections. This doesn’t matter to you.
(Note: I find it pretty funny, that the authors of the gamebooks put these events into the same area. There is a good chance, that you will encounter the dragon without a resurrection deal!) - 8 – 9 Outlaws: This is an event you also want. Pass a thievery check and a charisma check (both auto-passable now). Accept the offer to get 300 shards and +1 Thievery.
(Note: If you fail both checks, which are fairly high, they will take everything you are carrying. Thus, this event is dangerous, if you come here with low thievery/charisma.) - 10 – 12 A hungry ghost: This ghost requires a sanctity check. This is auto-passable.
(Note: The ghost has a damage potential of 18 (3d6). Failing this check can easily kill you.)
Make sure, that you have killed the dragon and gotten the outlaws at least once, before moving on.
Paladin of Ravayne
From the Haunted Hills move south-west to the (fake) Tower of Despair and then to Marmorek. Explore, to sail downriver until you reach Castle Ravayne. Enter the castle and enter the Inner Keep (auto-pass).
Talk to the baroness, in pursuit of a quest, slaying a monster, accept the mission. Do the same dialog again, to get the following rewards:
- +1 Rank
- The title Paladin of Ravayne
- The achievement Dragon’s Lair
- +1 Ability, pick +1 Magic
(Note: Unless you were very lucky at Castle Orlock, in that case pick +1 Thievery.)
Reward for the map
Talk to the Baroness again. Accept the quest to make a map. Then talk to her yet another time to turn the quest in and get your reward. It is 500 shards, +1 Scouting and the achievement Brokeback Mountain.
(Note: Your base scouting skill is now at maximum!)
Getting a Boon
Leave the inner keep. You have now access to your stash. Unequip your Vulcanium Mail and stash it. Go back to the inner keep, talk to the baroness and ask for a boon.
There are three outcomes:
1 – 3 Training – This is what you want. Pick +1 Combat.
4 – 5 Armour – This will take your current armor and give you a Splint Armour instead. (Useless.)
6 A ship – This will give you (another) barque in Ringhorn. (Pretty useless.)
Keep rerolling until you get the skill bonus. After you are done, sell the Splint Armour for 360 shards if you got it, take your Vulcanium Mail out of your stash and equip it.
Now leave the castle and sail downriver to Ringhorn.
Chapter 22: Pirates
At Ringhorn
Make sure to get a blessing against storms from the temple of Almir and Valmir.
If you got another barque from the baroness, then sell it. Take your barque with excellent crew and sail into the Coastal Waters south-west of Ringhorn.
(Note: You have been there before.)
There are four noteworthy events:
2-4 Storm – Use your blessing, return to Ringhorn, buy another blessing and try again.
5-6 Pirates – This is one of the events you want. If you get it, read below.
8-9 Ship of Wizards – Sail on.
10-12 Mermaids – This is the other event you want. If you get it, read below.
The pirate event
Choose to fight them. The three possible outcomes are:
10 – 13 Forced to give in (0.46%)
14 – 17 The pirates withdraw (15.74%)
18+ Victory (83.80%)
Defeat
It is very unlikely, but if you do get beaten, then you will lose up to 6 stamina (1d6). A charisma check will trigger, but you will auto-pass it. You will then get 320 shards + some random stuff and be taken to Yarimura.
However, you will not lose any of your gear or shards. Thus, heal at the tavern, use the Vade Mecum to get back to Ringhorn, buy a new ship, upgrade the crew and try again.
(Note: This is a net gain in shards even!)
Draw
Return to Ringhorn and try again.
Victory
Once you win, you will get +1 Rank and the achievement No Guts, No Glory. Further, pick whichever skill you want. You will also get 800 shards and a Pirate Captain’s Head, but that is not important at this point in the playthrough.
You only need this event once to rank up. But, since you are rank 8 now, the minimum roll is 14. Thus, there is no chance of losing anymore.
The mermaid event
Once you get the mermaids, speak to them and try to catch her in a net. As you are rank 7 (or 8), this cannot fail. Take the Coral-red Tresses, the other treasure does not matter and sail back to Ringhorn. You only need the item once, so just sail on, if you get the event again before getting pirates.
Golden Katana
In Ringhorn use the Vade Mecum to reach Aku. There, take the passage to Metriciens.
Move north to East Road and via Haggart’s Corner reach Magworts Fens.
A scouting check will trigger, but it will be auto-passed. You don’t need the potion, but if you want to take it, do so. After going further into the fen, pick up the Golden Katana.
Now move back south and reach Metriciens. Take the passage to Ringhorn.
Castle Ravayne
Explore the city and sail upriver until you reach Castle Ravayne. Enter the castle and enter the inner keep.
Seek out the wizard and hand him Coral-red Tresses. The reward is +1 Magic.
Seek out the wizard again and hand him Golden Katana. As reward pick +1 Combat. You will also get the achievement Am I A Joke To You.
(Note: This finishes Castle Ravayne!)
Sail back downriver to Ringhorn.
Chapter 23: One last round
The Ruby Citadel
Use the Vade Mecum to teleport to Yarimura.
Make sure, that you are at full health 20/20 and head north to Village of Vodhya, then west to Northern Mountains and west to Ruby Citadel.
Investigate the glow and enter the citadel. You will bypass the fight since your base sanctity is greater than 8. Further, you will auto-pass the magic check.
Choose to play the right note using your flute and auto-pass the charisma check.
The next roll is the reason why you cannot do this event earlier. If you get unlucky, then you could take up to 18 (3d6) damage. Before rank 8, this could mean instant death! Now the outcome doesn’t matter much. Your reward is +1 Charisma and the achievement Dissonant Harmonies.
Go back to Yarimura to heal back up.
Preparations
Make sure that you have the Sword of Water with you and that you have the quest
Remnants of the Past.
(Note: If you do not have the quest, teleport to Yellowport, take the Verdigris Key and head to Trefoille. Take the third door to reach the Isle of Mystery. Visit the chief mage and pick up the quest. Now, and this is important, take the teleport off the island or you might end up as a slave, if a certain ship picks you up.)
Going west
Move north to Village of Vodhya and head all the way west via Northern Mountains, Ruby Citadel, Wastelands and Pyramid of Xinoc.
Move south to reach Frozen Wastes.
There are two noteworthy events:
2 – 5: Wild horses – You will trigger a sanctity check and auto-pass it. Leave the horses alone.
8-12: Running Footsteps – This is the event you want. Follow the nomad, but make sure to help the shamans. You will gain +1 Sanctity and a Witch’s Hand.
Keep or drop the hand, it doesn’t matter.
Remnants of the Past
Once you are done, equip your Sword of Water. Now move south-west to River of Destiny. Ignore both events there.
(Note: You shouldn’t step into Frozen Wastes anymore, as it could trigger a fight with wolves. They aren’t hard but there is no point fighting them. Especially since you would probably have to swap around your weapons between White Sword and Sword of Water. That would just be annoying.)
Now move south to Grasslands. Two noteworthy events can play out:
2 – 5 A beguiling flute – You will auto-pass a magic check and you can pick up a decent reward. You already have it though, so you can just ignore it.
8 – 12 A ring of stones – This is what you want. Copy the runes. You will auto-pass the checks.
Reroll the area via Rimewater until you get it.
Turn in
Once you got it, go back east via City of Ruins, Strange Gully, Southern Plains, Beladai’s Camp and Gemstone Hills to Yarimura. Use the Vade Mecum to teleport to Yellowport.
Take the Verdigris Key out of your stash and go to Trefoille. Take the third door to teleport to the Isle of Mystery. Go up the mountain and enter the city. Turn in the quest at the chief mage and you will get +1 Magic and the achievement See No Evil.
Now leave the city and make sure to take the teleport for 100 shards. You could end up as a slave, if a certain ship picks you up!
Preparation
Now, use the Vade Mecum to get to Aku.
Make sure that you have the Sword of Water equipped. Your magic skill should be 18.
Head east to Farmlands (it doesn’t matter if your charisma gets reduced) and south-east to Mixen Sumps. There are two noteworthy events:
2 – 5: A sunken idol – Ignore the idol.
(Note: The reward is not worth it and there is a small chance to get poisoned.)
8 – 12: An ugly guide – This is what you want. Refusing her offer will trigger a very hard magic check and subsequently a fight. As you are wearing the Sword of Water, you will auto-pass. Now, before clicking “FIGHT”, make sure to swap your Sword of Water back to White Sword.
The fight is not difficult, but if you want some information check Appendix 3.
Summary (worst outcome): 17/20 (3 damage taken)
As reward you will get +1 Sanctity.
(Note: You have now maxed out your sanctity!)
Your own castle
Return to Aku and teleport to Ringhorn. Make sure, that you still have the Pickaxe with you.
(Note: If not, sail all the way upriver to Marmorek and get a new one.)
Then head west and go to Old Castle.
An event will play out and you will get Recall Spells. You will also get the achievement Castle Doctrine. You can stash the Recall Spells at your castle.
(Note: Similar to the Rod of Teleportation these are a little like cheating.)
Optional: Explore your castle and upgrade its defenses to 5. This requires 1600 shards, a pickaxe and a combat check (auto-pass).
Now go to the Blacksmith and buy a Leather Armour.
Afterwards, summon Targdaz and have him enchant it.
If the item vanishes, buy another one. If it works, you will get the achievement Arms Race.
Discard the Ring Mail or sell it at the next city.
Go back east to Ringhorn via Coastal Road.
Chapter 24: The High King
Preparation
Teleport to Aku and a buy a Potion of Comeliness. Also, pick up the Sceptre of Kings from your stash. Check, that you have the Sword of Water with you.
Further, it is imperative that you are sure, that you did get the information from the High King’s Seat a couple of chapters ago. I hope that you made a note. Otherwise, travel there again to make sure.
(Farmlands, Hall of Heroes, Singing Forest, Old Harkuna (east), High King’s Seat.)
Storm Demon
Now, teleport to Yarimura using the Vade Mecum.
Head north to the Village of Vodhya and west via Northern Mountains to Ruby Citadel.
From there, head south to Northern Plains. Reroll the area until you get “2-5 A voice in the wind.”
Once you get the correct event, follow the voices and you will take 1 damage. You will the auto-pass two sanctity checks and be rewarded with +1 Charisma and some Selenium Ore.
(Note: You have tons of Selenium. Take it or leave it.)
Going west
Head north to Ruby Citadel and west via Wastelands, Pyramid of Xinoc, River of Destiny to reach Rimewater in the south-west. From there go south into the Ice Mine.
Pay 10 shards to go on a tour. Go down into the dark tunnel and you will auto-pass a scouting check. You will meet Blue-Cap and pay him 200 shards to smash the ice.
(Note: You can also kill him to open the path or bring salts, but paying 200 shards is the easiest option.)
Now you will meet the Ice Queen. You cannot beat her in a fight, so you need the song to proceed.
(Note: If you try to fight her, you will automatically lose a rank and thus, fail the ironman achievement.)
Use the Potion of Comeliness to pass the check and you will wake the High King.
Your reward is +1 Rank, +1 Ability (pick +1 Thievery) and the achievement Lullaby Dirge. You will get moved to Rimewater.
Heading to High King’s Seat
Equip the Sword of Water and head to the Grasslands. Go south into the mountains and further south to Marmorek. Explore the city and pay 1 shard to cross. Select “continue in Old Harkuna” and reach the High King’s Seat.
At High King’s Seat
Visit the area and an event will play out. Go to the palace and you will automatically accept a quest. Go to the palace again and you will hand over the Sceptre of Kings.
The rewards are +1 Rank, a skill (pick whichever you like) and the achievement Rise a Knight.
Further, you will get the achievement for getting rank 10 (Power Overwhelming) and the achievement for getting rank 10 on ironman (Iron Adventurer).
(Note: If you have some Selenium Ore with you, you can hand it in at the palace for 800 shards. That is the best use for it now.)
Heading back
Move east to River Reese and pay 1 shard to cross. Explore Marmorek and sail all the way downriver to Ringhorn.
Chapter 25: Adventures at sea
Preparation
In Ringhorn, sell your trusty barque and buy a galleon (850 shards). Upgrade your crew all the way to excellent (140 shards).
Important events at sea
Take note, that the game can randomly toss you around the map, when running into storms. However, the chance for a split mast is very low (0.46%). There is no chance to die from the event itself, as your scouting is very high. However, you could run into a couple of events that might actually kill or harm your progress in an upcomming DLC. I will list the “dangerous” events here, going by area from west to north-east. Just quickly look them up if you encounter a special event on the way to an achievement.
1. Pirates in general
Never parley with pirates! They might steal you stuff. Either outrun them or beat them up. Nothing bad can happen from those two choices.
2. Uttaku
Storms and pirates only. Nothing can kill or even harm you here. (As far as I know.)
3. Golnir
A ship of wizards – This is not dangerous, as you will auto-beat them in a fight. However, in a DLC you might meet them again. Thus, I do not recommend fighting. Sail on.
The Ship of Souls – This event will cost you your ship. Also, there is a chance to die. Just sail on, if you encounter it in the eastern part of Golnir.
4. Sokara
Sea Battle – In western Sokara you can pick a side in a sea battle. This event can only be done once. If you get it, you should help the pirates, as this gives you a unique item, that might be used in a DLC (Silver Medallion).
A merchant ship – Between Marlock City and Yellowport, you can meet a merchant ship. This event can only be done once. If you get it, you should assist the Merchants. This triggers something, that could become important in a DLC.
A shipwreck – This event happens on the northern coast of Sokara. It is not dangerous, but I am including it, since you might trigger an (easy) fight. If you want to avoid it, don’t investigate the shipwreck.
5. Isle of Druids
An unusual catch – This event is unique and can kill you, if you pick the wrong options. Spare the sea centaur and you will get a Conch of Safety. That item is also unique.
6. The Great Steppes
A ship-wrecked mariner – This event is in the same area as the Avar Hordeth event. Pick him up, or you will miss out on a long quest, that might become important in a DLC.
A fire in the distance – This event can trigger a fight if you follow the light. Just sail on.
The relevant events
Now these are the events that you actually want to trigger to get your remaining achievements. Assuming you start from Ringhorn and you want to get all of them in a single run.
Boomstick
From Ringhorn sail east to the coastal waters that are located south-east of Scorpion Bight in Sokara. Reroll this area until you get “8-9 A ship of bizarre design”. Enter the craft and take the Magic Stick with you. This will unlock the achievement Indistinguishable From Magic.
Avar Hordeth
From there, sail north until the map shifts to the Great Steppes. On the very first area you want the event “11-12 A merchant ship”. This is actually Avar Hordeth’s flagship. Somehow he knows that you robbed him and wants to fight you.
Getting this event is rather rare (8.3%). Reroll the area using the Coastal Waters just west of it. Nothing bad can happen to you.
(Note: The rarity is the reason, why not many people have this achievement. Rolling the area 25 times, there still is a chance of 11% that you will not get the event. However, rolling the area 50 times, this goes down to 1.3%. It should not take more than 10 minutes to get it.)
Once you get it, sail to meet it. This will trigger a fight. For information, look at Appendix 3.
There really is no way to die here unless you do not kill Avar first.
Summary (worst outcome): 2/22 (20 damage taken).
After the fight you will roll three dice, but your rank (+10) and your excellent crew (+3), will get added. Thus, you will always score 16+ and automatically win.
(Note: I wonder if Avar was actually a bad guy. There is only a throw-away line saying that some of his dealing are a little shady. It seems like you are kind of the “evil guy” in this sub-plot.)
Anyway, you can swap ships, but it doesnt matter as you are also sailing a galleon. You will also gain 150 shards and a Mariner’s Ruttier. This item is useless right now, but maybe it will be useful in a DLC. Finally, you will get the achievement What’s Yours Is Mine.
Bazalek Island
From where you beat Avar, sail west twice. If you get “10-12 A fire in the distance”, just ignore it. You will then auto-pass a scouting check and you can explore the island.
Do so and press on inland.
(Note: The cave is completely useless.)
Swim through the river and you will auto-pass two ability checks.
(Note: You can also fight the knight, but it only gives you shards.)
Pick “Glass” or the golem will kill you. This will give you a number of shards (between 1000 and 6000) and also the achievement High Risk, High Reward.
(Note: If you collect unique items/weapons, then you should return to the island and reach the golem again. Pick “Scarlet” and you will get a Mythic Sword. This is probably the 3rd best weapon in the game.)
This finishes the chapter unless you want to read about some statistics about a third visit to Bazalek.
Optional: A third visit to Bazalek
It is obvious, that you should not visit the golem at Bazalek a third time, as your survival is completely up to chance. The event is interesting though, as it is the only time, that the game actually throws 4 dice. (Maybe there are other instances, that I am unaware of.)
So if you reach the golem a third time, you have to roll 4 dice and score 4 or 5.
The chance for 4 on 4d6 is 1 in 1296 or around 0.077%.
The chance for 5 on 4d6 is 4 in 1296 or around 0.309%.
Thus, your chance of death is 1291 in 1296 or around 99.614%.
If you have a luck blessing, you can roll twice and the chance of death is around 99.23%.
If you are an Initiate of the Three Fortunes, you only have to roll 3 dice and score 3-5.
The chance for 3 on 3d6 is 1 in 216 or around 0.46%.
The chance for 4 on 3d6 is 3 in 216 or around 1.39%.
The chance for 5 on 3d6 is 6 in 216 or around 2.78%.
Thus, your chance of death is 206 in 216 or around 95.37%.
If you have a luck blessing, you can roll twice and the chance of death is around 90.96%.
Or in other words, there is a roughtly 9% chance of survival.
This means, that being an Initiate of the Three Fortunes makes survival about 12 times more likely.
In the gamebooks, you got 1000-6000 shards again. I’ve never actually tried in the game. With quicksave and quickload it shouldn’t take too long. I wonder if anyone tried it yet.
Chapter 26: Leftovers
From Bazalek, sail north (nothing bad can happen, except a storm) and reach Yarimura.
Stash everything you want to keep and sell/drop the rest.
Investing
This achievement is very easy to get, once you have access to the Vade Mecum.
It does require a tiny bit of legwork.
Use the Vade Mecum to teleport to Yellowport. Explore the city by day and visit the harbour area. You will gain some information.
Use the Vade Mecum to teleport to Aku. Visit the trading guild and you will get some information. Return to the town centre.
Use the Vade Mecum to teleport to Ringhorn and visit the trading guild.
Make an investment of 2300 shards and check on it.
The information you just got gives you a +5 on the next roll. Thus, the worst result is a 7, which results in a 10% loss of the investment. Still as the investment is above 2000 shards, you will get the achievement The Wolf of Shard Street.
Take the investment out or leave it. It does not matter.
Preparations
Use the Vade Mecum and teleport to Yarimura.
(Note: Remember when I said that this guide will get you all achievements safely on ironman without using resurrection deals? Well turns out, it can not be done (without cheating). In the gamebooks, the check in the pyramid was a rank check. In the game it is purely based on luck. You cannot use teleportation items either, so resurrection deals are the only way to get it.)
Check if you have a resurrection deal active. If not (very likely) then buy one at the temple of Nisoderu for 800 shards.
(Note: If you care about your shards, then you can also move south-west to Sky Mountain via Gemstone Hills, Beladai’s Camp and Southern Plains. There it is only 150 shards. But if you get unlucky serveral times, this will require some extra walking back and forth.)
Unequip and stash everything, except the White Sword. If you have to buy a new tab, do so.
Afterwards, deposit all of your shards.
Reaching the pyramid
Now move west to the Pyramid of Xinoc via Village of Vodhya, Northern Mountains, Ruby Citadel and Wastelands (1 damage).
Approach the gates and walk past the idols. You will auto-pass the combat check. Go through the archway and you will trigger a magic check. As you are not wearing any gear, this is not auto-passable (92% success). However, failing does not matter. You will simply get a curse, that won’t impede you at all.
Now all your items and equipment will be taken from you. However, since you didn’t have anything on you anyway and the White Sword cannot be taken from you, this does not matter.
Eventually, you will get to the dreaded luck roll. 42% chance you die, 58% chance you live.
If you get lucky, then pass over the next paragraph.
Unlucky
Well, you die. Use the resurrection deal to respawn at Yarimura (or Sky Mountain).
(Note: A save route from Sky Mountain to Yarimura is via Southern Plains, Beladai’s Camp and Gemstone Hills.)
Now take 800 shards out of your stash and get a new resurrection deal.
(Note: Or 150 shards and get a new one at Sky Mountain.)
Move back to the Pyramid of Xinoc via Village of Vodhya, Northern Mountains, Ruby Citadel and Wastelands (1 damage). The events will play out exactly the same. Except, if you are already cursed, then you cannot get the curse twice.
Now, you might get unlucky again. Repeat the process.
(Note: I totally understand, if you feel like cheating now, but it really won’t take more than 5-10 tries. The chance for getting unlucky 5 times in a row is 1.3%. The chance for getting unlucky 10 times in a row is 0.016%. You have more than enough shards and a run takes about two minutes.)
Lucky
Finally you get lucky. You take up to 6 (1d6) damage from the beetle and move to the inner chamber. Here you can take the Obsidian Key.
Take the same route back to Yarimura.
(Note: The damage potential of this whole adventure is 8 damage. One for every time you pass Wastelands and 6 from the beetle. So at 22 stamina you don’t need to heal.)
Preparations again
Take everything out of your stash and equip everything you need to equip. Also withdraw your shards. If you got cursed, explore the city and go to the Tower of Bakhan. Here you can get rid of the curse for free.
Now, also take the Banner of the Shadar out of your stash and check that you have the Obsidian Key with you. Make sure to heal before leaving the city.
The Ruined City
Take the southern route via Gemstone Hills, Beladia’s Camp and Southern Plains to the City of Ruins. Explore the city and use the banner.
Visit the Crypt of Kings and you will auto-pass a magic check. This will trigger a fight. As the snake demon only has 10 stamina left, I will just post the fight details here.
-Turn 1: Tactical Assessment
-Turn 2: Stunning Blow + Attack
You will get a Scarab Amulet. Now, use the Obsidian Key and you will get a bunch of items. Take whatever you want. The only thing that matters is the Pyramid Key. So make sure to take that.
Back to the pyramid
Leave the city and move north via Horde of the Thundering Skies and Wastelands to reach the Pyramid of Xinoc. Go past the idols and use the Pyramid Key. This unlocks the achievement Tomb Raider.
More preparations
Go back to Yarimura and use the Vade Mecum to go to Aku. Sell or stash the items you picked up. Once you are ready, take the harbour passage to Metriciens.
Take the Green Medallion out of your stash.
(Note: This is the first item you ever stashed, all the way back in chapter 2!)
Heading north
Now, go all the way north to Forsaken Forest via East Road, Haggart’s Corner, Whistling Heath (north, north, north), Tekshin Tavern, Goldfall and Rainbow River.
The (real) Tower of Despair
At the Forsaken Forest, do not enter the leper hamlet. Instead press on and take the path into the woods. At the intersection go right and then west. Unlock the tower using your thievery skill.
Approach the wolves and use the green medallion to skip the fight.
Take the Enchanted Sword and the Regal Helmet.
(Note: This is the only good helmet in the game!)
Now select “Gather some treasure” but don’t actually take any shards. This will lead to another roll that can not be influenced. There are two outcomes:
2 – 10 Lucky (91.7%) and 11-12 Unlucky (8.3%)
Whichever outcome you get, you will get +1 Thievery and the achievement Bat Market.
However, if you get “Unlucky” you lose 1d6 stamina permanently.
Now you have gotten all achievements in the game! And in a single run on ironman! Grats!
Feel free to pass to the next chapter or just close the guide.
Optional: Should you risk doing Bat Market on your ironman character?
Well, if you are cheating the outcome of rolls, then definately yes.
Getting that +1 Thievery is nice.
However, if you play without cheats, then I would not risk it. Sure, the chance to lose 4-6 stamina permanently is very low. Especially if you get a luck blessing at Goldfall before entering the forest. However, it can still happen!
As there will be a lot of chances in upcomming DLCs to get +1 Thievery, I value the stamina much higher. Thus, I would personally argue, that you should skip the shards, the achievement and the +1 Thievery.
Obviously this is up to you though, that’s why I left this achievement till the very end.
This is also the reason why the guide never did the “Conjuror of Amusements”. Losing 1 stamina permanently for 1 magic is simply not worth it.
Chapter 27: Maximum stats
Well, you have pretty much beaten the game and there is not much more for you to do.
If you want to prepare your character for the DLCs, then you could try and maximize your stats.
If you have been following the guide, then your base stats are:
Charisma – 11
Combat – 11 or 12 (depending on your choice in the civil war)
Magic – 11
Sanctity – 12
Scouting – 12
Thievery – 10 to 12 (depending on Castle Orlock and/or Bat Market)
Stamina: 16-22 (depending on Bat Market)
There are ways to get some additional stats out of the slave areas in Uttaku. However, while those adventures are pretty cool, they are also very risky. This is due to the fact, that all gear is taken from you when you become a slave.
As such there really only is the unicorn event (+1 charisma and +1 magic).
However, doing this event is rather annoying. Thus, I didn’t include it in the guide.
If you do want to do it, you should first head over to Aku.
Preparations
Keep your equipment but stash everything you are carrying in your bags.
Now fill your inventory with 12 Potions of Healing.
Move up the western path via West Road, Kunrir, West Countryside, House of the Unbidden, to finally reach Icicle Forest.
If you are unlucky (event “2-5”) you have to fight three snow wolves here.
Now head east to Northern Grumes.
Northern Grumes
This area has three noteworthy events:
- 2-4 A storm in the mountains. (This does nothing, as you will auto-pass the scouting check.)
- 8-11 An ambush. (This triggers a fight against a bunch of triplings.)
- 12 A rare sight. (This is the unicorn event that you want.)
Keep rerolling the area until you get the unicorn. Annoyingly, this means you have to fight the wolves and the triplings repeatedly.
Eventually you will get the unicorn event. Try to befriend it.
You have to choose the sanctity check. Both the magic and the charisma check won’t reward you with anything. This check should be an auto-pass, since your sanctity (with gear) should be at 16.
The reward will be +1 charisma and +1 magic.
Optional: How long will this take?
Really it is all up to luck. If you enter Northern Grumes 100 times, then there is a chance of 94%, that you will get the unicorn event.
However, this also means you will have to fight the wolves around 30 times and the triplings around 40 times. So yea … between 0.5-3 hours maybe?
Optional: No other way?
Sadly, the only other area that allows access to Northern Grumes are the Standing Stones in the east. This area can trigger a fight against 4 tougher wolves, so Icicle Forest is the better option.
Optional: Jade defender
If you investigate the waterfall, you can find a mythical sword. However, the White Sword is much better, so there is no real reason to get it.
Chapter 28: The end
If you want to play ironman again, I recommend to give your character a fitting end.
(Note: Of course you can simply delete the save, but that is pretty unceremonial.)
Return to the Northern Mountains west of Yarimura and enter the Bronze Gate. You will be greeted by an Angel of Death. Now, you can join Nagils banquet.
(Note: This is essentially a hero’s end in Norse mythology. Sitting next to Odin in Valhalla.)
Have fun with your new character!
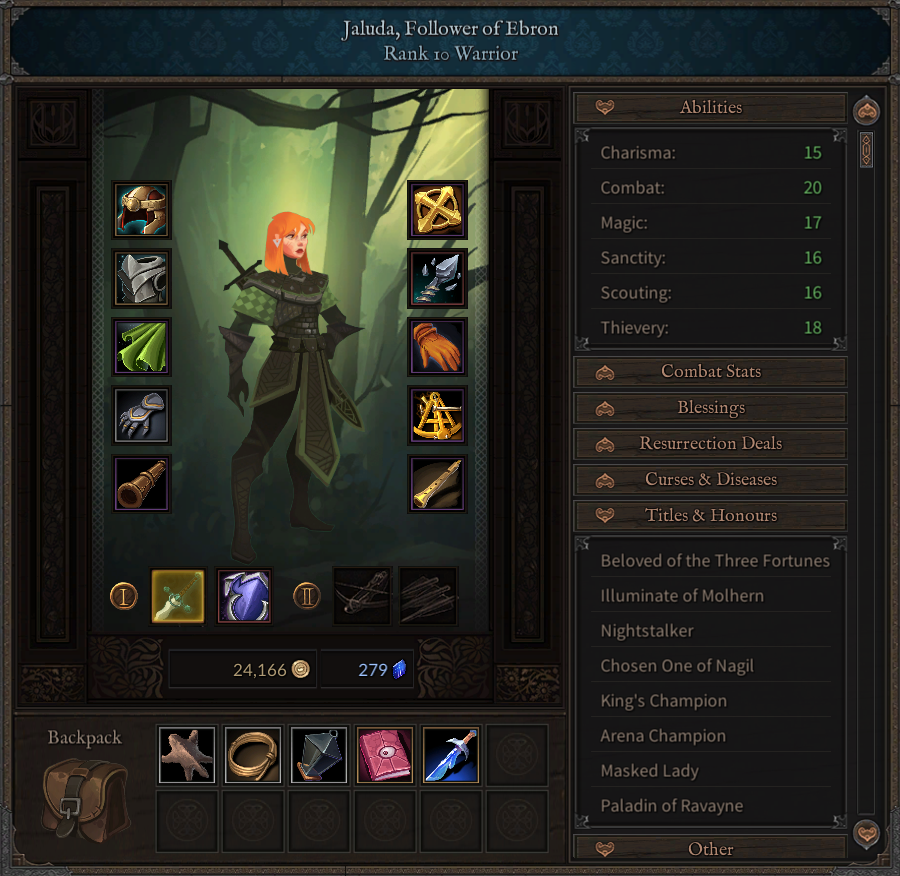
Appendix 1: Achievements by chapter
Chapter 1
Higher Calling – Become an initiate at any temple.
Make it Rain – Carry favour with the Three Fortunes and get richly rewarded.
Chapter 2
Twinkle, Twinkle, Key of Stars – Complete “A ghastly treasure”.
Chapter 3
Fortune Favours the Bold – Have 5000 shards.
Top Gear – Equip best in slot armour and ability items.
Chapter 4
Home is Where you Hang Your Armor – Acquire a house.
Secrets of the Deep – Solve a riddle from a mysterious piper.
Not Today – Receive the “Magic Shield” from water spirits.
Chapter 5
Pig-sticker – Complete “A Sacred Tusk”.
Cross-polination – Complete “In Service of the Druids”.
Chapter 6
Knightfall – Complete “The Black Dragon Knight”.
This One’s a Tribute – Complete “The Greatest Story”.
Transmutation – Complete “The Stolen Chest”.
Raider of the Lost Knowledge – Complete “Book of the Seven Sages”.
Chapter 7
Neverending Story – Complete “The Blockbuster”.
The Masked Singer – Complete “The Masked Spy”.
Chapter 8
Nightstalker – Complete “Masks in the Dark”.
No Rest for the Wicked – Complete “An Eye for an Eye”.
Have Weapon – Will Travel – Complete 10 quests.
Chapter 9
Cluedo – Complete “Intrigue and Treachery”.
Eucharist – Complete “The Lord of Thunder”.
Blasphemous Burglary – Complete “The Golden Chainmail”.
Chapter 10
Northern Hospitality – Complete “Seek Me Out”.
The Right Hand of Death – Get the White Sword.
Chapter 11
You can only get one of these:
Usurper – Complete “King Slayer” or Assassin – Complete “Assassin in Disguise”
Chaper 12
Welcome To My Palace – Complete “The Spider Palace”.
One of A Kind – Free the Mannekyn and explore Sky Mountain.
Death Is Just a Flesh Wound – Get a resurrection deal.
A Helping Hand – Complete “The Curse of Bakhan”.
Speak No Evil – Complete “A Thief’s Web”.
Beam Me Up – Reach the Underworld.
Chapter 13
Arkane Kombat – Get the title “Arena Champion”.
Chapter 14
Bookworm – Read the explorer’s book at Castle Orlock.
Chapter 15
Retiarius – Complete “Sunken City of Ziusudra”.
Exterminator – Complete “Rat Problems”.
A Ghoulish Task – Complete “A Ghoulish Night”.
Knight in Beastly Armor – Complete “Damsal in Distress”.
Chapter 16
Silver-tongued – Complete “The Silver Nightingale”.
Bring Me That Horizon – Buy a ship.
Heart of Darkness – Complete “Heart of Darkness”.
Chapter 17
Aoristic Park – Complete “Time Traveler”.
Avenger – Complete “The Holy Avenger”.
The Masquerade – Get the title Masked Lord/Lady.
Chapter 18
Primal Instinct – Attune one of the seven swords.
Beowulf – Complete “The Hall of Heroes”.
A Shade of Grey – Complete “The Lost Soul”.
Lazarus – Revive someone.
Chapter 19
Depending on your choice in chaper 10:
The New Order – Complete “Defend the Citadel” or
The North Remembers – Complete “The North Remembers”.
Chapter 20
Stairway to Heaven – Enter the market at the Golden Tower.
Siren’s Call – Repair the Mermaid’s Desire.
Air Miles – Defeat the young Rukhs.
Divine Reflections – Complete “The Mirror of the Sun”.
Fly You Fools – Complete “The Wingless Hawk”.
Chapter 21
Dragon’s Lair – Complete “Dragon Slayer”.
Brokeback Mountain – Complete “The Broken Backbone”.
Chapter 22
No Guts, No Glory – Defeat a pirate ship.
Am I a Joke to You – Complete “Wizardly Errands”.
Chapter 23
Dissonant Harmonies – Rescue Targdaz from the Ruby Citadel.
See No Evil – Complete “Remnants of the Past”
Castle Doctrine – Acquire your very own castle.
Arms Race – Enchant an item.
Chapter 24
Lullaby Dirge – Awaken the High King.
Rise a Knight – Complete “The Sceptre of Kings”.
Power Overwhelming – Reach Rank 10.
Iron Adventurer – Reach Rank 10 on Ironman.
Chapter 25
Indistinguishable From Magic – Acquire a gun.
What’s Yours Is Mine – Rob Avar Hordeth and kill him.
High Risk, High Reward – Raid the fortress on Bazalek Isle.
Chapter 26
Tomb Raider – Loot Xinoc’s tomb.
Bat Market – Loot the Tower of Despair.
The Wolf of Shard Street – Have 2000 shards invested.
Appendix 2: Encounters
(Note: In my testing only very few enemies ever blocked attacks in a previous versions of the game. In 1.0.9 no enemy ever blocked. Maybe they all have a very low chance to block and I just never see it?)
Chapter 6: Black Dragon Knight
The Black Dragon Knight is a very slow opponent with a reach of 1 tile. It can not move and attack in the same turn. As such, it can never attack you, if you are not standing next to it.
Turn 1: Tactical Assessment, move towards the knight.
=> The knight will walk towards you.
Turn 2: Stunning Blow (3 damage), Attack (at least 5 damage)
=> The knight is stunned.
Turn 3: Attack (at least 5 damage), Attack (at least 5 damage)
=> The knight is dead.
Chapter 6: Two Scorpion Men
Both Scorpion Men have a reach of 2. At most, they can move one tile and attack in the same turn. As such, they can never attack you, if you are at least 4 tiles away.
Sadly, you can not avoid damage completely in this fight. Even at extremely high defence, a Scorpion Man could always roll a critical hit (12 on 2d6). While this critical hit could still be blocked (20% of the time), in a worst case scenario it results in 3 damage.
Turn 1: Tactical Assessment, move towards the closest target but stay 4 tiles away.
Worst case outcome (very rare, see screenshot for reference):
=> Both Scorpion Men will walk towards you.
=> They are not next to each other and between them is a tile that is not passable.
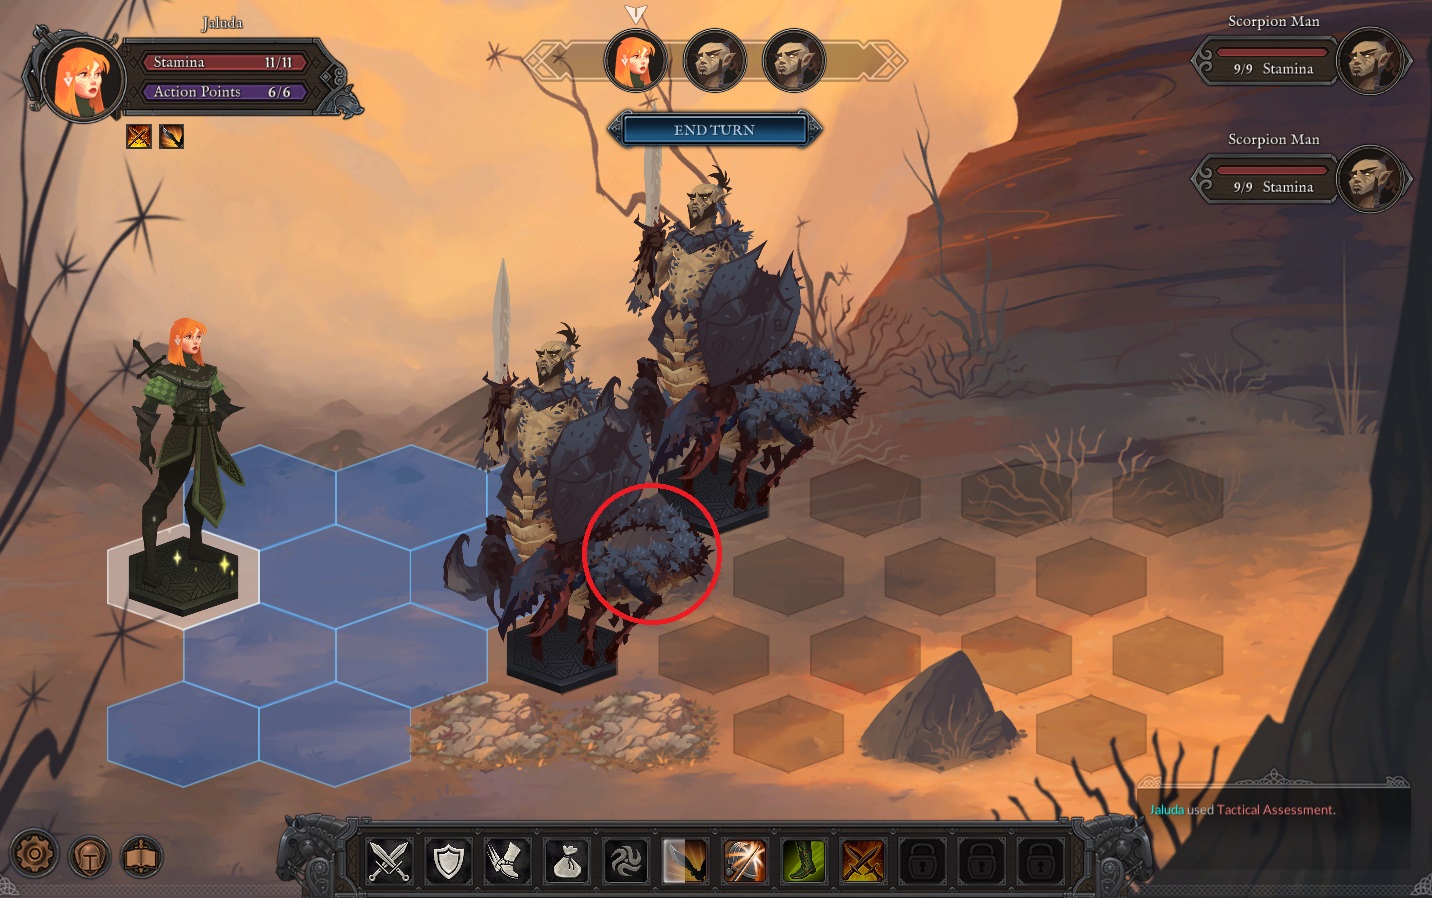
Turn 2: Stunning Blow (3 damage), Attack (at least 5 damage)
Worst case outcome:
=>One scorpion man will be alive at 1/9 and stunned.
=>The second scorpion man is two tiles away from you, rolls critical and deals 3 damage.
Turn 3: Attack the injured target (at least 5 damage), use the remaining 3 AP to move towards the remaining target.
Worst case outcome:
=> One Scorpion Man is dead.
=> The second Scorpion Man is at 9/9 and you are not next to it.
=> He rolls another critical and deals 3 damage to you.
Turn 4: Move next to the Scorpion Man, Attack (at least 5 damage)
Worst case outcome:
=> He rolls a third critical hit and deals 3 damage to you.
Turn 5: Attack (at least 4 damage)
=> The second Scorpion Man is dead.
Chapter 15: Rat Shaman and Rat Warrior
Both rat enemies can only move for 4 AP. That means, that they can only move 2 normal tiles or 1 special tile. Further, they only have a reach of 1 and can never attack if they also moved.
Turn 1: Identify the target that is closest to you. Move towards it, so it is 4 tiles away from you.
=> Both targets will move towards you.
Turn 2: Use Cleansing Flame on the nearest target (11 damage).
=> Target 1 is dead. Target 2 will move towards you.
Turn 3: Stunning Blow (5 damage), Attack (at least 6 damage)
=> Both Rat Men are dead.
Chapter 15: She Devil and two Man Beasts
The She-Devil has a reach of 2. However, she can never attack after moving.
The two Manbeasts have a reach of 1. If they move 1 tile for 2 AP, they can still attack you.
Both enemy-types crit for 4 damage.
Turn 1: Identify the Manbeast that is closest to you. Move towards it, so it is 4 tiles away from you.
=> All three enemies will walk towards you.
Turn 2: Use Cleansing Flame on the nearest Manbeast (11 damage). If somehow a target is closer than 3 tiles, move away.
=> Manbeast 1 is dead. Manbeast 2 and She-devil will walk towards you.
Turn 3: Target the She-Devil with Stunning Blow (5 damage) and Attack (at least 6 damage).
=> Only Manbeast 2 is alive. At worst, it will crit you for 4 damage.
Turn 4: Attack Manbeast 2 (at least 6 damage), Adrenaline Burst, Attack (at least 6 damage)
=> All targets are dead.
Chapter 16: Two Giant Chameleon
Both of them have a reach of 2. Both of them can move up to 3 tiles. Also, they have the ability to move one regular tile and attack on the same turn. Furthermore, their maximum damage on a critical hit is extremely high (10).
Turn 1: Tactical Assessment.
=> Both will rush towards you.
Now here is the worst case scenario:
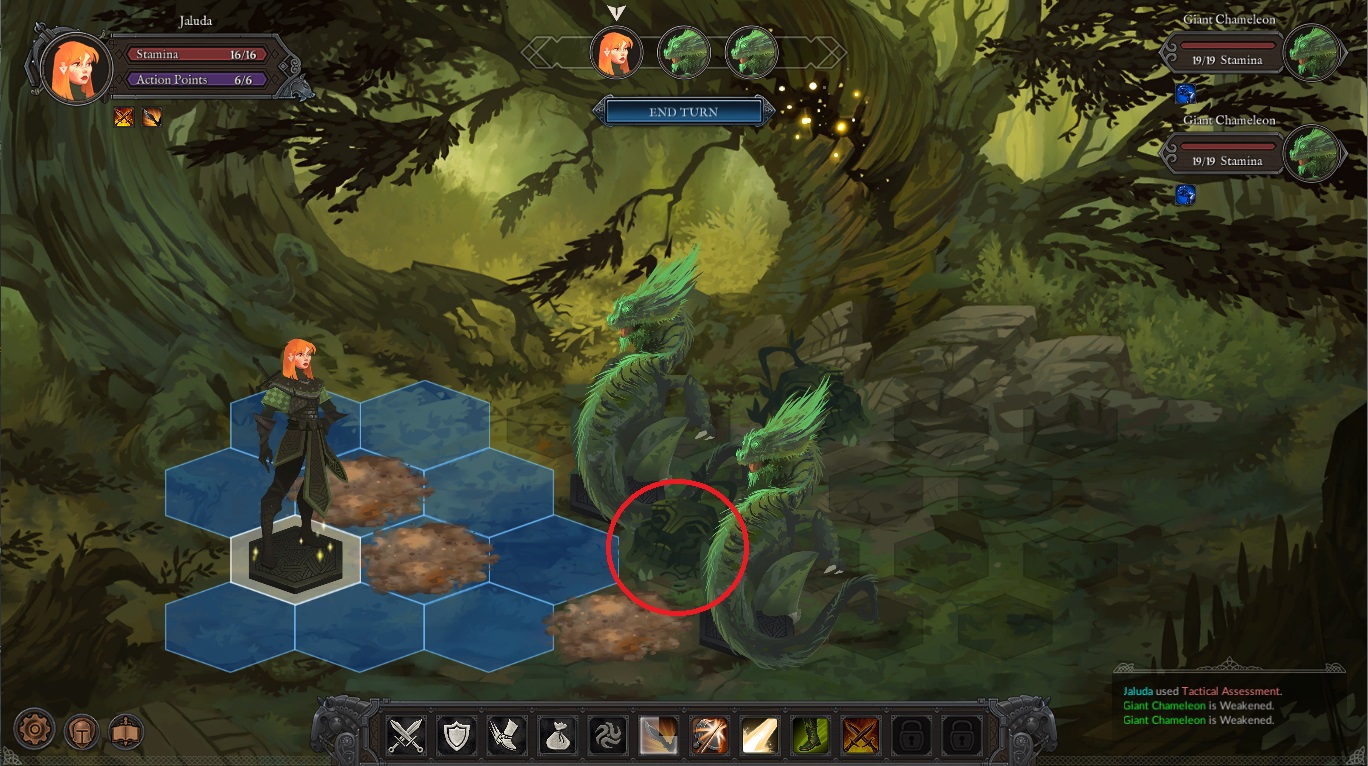
The chameleon are not adjacent to each other and the tile between them is not passable.
Turn 2: Stunning Blow (6 damage), Attack (at least 7 damage)
=> One is stunned at 6/19, the other crits you for 10 damage. You are now at 6/16.
Turn 3: Attack the low target (at least 7 damage), use two healing potions to get back to 16/16.
=> One chameleon is dead.
=> The other chameleon crits you for 10 again. You are now at 6/16.
Turn 4: Close to gap to the chameleon and heal with two Potions of Healing.
=> The chameleon crits you for 10. You are now at 6/10.
Turn 5: Attack (at least 6 damage), use a Potion of Healing to get to 11/16.
=> The chameleon is at 13/19 and crits you for 10. You are now at 1/10.
Turn 6: Attack (at least 6 damage), Adrenaline Burst, Cleansing Flame (11 damage).
=> Dead.
(Note: I am aware, that this is super unlikely. Further, you could also move tiles backwards to lure the chameleon into a better position. However, it is hard to explain that on a randomly generated map. In reality it will not play out like this anyway.)
Chapter 16: Kaschuf
Kashuf is fast but a single opponent with low health. As such, this is very easy.
Turn 1: Tactical Assessment.
=> Walks towards you.
Turn 2: Stunning Blow (6 damage), Attack (at least 7 damage)
=> He is stunned.
Turn 3: Cleansing Flame (12 damage)
=> He is dead.
Chapter 17: Three wolves in Icicle Forest
The wolves are somewhat dangerous. They have a reach of 1 and can move 2 tiles. They can move 1 tile and attack in the same turn. Also, they have a crit damage of 5.
Turn 1: Tactical Assessment. Move towards the closes wolf, but stay at least 4 tiles away.
=> They move towards you.
Turn 2: Cleaning Flame (12 damage).
=> The remaining two walk towards you.
Turn 3: Stunning Blow (6 damage) + Attack (at least 7 damage).
=> The remaining wolf might be in range and crits you for 5 damage.
Turn 4: Attack (at least 7 damage), Adrenaline Burst, Attack (at least 7 damage).
=> All wolves are dead.
Appendix 3: More encounters
Chapter 18: The Champion
The champion is very easy. He only has a reach of 1 and can only move 2 regular tiles. It can not move and attack in the same turn. Thus, you can just kite him around with the Disengage command until Stunning Blow comes off cooldown.
I am too lazy to describe the process of kiting him though.
Turn 1: Tactical Assessment. Move towards him.
=> Walks towards you.
Turn 2: Cleansing Flame (12 damage). Move backwards.
=> Walks towards you.
Turn 3: Stunning Blow (6 damage), Attack (at least 7 damage)
=> Is stunned.
Turn 4: Attack (at least 7 damage), Adrenaline Burst, Attack (at least 7 damage).
=> Dead.
Chapter 18: Water Drake
The Water Drake has a reach of 2. It can move up to 3 tiles. However, it can also never move and attack in the same turn. Thus, it is actually very easy to kite.
Furthermore, it has a rather low offence. At 19 defence, it can only hit with criticals (12 on 2d6). The criticals hit for 9 damage.
Turn 1: Tactical Assessment.
=> Walks towards you.
Turn 2: Cleansing Flame (12 damage). Walk backwards if it is only 2 tiles away.
=> Walks towards you.
Turn 3: Stunning Blow (6 damage), Attack (at least 7 damage)
=> It is stunned at 15/40.
Turn 4: Attack (at least 7 damage).
=> It will crit you for 9.
Turn 5: Attack (at least 6 damage), Adrenaline Burst, Attack (at least 6 damage).
=> It is dead.
Chapter 18: Wight
Turn 1: Tactical Assessment, walk towards the wight.
=> Walks towards you.
Turn 2: Stunning Blow (6 damage). Attack (at least 7 damage).
=> Stunned.
Turn 3: Attack (at least 7 damage), Adrenaline Burst, Cleansing Flame (12 damage).
=> It is dead.
Chapter 20: Two young Rukhs
The Rukhs are very fast. They can move up to 4 regular tiles. However, their reach is only 1 and they can only move 1 regular tile and attack in the same turn. Further their damage is rather low.
Turn 1: Tactical Assessment. End your turn.
=> Both will rush towards you.
Turn 2: Stunning Blow (6 damage), Attack (at least 7 damage).
=> One is stunned the other might crit you for 3 damage.
Turn 3: Cleansing Flame (12 damage), Defend.
=> One is dead the other might crit you for 3 damage.
Turn 4: Attack (at least 7 damage)
=> The Rukh might crit you for 3 damage.
Turn 5: Attack (at least 6 damage)
=> The Rukh might crit you for 3 damage
Turn 6: Attack (at least 6 damage), Adrenaline Burst, Attack (at least 6 damage)
=> Dead.
Chapter 21: Bull
Turn 1: Tactical Assessment.
=> Bull rushes towards you.
Turn 2: Stunning Blow (6 damage), Attack (at least 7 damage).
=> It is stunned.
Turn 3: Cleansing Flame (12 damage).
=> It is dead.
Chapter 21: Dragon
The dragon has a reach of 3 tiles. It can’t move and attack on the same turn. This means, if you are further than 3 tiles away, the dragon will never hit you (except with “flame-breath”). Thus, as a ranged character, you can somewhat easily ensure that you won’t get hit.
Information about “flame-breath”
The dragon will use “flame-breath” directly before your character’s 2nd, 6th, 10th, etc. turns.
It has infinite range and will never miss. Further, it will always do 4 damage directly and cause burning for 3 rounds. The burning damage cannot be avoided either. However, these two sources of damage will never overlap, so you will take at most 4 damage in a single turn. Or explicitly:
- Before 2nd turn: 4 damage + debuff application.
- Before 3rd, 4th, 5th turn: 2 damage from the debuff.
- Before 6th turn: 4 damage + debuff application.
- …
If you stun the dragon during your 5th turn, causing it to skip its 6th turn, it will not use the “flame-breath” until you have ended your 9th turn. Thus, you will also avoid the damage from the debuff.
General guideline
The dragons critical attacks hit for 6 damage. Thus, there is no way to die, if you end your turn at 11+ stamina. On most turns (no “flame-breath” turns), even 9+ stamina is enough to ensure survival.
Easy way to beat it (you only need 2 Potions of Healing):
Turn 1: Tactical Assessment, move towards the dragon.
=> Dragon will move 2 tiles towards you and is now at a distance of 3 tiles.
=> Dragon will use “flame-breath”.
=> Result (worst case): Dragon – 40/40, You – 14/18 (+burning)
Turn 2: Stunning Blow (6 damage), Attack (at least 7 damage).
=> Dragon is stunned.
=> You will burn for 2 damage.
=> Result (worst case): Dragon – 27/40, You – 12/18 (+burning)
Turn 3: Attack (at least 7 damage), Potion of Healing.
=> Dragon will crit you for 6.
=> You burn for 2 damage.
=> Result (worst case): Dragon – 20/40, You – 9/18 (+burning)
Turn 4: Cleansing Flame (12 damage), Defend
=> Dragon will crit you for 6.
=> You burn for 2 damage.
=> Result (worst case): Dragon – 8/40, You – 1/18 (burning is gone)
Turn 5: Attack (at least 6 damage), Adrenaline Burst, Attack (at least 6 damage)
=> Dead.
(Note: If you feel insecure, just use Potions of Healing every round. There is no reason to save shards really.)
Chapter 23: Toad Demon
The Toad Demon has a “poison-spit” that will always hit you. It will not directly do damage, but leave a debuff on you that first does 3 damage, then 2 and then 1. Then the demon will reapply it.
Turn 1: Walk towards it.
=> Walks towards you.
=> Poison spit. You will not take damage yet.
Turn 2: Stunning Blow (5 damage), Attack (at least 6 damage).
=> Stunned.
=> You will take 3 damage from the poison.
Turn 3: Cleansing Flame (11 damage), Adrenaline Burst, Attack (at least 6 damage).
=> Dead.
Chapter 25: Avar Hordeth
This fight features Avar Hordeth, two Brigands and a Sea Dog. It is very complicated to describe all possible outcomes, due to the high amount of enemies. I will try my best.
Turn 1: Tactical Assessment. Move closer to Avar Hordeth.
=> Hordeth and the Brigands will move closer to you.
=> The Sea Dog might crit you for 4 damage.
Turn 2: Stunning Blow Avar (6 damage) and attack him for at least 7, unless you can reach another target. This is the worst case. Otherwise kill the other target and kill Avar using Cleansing Flame during the next turn.
=> Avar is stunned. One target is dead or Avar is very low.
=> The Sea Dog might crit you for 4 damage.
Turn 3: Attack Avar to kill him.
=> Both Brigands might crit you for 2 each. The Sea Dog might crit you for 4.
Turn 4: Cleansing Flame and kill the Sea Dog.
=> The remaining Brigands might crit you for 2 each.
Turn 5: Attack the Brigand, Adrenaline Rush, Attack the other Brigand.
=> All dead.
(Note that this fight will never play out like that crits are increadibly rare and getting 7 in a single battle is pretty much impossible.)