In this guide, I will show you how any user can automatically translate CK3 (Crusader Kings 3) localization files to other languages.
Disclaimer
This guide is a work in progress, and some sections are still being revised and/or expanded. The ‘CK3-LocalisationChanger’ program is not yet completely finished and will go through a few more functions/changes in the future. Therefore, I strongly recommend reading the ReadMe file as well. I am happy to answer any questions you may have.
The Program
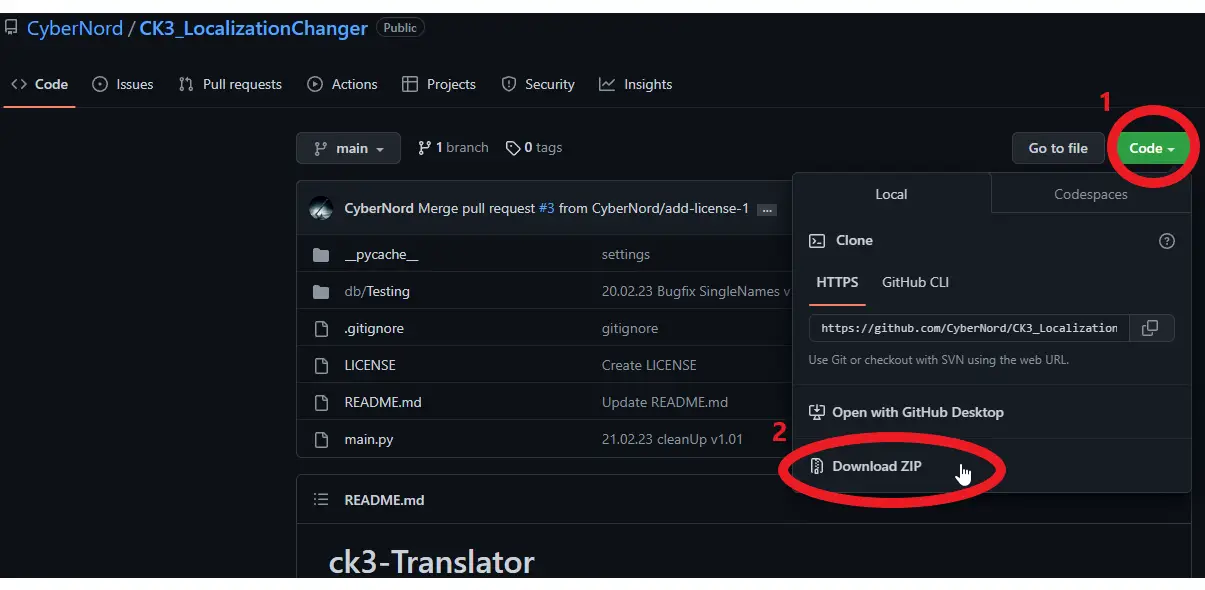
We will use Python for the translation process, and the program can be downloaded from my GitHub page. Once there, the project must be downloaded as a zip file, and then the folder should be unzipped anywhere.
In this guide, I will show you how any user can automatically translate ck3 (Crusader Kings 3) localization files to other languages.
Python & Packages
Required:
It is important to use the googletrans version 4.0.0rc1, since the older version will not work.
Translation Process
CK3 Mod Directory
First, we have to locate the CK3 workshop directory.
You can usually find this under the following path
C:\...\...\Steam\steamapps\workshop\content\1158310\ ....
The folder with the number 1158310 contains all of the CK3 workshop files you have downloaded. In that folder, you can find many folders with numbers. Those numbers are identification numbers for the mods, which can be found via the Steam Workshop.
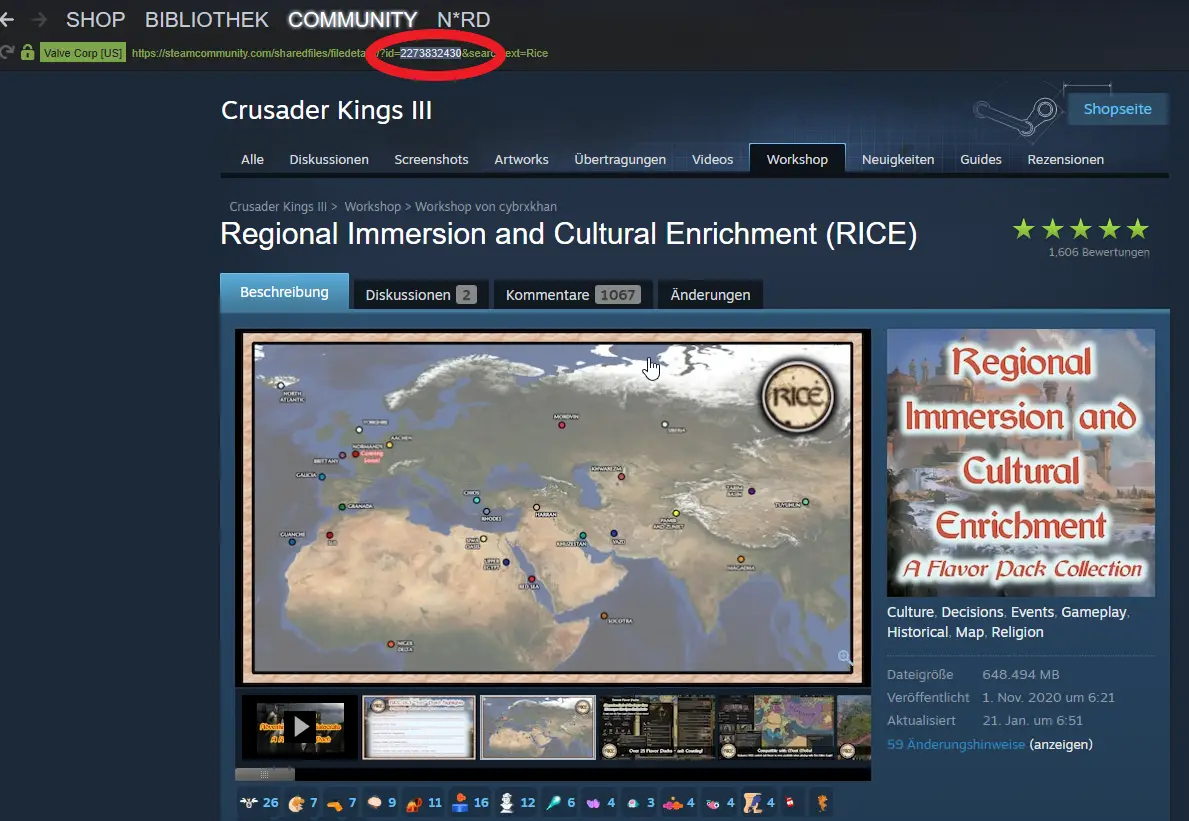
Once you have found the folder of the mod you want to translate head over to the folder which is called localization\english
This will look most likely something like that:
C:\…\…\Steam\steamapps\workshop\content\1158310\MOD_ID\localization\LANGUAGE

Then copy the path of this folder.
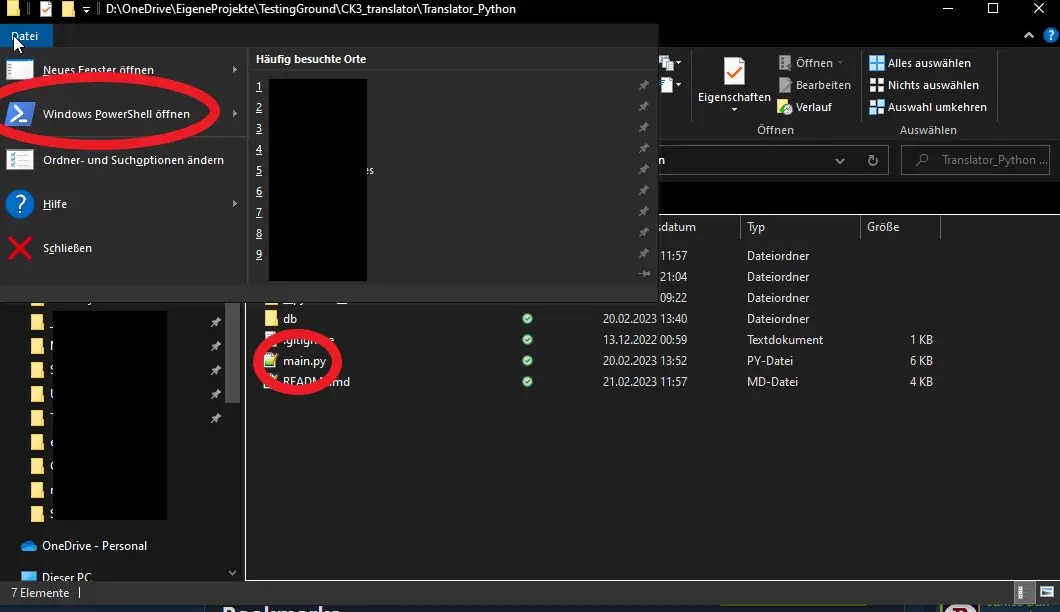
Translator directory
Now we go to the path where the program was previously unpacked. There we open the Powershell directly.
When opening PowerShell, we see the line marked with [1], which shows the path under which it was called. Now we can enter the command to start the translation [2]. To find the correct command for you, please refer to the “Commands” section.
In my case, I want to translate from English (default) to Russian. The command for this is python main.py -l2 ru Path. The translation will now take a while, depending on the size of the individual files [3].
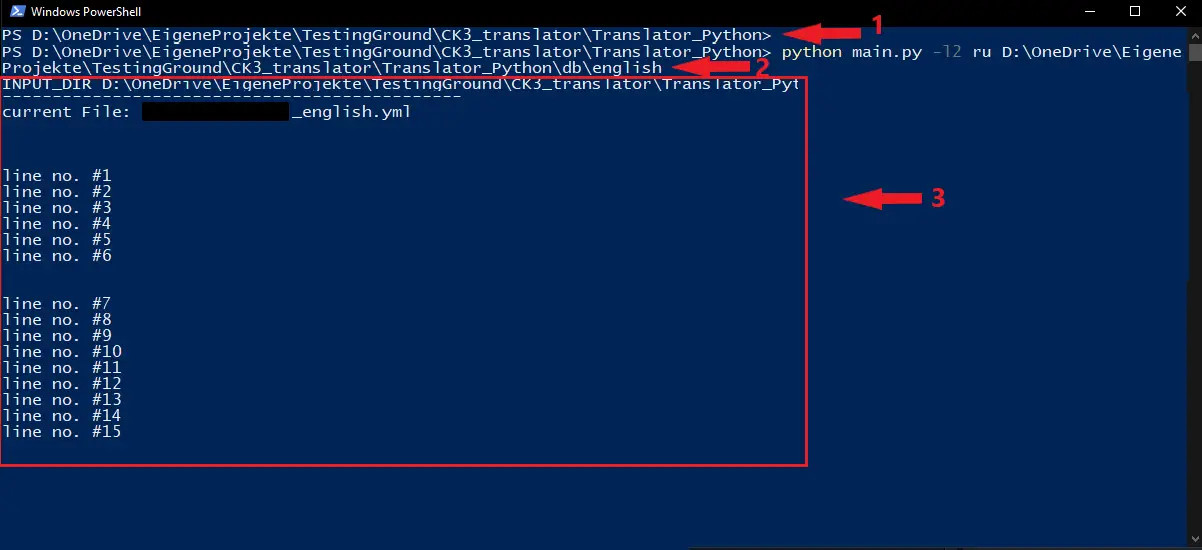
When it’s done you can find the translated files in the folder /db/OUTPUT_LANGUAGE
In my case, I translated a part of the mod RICE for the Russian language project here on steam.
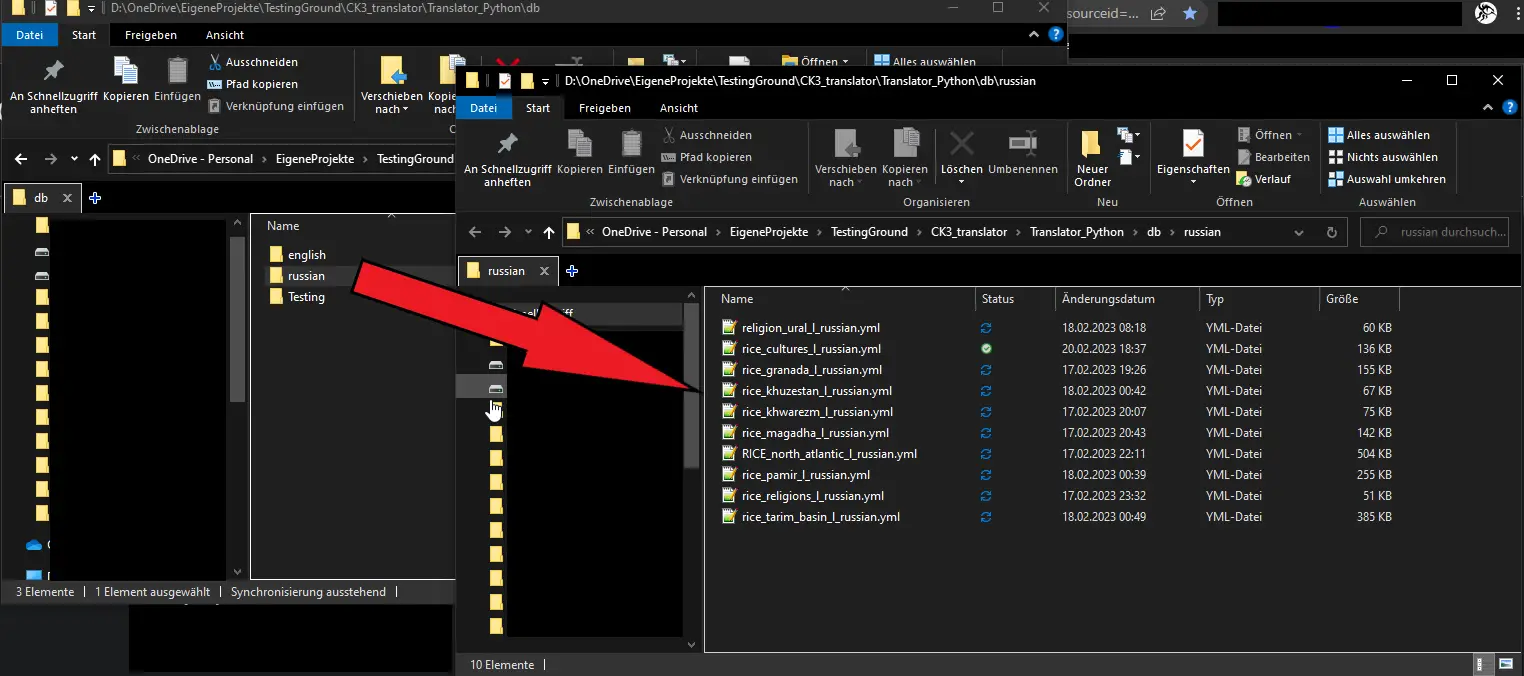
All that’s left to do is to copy the translated folder back into the main mod in your workshop files. Now, your mod has an automatically generated translation.
Commands
The general structure is
python main.py -l1 FROM_LANGUAGE -l2 TO_LANGUAGE -trans TRANSLATE? path
FROM_LANGUAGE
The default value is English, change if the original language is not English
TO_LANGUAGE
The default value is german, change if the desired output language is not german
TRANSLATE?
The default value is True, change to False if you want to keep FROM_LANGUAGE
( eg. English texts in german localization)
Officially supported languages:
- ‘en’ English
- ‘de’ german
- ‘fr’ french
- ‘es’ Spanish
- ‘zh-cn’ simplified Chinese
- ‘ko’ Korean
Examples:
This will translate from English (default) to French:
python main.py -l2 fr D:\the\path\to\english\loc\folder
This will translate from French to German (default):
python main.py -l1 fr D:\the\path\to\english\loc\folder
This will just alter the first line and filename so that the localization is detected by the game:
python main.py -trans 0 D:\the\path\to\english\loc\folder"