
How to make an aircraft carrier: designing the hull, aircraft, hooks, ACBs and breadboard for automated repairs.
The Aircraft
Naturally, an Aircraft Carrier need aircraft to launch. From the Depths offers Helicopters, Propeller and Jet Planes, Airships, Balloons, Missiles, and Spacecraft. Any existing design can be used as a drone, but if you don’t have anything prepared grab the prefab propeller plane. Add the frontal propeller, a small engine, and an AI – one radar off the bottom and an inter vehicle transmitter for your fleet to share detection is enough to start. Add weapons, and finally place the wing blocks such that the center of lift is equal to the center of mass for a stable plane. Setup the AI and save the design.
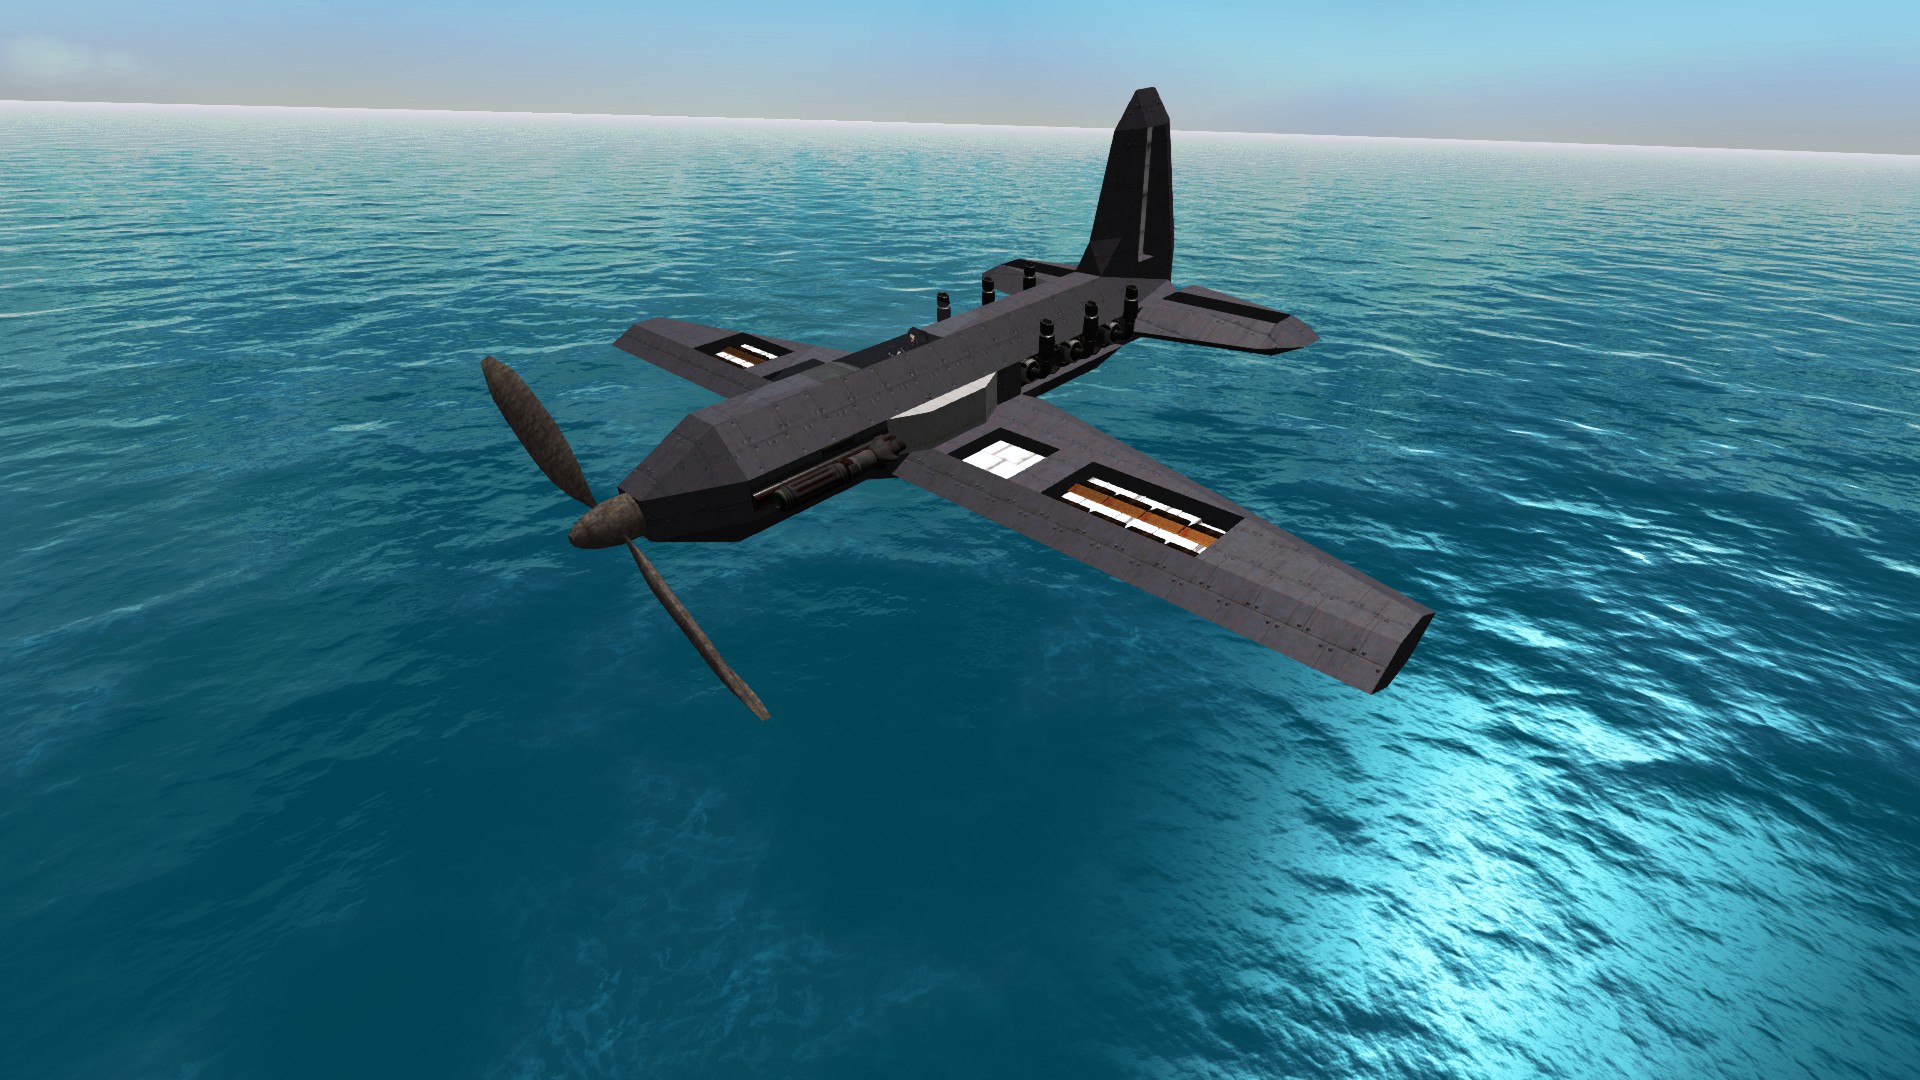
Carrier demo plane.
The Hull
Choose a hull for your carrier. A bigger hull can fit planes more easily than a smaller ship can. If you don’t have one ready I recommend using the prefab dreadnought pieces and an elongated central flight deck. Add some basic engines, cargo, and an AI. Armor your systems and add enough wood or alloy to keep the ship afloat without pumps or power, thus very resilient.
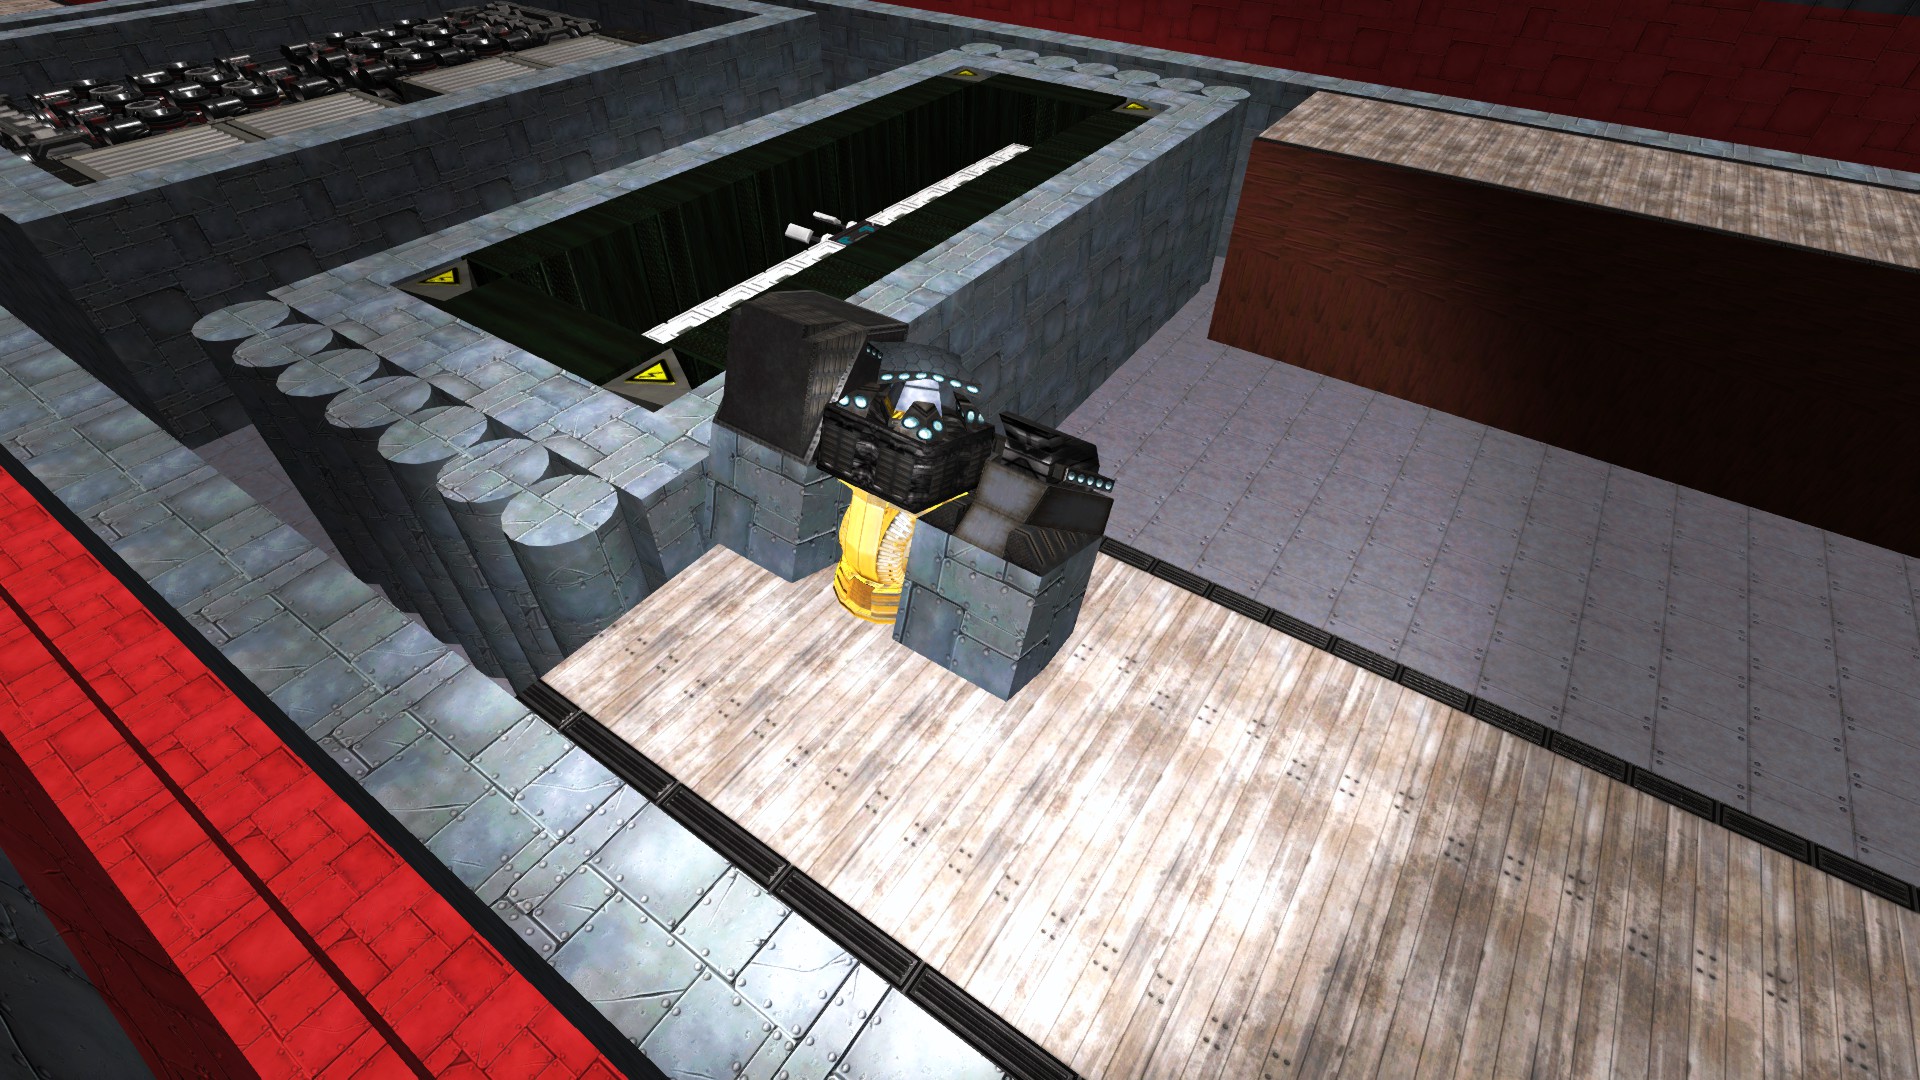
“The Hooks”
For the Carrier to actually have units attached, it will need docking stations (tractor beams) to hold them and sub-vehicle spawners to save the drone units into the main carrier blueprint. The easiest way of managing this is to create an elevator (or two axis) turret sub-object and attach both to it, plus a repair tentacle to fix your drones. By placing everything on a turret you can copy and paste it wherever, onto anything, and when you need to tweak where the drones are kept you can just adjust the idle angle of the turret.
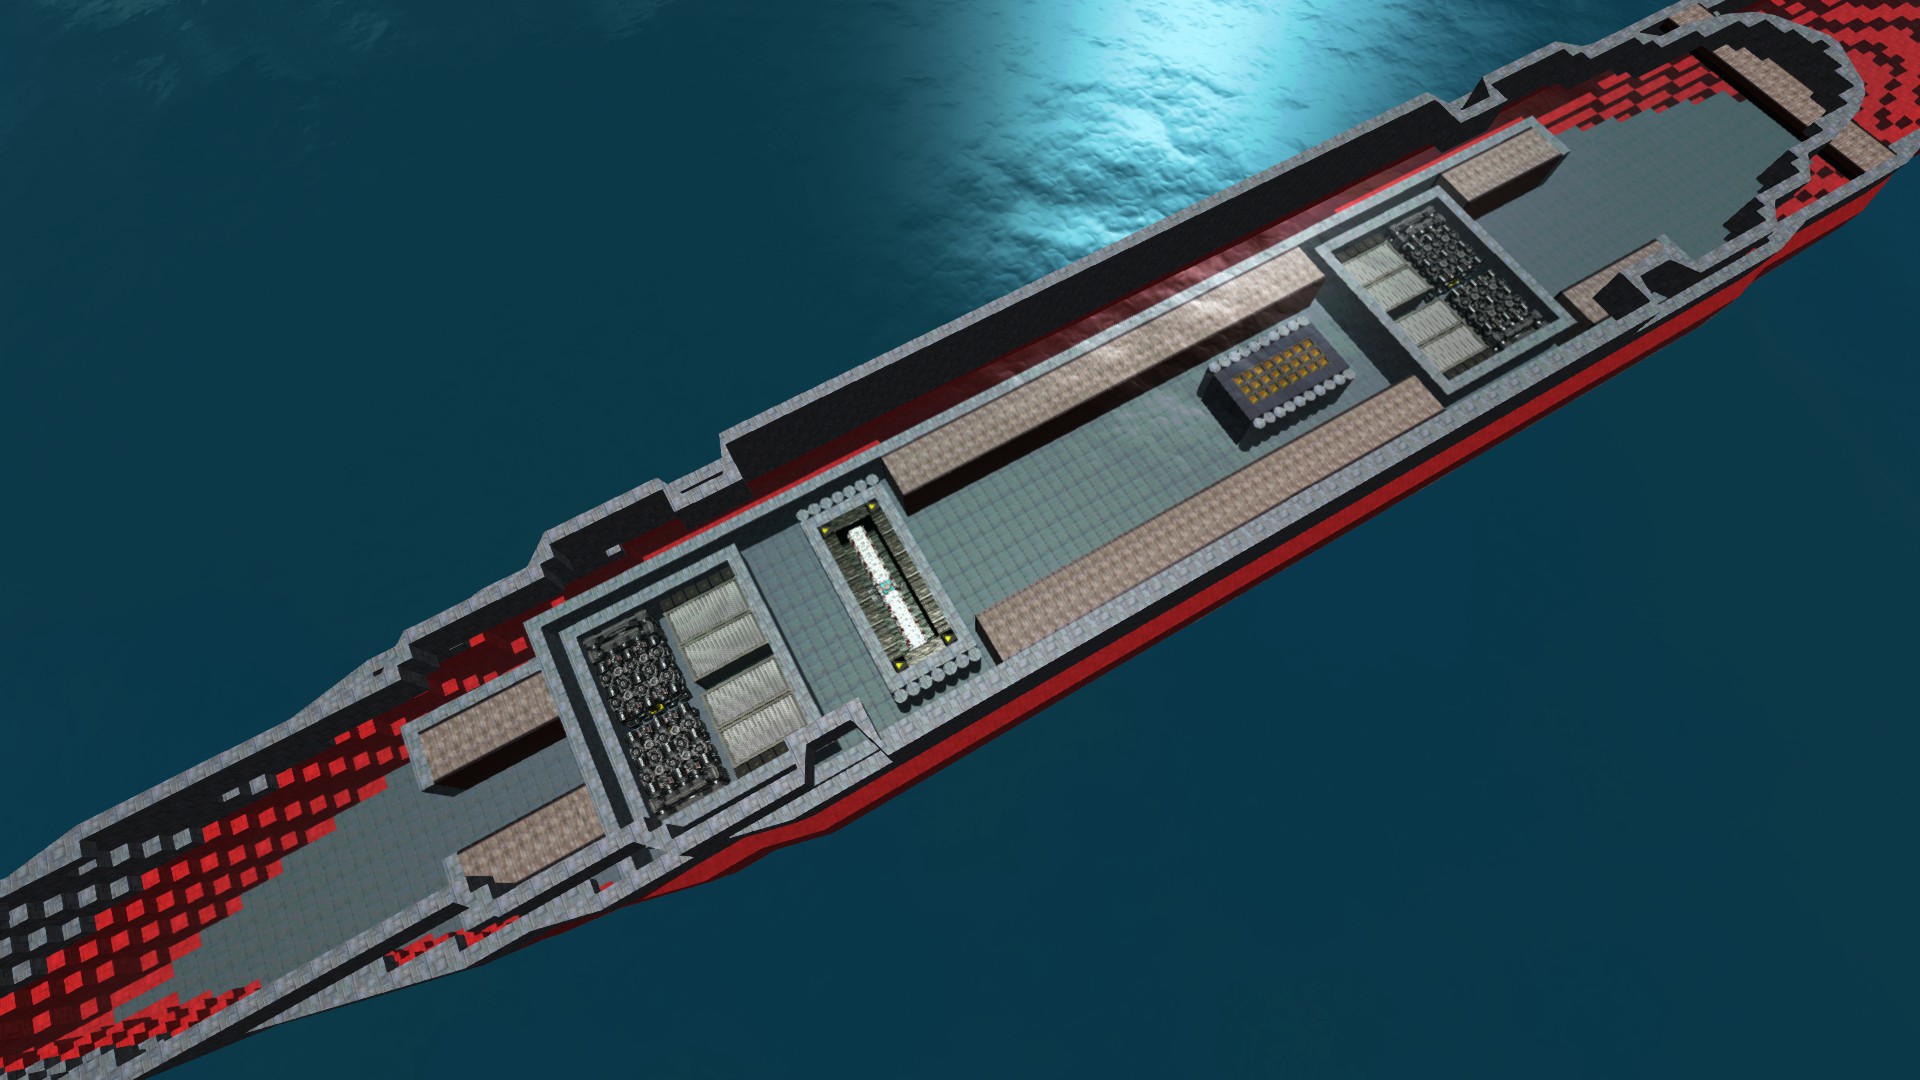
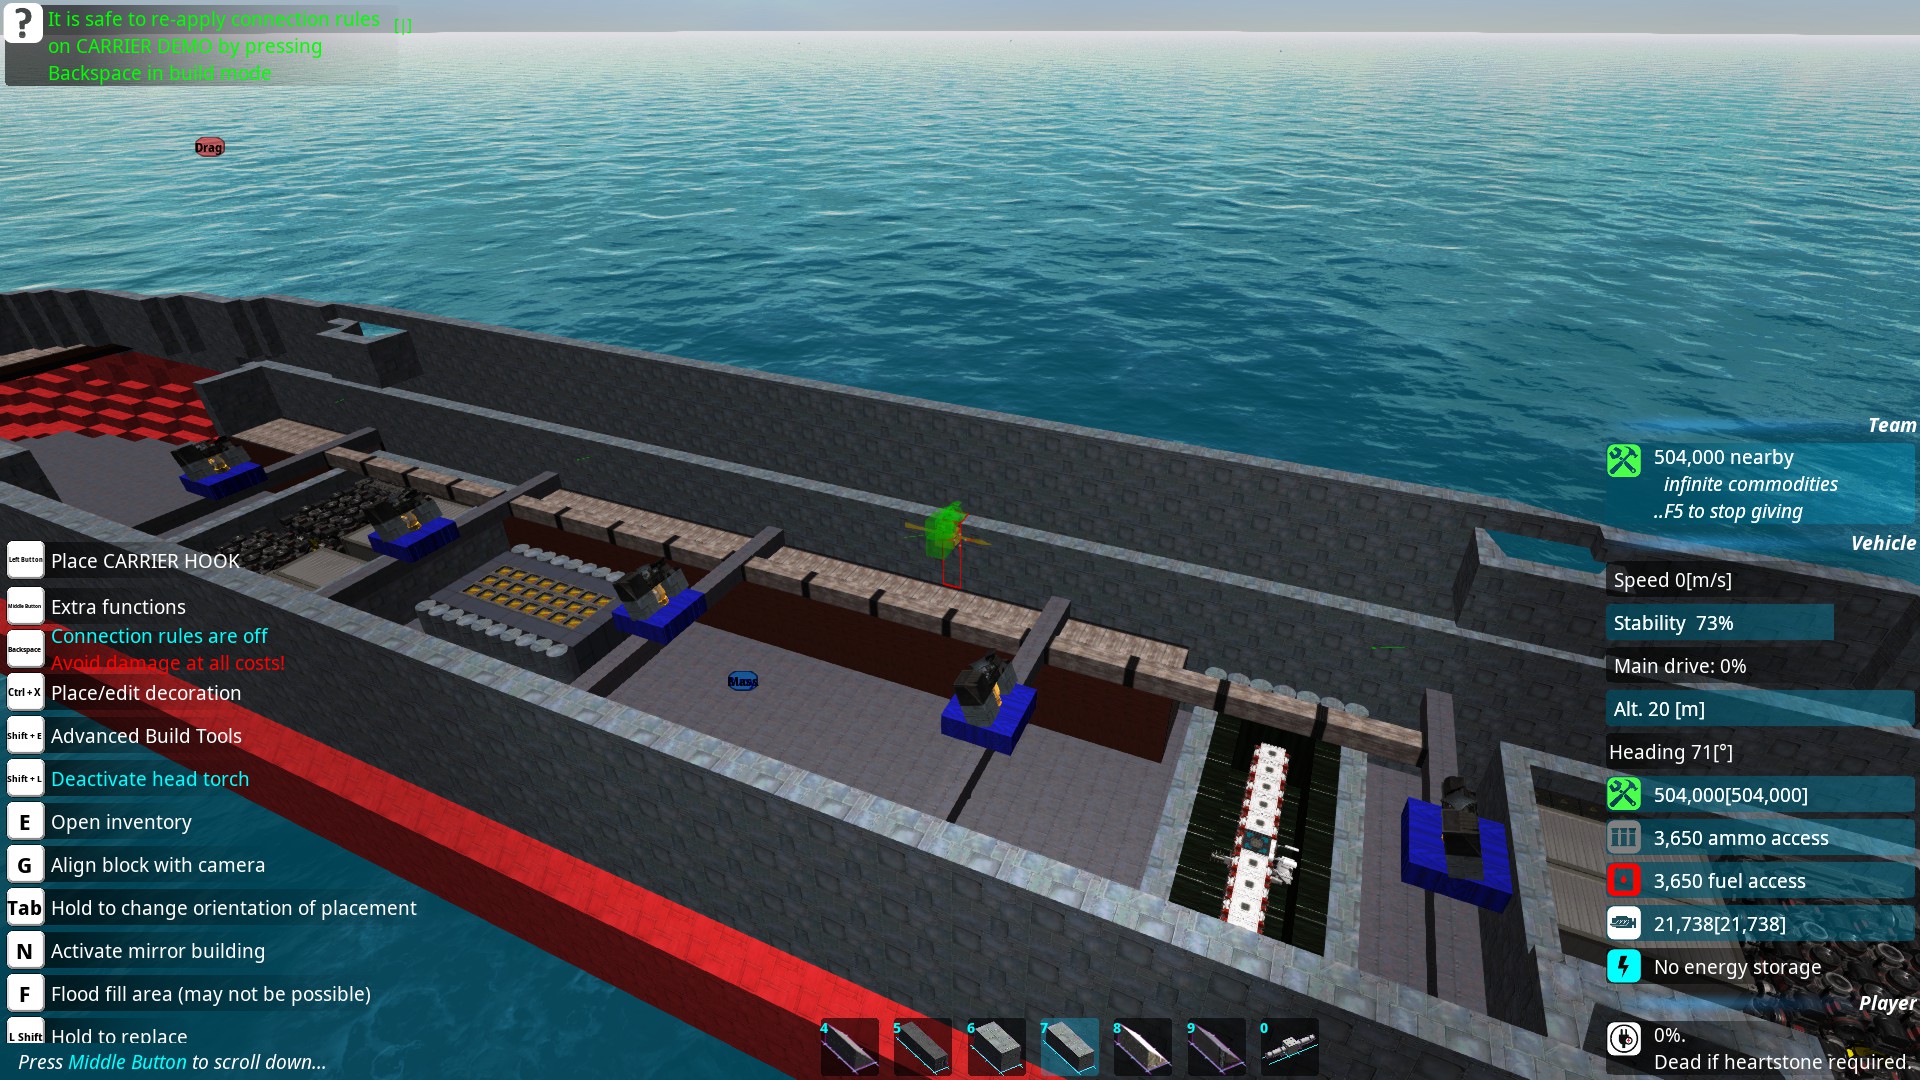
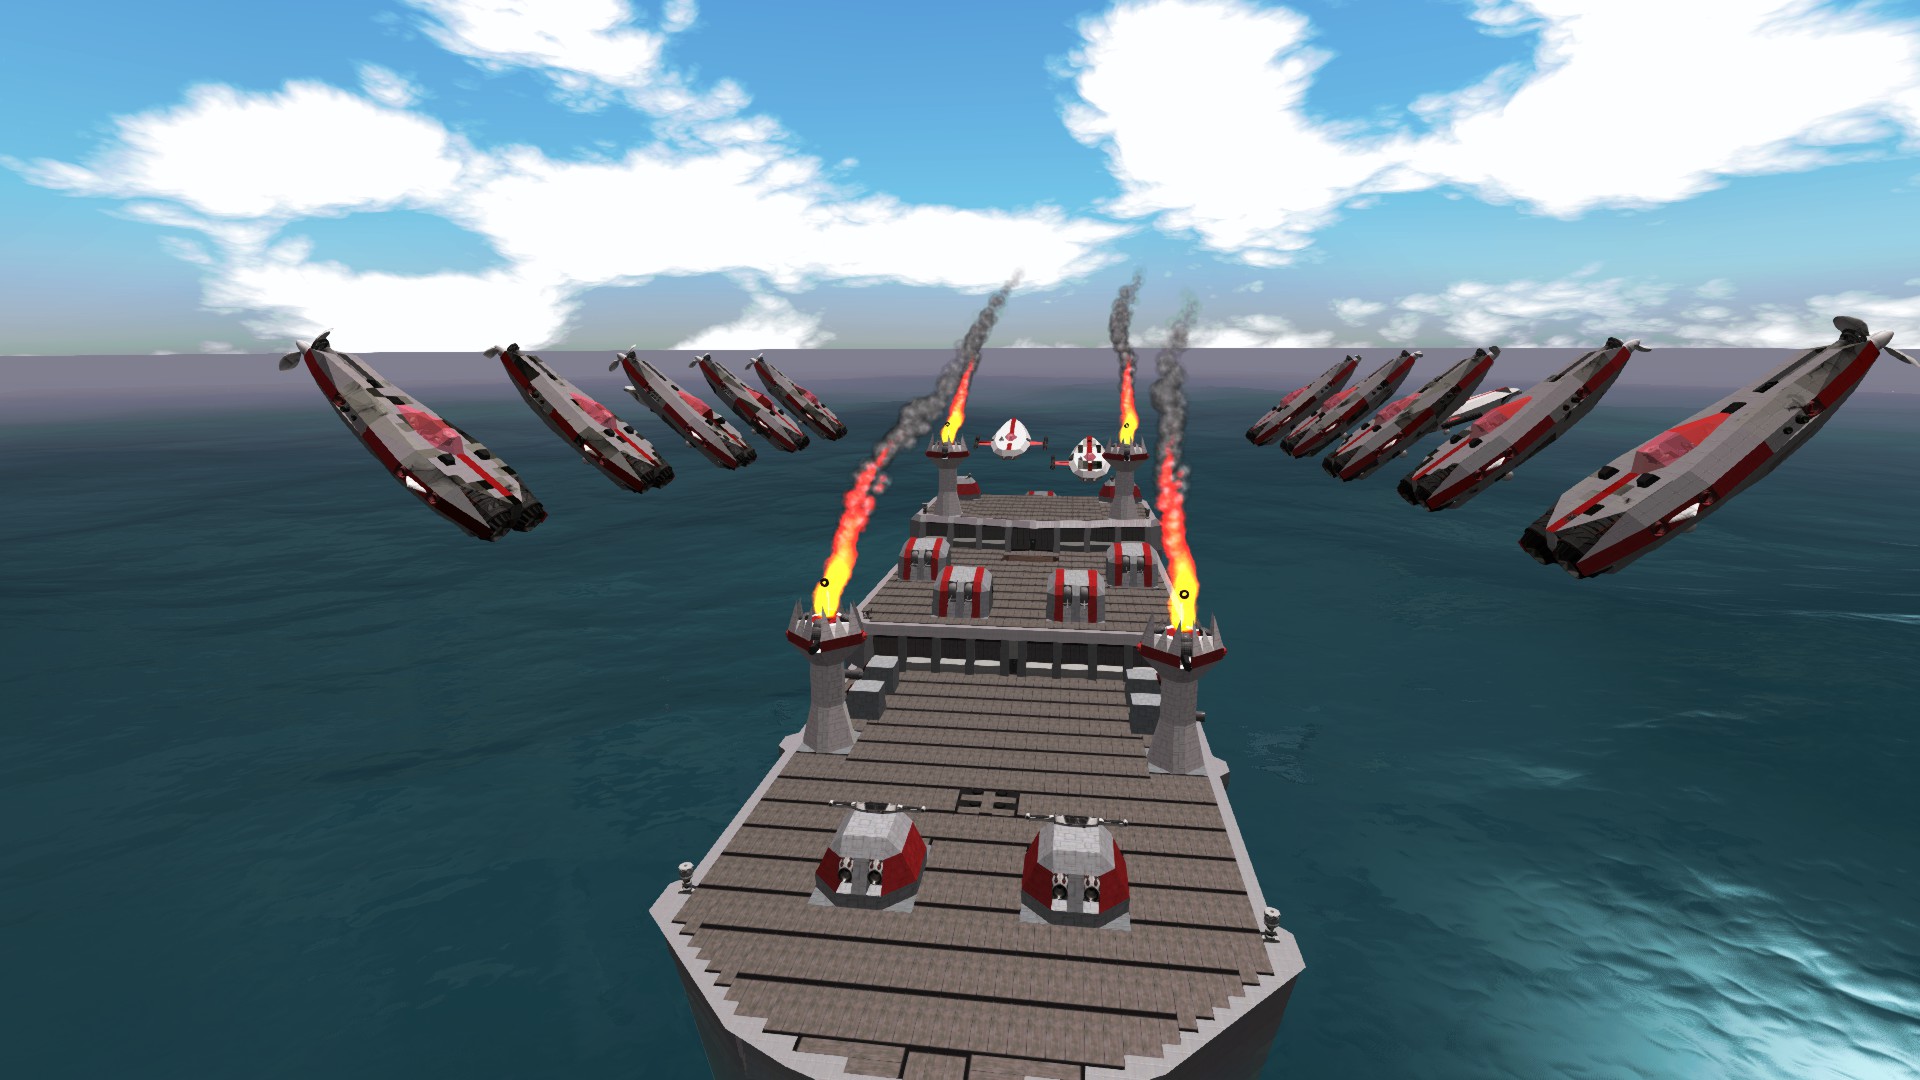
The carrier I built for this guide has 5 hooks, evenly spaced apart in the center of the hull.
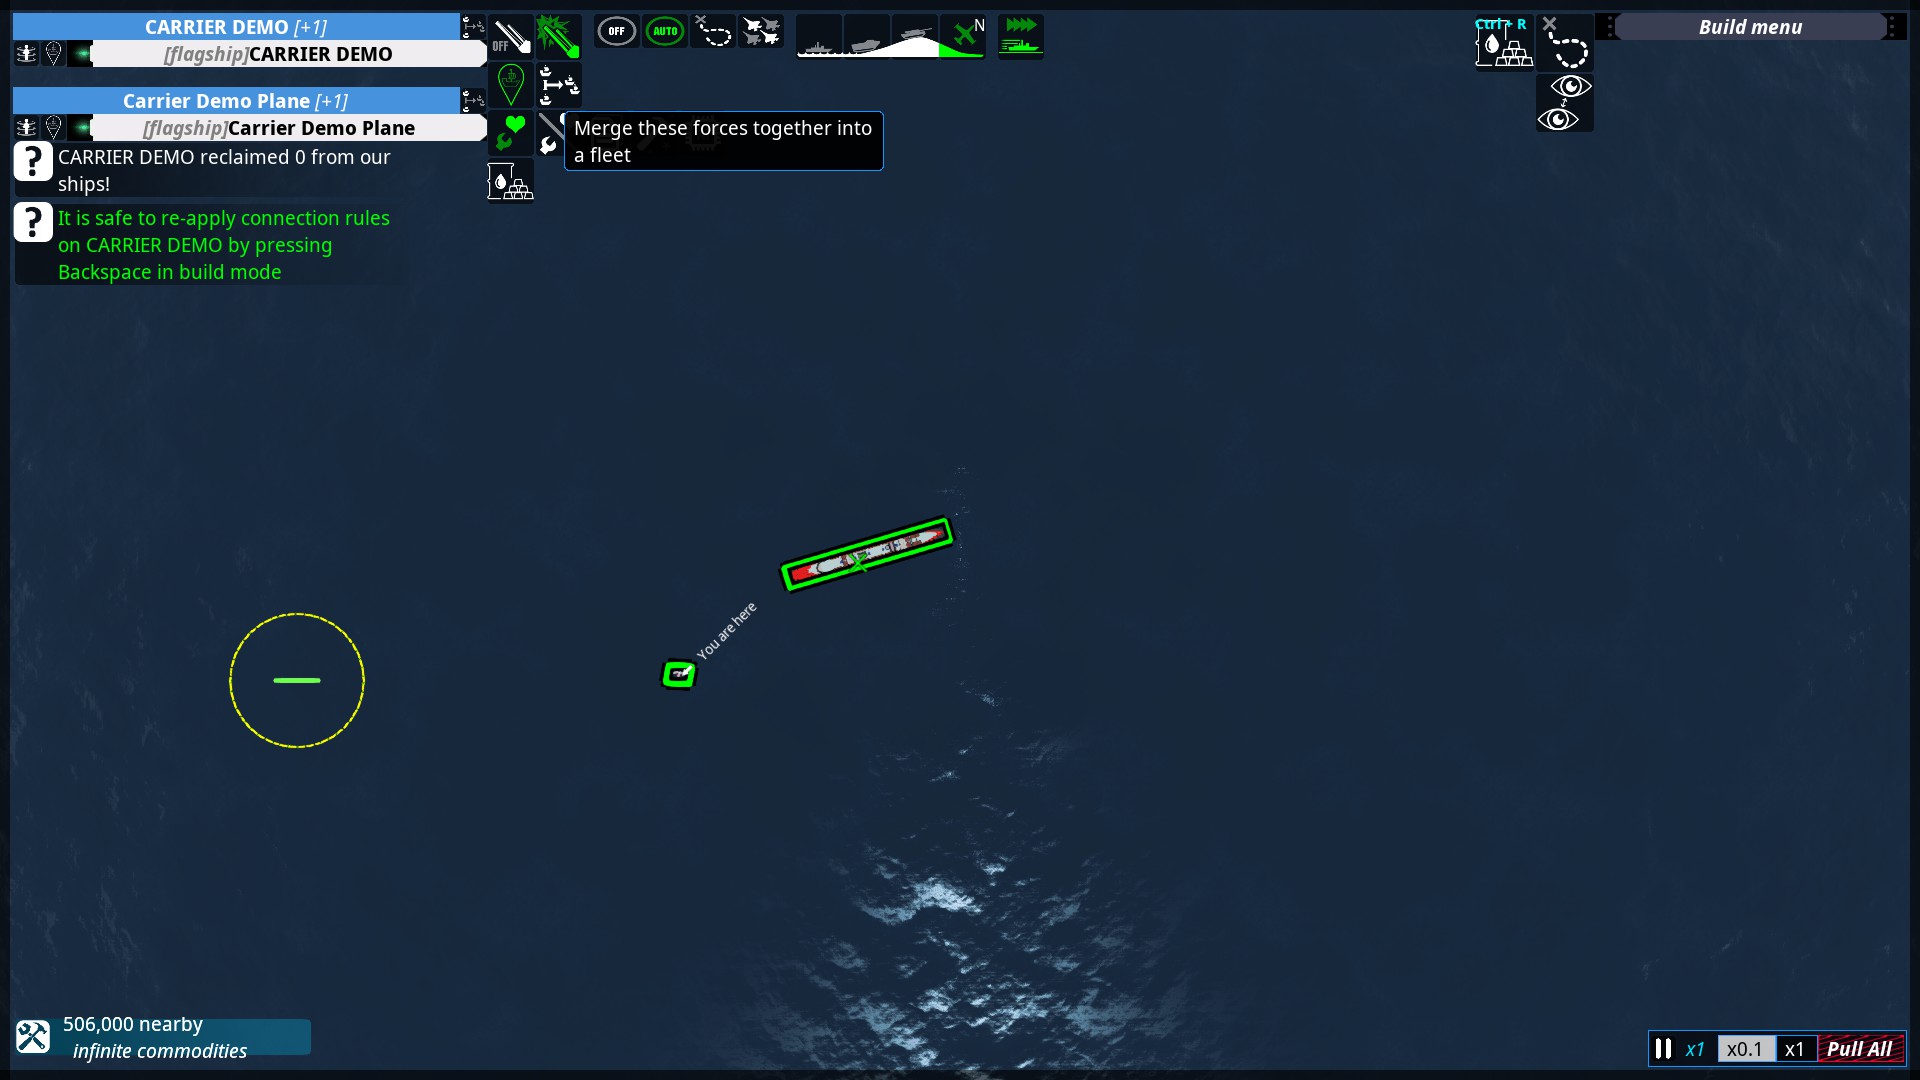
Creating Drones
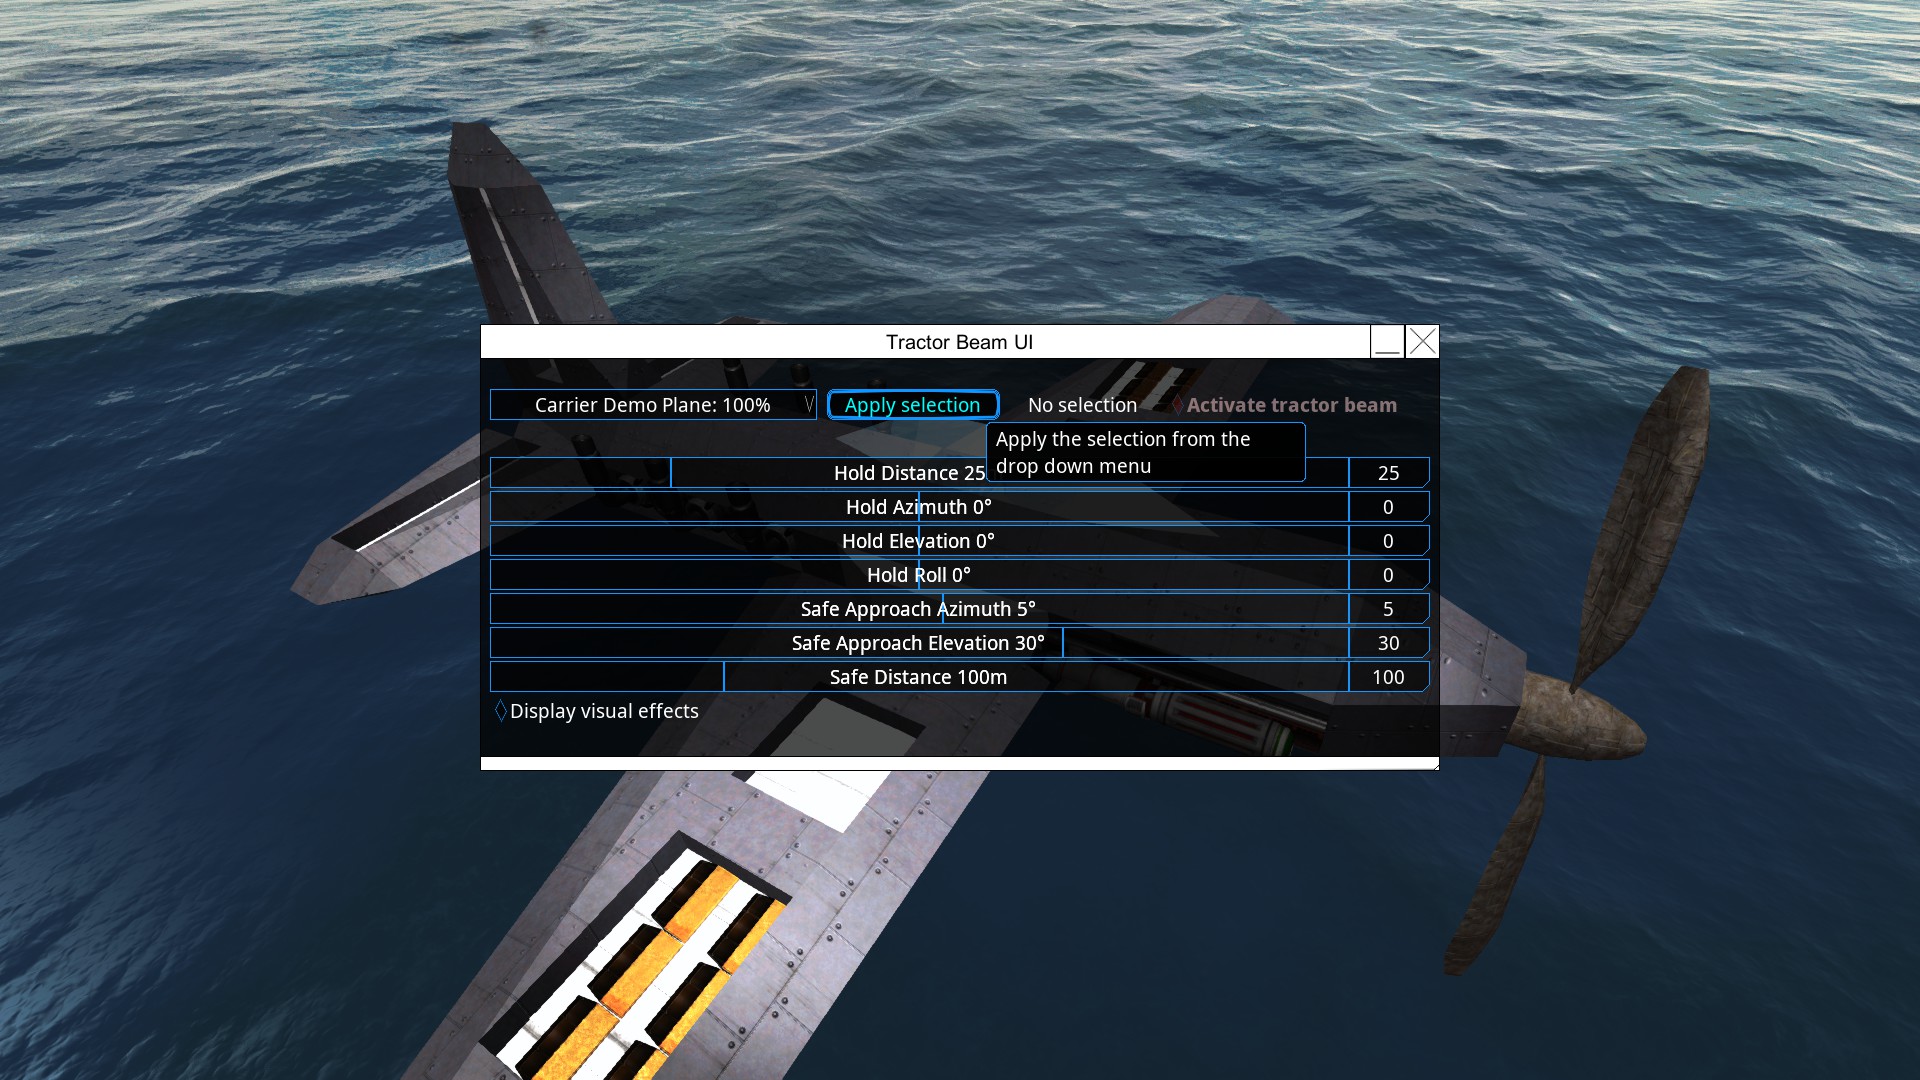
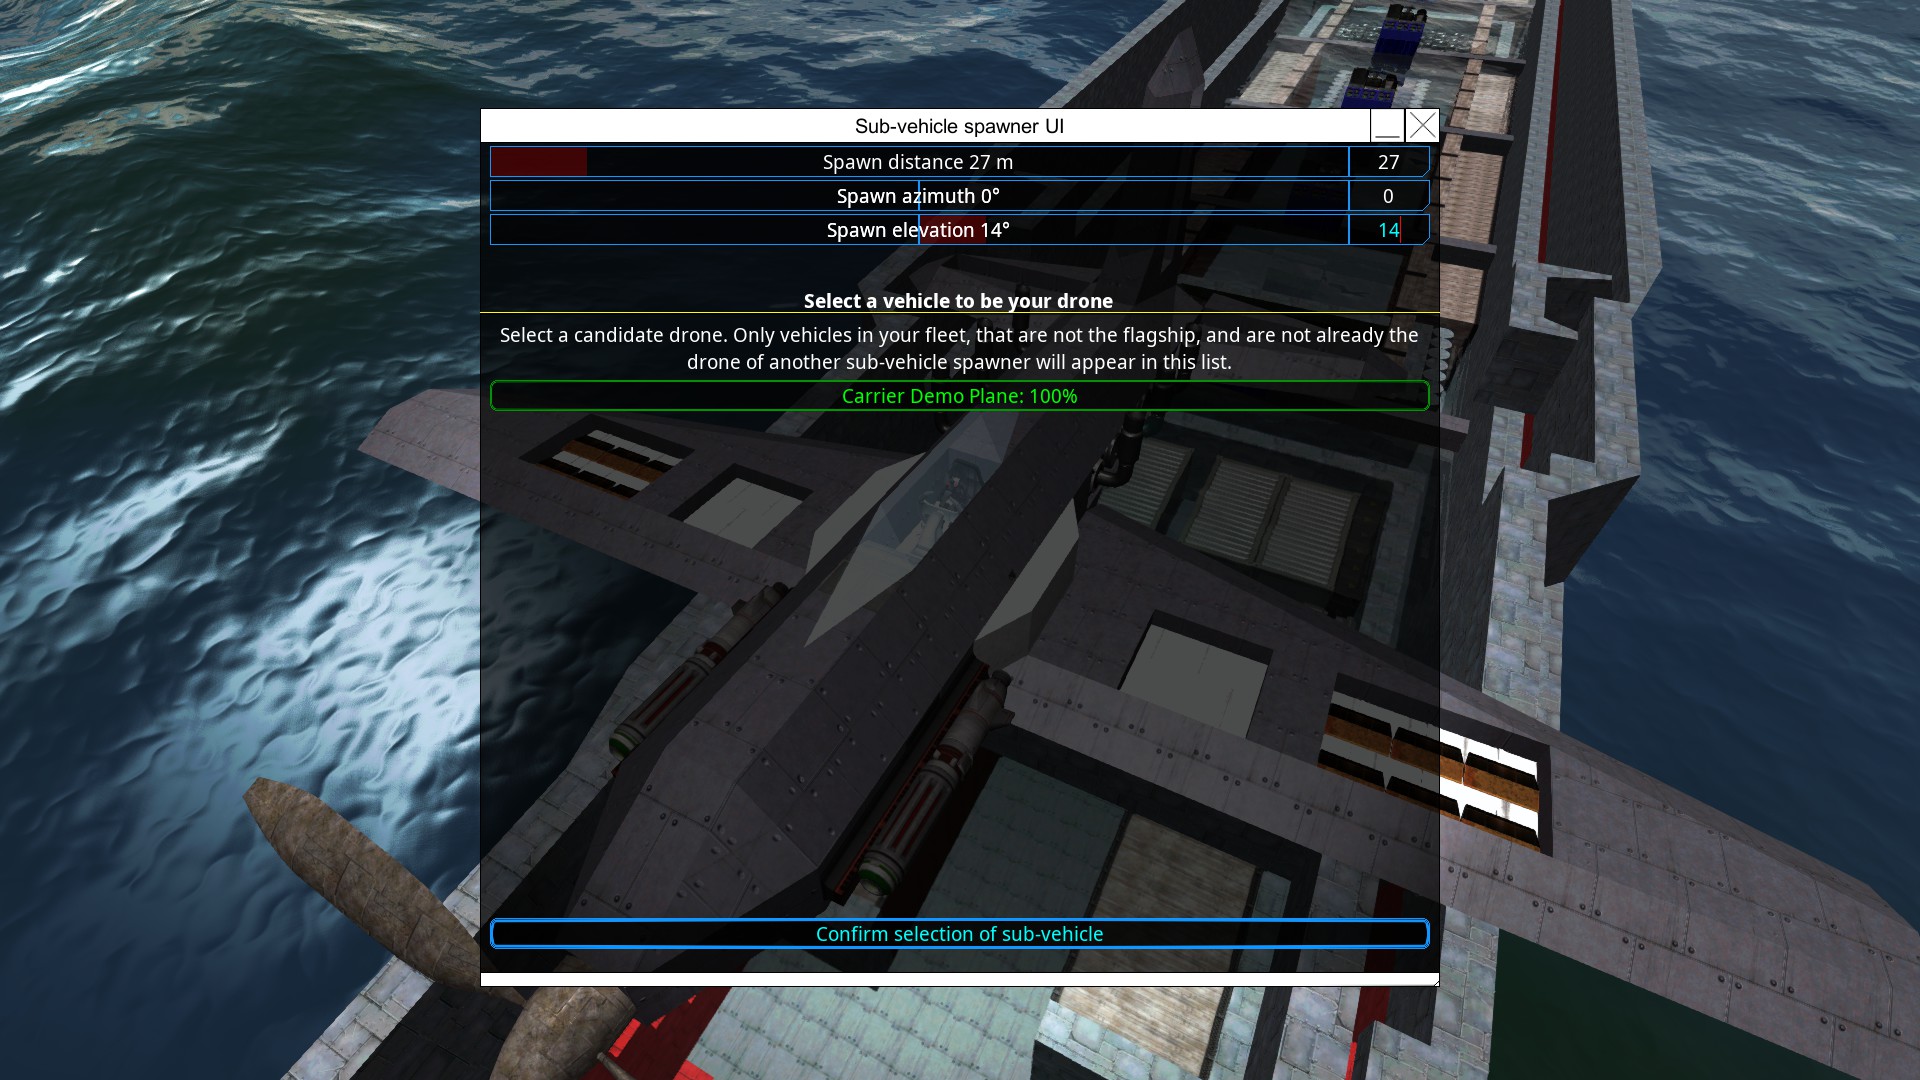
To convert your units to carrier drones, spawn ONE AT A TIME near the carrier and merge the two into a fleet. Then go to the hook, assign it to the tractor beam, activate it. Find the distance you want to hold the unit at and then copy this into the sub vehicle spawner’s spawning distance, and finally assign it to the sub vehicle spawner. This will save it to the carrier (but unfortunately not the sub object and you can’t just copy paste the hook with drones already attached).

Fitting the carrier.
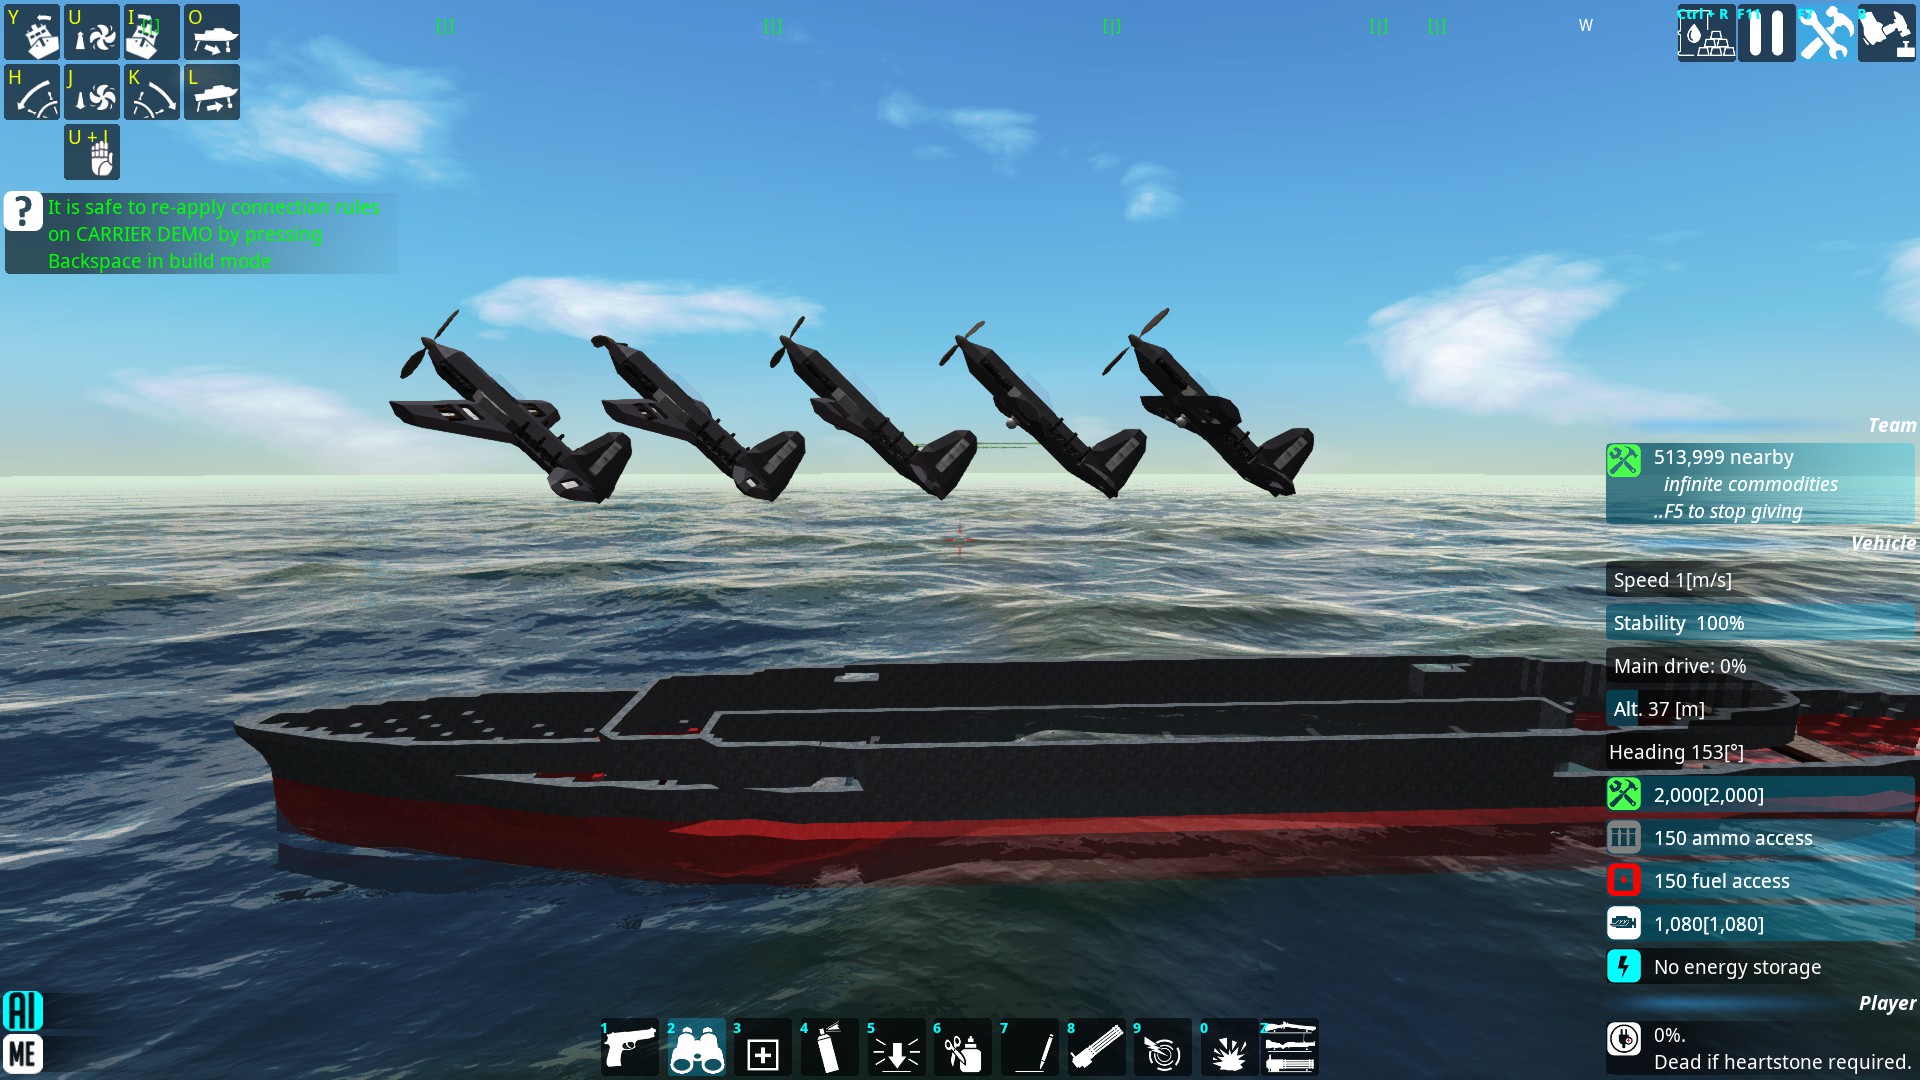
While you may be tempted to place and rotate your planes to look all nice on the flight deck, you won’t be able to fit many, and certainly not in an efficient manner. The two planes below were placed on hooks 16 meters apart, and they clipped (and would have been destroyed if not in godmode).
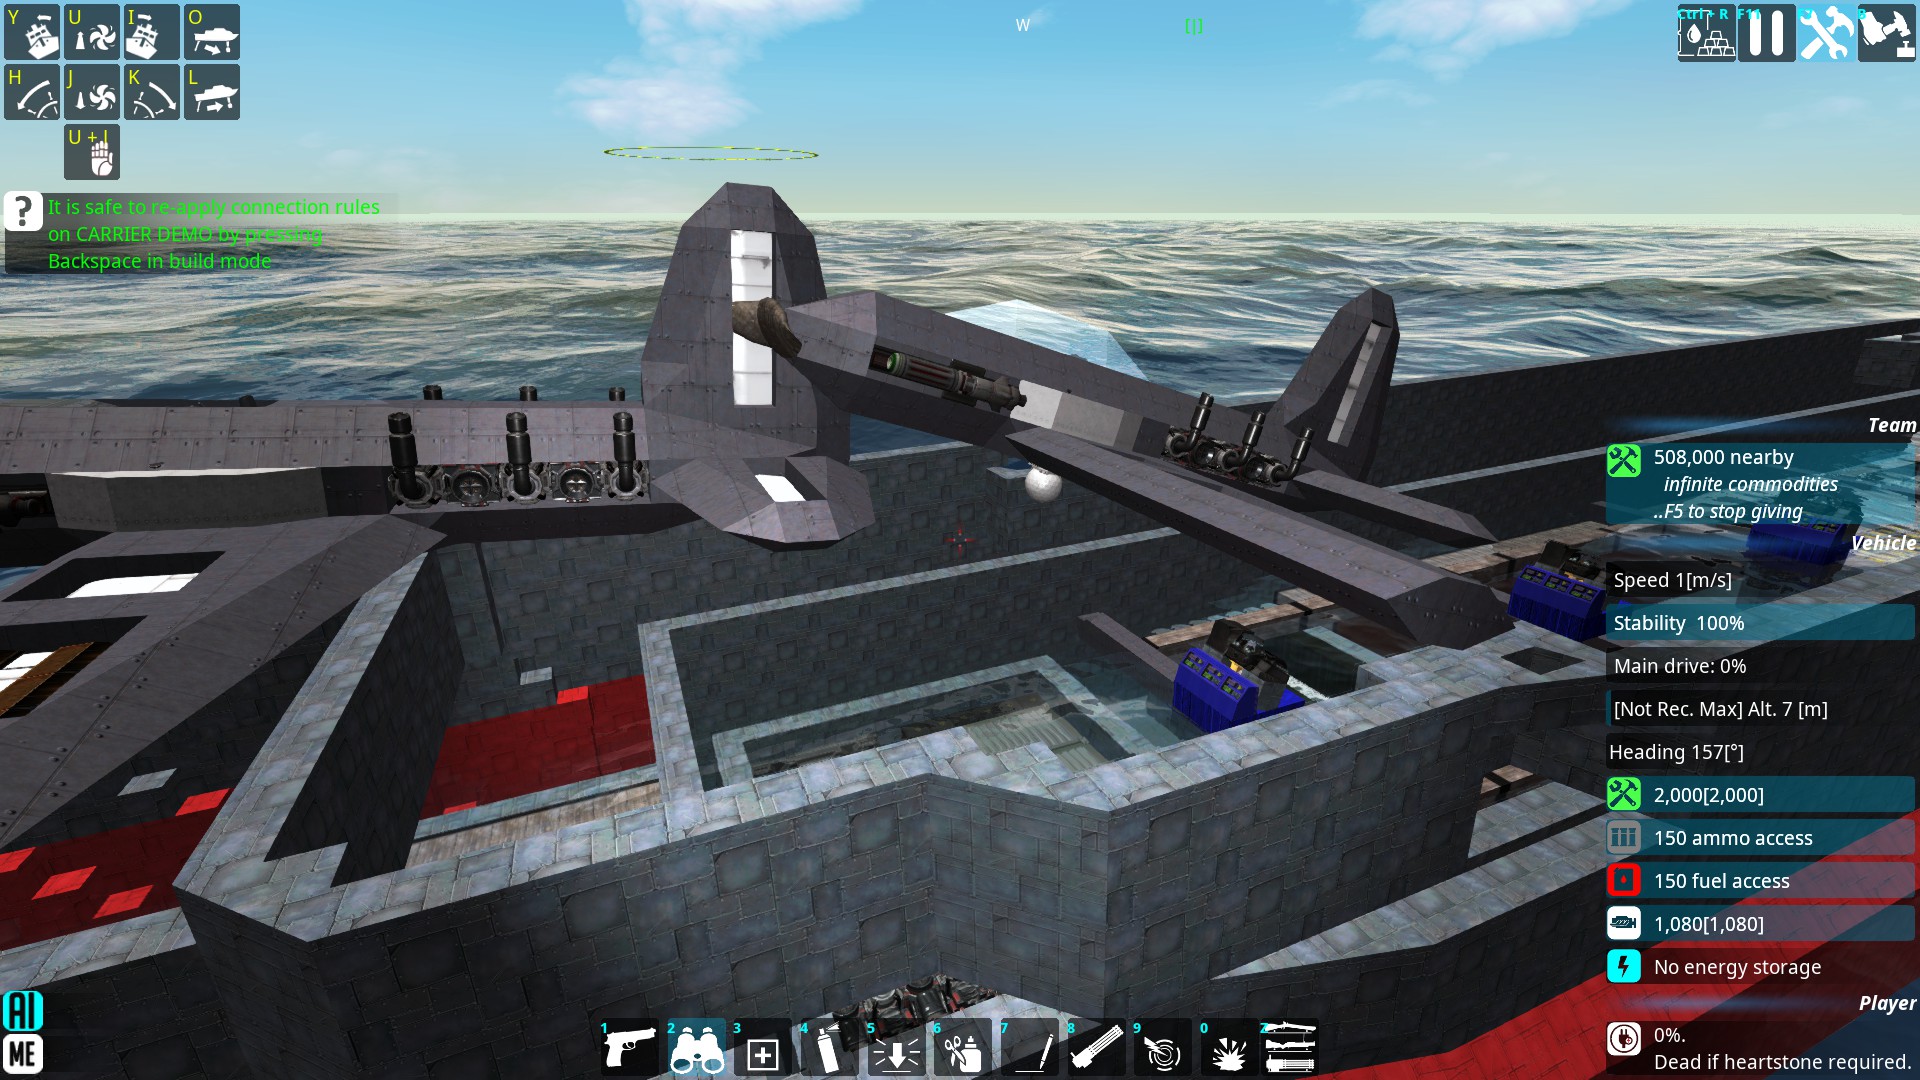
The reason why we have carrier hooks, is to store planes efficiently by keeping them at an angle: they’re relatively short when stood up and can be a bit above one another in a row. The example here is 45 degrees, 16 meters apart between hooks.
You can also suspend fighters from the sides of your carrier with outward facing hooks, like seen here.
The ACBs
At this point, you should use the renaming tool to name each hook so they can be referenced individually by the ACBs. Standardize the names to simplify it, like “FDL1” for Flight Deck Left Spot 1Each hook will need three ACBs to control it effectively. I chose to place them all near their respective hooks rather than the AI core because if the hook is broken flipping the switch doesn’t matter, also easier to rename and check that they all work.
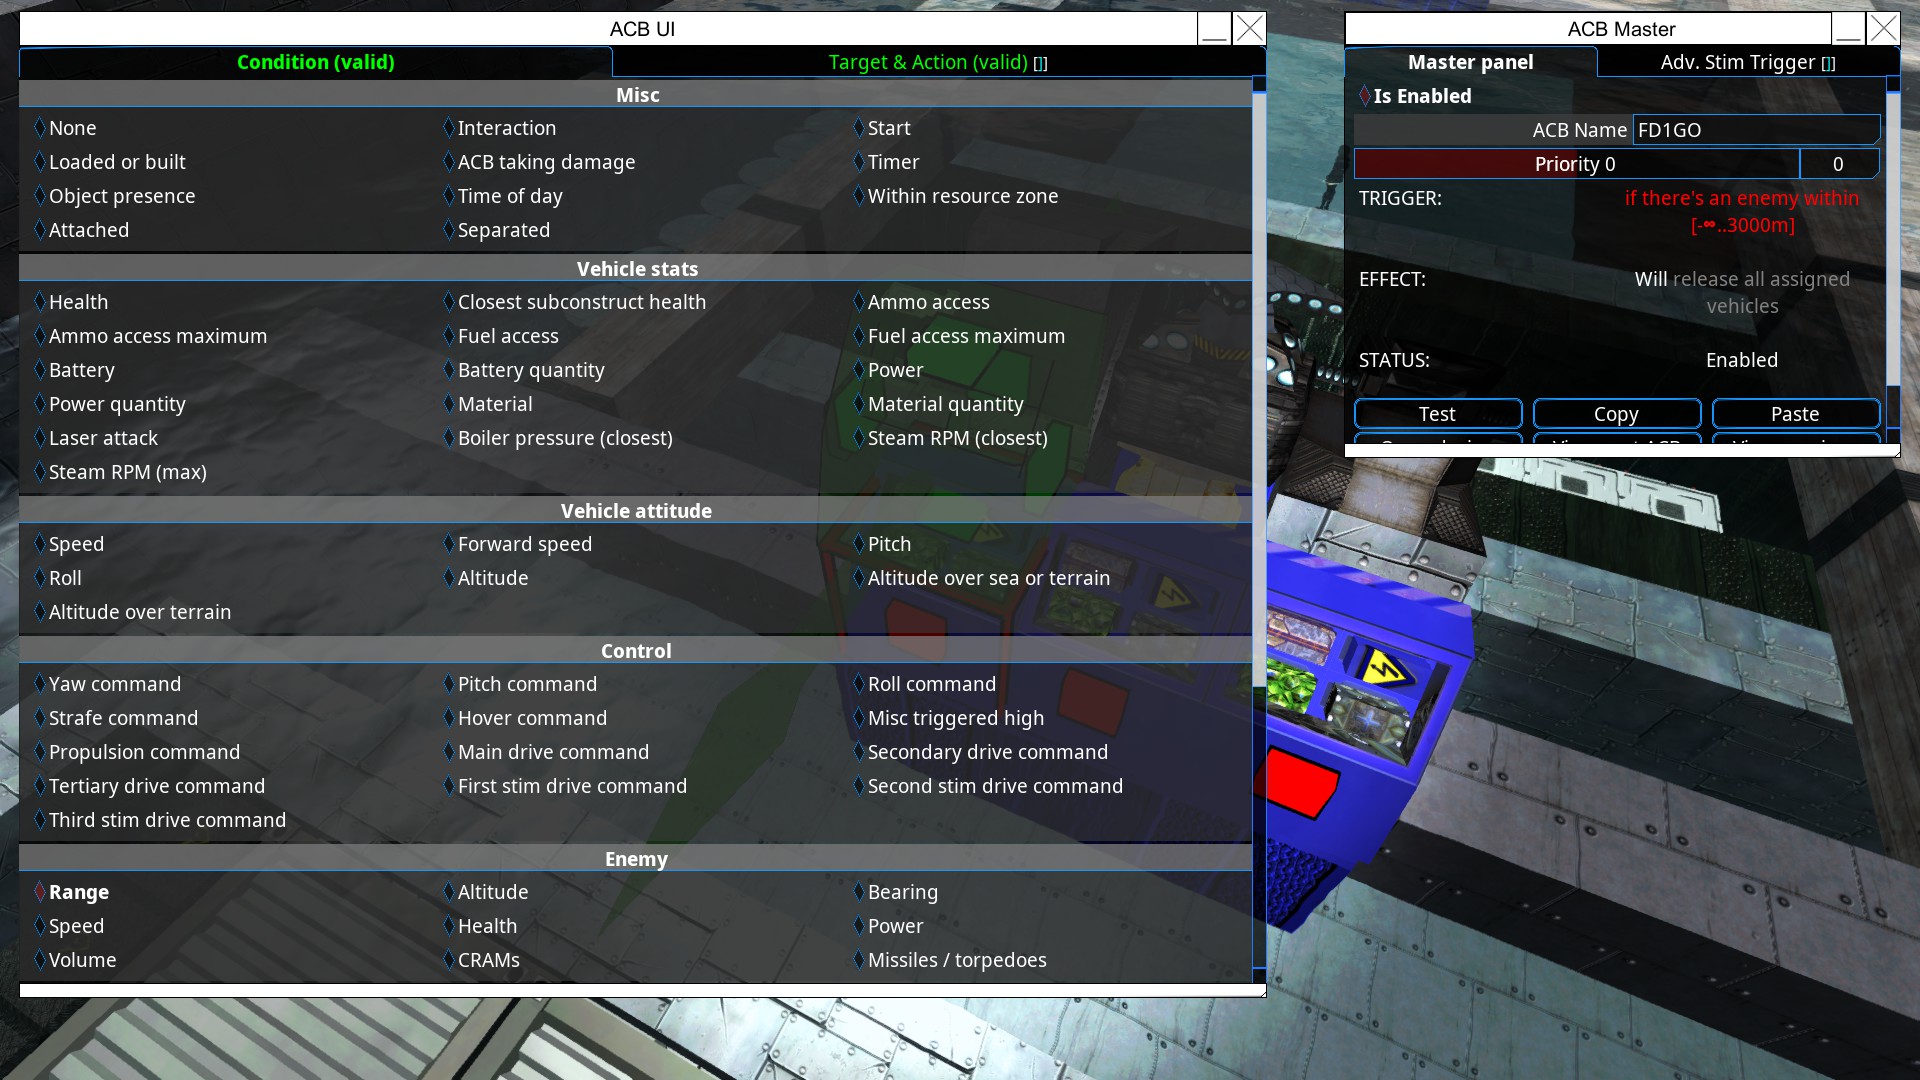
ACB 1 should be set to “if enemy within X range, docking station release all sub vehicles”
Range of 3km is fine. Remember to filter target blocks by the name of the docking station, and add a delay effect appropriate for the hook’s place in the line (1st = instant, 2nd 2 seconds delay, third 4 seconds…). Also name your ACB something like FDL1GO as it is the one that releases the fighter and must later be disabled to recall and repair the craft mid fight.
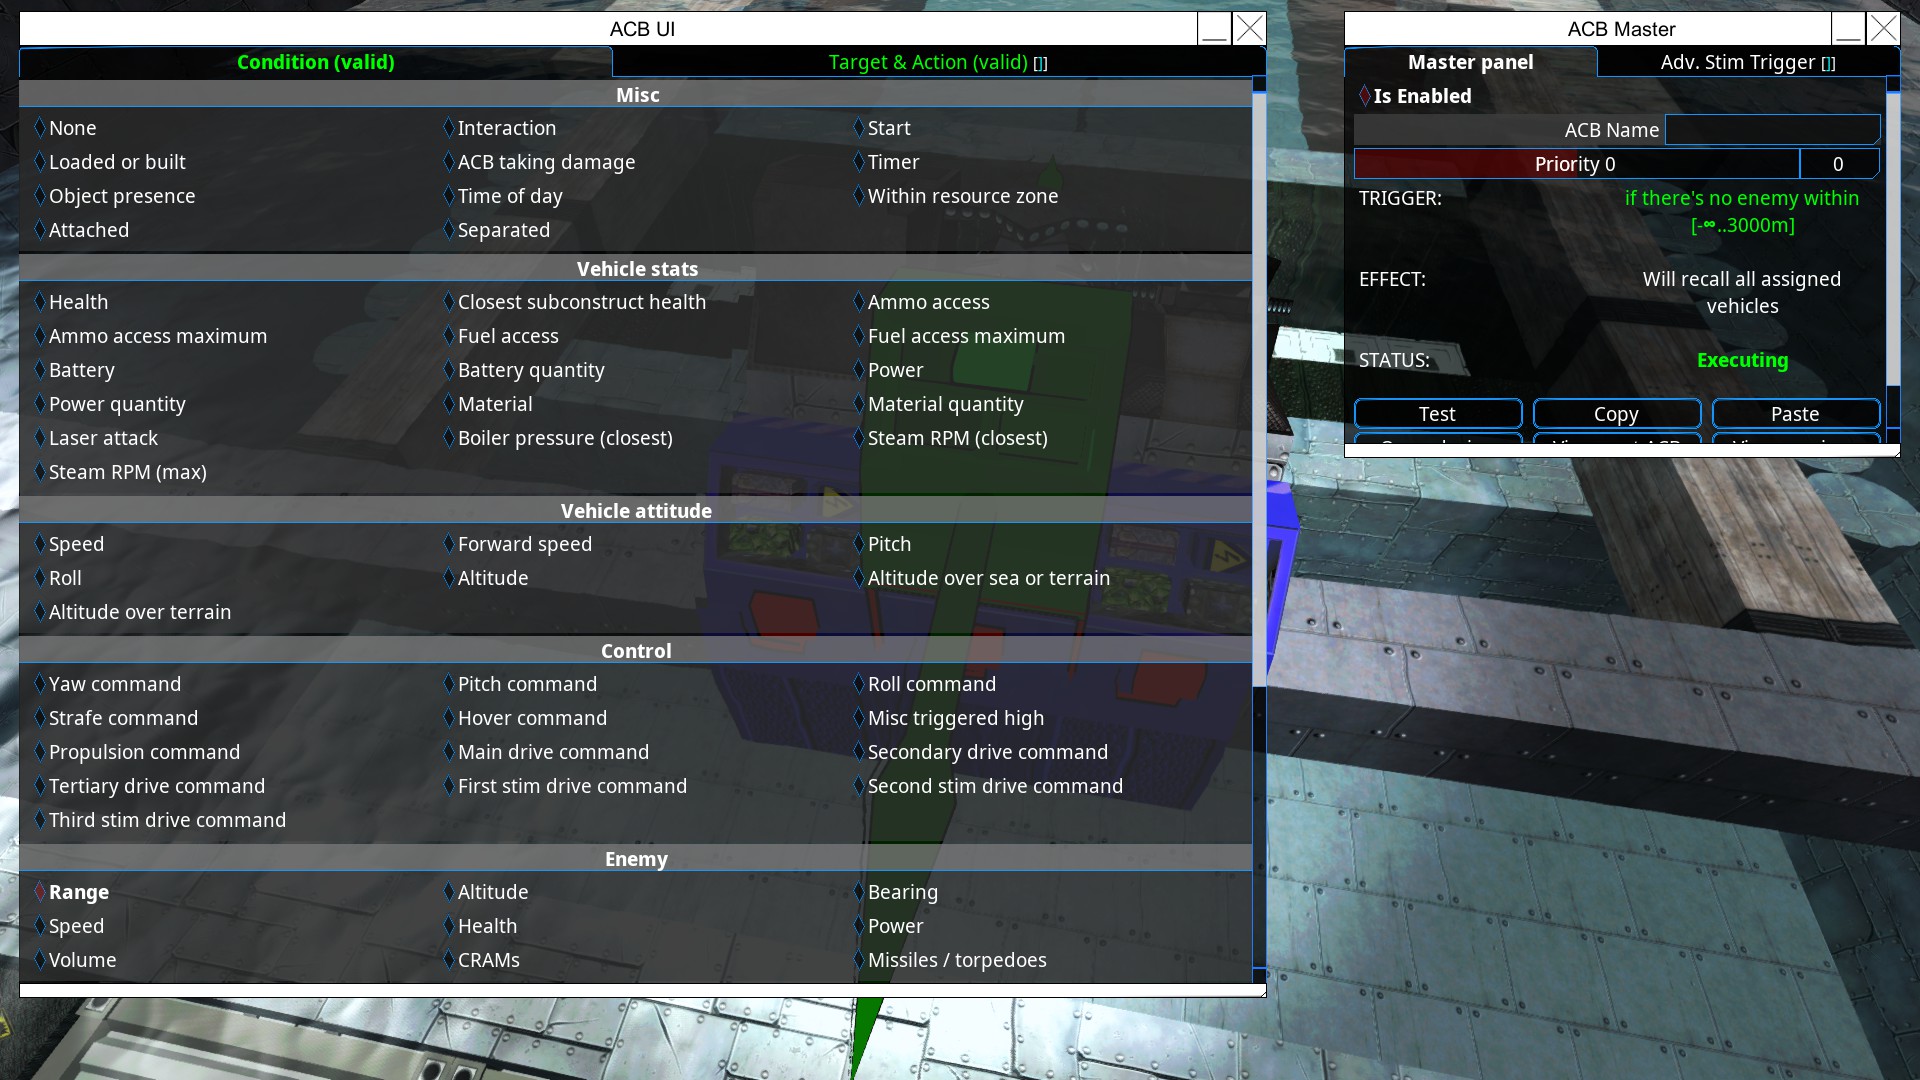
ACB 2 is much easier and doesn’t require a unique name. “if no enemy within range, docking station RECALL all sub vehicles” Again staggering the 2nd, 3rd, 4th and so on by 2 seconds is a good idea to avoid fighter collisions.
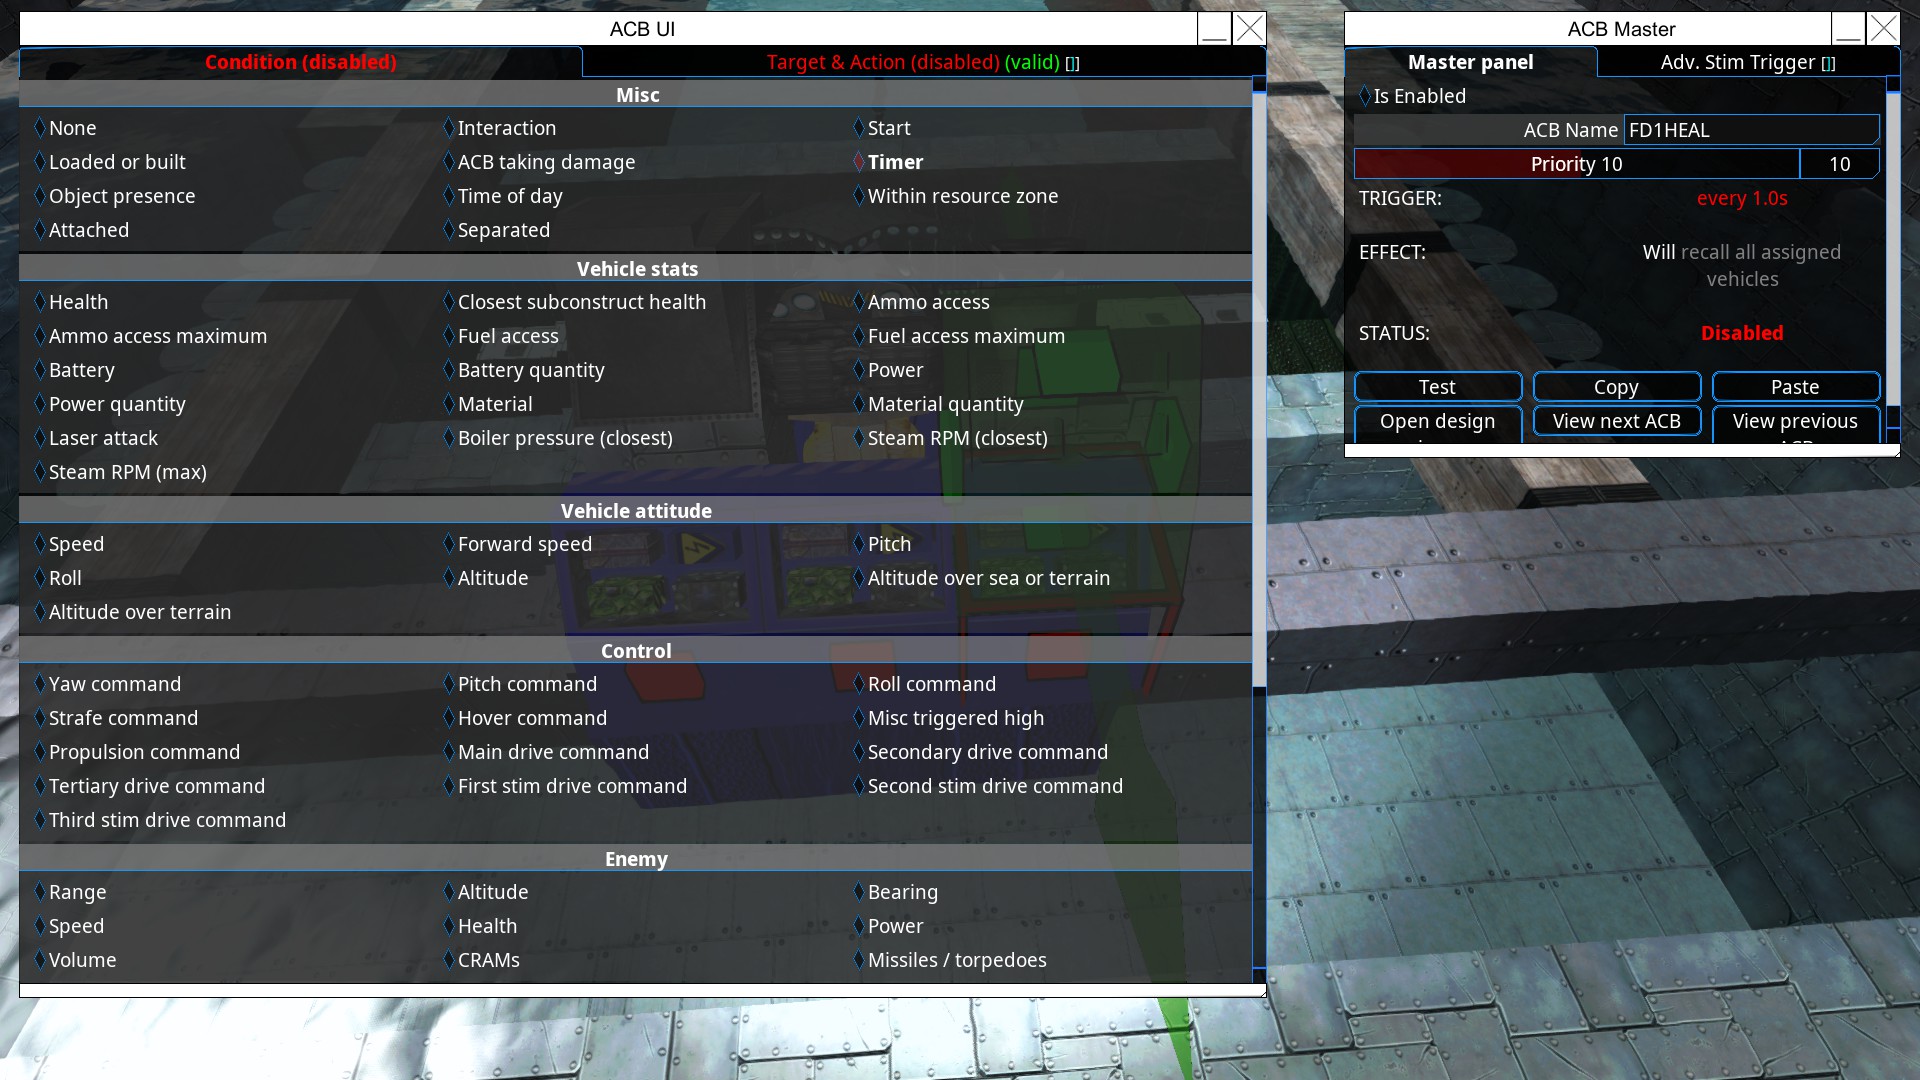
ACB 3 is a special case. If you do not want automated repairs, ignore it and the following breadboard section (but really why not, its cooler and more efficient)
Disable this ACB. Set its priority above ACB 1’s. Set it on a 1 second timer, to recall all sub vehicles and target the correct fighter hook. Name it something like FLD1HEALER for breadboard control.
Breadboard Repair System
The Dreaded time is upon us. THE BREAD IS HERE.
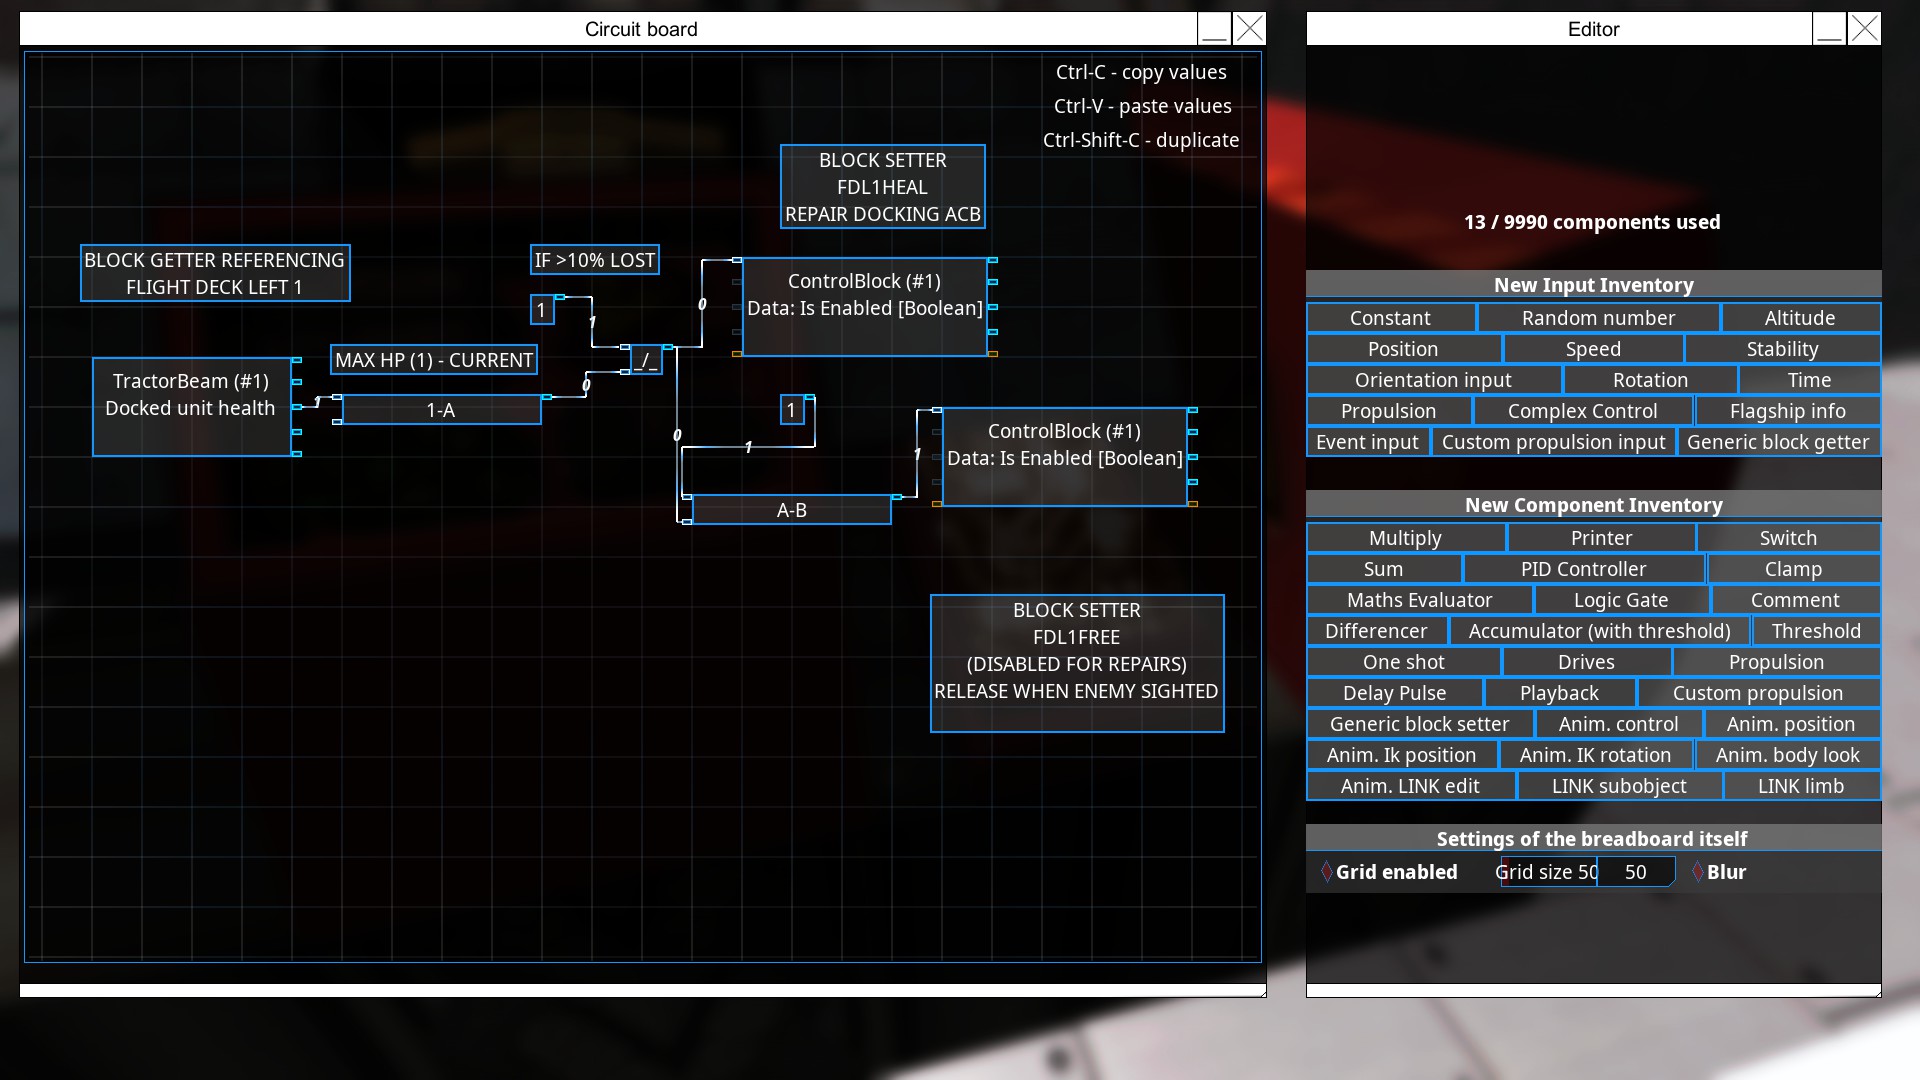
(Finished breadboard screenshot with comments below steps)
Follow these steps carefully.
1 Select “Block Info GETTER” on the upper right.
2 Place it in the board
3 Select it
4 Change the target block type to Docking Station 1 (or 2m depending on the one you used)
5 Enter the name of your target hook, ie FDL1 Flight Deck Left 1
6 Change data type to UNIT HEALTH (crucially, this works when undocked too)
7 Deselect the Block Info Getter
8 Create a “Math Evaluator” from the bottom right
9 Place it on the board, then select it
10 Change the expression to “1-A”, yes, one minus A
11 Exit the math evaluator
12 Click the THIRD output of your block info getter
13 Click the input for your math evaluator: this will link them
14 Create a SWITCH component from the right. Place it on the board
15 Create a CONSTANT component from the right, place it above your switch.
16 Set the constant to 1
17 Connect constant 1 to the TOP INPUT of the switch
18 Connect the MATH EVALUATOR’s as the second input on the switch
19 Click on the switch
20 Ensure its open value is 0
21 Set a Threshold value of how much damage is unacceptable to your fighters. A value of .1 means repairs at 90% health and below.
22 Exit the switch
23 Create a GENERIC BLOCK SETTER from the BOTTOM RIGHT. Not a GETTER.
24 In this SETTER, target ACB 3 “FDL1HEALER” or whatever name it has
25 Change the setter’s operation to ON/OFF BOOLEAN
26 Plug the switch in as the input.
====With this completed, your fighter will be recalled when its health is low — however ACB1 ‘FDL1GO” still wants to send it to fight the enemies and must be shut off.====
27 Create a constant, value of 1, somewhere below the setter
28 Create a MATH EVALUATOR near the constant
29 Set the Math Evaluator’s expression to A-B
30 Set constant 1 as the top input
31 Take the switch from step 26 as the second input
32 Create another Generic Block SETTER
33 Target ACB1 “FDL1GO”
34 Change the operation to ON/OFF BOOLEAN
35 Set the math evaluator as the input.
Congratulations. The breadboard should look a bit like this. It will control the recall ACB and disable the releaser when it needs to, and when the craft is healed it will disable the recall status and let it fly off.
Troubleshooting
When dealing with something as complicated as a carrier, a lot of things can go wrong. Test, Test, Test. It might work vs Marauders, but What happens vs submarines? What happens vs Airships? Super far away annoying space pests? Does your carrier have enough repair tentacles and materials to fix all the fighters or do they end up all back on the ship not fighting because a little flak gun keeps denting them a bit too much.
What I can say is
If your fighters crash into each other, increase the stagger between launches and / or increase the distance between units where they are held.
If your fighters do not launch or fail to be recalled, you may have made a typo in the naming of one of the blocks, typo in the target paths of the ACB or breaboard, the breadboard may have been done incorrectly, or your ship might have been damaged and the computer cannot function because it is currently a heap of slag off starboard.
If your fighters come back for repairs too often or stay too long on the carrier, increase number of repair tentacles, consider increasing acceptable damage taken (but also remember that 5% hp lost could be the AI getting shot out, or the propeller, or the engines).