Having trouble with solo missions? Fear no more! This guide tells you how to make your Scout the best solo-dwarf this side of Hoxxes IV!
Simple Overview
I have used this build for a while, and it has served me very well… almost too well.
What to expect in this guide:
Configurations for the Scout’s weapons for the best solo build.
What NOT to expect in this guide:
How to ask your girlfriend to play DRG.
I have created a list below with pictures. Hopefully, this build helps your DRG experience to brighten!
DRAK-25 Plasma Carbine Configuration
This picture shows you the configurations needed for a HUGE part of this build to work.
This part of the build is required.

The overclock it needs is called Thermal Exhaust Feedback.
This overclock adds heat to your shots when you are close to overheating. This allows for more damage, but overheats faster.
If you don’t have the overclock… then good luck! It’s a RNG (random number generation) drop, so hope you don’t grind 400 hours to get it!
OVERVIEW:
It will sometimes electrocute enemies, it will fire faster when overheating, set enemies on fire when close to overheating, then make you run faster when the DRAK-25 overheats. If paired with Bosco’s cryo-rockets, a talented dwarf could get some BIG damage numbers. This setup is PERFECT for hit-and-run tactics.
ZHUKOV NUK17 Configuration
This picture shows you the configurations needed for a HUGE part of this build to work.
This part of the build is required.
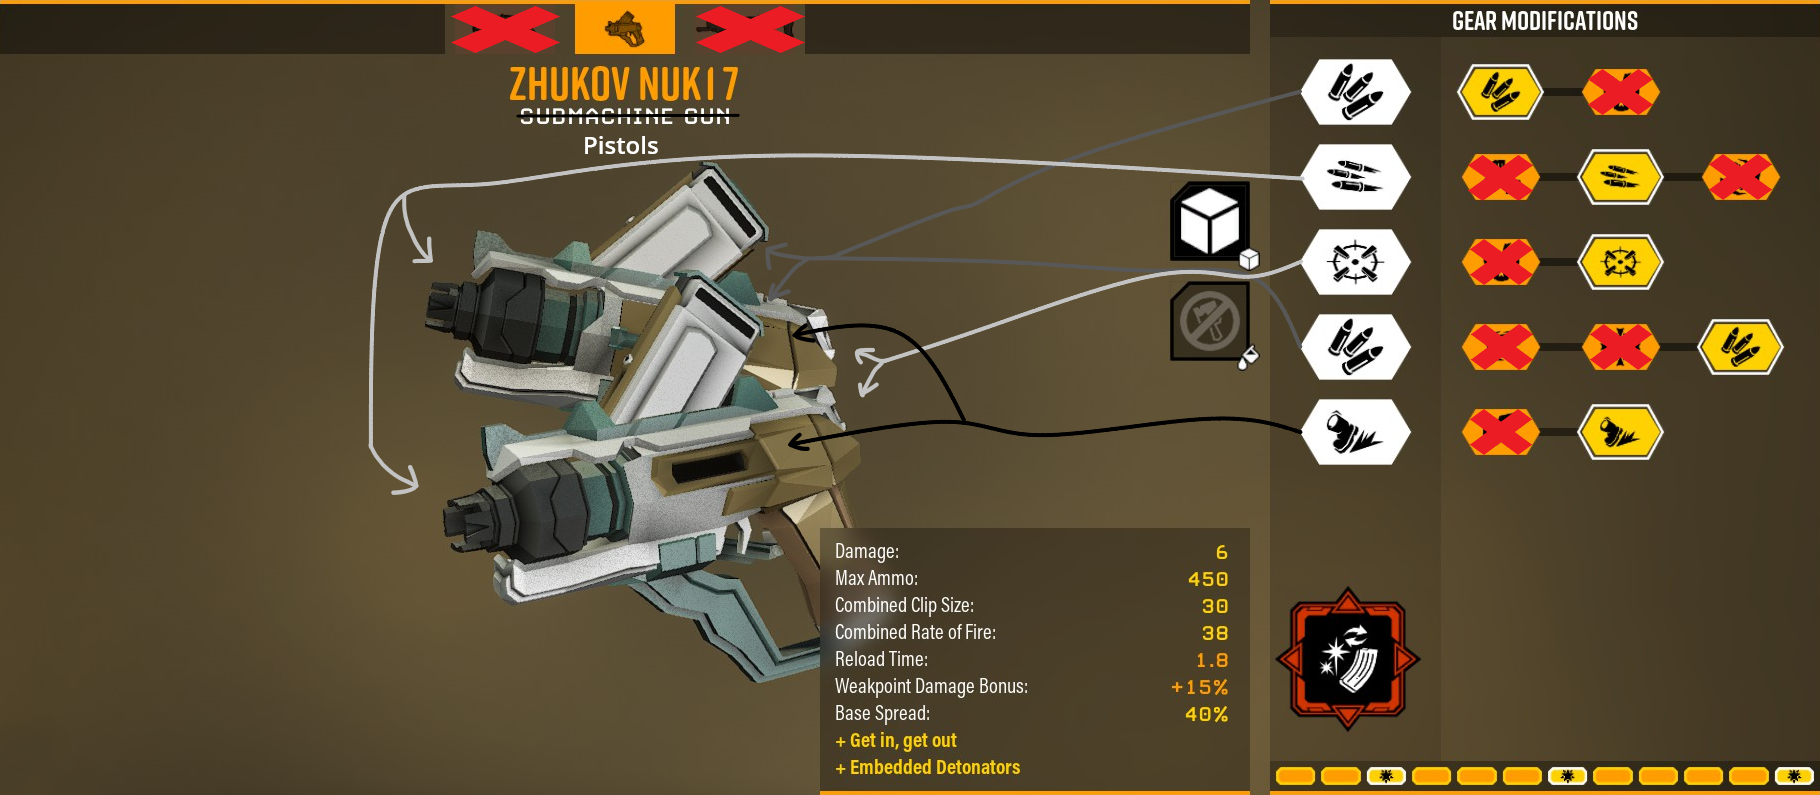
The overclock it needs is called Embedded Detonators.
It’s just like the name of the overclock. If you shoot a non-armor part of an enemy, it embeds detonators that will explode once you reload, or press the reload button. It’s not an actual AOE, but this does MASSIVE damage to your target if you land every single shot. However, it does much less direct damage, you have less ammo overall, and the reload time is longer.
If you don’t have the overclock… then good luck! It’s a RNG drop, so hope you don’t grind 400 hours to get it!
OVERVIEW:
The more shots you land on a target, the more damage you will do, especially with this configuration. It’s specialized to be a hit-and-run weapon, and can do A LOT of damage in the correct hands.
Grappling Hook Configuration
This picture shows you the configurations needed for a BIG part of this build to work.
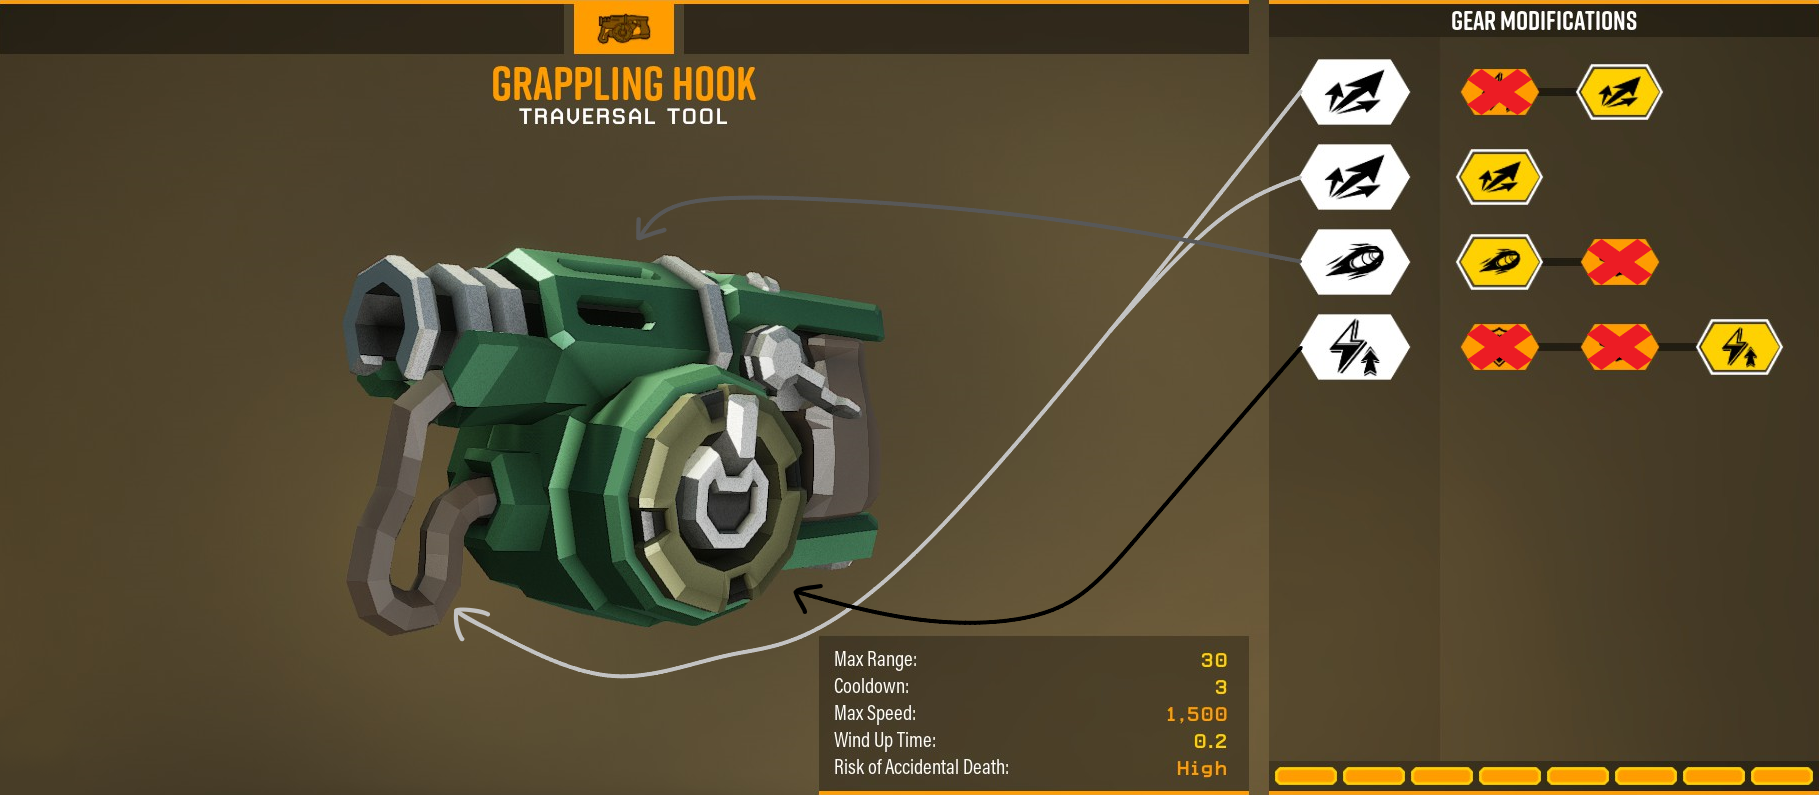
OVERVIEW:
This grapple is perfect for hit-and-run strats, because you can grapple to things far away, AND it grapples onto the object really fast, and has a decent recharge time.
Bosco (APD-B317) Configuration
This picture shows you the configurations needed for a BIG part of this build to work.
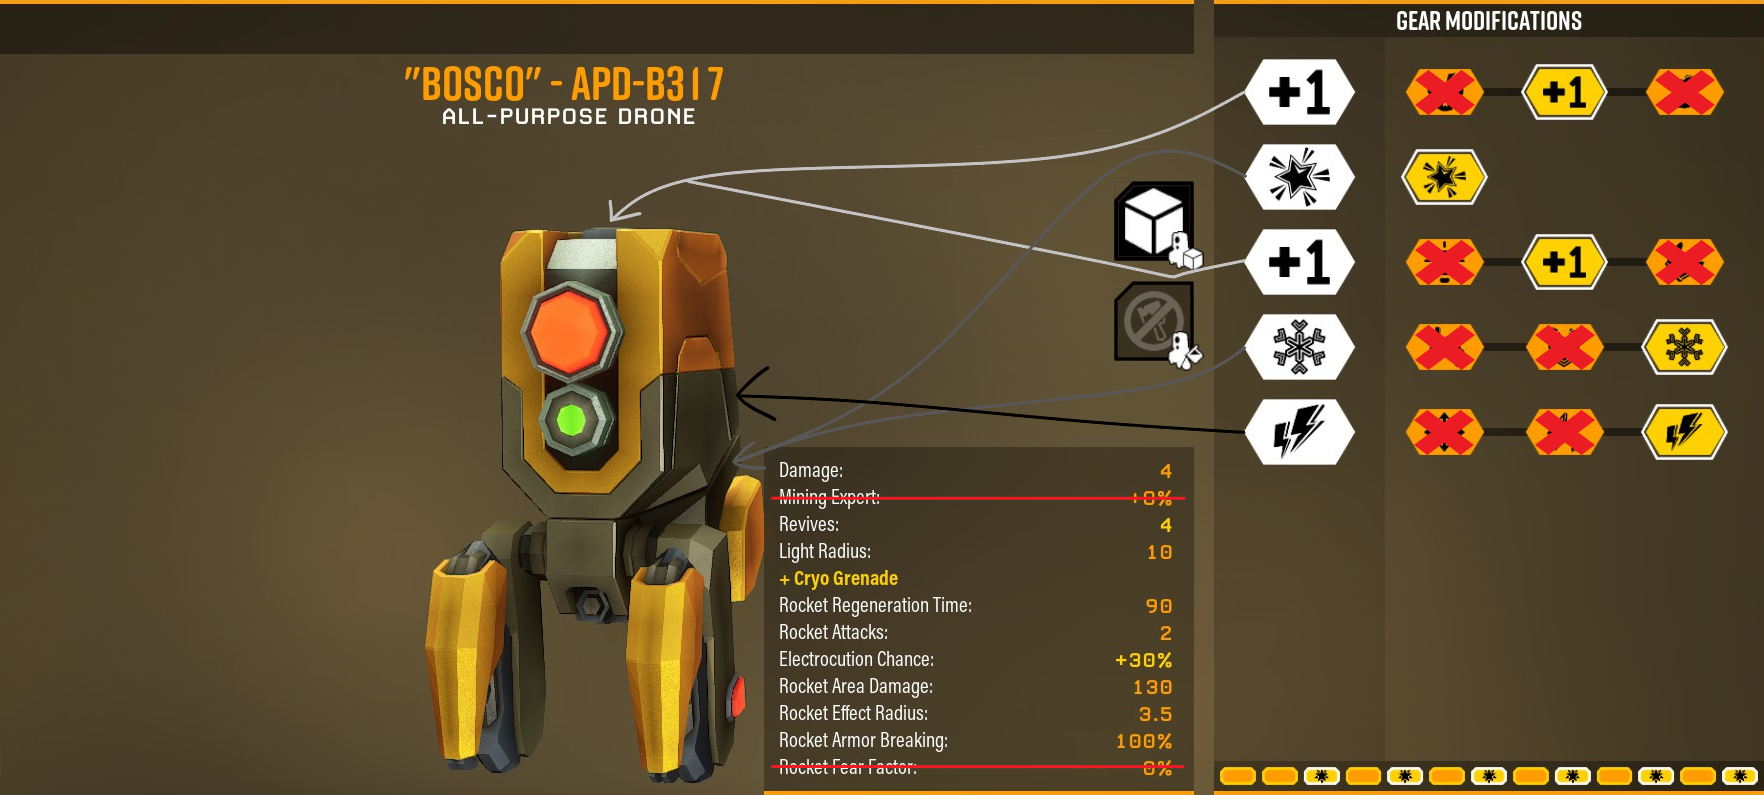
OVERVIEW:
Cryo rocket the flaming enemies, get some big damage numbers, get a bigger possibility of electrocuting enemies, and have 2 extra revives because we all make mistakes here and there. Its a higher chance of finishing a mission, after all.
Grenade Configuration
This picture shows you the configurations needed for a BIG part of this build to work.
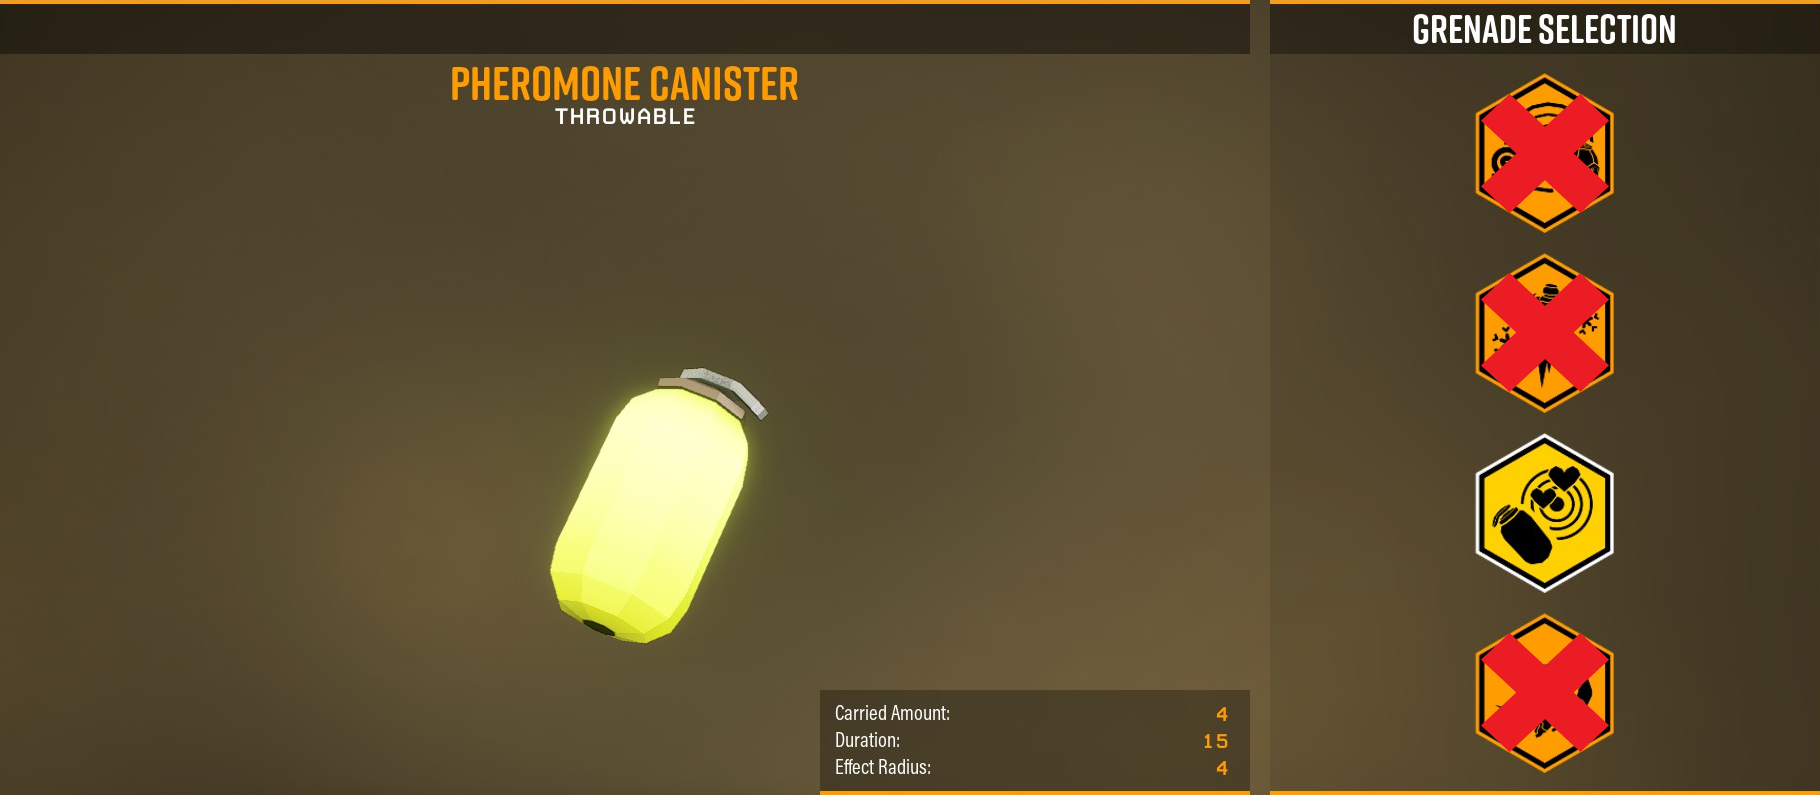
OVERVIEW:
This grenade helps when you are in a bad situation. If you can’t get enough time to resupply, this grenade (if used correctly) will get you that time you need. It also helps you get some time to breathe and escape as the bugs attack each other. (note: if on hazard level 5, the time it takes for the bugs to kill each other is actually kind of scary…)
Perk Configuration
This picture shows you the configurations needed for a DECENT part of this build to work.

- This will make enemys take some damage when they bite you. This will instantly kill Swarmers and Shockers on Hazard Level 5. (not when you are downed though)
- This reduces the movement penalty when walking in goo/web, and carrying items.
- This is very important. Extra health AND movement when you eat Red Sugar.
- This can essentially be 1 extra revive, but only if you can find health!
- This will help you get out of sticky situations fast. It has a cool-down, but can be used indefinitely.
In multiplayer, i would HIGHLY recommend replacing the dash with the ‘field medic’ perk.
Flare Gun Configuration
This picture shows you the configurations needed for a MINOR part of this build to work.
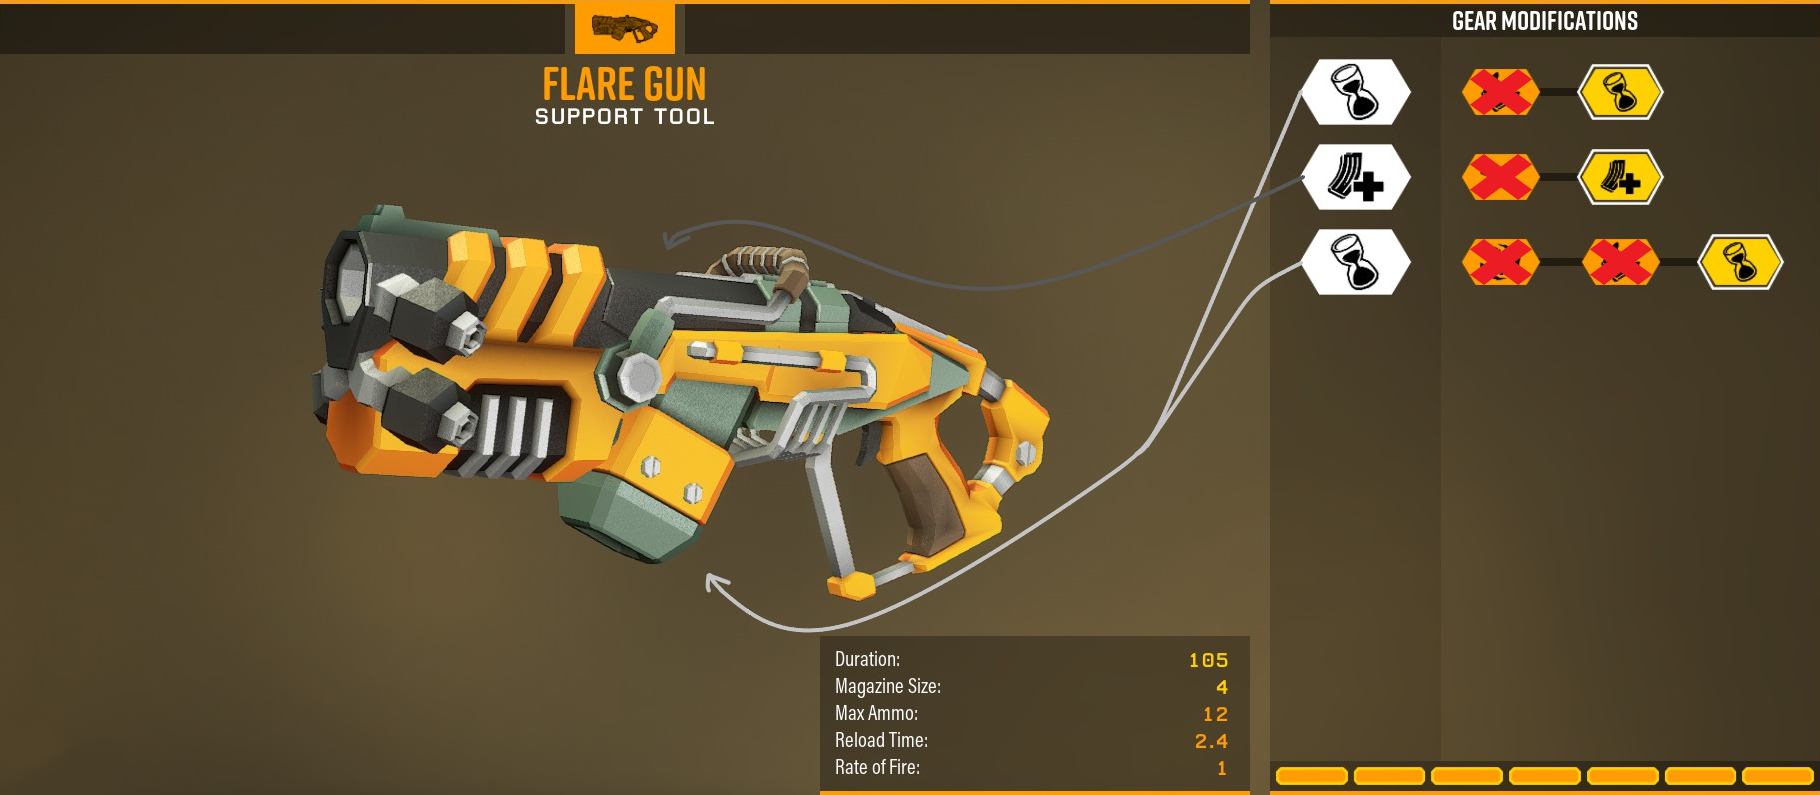
OVERVIEW:
Long lasting flare life, and you can unload some flares here and there in rushed situations.
“Fox” Armor Rig Configuration
This picture shows you the configurations needed for a MINOR part of this build to work.
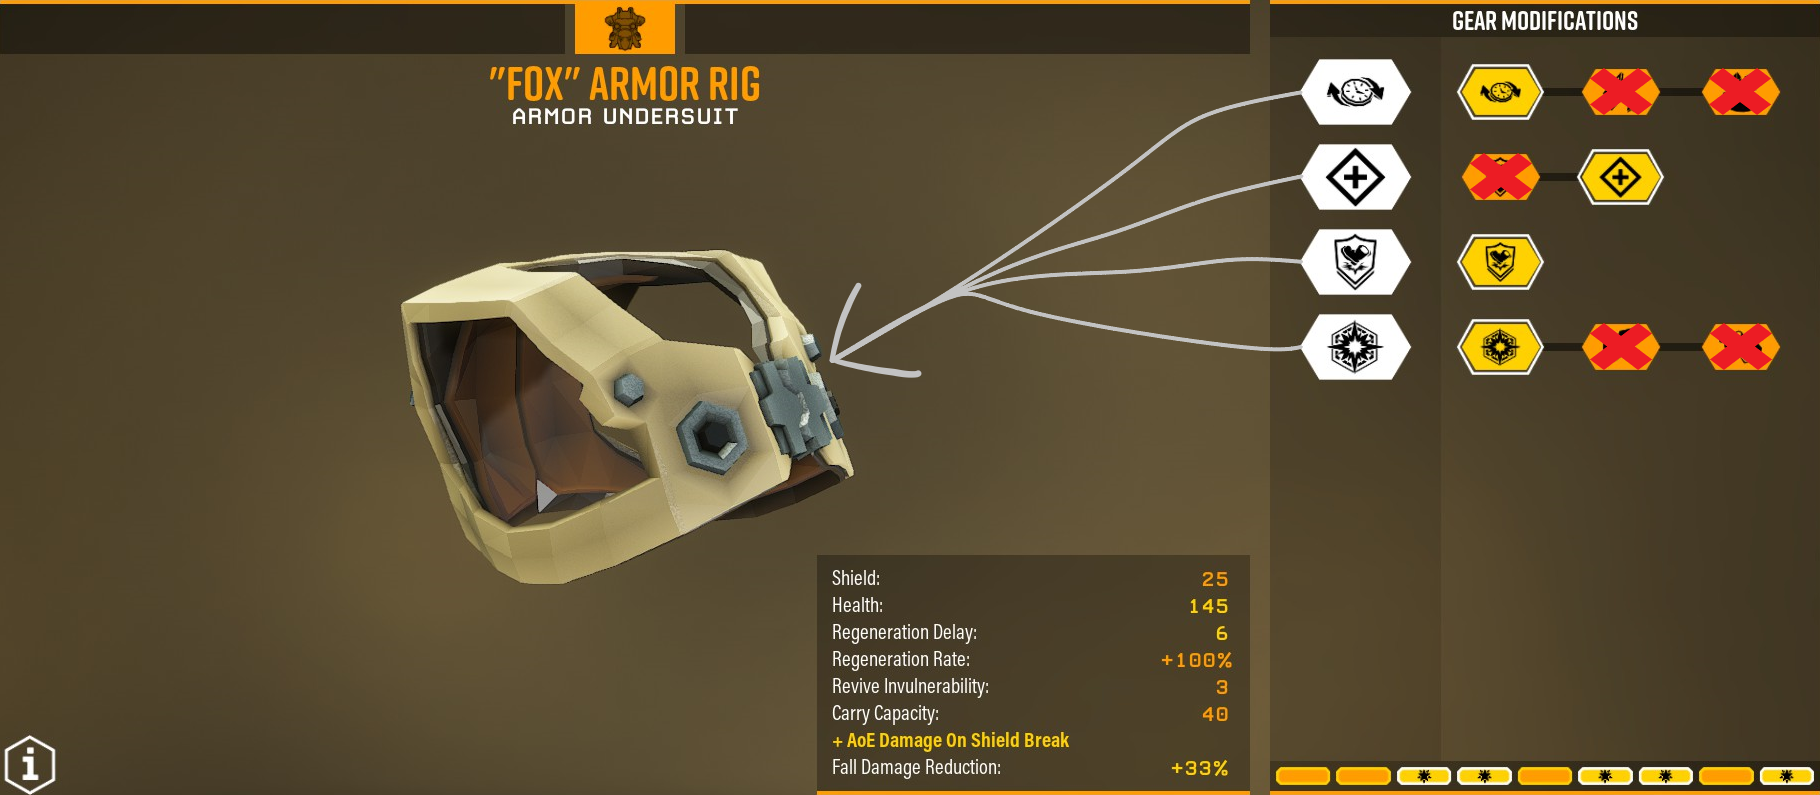
OVERVIEW:
When your shield will inevitably break, you will release an AOE damage area, and the shield will recharge sooner rather than later. It’s better to have more health, and if you get the ‘Red Rock Blaster’ drink, you’ll have much more health.
Pickaxe Configuration
This picture shows you the configurations needed for a TINY part of this build to work.

OVERVIEW:
This configuration allows for the power attack to recharge faster. Helps with mining, and can help when you have run out of ammo.