This guide will show you how to get all Eldritchvania achievements and if you finished the game and are still missing a few achievements (or if you’re stuck and need a clue as to where to go) this guide might help you! Even though some achievements are pretty much unmissable (or at least, shouldn’t be) I’ll still go over them real quick in case you need a hint!
Main achievements, part 1
The Obelisk Garden
Enter into the Obelisk Garden
Not much to say about this one, after talking to the priest drop into the room below and walk on the pressure plate to the right of the screen. Welcome to La-mu… I mean-Welcome to the obelisk garden!
Necronomicon
Find the Necronomicon
If you haven’t found it already, it’s in the room right below the first moving spike block. To open the chest, simply go left into the next room and trigger the collapsing floor trap located in the top row, then fall and move right to enter the middle row. This will let you push the block and open the chest.
Eldritch Blast
Learn the Eldritchblast Spell
In the room past the azathoth mural, there is a pressure plate in the top right. to access it, go down, right, climb the ladder and make it past the disappearing blocks. This will fill the room below with water and open a path by lifting the wooden platform. Go down into the water, swim right, then down and get the spell.
Watch Ended
Kill the Nullug Watcher
Boss time! The Nullug watcher is divided into three segments: the foot, which allows him to move around, the torso, which fires the splitting projectiles, and the head, which spits hazardous creep. While you technically can damage the torso as soon as the fight starts, I recommend focusing on the foot first, as the boss movement can make dodging the other two projectiles a bit tricky. Always keep an eye on the splitting projectiles, as they’re the main threat here. Patience is key here, if the creep prevents you from reaching the boss, simply wait far away until another replaces it.
Kadathian Sphere
Find the Kadathian Sphere
After beating the Nullug watcher, you’ll be rewarded with the oblivion steed summoning spell, which is used on the altar in the room with the jesus painting (you might wanna heal up before using it, though!). Once the beast appears, simply walk up to it (DO NOT turn around), swing your weapon three times in front of the creature’s head (not directly at it!) and then turn around. Once the creature bows down, walk up to it and you’ll be sent to a somewhat challenging platforming gauntlet, and after a short cutscene you’ll receive the sphere.
The Voynich Glade
Enter into the Voynich Glade
There are 2 ways to enter the glade, the first one (and by far the easiest) is to use eldritch blast on the red skull in the room with yig’s symbol to open the gate. The second one is to first complete the key shattered by Maurice (For more details, see the achievement below), then use it on the corresponding door to acquire the prism, which will let you cross the barrier in the room with ghosts (the one right before the Nullug watcher boss fight).
Cultist Key
Assemble the Cultist Key
All three pieces of the key are in the obelisk gardens. The first one is located to the right of the shop, swing your sword at the wall until it breaks. The second one is in the first room underwater, simply fire an eldritch blast at the statue on the wall to the left. The final piece is located in the room above the Nullug watcher, you’ll need to enter the green mist and use your glasses on the hole in the wall. Be quick, your health will rapidly drain while in the mist!
Sacrificial Dagger
Find the Sacrificial Dagger
This one requires both the eldritch blast as well as the kadathian sphere. In the right part of the Obelisk gardens, climb the ladder in the top room, then fire an eldritch blast at the red skull from the ladder. this will activate the moving platform. You can then either fire another eldritch blast at the flying enemy or time your sword swing to fend it off before it knocks you off the platform.

Nullug Talisman
Find the Nullug Talisman
Enter the room that was blocked off by the boulder in the voynich glade, then follow the instructions in the “The nullug mating ritual” book, which are as follows:
-Push the tall statue 2 tiles to the right
-push the small statue one tile to the left
-Push the tall statue back where it first was (2 tiles to the left)
-push the small statue one more tile to the left, this should open the chest and grant you the talisman.
The Children of Yig
Solve the puzzle of the six snake heads
There is a stone tablet in the voynich glade which gives you the order in which you must strike the snake heads to turn off the furnace, which is the following: 6 4 5 1 2 3 (IE you hit the 4th head first and the first head to the left last)
Priest Protector
Help Bruce return to the Blackhorn Church
Bruce is kept prisoner in the voynich glade. To find him, enter the glade through the prism barrier, and proceed until you get to the room you have to crawl through (the one with the row of spikes at the top). Some of the columns in this room are breakable, and while the door may be surrounded by unbreakable ones, the floor in front of it can be broken if you swing your sword while ducking. Once inside, cut the rope and save Bruce.
Worm
Learn the Worm Spell
Still in the glade, you can find an elder ngaro (by going through the 2nd entrance to the voynich glade) which asks that you remind him about the nullugs, simply show him the nullug talisman and he’ll reward you with the worm spell.
The Yig is up
Kill the Wrath of Yig
Use the “summon wrath of yig” scroll in the room at the top of the glade and… another boss! First of all, if you value your sanity, equip the sacrificial dagger instead of the sword. The loss of range might be offputting at first, but the additional damage is no joke, and being able to kill the small snakes in a single hit will help immensely with not being distracted during the fight. The giant fire snakes are easily avoided, but for the ones on ground level you’re gonna want to time your jump. the bouncing snake heads are the trickiest part of the fight and near the end of the fight it is almost guaranteed you’ll get hit by one, so save your healing spells for these. Other than that, simply swing your dagger at the boss to keep it away from you and you’re good!
The Sunken City
Enter into the Sunken City
Just like for the voynich glade, the sunken city has 2 entrances: one is in the obelisk garden, after unlocking a path using the nullug talisman you’ll enter a puzzle room with ancient numbers, jumping cycles all the numbers while pressing the buttons cycles their corresponding number slot by one. You’re gonna want to align the symbols corresponding to 3, 7 1 and 0 in that order, using the stone murals in the garden, as well as the “the nullug race” book for help. The other entrance is located in the voynich glade. Use the worm spell and head to the room with the three sorcerers (the one with the wrath of yig scroll), break the wall in the top right and after entering the next room… jump off! you’ll come crashing down on the floor and a path will open.
Main achievements, part 2
Parental Issues
Defeat Father Dagon and Mother Hydra
The sunken city will be split into two sides until both bosses are defeated, which I’ll refer to “garden side” for father Dagon and “glade side” for mother Hydra.
For both bosses, make sure you have either the sphere of Dagon (you can find how to get this one in the “optional achievements” section) or the water-breathing pill (bought from the scientist in the glade-side city). In glade-side, use the ngaro talisman to open the way underwater, and after going down all the way to the bottom mother Hydra will appear. Her tentacles spit projectiles but can each be destroyed, although they’ll start growing back after a few seconds. the dagger is once again a pretty good idea, as it easily takes out the tentacles and helps finishing off mother Hydra before any of the tentacles comes back.
For father Dagon, you’ll want to do the same on garden-side, but with the nullug talisman. Avoid the mine field and father Dagon will appear. He will swim in circles around the arena, but if you swing the dagger at him you’ll both be knocked back slightly, keeping him away from you and forcing him to eventually turn around. Avoid the poison breath and try to take care of the merfolks quickly, as they can be quite a nuisance. Eventually, father Dagon should die.
Spellbreaker
Defeat Cultist Leader Maurice
After getting the sacred words of ceremony from the city, go back to the obelisk garden and let yourself drown in the circle of stars underwater. This will send you to the cultist hideout. after using the words of ceremony in front of the mural to the right, Maurice will swoop in and steal the veneraxxi talisman! You know what that means: boss time! Despite its looks, Maurice has quite a lot of health compared to the other bosses, and wields the same spells as you, but they’re amost all better than yours. He even makes use of the infinite money spell to attack you! He sometimes uses the speed spell to run around the arena to try and hit you, which you can avoid by standing next to a wall and timing your jumps. He’ll eventually slam in a wall and stay immobile for a few seconds, which is a great opportunity to get free hits in. Another thing worth mentioning is his version of the healing spell. When I said “almost” all of his spells are better, this is what I meant: you can simply grab the healing projectiles before him, and they’ll heal YOU instead! After you’ve dealt enough damage he’ll tire out and use his ultimate spell against you:
…worm. His greatest weakness is a shoe to the face. You win! You can then leave by using a holy beacon, or more simply open the shortcut to the left of the area (this is another way you can reach father Dagon, but be warned that if you forgot to open the way above and you don’t have a holy beacon you’ll be stuck and will have to reload your last save!)
The Gate
Reach the gate
This one is extremely simple: after beating Maurice and getting the veneraxxi talisman, head back to where you fought mother Hydra and use the talisman in the room above it.
Wide Open
Break the seal of The Gate
Using the hints found right before the gate, you can locate four locks inside the ruins (don’t forget to pick up the silver key right next to the gate!).
The first one is in the surface area, go back to the start of the game and down into the water, then use the ngaro talisman in front of the ngaro mural to reveal the lock and use the silver key to reveal a door which leads to a block-pushing puzzle. Push the left block in the middle row on the 3rd plate, then push the middle right block in the hole that opened, and onto the 4th plate. push the top left block on the 1st plate and push the other left top block to the left and onto the 2nd plate (it may look like there’s not enough room to push it but trust me, there is!). Push the remaining top block on the 6th plate and the last block on the 5th, then touch the red orb that appears.
the 2nd lock is hidden in the obelisk garden. Use the Azathoth idol on the trumpet player to reveal a ladder. The next room has a puzzle that grants you an optional item, but you can just ignore it and use the key on the lock. In the next room, the puzzle is simple: avoid the fireballs for about a minute and touch the red orb that appears after that! Surviving may not be that simple, however…
Lock #3 is in the voynich glade in the room above black Tsathoggua and it opens a room with the king in yellow. For this one, simply step on the platforms in order! Hope you remember your numbers, if not, the order is bottom, top right, top left, far left, far right, bottom right, bottom left, remaining right and remaining left. Make sure to have enough semblance to use the speed spell, other wise reaching some of the top platforms might prove impossible.
Last lock is -you guessed it- in the sunken city! Go to father Dagon’s arena and into the cultist’s hideout. the lock is in the very first room you’ll enter, and I’m pretty sure you will need to open the shortcut anyway to submerge the room below. Again, make sure you have the sphere of Dagon or a pill, as this last puzzle happens completely underwater. It’s basically just the lost woods. Follow the air bubble’s direction, they might look normal at first, but after going into another room you might notice they’re not floating up as usual, they’re showing you the way. After a few rooms the last red orb will wait for you. If you’re not using the sphere of Fagon, be careful: your oxygen still drains during the cutscene!
After all that, all you have left to do is return to the gate and smack the lock open. Good luck!
Gatecrashed
Survive the Horror of The Gate
I recommend gearing up for this fight: find all the stats upgrades, find all the hidden items (more infos on these in the optional achievements section) and spells, stack up on semblance and you should be good!
The fight against fergus isn’t that bad, the only attack that can be tricky to dodge is if he uses the red projectiles in combination with the falling black holes. He can also bump into you, and since his fight pattern is quite erratic you’re gonna want to keep your distances with either the whip or some eldritch blasts. Feel free to use a few spells in this phase as defeating Fergus will also drop some semblance.
Then comes Veneraxxi. The fight starts off simple, with him only firing off triple projectiles or using his slow moving tentacle to try and damage you. For the first attack, all you need to do is tap the left/right key, you’ll move at the right speed to avoid all three projectiles. This might prove more complicated as the fight goes on, though… another attack is when two tentacles appear on both side of the screen, you’ll need to jump before they slam into eachother and hit you. After the boss has taken enough damage, creatures will come down to assist him by firing their own projectile. Jumping above is an option, but simply ducking won’t do: you’re gonna need to crawl if you wanna get low enough to avoid it. You can kill these enemies, and probably should, as they come back rather fast, and with two of them on screen things can get chaotic really quickly! The last attack to talk about is the green orbs that spawn from Veneraxxi’s shoulder, they can be destroyed but will leave lingering poison. Don’t be stingy, use all the ressources you have and once you beat the boss, don’t celebrate just yet…
Congratulations
Complete the Game
Why are you still reading this? The temple is falling apart! Run!!
Optional achievements, part 1
It had skulls coming out of it!
Die a painful death
There are multiple achievements for dying in specific ways in this game, and this is the first one: simply walk into the green mist and let yourself perish.
Journal Novice
Add 20 entries into the journal
If you haven’t been doing that already, pick up every note, check every mural with the glasses and read every sign/stone tablet. You can get this one with the content of the obelisk garden alone.
All Hail
Die a painful death
For this one, walk in front of the black tsathoggua statue in the voynich glade and let the dark mist claim you.
Death by boulder
Die a painful death
As the name implies, you’re gonna want to let the boulder roll over you. Do note that this can only be done once, as the boulder will be gone permanently after you avoid it!
Why are you running?
Kill a Genk before it can run away
By far the easiest way to get this is with the genk at the entrance to the voynich glade. Enter from the obelisk garden and avoid the genk to enter the next room, then come back in the room and wait for the genk to start coming at you. You can then attack it as it charges at you to not only prevent it from reaching you, but also push it in the hole. This will not only keep it stuck, but it will also charge into the broken wall, giving you access to the voynich glade map! you can then safely finish it. You could also ignore all that and use the whip to quickly take it out, but this will require you to wait til almost the end of the game.
Spectral Suspension
Kill a spectre in the obelisk garden.
You can kill the spectres in the rooms before the nullug watcher by simply landing an eldritch blast on them.
Light From Above
Use a holy beacon
You can buy one from bruce for only 5 coins, they’re incredibly useful and save a ton of time you would have otherwise spent backtracking.
Part of the congregation
Get healed by Priest Marcus 20 times
Requires 40 coins in total, but you might already be pretty close to getting this achievement by playing normally.
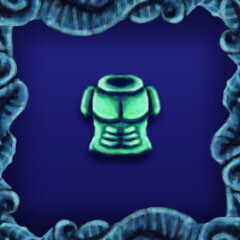
Armour
Find the Armour of Protection
This one is hidden in the room where you solved the six snake heads puzzle, to get it you must go back into the water in the previous room, and cast three eldritch blasts on the lower part of the right wall. This will destroy the wall and let you access the armour.
Maximum Fortitude
Find all health upgrades
There are three health upgrades hidden throughout the game:
-First one is in the obelisk garden, simply walk on all four trumpets in the azathoth room.
-second one is at the top of blackthorn church, climb up the ladder after getting the kadathian sphere.
-Last one is in the sunken city. Right below the room with the scientist shop, there is a hidden path you can only access by turning into a worm. Survive the glorified super meat boy level and you’ll get your last health upgrade.
Maximum Sanity
Find all Sanity upgrades
Again, three sanity upgrades to be found.
-First one is in the obelisk garden, past the deadly mist corridor. Use a barrier spell to make it through mostly unharmed, but don’t forget some semblance to make the return trip (or use a holy beacon, I guess?)
-Second one is given for free in the furnace room of the voynich glade, after you solve the snake heads puzzle.
-Last one is in the sunken city, in a hidden room to the right of the one with the hole that spits rocks. Strike the right wall to reveal the room, and read the tablet while having no sanity left. This will reveal not only the last upgrade, but also a healing spring where you can recover your health for 5 coins.
Maximum Semblance
Find all semblance upgrades
This time there’s four upgrades to find.
-First one is sold in the obelisk garden for 15 coins.
-Second one is hidden in the surface area and requires the stigmata gloves. Go to the secret area near the start and climb the ladder, then strike the wall to your left to reveal a hidden chest.
-Third one is in the voynich glade. In the room above black tsathoggua, strike the top right wall to reveal a secret path with a chest at the end.
-Last one is in the sunken city. Enter from the voynich glade side, walk through the deadly mist and use the ngaro talisman on the wall to the right to open the chest in the same room.
-Under water breath[/u]
Kill Hydra and Dagon without the Sphere of Dagon
Simply use a liquid breath pill from the scientist instead.
Sphere of Dagon
Collect Sphere of Dagon
In the sunken city, under the tsathoggua mural, break the crystal to unleash an ancient evil that will relentlessly chase you. Make your way to the tsathoggua statue in the glade and wait for the spirit to attack the statue instead. After that, simply attack the skull and get your reward.
A Helping Hand
Recieve help to break the cycle
I’m not quite sure of the requirements for this one, but here’s what I did:
After starting a new save and entering the obelisk garden, try to lose all your sanity without dying (no idea if that’s necessary, feel free to correct me if it isn’t). Make your way to the 2nd save point in the garden (the one in front of the nullug mural). Take damage from the spike blocks until you’re one hit away from death. Save, then die (using the spike block). Repeat until you see a shady figure next to you. Talk to it, and take its offer (you will lose all your coins). Deceptively hard to get for how early you can get it.
Optional achievements, part 2
Expedient Excursion
Escape the island in less than two hours
Save this one for a 2nd playthrough of the game, pretty much every puzzle has the exact same solution so you can take note of these in advance and solve them without needing to find their hint in the ruins. Save often and don’t hesitate to reload a previous save if you feel like you’ve wasted too much time, but even while going for a few optional items I managed to get the achievement with 15 minutes to spare.
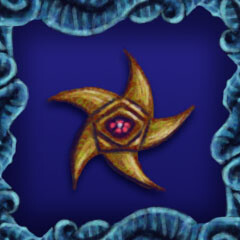
Whip
Find the Whip
First of all , you’ll need the nine sided star. It’s hidden in the sunken city, in a room with the statue of Cthulhu (there’s a pressure plate behind the statue). Once you have it, you’ll need to use it on 9 locations scattered across the entire game. These are:
-The Cthulhu statue in the room where you found the star.
-The Shub Niggurath statue at the entrance of the obelisk garden.
-The Azathoth mural, also in the obelisk garden.
-The Nyarlathotep mural, located in the hidden room above the Azathoth mural. Use the Azathoth idol on the trumpet player to reveal a ladder.
-The loathsome forgotten mural, in the first room with ghosts in the garden.
-The black Tsathoggua statue in the voynich glade
-The Yig statue in the arena where you fought the wrath of Yig
-The king in yellow statue, in the voynich glade room that you unlock by using the silver key
-The gate (in “the gate”…)
Once you have everything, the star should turn red. Go to the sunken city and, in the room with the scientist shop, use the star in front of the top left wall. Enjoy the best weapon in the game!
Thorough Examination
Beat the game with 100% completion
From my understanding, a 100% save requires all spells, weapons, usable items, regular items, maps and health/sanity/semblance upgrades, as well as possibly a completed Journal. Let’s go over every one of these:
-Spells: Pretty hard to miss, the healing spell is found in the very first chest you can find in the obelisk gardens. Simply activate the skull in the top right, but be careful about the collapsing floor!
The eldritch blast is mandatory and has its own achievement (Check the “main achievements, part 1” for more info). Same for the worm visage spell.
After getting the worm visage spell, return to the ngaro elder with the ngaro talisman to get the barrier spell. Do so again with the veneraxxi talisman to get the aura of agony spell.
Back on the surface, return to the start of the game with the prism and jump into the water to find a secret area. Solve the block puzzle and you’ll get the sprint spell.
The last optional spell is the infinite money spell, which is hidden in the sunken city. In the room right before the Cthulhu statue you’ll see a chest which seems impossible to get, but if you go in the room below and jump through the ceiling you can get to the chest quite easily!
The summon oblivion steed, summon wrath of yig and the sacred words of ceremony are all mandatory and cannot be missed.
-Weapons: The sword cannot be missed, you can’t start the game without it. The sacrificial dagger is also needed for some puzzles, and has its own section in the “main achievements, part 1”.
For the whip, simply check the instructions above.
– Items: The kadathian stone, prism, stigmata gloves and Fergus (my boy) are all needed to progress and cannot be missed.
The necronomicon and armour of protection both have their own achievement and are detailed in the other parts of the guide.
The fibrous soles are sold in the obelisk garden for 20 coins.
The boots of fleeing are found at the lower entrance to the voynich glade. To solve the blocks puzzle, push the lower block a bit to the right, so that you can push both top blocks to the left and on top of each other. Push them to the bottom, and to the right on the lowest plate. You can then push the remaining block on the other pressure plate and open the chest.
The charm of health and charm of power are both sold by the ngaro merchant for 20 coins each. You can find the merchant in the room right next to where you found the boots of fleeing.
The ring of Jesus is sold by Bruce at the church for 20 coins.
To find the mark of resolve, summon the steed of oblivion again, repeat the steps and let him carry you to the stars. Proceed as usual until you reach the ladder. Instead of climbing, use the worm spell and go through the hole at the bottom of the wall. Here you’ll find the mark as well as what remains of the nullugs…
The bracelet of vanquishing is in the obelisk garden. After showing the Azathoth idol to the trumpet player, climb the ladder into the room above. Strike the red skull 6 times while avoiding the projectiles fired by the Nyarlathotep mural. You can use your eldritch blast to hit the skull, and while its movements are somewhat random, it will always stop on one of the 6 red arms drawn on the wall (it can move to the same arm multiple times, however).
Last one is the serum formula, which is sold by the scientist in the sunken city. However, as it’s a consumable item, it may not count for 100%. Feel free to grab it, just in case.
-Usable items: Almost all of the usable items are either mandatory to progress or have their own achievement (or both). The only exception is the laudanum, sold by the scientist in the sunken city, but just like the serum, I’m not sure it’s required for 100%. If you’re worried you’re missing one, the list of usable items is: The glasses, cultist key, nullug talisma, ngaro talisman, sphere of Dagon, silver key, holy beacon, laudanum, liquid breath pill, azathoth idol, veneraxxi talisman and the nine-sided star.
-Health/sanity/semblance upgrades: see “optional achievements, part 1”
-Maps: There are 4 maps, one for the surface, one for the obelisk garden, one for the voynich glade and one for the sunken city.
Surface: On the screen with the jump tutorlal, there is a large block with a symbol drawn on it. Hit it a few times with your sword to get the map chest.
Obelisk garden: On the far right side of the garden, there is a small space you can crawl through at the bottom of the wall. This leads to a secret room with an easy puzzle, which gives you the map.
Voynich glade: After going through the top entrance to the glade, find a way to get the genk to fall down and run into the broken wall (see: “Why are you running?” achievement)
Sunken city: Find the fish with a giant skull in its mouth, and hit the skull three times. Do the same on the room to the left and it will open a chest at the top of that screen, which can be reached by coming from the room above.
-Journal entries: This one has its own achievement, and the guide character limit means it will probably require its own part of the guide. See you there!
Optional achievements, finale (The journal journey)
Journal Savant
Complete the journal
If you’re one of the few broken souls who went through the ordeal of completing La-mulana, seeing this achievement might have triggered some PTSD from the “Archaeological Authority” achievement. Fear not, though, as while it is similar, Eldritchvania does three things which massively streamlines the experience:
-The journal is a thing! It keeps track of everything you’ve checked for you, so you no longer have to look at the same things over and over in fear of having forgotten it. It even tells you if you’re missing some and in which area they are!
-Unlike La-mulana, there isn’t a single missable journal entry (unless you’re trying to do this during the escape sequence, in which case: why?).
-The game is far shorter, there are only 5 areas in the journal, and one of these can be completed as soon as you enter the first room.
These changes turn what could be a grueling experience into an actually fun treasure hunt (well at least I thought it was fun, your mileage may vary). Here is the entire list of journal entries, along with a small bonus!
Blackthorn isle
-Jesus painting
-Star above the entrance to the ruins
-ngaro mural in the seaside cave
-tablet right next to the ngaro mural
Obelisk garden
-the three pages of fergus’s journal, one near the entrance, one near the waterfall and one near the lower voynich glade entrance
-the five cultist signs, one at the start and four giving infos about the cultist key parts
-four tablets, one near azathoth, one near the water area, one in the hidden sanity upgrade room and one in the room with the oblivion steed statue
-the shub niggurath statue at the entrace to the ruins
-the trumpet player statue
-the azathoth mural
-the circle of stars underwater
-the markings on the wall of the hidden room that contains the map
-the three murals in the 2nd save room, one for the nullug, one for the ngaro and one for the veneraxxi
-the mural in the room to the left of the 2nd save room
-the unidentified mural in the first ghost room
-the four number murals, one before the nullug fight, one underwater, one next to the top entrance to the voynich glade and one in the room left to the main entrance
-the oblivion steed statue, as well as the markings on the wall right under it
-the nyarlathotep mural, above the azathoth room
-the three books sold in the secret shop
Voynich glade
-two fergus journal pages, one in the tsathoggua room and one above the room where bruce is trapped
-nine tablets, one in the top entrance room, one in the nullug puzzle room, one near the broken yig statue, one in front of tsathoggua, one near the first goat, one in front of the snake heads puzzle, one in the lower entrance room, one in the room to the right of the top save point and one in the room near the city entrance.
-the broken yig statue under the boulder room
-the dark mural above the sunken city entrance
-the ngaro symbol, in the room between the three sorcerers and the broken yig statue
-the mural in the room to the right of the three sorcerers
-the tsathoggua statue (I assume it still works even after it’s broken?)
-the furnace in the room to the right of the elder ngaro
-the ngaro statue next to the ngaro shopkeeper
-the king in yellow statue, in the silver key room
Sunken city
-two fergus journal pages, one in the first room when coming from the obelisk garden and one in the room right before the gate
-nine tablets, one near the tsathoggua statue replica, one in the room where you get the map, one in the room to its right, one near the dagon mural, one near the hydra mural, one in the planets room, one in the first room when coming from the glade, one in the room with the money spell chest and one in the cthulhu room
-the symbol above the elevator in the garden entrance room
-the tsathoggua statue replica
-the message underwater right before the mother hydra fight
-the planets mural in the glade entrance room
-the cthulhu statue, in the hidden room to the right of the money spell room
-the dagon mural, in the money spell room
-the hydra mural, in the room under the scientist shop
-the larger dagon and hydra murals, in their respective arena
-the circle of stars you come out of in the cultist hideout
-the veneraxxi mural in the maurice boss fight room
-the veneraxxi statue in the room right before the gate the gate
– the four tablets in the very first room, you can’t miss these!
??? These are all the points of interest needed to complete the journal, but there’s something else…
you might have noticed a strange red and black circle in the voynich glade while escaping the ruins. Turns out, losing all your sanity doesn’t just make the game harder, it also reveals some secrets (and not just a sanity upgrade!). You can find all these in a regular playthrough by simply walking around with 0 sanity. They shouldn’t be necessary at all, but they’re a nice easter egg to try and look for!
There are four circles I’ve found:
– in the room where you get the sprint spell on the surface
– behind the fake wall that leads to the book shop in the obelisk garden
– in the room above the sunken city entrance in the voynich glade, as mentioned earlier you can see it during the escape sequence
– in the whip room in the sunken city
Conclusion
Well, that should be it! Feel free to notify me if I forgot something or if my info is wrong. I don’t do guides often, it probably could’ve looked better and would probably have benefitted a lot from screenshots and such. Still, I hope it will provide all the help you need to navigate the ruins!