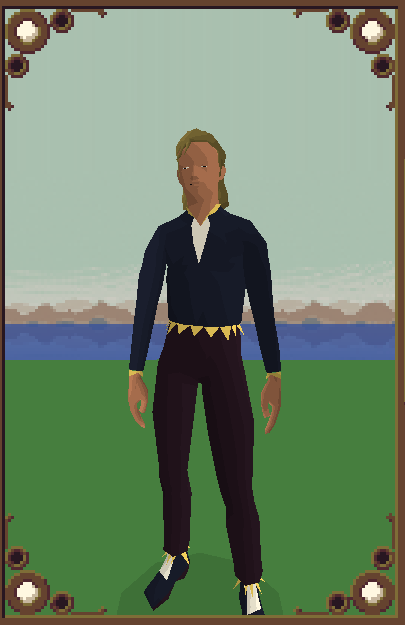
Since version 1.12.2, Super Video Golf allows players to add their own custom player models or ‘avatars’ using the Workshop tools. If you wish, you can even upload your custom avatar models to the workshop for other players to use.
To achieve this, you can use the free modelling software Blender to create and prepare your avatar model, and then import it to Super Video Golf via the in-game tools. This guide will walk you through the necessary steps to do so.
Introduction
It’s important to note that this guide specifically utilizes Blender version 3.1.2. Different versions of Blender may have different features, such as the vertex color property or the glTF exporter, so it’s important to ensure that the version being used is compatible. If any steps don’t yield the expected results, it’s recommended to check the current version of Blender being used.
For those using the Steam version of Blender, it’s possible to switch between different versions using the Steam client interface.
The Super Video Golf installation directory contains template files that can help with creating player models. You can find them under
assets/workshop/
This guide makes use of template files that come bundled with Super Video Golf. These template files are located in the installation directory and include two model templates for Blender as well as two *.ase files which contain color palettes. These color palettes can be imported into Blender and are utilized in later steps of the guide.
Preparing the model
Creating player models is a more complex task than creating models for balls and head wear. This is because player models require rigging with skeletal data. Sites like Mixamo make this task easier, but certain preparation steps must be taken. For example, player models need to be approximately 1.7 units tall, and humanoid. Additionally, the skeletal rigs must have exactly 41 bones or joints. This should be kept in mind if you are planning to add your own rig.
It is important to note that models in Blender are z-up, but they must be exported as y-up to be used with Super Video Golf. This guide will use Mixamo to take care of the rigging process. The export settings for Blender will be detailed later in this guide.
To get started with a player model you can use one of the two template files included in the installation directory of the game, under assets/workshop/ named template_male.blend and template_female.blend. These are based on project files created by VideroBoy and are available on Open Game Art in the public domain.
Whether or not you use one of these templates as a basis for your model, once you have finished creating the mesh you will need to colour it.
Colouring
To add colors to the models, vertex paint mode is used in Blender. The user is free to choose any colors they like, but it is advisable to use colors from the colordome-32 palette available in the templates directory. This is because the models use vertex color data and it is recommended to stay close to the recommended color scheme. For example, one can paint the eyes and collar of a model with colors from the colordome-32 palette.
The color choices for the player model are not just random, but rather specific “key” colors that can be substituted in-game using the player customization screen. These colors, which should be used for specific parts of the model, are listed below in hexadecimal format:
- 0x000000 – Bottom Dark
- 0x0a0a0a – Bottom Light
- 0x1e1e1e – Top Dark
- 0x282828 – Top Light
- 0x464646 – Skin Tone
- 0x646464 – Hair
Note that the hair colour will also match the colour chosen in the player profile editor for any active hair or head wear model. Any or all of these colour keys are optional.
These key colours are also available in the template directory in the file avatar_keys.ase for easier import into Blender.
Unwrapping
After coloring the model, you will also need to perform a UV unwrap on it. The reason for this is that the workshop tools will bake the vertex colors to a texture automatically when importing the model. This feature allows multiple player profiles to share a single model while having different textures with different color schemes.
The method you choose to unwrap the model is not too important, but the following recommendations may help:
- Leave a reasonably large area between islands, to allow for colour bleed when baking.
- Add seams along borders of different coloured parts so that way different colours have their own islands. This will prevent adjacent colours bleeding into each other.
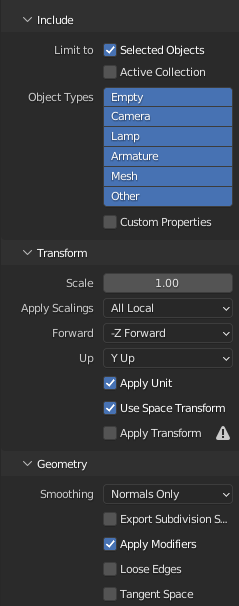
In order to use Mixamo’s auto-rigging system, you can export the model as an *.fbx file with specific settings. Ensure that you have applied any relevant modifiers, such as the mirror modifier included with the model templates. The recommended export settings for the fbx exporter are as follows:
Rigging the model
The guide employs Mixamo’s auto-rigging system, which is a free service provided by Adobe. However, this requires users to sign in with an existing Facebook/Google account or create a new Mixamo account. While some users may not prefer this option, they can still rig the model manually using Blender.
Due to licensing restrictions, it’s not feasible to distribute the default Mixamo rig. Therefore, you must create your own rig, which should have exactly 41 bones to match the existing animations added by the workshop tools during model importing.
If you are using Mixamo, then log in to the Mixamo site, and follow the instructions to upload the *.fbx file exported in the previous step.
Place the markers in the auto-rigging window accordingly, and make sure to set the skeleton LOD to 41 bones (2 chain fingers)
Click next, and once the auto-rig process has completed you should see a t-pose model ready for download. Click on the download button and choose the following options:
Save the newly rigged model to your hard drive, ready for re-importing to Blender.
This final step is necessary to convert the fbx file to a glTF file, required by the workshop tools importer. If you reimport it to your existing Blender file then it also provides an opportunity to check that the rigged model matches in size and orientation with the original model.
Select the imported model and the rig – making sure NOT to select any existing model! – and choose Export->glTF from Blender’s file menu. Using the following settings, making sure to include both UV and vertex colours, export the model to glTF.
Importing the model with the workshop tools
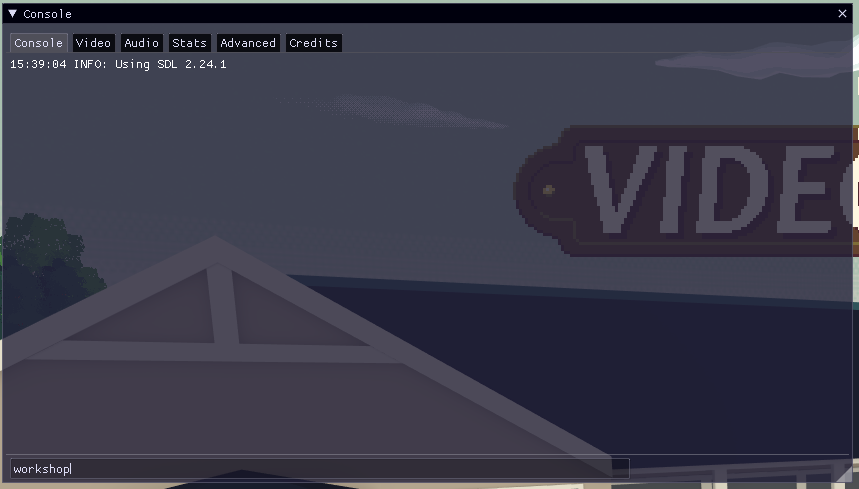
Once the glTF model has been exported from Blender it is now ready to be imported into Super Video Golf. Launch the game and, from the main menu, press F1 to open the console.
Type
workshop
into the console and press enter, to launch the workshop tools.
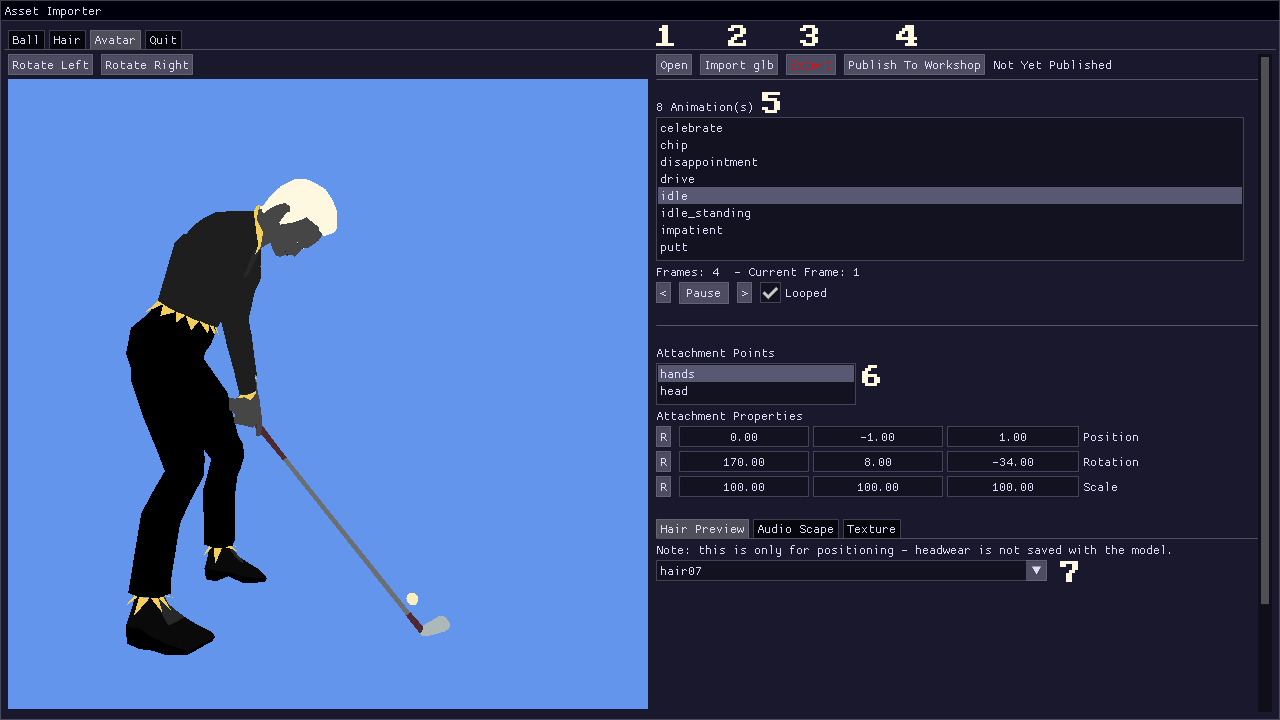
When the tools have launched by default you’ll be on the Ball tab of the importer. Click on the Avatar tab to switch to the player model importer.
Click Import glTF (2) and browse to your exported model. Click Open, and the model should appear in the preview window. If the imported model is distorted, or doesn’t appear, press F1 to open the console and look for any possible errors. Go back over the previous steps and check that you carried everything out correctly. If imported colours look incorrect it’s possible that newer versions of Blender have changed the vertex colour format to or from sRGB colourspace. In which case use the steps outlined in the introduction to revert to an older, compatible version of Blender (3.1).
Assuming the model has imported successfully it is now possible to preview the player animations by selecting each one from the animation list (5). Using Rotate Left and Rotate Right above the preview window you can rotate the model to make sure that the example hair and club model attachments are aligned correctly.
Using the Hair Preview tab (7) you can switch between different hair models to check for correct alignment.
If either the hair or club model needs some re-alignment, select the appropriate attachment point, head or hands, from the attachment point window (6)
The attachment properties can then be used to alter the position, rotation and scale of the selected attachment. Make sure to double check by rotating the preview and playing the animations that everything is in order.
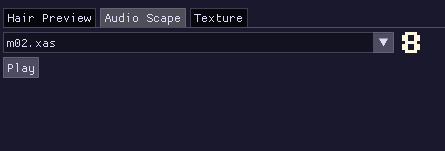
Click on the Audio Scape tab and select a set of voices to use with the model (8). After changing the selection you can demo the voices with the Play button to hear how they will sound in game.
When you are ready, click Export (3) which will highlight red to indicate if there are unsaved changes. Give the model a unique name (existing names will otherwise be overwritten) and click Save. You will now be able to quit the workshop tools and test the model in game. Open the profile editor and switch the player model selection until the new model appears.
At any point you can re-open the workshop tools, and from the Avatar tab click Open (1) and select a previously exported model. Then you may make any changes you require – just remember to click Export (3) again to save them. You can overwrite the existing model by using the same name or export it as a new model with a different name.
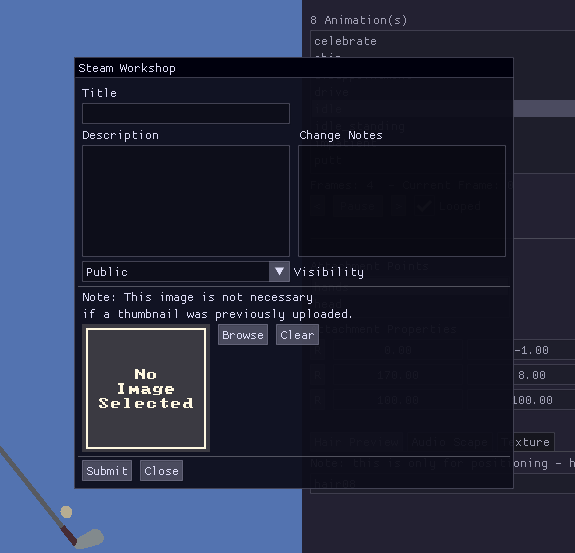
Optionally, at this point, you may also upload the model to the Steam workshop, to share it either publicly, or with your friends. Click Publish To Workshop (4) to open the workshop submission window.
The first time you do this you may find that the Steam overlay opens asking you to agree to the Steam Workshop Agreement. This only has to be done once, however you will not be able to upload anything until you agree to it. Sometimes the overlay will open even though you have already agreed – this is just because Steam hasn’t yet downloaded your agreement status. Waiting a few moments and trying again will remedy this.
The export window allows you to set the name and description for the item, as well as a thumbnail image. You can also choose whether or not the item is public or friends only, so that you can test the item with friends first before making it public. When you’re ready click Submit to upload the item. If any required fields are missing a pop up warning will appear, otherwise you’ll see an upload progress window. Once the upload is complete you can open the workshop page for the item in Steam and further edit it, including adding any extra images, screenshots or videos you may have.
