This guide explains the hows and whys behind building an army, instead of leaving just a template for you to copy.
By understanding the mechanics, you will be able to recognize the mistakes in some popular builds, and be more flexible when building your own army.
Introduction
This is a guide that will teach you how to build an army that can roll through NG ludicrous, while being flexible to fit whatever playstyle you enjoy more.
So I may convince you that I actually do know most of what I’m talking about.
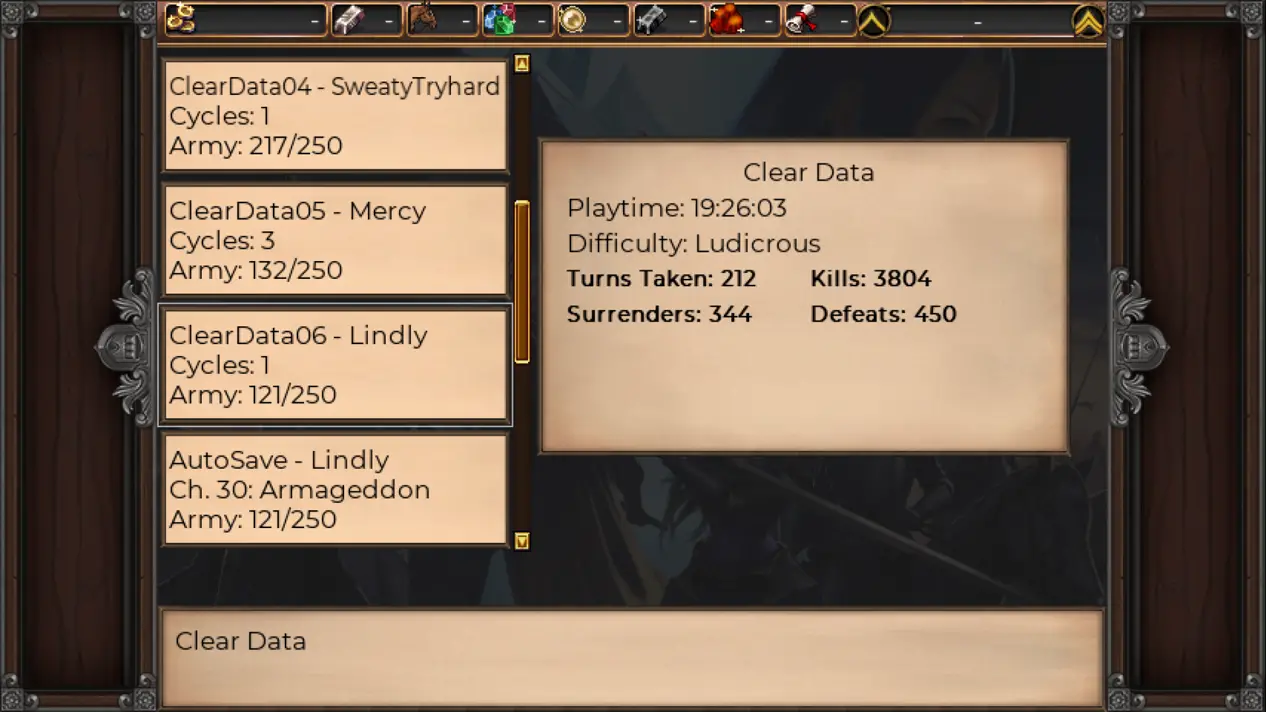
Definitely have a lot of room to improve, but suffice to say just clearing NG ludicrous stopped being that much of a challenge once I learnt to build my armies better.
Volley Mechanic (VERY Important)
In SoW melee combat, attack waves are structured. For one side, each time the squad attacks, units of the same type will all pick their targets then attack together in what we call a volley.
Then units of the next type fires off the next volley until all of the units in that squad attacks once. We call this a round. The defender then takes a round, then the attackers takes a round, and so on.
Volley order in melee combat (credit to Xyranius and Advil_PM on discord):
- Pre-battle (such as Oracle and Everlasting Potion)
- Guns front row
- Guns mid row
- Guns back row
- Magic and dragons
- Ranged (including Ranger first attack crossbow)
- Light melee and samurai
- Heavy melee
- Risen
- Healers
When a volley happens, all participants will choose their target first, then they all attack.
So what does it matter?
When you have a 9 champions squad attack a triangle formation enemy squad, all 9 will waste their first attack on the singular frontline enemy, as target selection only happens before the start of each volley, not during.
To prevent this, you want to make sure your squad composes of units belonging to different volleys, or have different target selections, so they spread out their attacks or at least look before they chop.
Example 1: multiple volleys
2 mage, 3 heavy, 2 light.
This is a very powerful squad type, it oneshots most enemy units on player phase. You don’t need all 9 members, good traits nor good artifacts to oneshot enemy squads even on ludicrous.
Example 2: different target selection
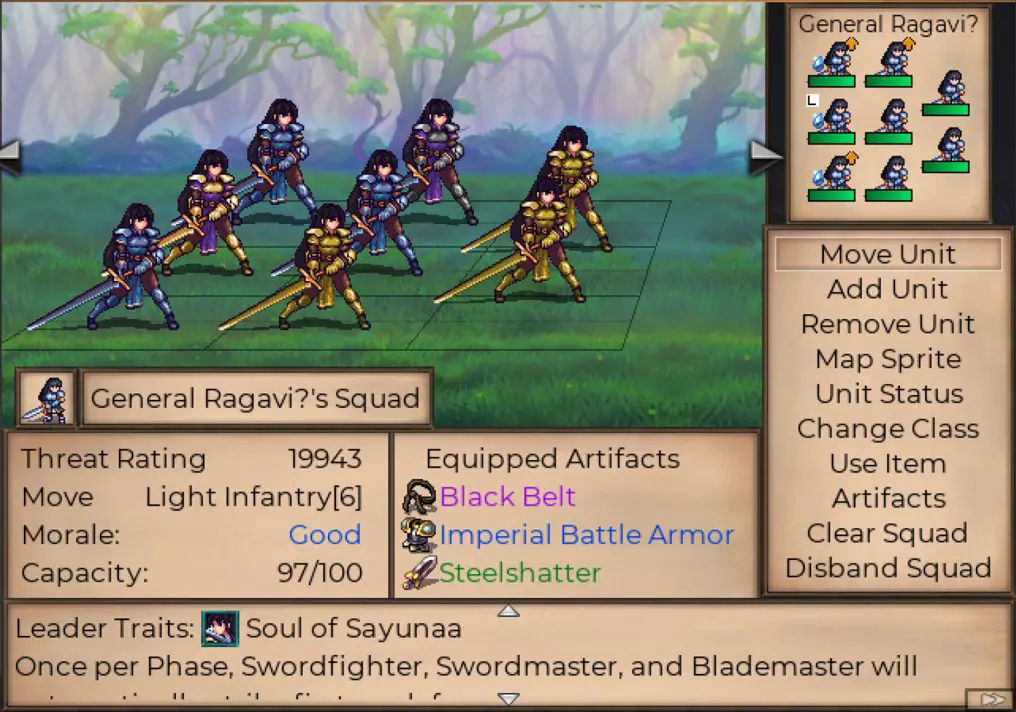
Volley 1: 4 frontline attack, 2 back stabbers, 1 guile (aka any unit)
Volley 2: 5 fonrline attack, 1 back stabber, 1 guile
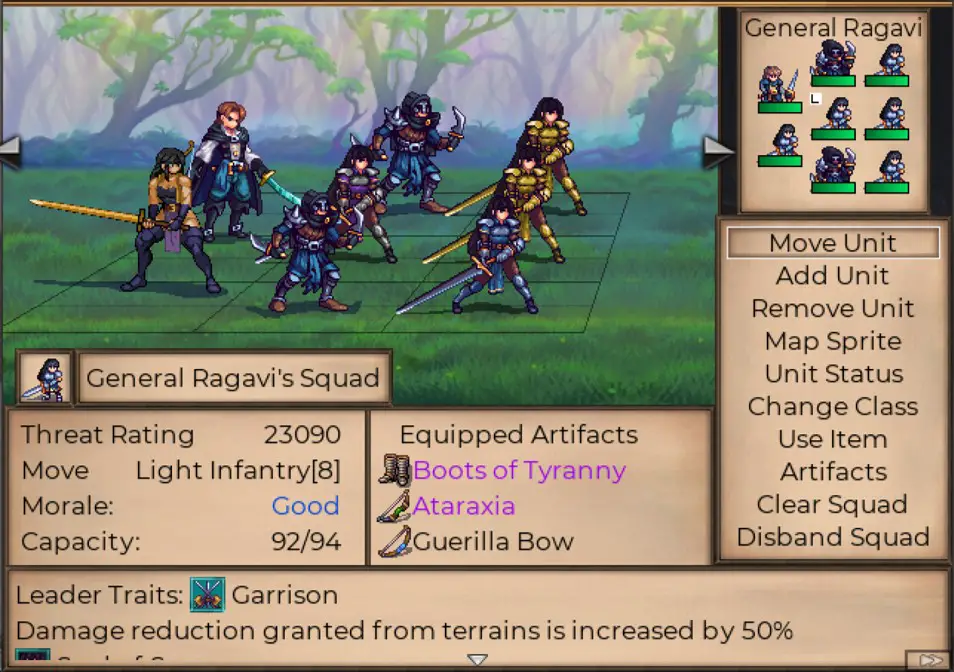
This is not a powerful squad by any means, as assassins are only useful on offense and General ragavi is mostly a defensive leader, but even still it does significantly better than a pure swordmaster General Ragavi squad or a pure assassin Kuroda squad.
You only need to replace one or two of the swordmasters with a heavy infantry for this to become a very powerful squad, despite the units mostly being in the light volley.
Example 3: what not to do
This squad will never kill a 3 row enemy squad unless you’re lucky with extra actions because each volley can only target enemy units not blocked by other enemy units in front. It will also leave both the mid and back row of the enemy squad alive to attack after the first volley.
This squad is a massive waste of both one of the most OP leader in the game and a lot of obsidians in the swordmasters.
Rounds: only important for ambushes
Each unit can participate in 1 or 2 rounds depending on unit type. Most units can take part in 2 rounds, with mages, unupgraded gunners, cannons and most healers only being able to take 1 rounds.
Stefen in particular has 3 attacks once he gets a shiny new sword, but he’s a special boy.
After every unit in the attacking squad participated in one of the volleys, the round finishes, and it’s the defending squad’s round, then the attacker round robin style.
Units with “extra action” may get a third attack and participate in an extra round. Executioner, desperation, having high morale, or being named Sybil may give that “extra action”.
When a light squad start the turn (before moving) in a ambush tile, then attack when they are standing in an ambush tile (after moving), the attack will be be considered an ambush. When ambushed, the defender loses their first rounds. i.e. attacker takes 2 rounds, then defender takes 1 rounds.
You can check which tile is an ambush tile by pressing F to cycle through different highlights, or just check which tiles are dark tinged when you select a light squad.
Basics: Movement Types
Almost everything in this section can be found in the in-game tutorial, so feel free to skip it.
Squad has a movement type.
Heavy infantry: the baseline
Light infantry: +1 movement, can ambush
Heavy cavalry: +2 movement, can move after action
Light cavalry: +3 movement, can ambush and move after action
The game adds up the number of units with light and heavy type, and assigns the light/heavy of the majority to the squad. If equal, it’s heavy.
The game adds up the number of units with infantry and cavalry type, and assigns the infantry/cavalry of the majority to the squad. If equal, it’s light.
*Each cat counts as 3 light infantries.
So as an example, a squad with:
3 light infantry
2 light cavalry
2 heavy infantry
1 heavy cavalry
4 cavalry vs 4 infantry = infantry
5 light vs 3 heavy = light
So the squad has light infantry movement.
(No, don’t actually use this squad, it’s practically trash. It’s used as an example.)
Then there’s the special unit type:
Flying: +1 movement, ignore terrain
Which requires having equal or more dragon riders and no cannons/cavalry in the squad.
Squad Types Overview
Not all squads do the same thing. Here I outline a few squad types you may want in your army, what they require and their use. Refer to further sections on details.
Resource: the amount of resources a squad would take up, specifically iron, magic gem, obsidian, sun stone, horse and pyrocite.
LDR: how much LDR the leader requires to be effective, aka how much you want this leader to hog objective captures and/or arena opportunities.
Stats: how dependent the units themselves are on being strong, aka artifact/trait investment.
The heavy/light/ranged squad mentioned refers to the enemy squads fielding mostly one type of unit, because the AI don’t really mix their squads up much.
Juggernaut Squads
Resource: high
LDR: high
Stats: high
These are squads that are designed to oneshot enemies on player phase, and can survive enemy attacks from full enemy squads attacks relatively unsathed while dealing heavy damage even on defense.
They sound OP because they are OP, but their cost is also OP.
Melee Killer Squads
Resource: low-medium
LDR: medium-high
Stats: medium
These are squads that are designed to oneshot enemies on player phase, and can survive attacks from weakened enemy squads on enemy phase while still maintaining squad integrity, but will fall apart if hit by a full enemy squad.
Dragon Squads
Resource: medium
LDR: low
Stats: medium
Dragon squads can ignore terrain, and they are great at killing enemy light squads or ranged squads, but is helpless against heavy squads. Use them primarily to assassinate ranged squads on or behind walls.
Dragon squads are also extremely powerful mid game because of the low LDR requirement to the point that they can somewhat contend with melee killer squads at killing heavy squads, but falls off later on once other squads start having enough LDR to start scaling.
Cannon Squads
Resource: high
LDR: low-medium
Stats: low
Low investment and effective, cannon squads are where you dump your extra resources. They oneshot light and ranged enemy squads, and can weaken heavy squads decently well. They don’t do much to dragons, and will die when attacked.
Healer Squads
Resource: low-medium
LDR: low
Stats: low
Ridiculously cheap, and they can keep your other squads topped up.
Tank Squads
Resource: medium
Exp: low
Artifact: medium
These are squads that are designed to not die too fast. That’s it.
Bait Squads
Resource: none
LDR: none
Stats: none
Their job is to die. Low threat rating makes them alluring targets for the AI.
Archer Meme Squad
Resource: medium
LDR: high
Stats: ridiculous
This is a meme. A full archer squad can actually can do incredible damage, but requires ridiculous investment in both traits and artifacts. It’s quite obviously never worth that kind of investment.
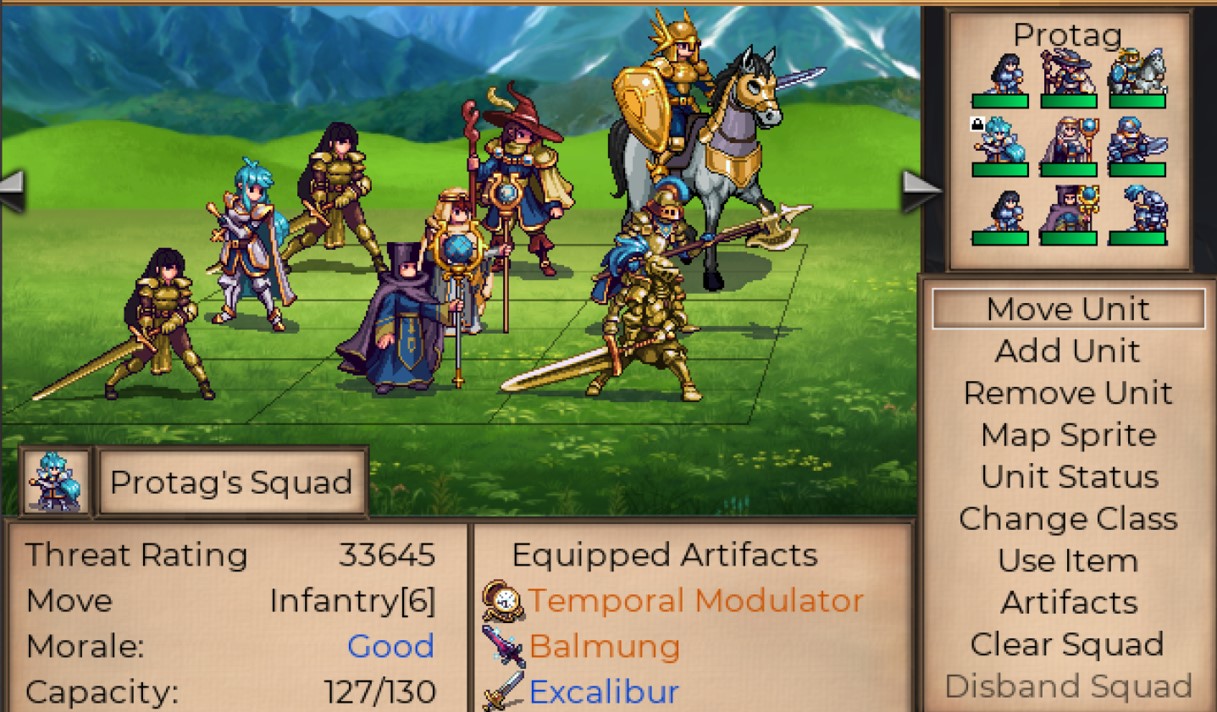
Juggernaut Squad
Example
Cost:
Resource: high
LDR: high
Stats: high
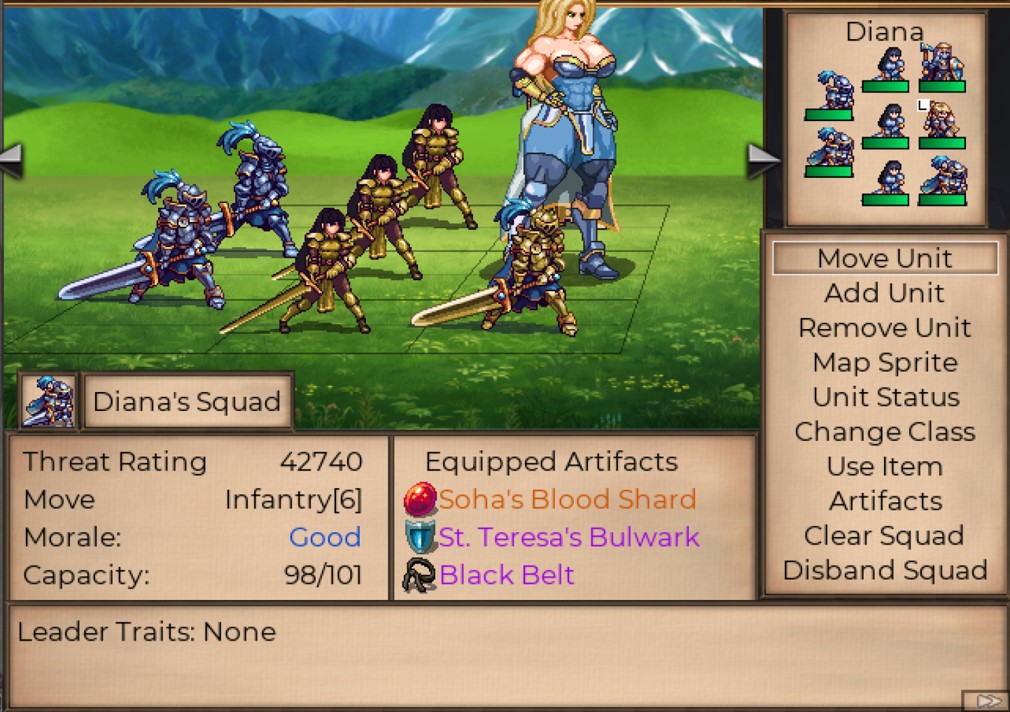
Composition:
Front: 3 heavy units, as most damage are to the frontline. This is nonnegotiable. Bloodlust is by far the best trait, but other defensive traits like resolve/bodyguard/barrier are also great.
Mid: light units, or at most 1 mage/healer. Do not bother with oracles.
Back: 2/3 light/heavy.
Artifacts:
Best: sohas blood shard, st.teresa’s bulwark, black belt, temporal modulator, balmung, everlasting potion
Good: anything with good str and/or arm.
Role: These are your heaviest investment squad. Their role is to charge forward before your army, and bait in enemy squads while weakening or killing them on the counter attack.
For positioning, rush forward until its in range of as many enemy squads as you can tank safely, and be the sole unit in range of those enemy squads so this squad takes the hits if those enemy squads aren’t too dangerous.
General concerns: The squad need to be tanky AF, and still be able to function relative well despite magic fatigue. They also benefit the most from damage, as they will see combat more times than any of your other squads, and as thus any increase in their damage will be put to use more times. You cannot afford too many of these in an army, so only send them where there’s the most fighting going on, especially when there’s heavy melee enemy cavalry presence.
Detailed Build
It is vital to have units in different volleys or target selection to do enough damage to kill or heavily maim enemy squads.
Frontline: you want to prioritize champion/zweihanders as they are the most hard hitting unit with guardian, but having a paladin/sentinel or two is fine. Again, while you want them to be tanky.
Light damage dealers: you want swordmasters, stefan, narima, general ragavi. A juggernaut squad does most of its work on defense, so assassins don’t do ♥♥♥♥, and rangers/hussars/archers just don’t do half as much damage no matter what you do.
Sustain: Soha’s blood shard, bloodlust and everlasting potion are the only 3 hp regeneration tool that doesn’t care about magic fatigue, so you prioritize those. Unfortunately one of them is unique, so if you wish to field more than 1 juggernaut squad without NG+, you’re going to have to improvise.
Healer: Without soha’s blood shard, your juggernaut squad will only be able to deal with so many attacks per turn before being worn down, which makes is dangerous in case of an unlucky turn where the enemy focus fired one of the already low hp unit. So you may want a healer to help keep your units alive. The healer isn’t there to sustain your juggernaut squad (that’s the healer squad’s job), it’s only there to make sure the lowest hp unit don’t turn into a dead unit before the rest of your army catches up.
Mage: As you always start with a melee killer squad and slowly feed it more resources/LDR exp/artifacts to grow it into a juggernaut squad, a mage can bridge the gap during the transition so you have enough damage to oneshot. Once you have enough, you will generally want to replace it with something that doesn’t care about magic fatigue.
Oracle protects the whole squad a little, but provides little help to any particular unit. And as a juggernaut squad, the entirety of your squad should be fine, the only time you’d desperately need
the extra sustain at the cost of a spot on the squad is when one of the units gets focus fired, and for that the oracle is of little help.
For the mother of all juggernaut squad, you want Soha’s blood shard + St. Teresa’s diadem + skull of Rowdain. The reason you want the skull is that it locks your moral to fearful, which while usually a detriment, is actually a boon for a juggernaut squad, as otherwise they’ll quckly go to shattered morale. The hit to stats however is massive, and requires drastic measures to counteract (st. teresa’s stupid hat). This squad will do ridiculous damage, has exactly 0 problem soloing an entire army, but requires you to keep it from getting hit by mages, as st. Teresa’s stupid hat reduces your MAG to 0 and your light units might get oneshotted by mages.
Other units worth putting in a juggernaut squad:
Centurion back row
Valkyrie back row
Never tried gunners myself, but they should work mid row.
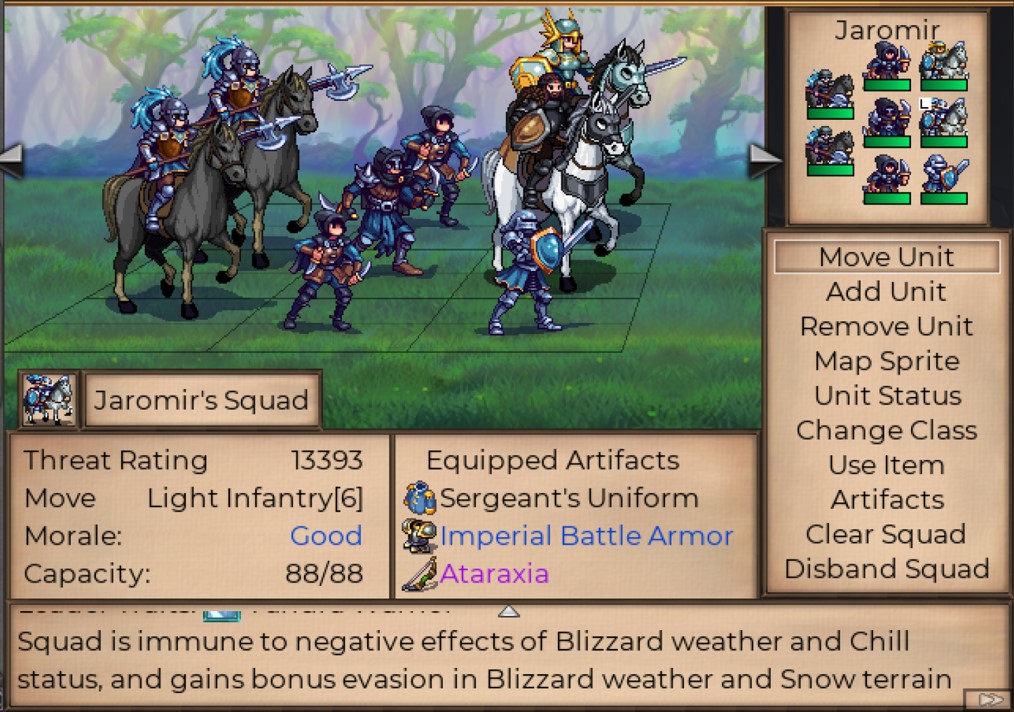
Melee Killer Squads
Example
Cost:
Resource: low-medium
LDR: medium-high
Stats: medium
Composition:
Front: 2-3 any heavy units, as most damage are to the frontline.
Mid: any damage dealers or supports.
Back: any non-mage/healer
Artifacts:
Best: anything that increases capacity
Good: anything that increases damage
Decent: anything
Role: These are your main offensive squads. They should oneshot or almost oneshot an enemy squad on the player phase, and can survive some attacks from weakened squads, but will fall apart if hit by full squads.
For positioning, you want to group up with other melee killer squads and push forward slowly, making sure that after taking action you end up somewhere out of range of full enemy melee squads.
General concerns
Damage damage damage. You mostly need damage with these squads. As you attack on the player phase, you deal a turn of damage before getting counterattacked, and if your damage is good enough, that counterattack will be coming from a half dead squad. Preferred movement type is heavy cavalry, light infantry, or heavy infantry.
Detailed build
Frontline: the best units are champions/centurions/zweihander/knight/valkyrie/paladin. You either want more damage directly with the first 3, or you want more damage by filling your healer quota with something that also does damage.
Midline: mage, healer, gunner, oracle, and light units like swordmaster/assassins. These are the safe spots, so whatever squishy unit you want goes here.
Backline: heavy/light units/gunner. You will still occasionally take an attack, so it’s still better to keep the mages away from the backline, but it’s not 100% required like a juggernaut squad.
It is vital to have multiple volleys or target selection types in a killer squad, or it’s not going to do enough damage to keep itself safe when attacking full or almost full enemy squads later on.
In general, heavy units, mage (in particular fire mage), sword masters and assassins do the most damage, so stock up on those as much as you can. You also don’t want to rely too much on healer squads, so typically 1 templar or 2 valkyrie/paladins would make this a self contained little roaming killing machine.
Do NOT ever build a melee killer squad with only 1 frontline. Even weakened squads can kill a lone frontline if nothing else is there to share the burden.
If you do put traits on units, prioritize offensive traits on the damage dealers (including frontlines if they are also damage dealers), then defensive traits on the frontline.
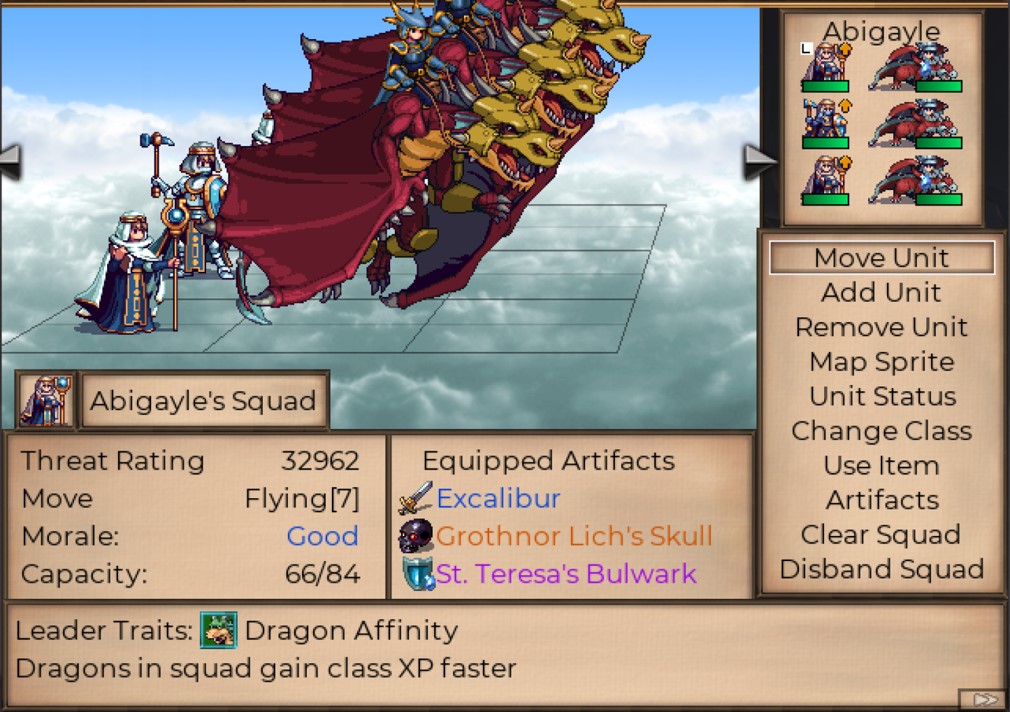
Dragon Squads
Example
Cost:
Resource: medium
LDR: low
Stats: medium
Composition:
3 dragons
3 infantry/mages/healers.
Artifacts:
Best: anything that increases mag, str or arm
Role: These are the actual assassination squads. Being able to bypass terrain means those pesky cannons/archers on walls are easy pickings. Also useful for rushing towards places blocked by terrain, or past choke points blocked by enemies.
For positioning, treat as melee killer squads: don’t get hit by full melee enemy squads, even when you’re off assassinating stuff on the wall.
General concerns
Dragons deal good AOE damage, but not as much as a melee killer squad, so they usually won’t be able to oneshot heavy squads.
Dragons aren’t nearly as tanky as a heavy unit, and not having a mid row means you cannot protect healers from backstabs, so they’re even more vulnerable than a melee killer squad.
Dragons taking up 2 spots means you incur less of the extra capacity cost of a 5+ unit squad, on top of only costing 15 capacity, means you’ll get a full dragon squad a lot earlier than any other squad, so they’re all around badass midgame but falls off later.
Detailed build
No horses because that forcibly changes your movement type to infantry. Being able to fly is the main reason you ever field a dragon squad, so that’s a no go.
In general, you have to choose between a heavy infantry unit to tank for the dragon, or a squishier unit to support them from the back.
For the heavy infantry tank, you typically want a paladin, as dragons don’t heal themselves, or a champion/zweihander, as they do the most damage to the often heavy frontline of enemy squads, which is what the dragons struggles the most to kill.
For a support backline, having a templar or two is great, as dragons requires quite a bit of babysitting to stay healthy when combating melee enemy squads, what with their low armor and large hp pool. Guardian trait only does so much without high armor, and dragons squads’s damage output being spread out means they will typically take almost the entire enemy squad’s worth of counterattack on the first turn, and only kill things on the second turn. You do not want oracles, as you’ll only be shielding for 6 instead of 9.
For mage backlines, siren is especially good, as its AOE double debuff on the first turn really helps mitigate the counter attack’s damage you will inevitably take. It’s less important when you’re only assassinating ranged squads, but incredibly useful when you fight melee squads.
For physical dps backline, you want swordmasters. They are the best at killing enemy frontlines, and typically that’s where the most heavy units are on enemy squads.
You do not want to fight enemy squads with heavy units both front and backline using a dragon squad, and dragons typically have no trouble killing non-heavy units, so there’s no point adding assassins.
Dragons are OP midgame, so there’s every reason to rush the dragon rider tech, but in general, you do not want more than 3 dragons squads, and I personally prefer having only 1~2. The mobility is only useful when you have somewhere to be that other better combatant squads can’t reach, but there’s only so many ranged squads to assassinate safely.