There are two different types of mods; code mods and content mods. Code mods use the BepInEx modding framework to alter the game’s code directly whereas content mods add or change certain game assets (such as costumes, themes, and characters). To better understand how this works, please see the diagram below.

Note that WECCL (Wrestling Empire Custom Content Loader) is technically a code mod itself.
Code Mods
Code mods are created through BepInEx and will require knowledge of C#. Due to the complexity of BepInEx mods and reading obfuscated code, this guide will not be covering the details on how to create them. The following links can help you on the way:
Please note that code mods are recommended to be put in Wrestling Empire\BepInEx\plugins\Manual instead of just “plugins” to prevent the mod launcher from interfering.
Content Mods
Content mods consist of structured files to be loaded through WECCL. Creating them generally requires no coding knowledge. Before starting with making content mods, please make sure that WECCL is installed.
Typically, content that should be added goes in “Assets” and content that overrides existing assets goes in “Overrides”.
When testing your mods, the “Assets” and “Overrides” folders can be found in: Wrestling Empire\BepInEx\plugins\Manual\Assets Wrestling Empire\BepInEx\plugins\Manual\Overrides (You can create the folders if they do not exist)
Any audio file placed in “Assets” will be loaded as a new theme. For all other features, please refer to the documentation of WECCL: Github
Uploading Mods
The easiest way to upload mods to Steam Workshop is through the dedicated uploader that can be downloaded here.
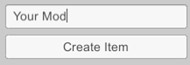
The uploader contains a template mod which you can check to understand the file structure. To prepare for uploading, you first need to create an “Item”. An “Item” essentially serves as a “reservation” for your mod. It simply creates the ID to be used for the mod and all its versions.
After creating the item, you can put everything in its “content folder”
![]()
When navigating to WorkshopContent, you should see something like this:
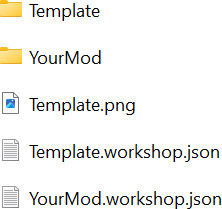
(“YourMod” being the name of the item)
Inside the content folder (“YourMod” here), you need two things:
A plugins folder with everything you’d usually put in “Manual” inside. A manifest.txt file with the following contents:
modName: <mod name>
author: <author>
version: <version> (SemVer recommended)
assemblyHash: <assembly hash> (only for code mods)
You can get the assembly hash by running Wrestling Empire\Wrestling Empire_Data\Managed\Assembly-CSharp.dll through this link.
Note that the template mod has the “assemblyHash” key despite being a content mod. When actually publishing content mods, you should remove it since content mods are
version-independent.
When done, put a preview image in WorkshopContent, fill in the rest of the fields, then click “Submit”.
![]()
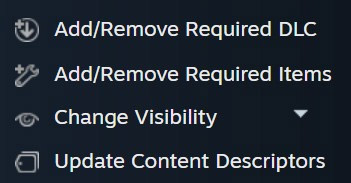
Important: when publishing content mods, make sure to add WECCL as a dependency through Steam Workshop.
Select “Add/Remove Required Items” from the menu on the right, then choose the required mods from the menu that shows up.
![]()
This step also applies to mods with other dependencies.