Standard Character creation gives a few basic options to give something that works, but why stop there? The game also provides a way to go even further, changing almost every last detail of your character in almost every visual way. In fact, it is even possible to go from your silent protagonist to someone with their own voice. What’s more, there is nothing stopping you from changing these choices at any time. While the extensive options can be impressive, the only limitation really is how much artistic creativity is required to make these changes yourself, and how long those finer details might take to apply.
Visual Configuration
The core resource that advances your ordinary character to something of your own personal creation is something called VRoid Hub. To make use of this resource, the first step is to at least have a character at all, as this feature updates the look of your existing character with the new look. Once that is accomplished, check the lower right of the screen for the button that starts everything.
As might become obvious quickly for anyone who explores that feature, you would require an account in that service to be capable of accomplishing the rest of this process. You will also need to have VRoid Studio installed. Yes, this is basically that resource you might see streamers use as vtubers instead of their own selves. Going into detail about the finer ways to make a VRoid is more viable in their own site, so that’s not going to happen here. Just keep in mind that everything here applies, all of the finer touches to your future character’s face, the exact details you put into their hair, their exact form of body, even what clothes they are wearing. If you’re the type to spend hours in character creation on average in a game, you might need to be ready for this to take days. Be sure to save frequently, so that your work is not lost. All of your changes in VRoid Studio are local to that program only, at least so far.
The important step once you’ve got a look you like is to apply the steps that move your look to your character. The Camera/Exporter has an option for Uploading to VRoid Hub that you’re going to need (it will want you to take a preview sample of the full body and a close-up of the face, but that’s just for a preview). For the first time you do this, it will obviously want you to connect your studio to your hub account. The process should be very obvious and easy to accomplish, especially compared to putting the finer details into that character. Be sure to check your hub account to ensure it is there. By default, your new look is completely private, and that might be fine. It is, after all, only going to be your own character. If you wanted to use something made by someone else, it would have to have less restricted access, but that would still only be limited to what other people have done (and thus isn’t as truly advanced in character creation).
With this done, you’re finally good to look back at the game again. If you’re setup correctly, clicking the VRoid Hub Settings button should have you pick from your list of characters (given you are still logged in). Selecting your character moves you to the list of looks you’ve made in VRoid Hub (this is also where you might select to see favourites too, if you were fine with making use of someone else’s work). Select your chosen look and you’re good to go.
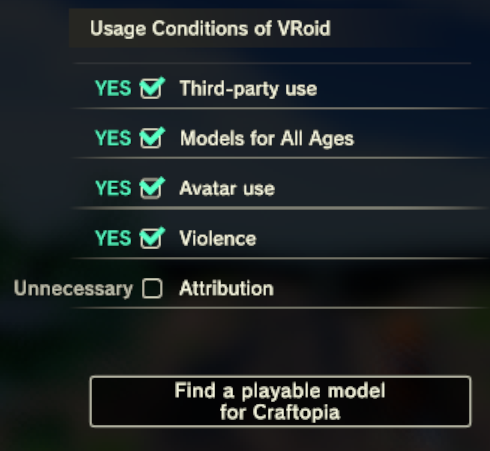
For Favourites, these are the requirements:
Important Note: If you want to use this look in multiplayer, be sure that the people you are playing with have also signed in to VRoid Hub, even if they aren’t making their own custom look. Without doing this step, that person will only see your character’s basic look from the in-game creator.
Audible Configuration
Having the right look is one thing, but at the time of this guide.. your silent protagonist won’t even grunt. While a few might be uneasy about such a solution, there is still a mod designed to enhance your character creation options by giving your character an Action Voice. The mod does provide the controls for giving your character a voice, but will by default change nothing. You could visit Nexus Mods to get a fully packed voice, but that isn’t exactly creating your own character.
Important Note: As it was brought up previously as an important consideration for visuals in multiplayer, it should be established that this feature is not applied in multiplayer. To hear the same thing, everyone would need the same voice settings. To make this distinct, the mod does allow configurations to be made by character name, but the files prepared would still need to be sent and applied manually.
For the most part, between the steam mod and the nexus mod, how this process works is actually rather well documented (you would just need to know to look for both). The entire feature works by looking for actions your character does based upon the name the developers gave that action. Jumping in the air is an action called “Jump”, which then looks in a folder called “Jump” for all .wav files and would then pick one at random. By default, the folder does not even exists, so it can be handy to use the “/actLog” command in game to get used to what the game calls any particular action. Make the folders you feel you would need, even if you start with the list given by the Nexus mod (be sure the folders are in the right location, which can be set in the mod’s config, defaulting to an “ActionVoice” folder in your personal “Documents” folder, which also does not automatically exist). It can be easier to use the feature’s + and % characters in folders when considering voices which wouldn’t really change. Swinging a sword and swinging a katana might involve your character making the same vocal expression for that first swing in a combo. Be sure to understand how the mod handles this feature before continuing, even if you don’t have all of the needed folders figured out yet.
At this point, you now need the actual .wav files you’re going to be using here. Much like the example in Nexus Mods, it is possible to even scramble for other mods in any other game and apply them to your own personal design (as long as they are .wav files). More effective might be locating a suitable online service that gives free-use voice samples in a giant list of .wav which can be assigned however you wish. But for a true make-it-yourself, you might need to involve either resources that can alter your own voice or resources that produce speech from text using an AI. In this case, there is nothing specific to recommend (especially since quality options here won’t be free). A few concepts to look at involve key products like: “Resemble”, “LOVO AI”, “Voice.AI”, “Uberduck”, “MagicVox”, and “Replica Studios”. Not about to vouch for any one specifically, but this should provide a perspective of what such resource options look like in the modern market. Of course, there is also always the answer of knowing someone who can do the voice acting naturally (or even better, that being you). It just can be awkward hearing such a familiar voice while you are playing.
- When using a resource that alters a real voice, keep in mind that the alterations you use is actually part of character creation. Design the exact values of the alteration, then produce the .wav files while trying to be as constant as possible (don’t forget to be expressive emotionally, for proper impact). This solution does give the most personally-modified results, fitting the concept of this guide the most, but it might feel limited in how the root of the result is always based upon that original voice. Doing this entirely yourself would have a lot of non-technical effort required simply in vocal practice for where you might want to start from, how it might be said or expressed even before it is mapped over to a new voice.
- When using a resource that provides text to speech, keep in mind that a vast number of the voices you want are expressions rather than words. Your character is grunting to the effort of swinging a sword in far more ways than they are calling out their cast of “Heal”. Whatever resource is chosen, you’re going to want to know how to produce those vocal sounds with it, and it might be handy if the voice can be emotional about their rage or pain in the process. Saying “Hya” properly when starting from just the written text isn’t as easy as it might look, first attempts may sound flat and might fail in proper pronunciation of what is effectively not even a word, so it might be important to get creative here.
A benefit of how this resource is made is that modifications to the .wav files in the folder will update the game even while playing the character, without needing to restart. This means it might be helpful to even have the game open when getting the actual voices recorded and applied properly, to practice with the live motions and apply the changes all in real time. Just make sure you have a lot of food to work with when doing this, or maybe use a test character in a creative mode that you don’t even care about.
This part of character creation might not be as smooth as the visual part as it is presently designed, but maybe one day there might be something more integrated to fill in for this gap (or they might just get voice acting done, even using an AI solution as above, this is what something like Replica Studios supposedly exists for). When this happens, I might personally wish that the voice could be at least distinct by choice of gender and species (plus maybe getting to pick a voice type even after that), but that then won’t even be as powerful for making something as unique and distinct as you can now.