This will teach you how to make your own badges and banners for the Army Painter in Dawn of War
What You’ll Need
- A program that can convert images into TARGA (.tga) files. Since it’s free and easy to use, I would suggest using GIMP I will be using GIMP in this guide.
- An image editing program or site. This is also covered by GIMP, but you can use any image editor, like Photoshop, BeFunky, Ezgif[, or Lunapic
- An image. This can be something made by yourself, or pulled off the internet, but it must work with your image editing program.
- Optional: A folder to keep your finished badges and banners in. This isn’t needed for actually putting them in the game, but having a place to keep them is a good idea, in case you do a fresh install and need to put them in your game again. This also makes moving them between the different expansions a little easier.
Requirements
If you want to put your image into Dawn of War or one of its expansions, this is the format it has to be in. If it satisfies all of these, it should be read by the game, and put onto your forces.
TarGA file (.tga)
64×64 pixels for badges, 64×96 for banners
Name of file does not conflict with any other
No RLE compression
Has an alpha channel
In your game’s Badges folder or Banners folder
Step 1
Choose a picture you want as your badge or banner. It can be a picture you made yourself or something from the internet, it doesn’t really matter. I’d recommend you use a png file with a transparent background. Edit the picture in whatever way you want until you feel it is done or If the picture is fine as is and you don’t feel the need to edit it at all then go to one of the editing websites above or however you wish to do it and resize the picture down to be ether 64×64 for your badge or 64×96 (96 being your height).
Step 2
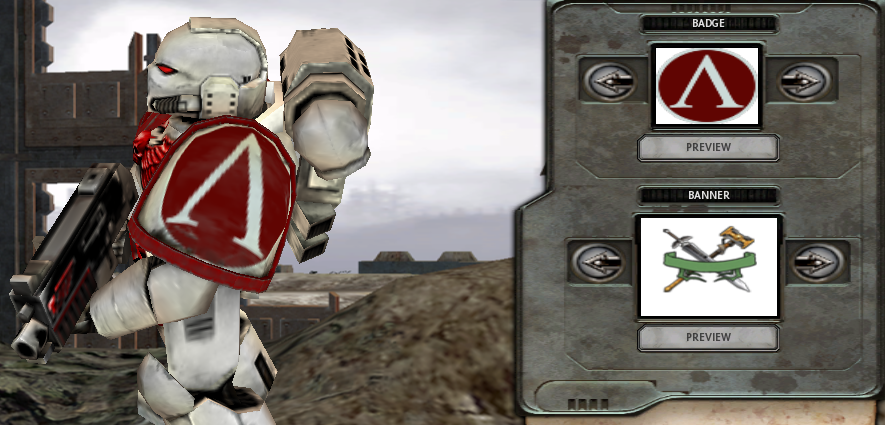
Open up GIMP, then go to File, click New. If you’re making a Badge, (the image that’s on your army’s shoulder pads and tanks) set the Image Size to 64×64 pixels. If you’re making a banner, (the image on your strategic points flag) make it 64×96. Once you’re done choosing your size, hit Ok, then go to File again, but this time, click Open As Layer and find your image, then hit Open. Now, your image should be a layer on top of a white background.
Step 3
Look on the right side of your screen and click on Channels and add a alpha channel, otherwise your image won’t be read by the game. Be sure to delete the white background while you’re at it, or you’ll have a massive white square on your troops shoulder pads. The white background is no longer needed.
Step 4
Now that you’ve resized your picture, added a alpha channel, and have deleted the white background, go to File, then click Export As.
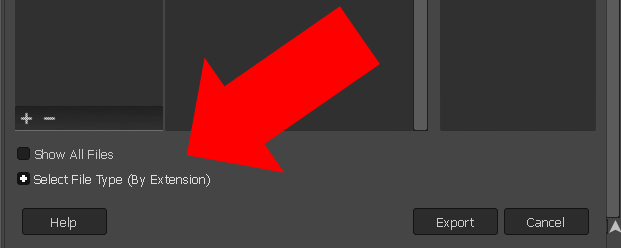
Navigate to where you want your image, and then select “Select File Type (By Extension)”. Scroll down until you find “TarGA image” (.tga) from the dropdown list at the bottom and hit Export.

Once you hit the button, a window will pop up with RLE compression and the origin. the origin doesn’t matter, but make sure to uncheck RLE compression, otherwise, the image won’t be detected by the game.
Step 5
You’re now finished. All you need to do now is place your finished file in ether the “Badges” or “Banners” folder of your Dawn of War game. You’re ready to make your own custom armies !
Remember to place your files in the proper folder since badges will not work if placed in the banners folder and vice versa and to give your files a name.
Additional Notes
- Army Painter info does not carry over between expansions. For instance: If you put a badge in Dark Crusade’s badge folder, then play Soulstorm, the badge won’t show up in Soulstorm. If you want to see your badge in all expansions, you’ll have to copy it to each one manually.
- Yes, custom badges and banners will work in multiplayer. There is a bug in versions 1.3 and 1.4 that cause them to stop showing up on consecutive matches, but this can be stopped by selecting another army, then switching back to your custom one again.
- If you have a picture you wish to use as a badge or banner but cant find a version without a background and you want to remove the background Lunapic has a “Transparent Background” tool that can remove it with a click and a “Eraser” tool to remove stuff manually.