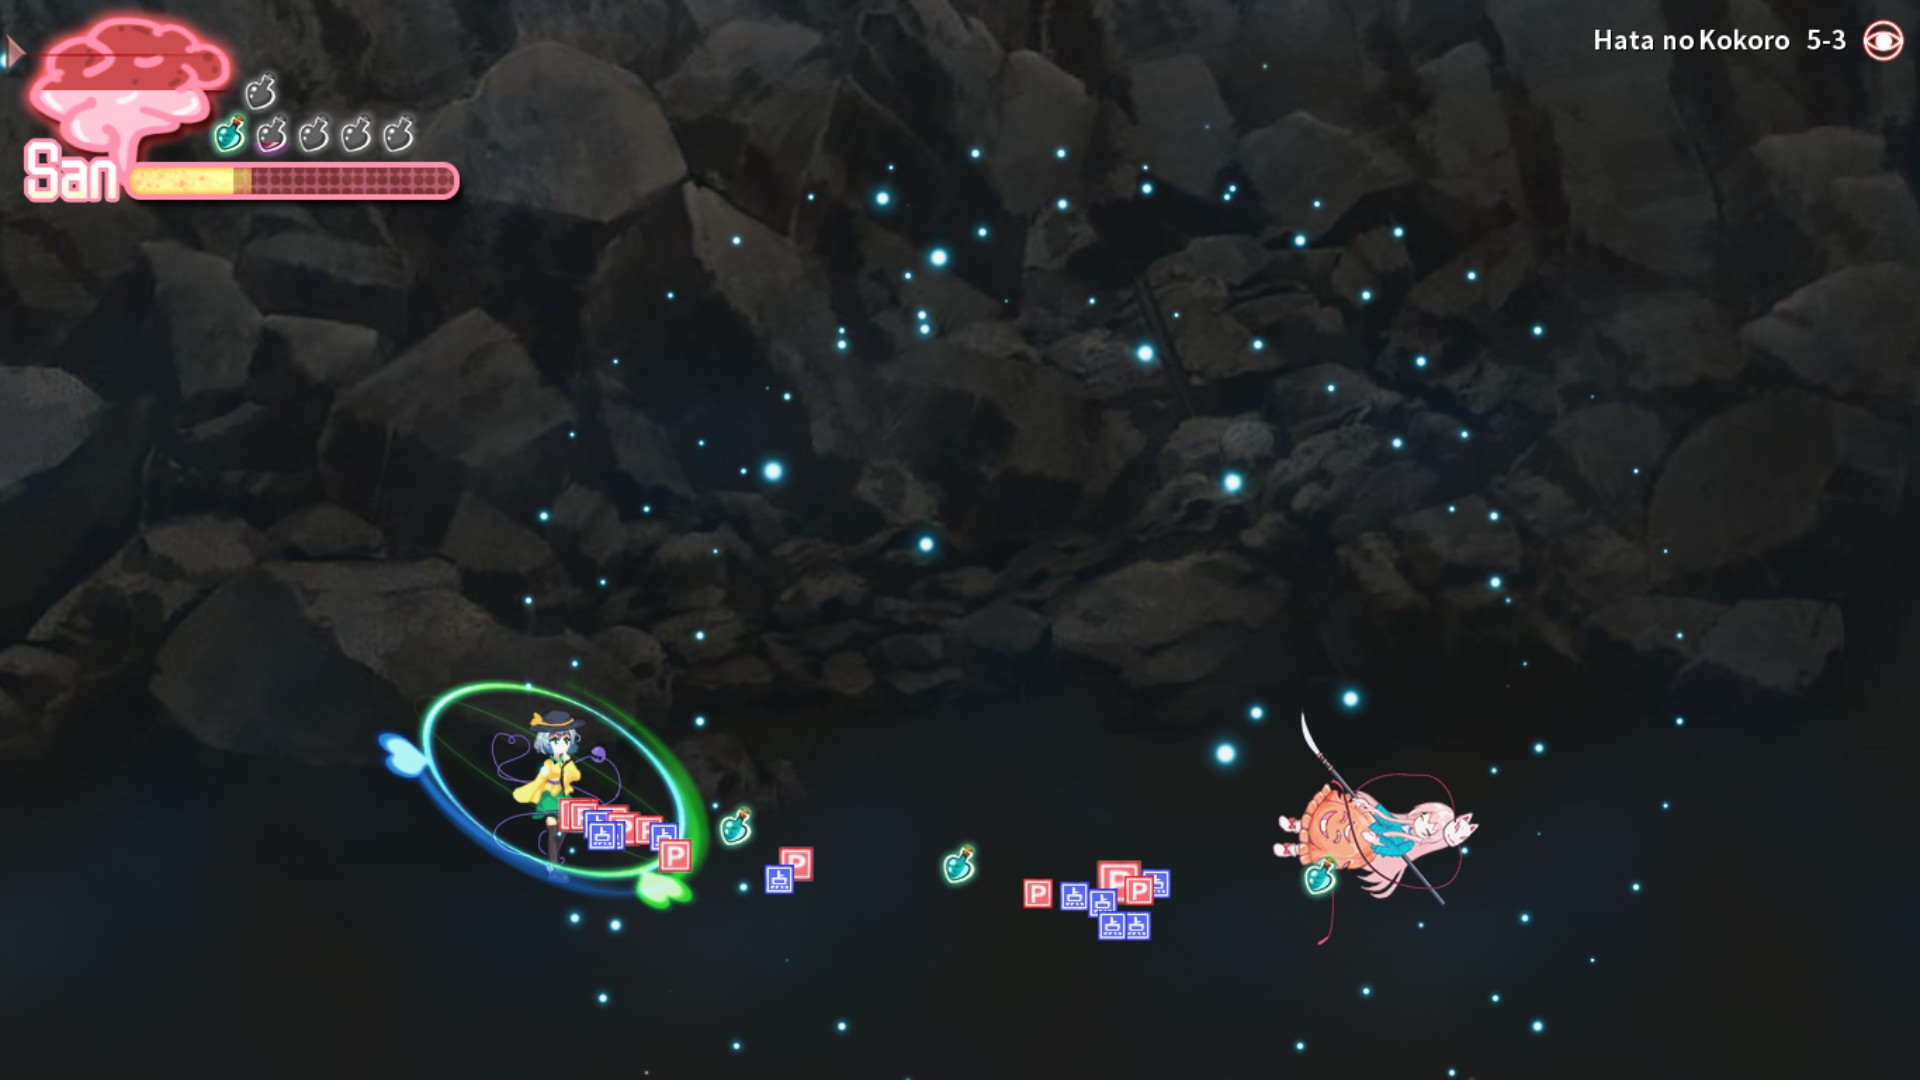
Just a few tips and tricks for people struggling with Kokoro’s boss fight in 5-3.
Introduction
The new Hata no Kokoro boss fight found in level 5-3 can be a very tricky and challenging fight to learn. I will be going over some tips and tricks to help you have an easier time learning and dealing with specific moves. I would recommending trying to clear this fight in normal mode first before you attempt mind eye mode, but the choice is yours
Video showing examples of attacks described for each phase.
Phase 1
Phase 1 is one of the easier phases to learn and there are some simple attacks that are worth noting.
- Swings: After certain attacks she can follow up with a chain of 3-4 fast swings ending in a thrust of sweep. Deflecting these swings can accumulate a lot of posture damage.
- Slow Swings: Kokoro will wind up 3 consecutive slow swings, which can follow into a thrust or sweep attack. You can attack her a few times in between the swings, but note that the 3rd is faster.
- Thrust Attack: A danger symbol will flash and Kokoro will launch a thrusting attack, this can be deflected and countered for damage, although she will follow up with a swing or sweep sometimes.
- Sweep Attack: A danger symbol will pop up showing and Kokoro will preform a sweeping attack. You can jump over this and drop on her for extra damage.
- Counter Attack: If you put a decent amount of pressure during the first phase she can deflect your attacks leading to a swing and a sweep that pushes you back into a set of 3-4 swings.
- Slam: The slam becomes a common attack as the phases progress. To avoid this, do not try to dash away, just walk towards her and parry.
Phase 2
Phase 2 is the most tricky phase to learn by far, there are a lot of attacks that may seem confusing to avoid at first. The spinning/rolling attack can be deflected although getting the timing down is really tricky, especially in mind eye mode where you have to get a near perfect deflect.
Spinning attack:
- It has 5 spins that you have to parry.
- Try to look at where the spear during the spin to parry it.
- The transition from the 4th to 5th is sped up and getting hit by the 5th spin will deal a lot of damage.
- You can move away from the 1st spin, but the 2nd and 3rd spin will usually reach you depending on where the attack starts.
- Moving into a corner can usually help you prepare or learn the timing for 2nd and 3rd spin.
- Parrying the entire spin cycle will deal a good amount of damage to the boss’s posture.
- The boss can follow up with a slam or sweep depending on how close you are, this is a good time to punish.
- If you get hit by the spins before the 5th you can try to recover and deflect dash on the last one.
Safe Windows to attack:
- Phase Transition: When the boss swaps from phase 1 to phase 2, you can open with a charged projectile to get a free chunk of damage
- Sweeping Attack: The boss has 2 variants to the sweeping attacks in phase 2, one where they add an extra sweep and a normal one, you can jump and drop on the boss like in phase 1
- Thrust Attack: Like the first phase you can deflect these and attack for damage. You can also throw out a projectile to bait this attack.
- Slam Attack: If you are close to the boss during the startup of this animation, you can walk towards the boss and this attack will go right over you leading to some free hits. This isn’t something you should look for all the time, but it is useful when you get the opportunity.
Beware: The boss may follow up with some swings after a slam attack, this attack will still be able to hit you, even if you are behind the boss. Make sure to dash away or reposition yourself in front of the boss if this attack happens
Phase 3
This phase should be slightly easier if you are able to keep up with phase 2. There are a few attacks that you are added with this phase.
Notes:
- Wolf Charge: This attack will be different depending on if you are playing on normal or mind eye mode.
- These attacks are similar to sweeping attacks, you can drop on the boss for lots of damage
- When it jumps, you can just stand still and avoid it.
- On Normal mode, it will charge 5 times, jump over you once, charge, jump, charge and stop in the middle of the screen.
- On Mind Eye Mode, it will charge 5 times, jump, charge, 2 jumps, charge and stop in the middle
- During the last charge you can charge a projectile and fire it when the boss stops in the middle of the screen. If you time it right you will take a large chunk off of the boss’s hp.
- Spinning Attack: The spinning attack is back and stronger than before. The boss will do two consecutive swings before launching the spinning attack most of the time. After the fifth spin, the boss will instantly follow up with a slam, so be cautious.
- Tempest Noh: This is a simple thrust attack that the boss can preform a few moves after the wolf charge. It will trigger when you are close to the boss, you can deflect it or just dash behind.
Closing Notes
Here is a full run for both normal and mind eye mode.
- Most of the normal swing chains can end with a sweep or thrust.
- The fight can have a bit of RNG, especially on mind eye mode due to the spirit orb spawning at inconvenient times. Try not to engage the boss when the orbs are active.
- Staying close to the boss, may have a lower chance for the boss to do a spinning attack or spawn orbs.
- There is a lot of momentum involved in the 2nd phase, but once you get the rhythm it will feel more manageable. Don’t be discouraged if you aren’t making that much progress in the second phase, it took me around 10 hours to learn the fight.
- If you are on normal mode you can lower the damage dealt to help practice the moves or to get an easier clear in general.
- Taking a bit of damage during phases 1-2 is fine as long as you only use around 2 healing charges. The bosses drops healing charges when swapping phases
- There is a rock you can stand on, located on the left side of the screen. If the boss is on the rocks, most of their attacks will still hit you.
Sorry if some of the quality is off, I haven’t written a guide before so I’m not sure how to add timestamped videos, as they break when I add them. If you have any questions or need help, please let me know.