
We are skipping all three bosses and defeating the last boss by the start of loop 3.
Introduction
Tl;drskip all bosses, fight the last one. No need to really read most of the text (it’s just clarifications, insight and flavour), just look at the pictures and read the Motions part.
This is a guide for completion of the final chapter of Loop Hero in 2 loops. Please note that this cannot be done on your every run, there is a decent amount of luck required. On the other hand, the strategy has a certain consistency – I estimate about 1 in 10-20 runs can be won with optimal play. Most often, you only take the run to the end of loop 1 to estimate how promising the start is. That’s why failed runs only take 2-5 minutes and one dedicated playing session is enough to complete this self-imposed challenge.
Why do this? We aim to skip the boss rush and only fight the final one, which leads to a secret dialogue and a sense of accomplishment. This is a distinct way to play the necromancer class, complete with reassessment of traits’ and stats’ usefulness. Finally, this is a legitimate, even though unnecessarily difficult, way to complete the game with little in the way of meta progression.
This is an improvement upon my own guide on reddit, I tweaked the decklist, understood the stall part better, and critically – added flexibity and consistency to the strategy.
The decklist
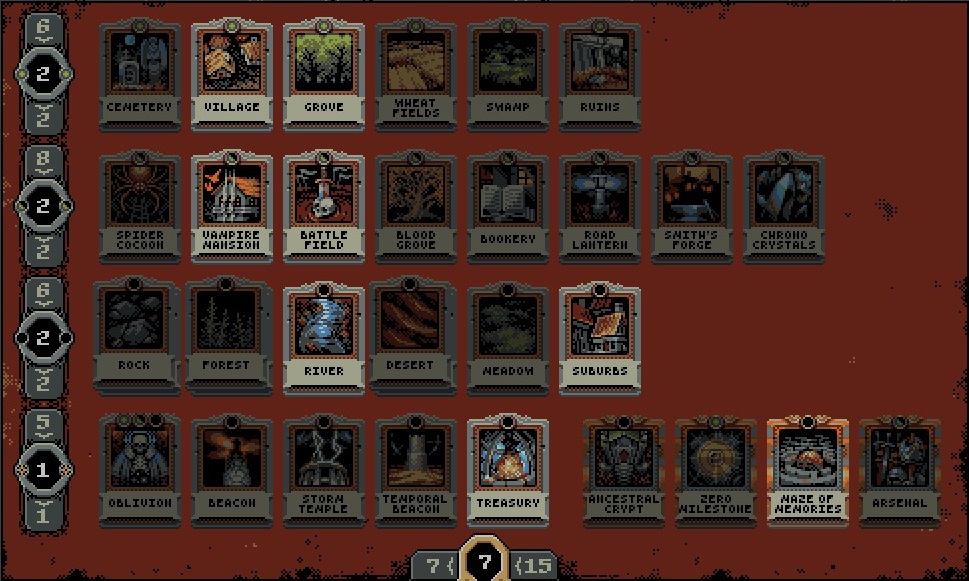
The gameplan is to slow down the loop clearing to allow many enemies to spawn and generate a lot of cards/tiles fast. Some traits are really crucial for that and for beating the boss. Stall, card generation, leveling – every card serves at least one of these purposes. The deck is about as small as possible (46 cards total), we want higher chances to draw the important pieces.
Golden:
- Maze of memories – we are in a rush to fill 202 tiles in just 2 loops, 37 tile headstart is very handy. Maze can also instantly pop a couple of Treasuries, which gives the run some form of boost. I have done without the Maze on some occasions, so you might want to try Ancestral crypt or Arsenal for survivability.
Road:
- Village (3) – provides an instant 5 enemy fight when ravaged. It’s not much in terms of card generation (about 2.6 cards from the whole pack on average), but it’s a good stall and a great source of experience points. Spawns bandit camps, which is a good thing when we rush map progression.
- Grove (4) – now this is premium card generation. Groves spawn fast, once in 2 days, one grove can cover three tiles if given ample time, that is 12 ratwolves, and each ratwolf gives a juicy 0.9 cards on average (and high level gray gear to boot). This is the second highest a regular enemy can offer, the best being 1.3 cards from the good old slime.
Roadside:
- Vampire mansion (3) – probably the single best card in the game and the linchpin of this strat. Gives enemies healing, which is the ultimate stall engine. Adds 1.66 cards on average to the bounty from encounters (0.83 if there’s no way to spawn Swarm of bats).
- Battlefield (2) – Ghost gives a ton of cards (1.5 on average), Ghost of a ghost is a part of a great stall setup. Overlapping battlefields can be used fill the road tiles, however, it is not usually needed.
Landscape:
- Suburb (18) – we need an early level, ideally loop 1, worst case early loop 2. Suburbs are indispensible for that.
- River (14) – gives kickstart to the Suburb exp, spawns Fishmen when turned to Reed. Fishmen are not very effective for cards (0.42), but this gets offset by the fact that River drops twice as often as all other spawners combined.
Special:
- Treasury (2) – there are no good special cards for our task, but at least Treasury pays for itself and some more (gives 2 cards and 2 items when completed).
Optional:
- Temporal beacon – faster day cycle is good for spawn, but time goes backwards when Watchers are in the fight. Not worth it IMO, but excessive testing may prove otherwise.
- Chrono crystal – pretty much impossible to use with Reed, but it ramps up the efficiency of Groves quite spectacularly. Not strictly necessary, and I don’t want to dilute the card pool.
- Bookery – cycles for good cards, but screws up Maze of memories, and we can’t place that before the start of Loop 2.
The traits

There are some traits we absolutely need to succeed, so the only optional trait in our trait deck is Gift of blood, all other extra traits should be unchecked. The value of some traits is close and situation-dependent, so it’s going to be a tier list.
- Laying down one’s life (LdoL) – (S tier) the single most crucial trait. The hero gets tankier and more survivable, the enemies clear skeletons in a timely and reliable manner, which makes the enemies more survivable too – it’s a win-win! Without the trait tanking the tougher fights and the boss is impossible.
- Gift of blood – (A tier) it’s really very hard to kill the boss without this one (the boss has lots of defense and the skeletons barely scratch him). It is the best offensive trait, so it will speed up your clear rate and break each and every stall setup. Naturally, you want to pick it as late as possible: right before boss, or if you really need a powerup to survive the fights. If you are forced to pick it early, you can “switch it off” by turning combat speed slider to 2.5x.
- Residual heat – (A tier) great heal, but it only works if you have LdoL or summon quality, which we generally cannot afford. Otherwise some enemies will just target the hero himself. From my estimates Residual heat adds like 1xLoop hp/sec of regen for this build.
- Card sharp – (A tier) this one gets a lot of hate, but here’s the deal: we need 202 tiles, sans 37 with Maze, the Lich will help with about 10, leaving us with 155 to cover. Early pick of this trait can take care of about 10-15 cards and has snowball potential.
- Field practice (B tier) – usually just a 0.25 of a level for the second loop and 0.5 a level for the boss, but it makes a difference and frees up some inventory slots.
- Horde – (B tier) for a very nice boost in the beginning of the boss fight.
- Art of control – (B tier) pretty useless without high skeleton level and/or attack speed.
- Edge of the impossible (B tier) – good in theory as we have low max skeleton count.
The stall setups
This goes loosely like (recommended skeleton level, required regeneration value – # of ingame days passed)
Ransacked village
Our bread and butter stall.
Loop 1, 0 sk lvl, 3.6 HP/sec – 1 day, without the regen you pay like 150 HP, but win anyway.
Loop 2, 1.2 sk lvl – 1 day.
Ghost of a ghost under vamp aura loop 1
The best setup: low regen needed, occupies hero for days on end, but requires luck to spawn. With LdoL trait this single fight means you are good in terms of enemy/card generation for the rest of the run. However, the means even more luck. We do not equip defense or evasion for this one, as damage to necro is required for Ghost2 to heal and to clear the skeletons faster, keeping the stalemate.
LdoL, 0 sk lvl, 0.6 HP/sec – 7-30 days
No LdoL, 0 sk lvl, 1.8(?) HP/sec – 1-4 days, can equip defense
Vamp+slime loop 2
A tricky fight, the vamp and bats hit like a truck, it is very hard to outheal them, so you manage your skeleton level to get the most out of it and not die.
LdoL, 0 sk lvl, 4.2 HP/sec (2.2 + Residual heat) – infinite
No LdoL, 0 sk lvl – ~1 day at the cost of a reincarnation and a half
The motions
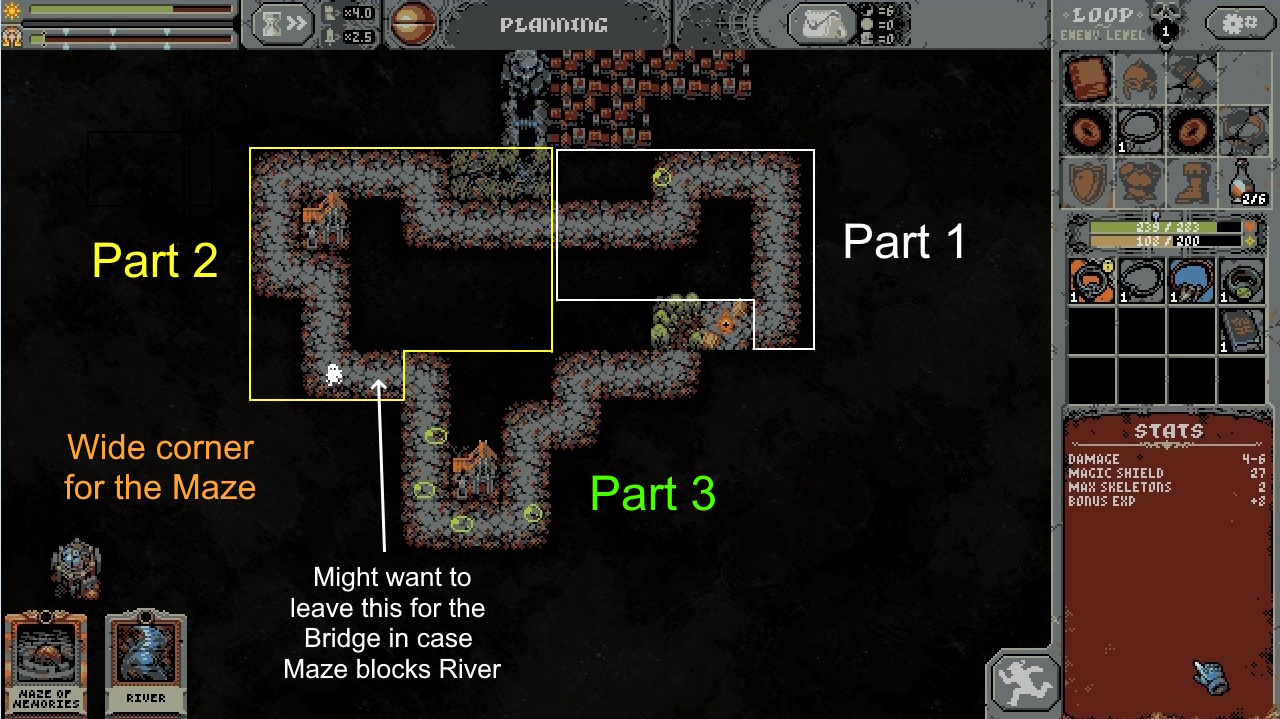
1. Start the run, glance at the loop you’ve been dealt. Split it roughly in three equal parts, first will be for stall and item gain at the beginning of loop 2, second is for Reed, and third is for Groves. Start of the second section has to be close to the edge of the map, so that we start Reed placement as soon as possible. All our lanscape cards have conditions on placement, so take care to not wall yourself up with an unfortunate Maze placement or with a Palace drop.
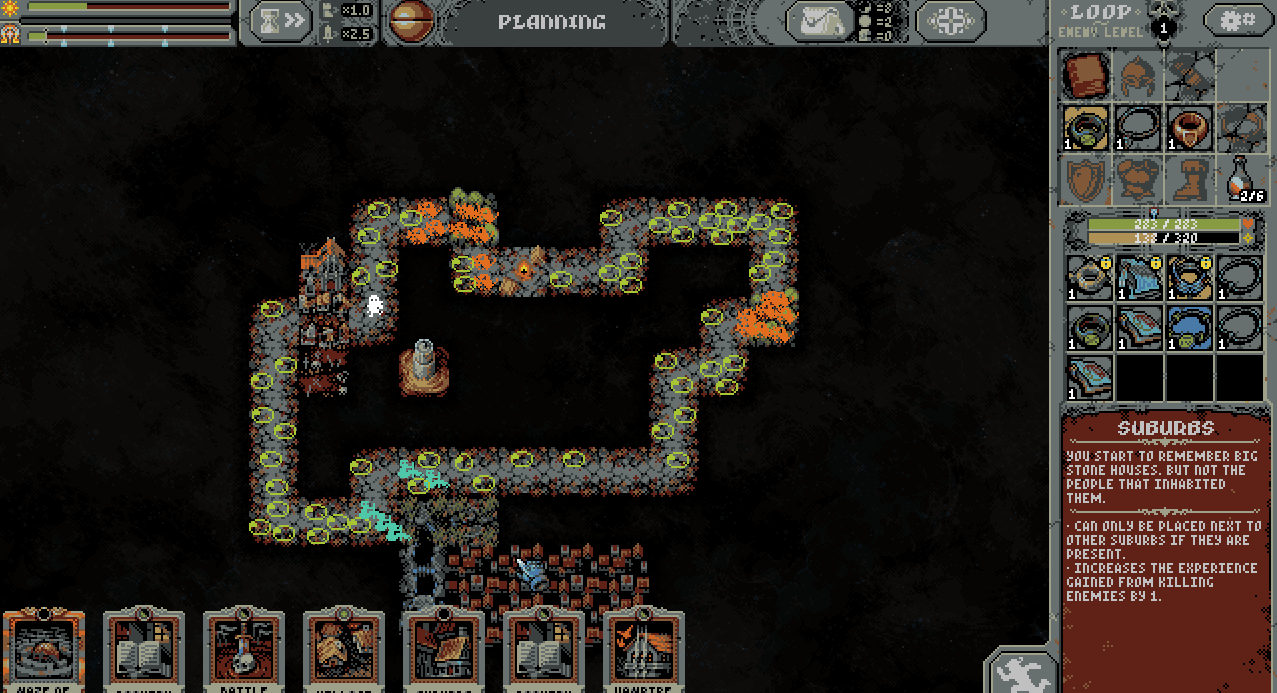
2. Equip the amulet and any regen items,
do notequip the grimoire or any other skeleton level items yet. Defense and evasion can be detrimental as well. In terms of cards we search for Vampire’s mansions, Villages and Battlefields. If you don’t have the full combo, it’s not the end of the world. Place Mansions on top of at least two slime fights, preferably with a free road spot available for a zombie fight this same loop, should a Village drop. The pic above is like a dream placement. If you have all three pieces of the combo, wait so you can level up during the Ravaged village fight (village fights give about 70 xp + 6 times whatever bonus Suburbs provide you).
3. If you managed to summon Ghost of a ghost on a vamp tile, good, if you’ve got Laying down one’s life on a level up – great! Just be ready to equip the book if the Primal matter appears. If you have no luck with the ghosts – make Ravaged villages if you can, also you may want to save up one Mansion for the beginning of loop 2.
4. If you get a Grove, put one right before the Camp tile before it is blocked by a Palace, other Groves go at the start of section 3 of your loop. Treasuries go in a dedicated corner for now, where you’ll just pop them all at once with the Maze of memories later. The corner better be on a different side of the map from your Suburbs and preferably far enough from Camp to let Palaces spawn.
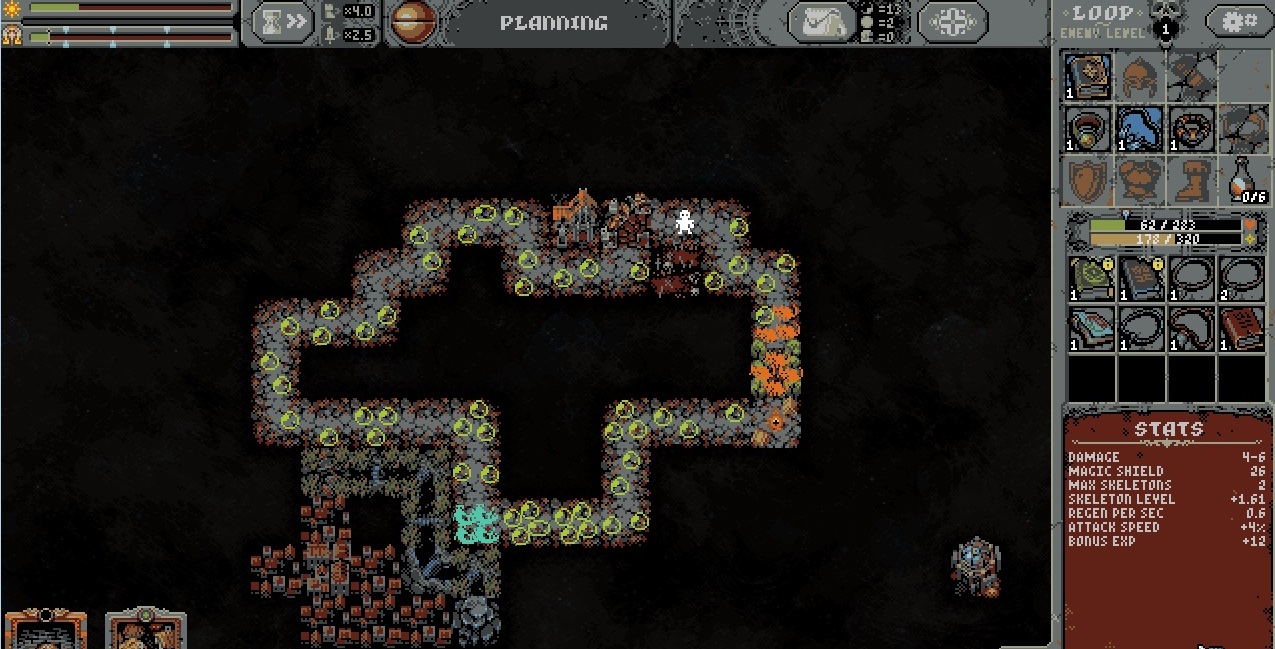
5. First good indication of a good run is how close you are to spawning the first boss at the end of loop 1. It takes 38 tiles to do so, but sometimes 37 is enough (I would guess when some tiles get transformed upon 37th tile placement). Do not spawn the first boss until you cross to loop 2. Sometimes, the run is too good and you have too many cards – then a Village drop on top of an enemy group can save you from discarding the Maze (max hand size is 13). Sometimes, you have to discard the Maze and some more, but such is life.
6. Once loop 2 starts you can place the Maze. Sometimes there are enough cards to instantly replace boss 1 with boss 2. If you were lucky with your stall (got Ghost of a ghost, or otherwise passed 6-7 ingame days on loop 1), equip some skeleton level and proceed normally. Place Villages and Mansions as you go, save Battlefields and maybe one Mansion for the beginning of Fishmen fights. 0.8 sk lvl is enough for the Vamp+Slime fights and about 1.2 sk lvl for Ravaged village fights. If you did not stall enough, you can try Vamp+Slime stall, start the fight with 0 sk lvl burn through a reincarnation, and then switch in some sk lvl at some point during second life so as not to die. This get leaps and bounds more effective if you’ve got high regen.
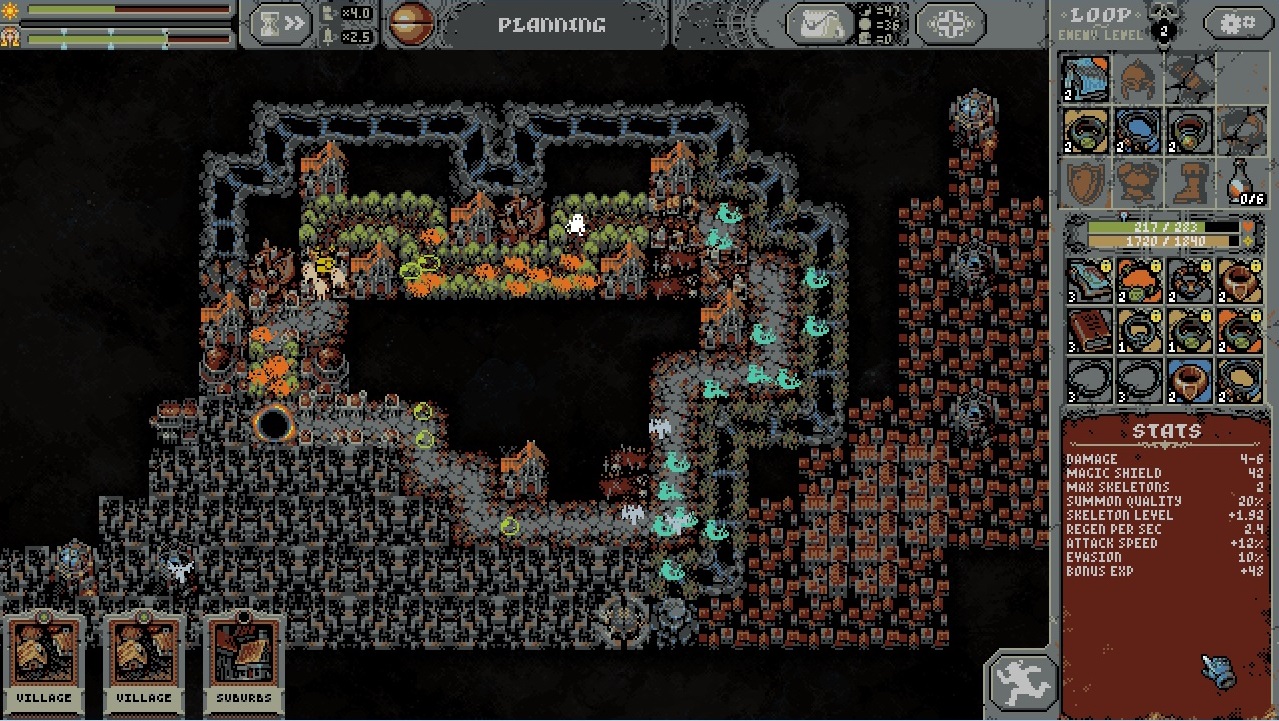
7. Now we come to the Reed portion. Actual successful runs are the ones when at least 2 Fishmen managed to spawn from the first Reed, and the ones when you get a lot of Slimes from Ghost of a ghost fight. Time to decide to proceed or restart. Here are some examples of successful run starts.
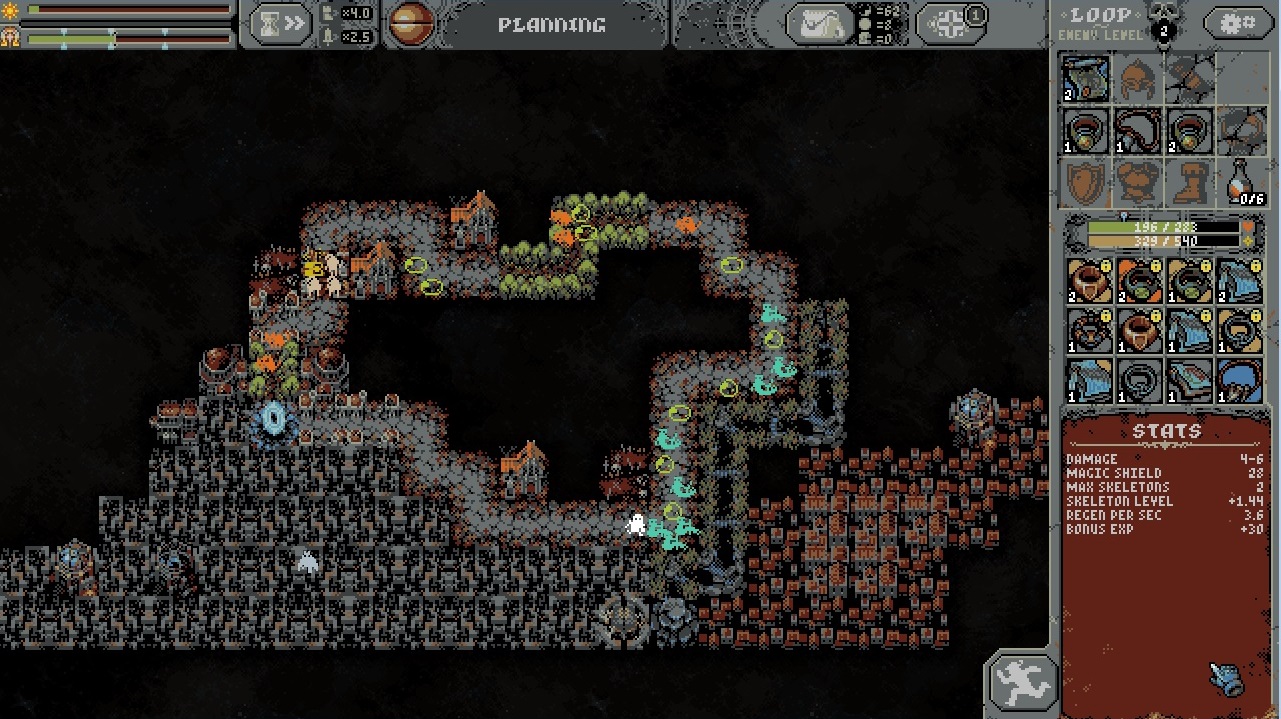
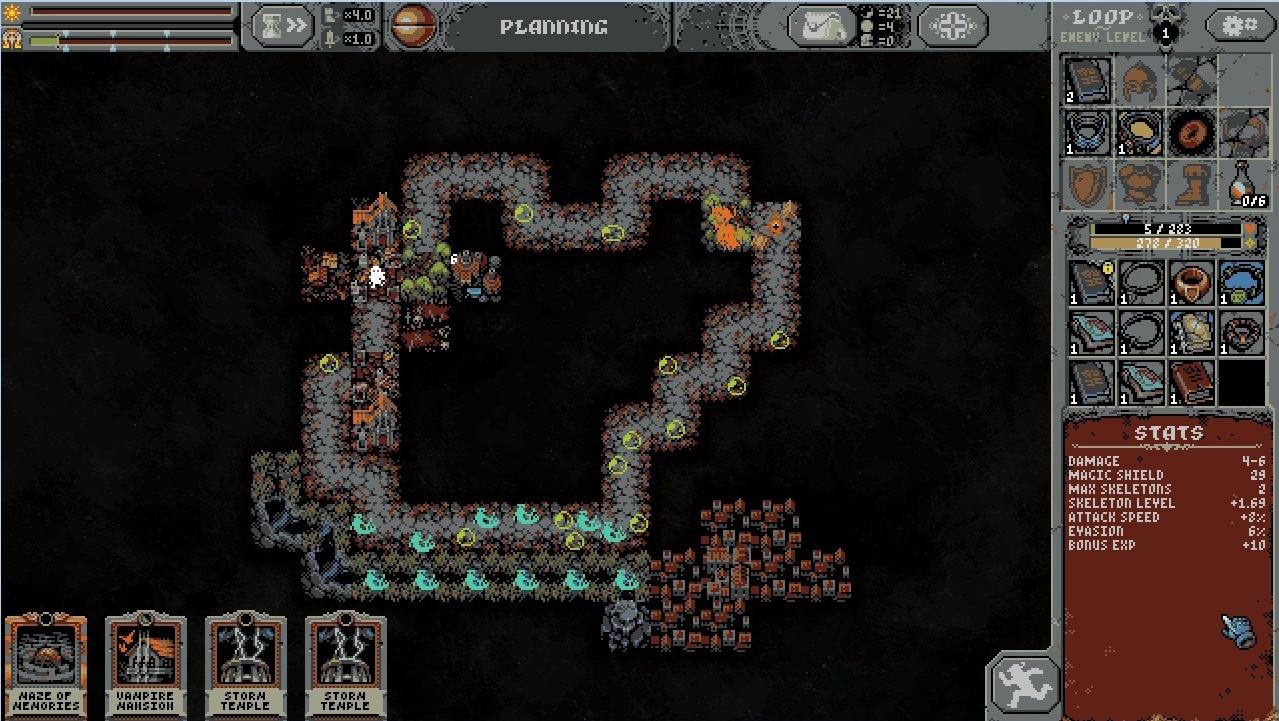
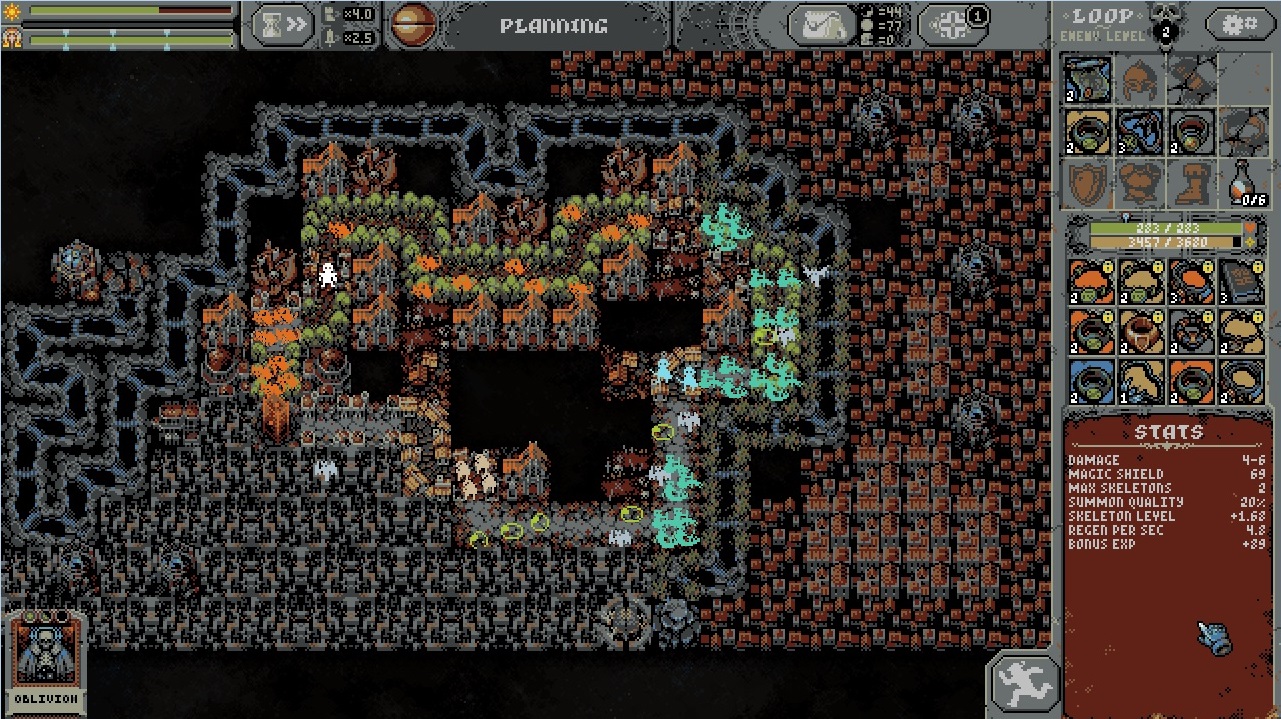
8. We aim to provide Vampire and Battlefield aura to the rest of the Loop. Villages only go to the first section where you try and spawn Bandit camps (it is an extra tile). Now it all boils down to adjusting your skeleton level and keeping some regen. Once there are a couple Fishmen and a Vampire in the fight, you might want 1.8 sk lvl, full Fishmen and full Ratwolf fights require at least 2.5 sk lvl. You can stall some more by tinkering with the skeleton level, but this is playing with fire, especially if a Prime matter appears. Ratwolves drop high level gear, start to stack up (by this I mean lock in place) lvl 3 evasion rings, high sk lvl books and the like. Here is a progression of the run that succeeded just barely.
9. The boss is actually no joke for this build because we have slow summon speed and low max skeleton count. What I have found to work:
2.5+ sk lvl, 30-40% evasion, ~1.2 HP/sec, Gift of Blood, Residual heat, LdoL (best)
2.8+ sk lvl, 40% attack speed, ~1.2 HP/sec, Gift of Blood, Residual heat, LdoL, 3+ max skeletons
3.2+ sk lvl, ~1.2 HP/sec, Gift of Blood, Residual heat, LdoL
4.6+ sk lvl, ~1.2 HP/sec, Residual heat, LdoL
My final traits from the same run:

10. Congrats, you did it!