This guide is for NVIDIA GPU users!
Currently there are two major ways to add DLSS in Starfield. One is dependent on ReShade, and thus disables the Steam overlay, while the other one has no such dependency, but also comes without sharpening. In this guide I will show you step by step how to add DLSS and also the simplest way to add sharpening.
All this without modifying or changing game files, without affecting achievements and being easily removable.
What is DLSS and why do I need it?
Deep Learning Super Sampling (DLSS) is a new image rendering technology developed by NVIDIA, which uses deep learning to produce an image that looks like a higher-resolution version of an original lower resolution image.
In essence it gives you performance while retaining quality.
AMD’s version of DLSS is FSR and Intel’s version is XeSS.
Unfortunately Starfield officially only supports FSR which is worse than DLSS, especially on non-AMD cards.
By replacing FSR with DLSS you will be able to upscale the game from a lower resolution to your native resolution, gain FPS and keep a solid image quality.
Adding DLSS
1. Download FSRBridge – DLSS from Nexus Mods
It can be found here.
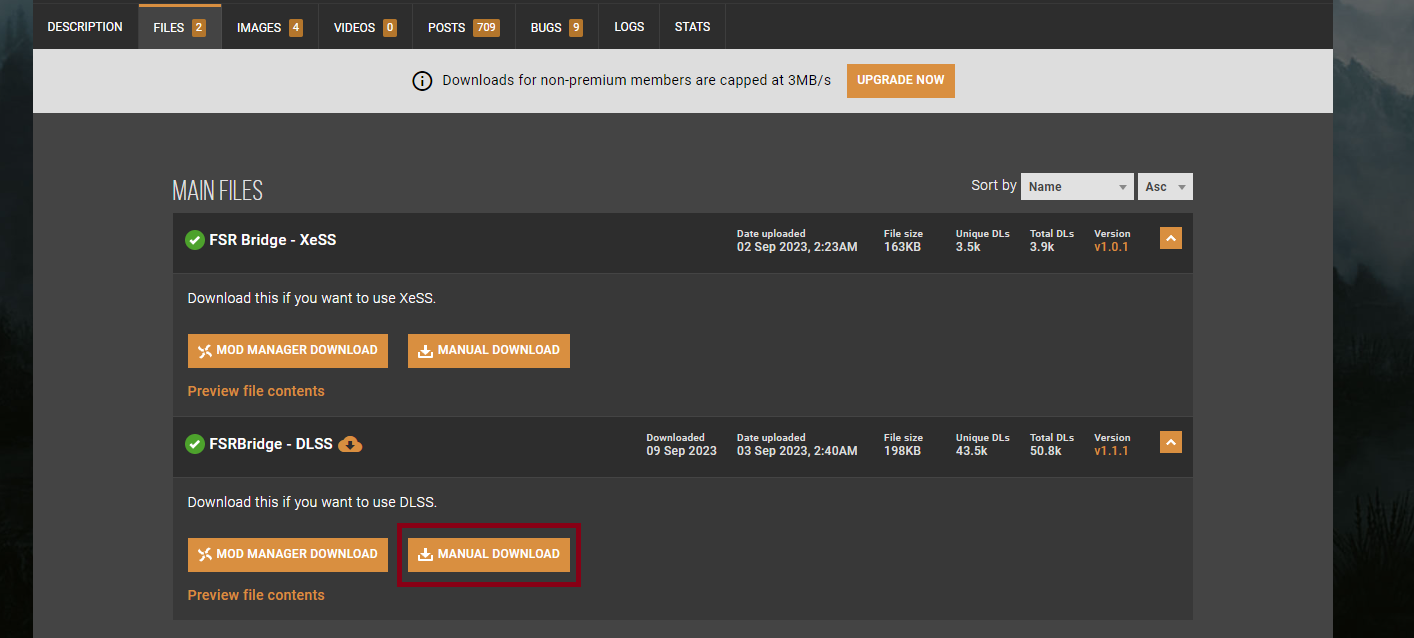
Note that you need to create an account and use the slow download button afterwards.
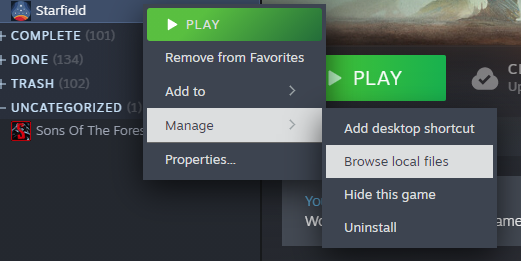
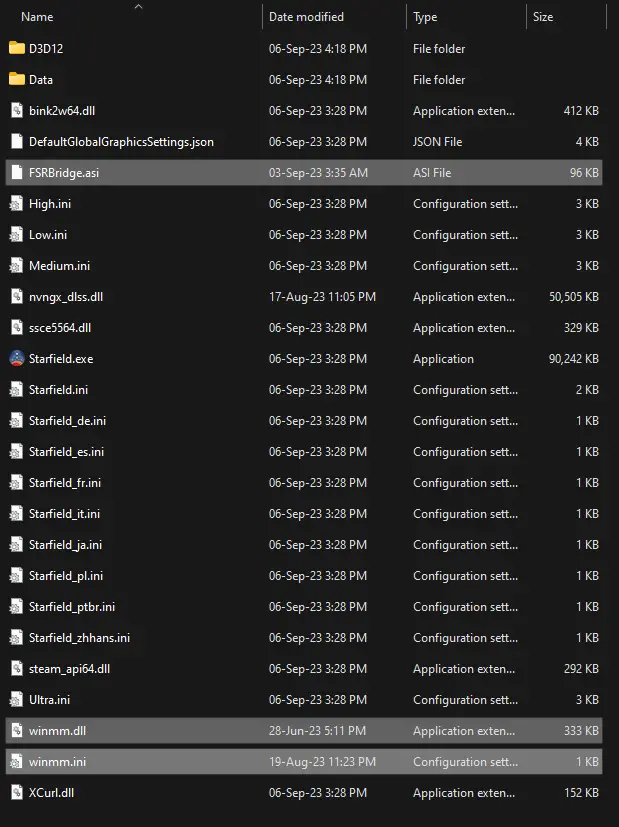
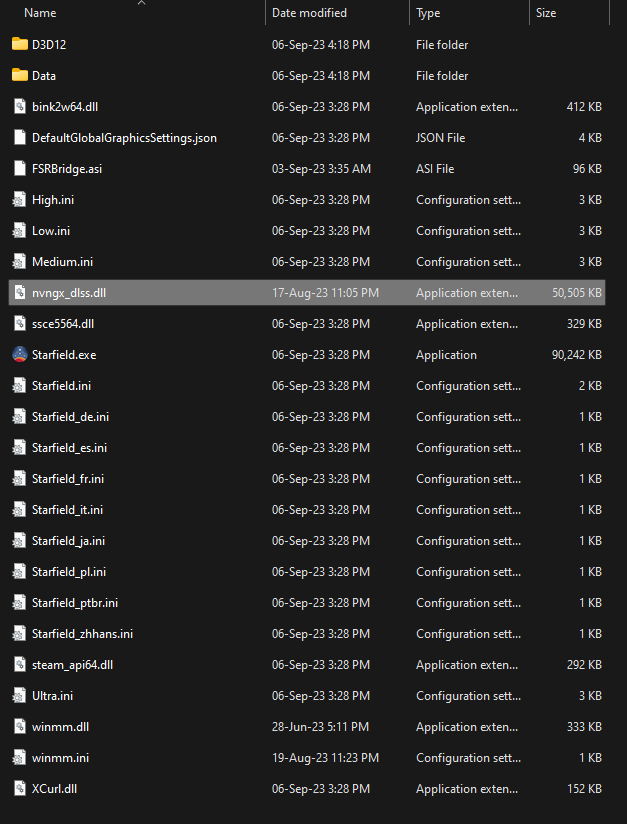
2. Extract the downloaded files into your game folder
Using 7-Zip or even the default Windows unzipper extract these three files.
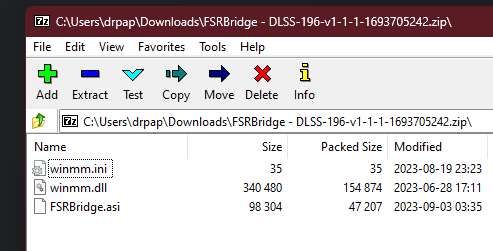
Move them to your Starfield game folder.
If you want to remove it later just delete these files.
3. Download the latest version of DLSS and add it into your game folder
It can be found here.
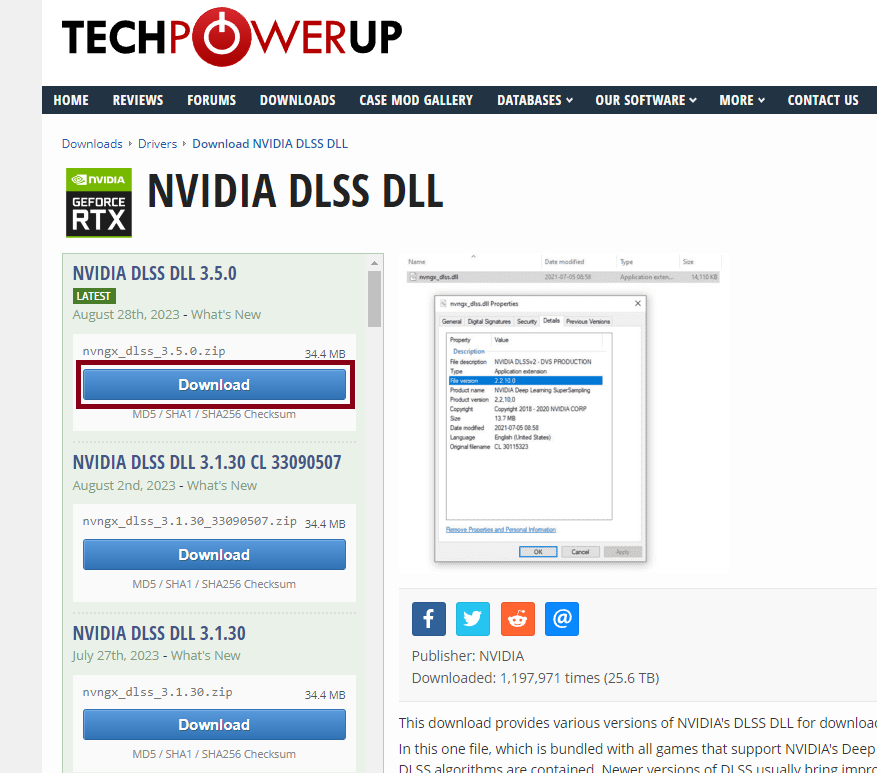
Choose any server and the download will start automatically.
Using 7-Zip or even the default Windows unzipper extract this file.
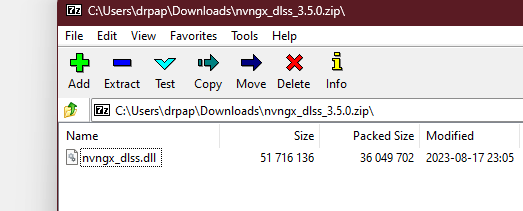
Move it to your Starfield game folder, same as before.
If you want to remove it later just delete this file.
4. Turn on FSR2 in your game and adjust the upscaling
FSR is now replaced with DLSS. You need to keep it turned on!


The render resolution scale percentage determines from which resolution will DLSS upscale the image to your native resolution. Lower % gives more FPS but lower quality. Putting it at 100% doesn’t provide any FPS increase. Play with this setting until your find your preferred FPS/quality ratio.

Note that sharpening no longer works. It doesn’t matter what % you set it at, it won’t change anything. I keep it at 0.
Adding Sharpening
We will be using NVIDIA Freestyle, the simplest method which will also preserve performance compared to ReShade.
1. Download GeForce Experience
There is a likely chance that you already have it installed.
If not, you can download it here.
It can also be used to update your GPU drivers if they aren’t already which is crucial to performance.
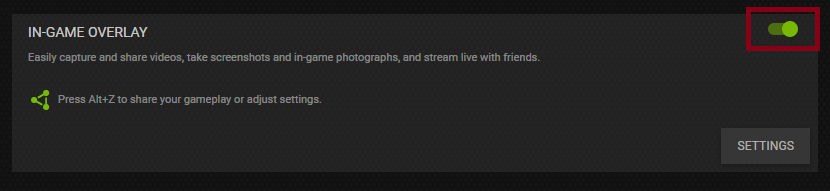
2. Enable the in-game overlay
Open the GeForce Experience settings and enable the overlay.
3. Enable the Sharpening filter in game
Launch Starfield and press ALT+F3 to open up the filters overlay.
Add Sharpening and fiddle with the sliders to get your preferred look.
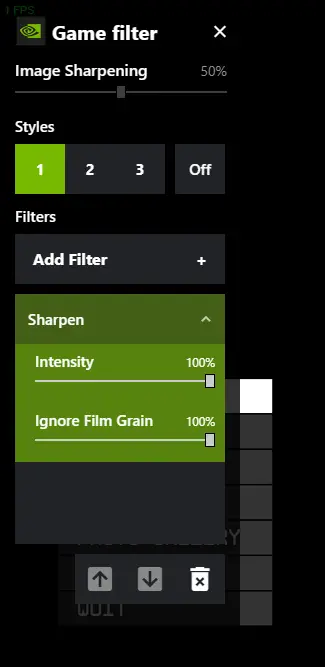
Note that I am not talking about the “Image Sharpening” slider at the top!!!
I keep mine at 100/100.
Note that you can also add some other filters if you so choose.
Uninstalling
Simply delete the 4 files from the game folder:
- FSRBridge.asi
- nvngx_dlss.dll
- winmm.dll
- winmm.ini
Disable the GeForce Experience in-game overlay or simply remove the sharpen filter via the overlay.