Based on personal experimentation and tweaking, this is one of, if not the most efficient method to grind gold, making prestiging possible in less than two hours even if you start at zero.
Overview and Recommendations
Grinding gold efficiently in this game certainly isn’t easy, as it requires you to have ample experience with traps, navigation, and hazards. Although this method is quite basic, and could be surpassed easily, this guide aims to provide a basis of experimenting for increasing gold output as much as possible in the shortest amount of time.
Some pre-requisites/recommendations:
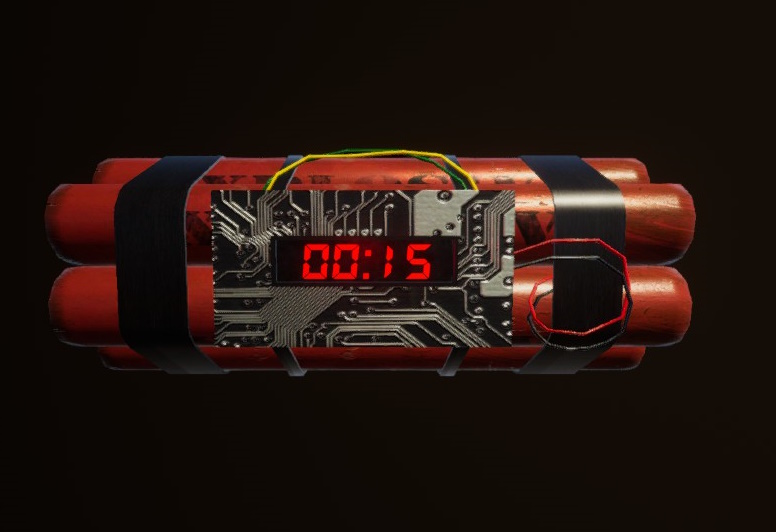
TNT; this is used to open blast-able doors for treasure and gold, and is responsible for at least 30% of the output you gain per expedition.
A cat; a prestige/challenge point is required to unlock this pet, which requires either a prestige or a completion of the weekly challenges. The cat type does not matter, and is open for personal preference. The cat allows you to take one fatal blow from hazards or traps and survive(excluding pits.) This gives you extra breathing room for if you make a mistake or mess up, so you can still proceed and keep your average output per expedition consistent.
Experience with playing solo; the fastest and greatest gold output with this method requires you to play solo, so being prepared for sudden surprises, noises, etc. is recommended. Even with the “finders keepers” setting for the game with multiple players, you still won’t get an increased gold output compared to if you do it solo, in proportions to the time it takes.
Settings and Difficulty
To start, the Cursed Sand Ruins map is the faster method between the two variants of this tomb, as it is closer to the van compared to the Crypt of the Great Pyramid. You want to spend as little time as possible inside and outside the tomb collectively, hence this map selection. The difficulty should be set to Brutal, as it increases the output the most out of all the difficulties. Setting it to Hard or Normal is okay, as it reduces the amount of zealots that spawn, although these will be the least of your concerns when exploring. With the settings that are customized, the difficulty has minimal effect on your success.
The settings are the most important part of the setup. I recommend setting a preset for the modifiers made, which I will go down the list of changes first(minus PVP, Loot Mode, and Disarm Traps) and summarize with a total output increase:
- Medkits: OFF; Medkits make no difference if your health is modified, which is what this list includes for maximum gold collection.
- Timed: 6 MINUTES; this can be increased to 9 minutes for the first couple of attempts if you want to get a feel for the speed and adjustments to the difficulty, but 6 minutes will always provide enough time for you solo.
- Locked Chests: ON; banishing is not optimal for the consistency and efficiency of an expedition, so the chests being locked will not negatively affect your expeditions.
- Starting Health Points: 1; this modifier means you will die in one hit to any damage, but this is where the cat’s ability comes in handy; while keeping the percent increase this modifier has, it allows you to take an extra hit before dying. It’s good for some traps that can be annoying or unexpected. This can be increased if preferred for your first few expeditions, and can be promptly reduced back to 1 once you feel comfortable.
- Blessing of Osiris: OFF; the Blessing is futile for these expeditions, especially with the cutscene that plays whenever you die. It takes off around 30 seconds, and with the timer still counting down, it does more harm than good to leave it on for this list of settings.
- Spirit Interaction Frequency: LOWER; the method used does not require you to enter the inner tomb, although there is gold inside. It can yield an extra amount, but only if you get all the evidence in time and open it. Once the inner tomb opens, the timer stops, giving you extra breathing room for the expedition; however, do note that it can decrease the gold output over a time interval because it takes extra time. Gathering evidence while searching for gold is also not fruitful and oftentimes will not always give you an answer in time to open the inner tomb. If you can multitask and juggle collecting gold and gathering evidence, plus implementing some strategies from 3-minute timed expeditions for gathering said evidence, it could potentially give you more, although the average gold per minute you collect would barely increase regardless.
Once you have selected all the modifiers listed with their given options, you should end up with this:
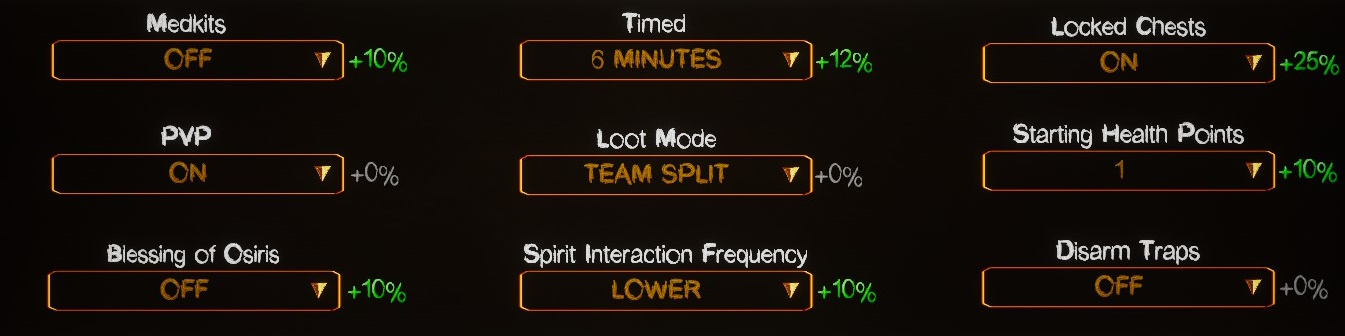
The percent increase these modifiers collectively yield is 77%(although you will not be taking the relic unless you absolutely want to, so it’s technically 65%.) Combined with Brutal difficulty, this yields a 95% increase in gold and XP.
The Expedition
Once you have started, run and open your backpack at the tent area. Even with five inventory slots, you should still be able to do anything you need to in order to get as much gold as you can in 6 minutes. Pick up the torch, the photo camera, the TNT, the tablet, and the metal detector; all five of these can be needed. If you have extra inventory room, you can add some evidence-gathering items or tools to your belt which can assist you.
Once you enter the ruins, the timer starts. What you want to do is complete as many objectives as possible while you are exploring, which includes prison chambers or treasuries if one of their levers are not within the inner tomb. Your primary focus is gold, but rare treasures and documents can provide a noticeable increase because of the percent bonus. On the Cursed Sand Ruins, the rare treasures can be found at one of these locations:
- One of the boulder traps
- At the Royal Mummy room
- At the Hieroglyphs Room
- In the Treasury
- In the Prison Chamber
One rare treasure and document is always behind the destructible door, so each expedition will always yield at least one rare treasure and document. Rare treasures do not require inventory room, but they do require your offhand to not have a rare treasure already there(meaning you have to deposit them one at a time.)
Documents can be located almost anywhere that isn’t a default hallway, a dead-end of a hallway with or without a pedestal, or a sarcophagus that lines the hallways. This excludes the inner tomb and the lower level entrance as well, since they don’t have those. They can be located on:
- Stone railings where there are pits
- Stone railings in corner rooms(connectors that are between two hallways or rooms with a statue in the corner)
- Stone railings in the Royal Mummy room or a connected mummy room(a room that is connected to two pathways with an opened tomb containing a mummy in the middle)
- On tables in the Hieroglyph Room or Prison Chamber
- On the floor in the Hidden Treasury
- Any special dead-end room that is not a hallway variant(statue rooms, tomb rooms, portal rooms, etc.)
- At the base of one of the four mummies in the four-way room with a statue in the center
Do note that they can be hard to spot without a flashlight and require a keen eye to spot normally. Each document collected yields a hearty gold bonus if they are placed in the tray outside the tent where you also deposit rare treasures. This is where the increased inventory space is useful, because you can get upwards of five documents with the settings for this expedition.
Objectives give gold bonuses, which is why you also should complete them along the way. Locations of objectives will also be listed, for further convenience.
Remains:
- In the sarcophagi that connect to the default hallways(they do not always contain a mummy, but they are also the most abundant container of remains. You can take a photo of the mummy inside without opening the sarcophagi, which is explained in my other guide that was linked earlier.)
- In the dead-end Sarcophagus Room(either in the single upright sarcophagus or within the ones on the floor. Again, photos of the mummies can be taken through the sarcophagus lid.)
- In the four-way room with a mummy in each corner
- In the two-way room with a mummy in the center
The sarcophagus in the prison chamber on this map variant(from my few hundred hours of playing) have never yielded a mummy inside, so it was excluded from this list.
Past Explorations:
- In the four-way room with a pit in the center
- In the dead-end spike pit room
- In the prison chamber
- On the other side of the spike maze
The remains in the lower level do count, but since this expedition does not go for banishment or the relic, this is excluded.
The Royal Mummy spawns in only a specific dead-end room, where both the rare treasure and a document have a chance to spawn.
Hieroglyphs always spawn in a dead-end room with a table and a baboon statue(mmmm, monkey) that also has a chance for a document and/or a rare treasure to be located at.
If the Hidden Treasury spawns on an expedition, the location is always at a dead-end hallway behind a fire pedestal.
Possible lever locations will also be included, although it may not list all of them; do not rely on it for 100% of lever locations, it just aims to be a guide for locating them easily:
- In the starting room of the ruins, bordering any of the four walls
- In the four-way mummy room
- Behind a fire pedestal at a dead-end hallway(which could also potentially be a hidden treasury location in rare circumstances)
- In the middle of a swinging-ax trap hallway
- In the two-way hallway with a mummy in the middle
- In the Royal Mummy room
- On the other side of the spike maze room
- In the inner tomb(the radar can display this if you walk up to the inner tomb close enough for it to display on said radar, but do not expect it to always be there)
Again, you want to complete as many objectives as you possibly can without opening the inner tomb. It is also possible for some bugged objectives too, like a royal mummy objective without one spawning or more documents than those that end up spawning, but these are quite rare and don’t have much impact on your output.
While looting the tomb, you may still get evidence regardless; mark it down if you want to, in case it is enough to allow you to open the inner tomb. The increase isn’t significant, but it’s up to you.
The Conclusion
Hopefully your first expedition in grinding gold went well, and gave you a reward similar to this:

While the timer only gives you the percent bonus if you retrieve the relic, it’s good to have it to keep track of how fast you can become with this method. It also is there to remind you of how fast you should be whenever you gather gold.
That’s all there is to it, hopefully this covers plundering the Cursed Sand Ruins well enough. Leave a comment if I missed anything in any of the lists.