I noticed that every guide for this achievement is about the Support 08 Sofia scenario. While it gets the job done, it can be incredibly frustrating to constantly get destroyed by MANPADS and APCs and having to start over again. As such, I decided to create this guide for people who want a more risk-free method of completing it on 04 Rodopoli.
Getting Started
Now that you know how everything works, load 04 Rodopoli. The reasons we want this scenario specifically are:
- No enemy AA or strong APCs. The opponent only has technicals and infantry.
- Easier Objective LZs (except Delta). The Rodopoli Landing Zones that we will use do not have big cities or very hilly terrains that require extra precision and care to manage.
- More mobile helicopter. The PO 30 Orca is smaller and much more controllable than the NATO Ghost Hawk, while also trading the 2 miniguns for pilot-controlled miniguns and rockets.
- Less small arms fire.
- Rodopoli trades safety for speed. While you will be less likely to be destroyed by the enemy, you will not get any breaks and will have to transport the 10 groups ASAP. Having 400 tickets is mandatory, or you will easily lose.
Now that you’re in the lobby, check the parameters in the top right corner of the menu and change the tickets to 400 and the time to 03:00 (the achievement is doable in daylight, but you will have to deal with much more ground fire).
General Tips
Ignore the Taru helicopter; just get in an Orca.
The most important thing to keep in mind is that speed is key. The FIA will quickly capture Charlie, Echo, and Foxtrot, and you will lose tickets rapidly after they do. I finished this achievement with around 100 tickets left. Even though it is a safer scenario in general, you will have to be a lot faster than on 08 Sofia.
Use your weapons when needed. The Orca is armed with a minigun and rockets, so you are free to use them to defend yourself if you can’t flee fast enough.
Avoid 50 cals. If you get shot by one, turn around and run away. While they might not be as dangerous as CSAT APCs, they can still kill you.
Don’t get too close to any objective beyond Delta. It’s too risky. If all objectives up to and including Delta are captured, go back to base and rest a bit while the FIA recaptures one or two of your objectives. Just keep an eye on the tickets to avoid suddenly losing the game.
Landing Zones (LZs)
You don’t have to follow the images below; they are just examples. Feel free to experiment and search for your own LZ as long as it’s within a 270m radius of the objective and is relatively safe.
LZ ALPHA
All hail the dinosaur.
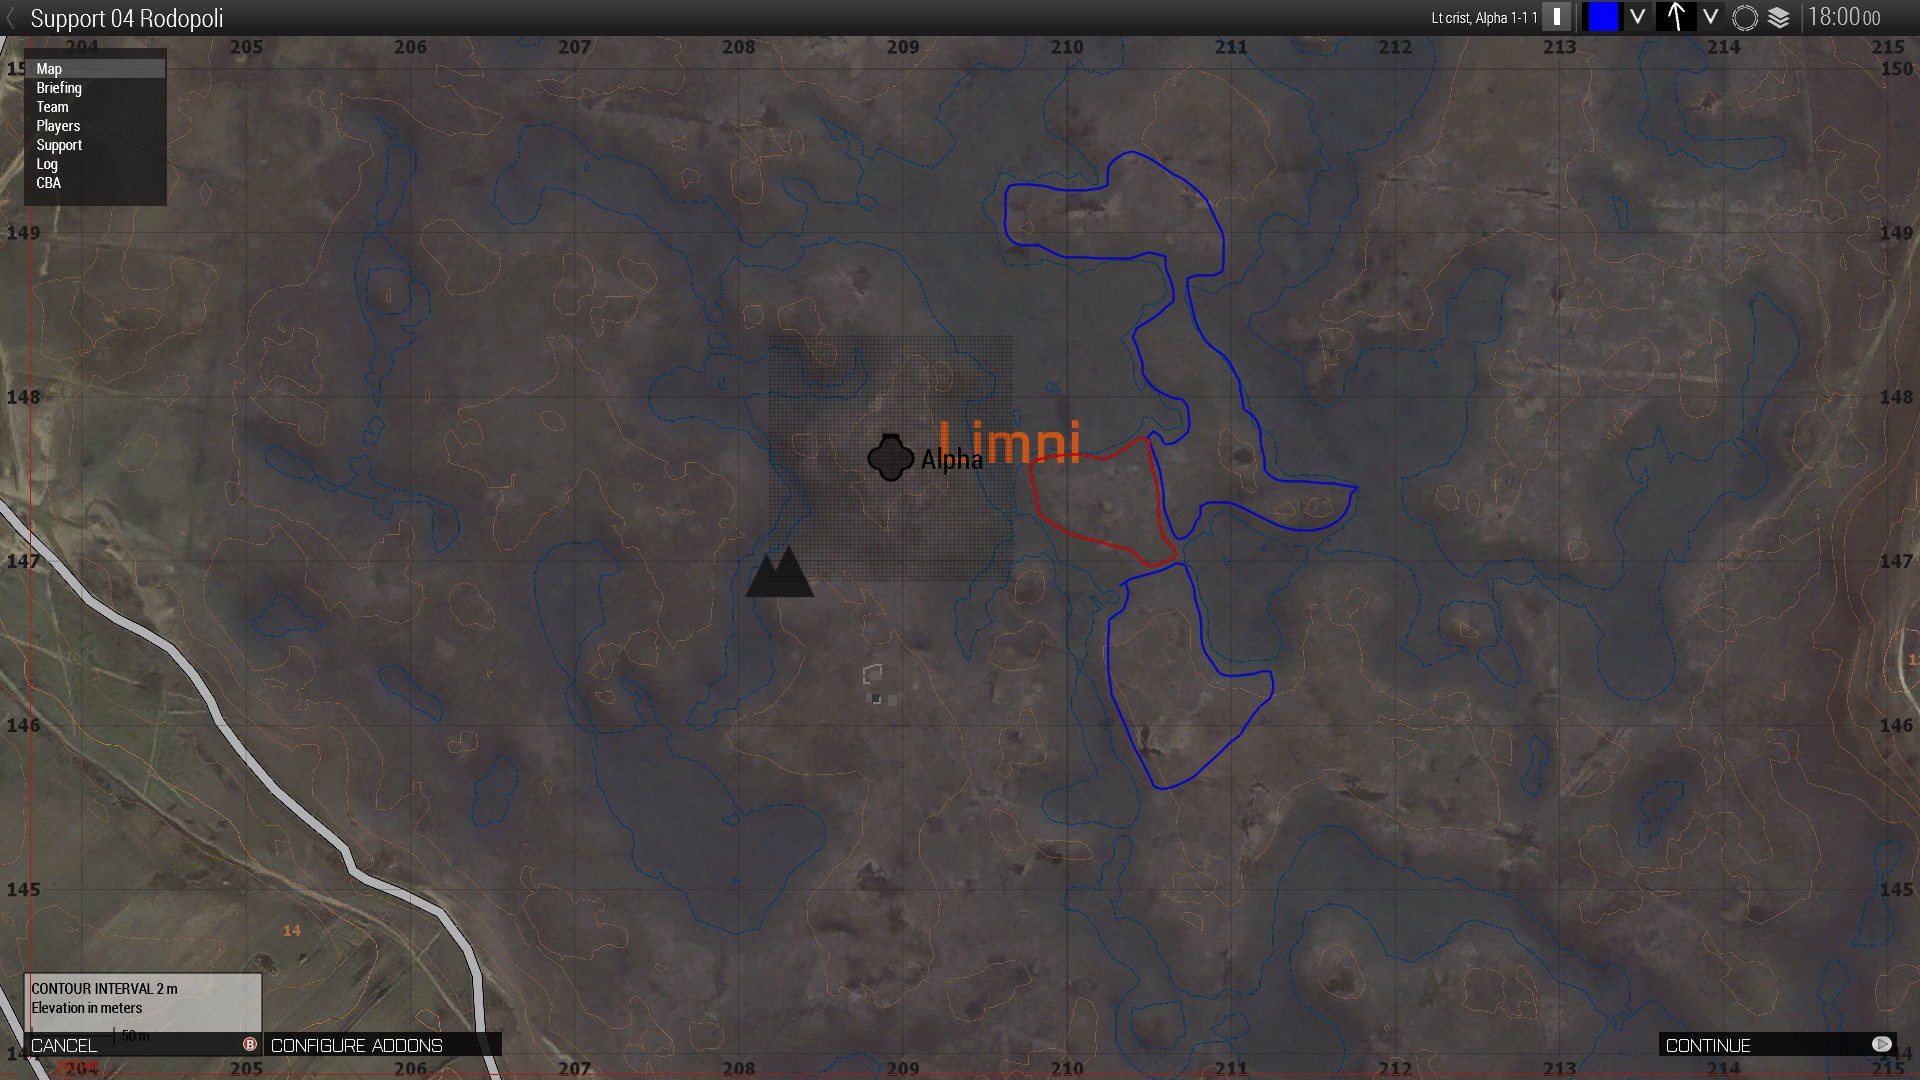
Blue is good; red is only for emergencies.
This one is quite tricky, as half of it is shallow water. However, it has no obstacles, making it an easy landing zone. Grab the closest groups and drop them here until it is fully captured. (TIP: If a group fully loaded into your helicopter before Alpha was entirely captured, you can still drop them there, and it will count as a landing.)
LZ BRAVO
This one is pretty simple. Try to land to the south and east if there’s any danger.
LZ CHARLIE
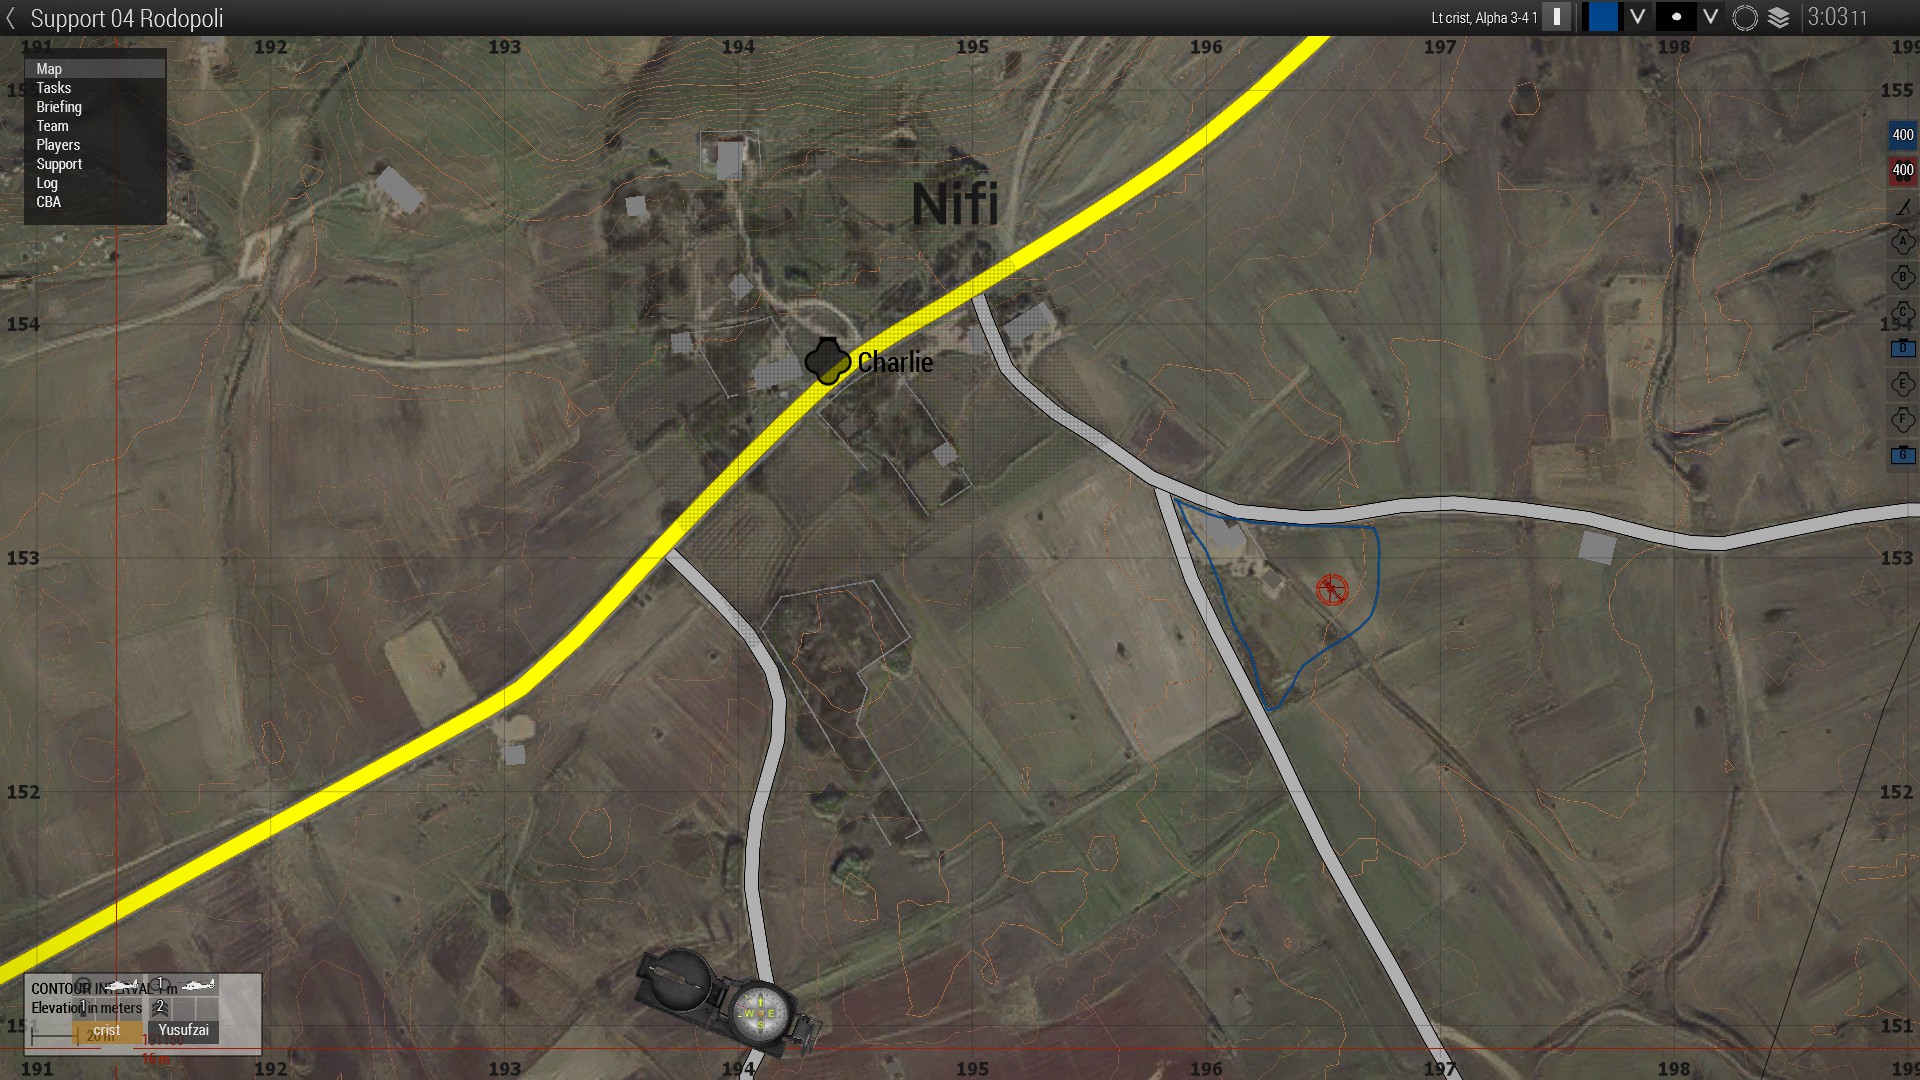
Land in the blue area. It is by far the safest, with good cover and flat terrain.
LZ DELTA
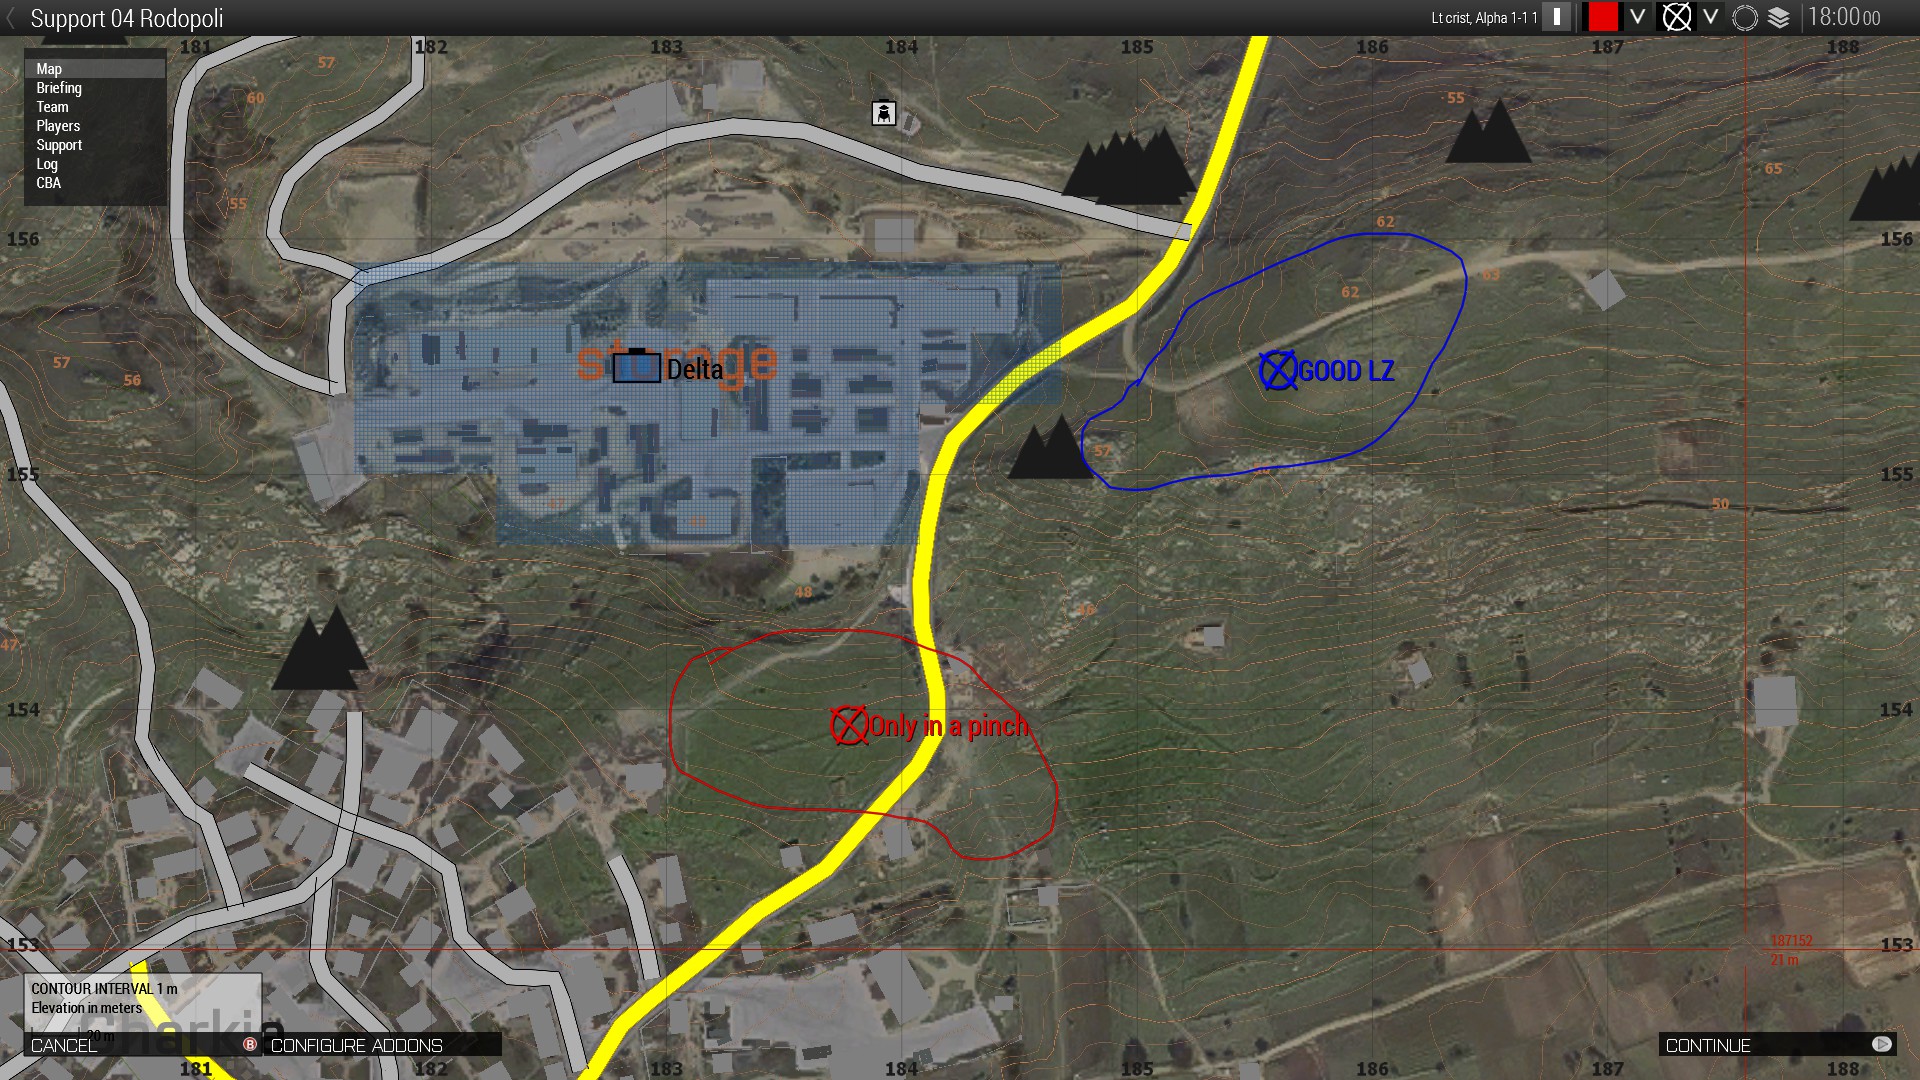
Probably the hardest of the 4, it has hilly terrain and not much cover. I found the best way to land here is on the hills to the east. Sometimes there’s a machine gunner on the tower directly on the objective, so check that every time you come around here to make sure you don’t randomly get sniped.
End
I hope this guide helped you. It’s my first ever guide, so suggestions are much appreciated. Happy flying and godspeed, achievement hunter! I believe you can do it!
Final note: Get some mods to help you along the way. I find Enhanced Map and Enhanced GPS useful.