Guide on how to get mods for Persona 3 Reload working on the Steam Deck using Reloaded II and Protontricks.
Protontricks Setup
You will need Protontricks, if you already have that installed you can skip this entire section after reading this.
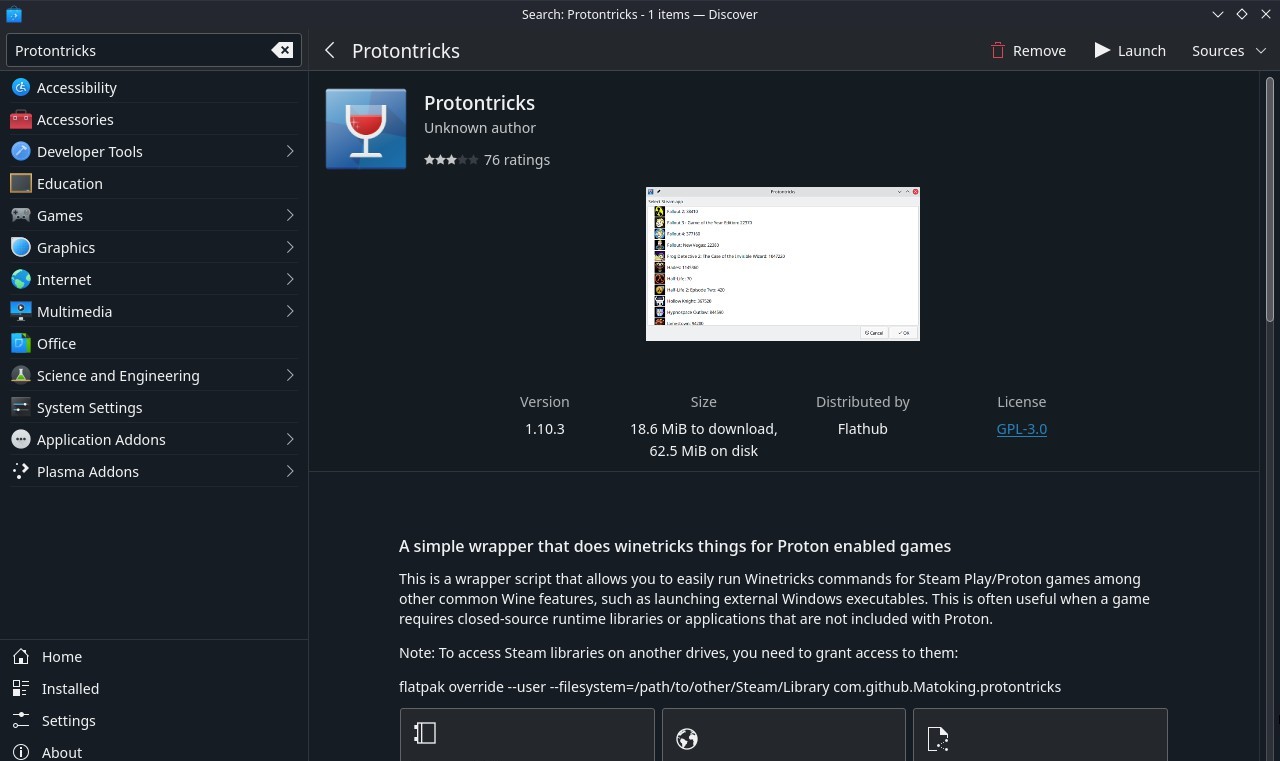
Open up Discover and search for Protontricks then install it.
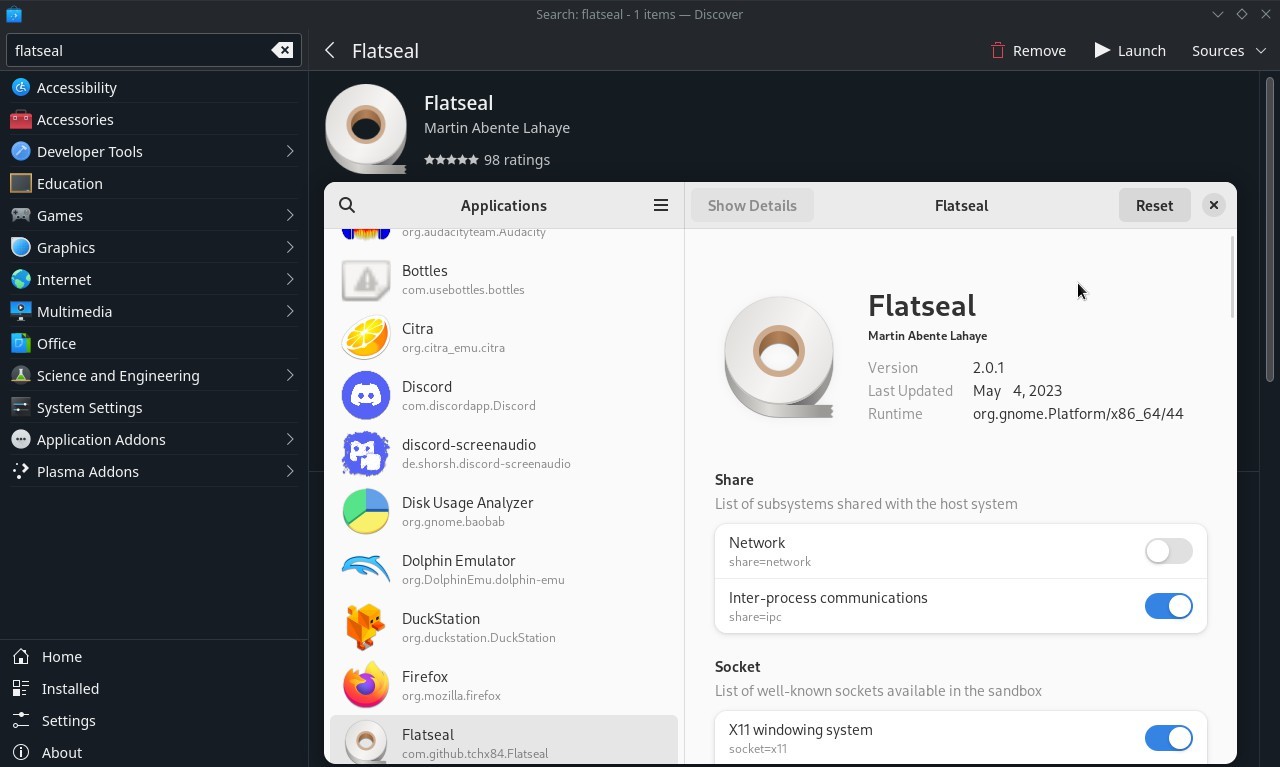
After that, search for Flatseal then install and open it.
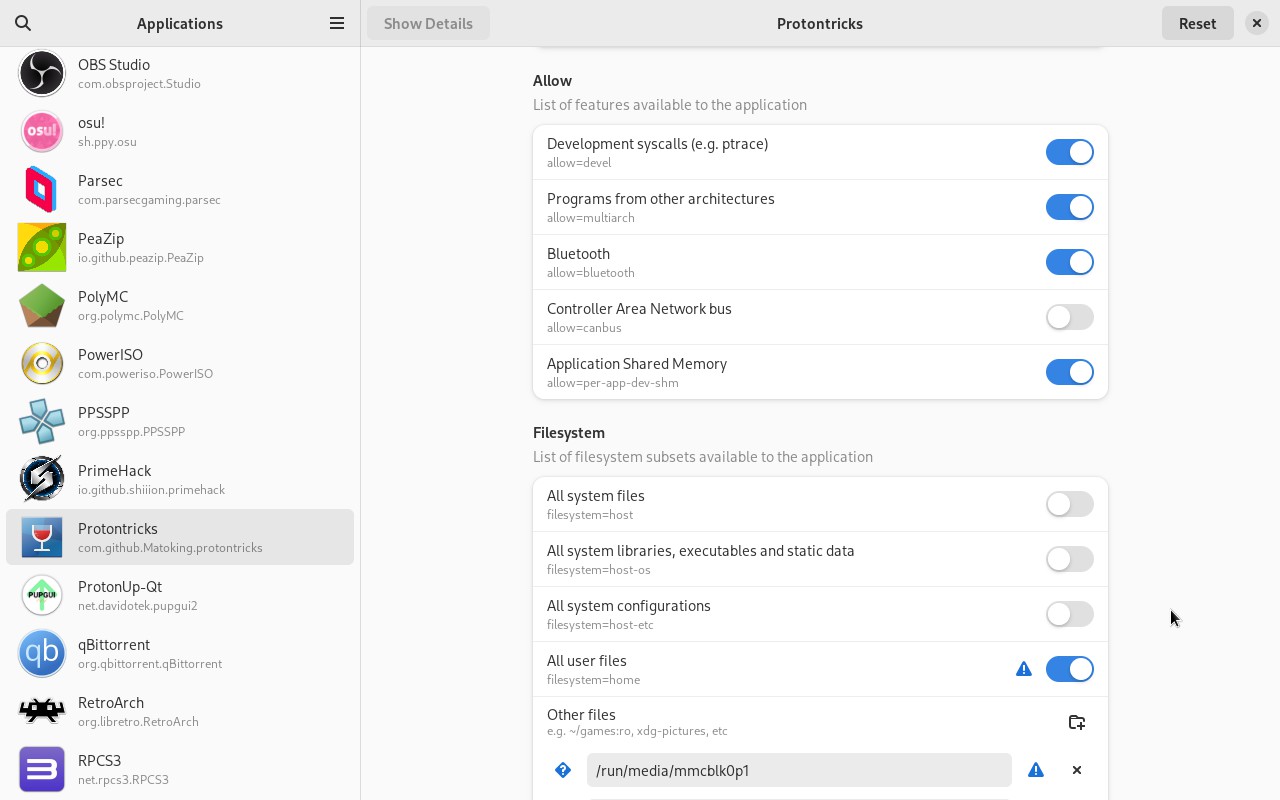
Click on Protontricks on the left, scroll down to Filesystem then click All user files and give permission to /run/media under Other files.
What is Flatseal and what exactly am I giving access to?
Flatseal allows you to review and modify permissions from your Flatpak applications, we are giving Protontricks access to any external drive (like a MicroSD card) you may have in case the game is installed there.
Reloaded II Prerequisites
Before starting, run Persona 3 Reload at least once with Proton 8.0-5 (or your preferred Proton) to generate the prefix.
Next download these:
Visual C++ 2015-2022 Redistributable (x64)
Visual C++ 2015-2022 Redistributable (x86)
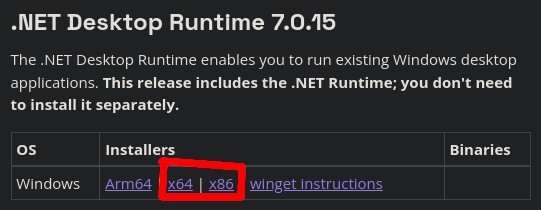
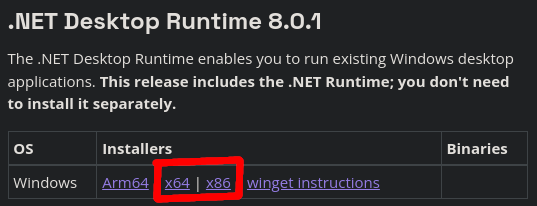
.NET 7 Desktop Runtime (Install BOTH x64 and x86)
.NET 8 Desktop Runtime (Install BOTH x64 and x86)
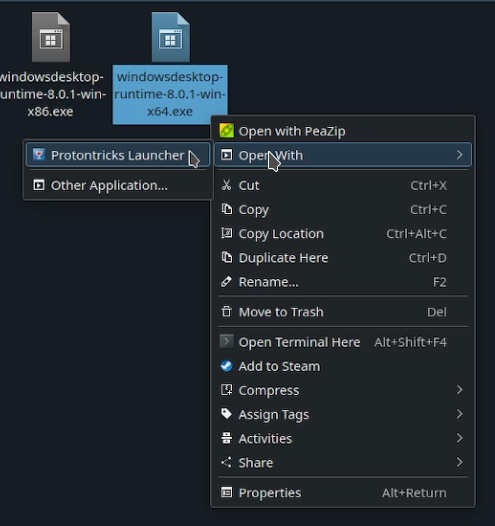
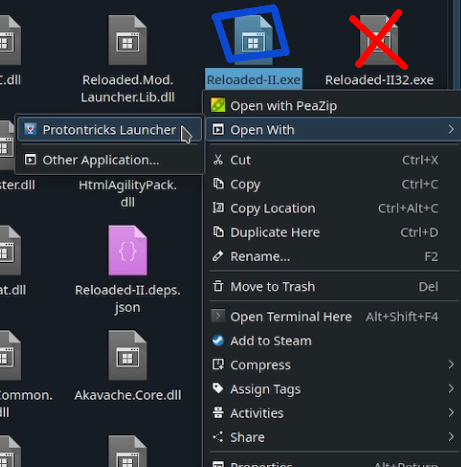
Download each one by right-clicking > Open With > Protontricks Launcher.
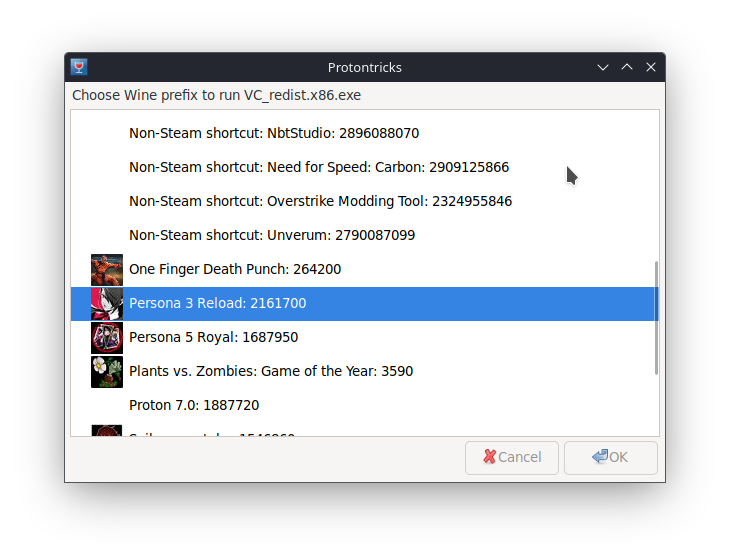
After it opens, scroll down and click on Persona 3 Reload’s Prefix.
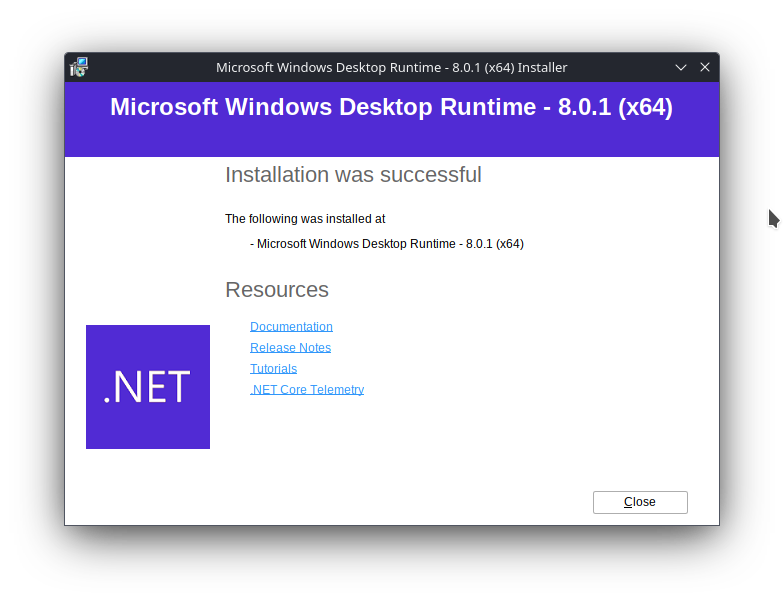
Do this one at a time with all 6 files.
Reloaded II Setup
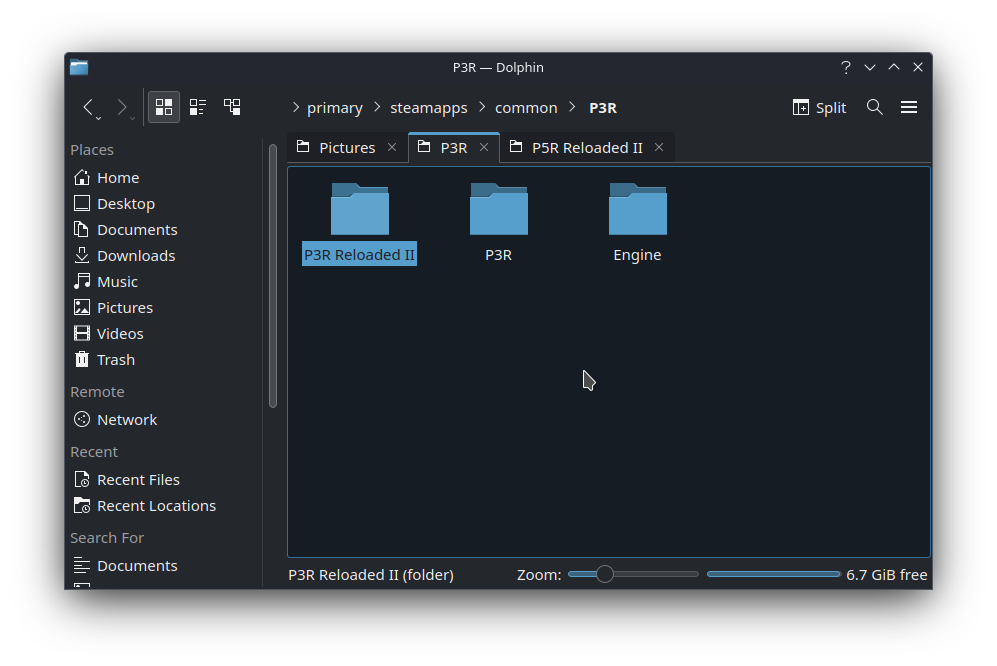
Download Reloaded II and extract it to a folder anywhere you want, the name also doesn’t matter.
(I created a folder called P3R Reloaded II and put it in my P3R Directory).
Open Reloaded II the same way you downloaded the prerequisites, you will need to open it like this every time. Make sure you are opening Reloaded-II.exe and NOT Reloaded-II32.exe.
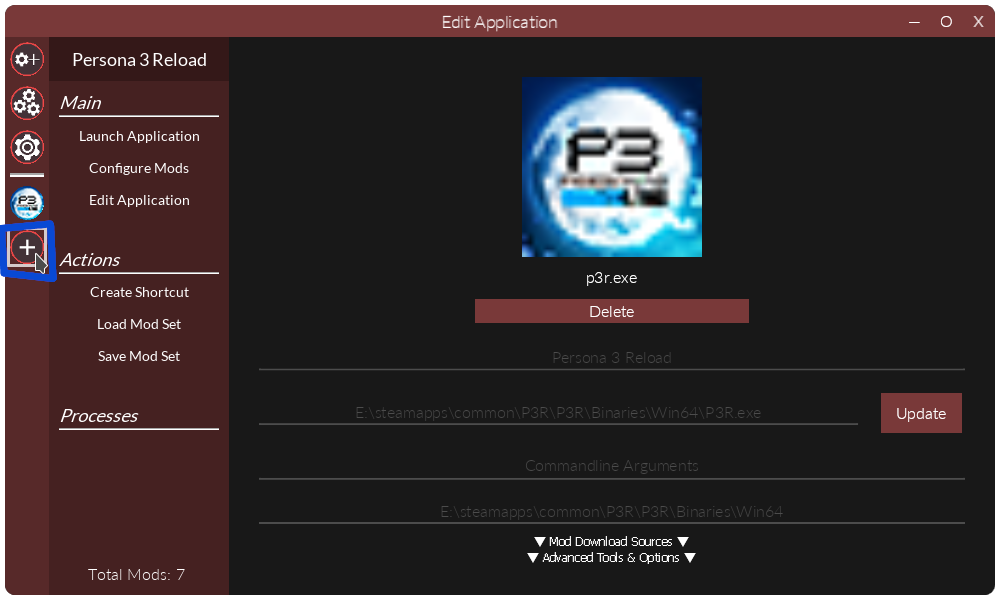
Click Add an Application and direct it to your P3R.exe
Location will vary depending on where the game is installed, double check it’s correct.
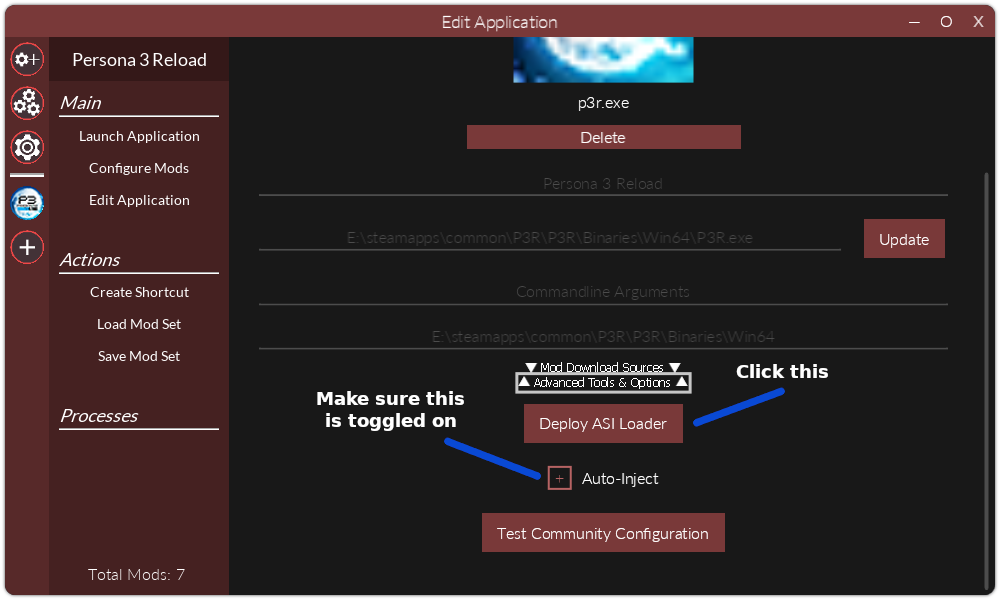
Click on Advanced Tools & Options, toggle Auto-Inject on, and Deploy the ASI Loader.
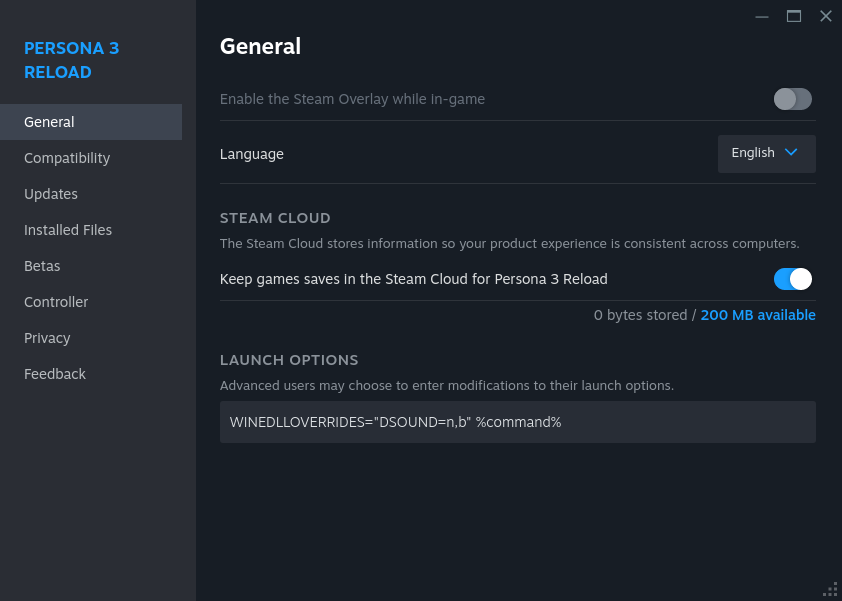
Go to your Steam Launch Settings for Persona 3 Reload and add WINEDLLOVERRIDES=”DSOUND=n,b” %command%
Now we’ll need to download our first mod, Persona 3 Reload Essentials. There are 2 ways to install mods, automatically and manually. Pick whichever method you prefer.
Installing Mods Manually
Whenever you download a mod, make sure to also download any requirements it may have.
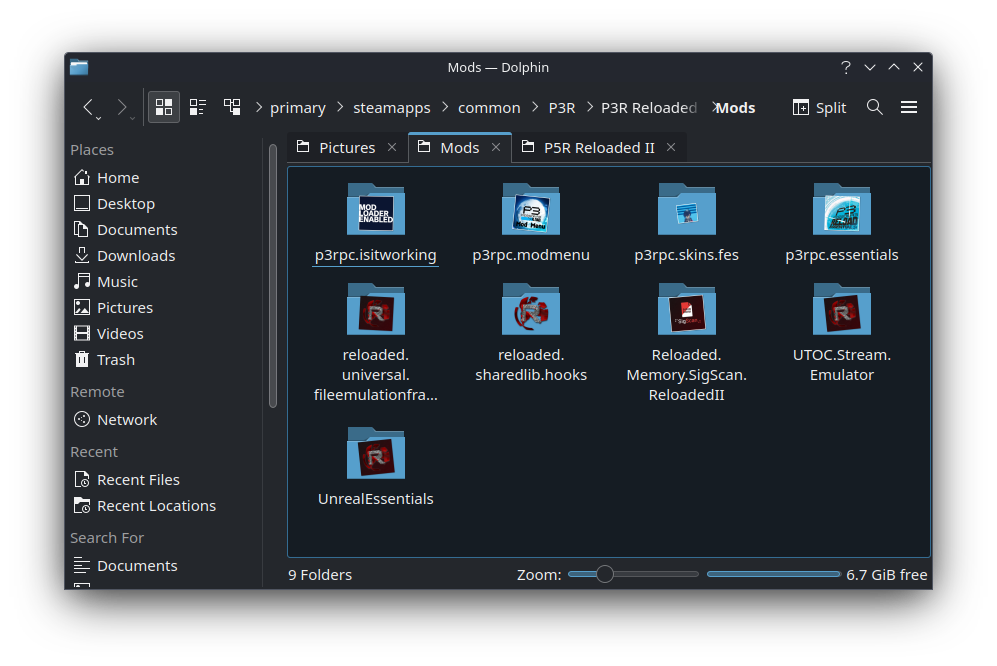
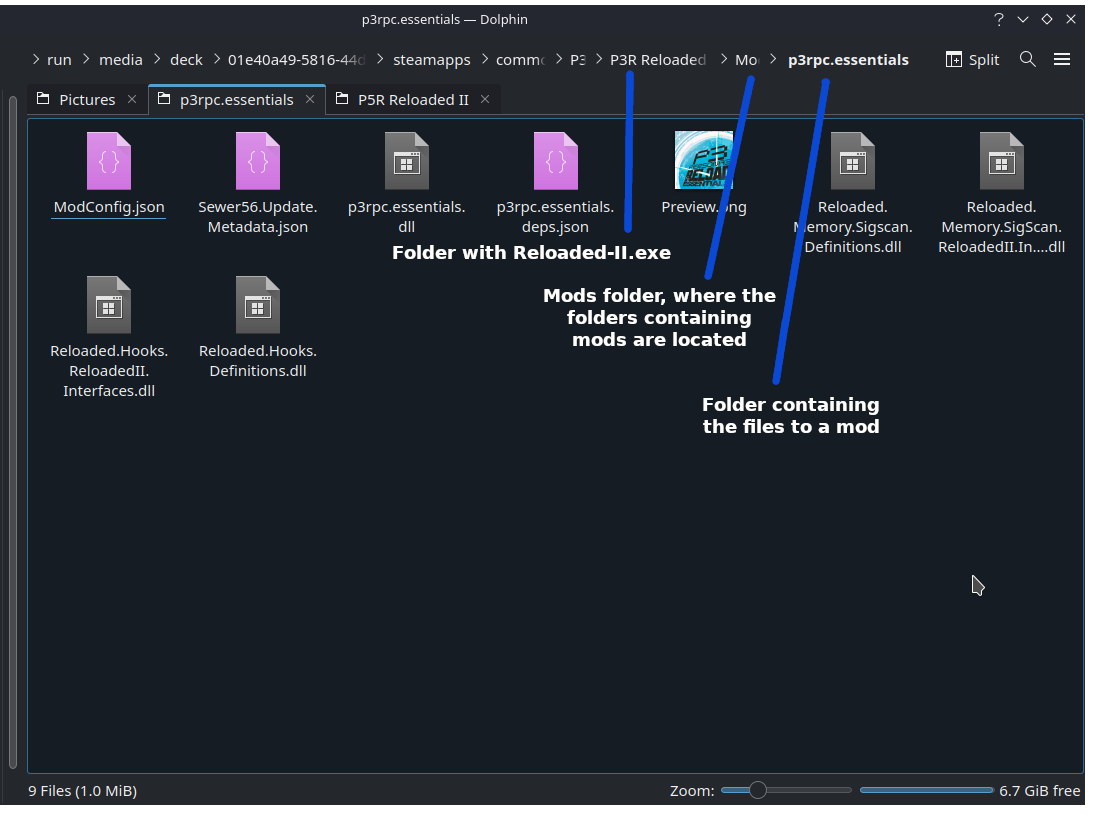
Wherever your Reloaded-II.exe is located, there should be a folder named Mods. You’ll want to create a folder for each mod you download in there.
Each Mod in its folder should look something like this.
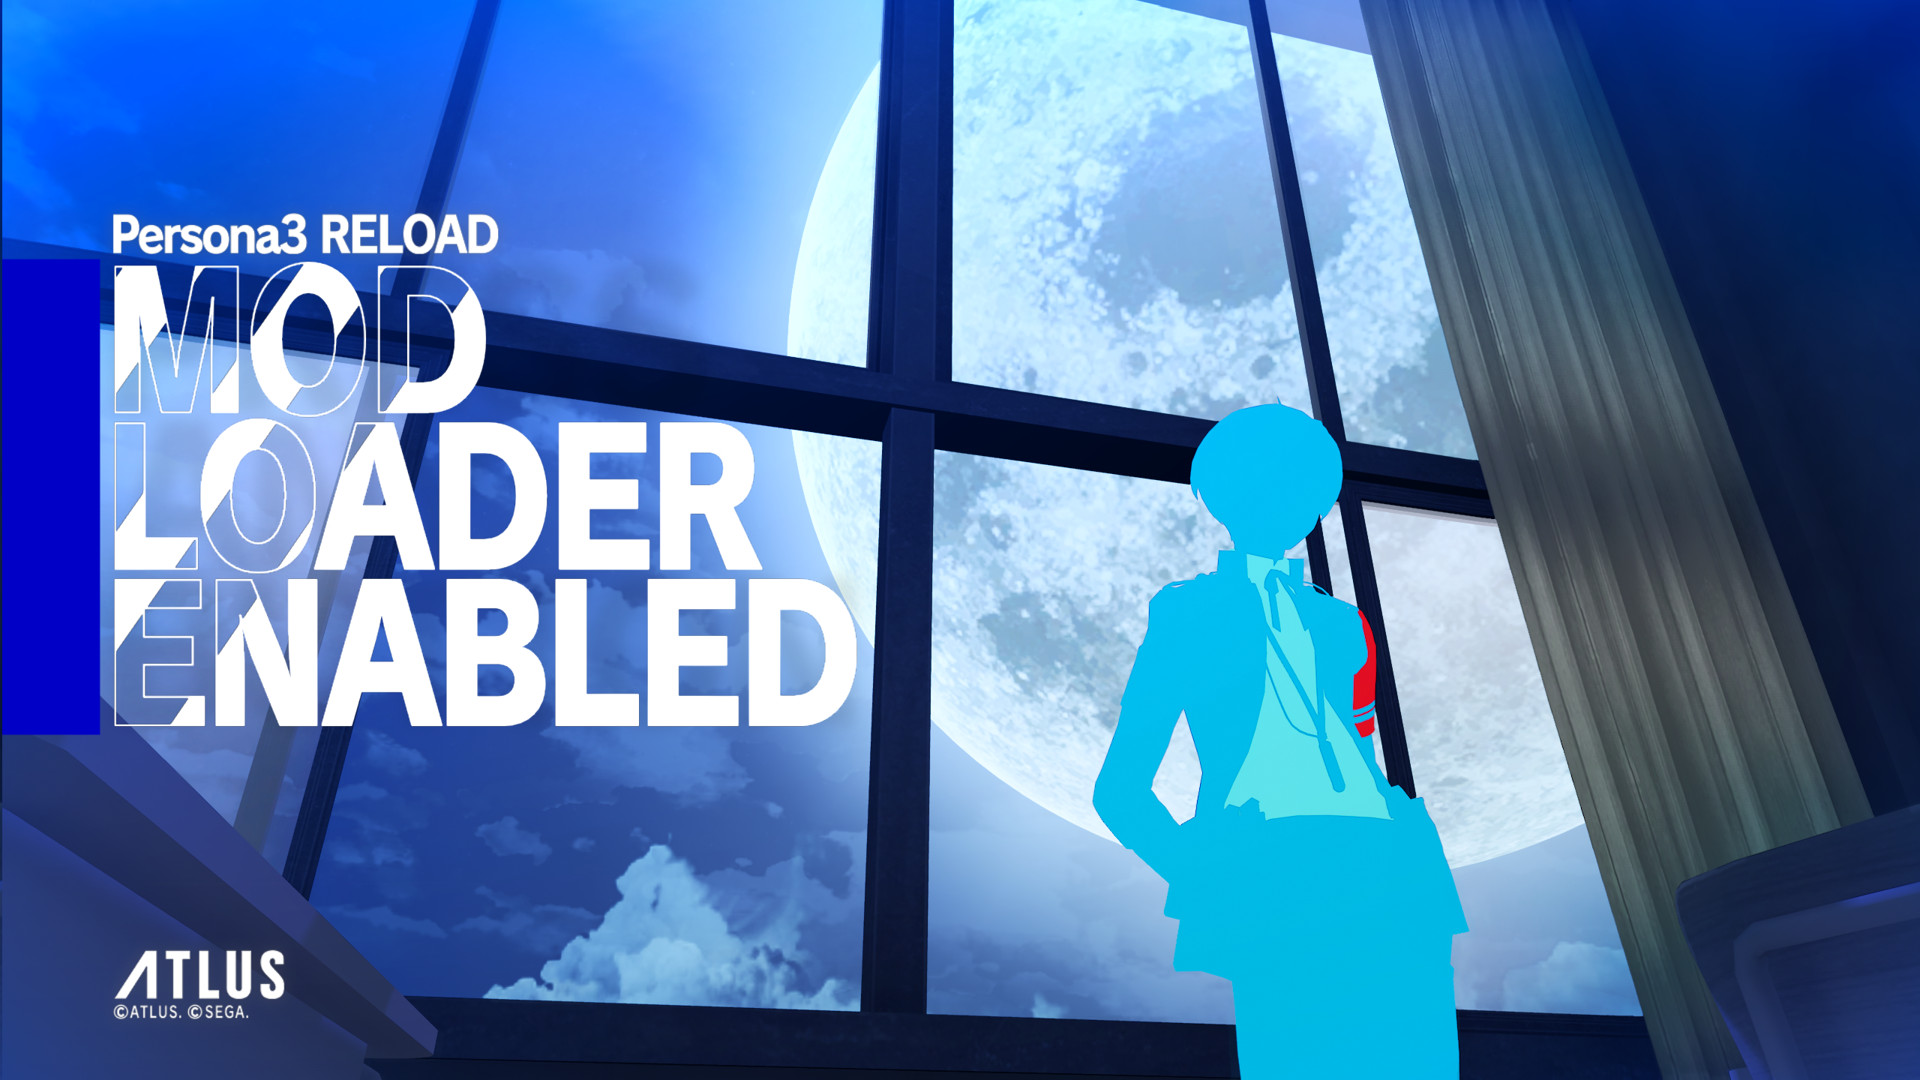
This 2nd mod, Is It Working?, isn’t needed but will tell you if mods are working on the title screen, which makes testing much faster.
Installing Mods Automatically
Whenever you download a mod, make sure to also download any requirements it may have.
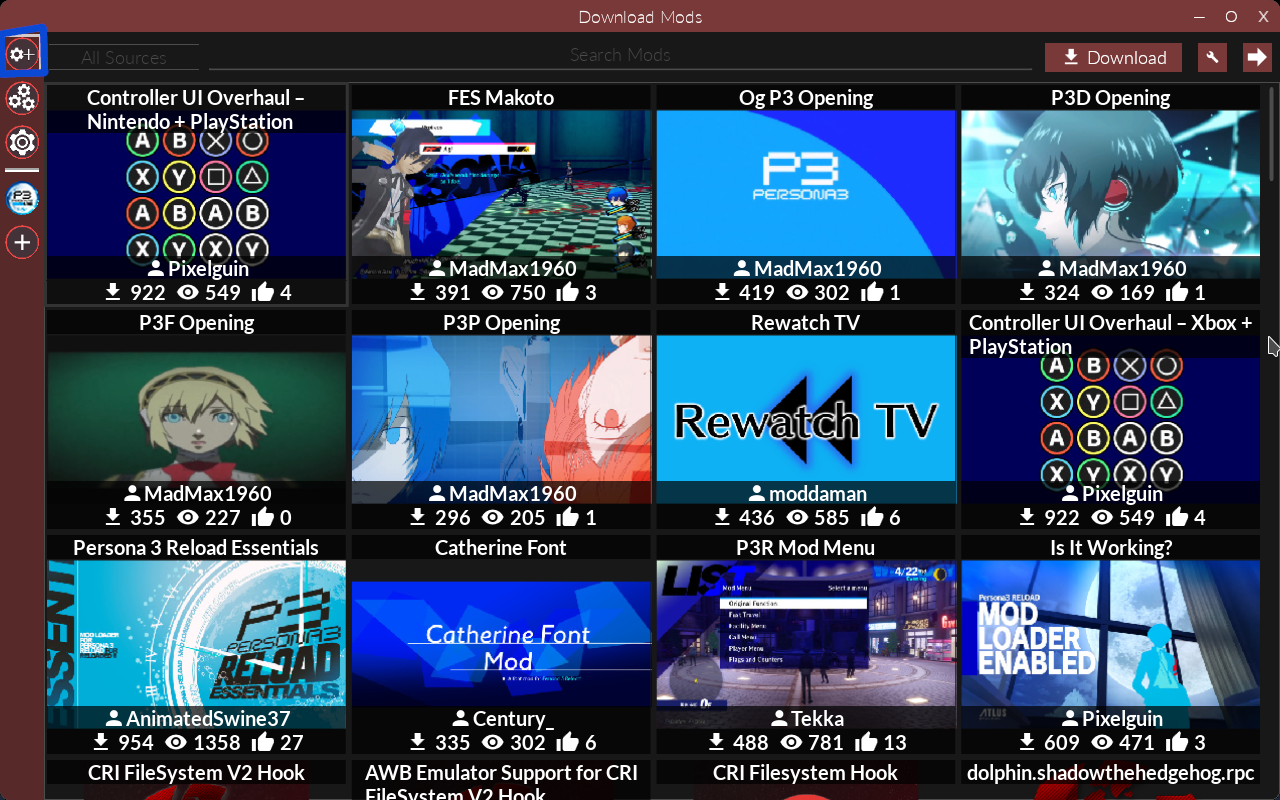
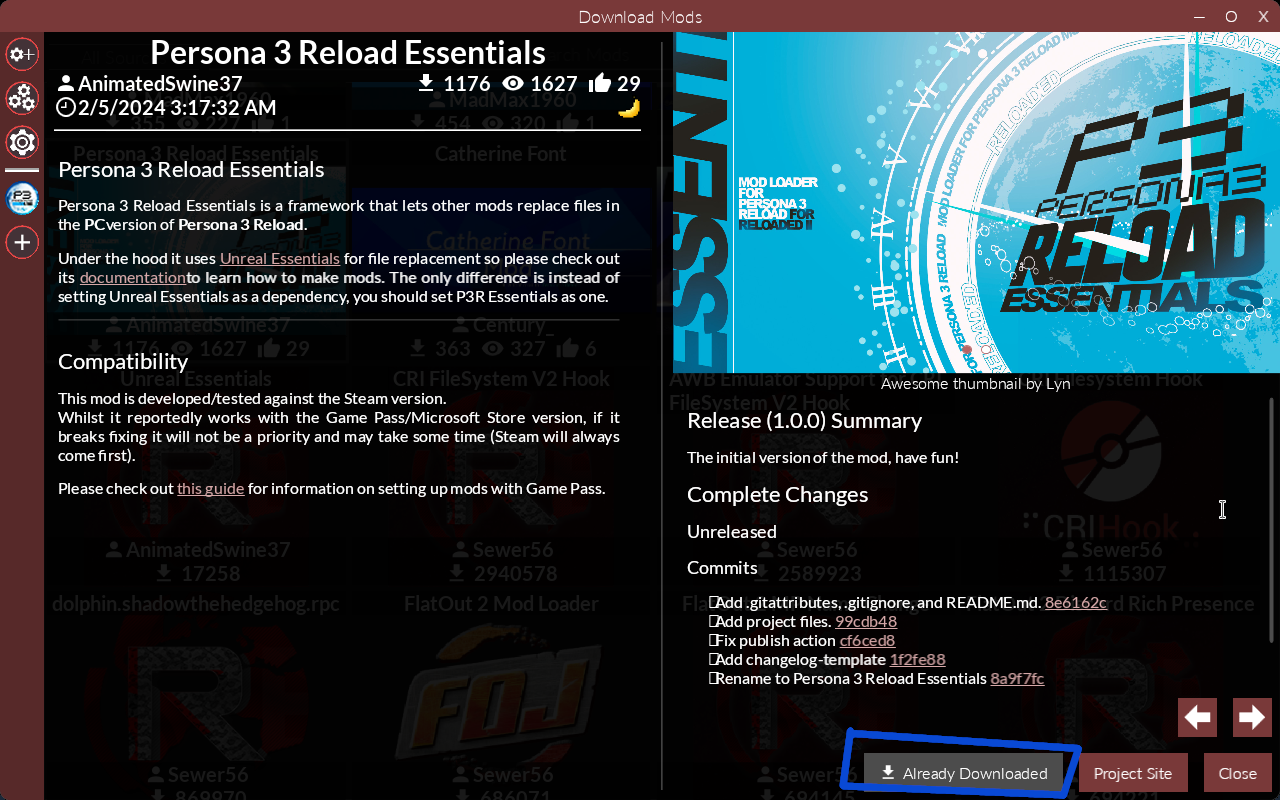
In Reloaded II, click the top left button to browse P3R mods on GameBanana. Simply clicking a mod and clicking download will download it.
This 2nd mod, Is It Working?, isn’t needed but will tell you if mods are working on the title screen, which makes testing much faster.
Managing Mods
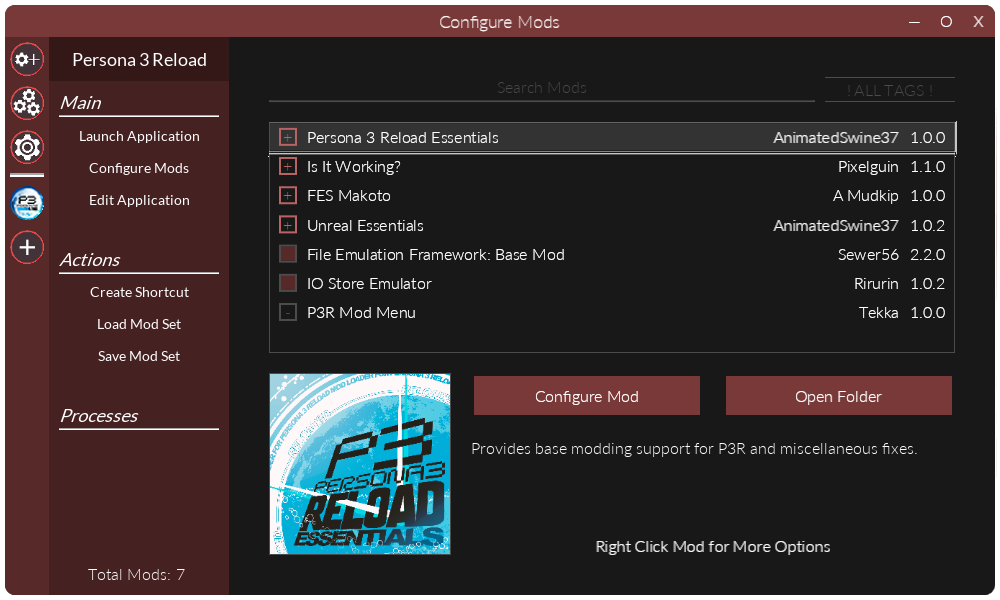
Mods are loaded from Top to Bottom, a mod higher than another would take priority and overwrite anything that overlapped.
Make sure Persona 3 Reload Essentials is always at the very top.
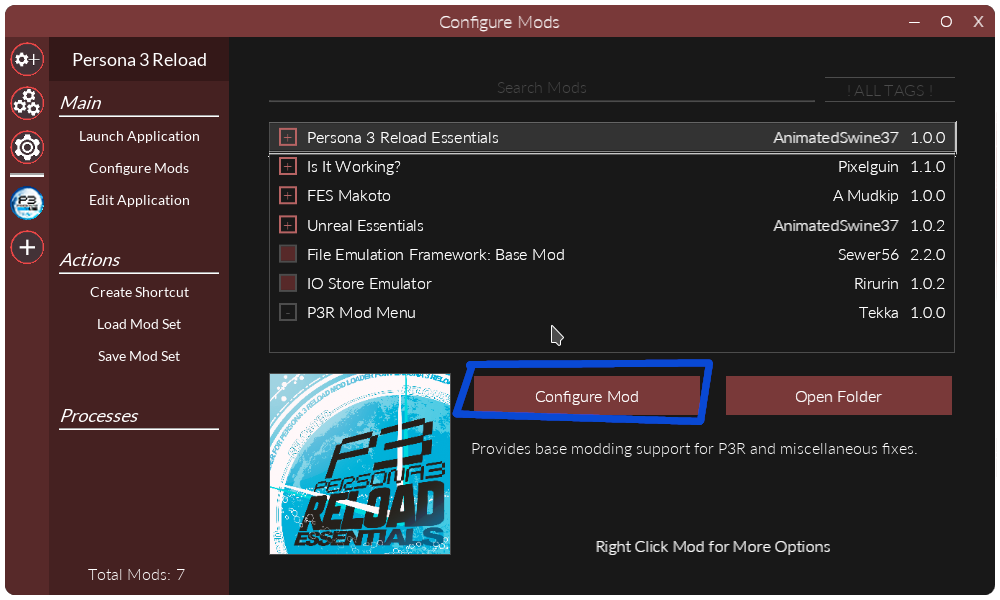
Some mods have extra settings that you can toggle or customize by clicking Configure Mod, some others will have some kind of text file you can use instead.
Final Notes
You should be good to go assuming you didn’t misstep along the way. If you have any questions or need help, try asking in the Persona Modding Discord. If you don’t have Discord or just lack a phone number (me) you can try posting a question on GameBanana but it may take a long time to get any responses. Please keep in mind that, at the time of writing this, Persona 3 Reload’s Modding is still in its infancy and will likely develop a lot over the next year.
Hope this helped!

