
This guide will help you understand Ghandagoza’s mechanics, gives you helpful tips and guidelines for how to play, and make a case for him as an unpopular but overlooked character who is incredibly fun and rewarding to play.
Introduction
Before we get into the meat of this guide, a few things need to be established. Ghandagoza is not a top tier damage dealer. He doesn’t fill a unique role in terms of party utility. He is very unpopular, quite possibly the least popular in the game. These three things you might know already, and with that in mind you might wonder, why play Ghandagoza? Why not play someone else? If you are already set on playing Ghandagoza, you can skip this the rest of the introduction.
The case I’ll make for Ghandagoza is that he’s fun. This may be a largely personal argument, but it’s my belief that he’s mechanically unique, well designed, and rewarding to play. At the risk of offending people, I will make the case that he’s better designed than most if not every character, because in order to illustrate why I find him fun and rewarding I must simultaneously explain how other characters that may do more damage aren’t as rewarding to play, in my view.
Everything in Ghandagoza’s toolkit is useful. With the noted exception of some skills which you won’t have equipped regardless, Ghandagoza makes use of everything he has, in a meaningful way. Many characters’ simply rotate through their skills as they come off cooldown. Charlotta will Ladder dodge cancel corkscrew, onslaught, noble dodge cancel corkscrew, sword of lumiel… all on a downed boss that isn’t moving. I would know, this is the character I played the majority of the game with. The problem I have here is that the majority of her skills aren’t being used to respond to circumstance, they’re being cycled as they come off cooldown. Since they’re part of her “DPS rotation”, this means that they’re at odds with a more practical use, such as gap closing, and may end up on cooldown when you want them to suit a specific need rather than optimize your damage on a dummy. This in part is why dummy tests as a measure for a characters effectiveness aren’t always reliable, but it’s also a sign of the game suffering from a push and pull where playing optimally and playing in a satisfying manner don’t always mesh.
Ghandagoza on the other hand doesn’t have this problem. Ghandagoza’s play revolves around building his “Eternal Rage” meter to strengthen his “Raging Fist”, which is where the bulk of his damage comes from, not his skills. Ghandagoza’s skills are purpose built to mete different circumstances and are not an exercise in monitoring cooldowns. Ghandaghoza’s active skills have short cooldowns relative to other characters and are reliably available when you want them. Ghandaghoza uses both his grounded and aerial basic combos, rather than bizarre cases like Rackam where aerial attacks totally subsume normal grounded strings, or aerial strings being useless against grounded enemies ala Siegfried. With all that said, let’s get into the meat and potatoes.
Skills
Must Have Skills
Iron Shoulder
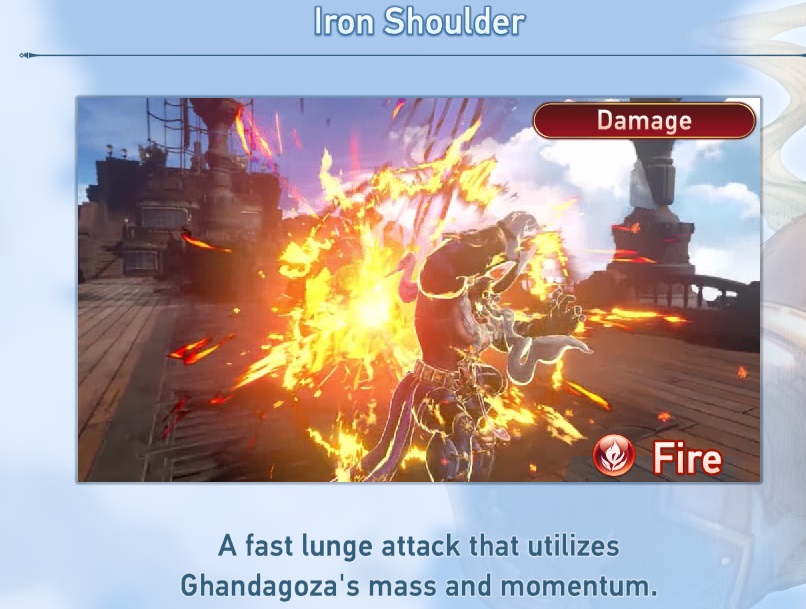
Standard gap closer that comes in almost everyone’s toolkit, and a non-optional must have skill just like near everyone else. Substitutes the first normal attack in the grounded string, but covers a large distance at an incredible speed and ends almost immediately on contact. Very short base cooldown at around 15 seconds. Ghandagoza doesn’t have a non-skill gap closer attack like Siegfried or Charlotta, but this skill’s short cooldown makes that a relatively painless drawback. I would argue that this is the best gap closer CD skill in the game if weighed purely on it’s own merits rather than used as a vehicle for charge cancel spamming like Percival. It can be used as an animation cancel for a grounded finisher but I would advise saving it for a boss moving away, unless you’re confident they’ll stay close.
Branding Palm
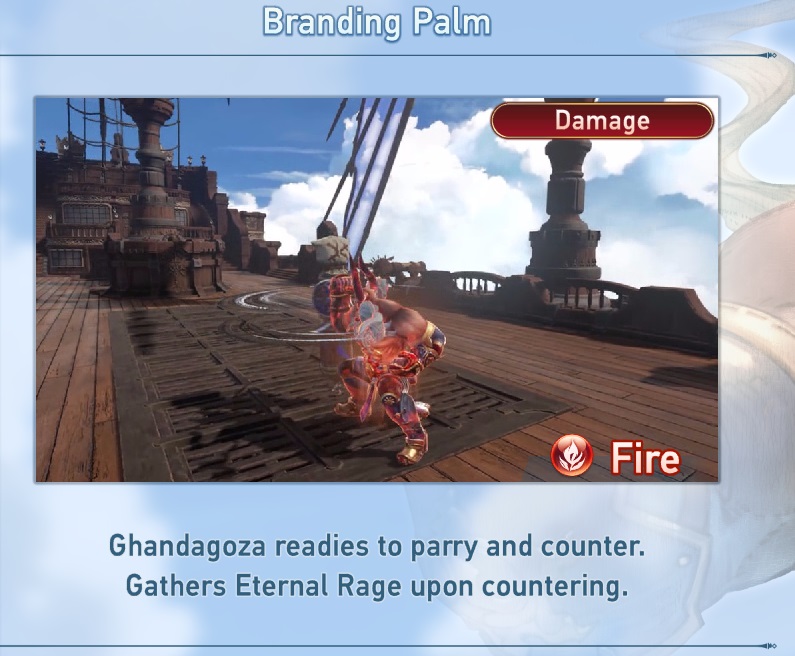
Standard counter move, near identical to Charlotta’s and Siegfrieds, but a 100% necessary skill for Ghandagoza. Ready stance is assumed for a generous amount of time, followed by a powerful counter upon intercepting an attack. Cooldown is pretty standard at about 40 seconds base. What makes this move necessary is that it builds 50 percent rage meter. It also automatically gap closes, which makes it uniquely useful against enemies that open with projectiles like Firewyrm or Golem, which will allow you to instantly gap close to your target with 50 percent meter in the bank. Otherwise it’s advisable to use this skill as it comes off CD early in a combo, but not late (better dodge i-frame and combo save for finisher). Procuring this counter provides invulnerability for the duration of the skills animation but ends immediately after.
Infernal Stomp
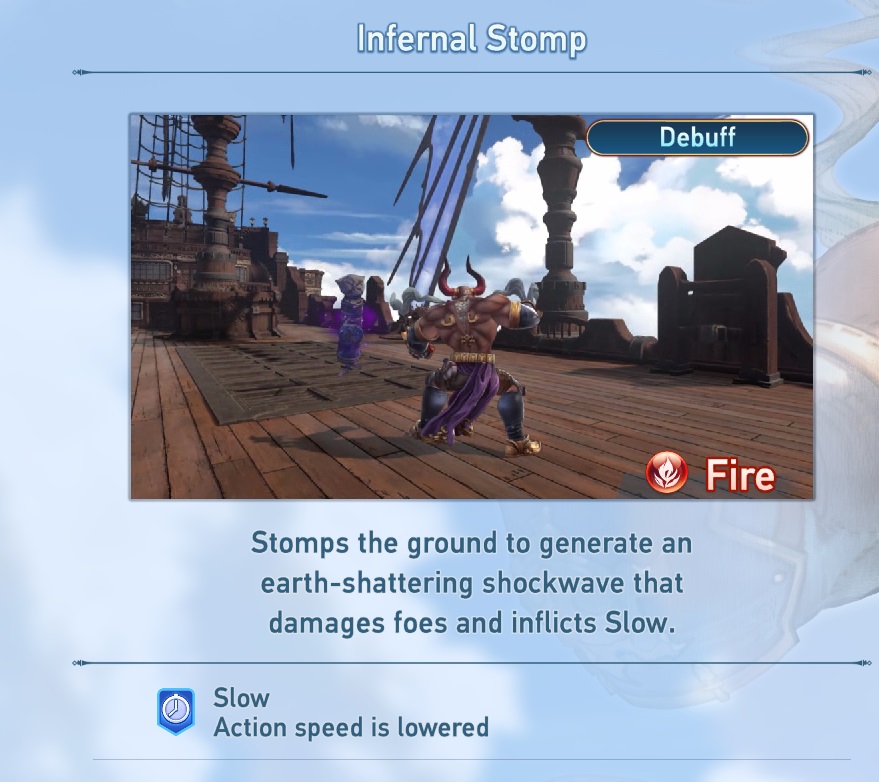
Stomp attack that applies slow to target. Any skill that applies slow, freeze, or paralyze is a must have in any characters arsenal, and Ghandagoza is not an exception. No advice I give about this skill will be any different than most any other skill like it, but for the uninitiated you generally want to use this skill when a monster enters overdrive in order to extend the duration of time they can be attacked before entering bloodlust, where they’re otherwise immune to slow etc. and take reduced damage. There are exceptions to this on a by enemy basis but that’s the subject of a different manual. At 2 minutes this is a long cooldown, but that’s pretty normal for a slow skill.
Vying for slot 4
True Avidya

You might be surprised to see this one here if you know how attack cap works. Generally speaking, attack boosting buffs are totally useless. If you care at all about your gear, you have already raised your attack cap as much as possible, and subsequently reached that cap, and any buffing skill will have no effect on your damage. However in this case, we’re using this skill explicitly as an animation cancel for the end of a grounded string that subsequently charges the last 30 percent of rage meter. The use case is somewhat odd and specific as other preconditions must be met in order to be used optimally, and it’s kind of a long 1 minute cooldown for something that isn’t THAT useful. We’ll get into that later.
Arhat Skybreaker

This is a tricky one. Just like Avidya, I believe this skill is best used as an animation cancel for a grounded finisher, but unlike Avidya, it doesn’t build any meter, and while it does a decent chunk of damage, it’s slow enough overall that many times it will be the difference between landing another combo finisher or not, and since it doesn’t combo OR add meter, in my testing it’s difficult to find a use case for it that doesn’t take away from rage fist. It’s hard to explain succinctly, but the only thing that keeps Skybreaker in the “maybe” section is that it has a lot of stagger, and being able to stagger on command can be useful for procuring link-time immediately after a crossburst. I’d say use which one you want and don’t worry too much.
Don’t use these
Dhyana
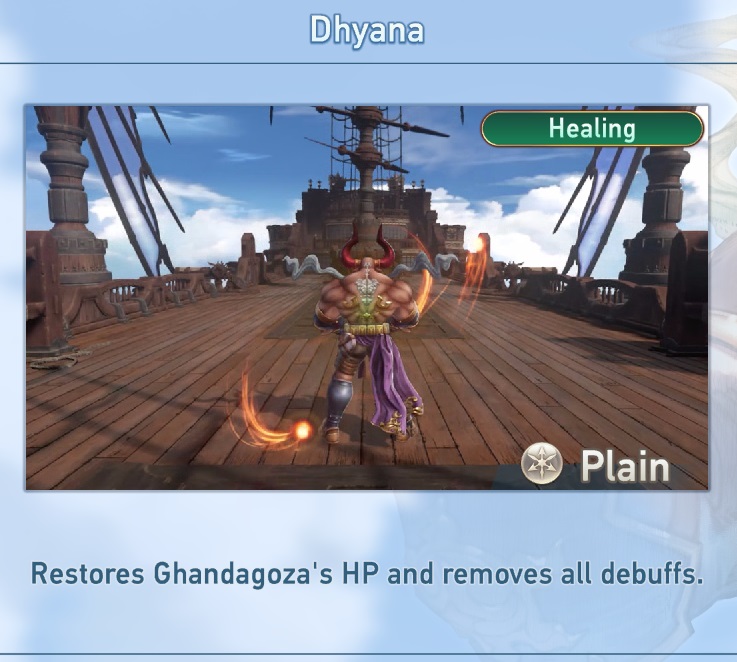
In a world where Potion Hoarder exists, healing skills just aren’t something worth considering. Curing your own debuffs is somehow even more useless. The only debuffs that’re truly debilitating are Paralyze, Glaciate, and Slow, but this skill can’t be used when you’re Paralyzed or Glaciated, and it’s so slow that it’s better to just let Slow wear off automatically.
Eternal Rage

In theory, this sounds like a great skill. Fills your meter completely? Why wouldn’t you want this? Well, the animation for this skill is too damned slow, and the cooldown is too damned long at a whopping 2 minutes. Even in a case where a boss is coming out of bloodlust and you’ve got little else to do, you’re still better off combo skipping a finisher than slotting this in.
Lion Stance

Here we have a skill that’s similar to Avidya, but different in the sense that it’s largely useless. “Jammed” is another attack buff, but since it doesn’t contribute into the cap, it goes in the trash just like all the others like it (except for Supplementary damage), and to top it off it has a bad conditional. “Stout Heart” is something you should be slotting into a sigil, so having it as a buff is redundant. All that leaves is Hostility, which I suppose could be helpful sometimes? Maybe if a ranged character is pulling aggression too much? Needless to say this is not really a valuable skill all things considered.
Final Note on Skills
To wrap it up with a nice little bow, you should run Iron Shoulder, Branding Palm, and Infernal Stomp no matter what. My personal preference for the last skill True Avidya, but you could choose Skybreaker if that suits your fancy. Dhyana, Eternal Rage and Lion Stance are bad.
Sigils
Standard Advice
I don’t want to spend too much time talking about non-character specific stuff, as there are plenty of other guides for that. Just like every other character, you want 4 lvl 5 damage cap, a fully awakened Terminus weapon, one Critical Hit 5, War Elemental (if you have it), Supplementary Damage (if you have them), Critical Hit chance and Normal Attack damage cap up on Overmastery, etc. etc…
This guide is long enough, so we’ll focus on the things less obvious for Sigil Selection.
Stout Heart

With some exceptions like Vaseraga who naturally has Stout Heart almost all the time, this is a pretty standard slot in. Stout Heart applies super-armor and reduces damage taken by roughly 30 percent. Aside from survivability, this is important for allowing Ghandagoza to finish his combo finisher without being knocked on his ass should an attack intercept him in the middle of it. Unfortunately, if you dodge in the middle of a combo finisher, or even link-attack during it, it does not save your combo finisher. It’s gone. So you best do it if you can despite the consequences. That leads us to another one.
Quick Charge, x2

Rage Fist doesn’t take a long time to charge, but Quick Charge does make a difference. This difference is most notable during link time where you’ll be doing nothing but spam Rage Fist, where the charge speed will make a big difference. Quick charge has the added benefit of having a bit of percent attack up on it for everything, and Ghandagoza is so easy to attack cap that a couple of these will bring you almost to cap. Take whatever decent + skills you can get on these. Nimble Onslaught, Uplift, Potion Hoarder, just to name a few common good + skills.
Improved Dodge
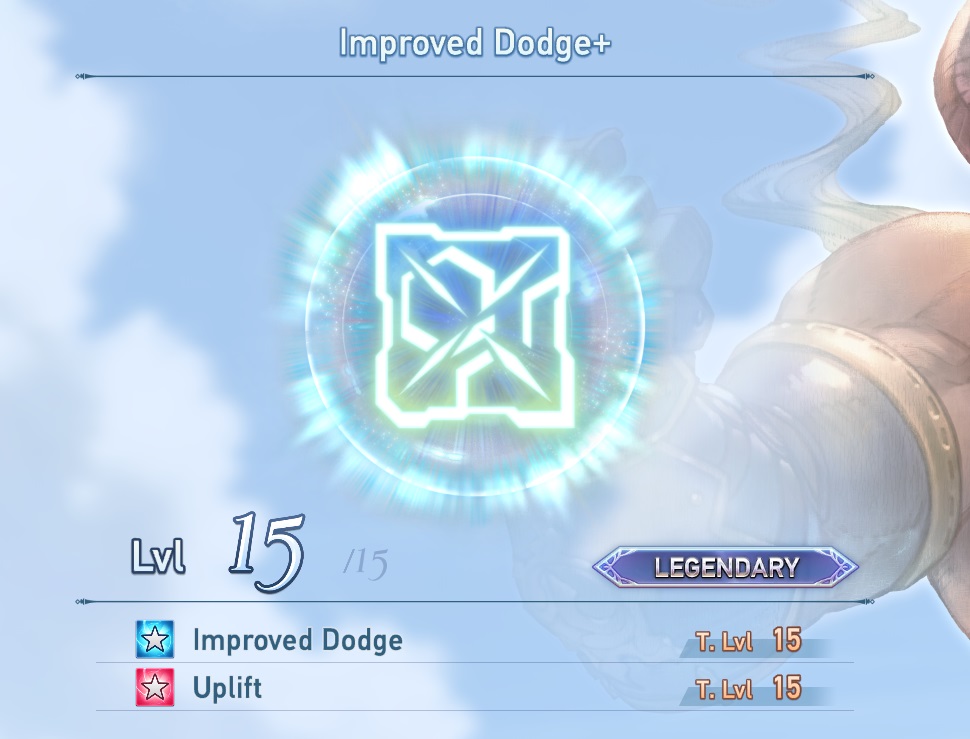
Like Stout Heart, most characters want this sigil, but Ghandagoza specifically so. Combo saving and combo skipping is a big deal for Ghandagoza, so having more dodges is crucial.
Eternal Rage’s Ethos
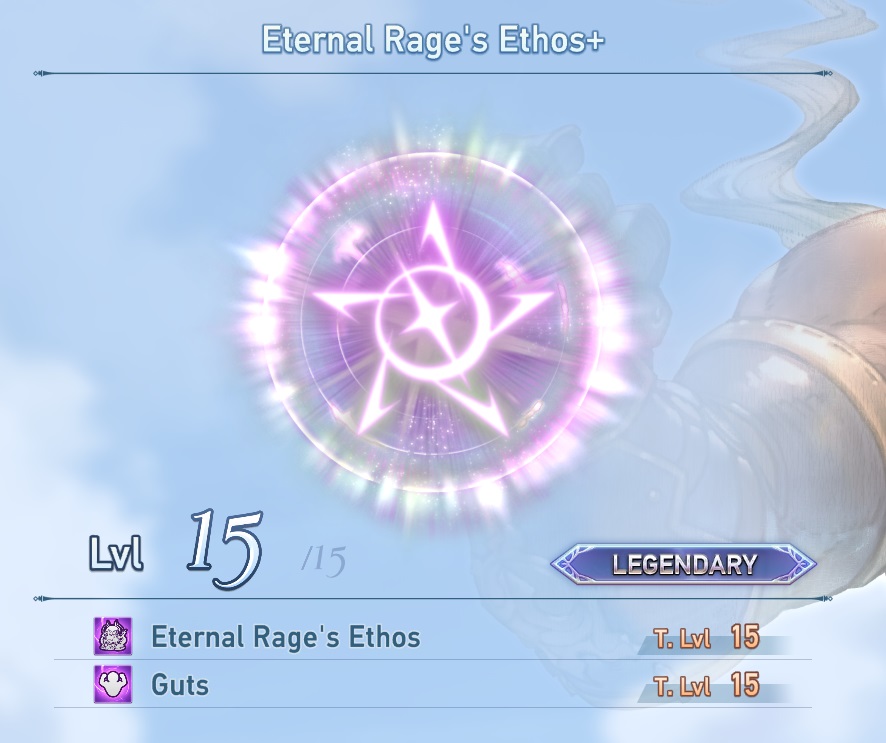
This one is obvious. Need I even explain? 50% higher damage cap on Rage Fist. I take a good plus skill on this one because his other character unique sigil is useless, as it’s a conditional crit rate sigil. You’re much better off crit capping via normal means.
Plus skills worth looking out for
Potion Hoarder, Guts, Uplift, Nimble Onslaught, Steel Nerves, maybe Drain if you’re really struggling and running out of potions.
Basic Combos and Rage Fist
As stated in the introduction, Ghandagoza’s playstyle revolves around building eternal rage meter. A max gauge rage fist does over 3 times as much damage as the entire grounded basic string combined. Likewise with his damaging skills. We’ve covered his skills and sigils, IE how to build the character. Now let’s examine his basic toolkit. For the sake of visual coherency I will not be wearing any supplementary damage sigils.
Ghandagoza must time his attacks in order to be played optimally. This means pressing the attack button right as the previous attack lands. I can assure you that this is a minimal hurdle and something that will become second nature as you play him. His attacks come out at a rhythmic and consistent pace as opposed to Siegfried, where the attacks can vary wildly in duration.
Grounded combo (timed)
This is what a perfectly timed grounded combo looks like. The combo finisher is the only attack that generates meter, and is therefore the most crucial hit to land. The first attack naturally cannot be timed, as it’s the opener, but every subsequent attack must be timed, or else no attack following can be, within that string anyways. A timed attack does a bit more than 3 times the damage of an un-timed attack, and the untimed finisher only generates 50 percent meter compared to the 70 percent a timed finisher generates. A full, perfectly timed grounded string does about 850 thousand damage without supplementary damage or glass canon (commit to memory that none of the figures I will be quoting will include supplementary or glass canon for consistency).
Grounded combo (untimed)
An untimed string has a completely different set of animations than a timed string, but the most obvious and prominent difference visually is the lack flash and clank sound that come from a perfectly timed attack. Since this string still generates significant meter albeit less, there’s no reason to interrupt it should you mess up, but obviously you want to get in the habit of timing your strikes properly as this combo is strictly worse in all respects, clocking in at only 325k and generating far less stun as well as less meter. Just shy of a third of the damage of a proper string.
Air Combo (timed)
An air combo opens with a rising attack (which is to attack immediately after jumping), following by a buffered normal attack, at which point you time the following two swings (the attack following the rising attack need not be timed, nor the descending attack). This combo generates 50 percent meter, does about 525k, and is faster than the grounded combo, however we’ll go into more detail about this air combo in a bit.
Air Combo (untimed)
Much like the untimed grounded combo, it does significantly less damage. However instead of building less meter than it’s timed counterpart, it generates no meter at all, which is brutal. You absolutely do not want to mess up the timing for these and you ought to just cut it short.
Rage Fist (uncharged)
Uncharged rage fist is never worth doing under and circumstance. It does very little damage, and takes much longer to charge than a full meter rage fist (also known as rage fist 5). In fact, each tier of rage fist is so dramatically stronger than the last that there’s really no strong argument for using rage fist except when the meter is completely full.
Rage Fist (100%)
Comparatively, a full meter rage fist charges dramatically faster, and deals just over 2 million damage (Do note I’m using 2 Quick Charge V sigils for 30% faster charging). Building towards this is the primary strategy for Ghandagoza. Releasing a charged Rage Fist just before an attack connects will grant you temporary invulnerability for the rest of the attack duration (something to consider, but not something you would wait seconds for compared to simply releasing the attack and dodging afterward).
Strategies and Techniques
As I’ve said several times already, Ghandagoza is all about building Eternal Rage meter for a fully charged Rage Fist, so let’s do a quick inventory of what builds meter and how much.
- Grounded Combo String (Timed): 70%
- Grounded Combo String (Untimed): 50%
- Air Combo String (Timed): 50%
- Branding Palm (Counter): 50%
- Link Attack: 30%
- True Avidya: 30%
- Eternal Rage (Skill): 100% (do not use this)
- Link Time: Permanent 100% (until Link Time ends)
As you can see, some things fit together nicely, some things do not. Keeping that in mind is important for playing Ghandagoza well. Let’s examine some combinations and their practical use cases.
Strategies
Counter (50%) into Air Combo (50%)
This combo serves as a great opener for many fights. We’ll use Pyet-A, who always opens with a lunging attack that slides to your right (his left). After procuring a counter from Branding Palm, his recovery frames gives you plenty of time for an air combo to mete out the remaining 50% meter. Landing with aerial barrage (dropping attack), and charging his Raging Fist before intercepting the oncoming attack. Note again that i-frames from Raging Fist are largely something that should be incidental and not something you should be going for, as it’s usually more efficient to let the fist fly and dodge afterward rather than wait for an oncoming attack.
Grounded Combo String (Timed) (70%, and Link Attack (30%)
This is a pretty standard bread and butter combo, applicable when the Boss’ stun gauge is not on cooldown (As a basics recap, filling a stun gauge procures a link attack, and sets the bosses stun gauge on cooldown for a set period of time as the bar turns gray and depletes to zero). I’m opening with Iron Shoulder here, but when gap closing is unnecessary or the skill is on CD, Normal 1 functions the same way. When the boss is stunned, you can interrupt your grounded combo string for a link attack and gain 30 percent gauge. Your combo will resume where it left off. However, if you start a normal attack but do not finish it, and then link attack, you can skip that normal, bringing you to your combo finisher faster than otherwise. This will bring you to 100% in one singular string.
Important Note: Do NOT use Link attack in the middle of your combo finisher! It will eat your combo finisher. If the boss becomes stunned while you’re performing a combo finisher, wait until it’s done and THEN Link Attack!
Grounded Combo String (Timed) (70%), into True Avidya (30%)
Identical to the previous combo, but assuming Link Attack is unavailable, either because the stun gauge hasn’t been filled or it’s on cooldown (and of course presuming True Avidya isn’t on CD), you cancel the recovery frames of your combo finisher with True Avidya, which in turn shores up the remaining 30% meter.
Double Air Combo (Timed)
Without stun/Link Attack, and without Skills, this is the fastest, most efficient method of building meter. Perform the air combo as demonstrated in the basic combo’s section, but dodge cancel the meter building hit the moment it connects and continue another three piece string before landing (dodge cancelling is necessary, otherwise you must land one way or the other).
Important Notes: Due to this being the fastest method of building meter without Skills or Stun, you might be thinking to yourself that this is the best option whenever said resources are unavailable. This is not the case. When you’re midair, you cannot combo save a timed air combo. That means that any midair dodge used for before an air combo finishes will ruin it completely, generating no meter. Furthermore, you can only dodge once in midair before landing. What this means is that a double air combo is best suited for when a boss is stunned by an SBA chain, downed, or otherwise in some situation where you can be certain to get the full combo off. Otherwise it will just whiff or leave you very vulnerable, especially on the latter half of the combo. Against a boss that is up and about, it’s generally best to rely on grounded combos. They have much more versatility due to techniques I’m about to explain.
At this point, Youtube hit me with a daily upload limit, so the rest will be streamable links
Combo Skip and Gap Close
https://streamable.com/uv84ch
Let’s say you want to gap close but Iron Shoulder is on CD, or you’re, let’s say midway through a combo and don’t want to cut it off. That’s a great situation for combo skipping. Simply roll out of your existing combo, buffer an attack input roughly before the roll ends, and then roll again, repeating this process however many times necessary to reach your enemy. Obviously “Improved Dodge” is necessary for this strategy to function effectively.
Combo Save and Gap Close
https://streamable.com/a25btu
Mirroring the same situation as above, but assuming you’re already at the combo finisher, you would do the exact same thing but without buffering an attack input during the roll until the moment you reach your target. Note that both of these strategies are useful for some other characters, most notably Siegfried, albeit he relies more heavily on mixing in heavy gap closers.
Against particularly annoying and mobile enemies like Managarmyr, any of the ____dile enemies, Furycane etc. these combo saving/skipping strategies are crucial. Whereas with more rooted enemies like Pyet-A or the Wyrm dragons you can get away with using air combos more aggressively when other finite resources are exhausted.
Conclusion
To put a cap on this rather lengthy guide, I hope I’ve illustrated how cool Ghandagoza is! I find him much more interesting and rewarding to play than any other character, even though he’s comparatively weak compared to a jump spamming Rackam, dodge cancelling charge Percival and so on.
Go forth, and let the raging fist guide you!