The touchpad is a common feature on laptops that allows users to control the cursor and click on items on the screen without the need for a separate mouse. While touchpads are convenient, they can sometimes be a hindrance when typing or using a separate mouse. In such cases, it can be useful to disable the touchpad so that it doesn’t interfere with your work. In this article, we will explain how to disable the touchpad on a Windows 10 laptop.
To disable the touchpad on a Windows 10 laptop, follow these steps:
- Go to the Start menu and click on Settings.
- In the Settings window, click on the Devices option.
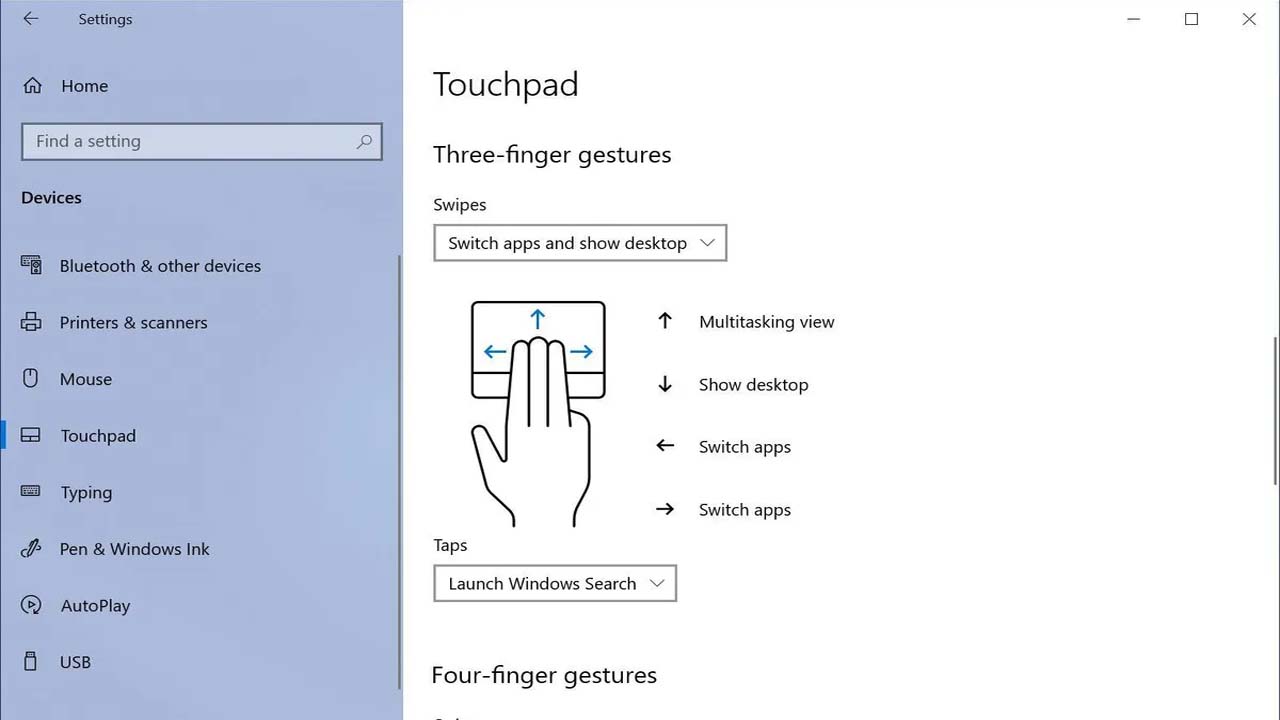
- In the Devices window, click on the Touchpad option in the left menu.
- In the Touchpad settings, you will see a toggle switch next to the “Touchpad” option. Turn this switch off to disable the touchpad.
- Once the touchpad is disabled, you will no longer be able to use it to move the cursor or click on items on your screen.
Alternatively, you can also disable the touchpad by using the touchpad itself. Most laptops have a dedicated touchpad on/off button or a key combination that you can use to disable the touchpad. Consult your laptop’s user manual for specific instructions on how to do this.
How can I enable the touchpad on my laptop again?
- To enable the touchpad on your laptop again, follow the steps outlined above to access the Touchpad settings in the Devices window. Once there, simply turn the toggle switch next to the Touchpad option back on. Alternatively, you can use the dedicated touchpad on/off button or key combination to enable the touchpad, if your laptop has one. Consult your laptop’s user manual for specific instructions on how to do this.
Is there a way to disable the touchpad only when a mouse is connected?
- Yes, there is a way to disable the touchpad only when a mouse is connected to your laptop. To do this, follow the steps outlined above to access the Touchpad settings in the Devices window. Once there, look for the option labeled “Leave touchpad on when a mouse is connected” and turn this option off. This will disable the touchpad automatically whenever a mouse is connected to your laptop.
Can I customize the touchpad settings on my laptop?
- Yes, you can customize the touchpad settings on your laptop to suit your preferences. To do this, follow the steps outlined above to access the Touchpad settings in the Devices window. Once there, you will be able to customize various aspects of the touchpad, such as the sensitivity, the scrolling behavior, and the tapping behavior.
Is it possible to disable the touchpad using a keyboard shortcut?
- Yes, it is possible to disable the touchpad using a keyboard shortcut on some laptops. The exact keyboard shortcut will depend on your laptop model, so consult your laptop’s user manual for specific instructions. In general, you can press the “Fn” key along with a dedicated touchpad on/off key to disable the touchpad. For example, on some Dell laptops, the keyboard shortcut to disable the touchpad is “Fn + F3”.
Can I use a touchpad while it is disabled?
- No, you cannot use a touchpad while it is disabled. When the touchpad is disabled, it will no longer respond to your finger movements or taps, so you will not be able to use it to control the cursor or click on items on the screen. If you need to use the touchpad again, you will need to enable it using the steps outlined above.