With SIGNALIS nearing the end of its lifecycle on Gamepass, some people, including myself, wanted to transfer save files out of that version of the game into the Steam version. Unfortunately, the process is rather complicated and there exists no good (and up to date) guides on how to properly do this. This guide aims to fix that.
What You’ll Need
- A Gamepass or Microsoft Store owned install of SIGNALIS (It is fine if you still have Signalis installed after the Gamepass expiration, just don’t uninstall it yet)
- A Steam owned install of SIGNALIS
- An extra gigabyte of space on C: Drive or otherwise where-ever Steam is installed
- A folder to use as a workspace for copying and renaming files
- Atleast one empty profile slot in-game in the Steam version. Preferably two empty profiles.
- Lots of patience and focus
Preview / Context
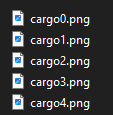
The Steam version of SIGNALIS features savegame encryption. This writes the saves as .png image files, labled cargo0 – cargo4. This behavior is unique to the Steam version, as the Gamepass version writes the files directly and does not support savegame encryption.
The release version of SIGNALIS (from now on referred to as “1.0”) features a debug command that toggles the game’s use of save encryption on/off. However, this command was apparently disabled in the current version (referred to as “1.1” or “Spatz”). Due to this, we’ll have to downgrade our current install of the game from 1.1 to 1.0. This is easy to do, but it does complicate things overall, as well as outdating the only other existing guide online that I could find.
This guide will teach you how to downgrade your install of SIGNALIS, transfer out the save files from Gamepass, rename them properly, import them safely into the Steam version, and then restore your game install back to the current update.
Downgrading SIGNALIS from 1.1 to 1.0 (Steam Only)
First, you will need to get into the Steam client console. The easiest way to do this is to open a web browser and then put in:
steam://nav/console
or
steam://open/console/
You will get a console tab

In here, you will put in:
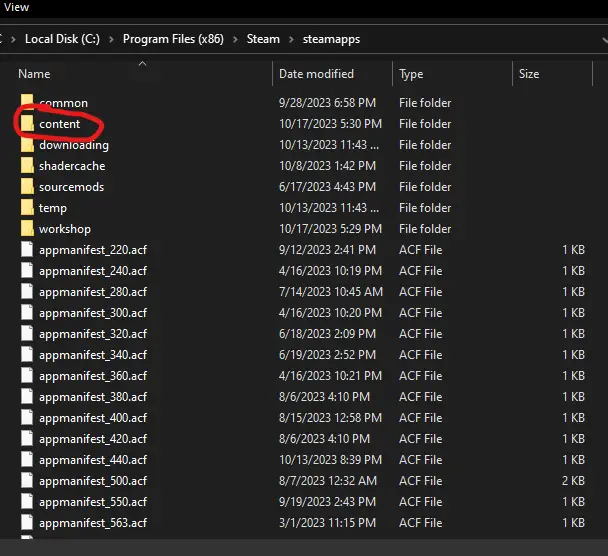
download_depot 1262350 1262351 6585255940086961378
Assuming you own the game on the current active Steam account, you will eventually get these outputs:

Once you see the final line in that screenshot, go to your main steamapps directory (This will be C:\Program Files (x86)\Steam\steamapps for most people), and you will see a new folder called “content”. Inside here will be the 1.0 install of SIGNALIS.

Next up, copy your current main install of SIGNALIS somewhere else as a backup. You will be overwriting the files in that directory, so you want to keep the originals safe for restoration later.
Once you have a backup of your main SIGNALIS game install, you will copy the files from that depot download earlier into your main game install, overwriting everything.
If you have done this correctly, when you next launch the game, you should see
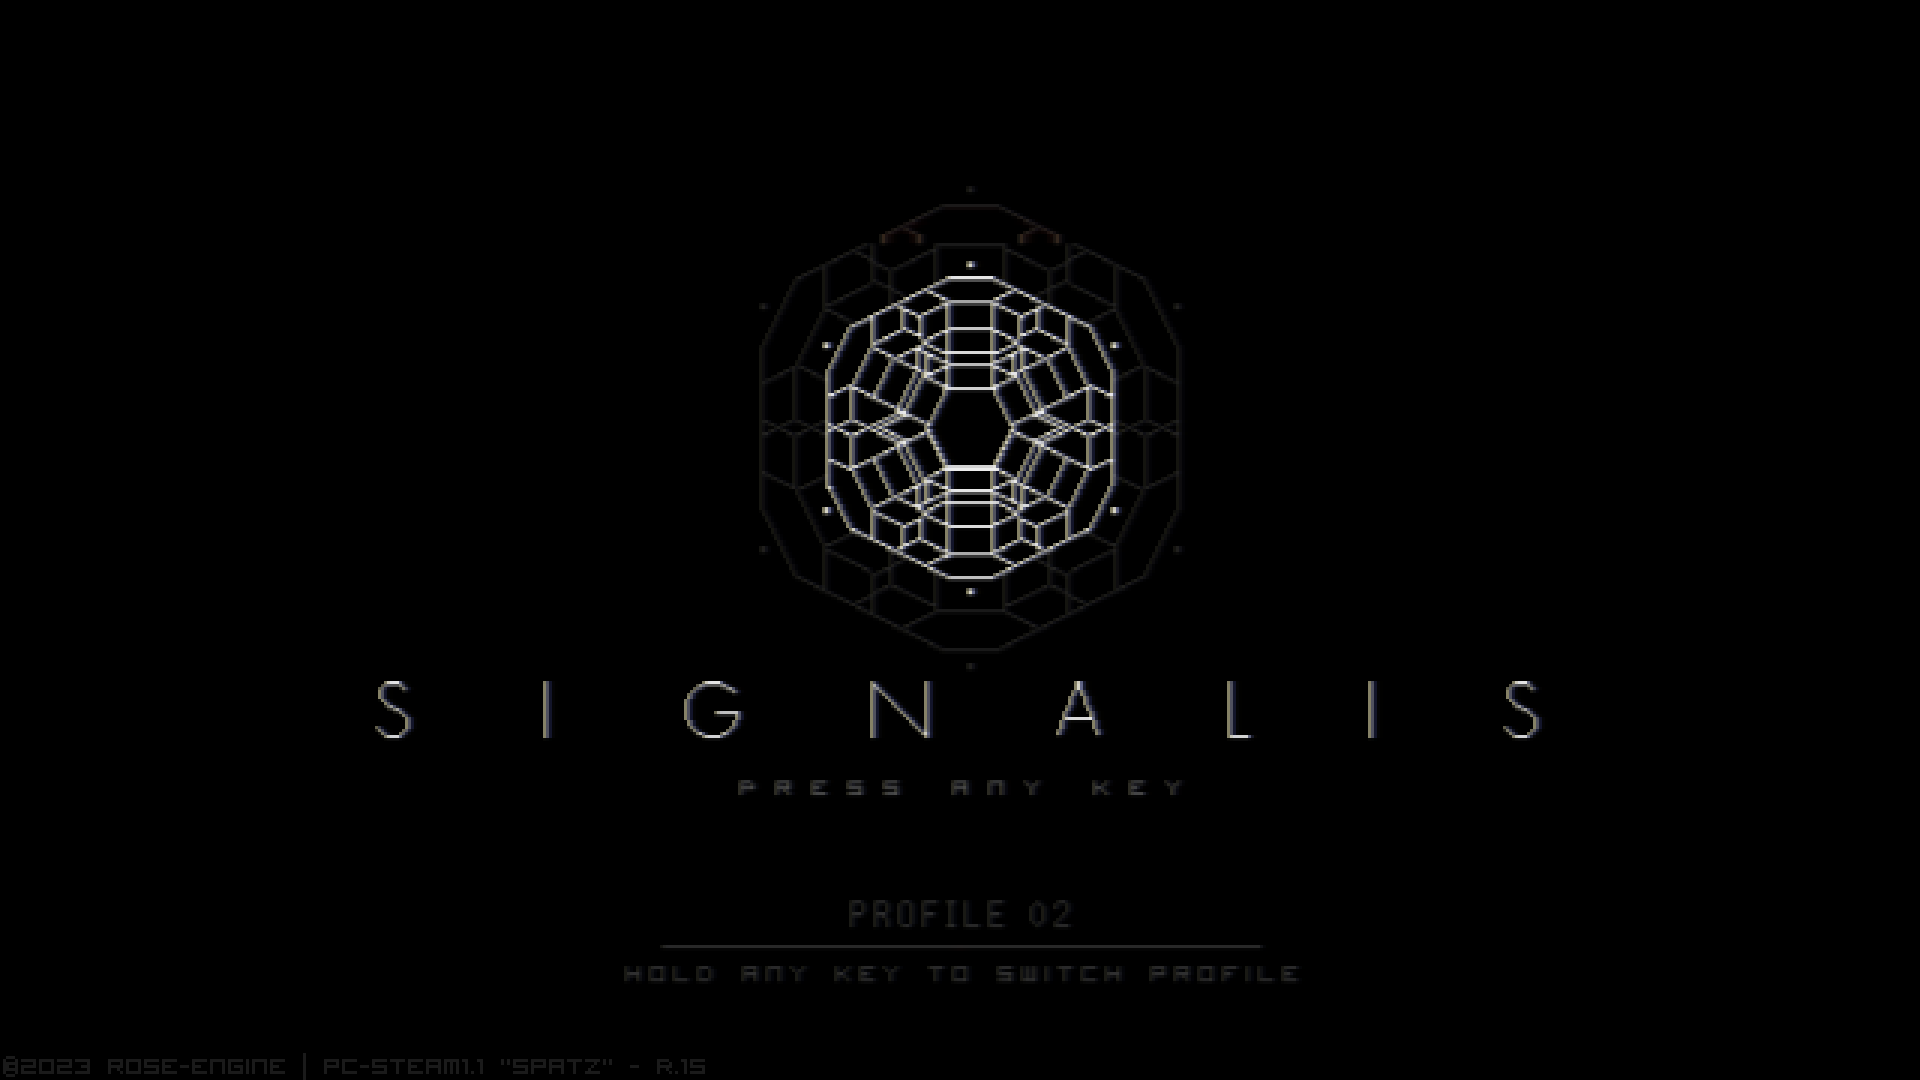
“©2022 ROSE-ENGINE | PC-STEAM1.0 – R.4” in the bottom left. You can move onto the next section.
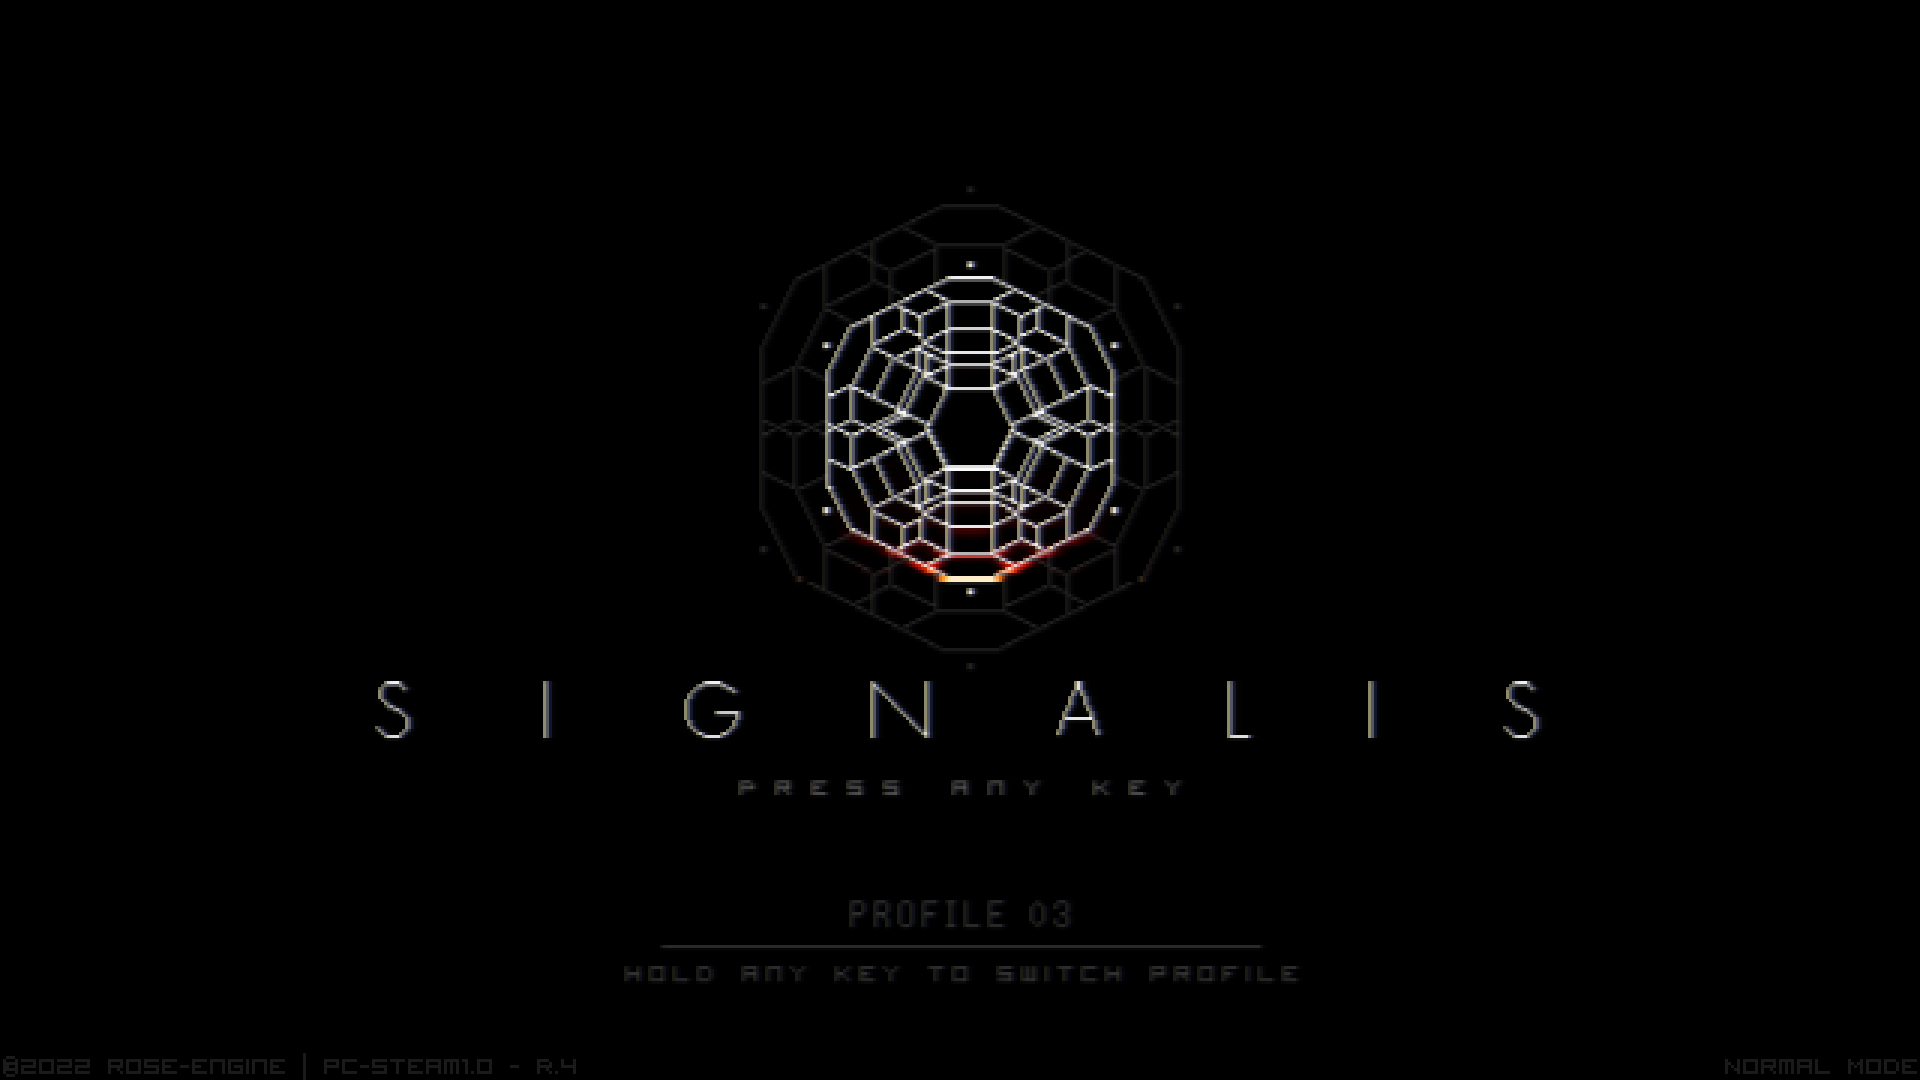
If you instead see “©2023 ROSE-ENGINE | PC-STEAM1.1 “SPATZ” – R.15″ then you are still running the current version of the game that disallows disabling save encryption. Try this section again.
Finding and Backing Up Gamepass Save Files
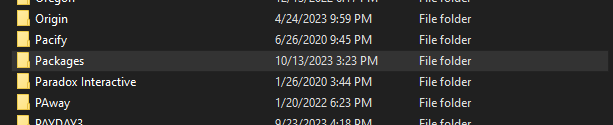
You’ll want to go to
C:\Users\[Your Username here]\AppData\Local\Packages\HumbleBundle.SIGNALIS_q2mcdwmzx4qja\SystemAppData\wgs\000900000135FB56_0000000000000000000000007239D761
You can also use %localappdata% in the Windows Search or Run and find “Packages” then your HumbleBundle.SIGNALIS folders.


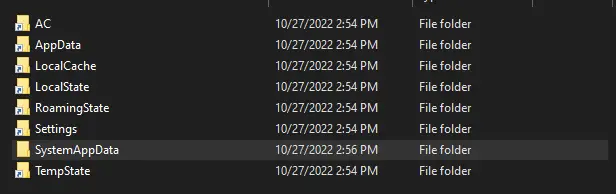


In here is a folder with a long string of characters. This is where your saves are located.
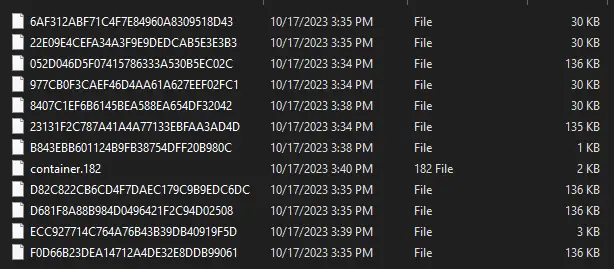
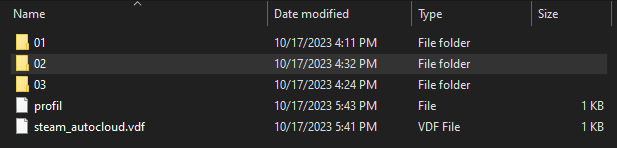
The next steps depends on how many saves you have in your Gamepass game. In the provided screenshot, the files that are 136ish KBs are the main save files, and the files that are 30 KB, are what store the in-game screenshots. The main save file sizes will vary depending on the progress you’ve made in said saves, but they never really go below 10 KB, making them easy to identify regardless. The number of main save files you have in here will be the number of saves you have in game + 1, as the latest save always has a backup copy.
Copy all these larger files as well as the 30KB files out of this folder, and into another space for renaming.
Renaming These Files for the Steam Version
Your eventual save folder will need to include all of this:
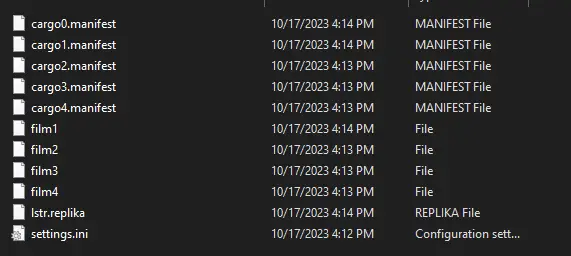
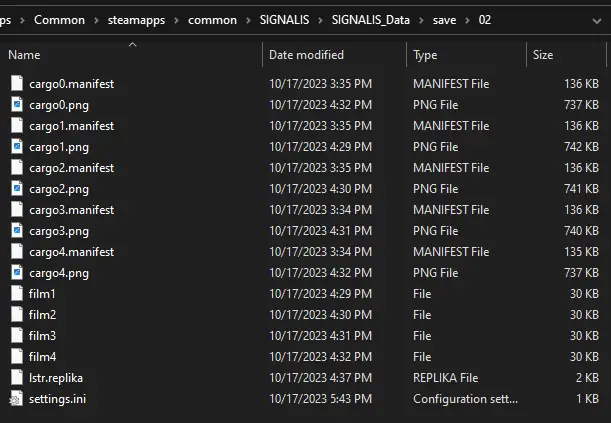
Those bigger files (your actual saves) will need to be named: cargo0, cargo1, cargo2, cargo3, cargo4. 1-4 are what appear, in order, in the save menu. Cargo0 is a backup that the game makes of your most recent save.
Give the main files an extension of .manifest but do not give the 30KB files (your screenshot files) any extension. Name your screenshot files: film1, film2, film3, film4, in relation to what “cargo” file they correspond with. There is no film0.
If you’re unsure which save file is what (if you have multiple saves), you should use the Date Modified times to figure this out, or go back into the Gamepass version of SIGNALIS and save all the files in backwards order (so that cargo0 is equal to cargo1 for convenience, and the saves are listed in order when sorted by Date Modified).
Do not worry about the super small files from the Gamepass saves, or the lstr.replika and settings.ini from the Steam saves. They are not important.
Setting up SIGNALIS 1.0 for Importing the Saves
This is relatively quick.
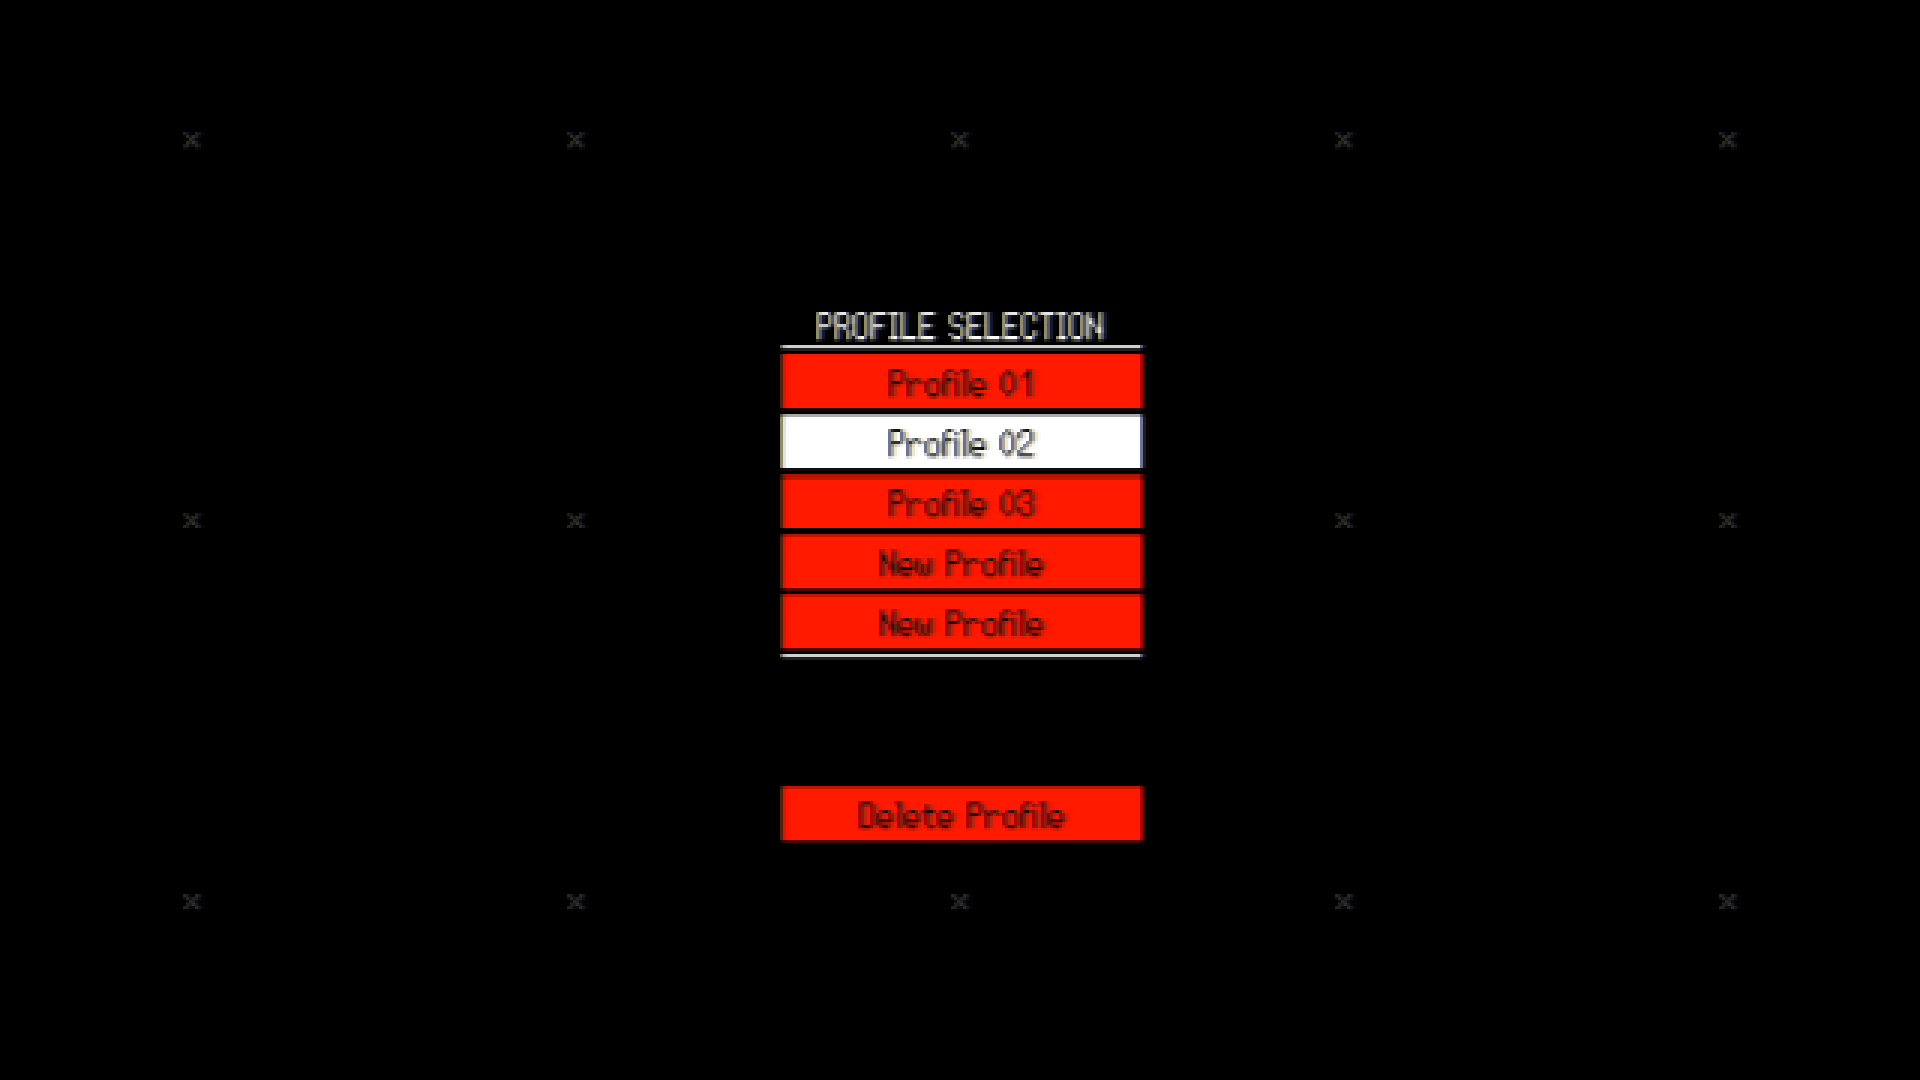
After launching the 1.0 version of the game, you will want to create atleast one new, empty profile. Preferably two. If you have not used Profile 1 yet, then you can use that to import the saves.
To do this, hold any key to fill up the bar on the title screen, then let go when the bar is full. You will enter a Profile Select screen. The screenshot below already has Profile 2 and 3 created, but you will want to make two empty profiles yourself, or use Profile 1 if its unused.
Once these have been created, exit the game.
Pasting In the Saves Into the Steam Version
This is also quick.
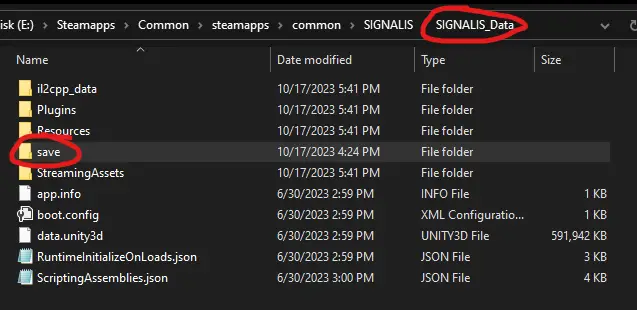
In your main game directory, find your save folder. This will be in SIGNALIS_Data then save. Your profiles will be numbered 01-05. Find the profile that you will paste your saves into, and copy over your cargo.manifest and film files from the previous section into that profile folder. Ignore the lstr.replika and settings.ini files.
Importing the Save Files into The Game
Here’s the tricky part:
By default, the game will not check for unencrypted save files. If you go look for them now in game, you’ll only find the Begin button. To fix this, we’ll need to switch to non-encrypted mode, enter each save file, overwrite them with encryption enabled, disable encryption again, re-enter the main menu, then repeat. Sound complicated? Here’s a better explanation.
For this, I’ll be assuming that we’re using Profile 2 as the main location. Its easier to explain. Substitute the profiles with your own if you’re using different ones.
1. After Launching the Game, enter Profile 3 (or whatever secondary empty profile you’ve created)
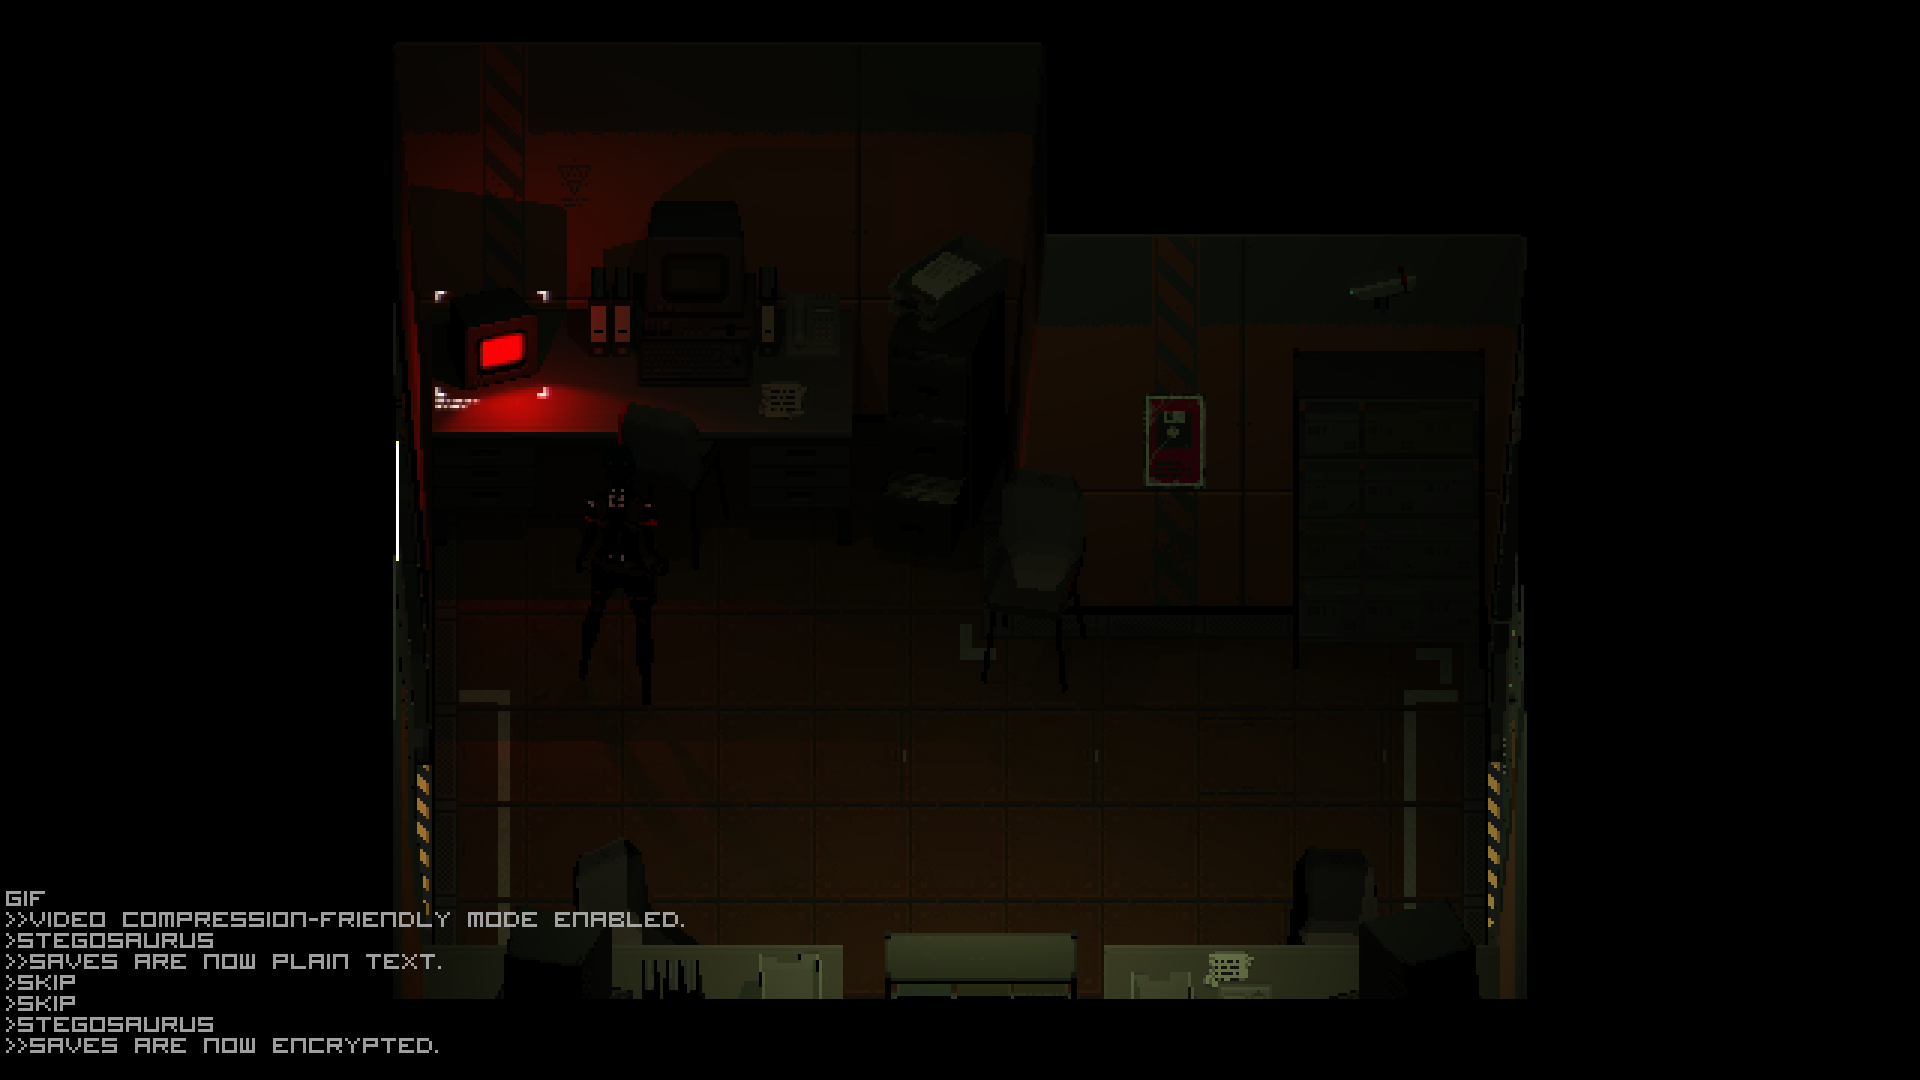
2. In the title screen, press F7, type in ausruinen on the keyboard, then press enter (if the menu has already loaded, make sure the highlighted button is Settings before pressing Enter)
3. Press F7 if nothing came up, you’ll see text at the bottom of the screen. If not, then retry step 2.
4. In the debug console, type stegosaurus. You should see a “>>SAVES ARE NOW PLAIN TEXT.”. If not, try again.
5. Exit Profile 3 (or other secondary empty profile) by pressing escape on the main menu, and return to Profile 2 (your main empty profile)
6. Enter the main menu, you should be able to access the Continue screen and see all your old saves here
7. Enter a save
8. After entering the save, open the debug console again with F7 and type stegosaurus again. You should see a “>>SAVES ARE NOW ENCRYPTED.”
9. In encrypted saves mode, overwrite the current save you are in. Don’t worry, the unencrypted version will actually still stay intact in the files, but if we are updating back to 1.1, then we will be unable to use those unencrypted files.
10. Enter Debug again, switch back to Plain Text mode with stegosaurus, and then exit to the main menu. By doing this, you’ll see the rest of the unencrypted saves that you need to convert over.
11. Repeat steps 7-10 for each save that you have. Once you overwrite the final save in encrypted mode, do not enter Plain-Text mode afterwards, but instead just go directly back to the main menu while still having encrypted saves toggled on.
If you see all your saves in the Continue screen without being in Plain-Text mode, then you have successfully converted all your saves. You can also double check this by seeing if there is a .png and a .manifest file for each save that you have (+1 because of cargo0).
If all is good, you are now finally ready to restore the game to version 1.1 “Spatz”.
Upgrading SIGNALIS Back to 1.1 From 1.0 (Steam Only)
Exit the game, allow Steam Cloud to sync the new saves if its enabled. If it prompts you about conflicting files, choose local.
Find where-ever you kept a backup of SIGNALIS 1.1. If you copied a save folder with it, I recommend removing the save folder from the backup before proceeding, else you risk overwriting and undoing all your work thus far.
Copy this backup’s files back into your main install of the game, and allow all overwrites. If the game doesn’t launch or if you didn’t backup the original files, then you will need to run a verification. You can do this in the Properties found in the gear icon on the Library page. This will effectively restore the game to 1.1 but will redownload missing files.
If all is well, you should see the Version 1.1 text in the bottom left when launching the game. Your saves should work in this version. You have successfully transferred your saves over from the Gamepass version of SIGNALIS to the Steam version.
Enjoy!
“©2023 ROSE-ENGINE | PC-STEAM1.1 “SPATZ” – R.15″
Closing Thoughts
Something cool to note:
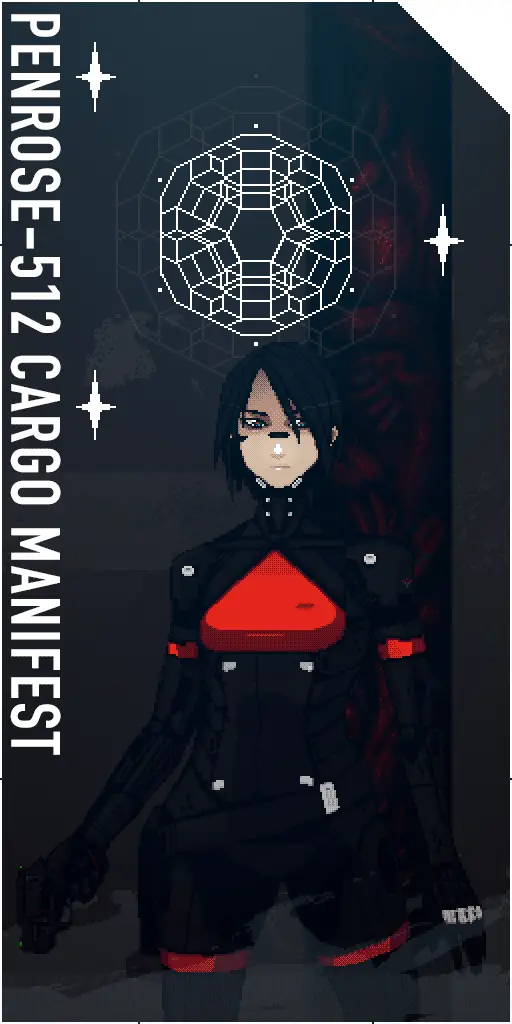
You can actually see the difference between a brand new encrypted save file with almost no data, and an encrypted save that was fully completed and has a ton of data, if you look very closely at the “grain” in the images, and compare the two.
A brand new save file (look near the bottom of the image):
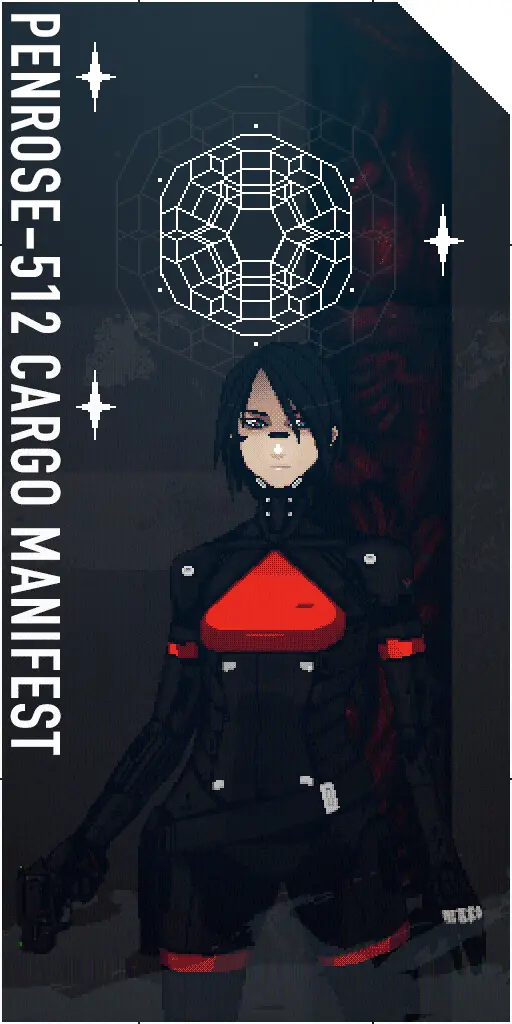
A fully completed save file:
I’m completely unsure why this was done as the default saving process of the game. If anyone at Rose-Engine reads this, feel free to answer why. Its rather intriguing.
If you made it this far: thanks for reading! Feel free to comment any suggestions, corrections, notes, or anything else.