Office
- After the opening sequence, approach the table and and pick up the walkie talkie by pressing E. Pick any options during the call.
- After the call, press Q to trigger an optional conversation.
- Approach the left end of the bookcase and examine the books.
- Press Q for an optional conversation.
- Now keep interacting with the books and pressing Q until the following achievement unlocks:

Chatty
Trigger many optional conversations
- Turn left and open the cabinet to find a safe.

- Enter 7341 and pick up the key.
- Exit through the door left from the cabinet (key is automatically used).

House Guest
Escape the office
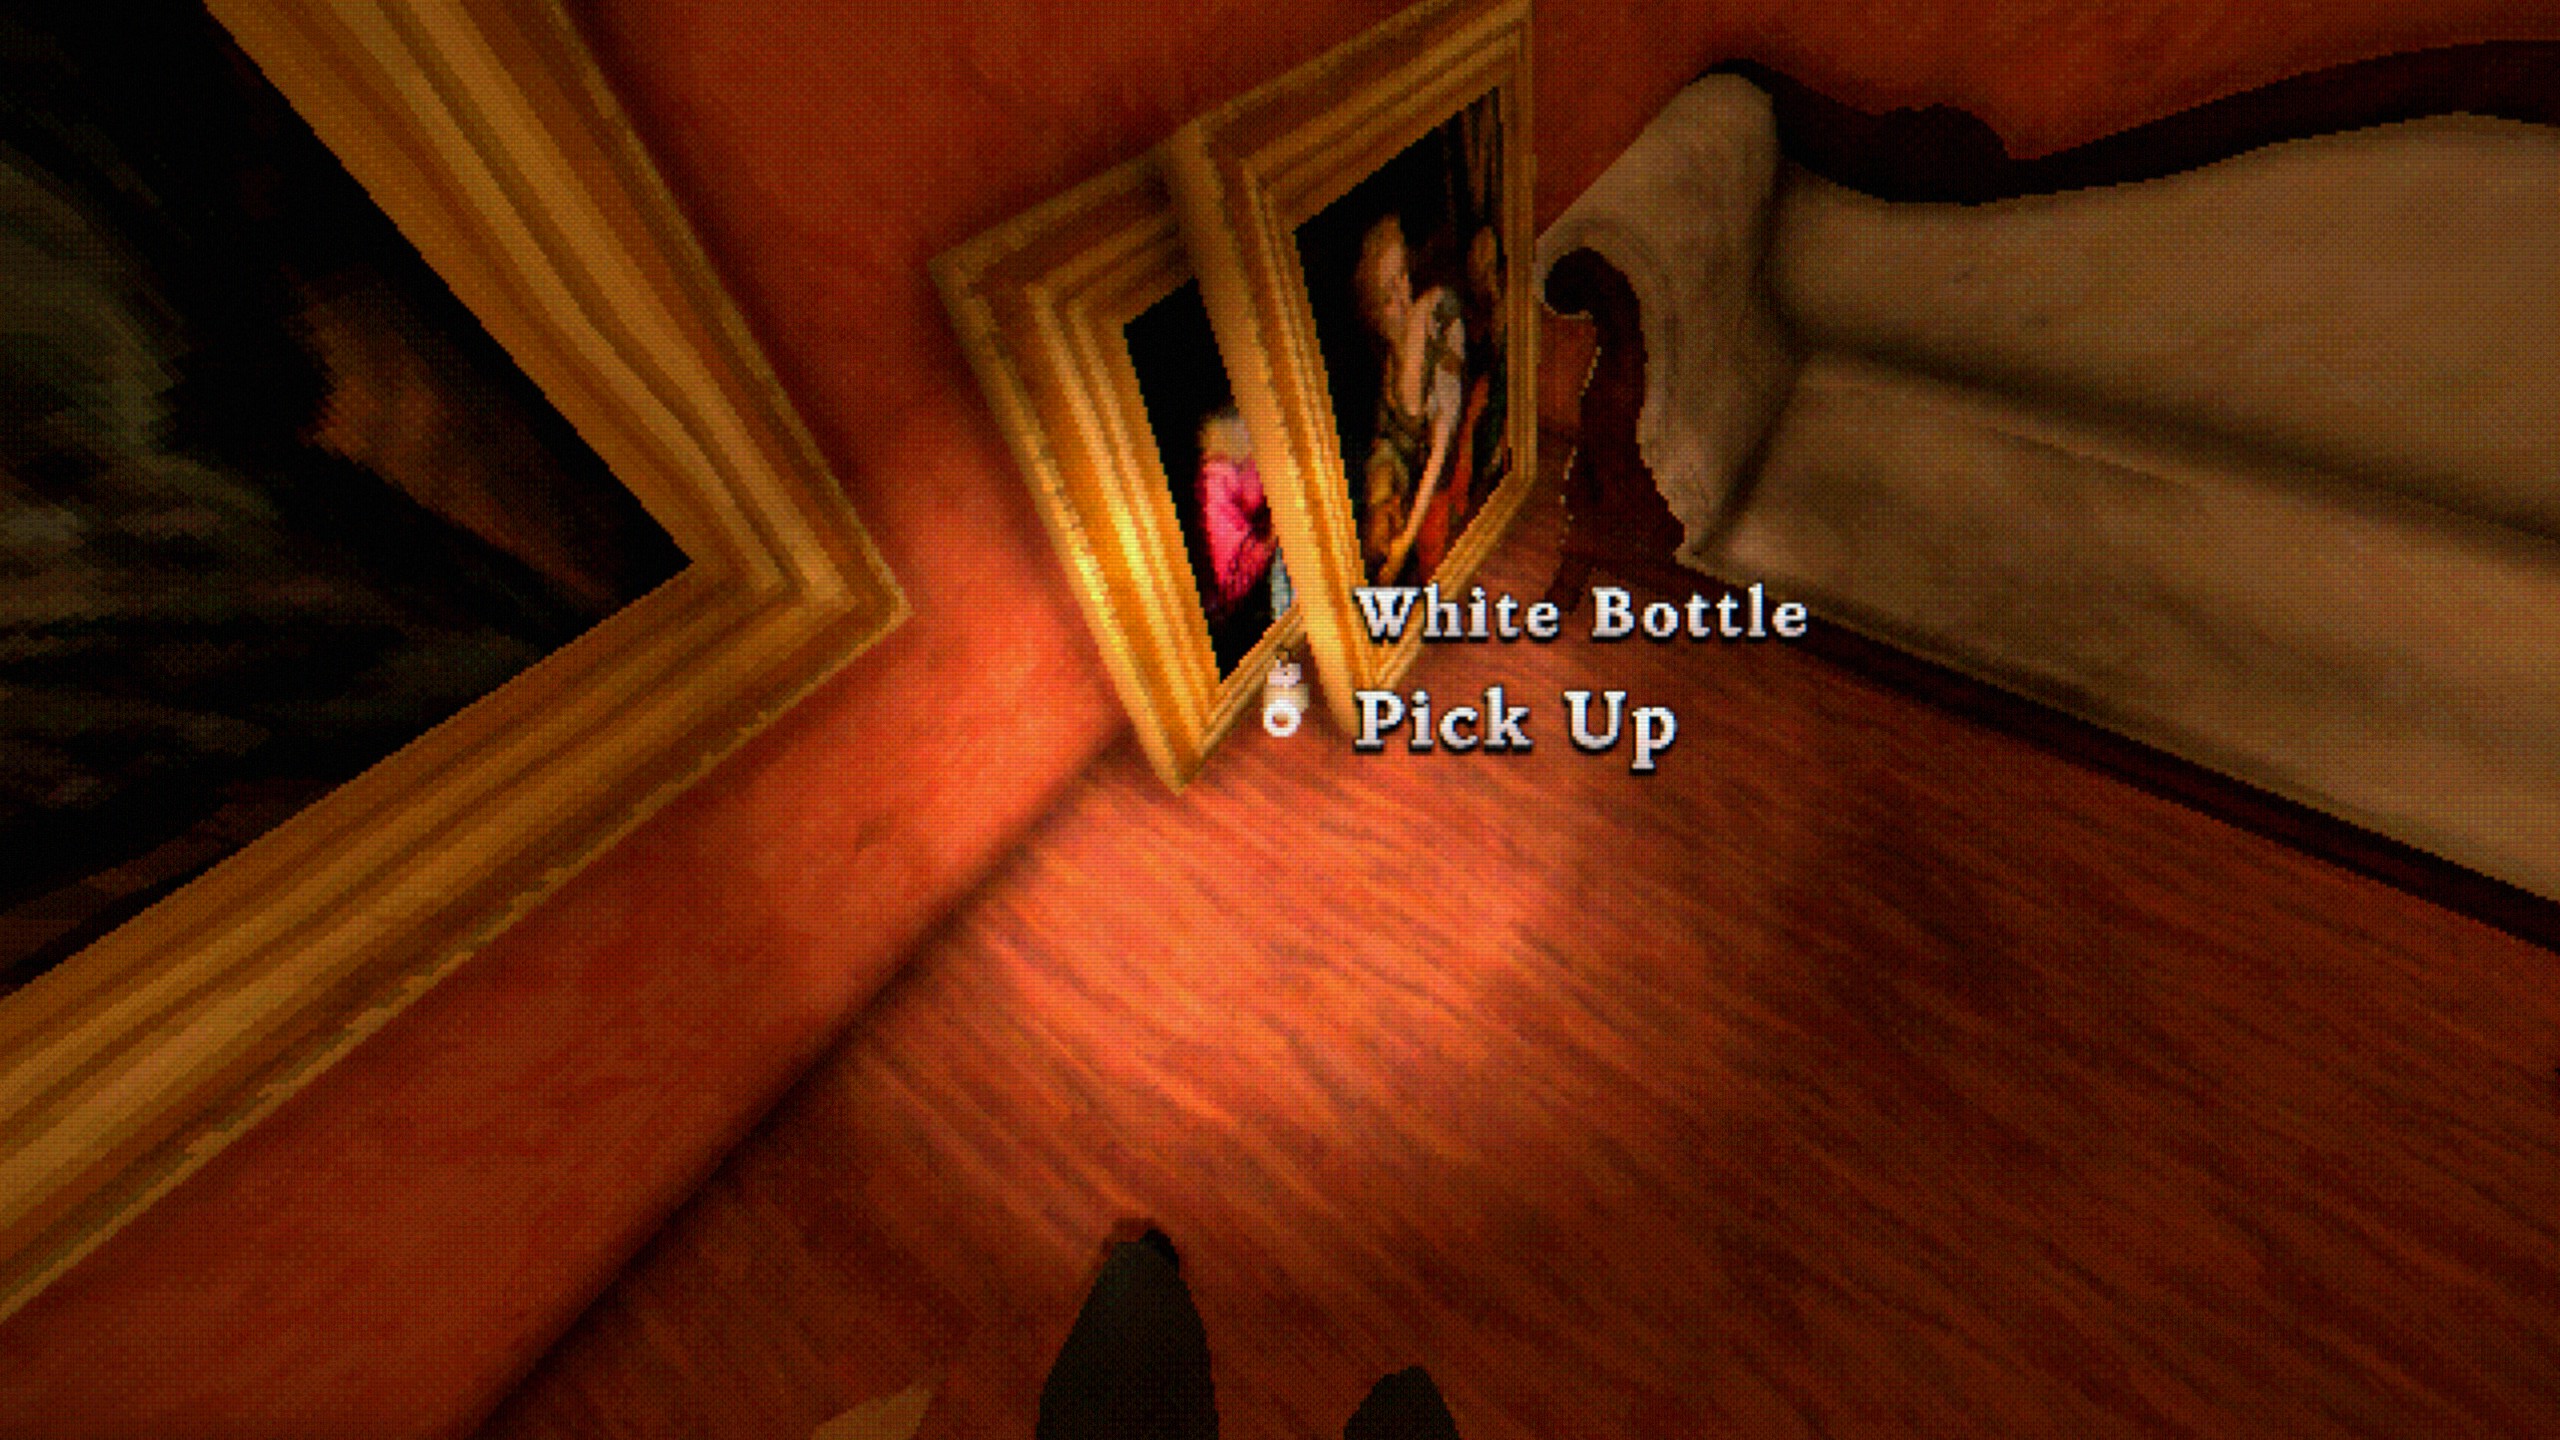
Bedroom
- Pick up White Bottle by the paintings.
- Pick up Red Bottle beside the clock.

- Pick up Yellow Bottle on bedside table.

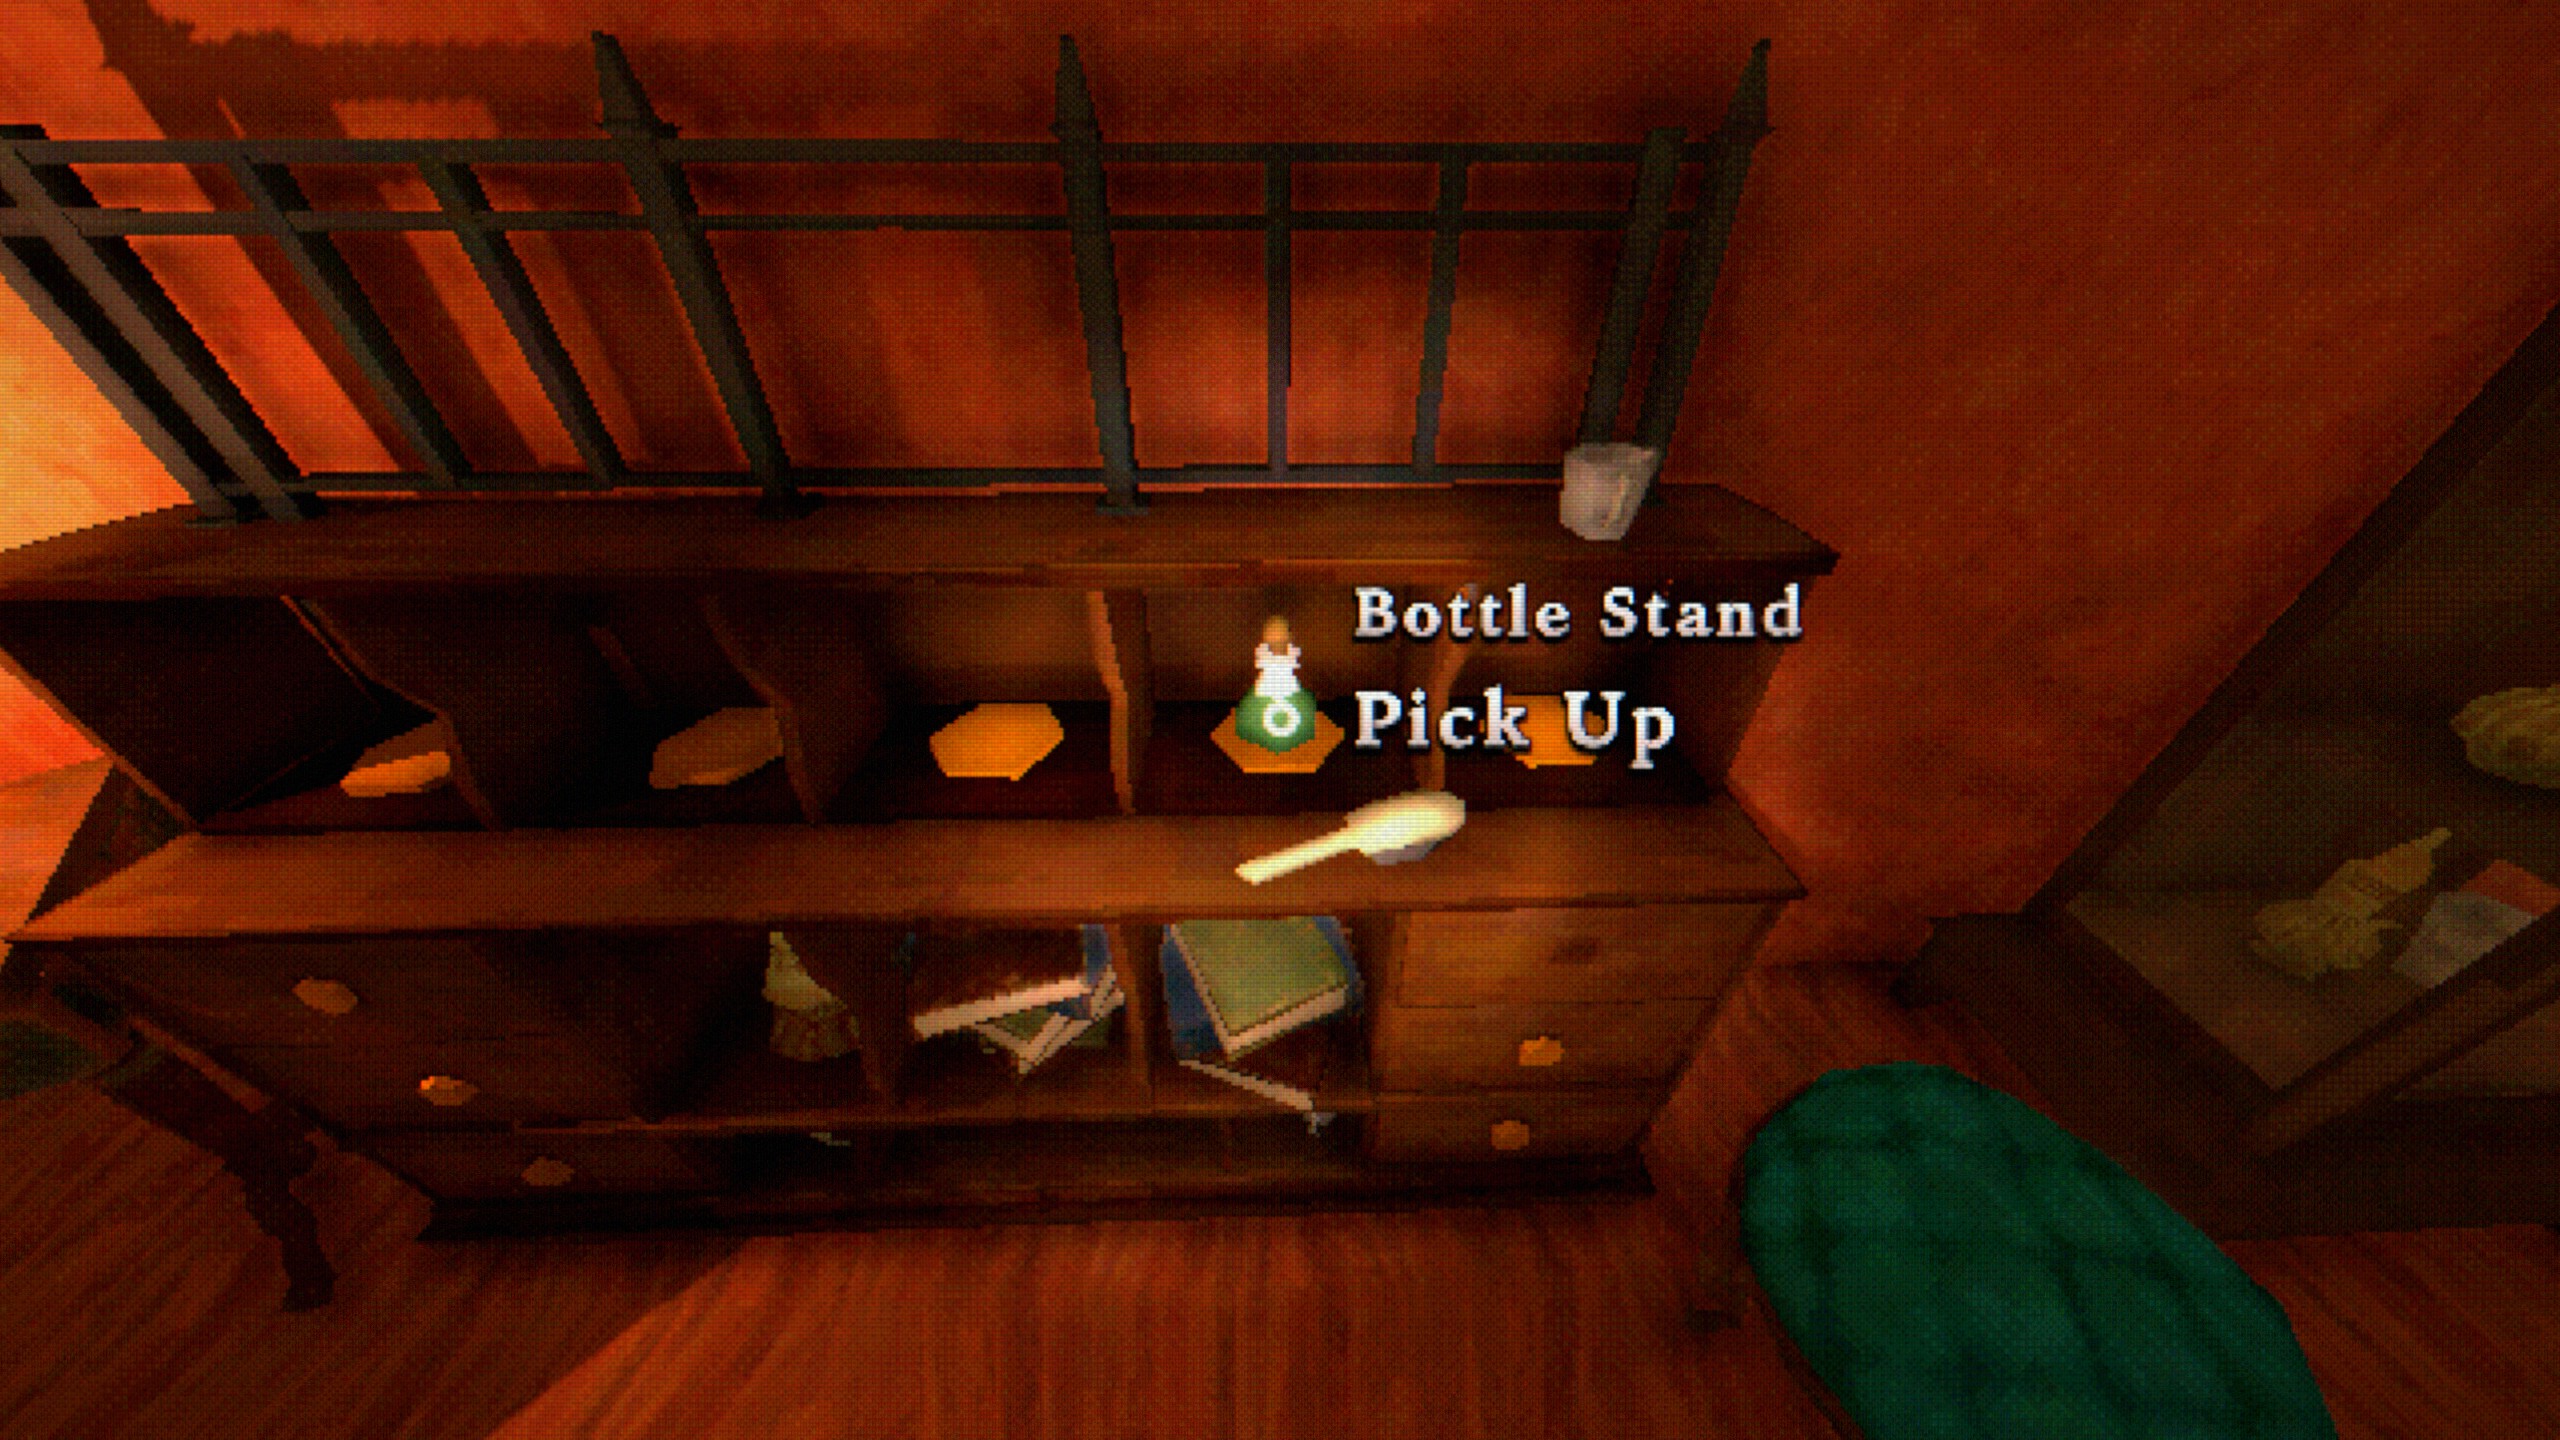
- Pick up Green Bottle from bottle stand.
- Pick up Black Bottle from drawer.

- Once all bottles are collected, place them in the following order in the stand: Black – Yellow – White – Red – Green.

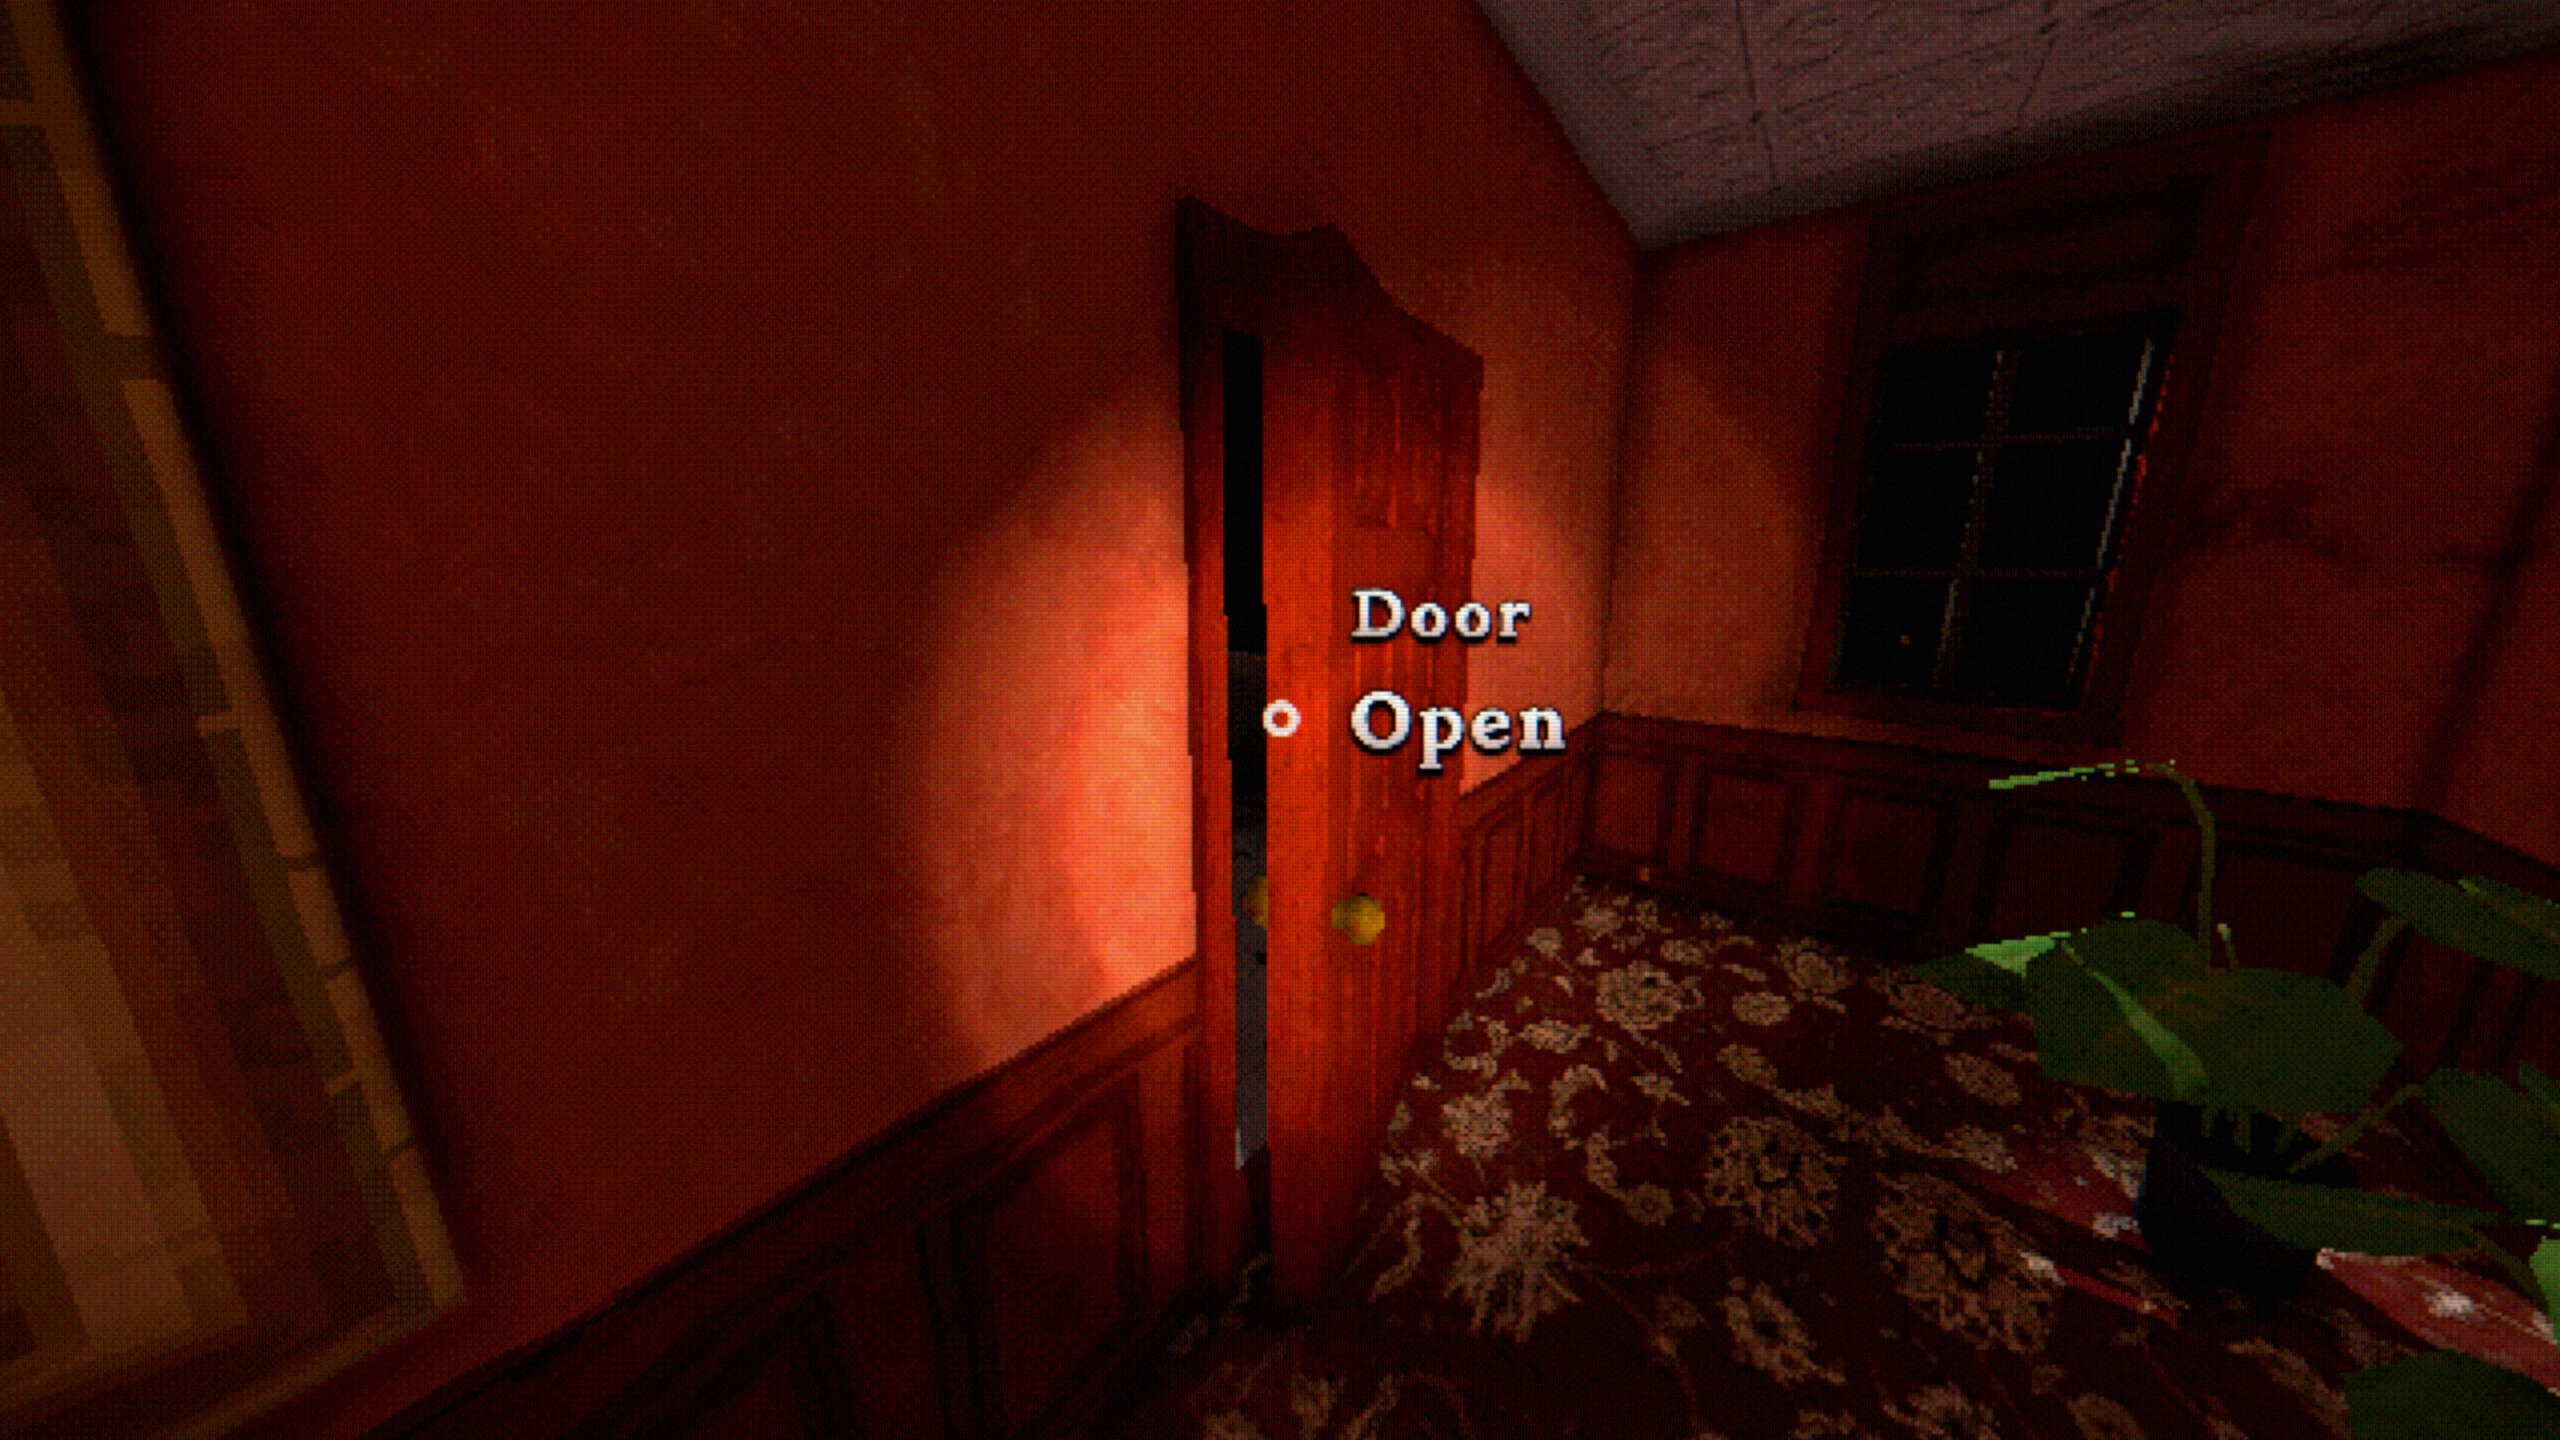
- Pick up the key from the drawer that opens and exit the room through the door to the right.
F1 West Wing
- After the dialogue, head down the corridor and open the door by the Grandfather Clock.

- Watch the scene, then continue down the corridor and enter the bathroom.
Bathroom – Torres – Second Bedroom
- Face the mirror and adjust yourself so the word REVEALS spells on the reflection.

- Interact with the painting that moved to reveal a crack on the wall.
- After some more scenes, pick up the Hatchet from the wall.
- Save your game → Slot 1
- Examine the crack on the wall and choose to Try to smash through.
- Watch the scenes that unveil.

Doing My Best!
Save Torres
- After unlocking the achievement, reload the save you just made: ESC → Load → Slot 1.
- Exit the bathroom and head to the door by the Grandfather Clock.
- Interact with the door and choose to Break down the door twice.
- Approach Torres for a scene.

Doing My Best?
Hurt Torres
- Exit to the corridor, then backtrack to the first bedroom area but continue past it until spotting an open door. Head through it.
Main Hall – Great Room
- Once entering the main hall, turn around immediately and head downstairs.

- Once downstairs, turn left and head towards the Great Room. Watch the scenes.
- You receive a Map. Press M to open the map and head to the marked door.

- Head down the corridor and go through the first door on the left to find the library.

Library
- Approach the Weapon Display case and press the buttons in the following order: 4 – 2 – 1 – 3 – 5.

- Pick up the Library Statues from the Weapon Display case. A bookcase will reveal on the left hand side.
- Approach the bookcase and slide the following books:
- Top shelf: 1 to the right
- Middle shelf: 6 to the right
- Bottom shelf: 3 to the right

- A doorway to the Gallery will open.
Gallery
- Watch the scene, then examine the paintings at the corner.
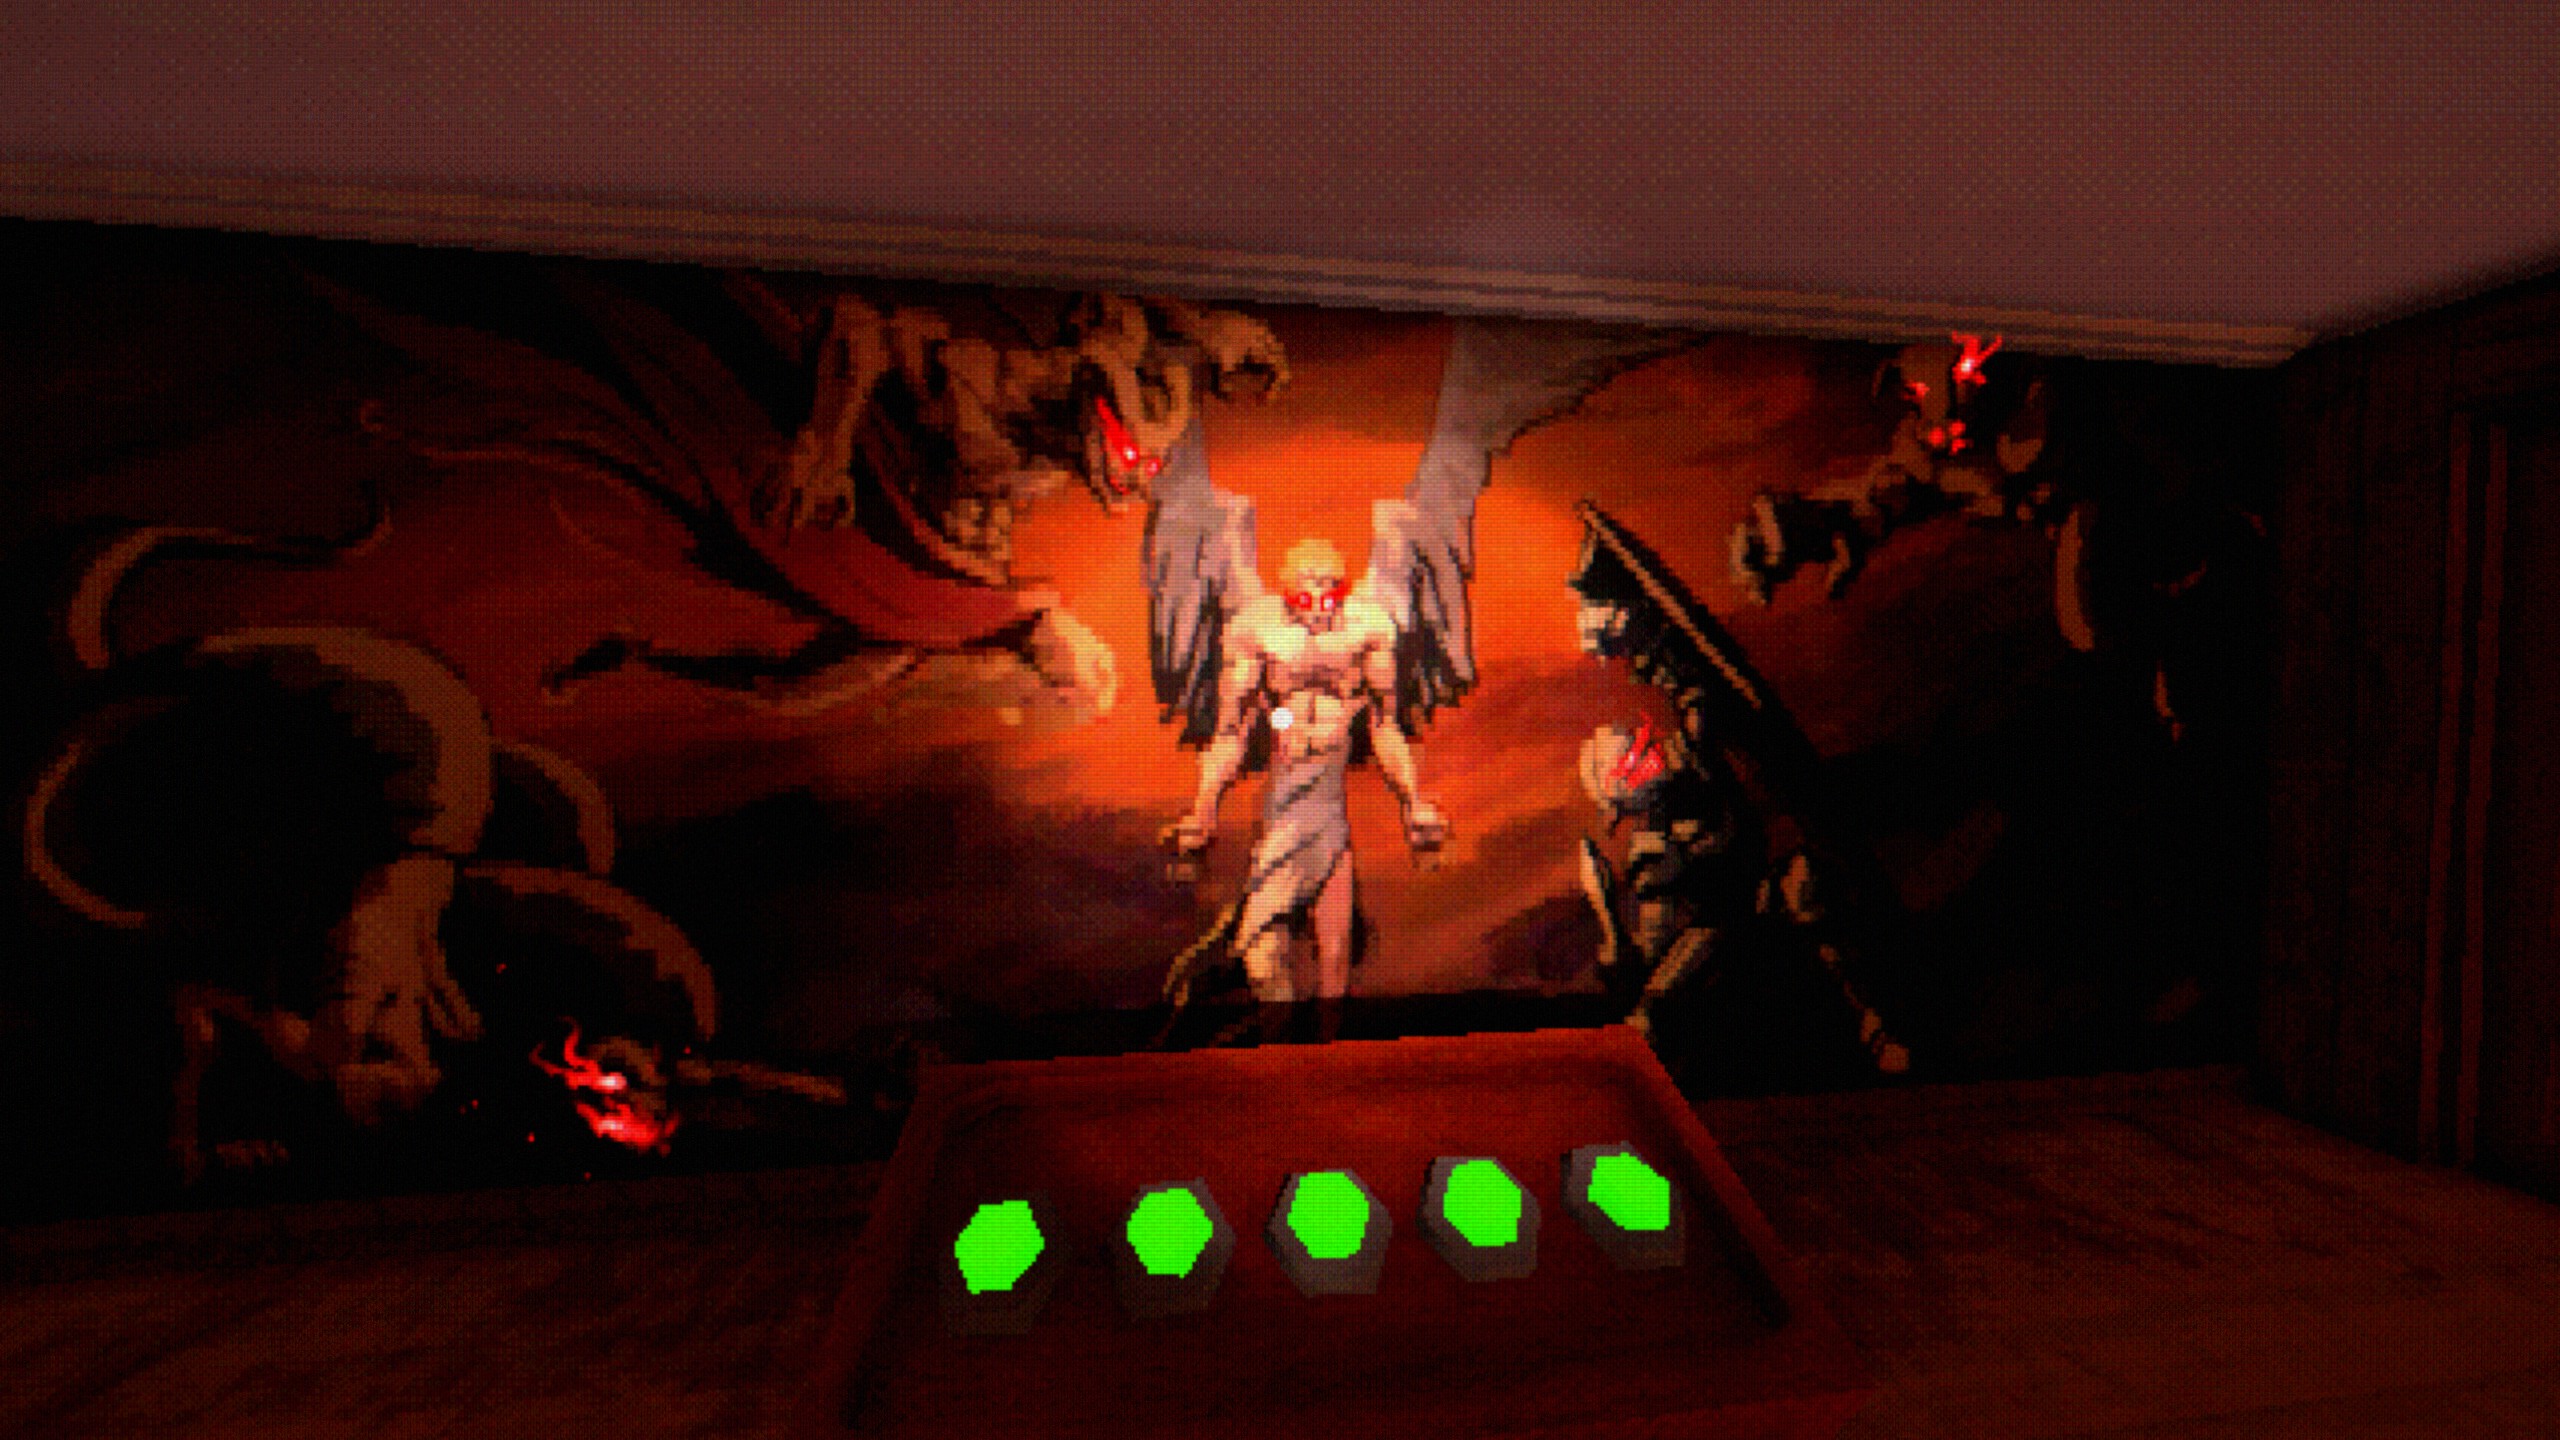
- Turn around and approach the podium with the buttons. Press the buttons in the following order: 1 – 2 – 3 – 4 – 5.
- Turn around and approach the statues.
- Solve the puzzle:

- Another set of doors will open.
- Exit through the large doorway to the Main Hall, then proceed to the opposite side to continue.

Lounge – Charles
- After the relatively long cutscene, turn around and interact with the sigil behind the painting.

- Turn around to find a second sigil on the floor. Interact with it.

- Interact with a third sigil in the ceiling, at the middle of the room.

- Interact with the books left from Charles to reveal a fourth sigil.

- And lastly, interact with the fifth sigil next to the bookcase right from Charles.

- Now pick up the journal that appeared in the middle of the room and speak to Charles to identify the sigils.
- Save your game → Slot 1
- Make sure to never overwrite this save as it will be used for the Second Playthrough.
- Solve the sigils riddle:
- North: Andromalius
- West: Malthus
- East: Bifrons
- South: Raum

- Answer that you’re Ready for the ritual and watch the scenes.

History Lesson
Save Charles
Closet
- After the scenes, make your way to the East Wing corridor (same path we took to the library) and open the door with the lion on it.

- Approach the keypad and enter 2940. This will reveal a door with a second puzzle.
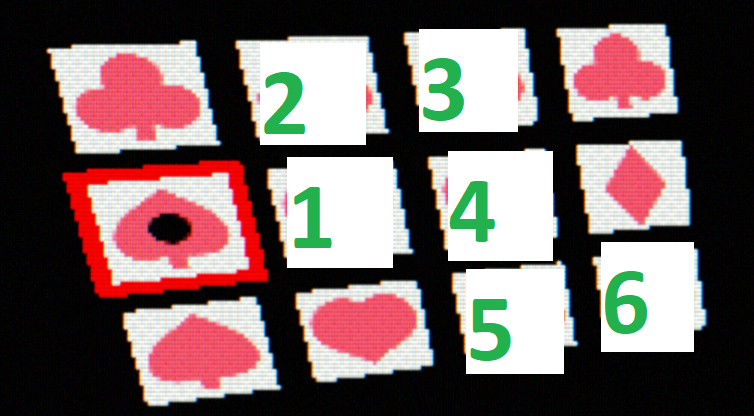
- Solve the second puzzle: Spade – Heart – Diamond – Spade – Diamond.

- Solve the puzzle on the third door:
- Blue – Pink – Pink
- Yellow – Yellow – Pink
- Pink – Blue – Yellow

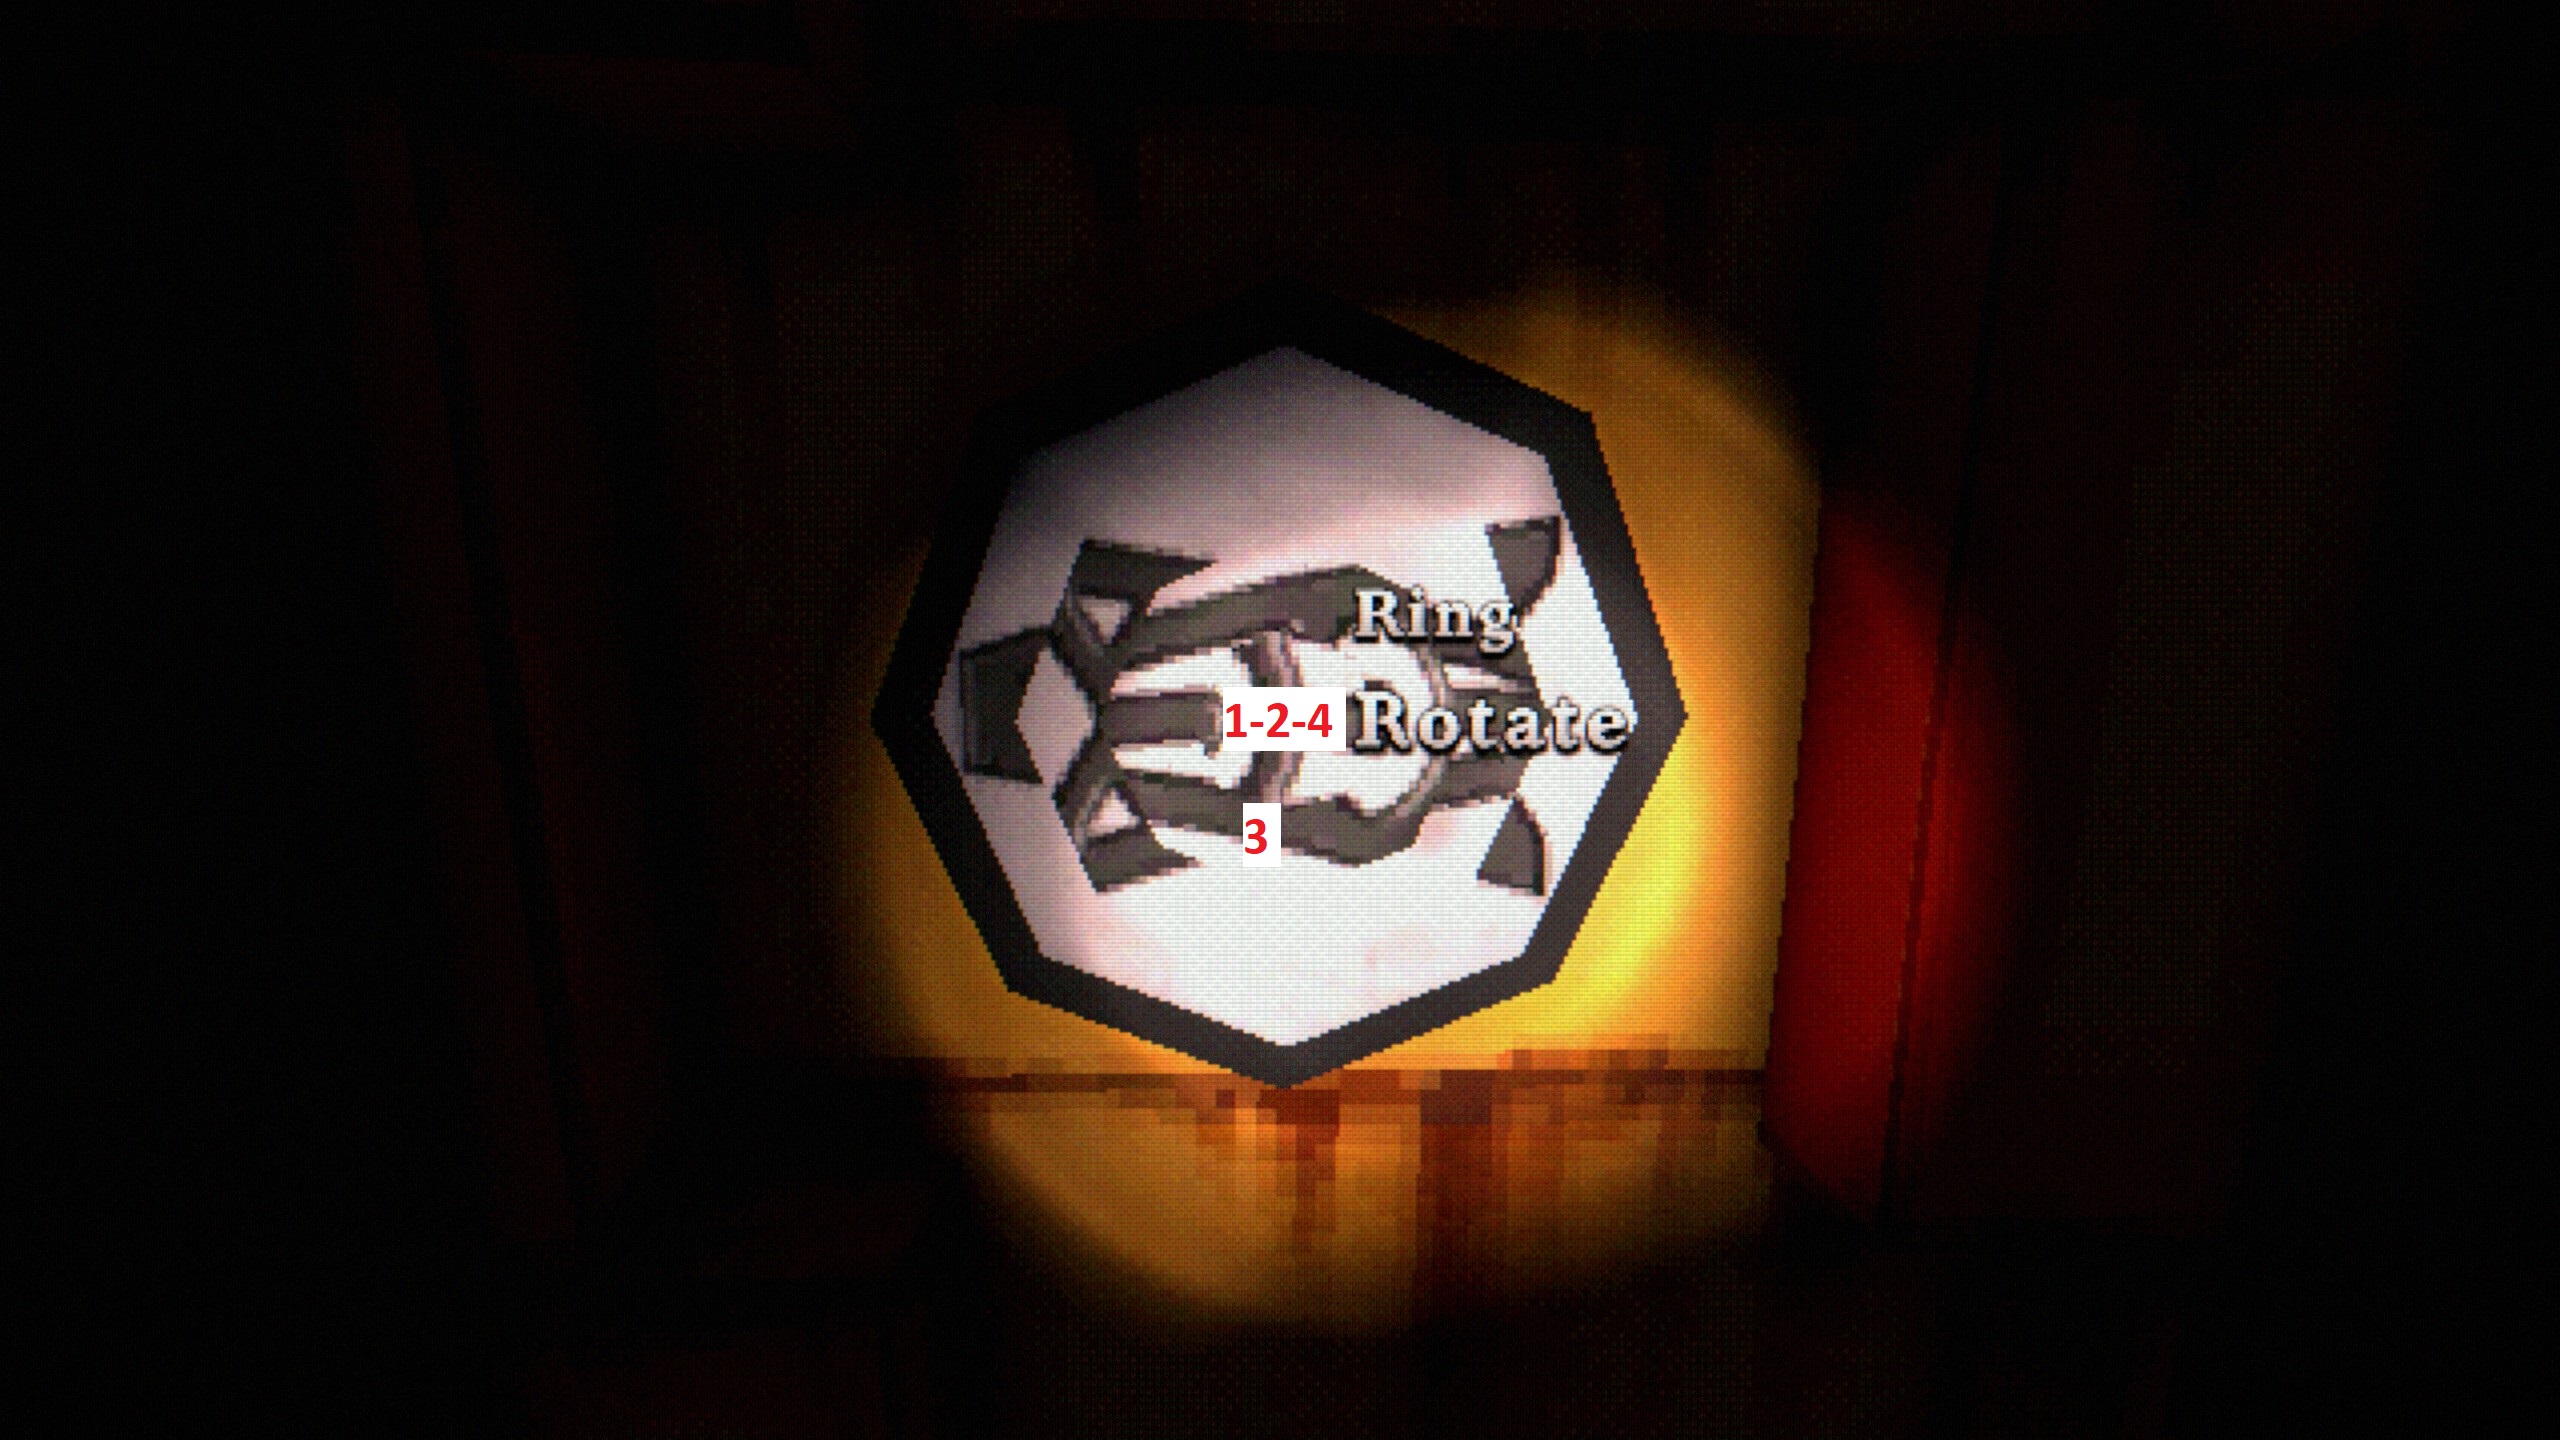
- This will reveal one last door. To solve the puzzle quickly, rotate the innermost ring twice, the third ring once, and the innermost ring once (refer to screenshot for clearer instructions).
- Pick up the Appointment Card that reveals.
- Turn around and follow the footprints to a door. Head through it.
Clinic
- Back at the East Wing corridor, head towards the library and interact with the door to its right.

- Watch the scene, then head into the Clinic.
- Once inside the Clinic, approach the door with the red light on it and open the drawer to reveal a Model Liver. Pick it up.

- Now press the red button just right from where the liver was.
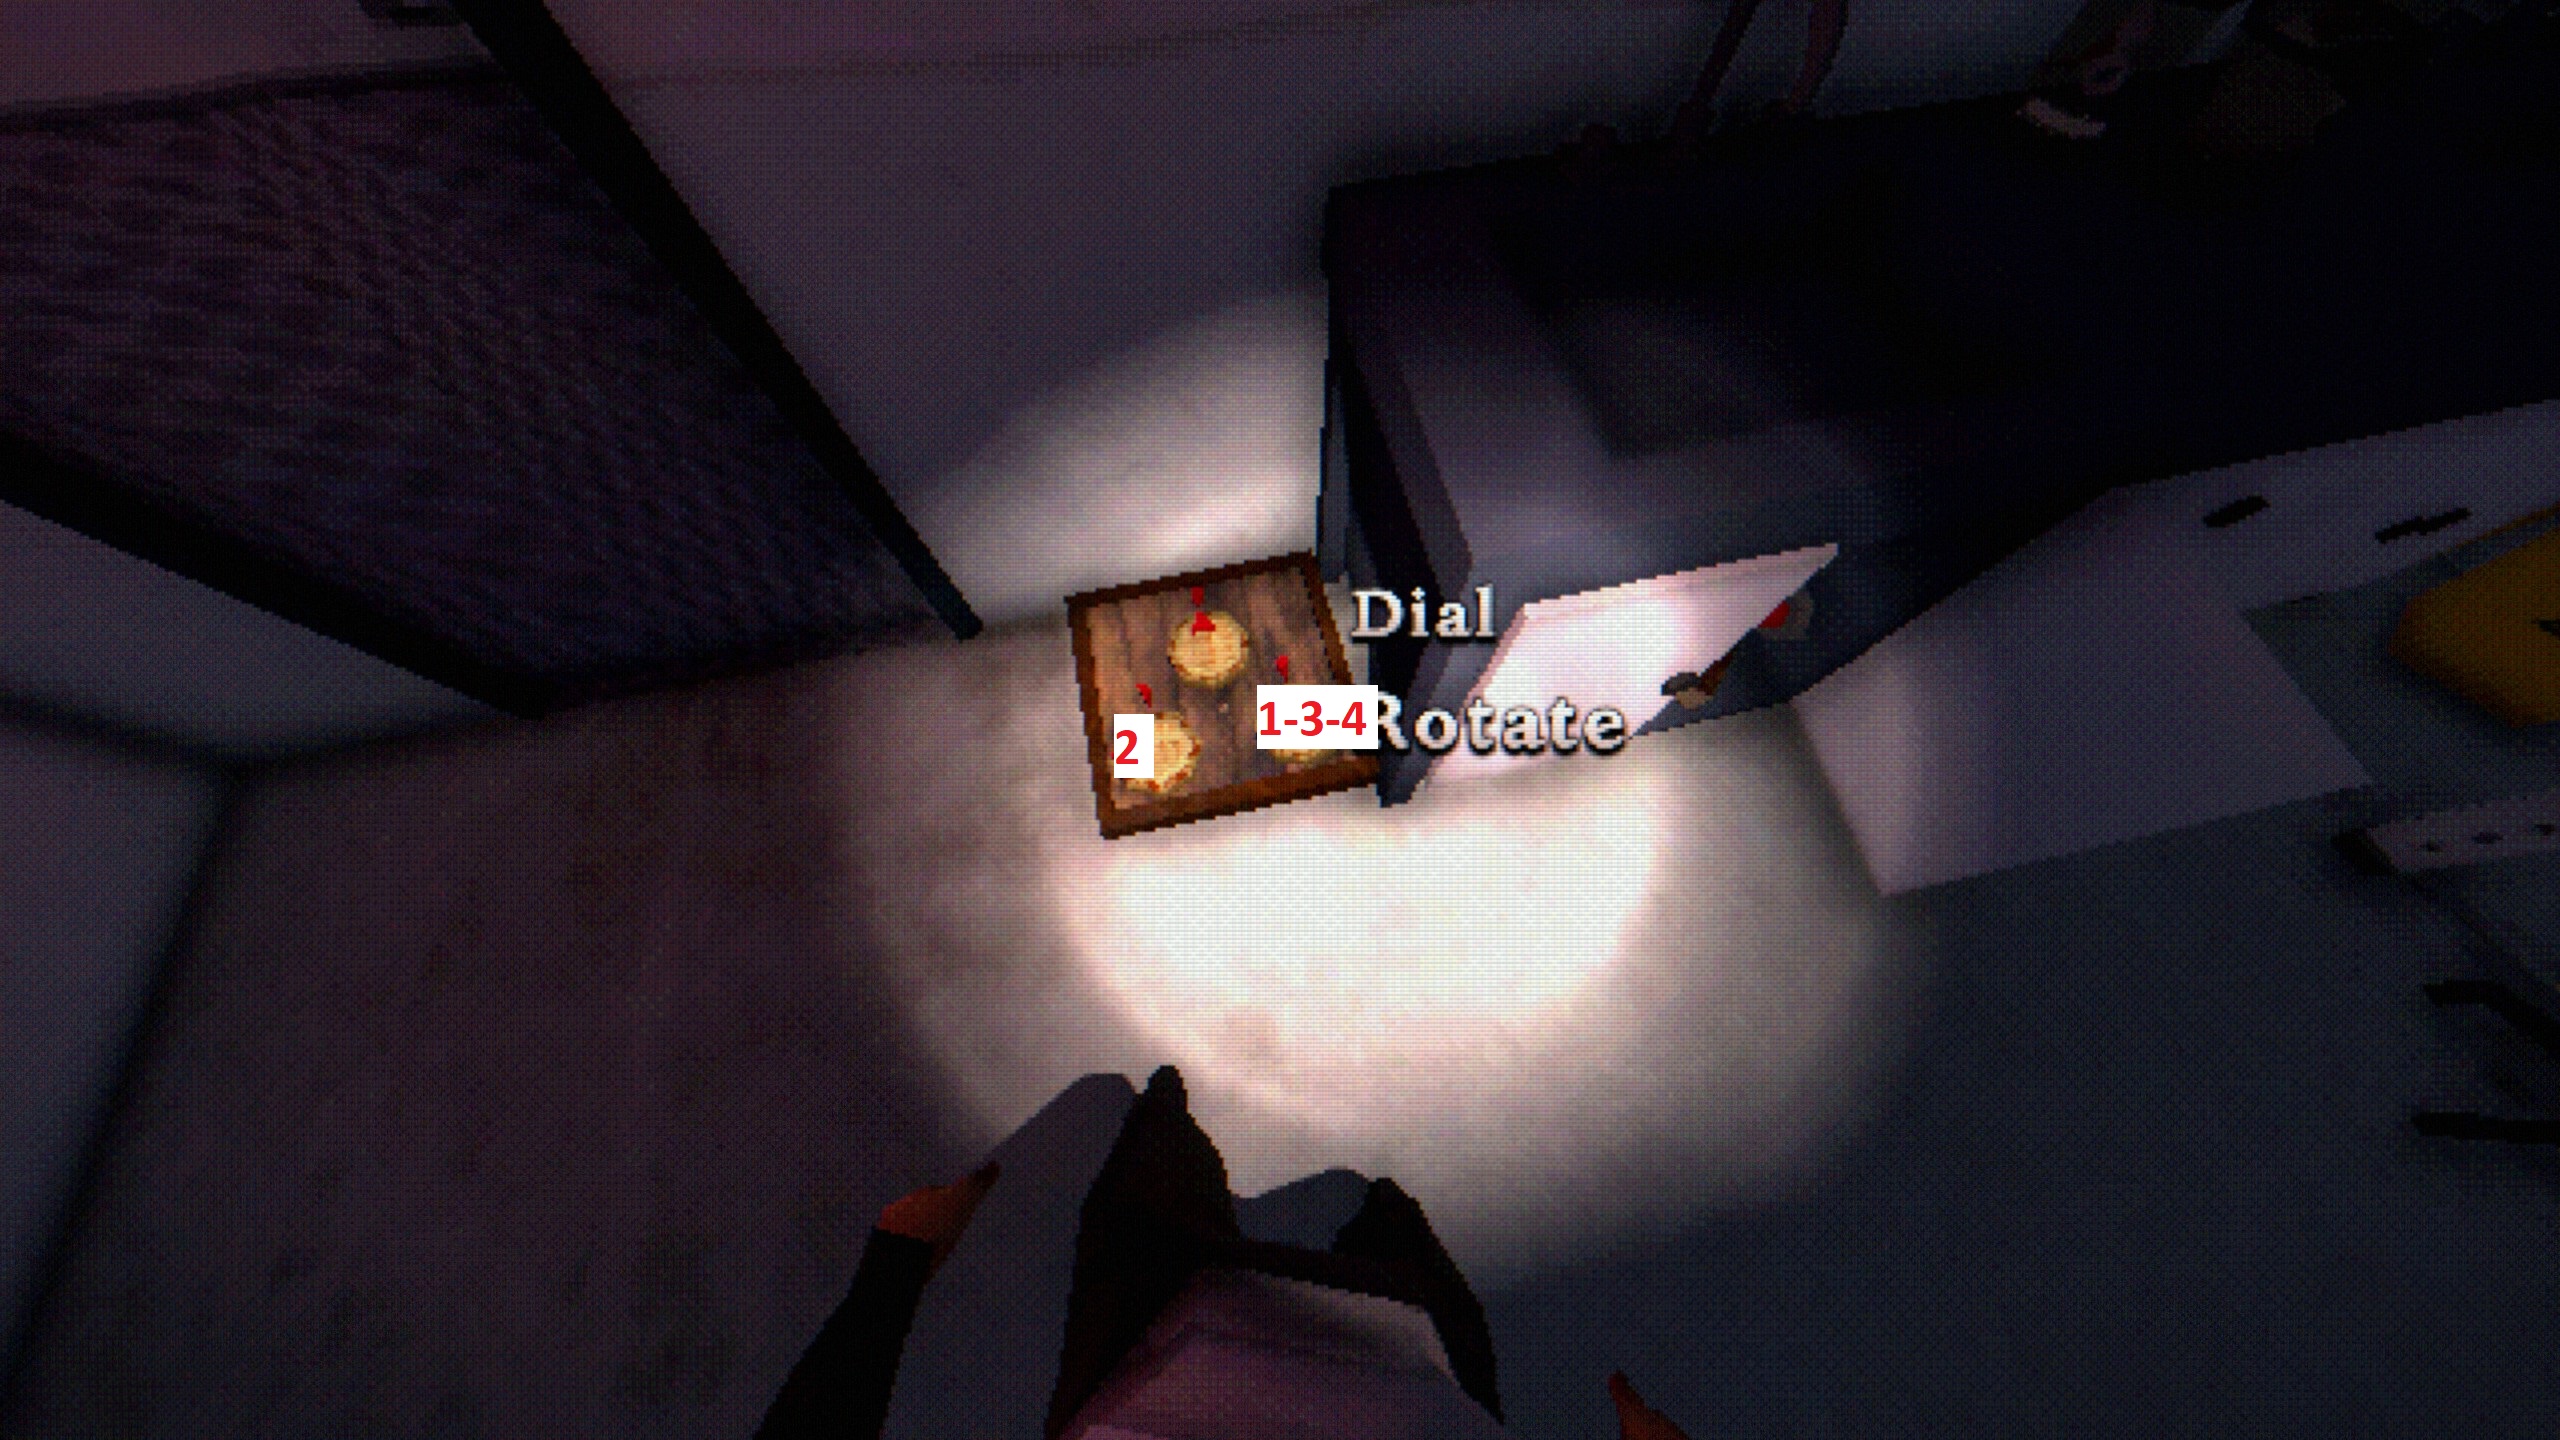
- Solve the dials puzzle. Counting the dials from top to bottom and left to right, interact with: 3 – 2 – 3 – 3.
- Pick up Model Heart.
- Open the bottom drawer and pick up Model Lungs.
- Open the drawer beneath the Organ Model and pick up Model Stomach.

- Interact with Organ Model to insert all the organs, then pick up the Brain from its head.
- Approach the cabinet by the entrance and place the Brain in the jar. You’ll receive a Skull.

- Attach the Skull to the Skeleton Chest and solve the puzzle
- Adjust the head if it’s not facing right from the beginning.

- Should look as follows when solved:

- Head through the door that opened.
Surgery – Ruth
- Once you regain control, pick up the Chemicals left from the Poisoned Woman.

- Open the bottom drawer under the Centrifuge and pick up the Needles.

- Turn around and examine the Scrapes on the wall next to the bookshelf.
- Interact with the Bookshelf and choose to Move the shelf.

- Head through the hole and examine with the Dead Person to receive Scribbled Note and Found Antidote.
- Go back to the Poisoned Woman and examine her.
- Use an inventory item and choose Needles. Receive Drawn Blood.
- Save your game → Slot 2 (just in case)
- Use the Centrifuge and choose Found Antidote. Receive Tau – Blue Chemical.
- Interact with Beakers Mix on left hand side and choose to Synthesize an Antidote.
- Add the following ingredients:
- Drawn Blood
- Tau – Blue Chemical
- Choose to Add another ingredient: Alpha – Red Chemical
- Choose not to add another ingredient. Receive Antidote?
- Interact with Poisoned Woman and choose to use an inventory item. Select Antidote? and confirm the injection.
- If done correctly, Ruth will be saved and you’ll receive the following achievement:

Elementary
Save Ruth
F1 East Wing – Master Bedroom – Hidden Room
- After the scenes, head upstairs through any of the staircases and proceed through the door to the right of marked door.
- Walk down the corridor and head through the first door on the left.

- Interact with the keypad on the cupboard on the left hand side and enter 1925.

- Go inside and pick up the Slide from the floor.

- Head back to the Master Bedroom and insert the Slide in the Projector at the middle of the room.
- Turn around and solve the puzzle in the dressing table: Twice, Twice, Once.
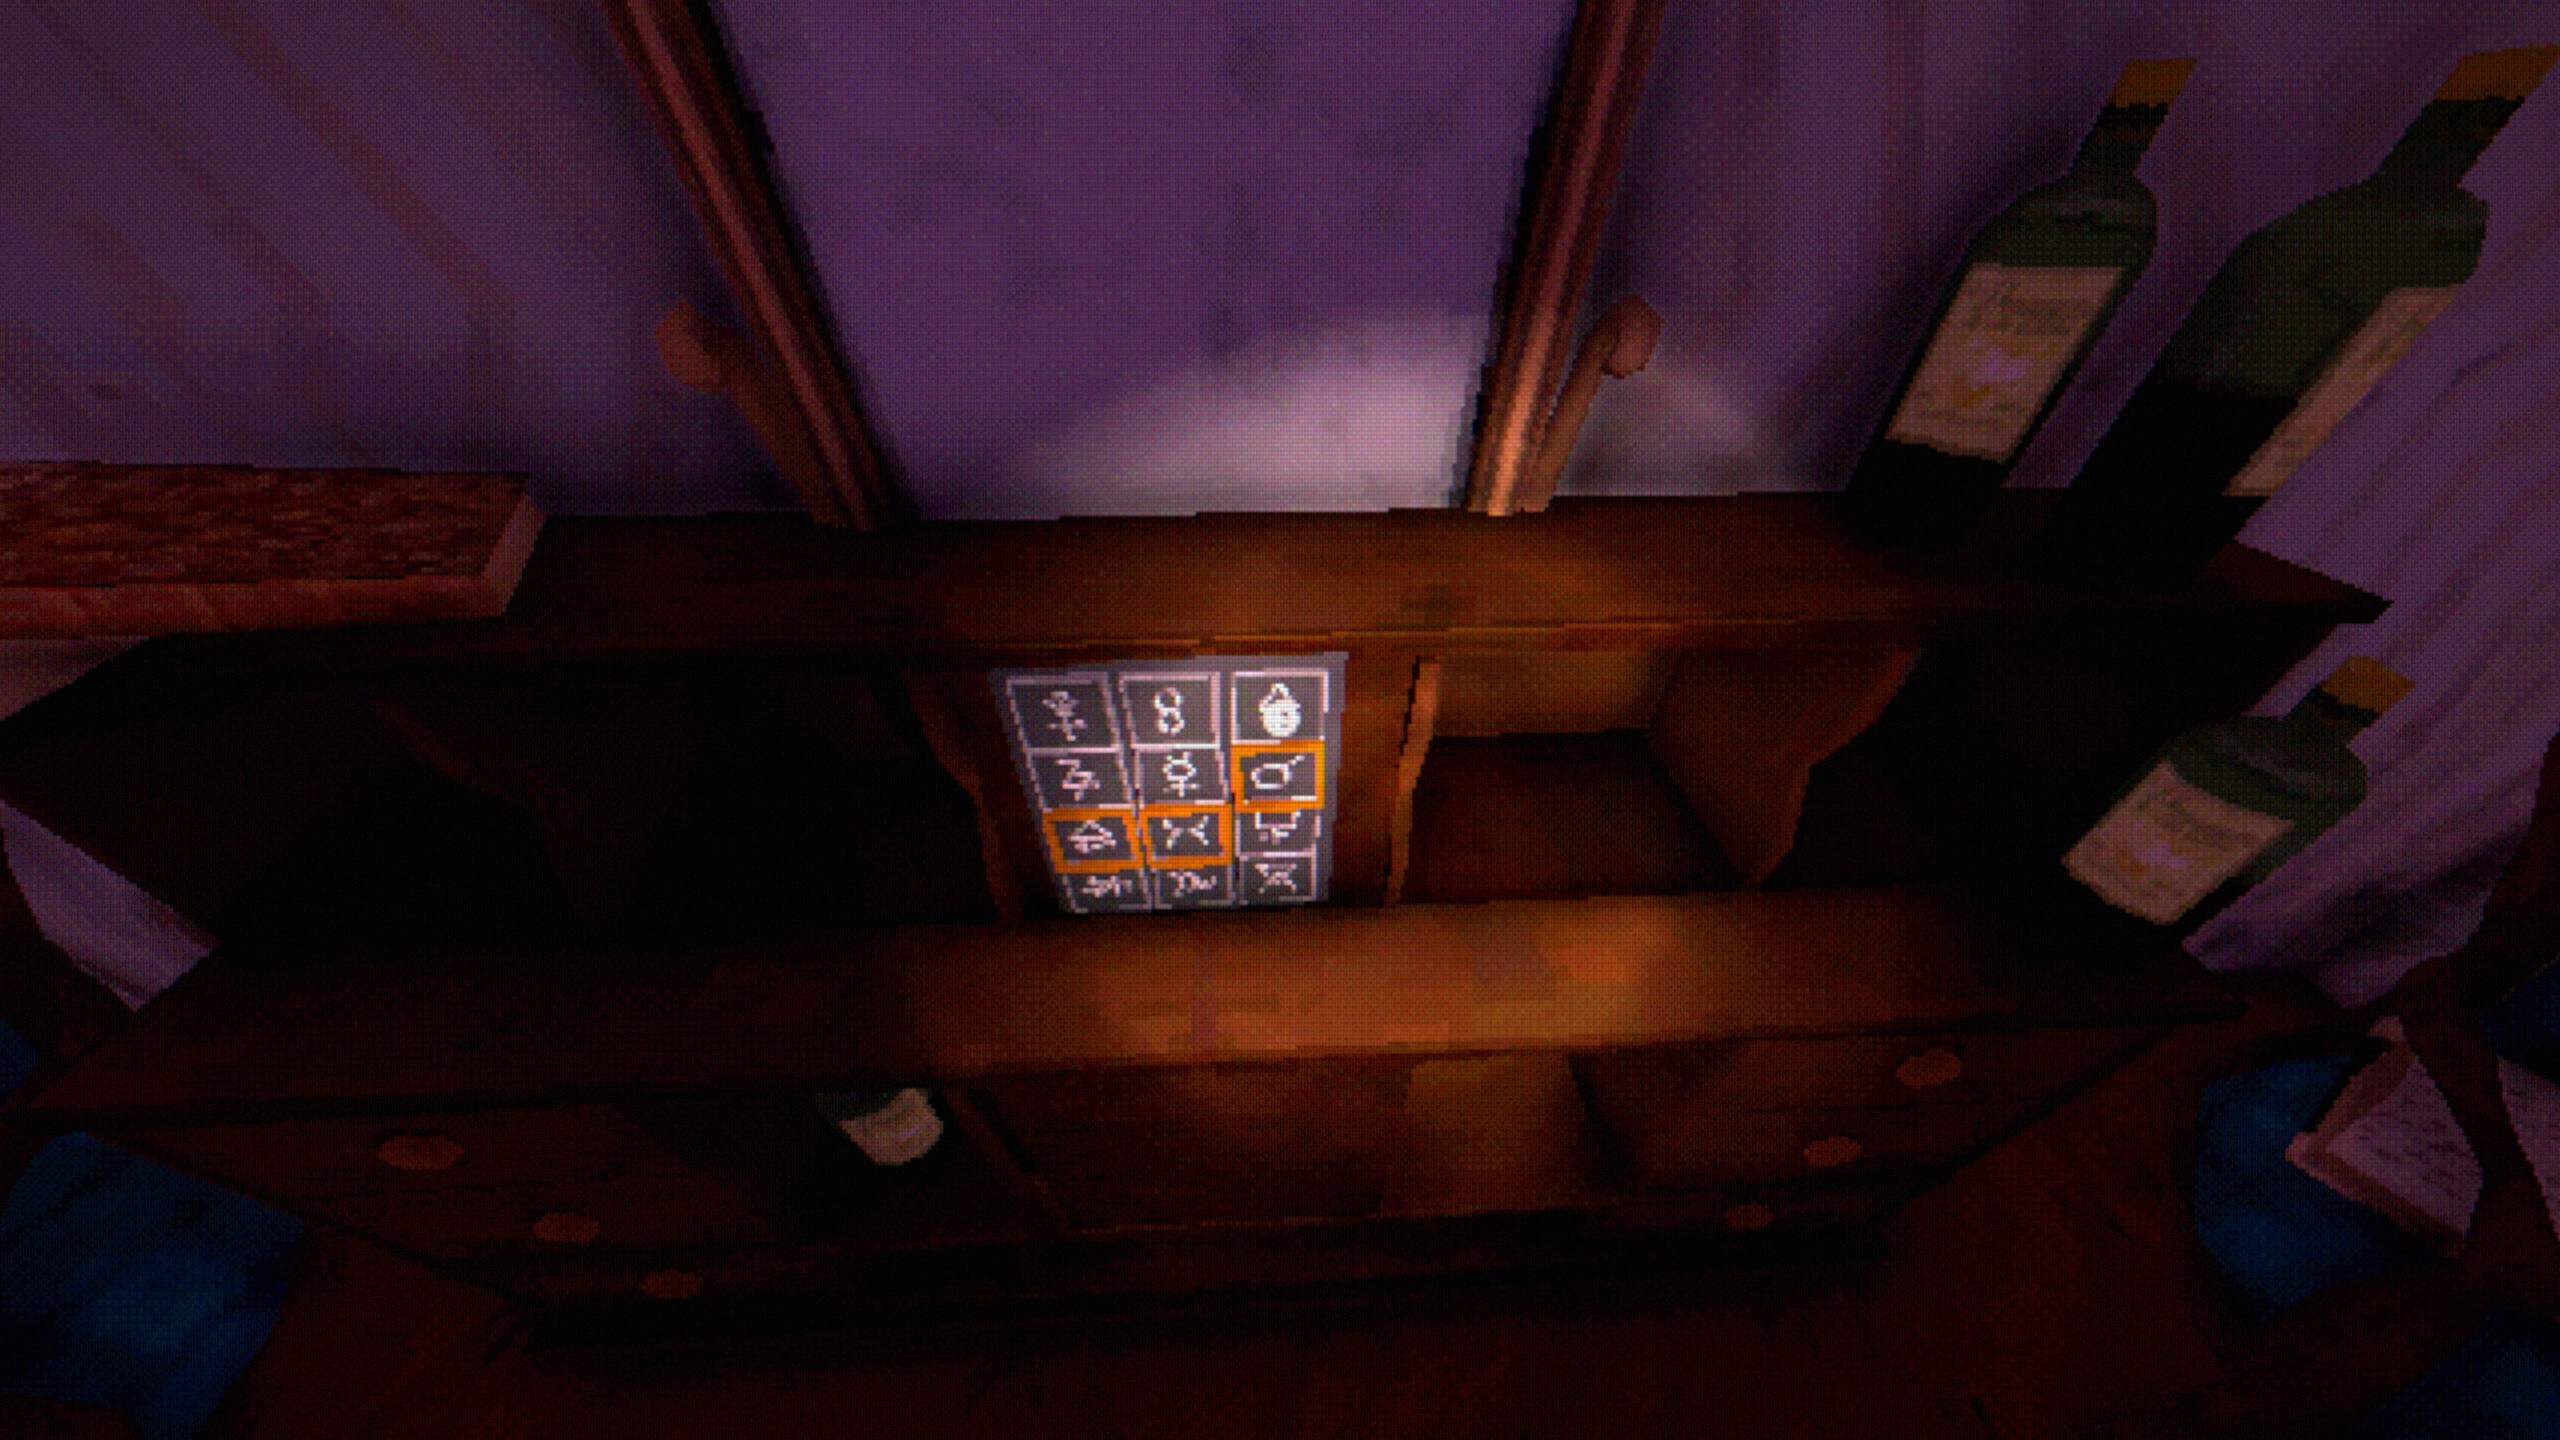
- After solving the puzzle, pick up another Slide and Statues.
- Insert the new Slide in the Projector and examine the Board nearby.
- Solve the puzzle: rearrange the statues in the middle column from shortest to highest, creating a door shadow.

- Proceed into the Hidden Room and watch the scenes.
- Once you regain control, head through the doorway into the Planetarium.
Planetarium
- Head to the middle of the room and solve the puzzle, press the Toggle Lock Button beneath each projector after each input.

- Solution:
- West Button: 06-05
- North Button: 25-07
- East Button: 08-03
- South Button: 11-08
- If done correctly, a lockbox will open up revealing a key.
- Pick up the key and open the door directly next to it. Receive Peacock Key.

- Head through the door, then follow the corridor to the right until it loops.

- Now backtrack a few steps (see screenshot for reference) and attempt to go again through the endless hall. You’ll reach the Main Hall this time.

- Head through the Peacock door in between elk heads.
Living Room – William
- Examine the painting next to the Peacock door and watch the scene.

- Next, turn around and move the Rug at your feet.

- Solve the circuit puzzle:

- Head to the cupboard behind the counter and enter 5423.

- Pick up the Drinks + Empty Water (both are picked up together) and Coffee Beans.
- Now interact with Water Filter, turn around, and head to the table with the Vase and pick it up.

- Choose to Take water from the vase. Receive Dirty Water.
- Head back to the Water Filter and interact with it to purify the water. Receive Filtered Water.
- Save your game → Slot 2 (just in case)
- Interact with Coffee Maker and choose to Make Coffee. Receive Fresh Coffee.
- Now head to the other end of the cupboard and interact with Mixer.
- Prepare the drink:
- Fresh Coffee → Two Parts
- Whiskey → One Part
- Choose to add another ingredient: Apple Liqueur → One Part
- Choose not to add any other ingredients. Receive Gumshoe?
- Make your way to the other end of the room and examine the fireplace. Choose to Warm Gumshoe? Receive Piping Hot Gumshoe?
- Talk to William and choose that I’ve made the right drink.
- If done correctly, William will be saved and you’ll be awarded with the following achievement:

The Music Was Nice…
Save William
East Stairway – West Stairway – West Wing – Lab
- Once you regain control, exit to the Main Hall, then enter the East Wing by going through the door to the right of the Gallery.

- Follow the corridor all the way to its other end to find a Lion door. Head through it to discover East Stairway ← missable location required for Cartographer achievement.

- Head upstairs and through another Lion door to find yourself at the F1 East Wing.
- Follow the corridor to its other end and head through the door to reach F1 Main Hall.
- Now proceed through the door to the left of the Peacock door to reach F1 West Wing.

- Follow the corridor and watch the scene.
- Head through the previously boarded door.
- Walk downstairs and through the door.
- Proceed through the West Wing corridor and enter the semi-open room at the end to access the Lab.

- Approach the Vat for a scene.
- Once you regain control, turn around and pick up the Clean Cloth from the surgical table.

- Now interact with the Blood stain on the floor to receive Bloody Cloth.
- Interact with the Control Panel at the middle of the room to trigger a lockdown.
- Turn around and pick up the Screwdriver and the ID from the locker.


- Open the locker to the left and examine the Uniforms to receive a Lighter.

- Interact with the Control Panel to disable the lockdown.
- Examine the Panel at the bottom of the middle Vat to open it with the Screwdriver.
- Now interact with the sensor that revealed behind the panel.
- Interact with Control Panel and watch the scene.
- Exit the Lab and head down the corridor to trigger another scene.
- Go through the door that opened.

Pantry – Kitchen
- After the scene, pick up the Note from the floor.

- Turn around and examine the painting to reveal a keypad.

- Interact with the keypad and enter 6322.
- Head through the door.
- Solve the puzzle by moving the meat with the red arrows to the other side of the room:

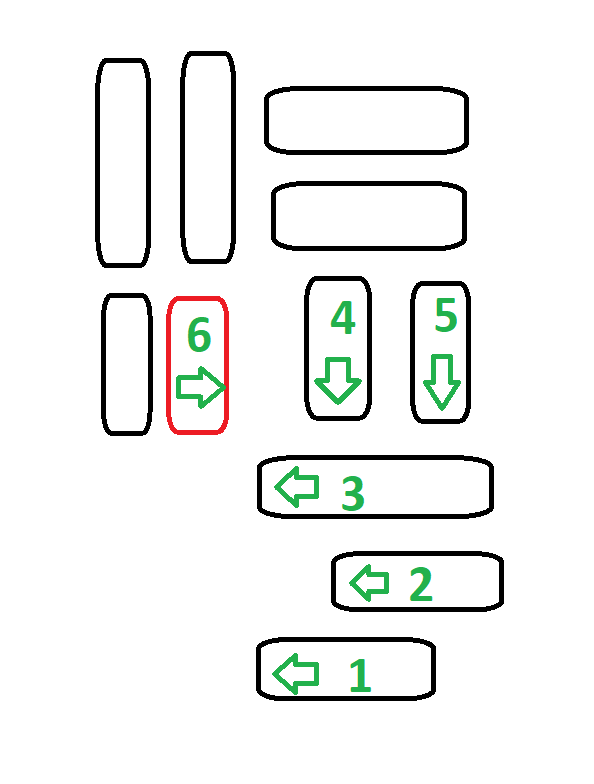

- Watch the scene and receive Kitchen Key.
- Exit through the door you came from and then to the corridor.
- Watch the scene.
- Open the door opposite from the Pantry to access the Kitchen.
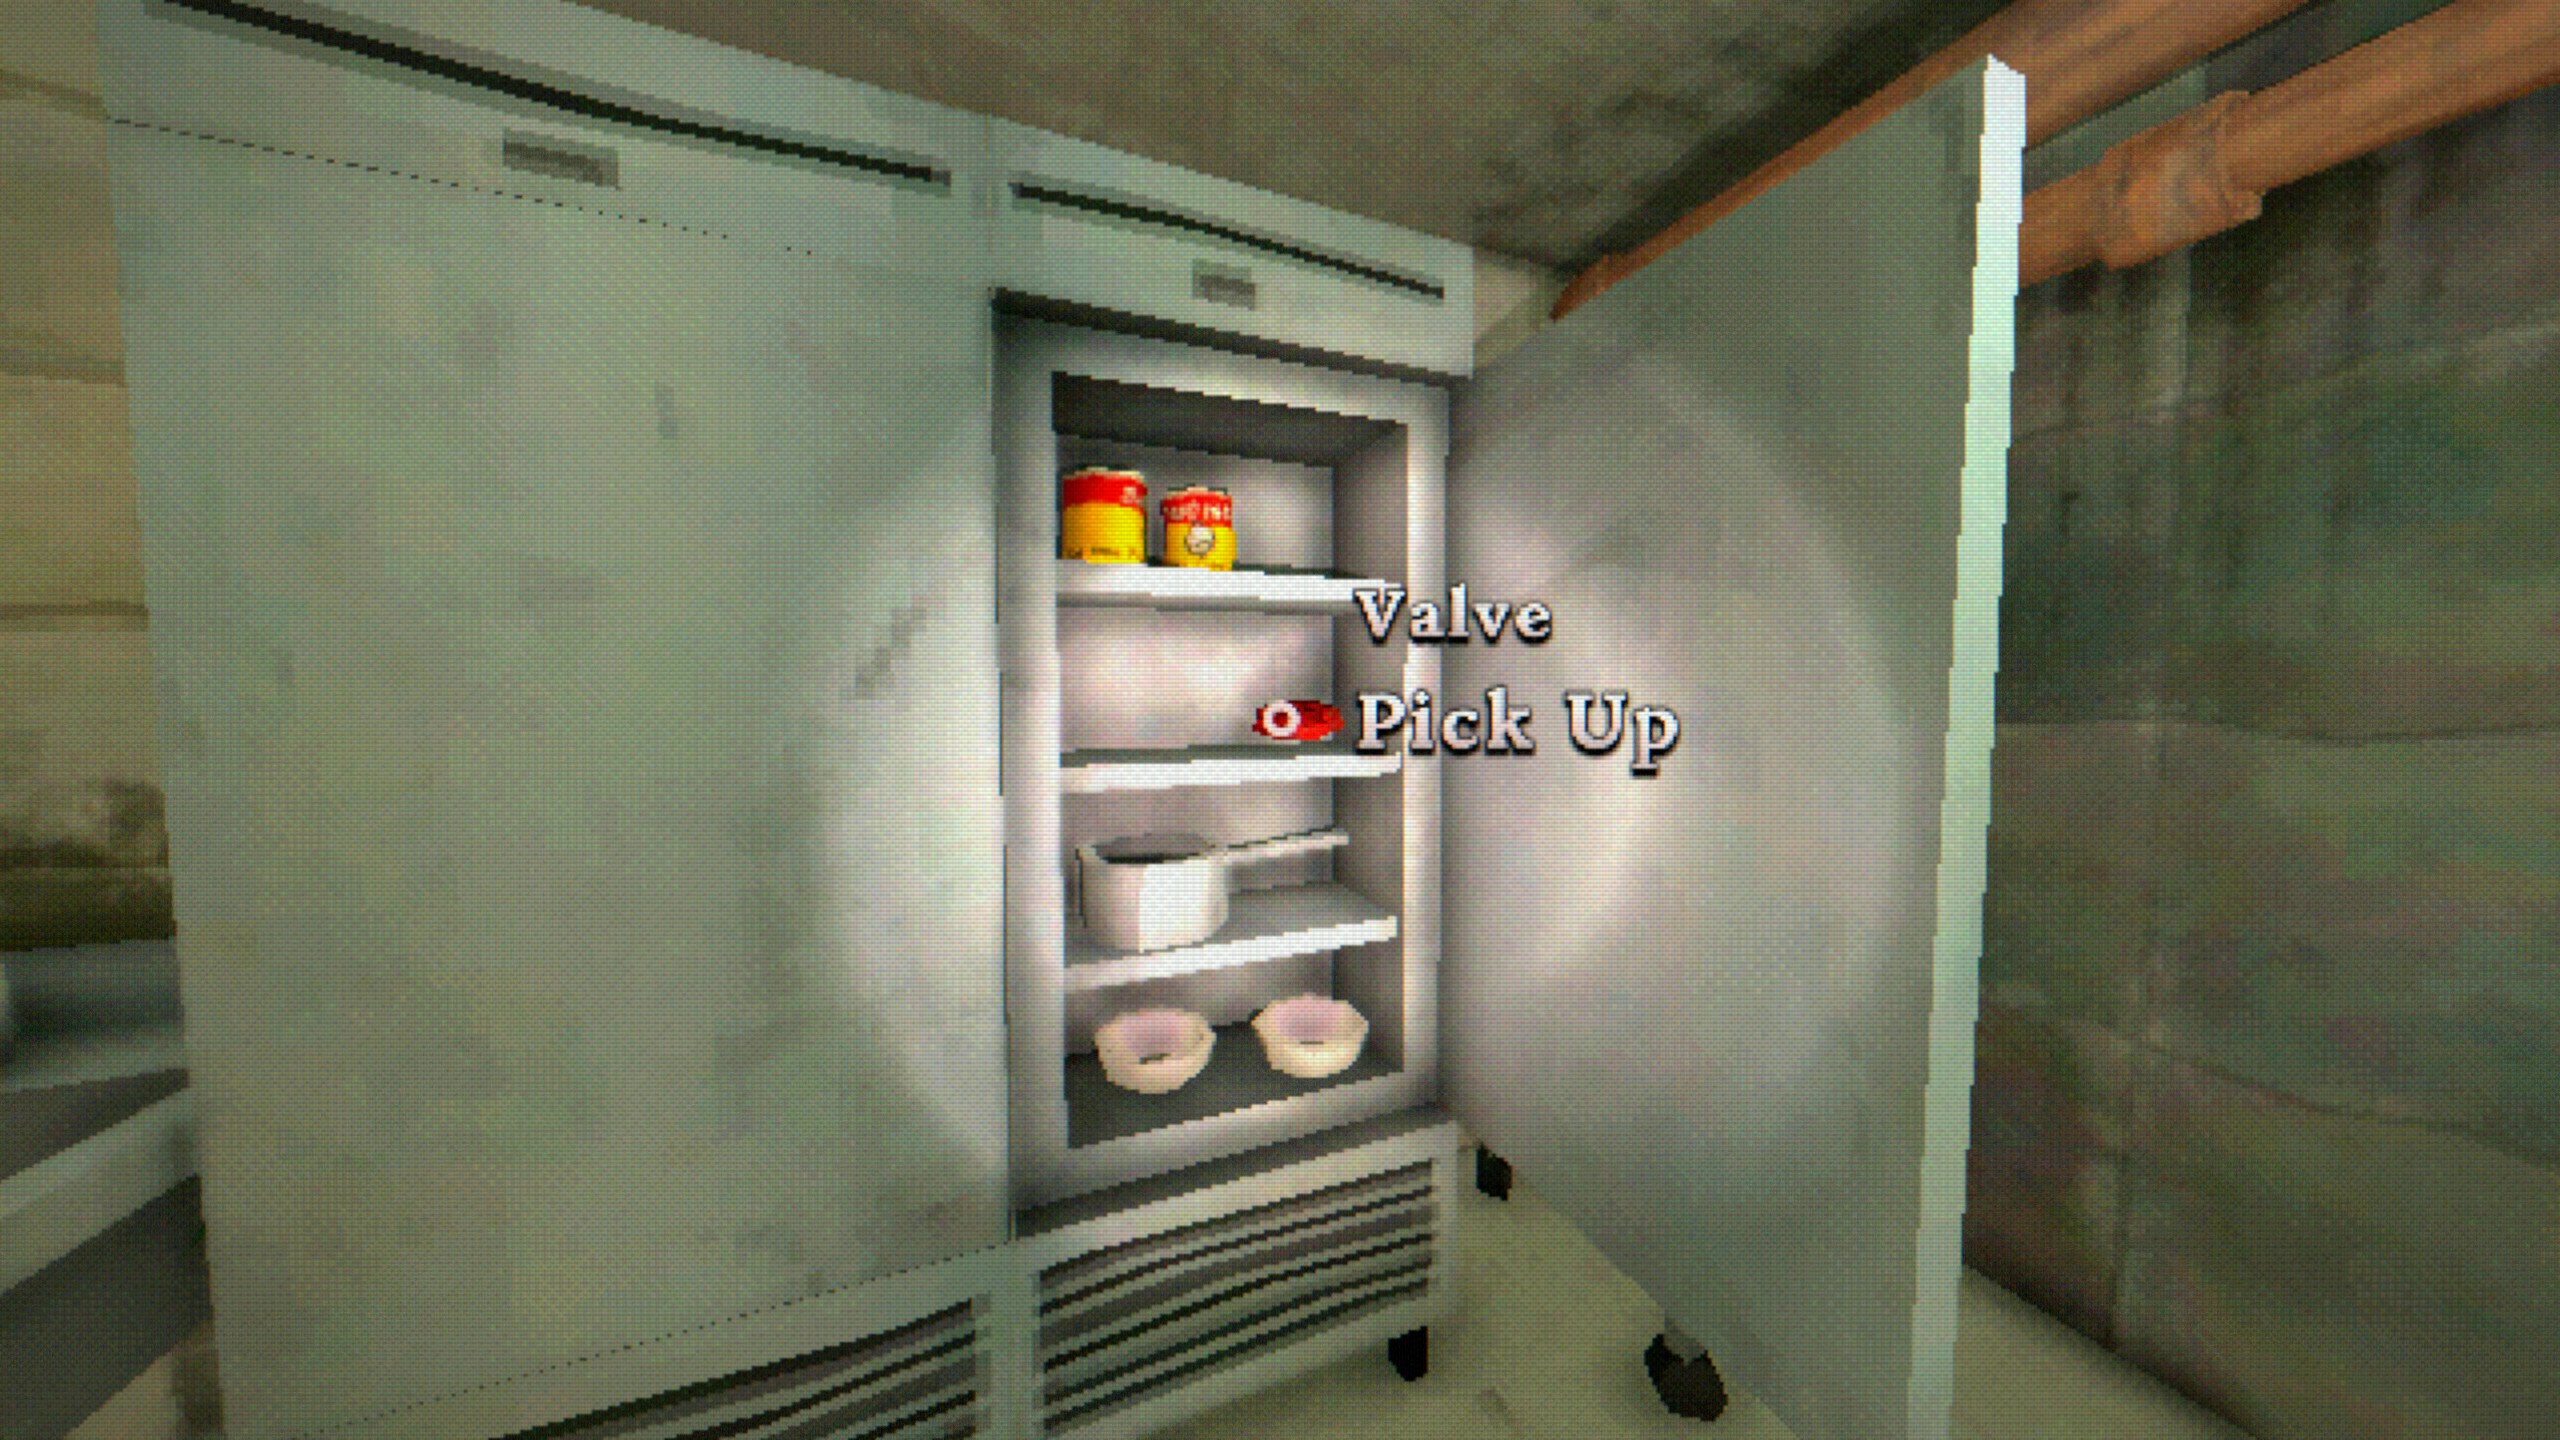
- Open the right door of the fridge and pick up the Valve.
- Turn around and approach the gas system above the oven, then use the Valve.
- Solve the puzzle:

- Head through the door.
Holding Cell – Kai
- After the cutscene, head into the first cell for another scene.
- Once you regain control, head into the computer room and enjoy another cutscene.
- Save your game → Slot 2 (just in case)
- Examine the computer and solve the puzzles. Press E to confirm each step.


- If done correctly, Kai will be saved and you’ll be awarded with the following achievement:

Co-op
Save Kai
- Watch the scenes.
Sub-Basement Entrance – Research and Development – Sub-Basement Hallway
- Once you regain control, exit to the Main Hall and head towards the exit door (marked as a padlock in map) to enjoy some more scenes.
- After the scenes, proceed through the corridor and through the door.
- Head straight the the next door and pick up the note.
- Turn right and pick up the Toyswords in between the computers.
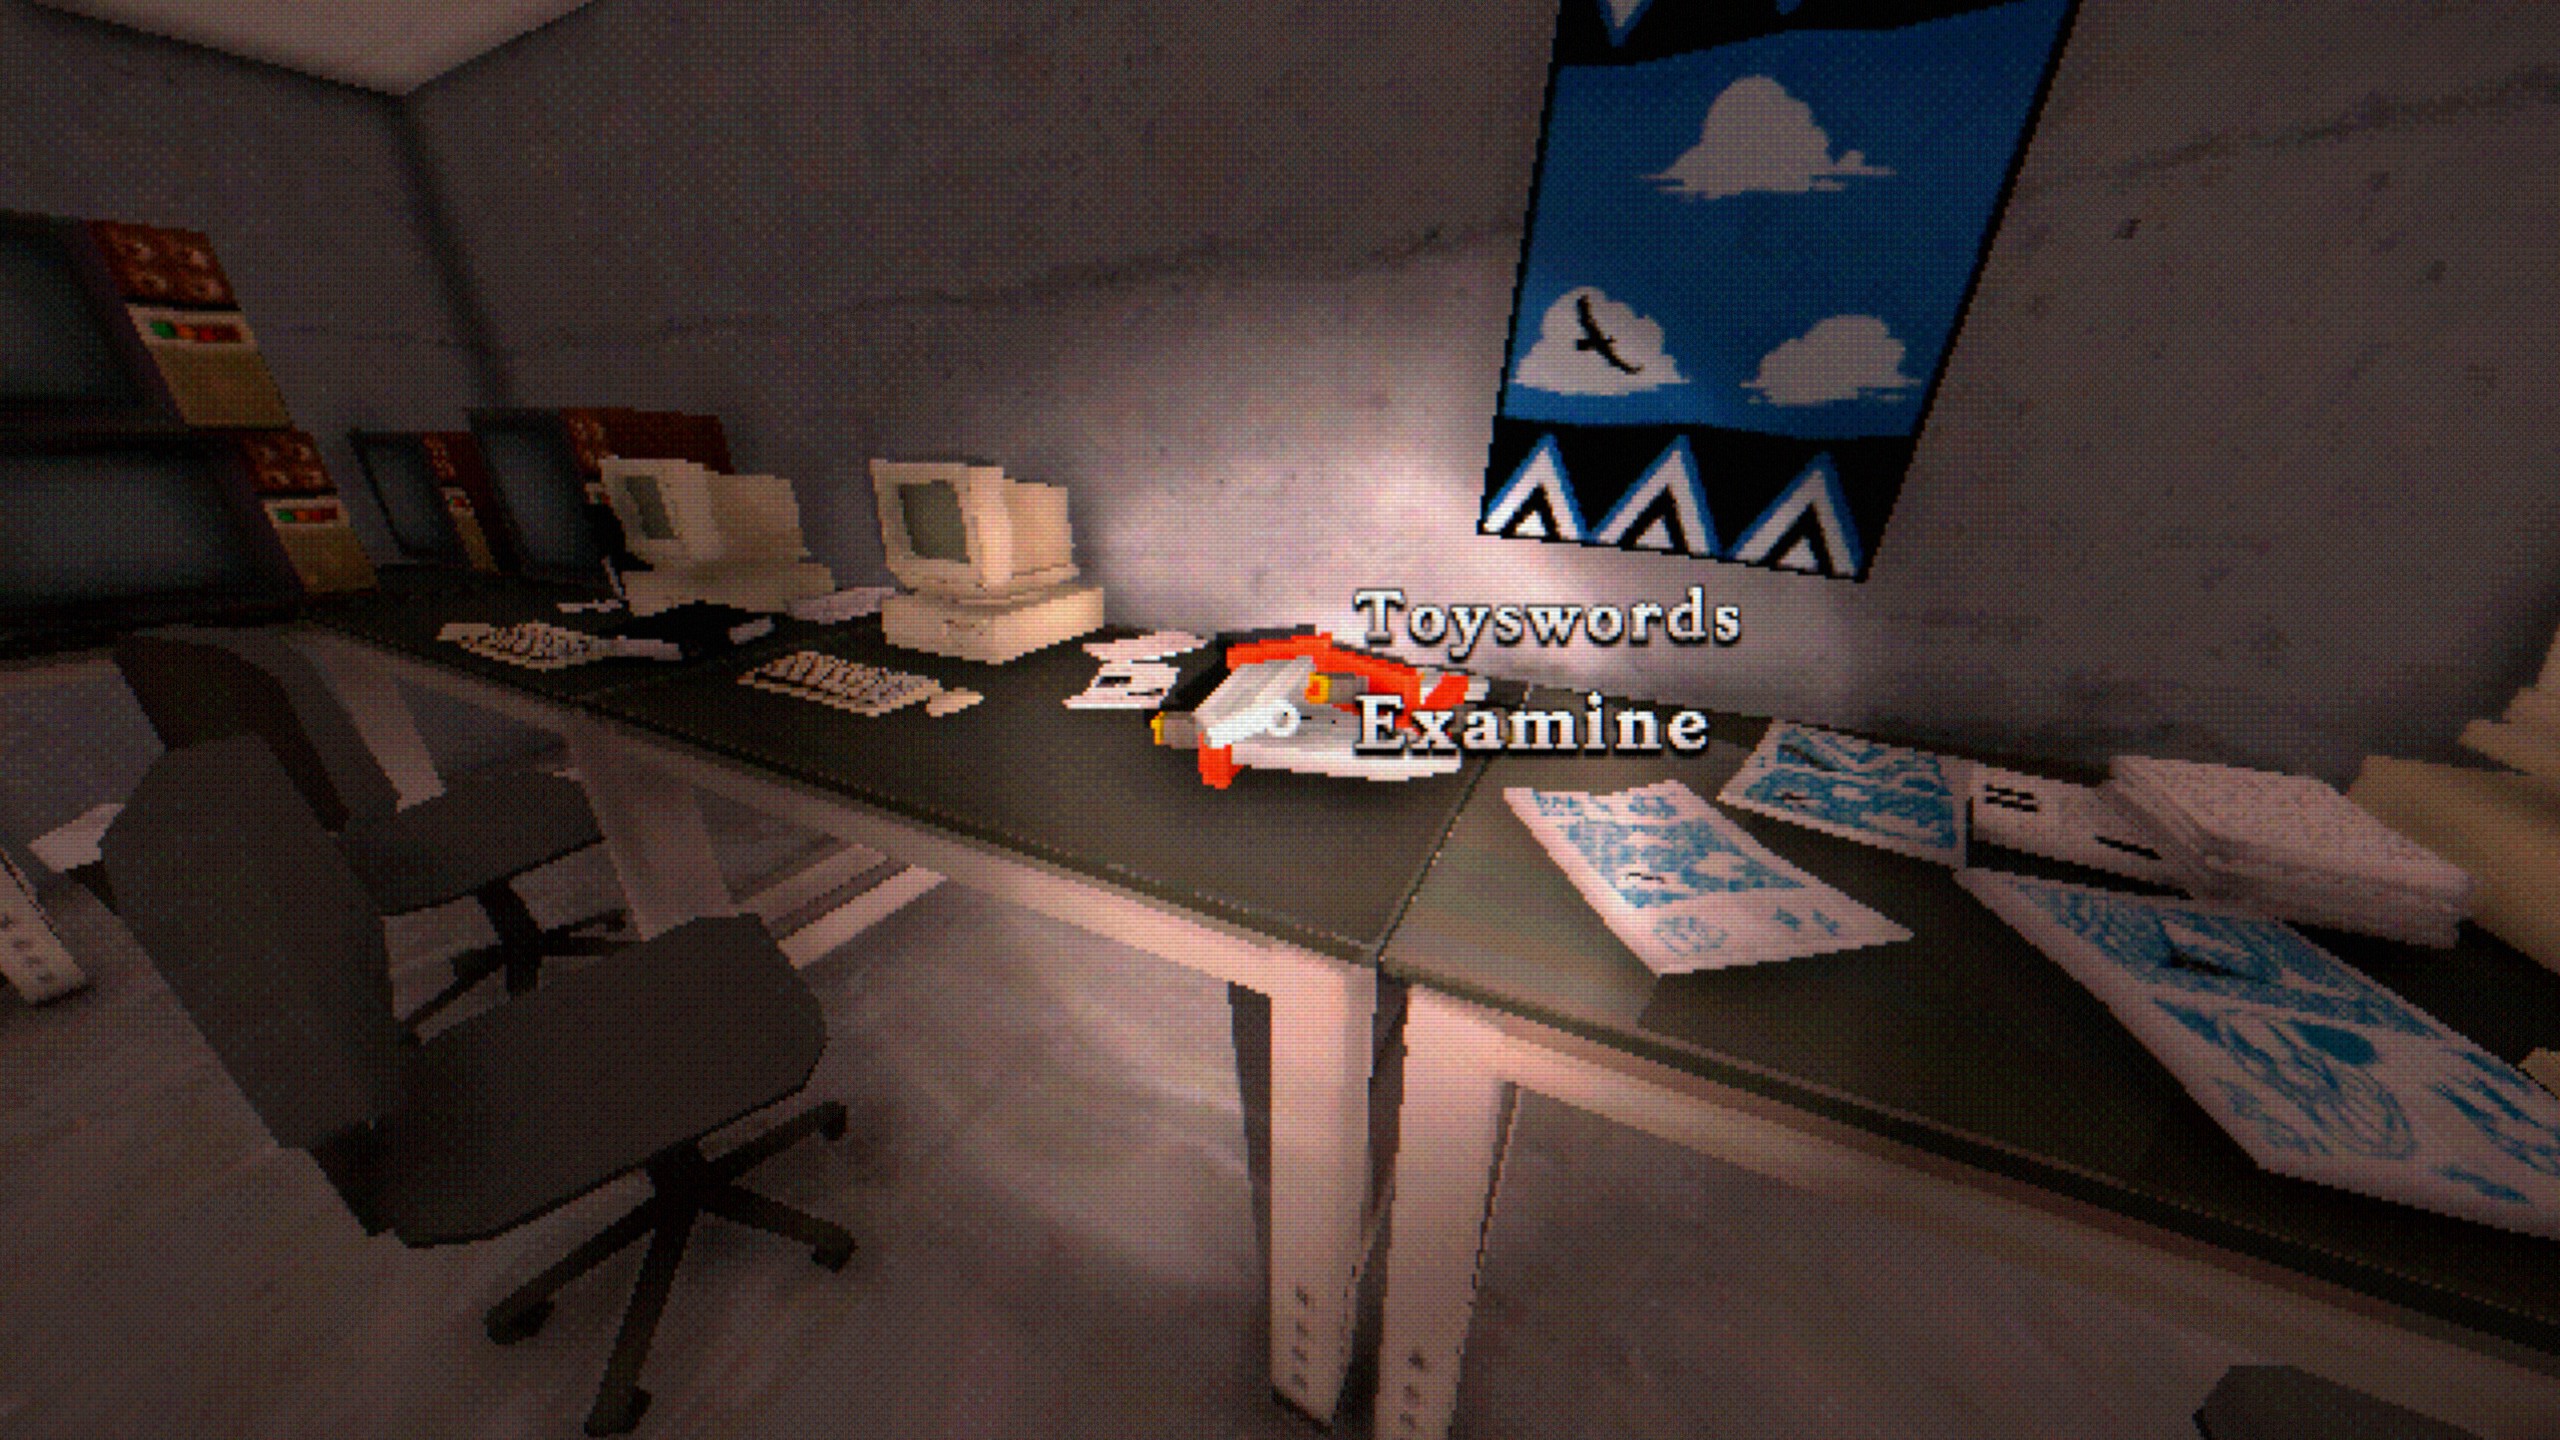
- Now solve the Toybox puzzle by sticking the swords on the respective slots.
- Green: Bottom
- Red: Right
- Blue: Left
- Yellow: Bottom
- Collect the note from the clown and pull the Book from the bookcase right of the door.

- Head through both doors and down the corridor.
- Watch the scenes. Receive Admin Keycard.
Reception – Subject Room – Control Room – Meeting Room – Director’s Office
Once you regain control, enter
BOTH Bathrooms(west from corridor) to add both locations to the Cartographer achievement.

Now head straight down the corridor and though the door on the left hand side to add this location to the Cartographer achievement.

Leave and enter the Control Room.

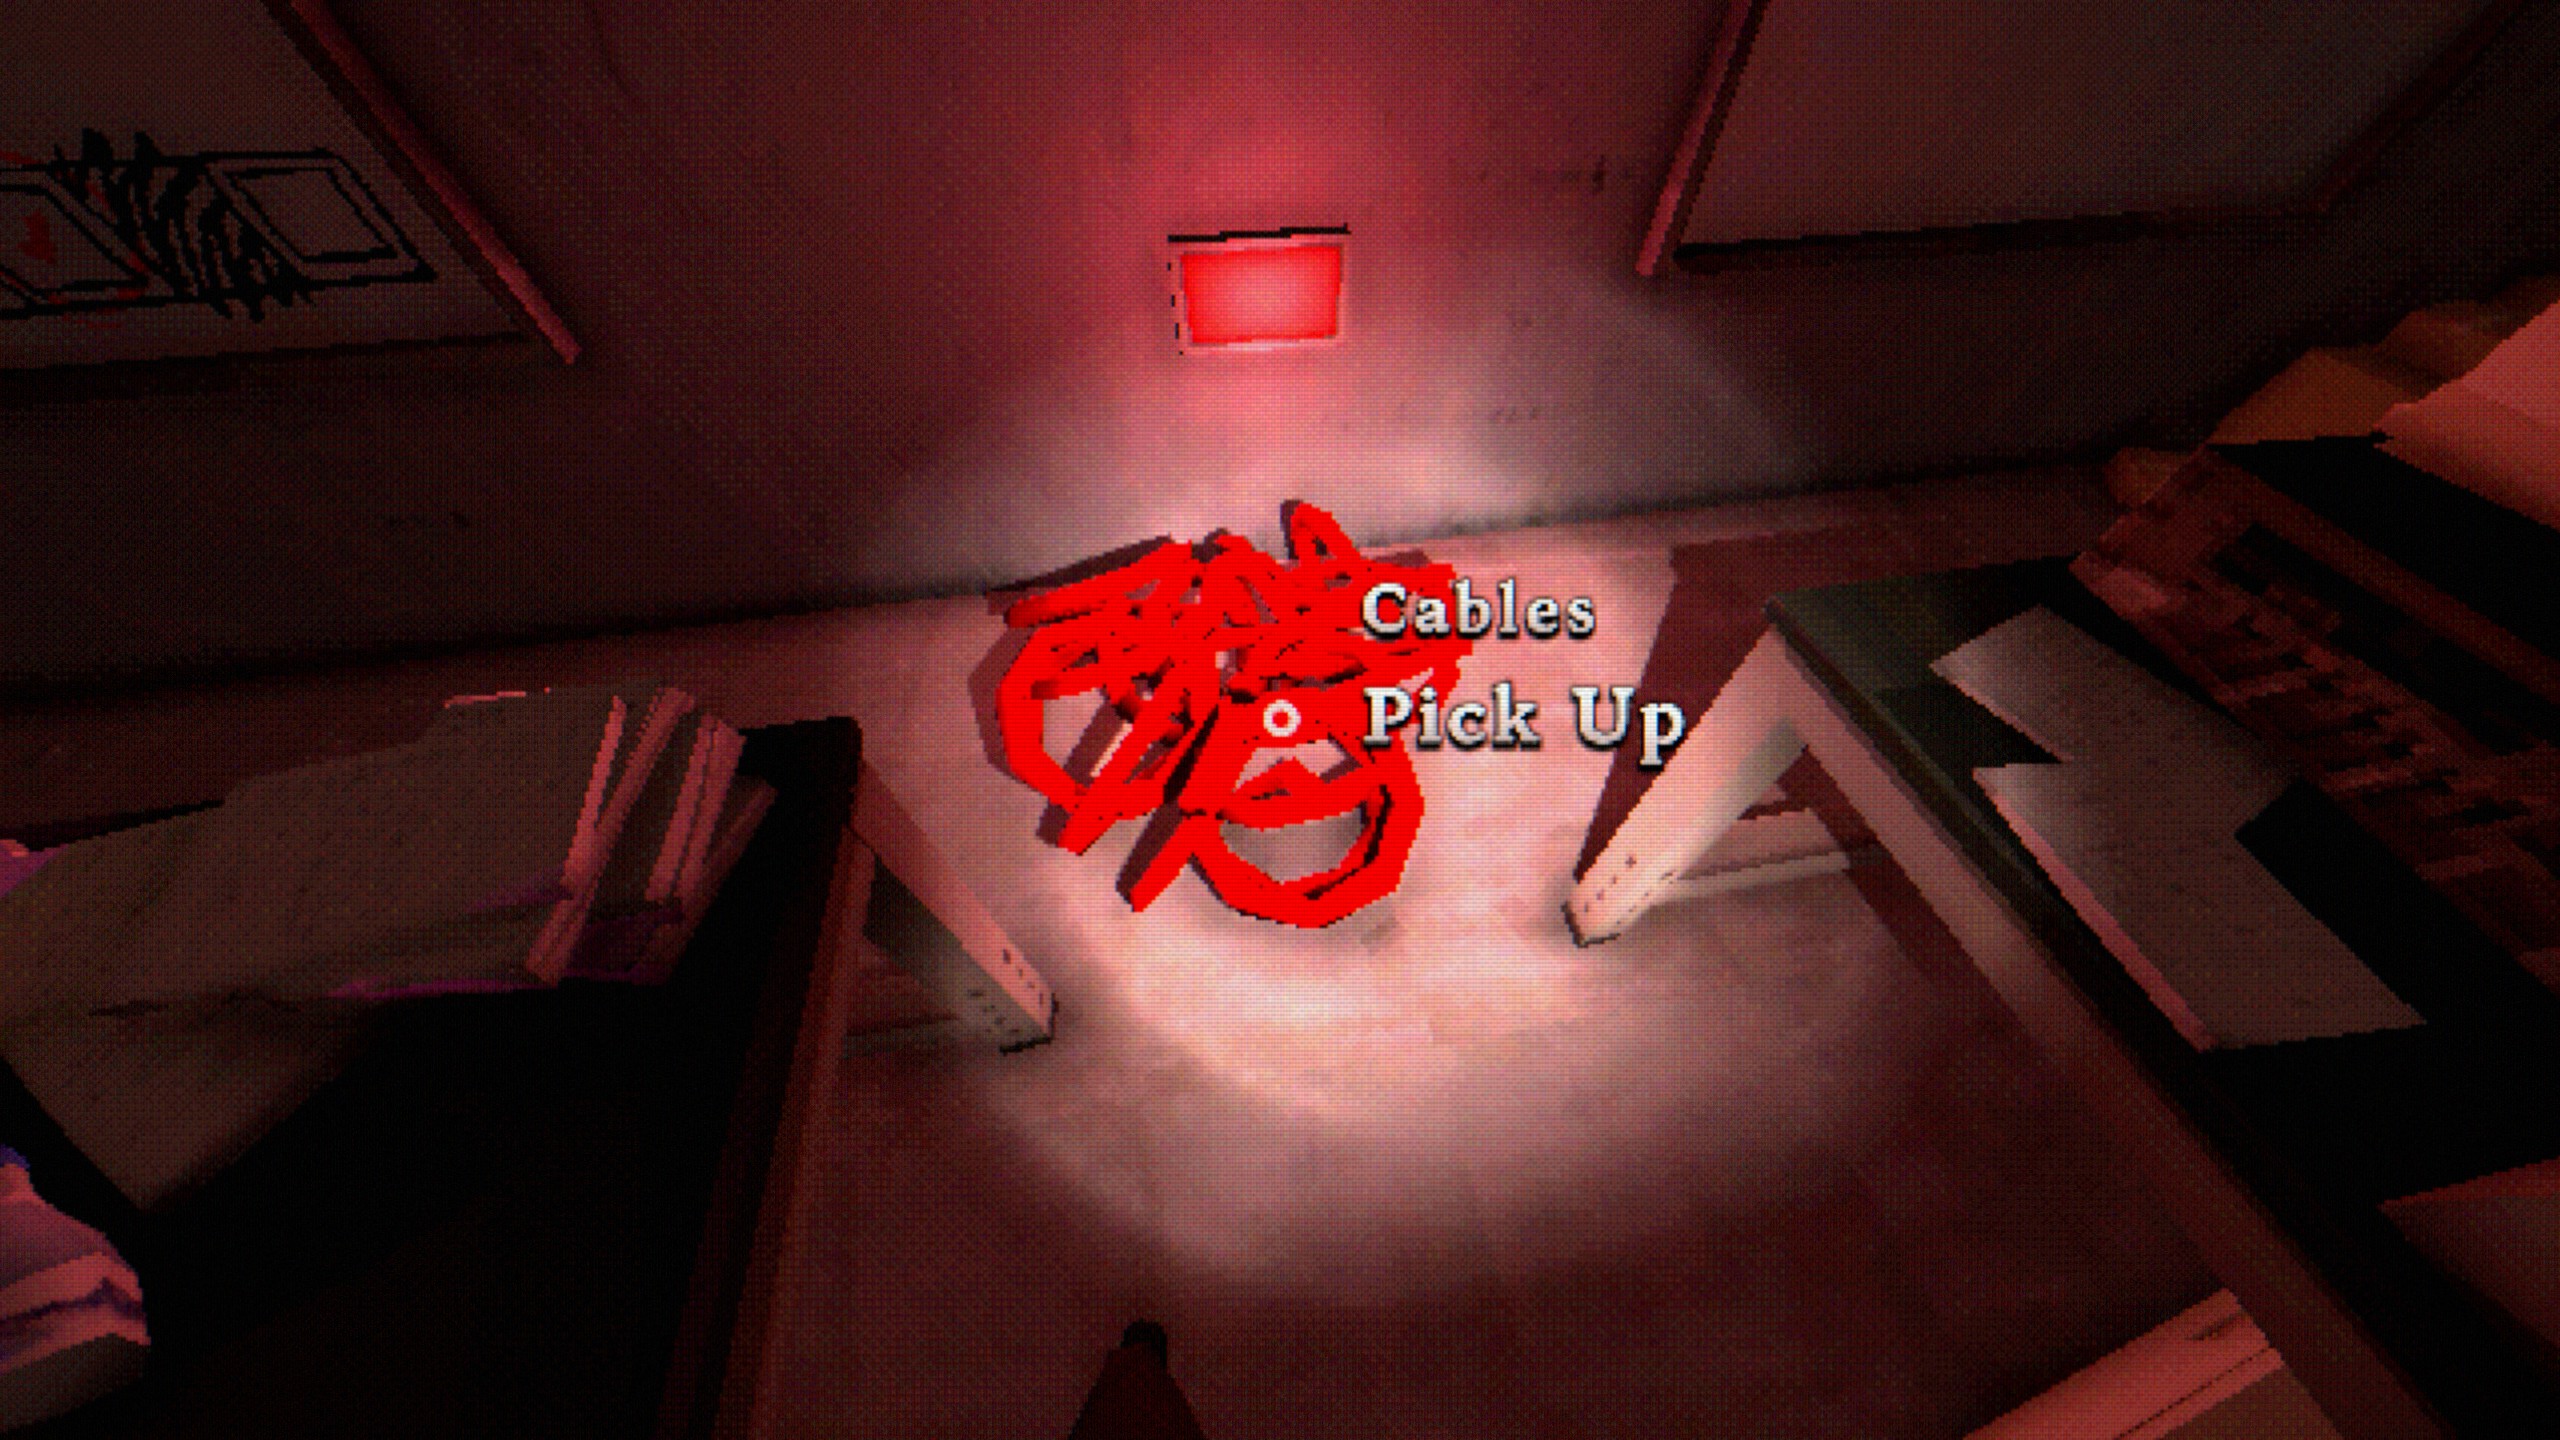
Pick up the
Cables from the left hand side of the room.
Now solve the colored cables puzzle at the right hand side of the room.

Interact with the
Computer Tableat the center of the room and exit to the corridor.
Now enter the Meeting Room and head through another door to access the Director’s Office.

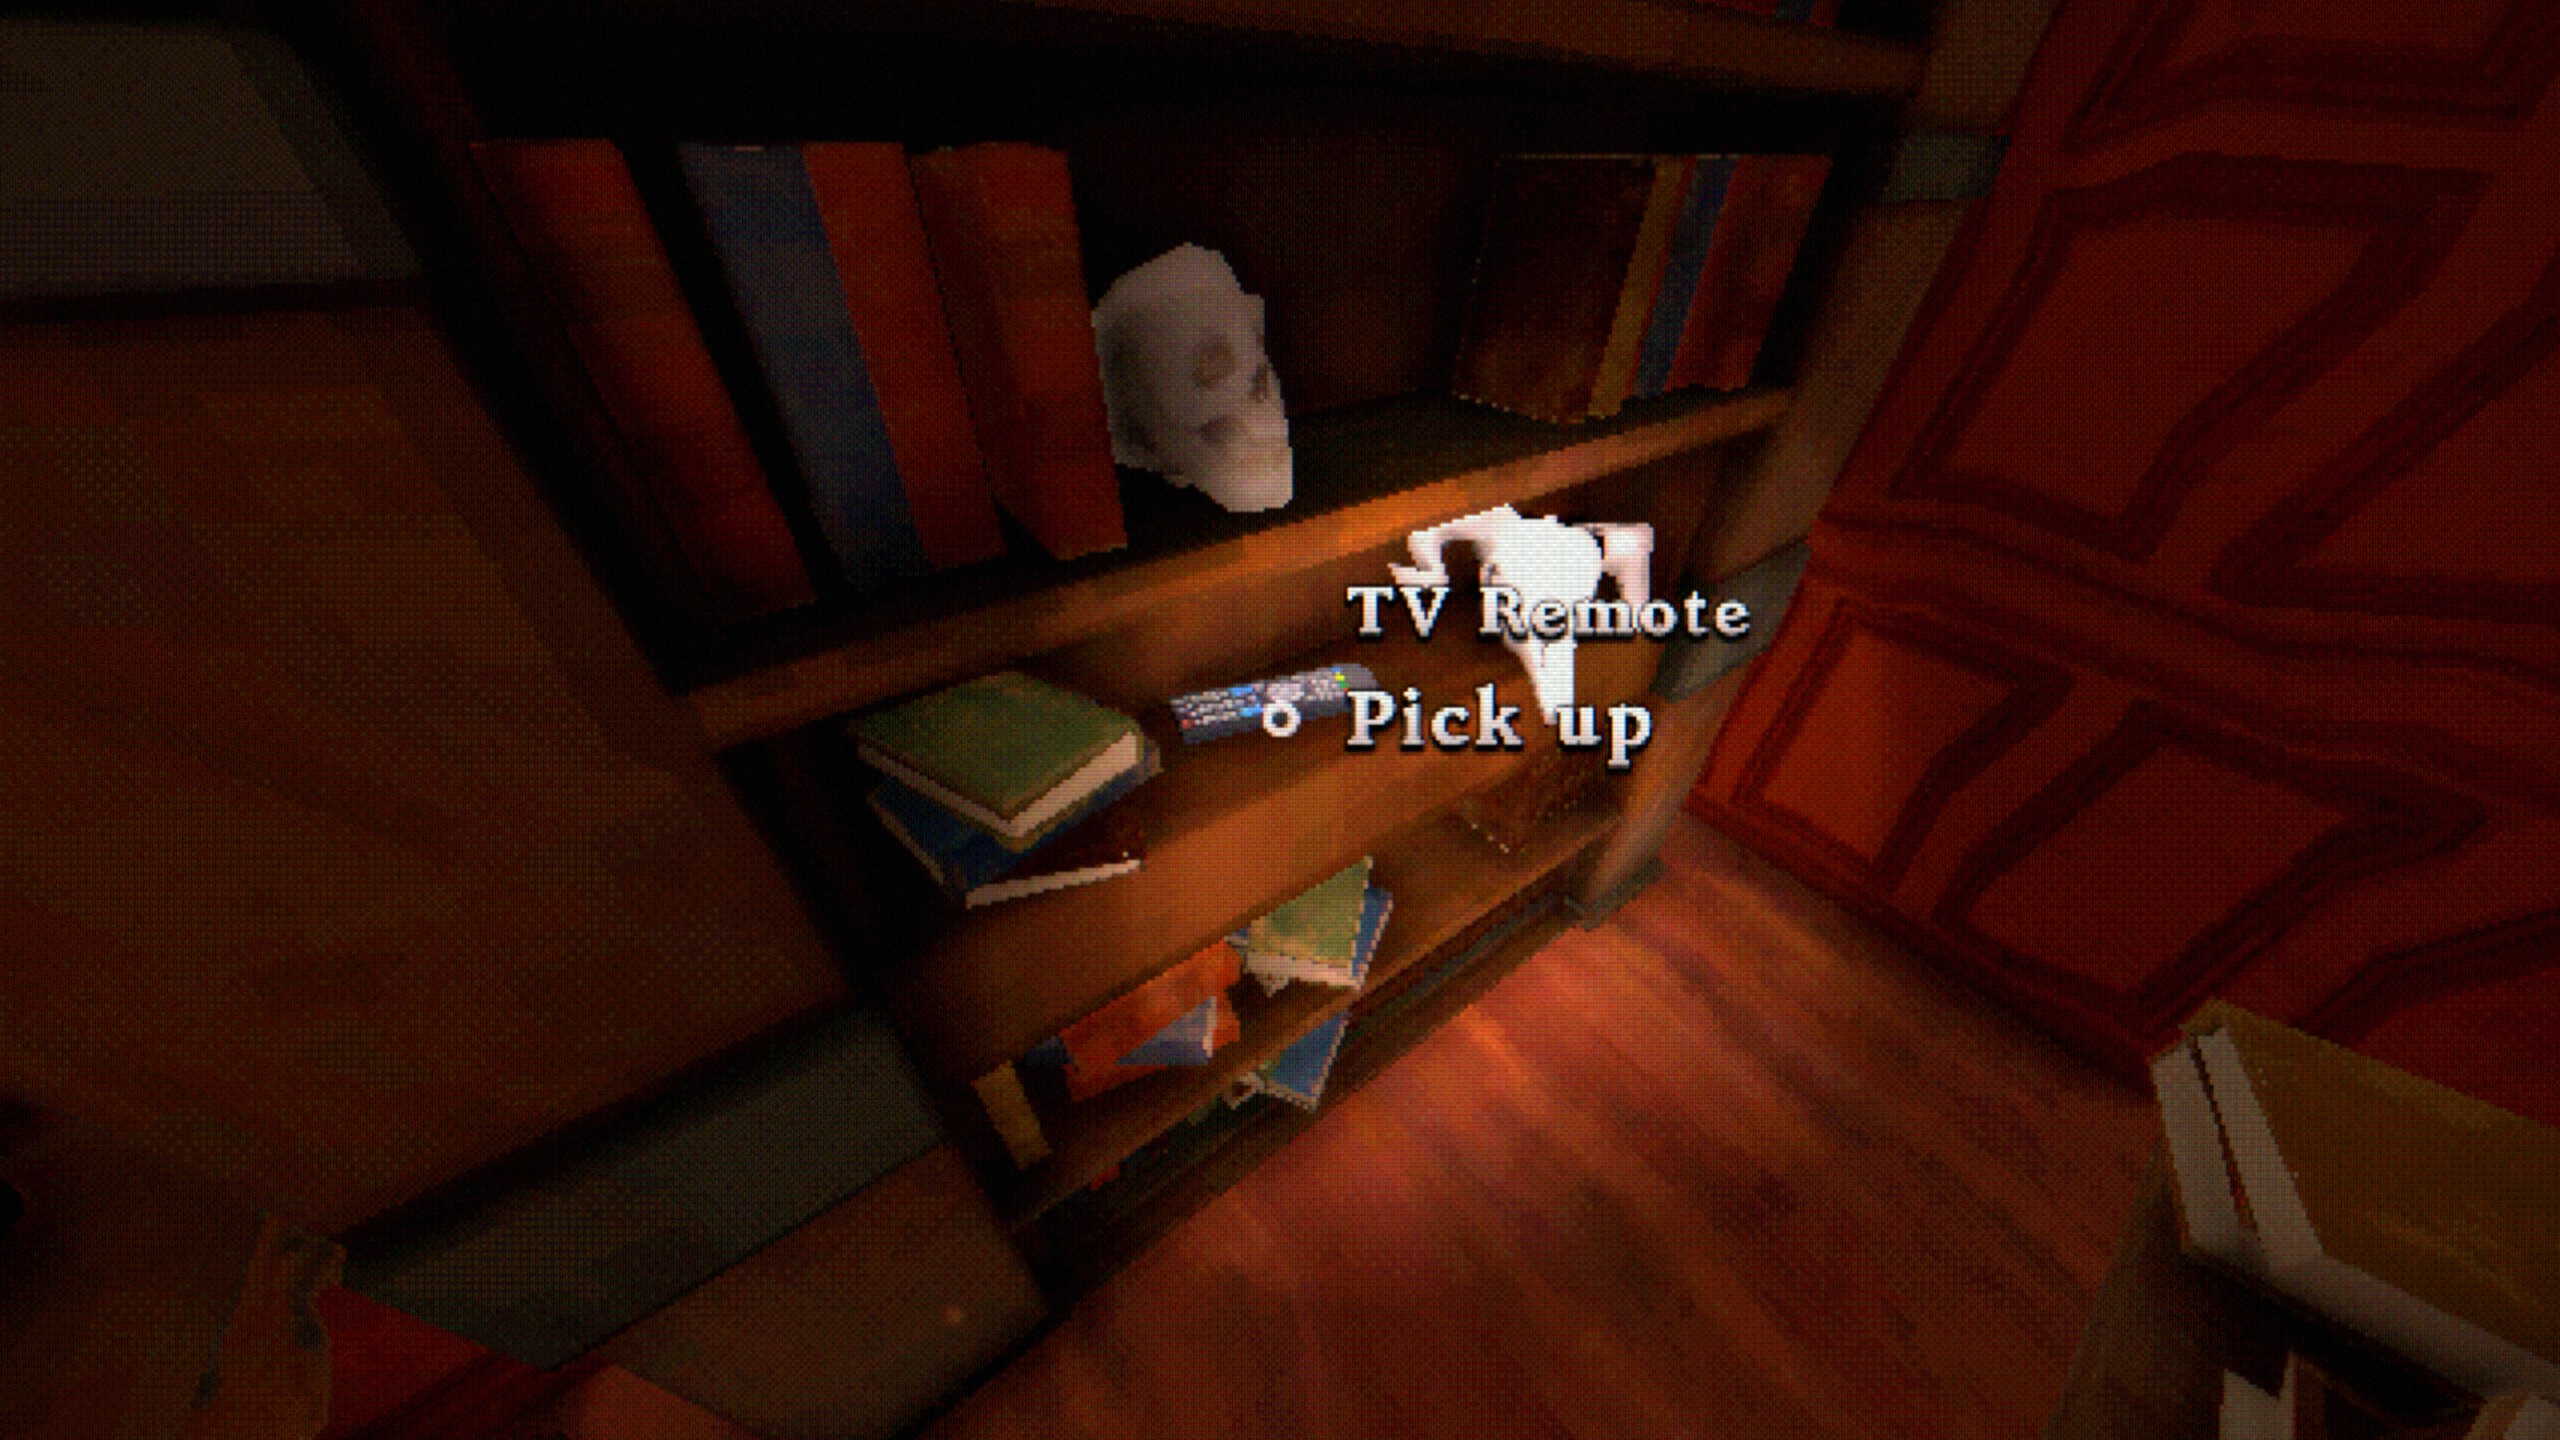
Pick up the
TV Remoteand use it twice on
Director TVto reveal a pattern.
Interact with the following painting to reveal a control panel.

Now head back to the
Reception.
Cellar – Hidden Crypt – Sealed Crypt
- As soon as you return to Reception, you’ll be greeted by a scene. DON’T SKIP. Instead, go slowly and answer with NO when asked if you’re Really ready to leave.

- Save your game → Slot 2
- Don’t overwrite this save as it will be used for the other endings.
- Once you regain control, head down the corridor and through the door to Sub-Basement Entrance → Research and Development → Sub-Basement Entrance → Sub-Basement Hallway → turn around and take the door to Sub-Basement Entrance → Research and Development → Sub-Basement Entrance → take the Elevator.

- You’ll be taken down to the Cellar.
- Go around the barrels and examine the second from the end to reveal a secret passage.
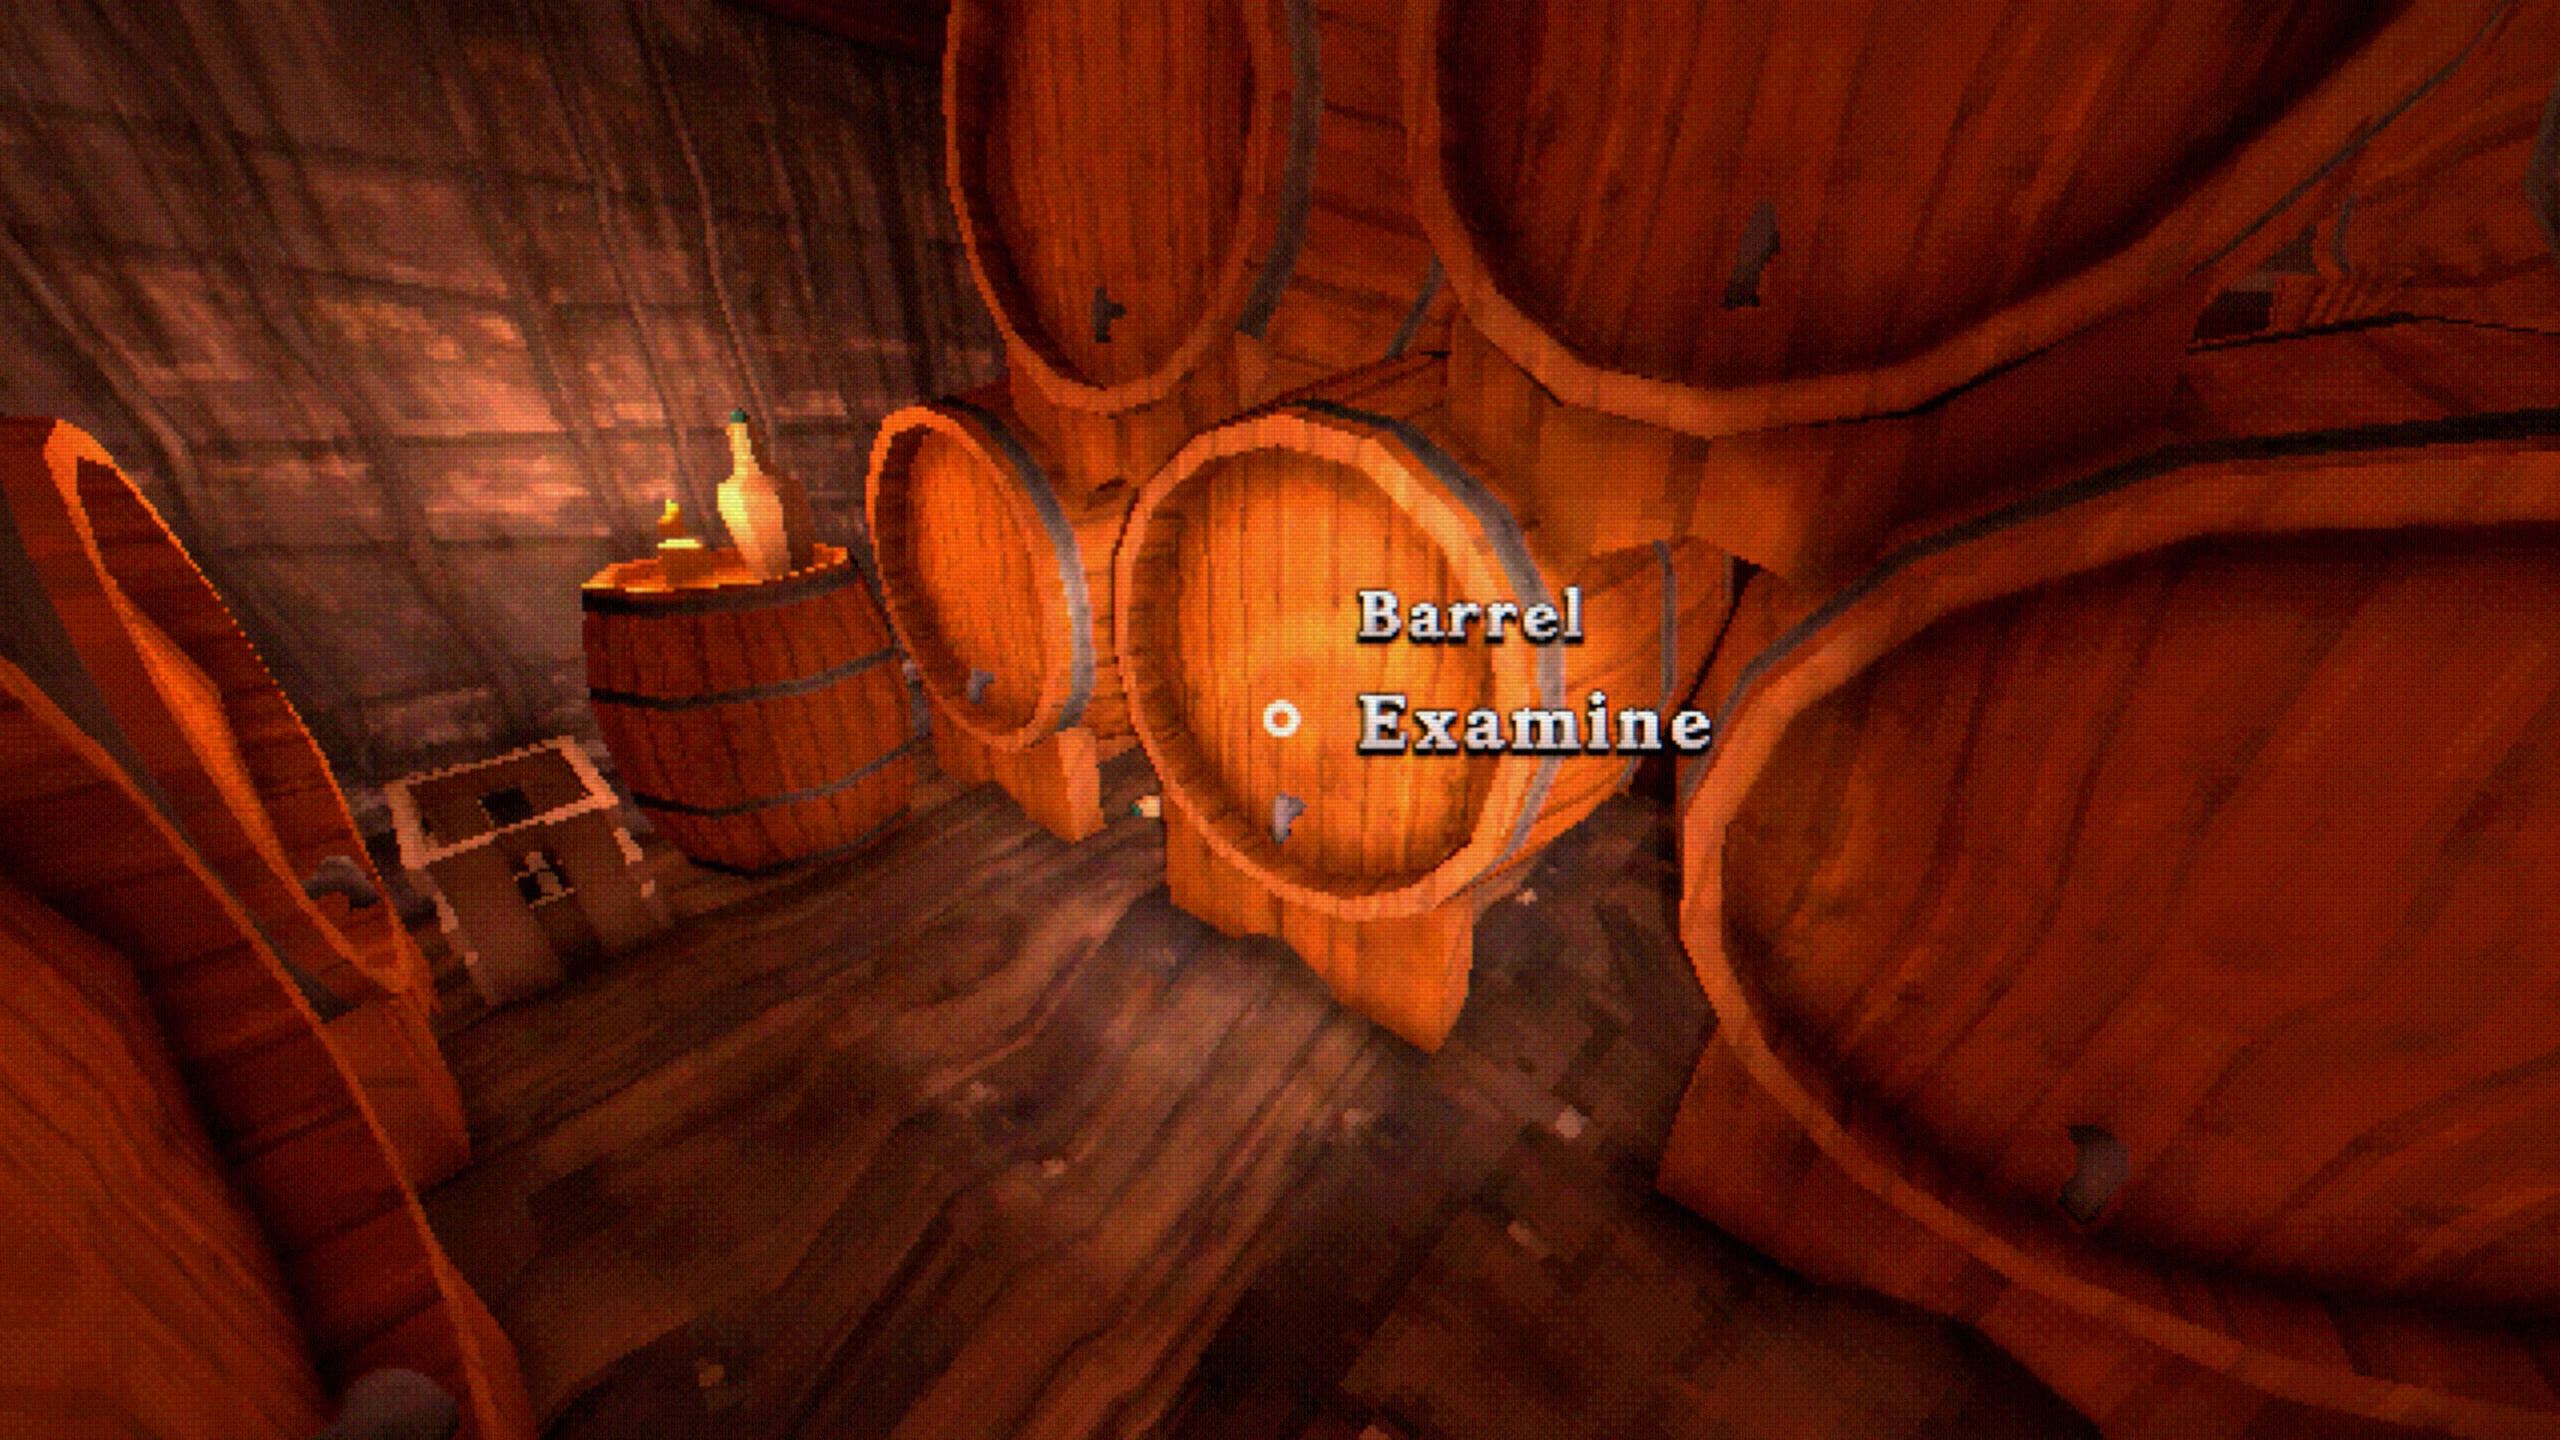
- Solve the puzzle with the dials. Solution from left to right:

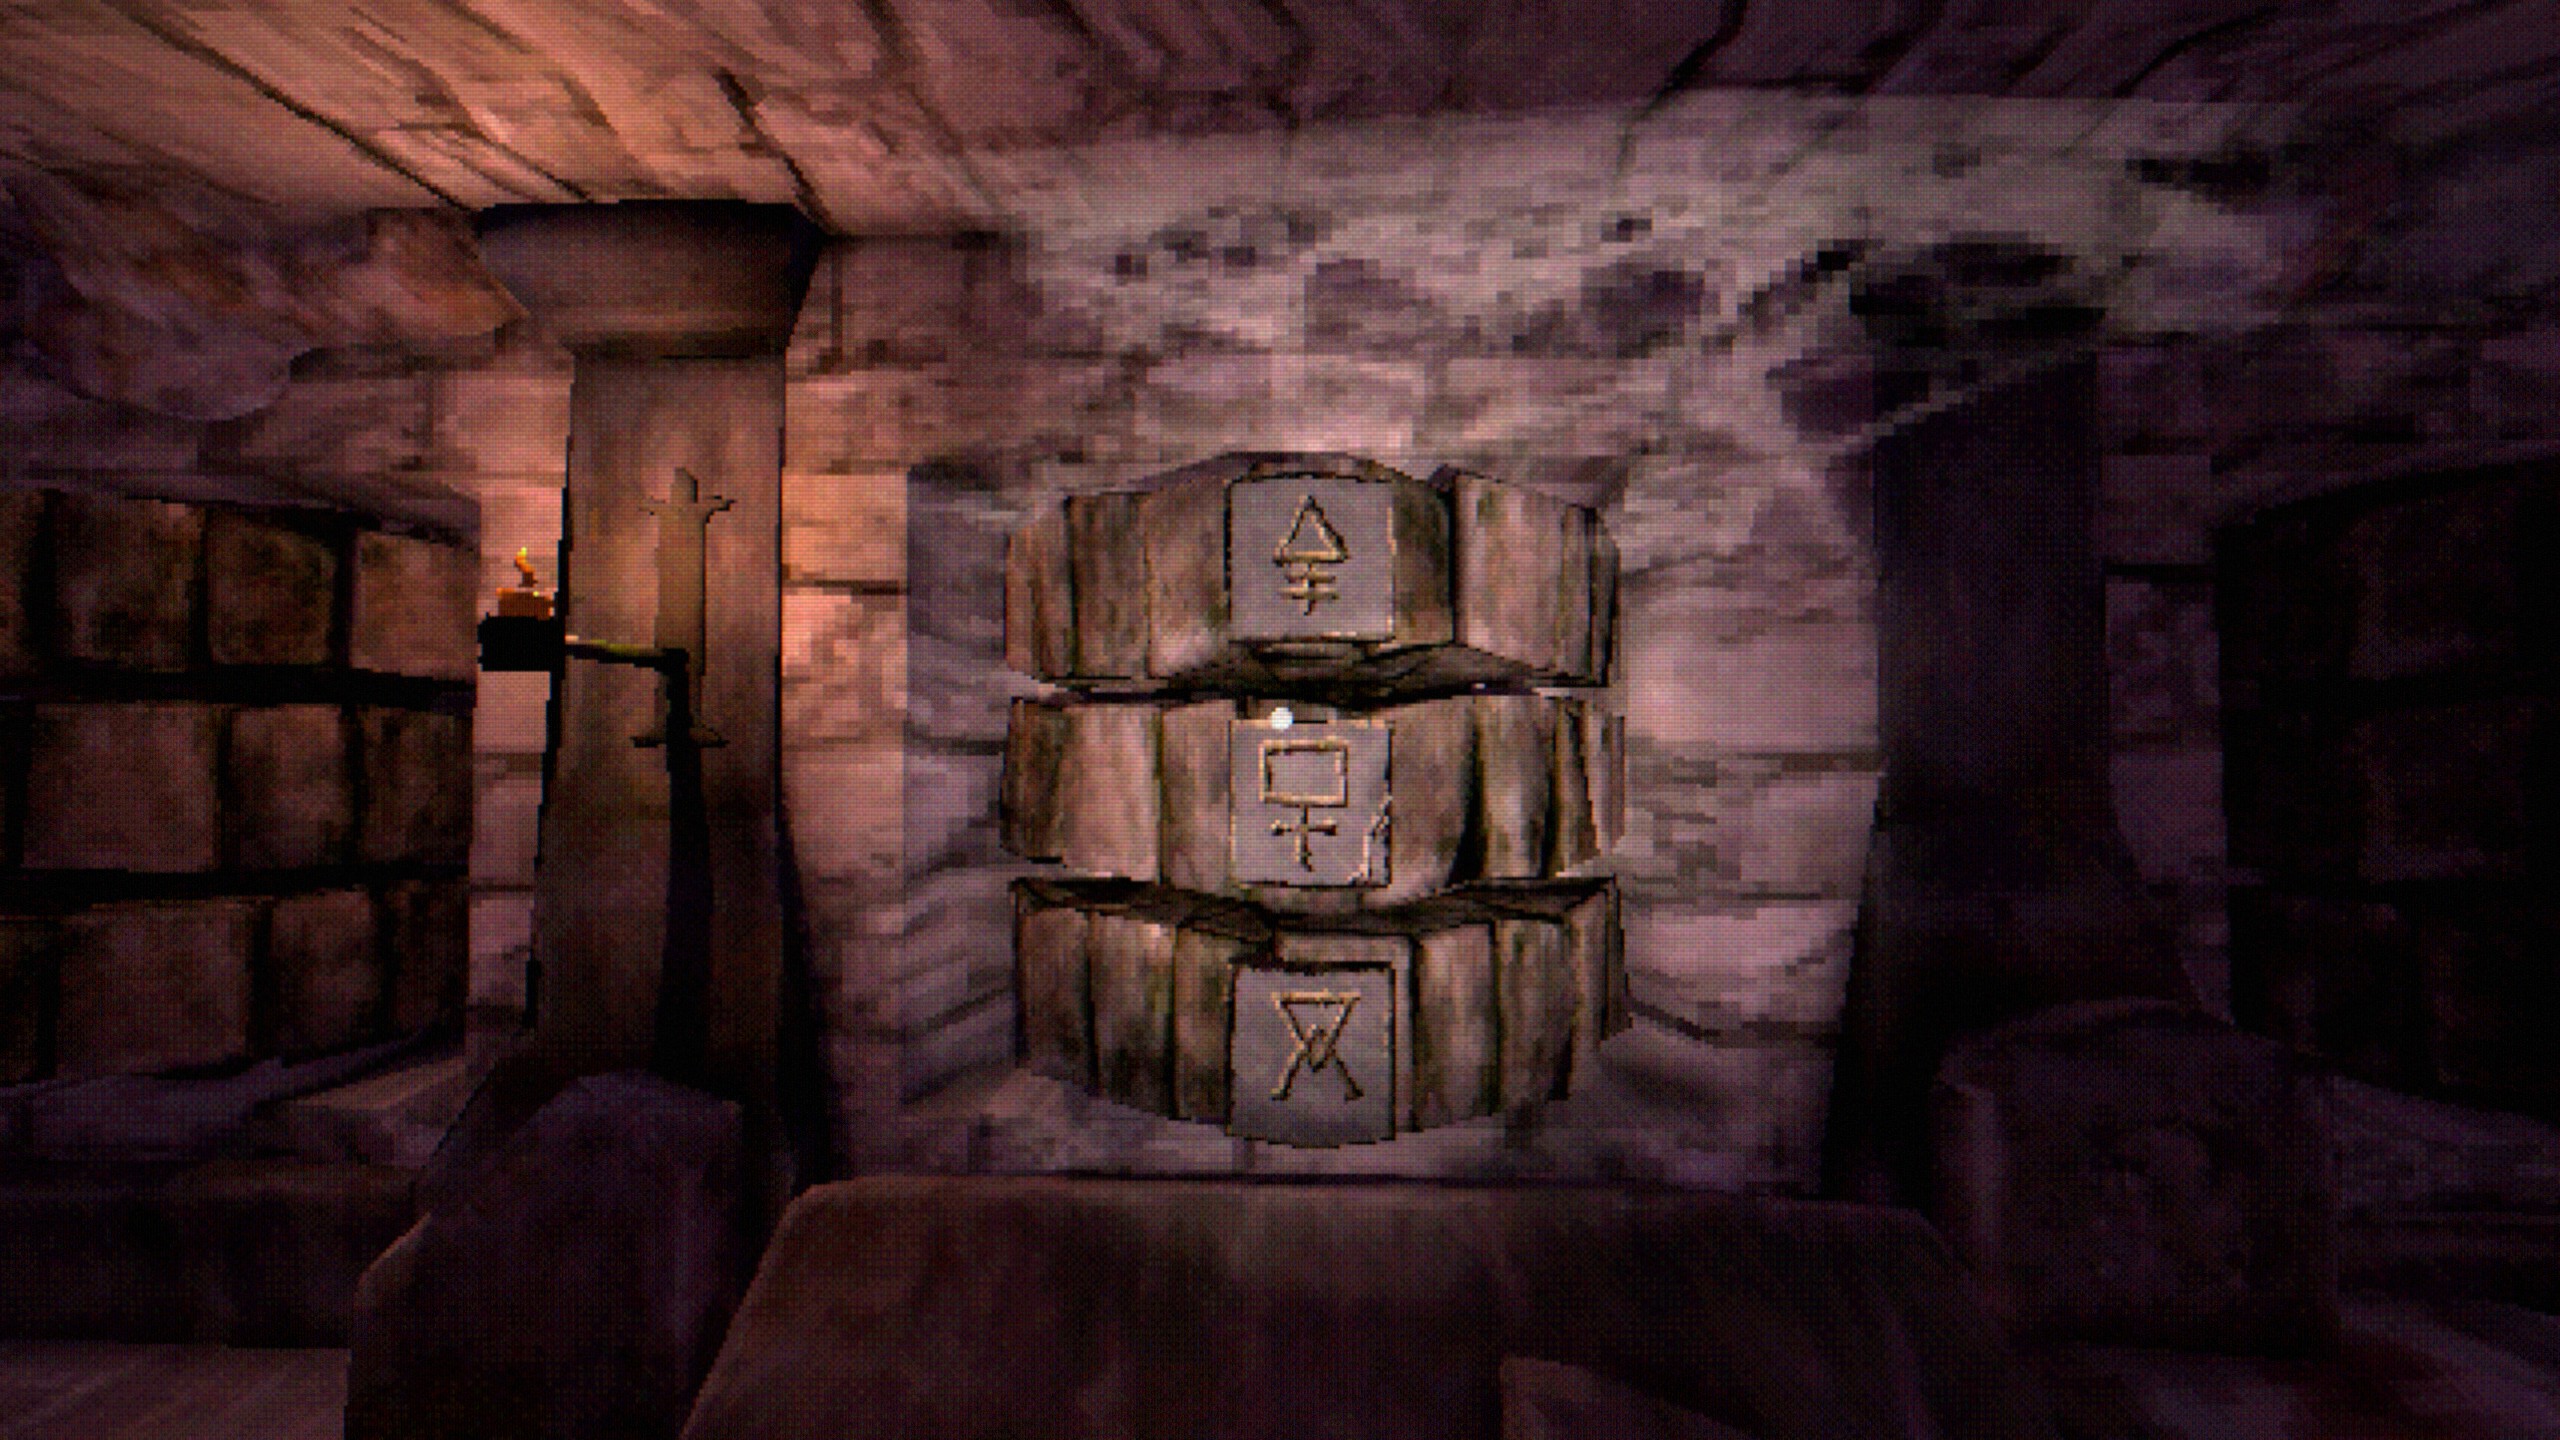

- Solving the puzzle reveals a staircase. Head down.
- This is the final location for the Cartographer achievement. If you visited every location, press M to trigger the achievement:

Cartographer
Complete the map
- Facing the staircase, go right and pick up the Handle from the grave slab.

- Use the Handle on the Mechanism just in front of the staircase.

- Watch the scenes.
The Well – ??? – True Ending
- Once you regain control, head all the way downstairs, take a left, and follow the cavern to Cave Lake.
- Examine the Cave Stone Pedestal to start one final puzzle.

- There’s 3 types of sigils:
- 1 which connects 1 to 1 in | shape.
- L which connects 1 to 1 in L shape.
- W which connects 3 sides in _|_ shape.
- Swap the sigils to their correct positions, then rotate them to make all the beams to reach the pedestal. Solution:

- Once the puzzle is complete, follow the pathway that reveals and talk to ???.
- At the Bathroom section, turn around and interact with the painting, then examine the mirror.

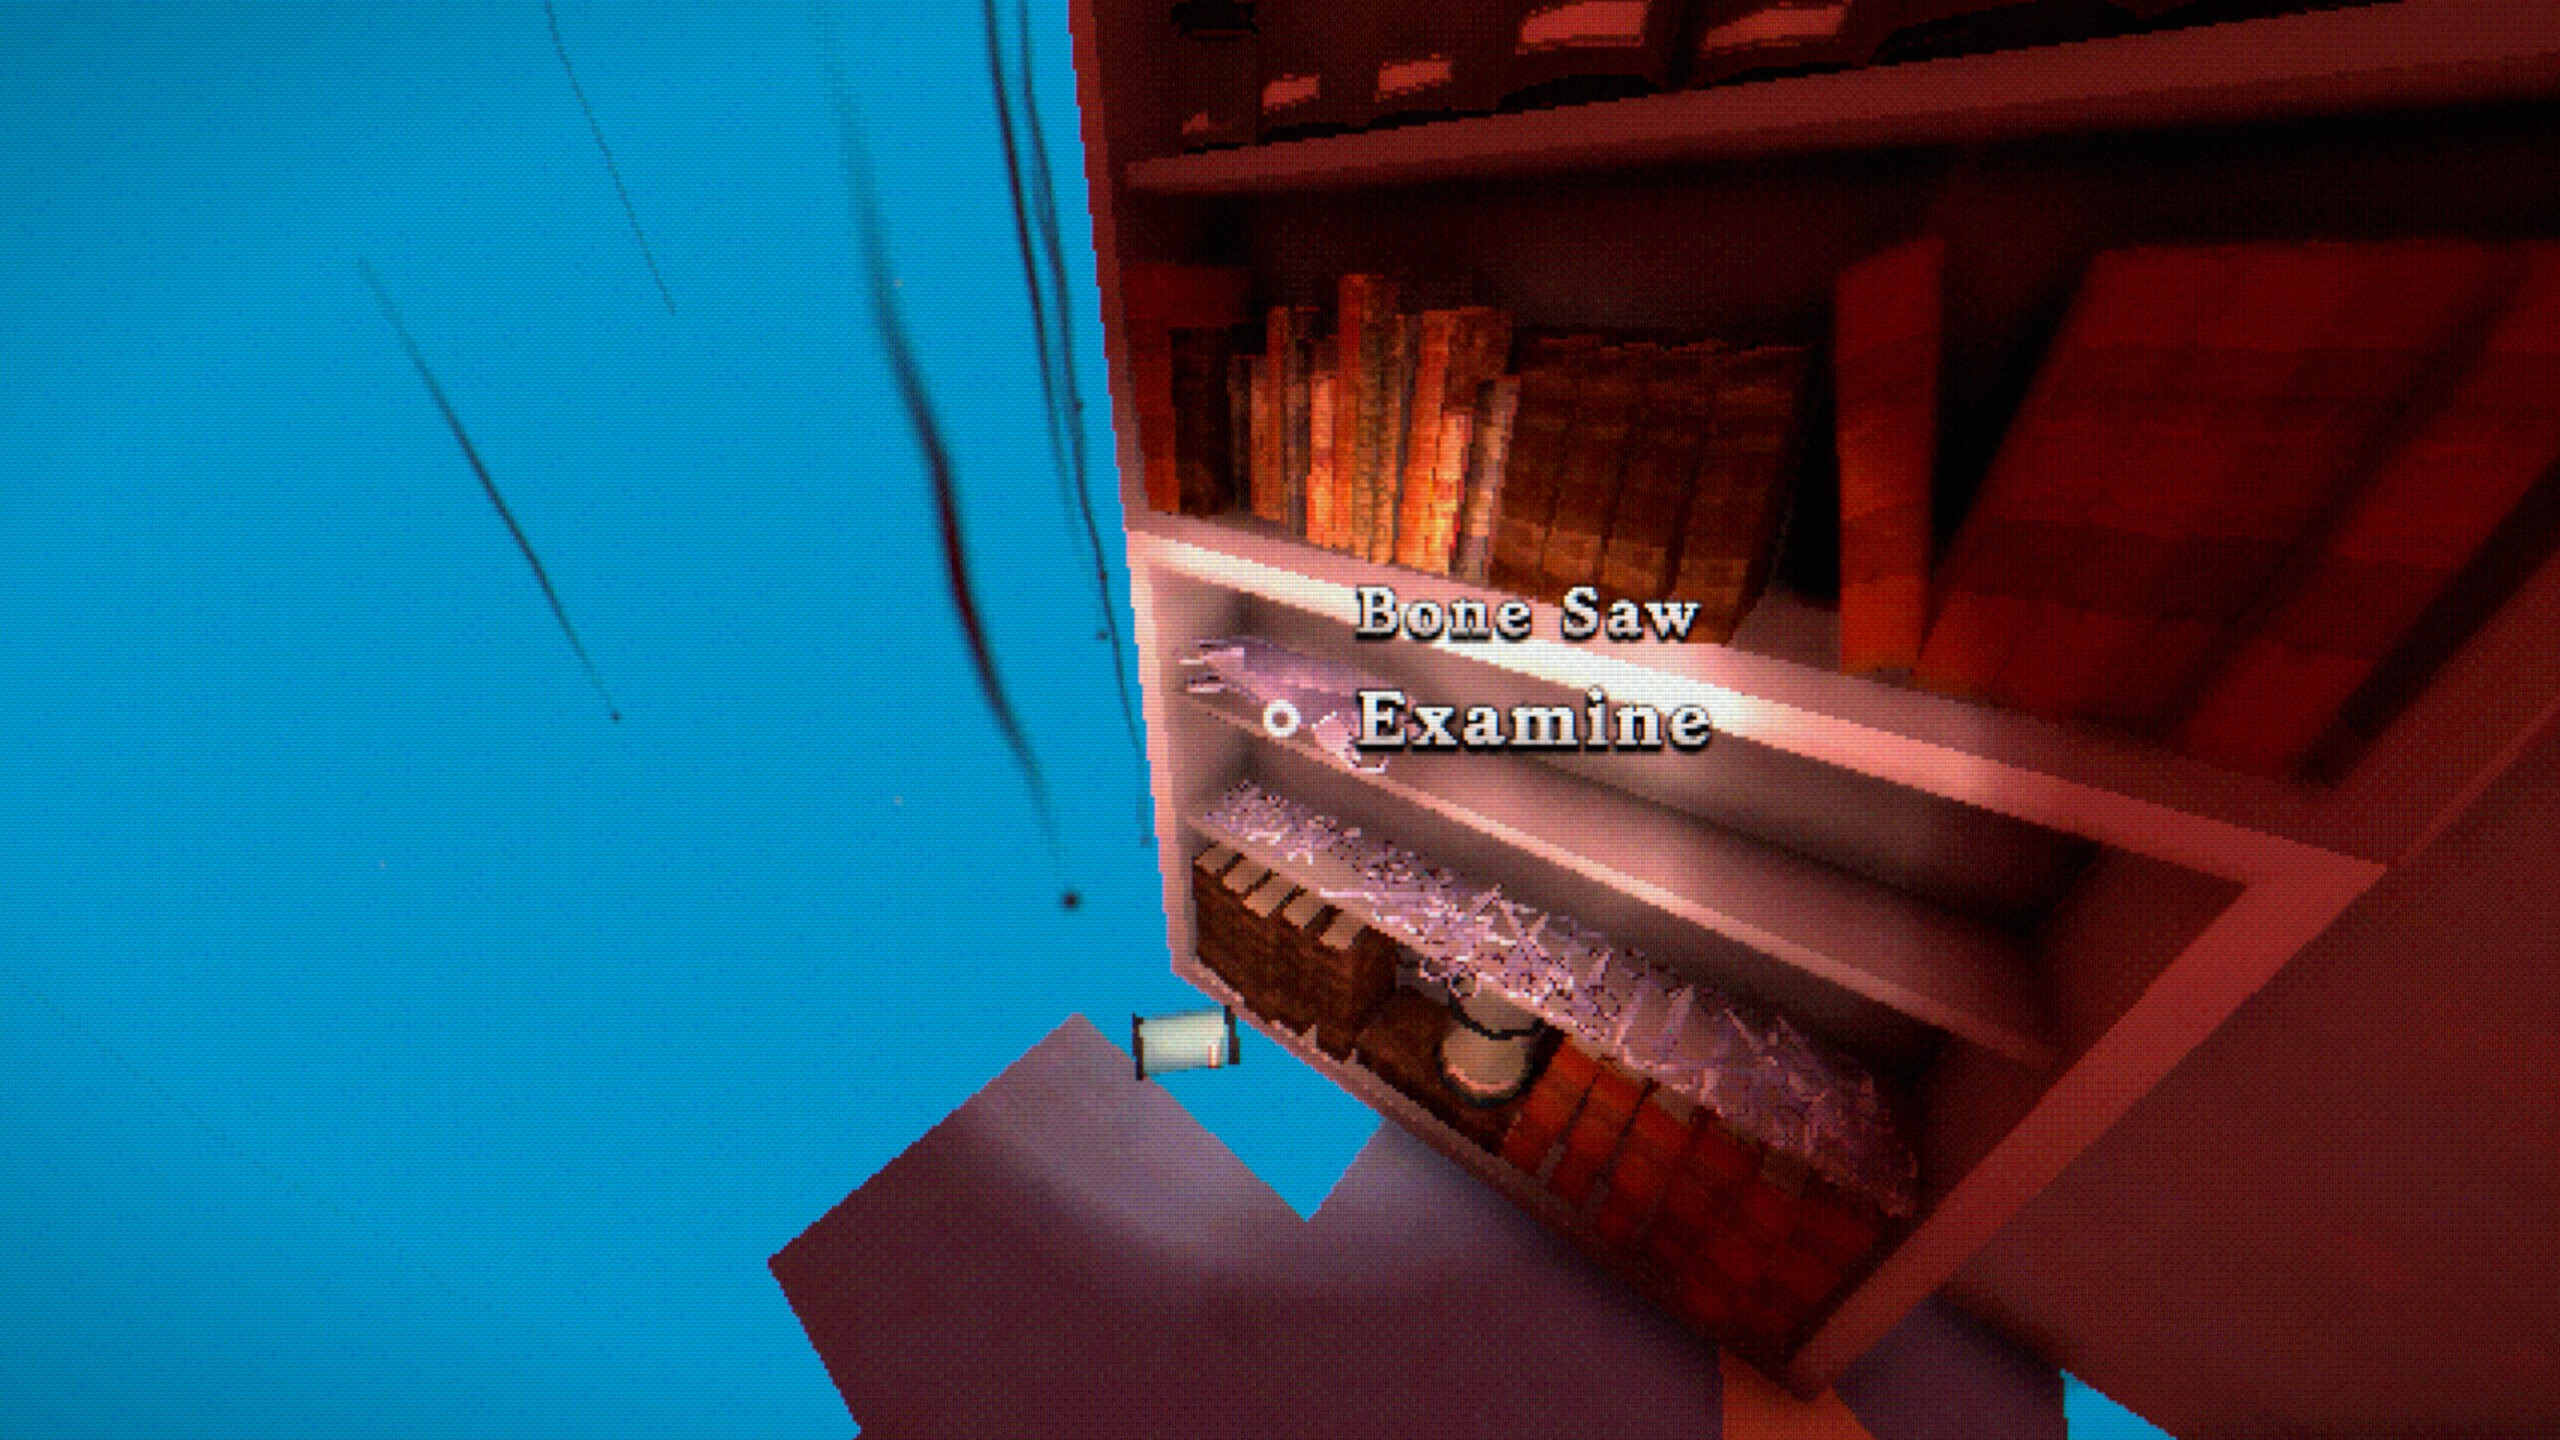
- At the Surgery section, pick up the Bone Saw, then examine the wall right of the shelf.

- At the Lab section, exit the Lab and follow the corridor, then head through the door.
- Watch the scenes.
- Once you regain control, walk up the long staircase and enjoy the True Ending!
- Congratulations!

Until The Bitter End
Save The World
Good Ending
- Load → Slot 2
- Speak to Torres and answer that you’re Ready to leave.
- Enjoy the Good Ending!

A Group Effort
Save Everyone
Kill Charles – Kill Ruth
- Load → Slot 1
- Place the same sigil on all four locations.
- Answer that you’re Ready for the ritual and watch the scenes.
- If done correctly, Charles will be swallowed by the wall and you’ll be awarded with:

Doing What He Loved
Fail to Save Charles
- Head to the East Wing (door by the Gallery) → proceed through the corridor → enter the first Lion door.
- Solve all four doors:
- Keypad: 2940.
- Pick up Appointment Card and follow the footprints to the exit door.
- Back at the corridor, interact with the Clinic door and watch the scene.
- Head inside the Clinic.
- Pick up the Model Liver and press the red button.
- Solve the dials puzzle and pick up the Model Heart.
- Open the bottom drawer and pick up the Model Lungs.

- Open the drawer beneath the Organ Model and pick up the Model Stomach.
- Interact with Organ Model to insert all the organs. then pick up the Brain.
- Place Brain in jar.
- Attach the Skull to the Skeleton Chest and solve the puzzle:
- Enter Surgery and watch the scene.
- Pick up Chemicals and Needles.
- Interact with Beakers Mix and add any two ingredients. Receive Antidote?
- Use Antidote? on Poisoned Woman. Confirm injection.
- If done correctly. Ruth will convulse and die.

Horrible Science
Fail to Save Ruth
Kill William
- Once you regain control, head to East Wing, follow the corridor to its end, and go through the Lion door.
- Head upstairs and through another Lion door.
- At East Wing, follow the corridor and enter the Master Bedroom by the painting.
- Enter 1925 on the keypad and pick up Slide in Hidden Room.
- Go back to Master Bedroom and insert Slide in Projector.
- Turn around and solve the puzzle:
- Pick up the second Slide and the Statues.
- Insert Slide in Projector and examine the Board.
- Solve the puzzle:
- Re-enter Hidden Room, watch the scene, and head through the door to the Planetarium.
- Solve the Planetarium puzzle:
- West Button: 06-05
- North Button: 25-07
- East Button: 08-03
- South Button: 11-08
- Pick up the Peacock key and head through the Peacock door.
- Make your way to the Main Hall: Right through the corridor, backtrack once it loops, proceed through the corridor.
- Head through the door in between elk heads.
- Watch the scenes with William.
- Once you regain control, interact with Painting by Peacock door for another short scene.
- Move the Rug and solve the circuit board puzzle.
- Enter 5423 on the keypad behind the counter and pick up Drinks and Empty Water.
- Talk to William.
- Use the Mixer located at the right hand side of the cupboard behind the counter and Mix a drink.
- Add Whiskey in one or two parts twice to finish the drink. Receive Gumshoe?
- Head to the fireplace and give the drink to William.
- If done correctly, William will suffocate to death and you’ll be awarded with:

A Stiff Drink
Fail to Save William
Kill Kai
- After William’s demise, head upstairs through any staircase and enter the West Wing.
- Proceed down the corridor and head through the previously boarded door.
- Head downstairs and make your way to the Lab.
- After the scene at the Lab, pick up the Clean Cloth from the surgical table and wipe it on the blood. Receive Bloody Cloth.
- Examine Control Panel to trigger lockdown.
- Turn around, pick up Screwdriver and ID from the open locker, and Lighter from the other locker.
- Interact with Control Panel to shut down the lockdown and watch the scene.
- Use Screwdriver on Panel, then examine Sensor.
- Use Control Panel to free Kai.
- Exit the Lab and follow the corridor for another scene.
- Once you regain control, enter the Pantry.
- Pick up the Note from the floor, then examine the painting by the door to reveal a keypad.
- Input 6322 and proceed through the door.
- Solve the puzzle:
- Receive Kitchen Key.
- Backtrack to the corridor for a scene with Kai, then enter the Kitchen.
- Pick up the Valve from the right side of the fridge, then place it on the gas system above the oven.
- Solve the puzzle:
- Head through the door.
- Enter the Holding Cells for a scene, then make your way to the computer for another scene.
- After both scenes, examine the computer yet another scene.
- Interact with the computer and give Kai a bad instruction (right as first step for example) and confirm.
- If done correctly, Kai will die electrified and you will be awarded with:

Electric Solitaire
Fail to Save Kai
Bad Ending
- Once you regain control, exit to the Main Hall and head towards the exit door.
- Enjoy the Bad Ending.

Sole Survivor
Save Yourself