A guide on how to defeat all bosses in Night Raider. In this guide I will carefully explain how to defeat all the bosses in the game, the requirements in order to defeat them, their drops and other information about them.
Main Bosses
DISCLAIMER: THIS GUIDE IS FULL OF SPOILERS, RUN AWAY IF YOU DON’T WANT TO BE SPOILED
This guide is intended for Veteran mode so it should also be viable for Novice mode up to the Hard difficulty. Heroic and Hellish difficulty are only available in Veteran mode.
If you started your game in Novice mode you will have to reset your save, mainly because Novice mode has higher drop rates.
In the game, there are a total of 4 main bosses that I will discuss in the following sections. Additionally, I will cover 2 mini-bosses that you can encounter around the map after the main boss sections.
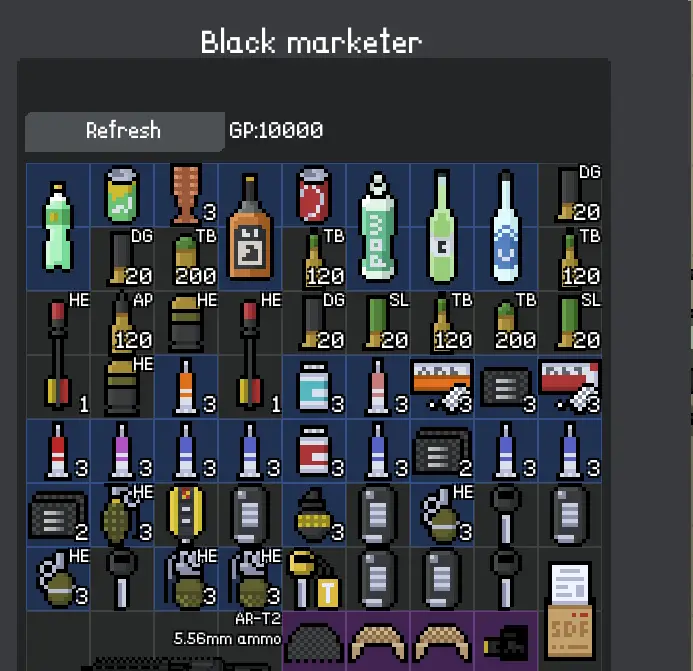
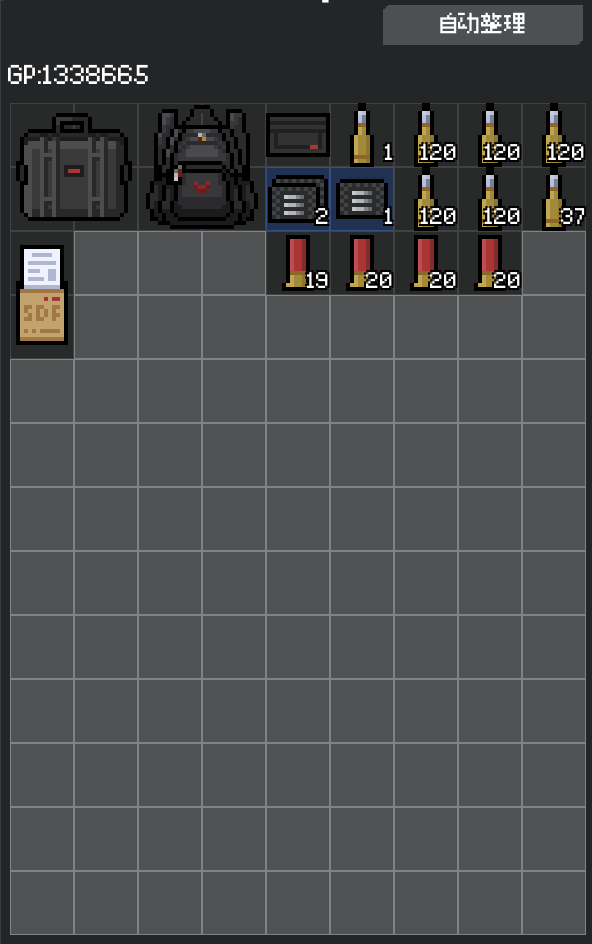
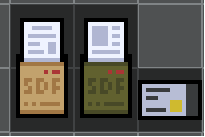
As you start the game you will have to start by playing in the easy difficulty in order to get used to the game. While exploring the easy difficulty, you may stumble upon documents, typically found in safes, or you can purchase them from the black marketer for 90000 GP. It’s worth noting that the black marketer only sells documents for the normal difficulty in the current version. For higher difficulties, you’ll need to find them in safes or obtain them by defeating bosses.
These documents are single-use, meaning you will lose them upon entering a difficulty level equal to normal or higher. If you manage to defeat the boss for the difficulty you are entering, they will always drop documents appropriate for the current difficulty or one level above it.
Furthermore, safes may contain documents for the current difficulty or one level above it.
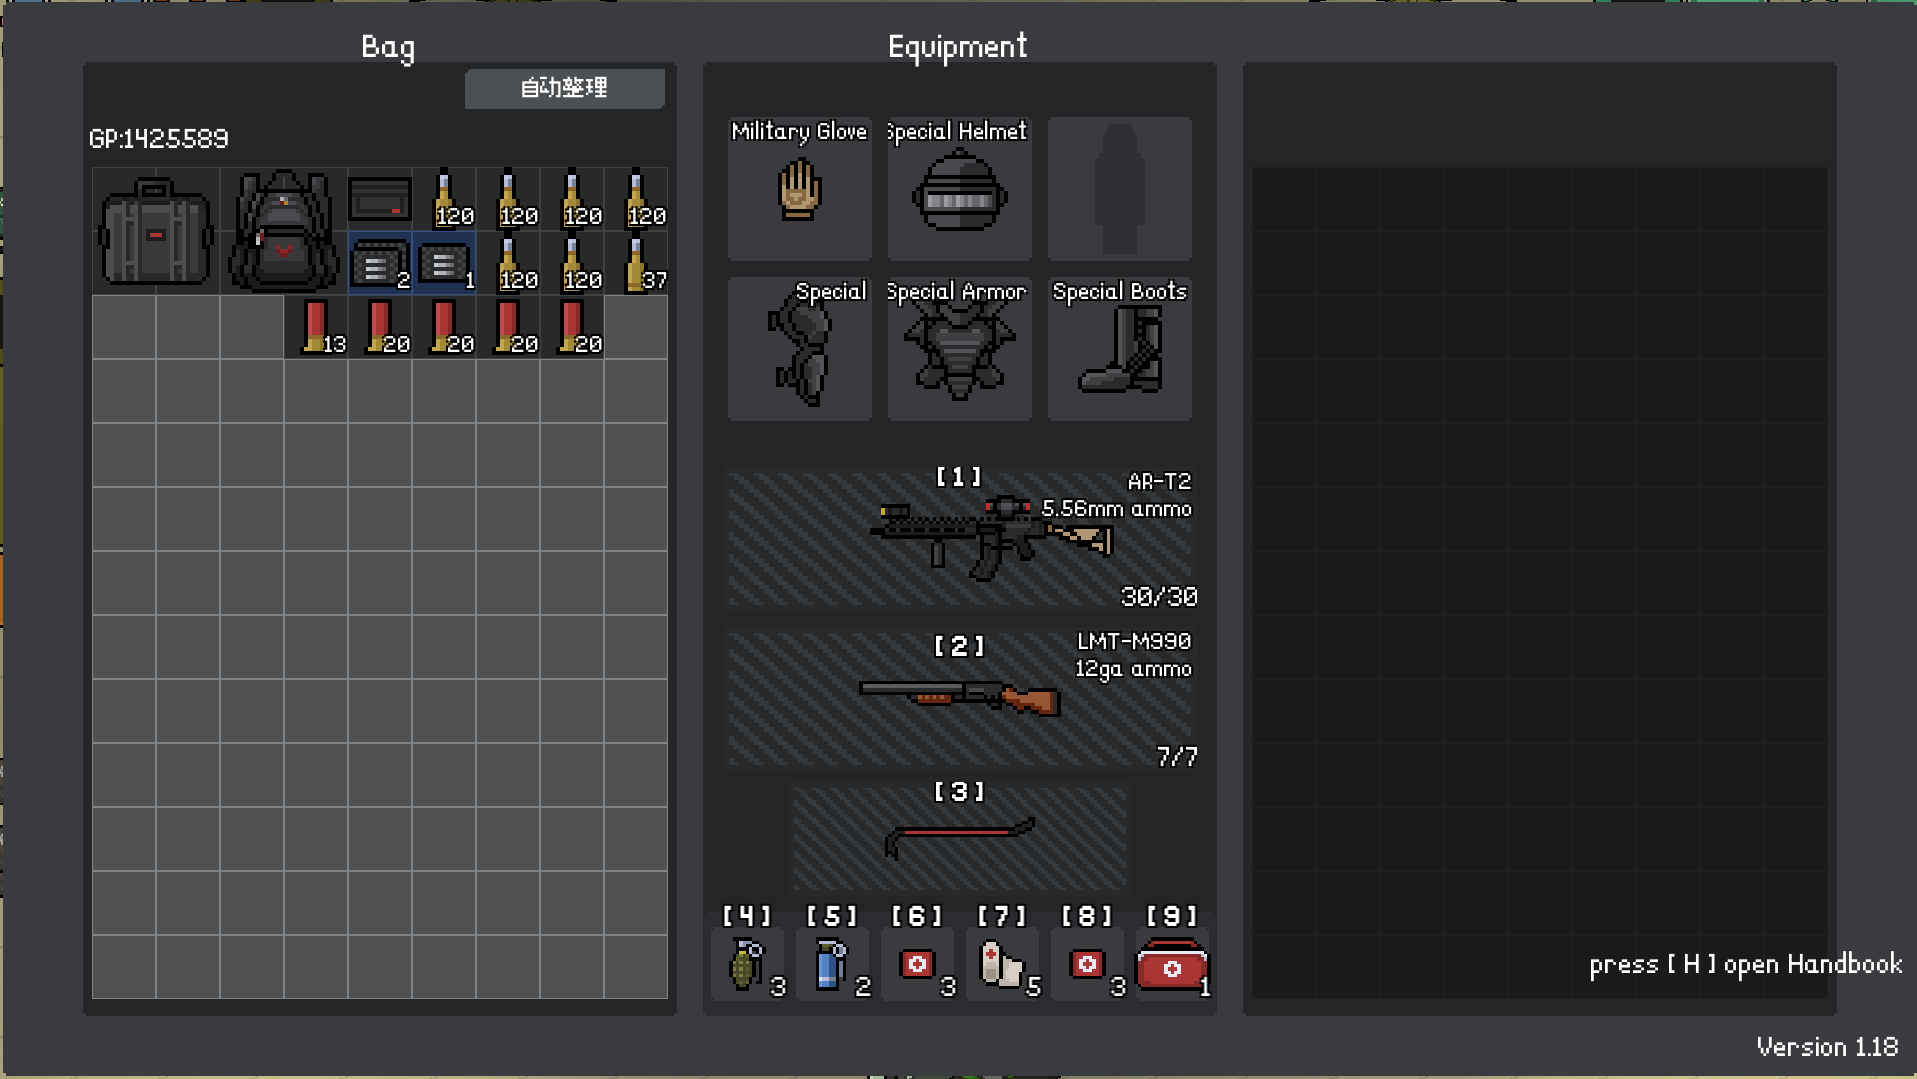
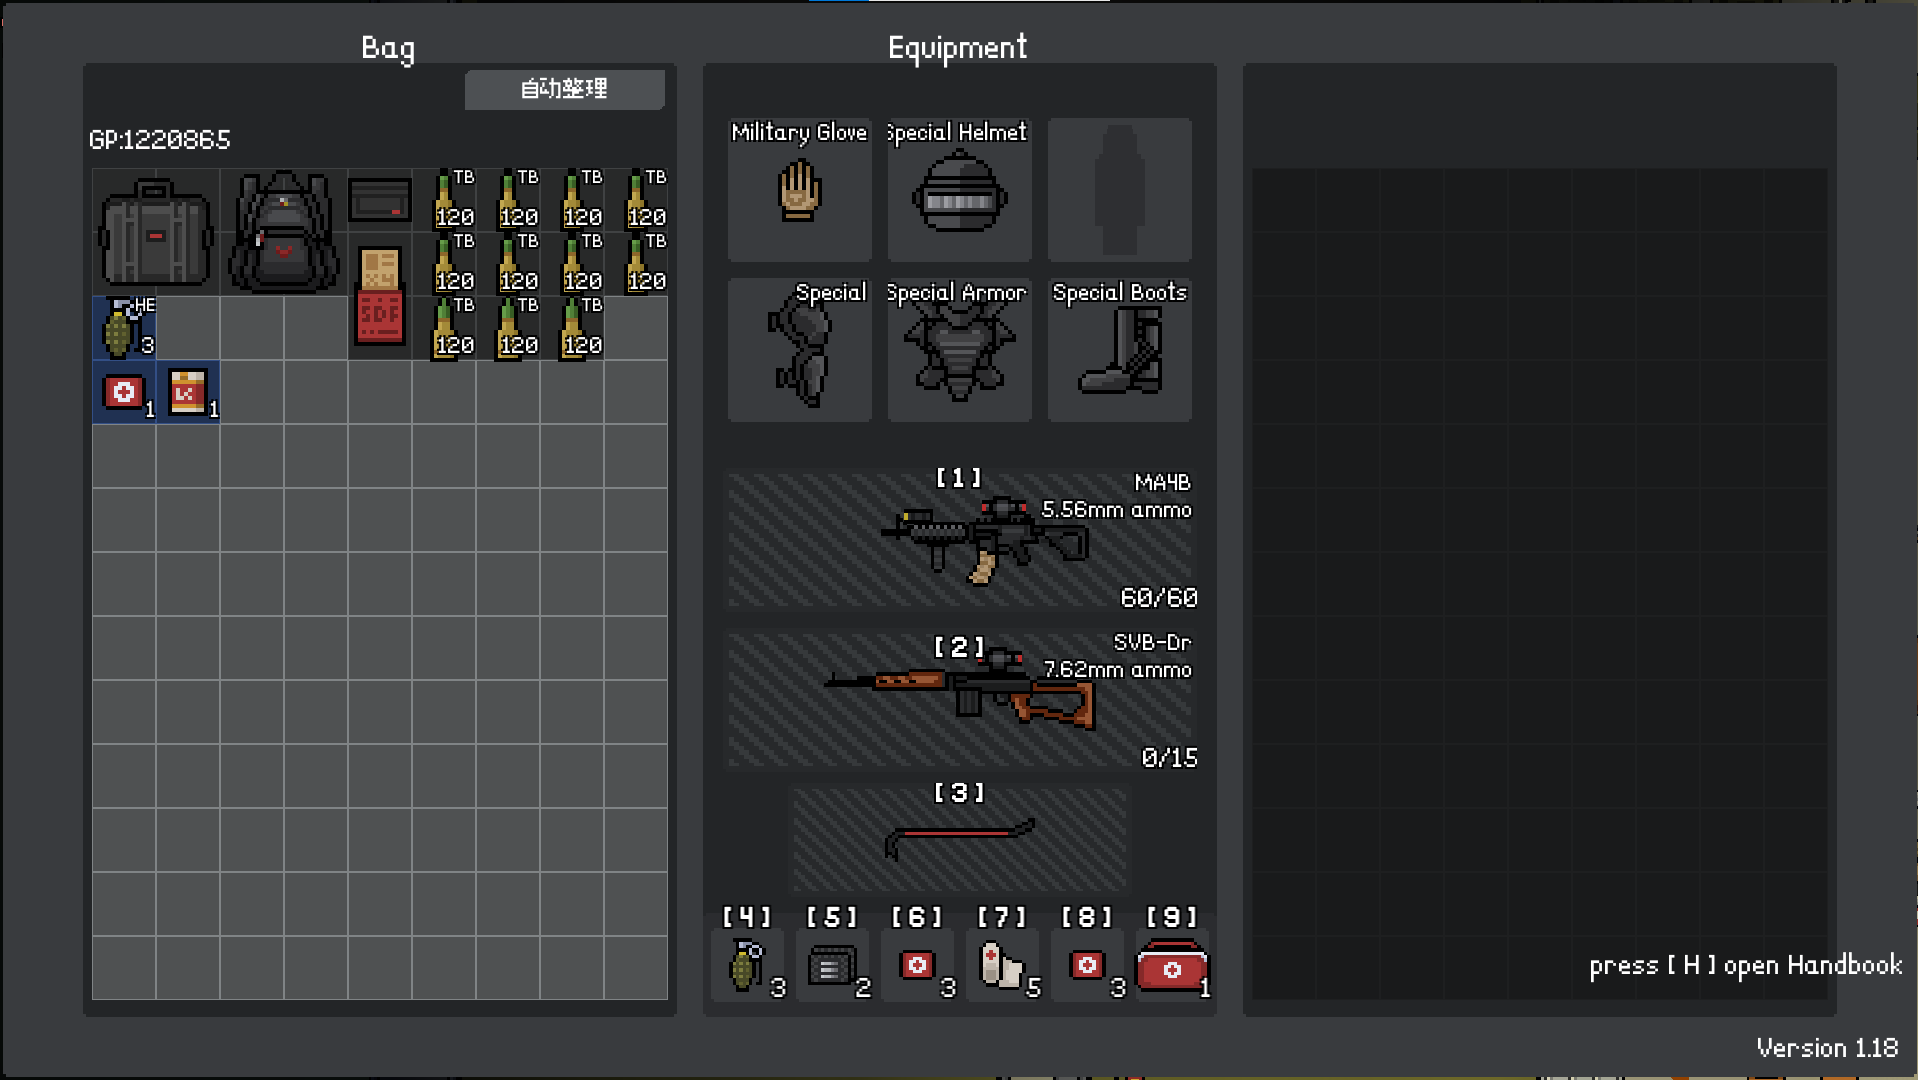
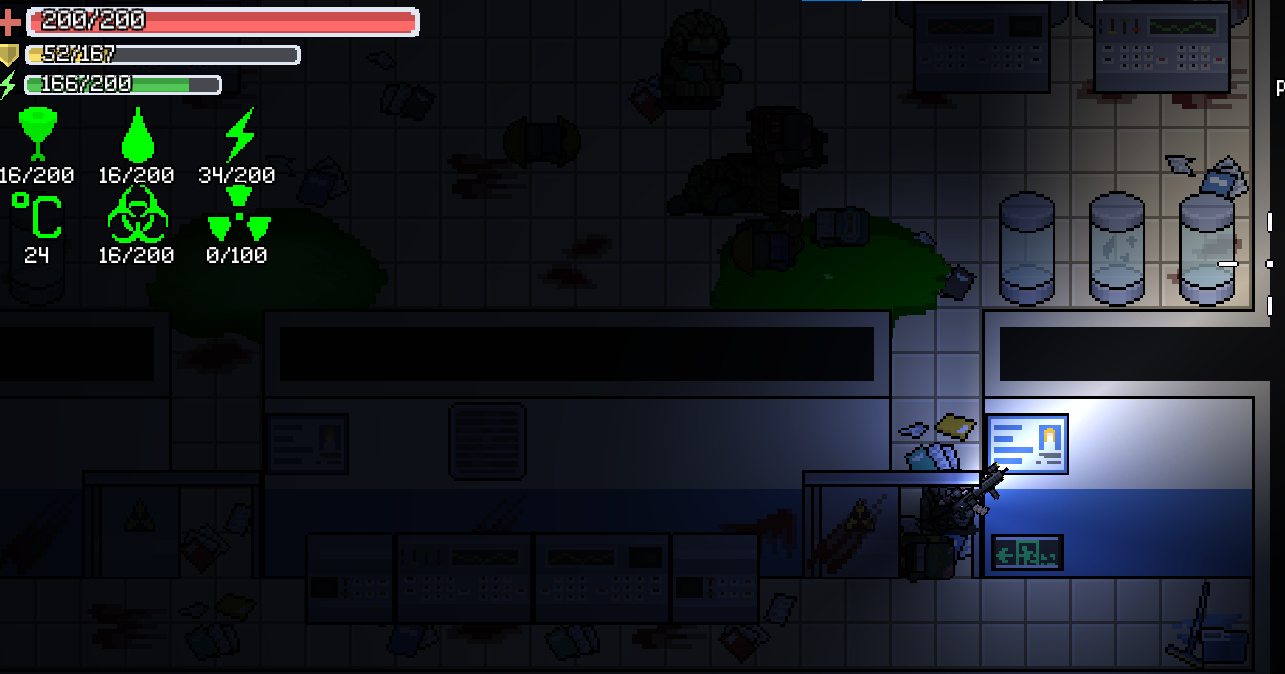
Before facing any of the bosses, I highly recommend bringing bulletproof insets to recover your armor and first aid kits for restoring your health points. It’s important to note that as long as your armor is up, you will not receive any debuffs (such as bleeding), so it’s crucial to keep your armor up.
It is highly recommended to always start by killing the bosses before looting any other buildings. This way, you can recover the consumed documents and have a better understanding of your remaining resources after defeating them.
Normal Difficulty Boss
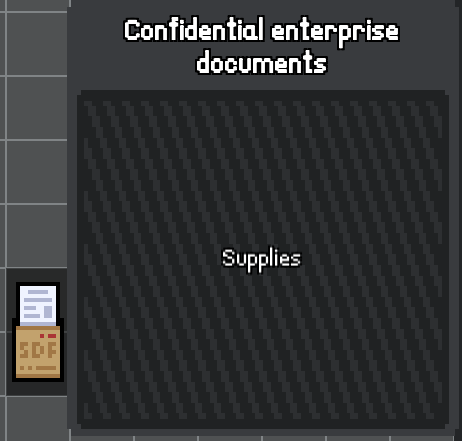
For the first boss you will require to have Confidential enterprise documents in order to enter the normal difficulty. As mentioned before, the documents will be lost once you enter the normal difficulty.
Do observe that I’m am using higher level armor as it would take quite a while to craft new armor from scratch and it would also be a waste of resources.
I recommend the AR-T2 for defeating the boss and the LMT-M990 for dealing with normal zombies. I took around 6 stacks of normal 5.56mm ammo and around 5 stacks of buckshot. Buckshot is very cost effective for dealing with normal zombies as it is very cheap and normal 5.56mm ammo while it is more expensive, it deals a lot more damage. By all means save the 5.56mm ammo for the boss.
I also highly recommend bringing bulletproof insets to recover your armor and first aid kits to recover your health points.
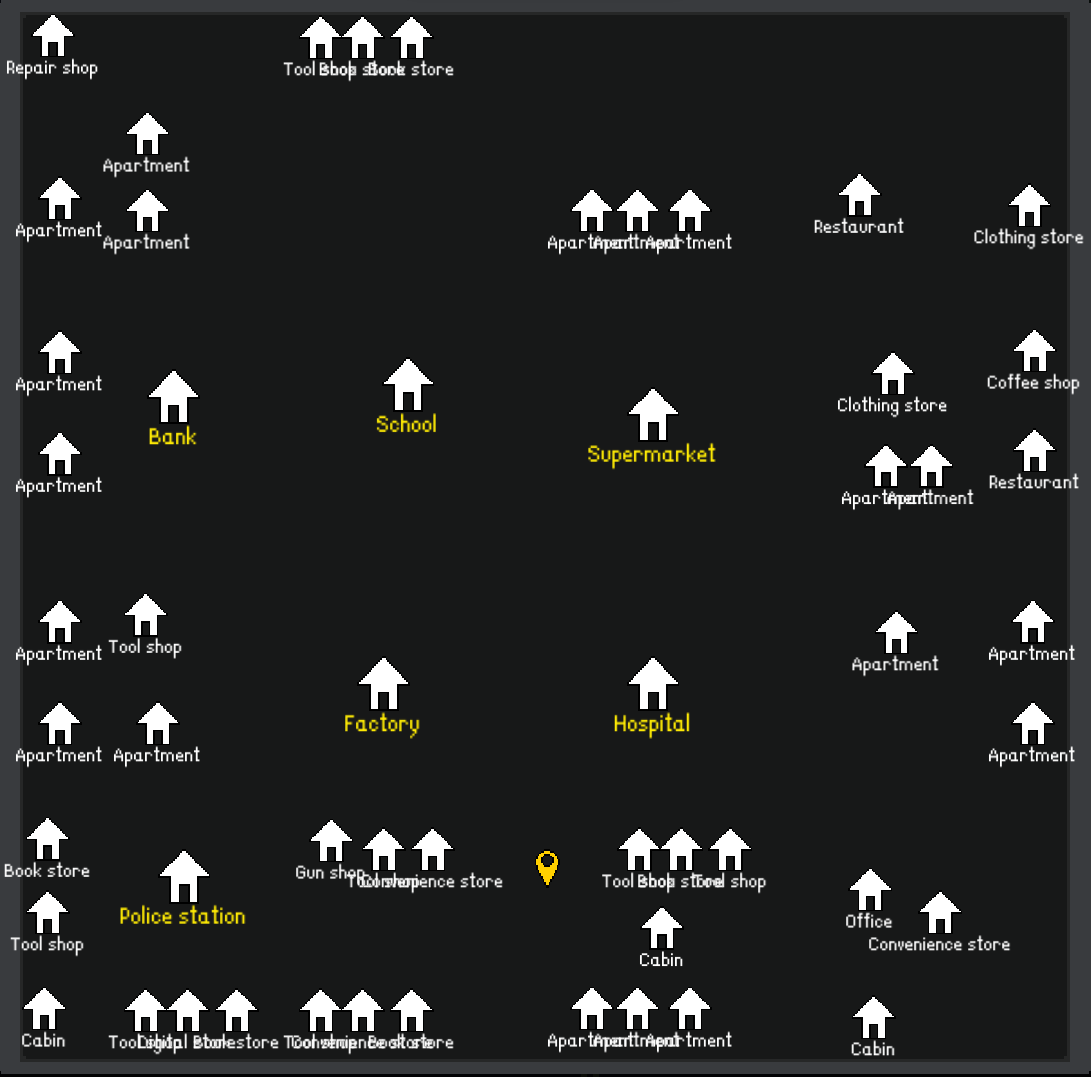
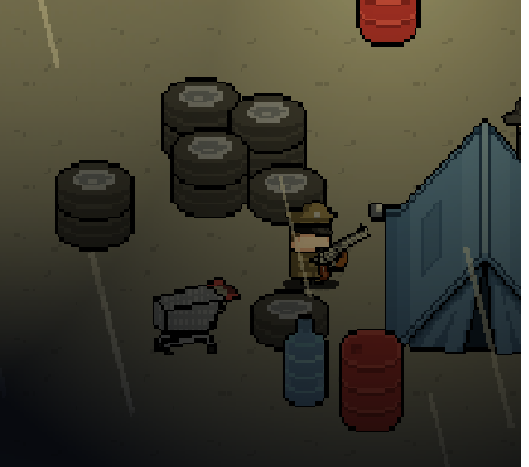
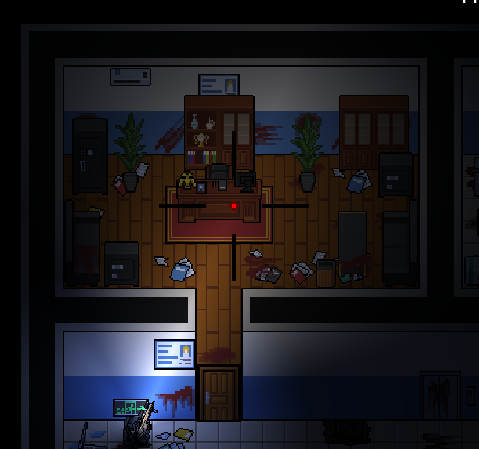
If you look at your map upon entering you will observe a new building named Factory on the map, with the font coloured yellow, that is the location of the boss.
As you enter the factory do take notice of that lobby as that will be where you will have to lure the boss so you can fight him more easily. By this point you must conserve your stamina, you will need to use it for dodging the boss’s charges.
As you move up the factory you will reach the central room where he will usually be.
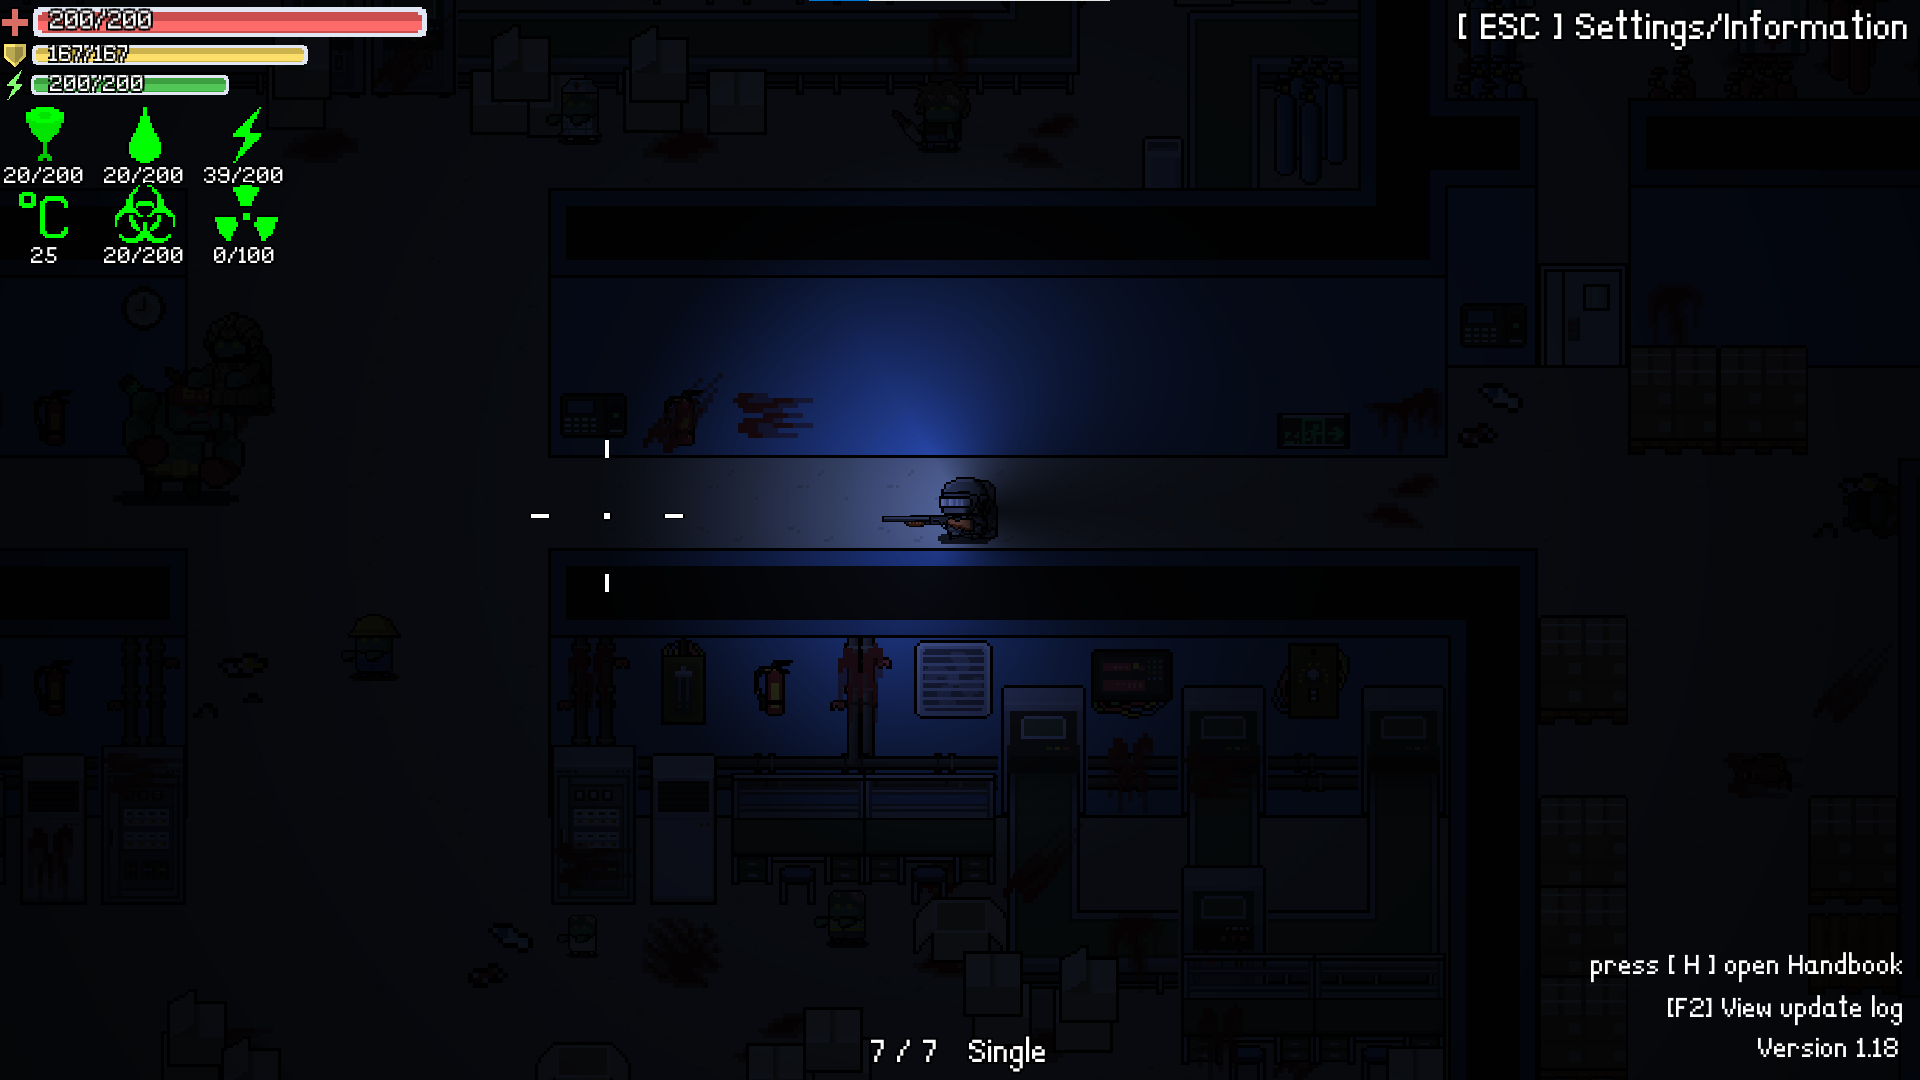
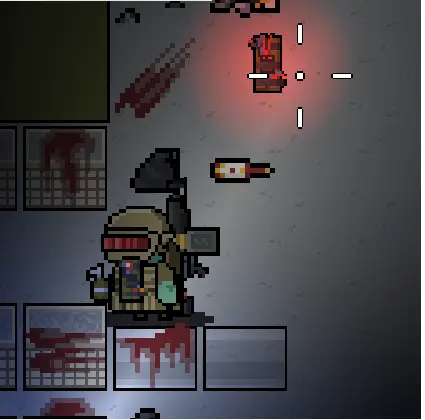
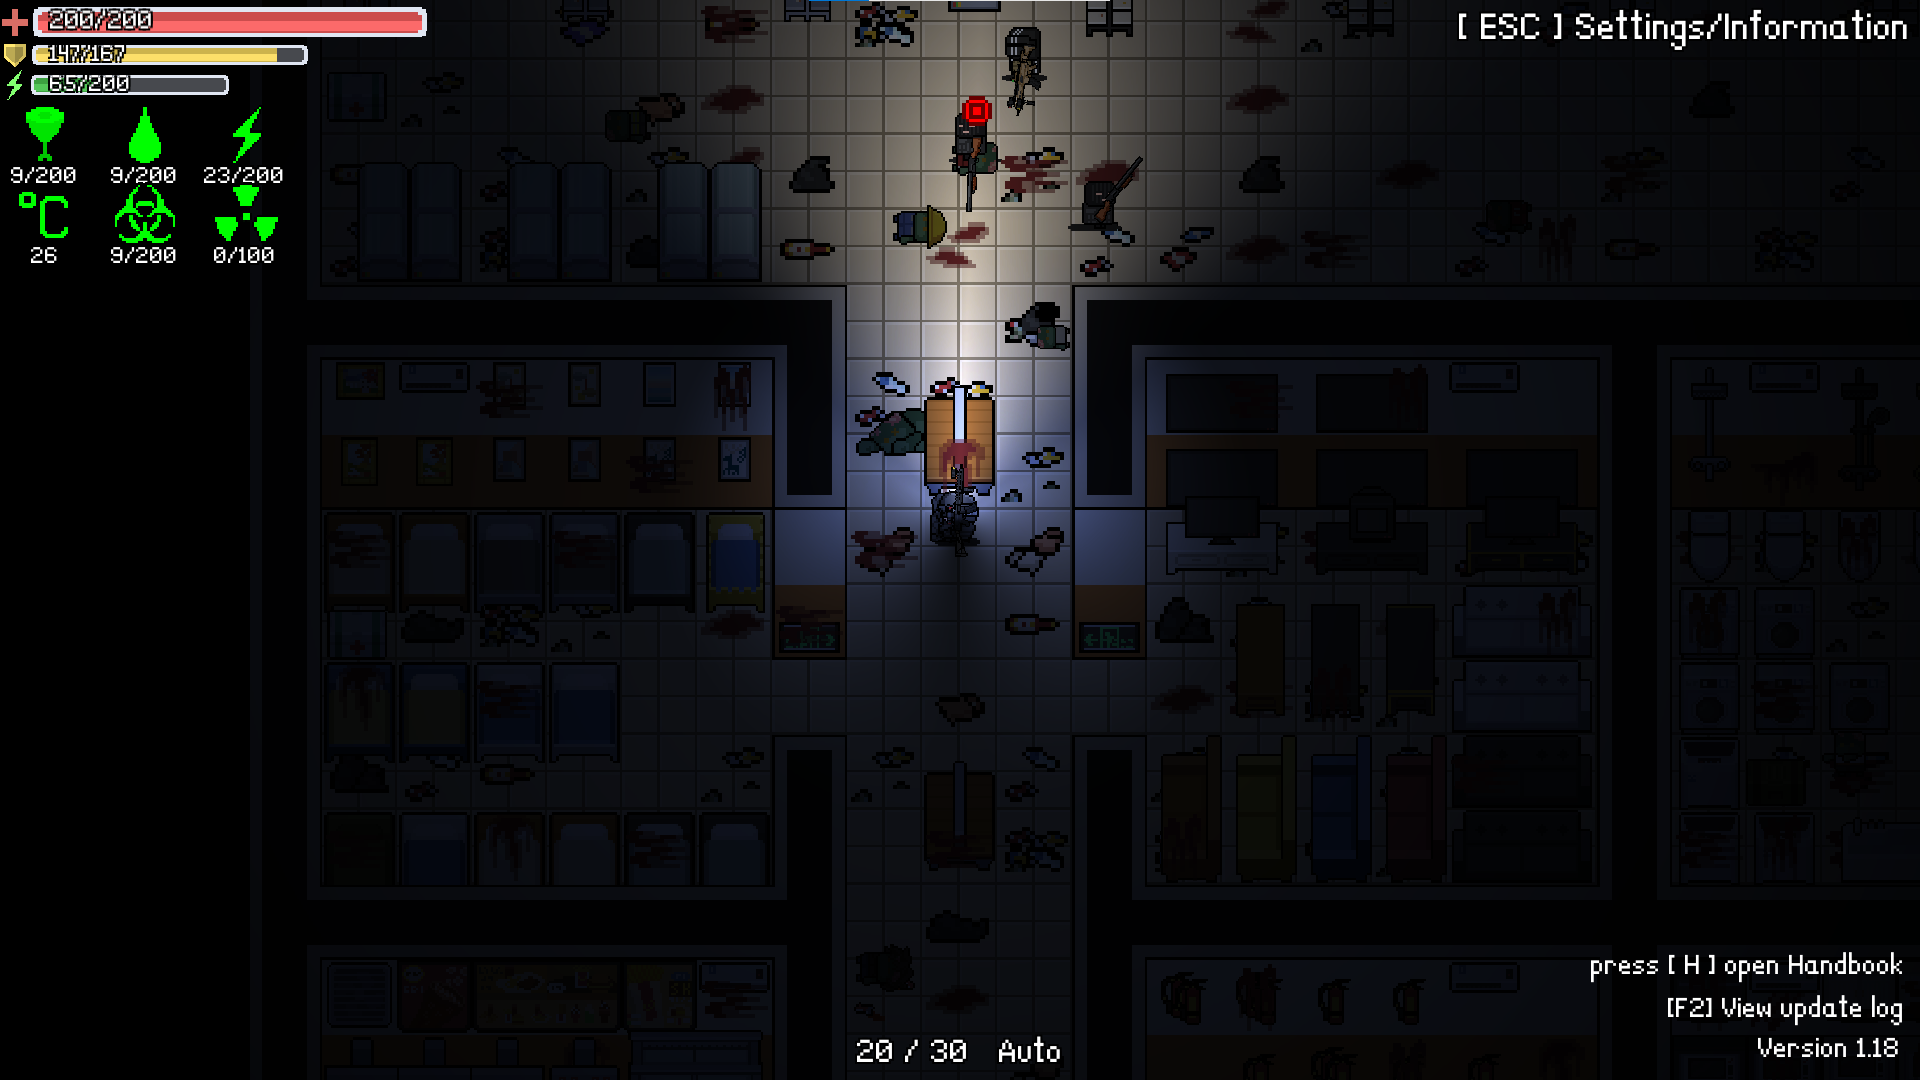
The boss has 1 single attack type which is charging towards you really fast. He repeats the same charge every 3 or so seconds. He will only charge when you are in his line of sight and the direction of the charge does not change once he starts charging. As soon as he hears your shots, be ready to either dodge or run away, the moment your in his line of sight he will charge at you. The strategy I recommend the most is to lure him to the lobby at the entrance of the Factory where you can easily dodge due to it being a quite open space.
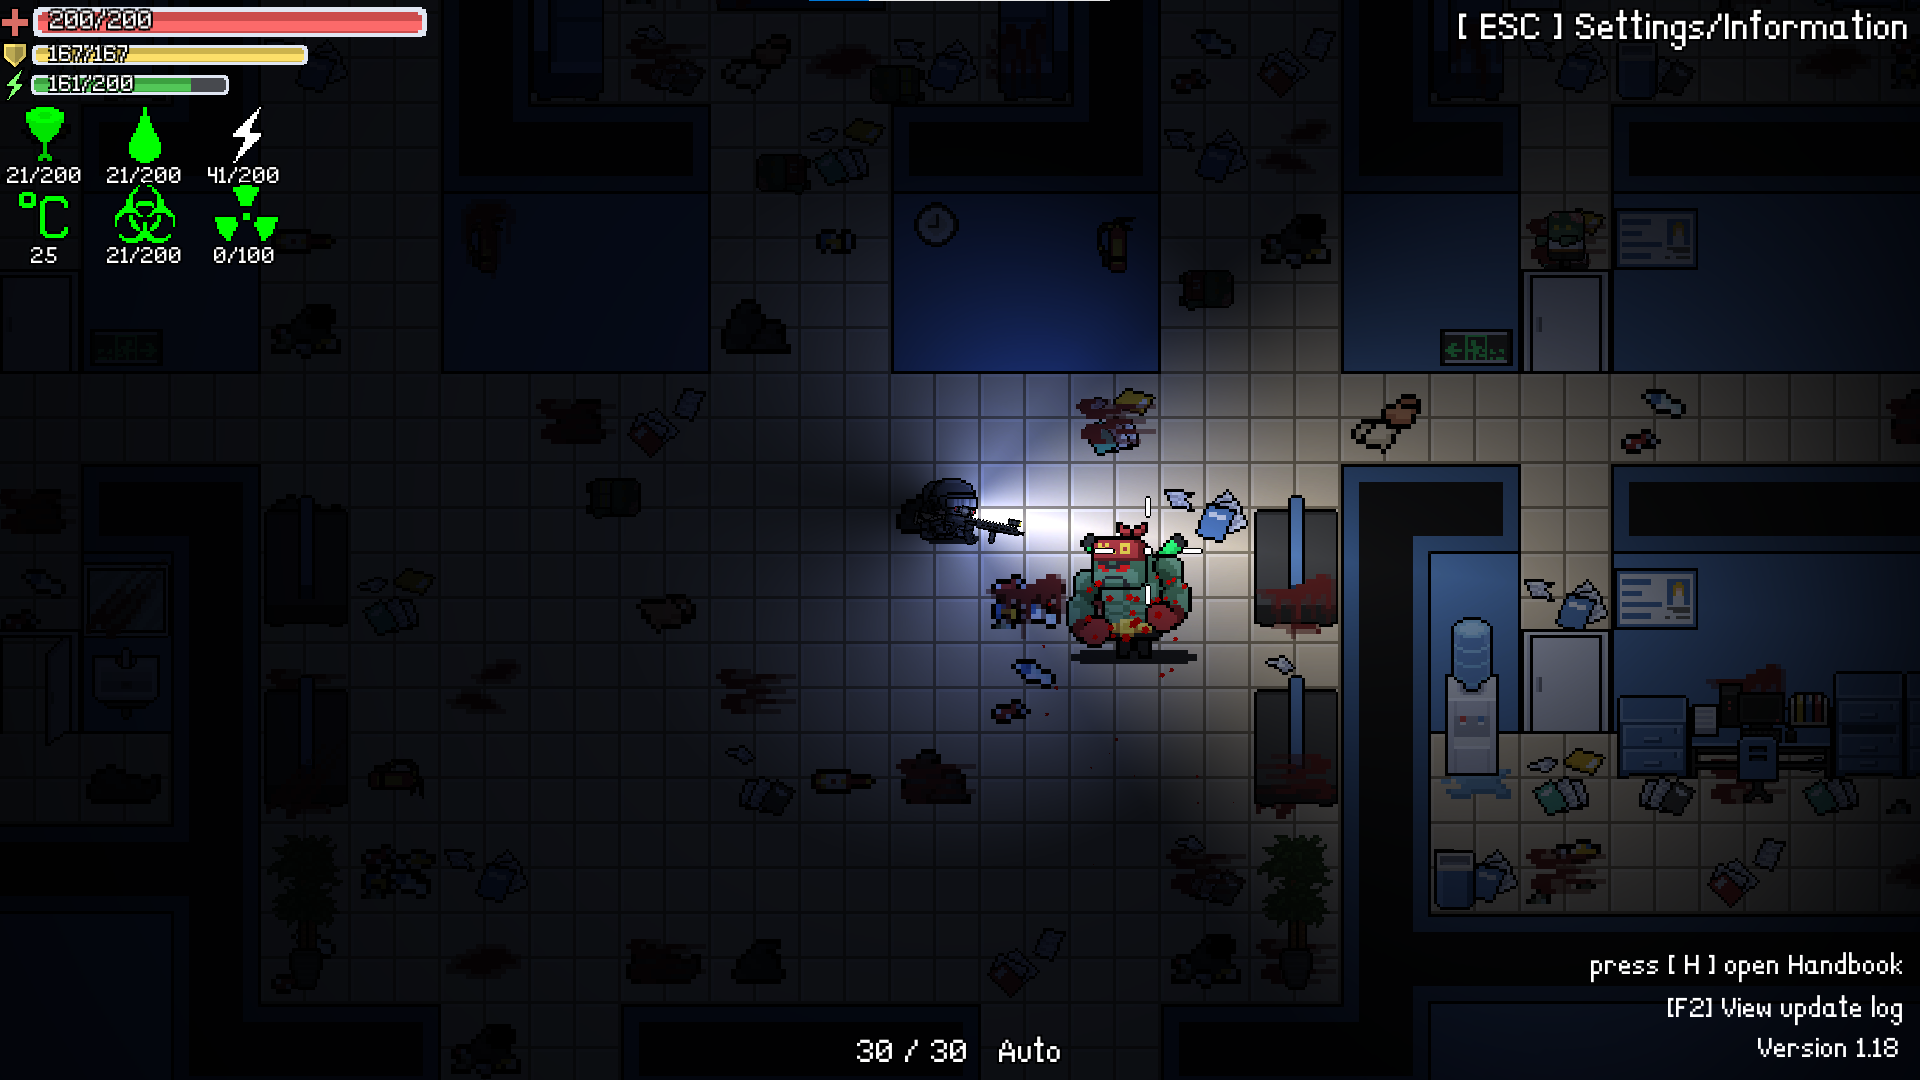
Once you get the timing of his charges down you can easily dodge his attacks and kill him without even getting hit. He barely requires 1 stack of 5.56mm ammo to die. You may also see bellow his possible drops, he will always drop one of the 2 document types and may drop a Induction IC Card (White) that unlocks some doors in the factory with medical loot. I tend to ignore them as it is much better to search for medical loot at the Hospital.
The chances of the boss dropping documents for the Hard difficulty are between 20%-50%. I was quite unlucky and had to kill the boss 10 times in order to get the documents for the Hard difficulty for this guide, but that is just me being unlucky.
Hard Difficulty Boss
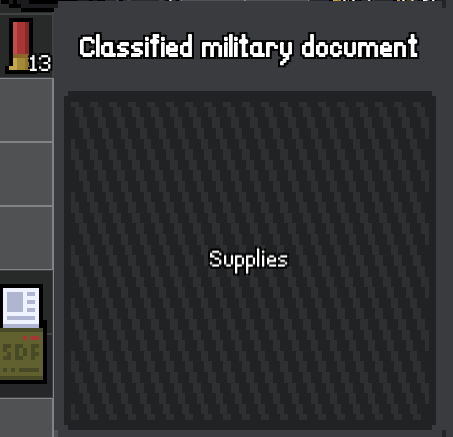
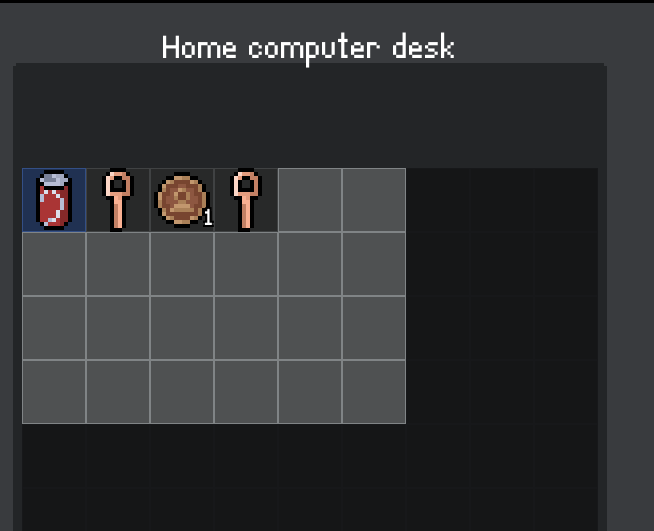
For entering the Hard difficulty you will require Classified Military Documents as show in the image bellow. As mentioned in the previous section, it is a single-use item.
As mentioned in the previous section, the armor I am using will be of higher level than what you will have. The main weapon I recommend is the ACPR which is superior in every way to the AR-T2 and is obtained from the mini-boss found at the supermarket (see some sections below for more information) in the Normal Difficulty. As for your secondary I chose the SVB-Dr as it was a more commonly found DMR which you can use to shoot from range, but you could also use the Mk-SR which is much better but only found on the hard difficulty.

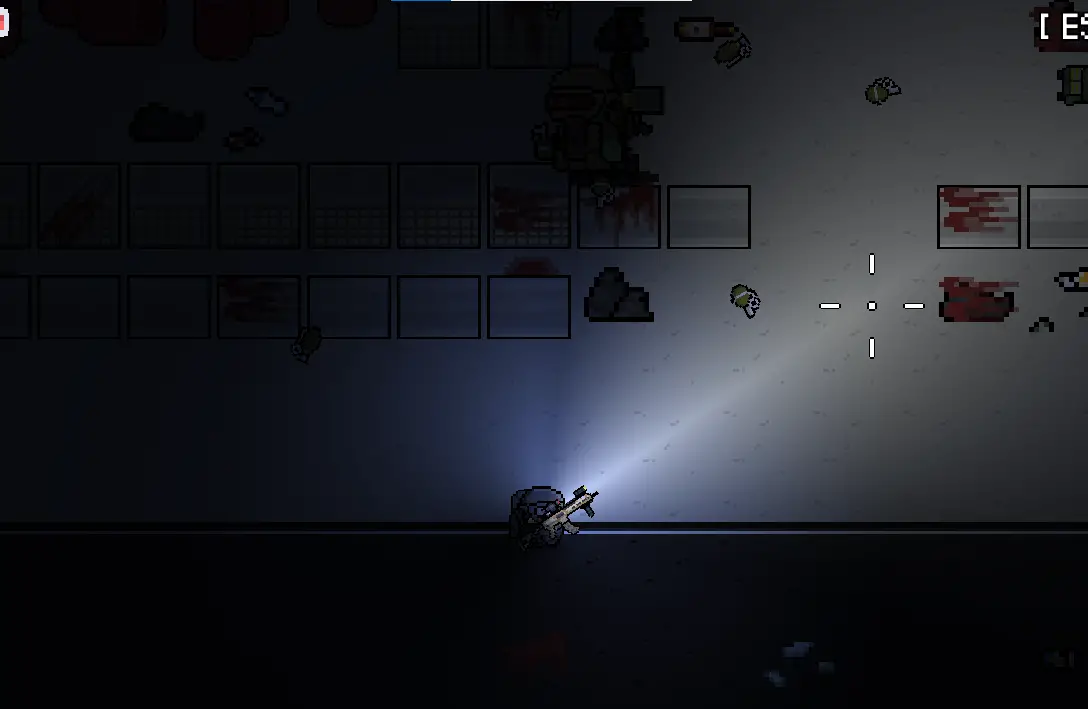
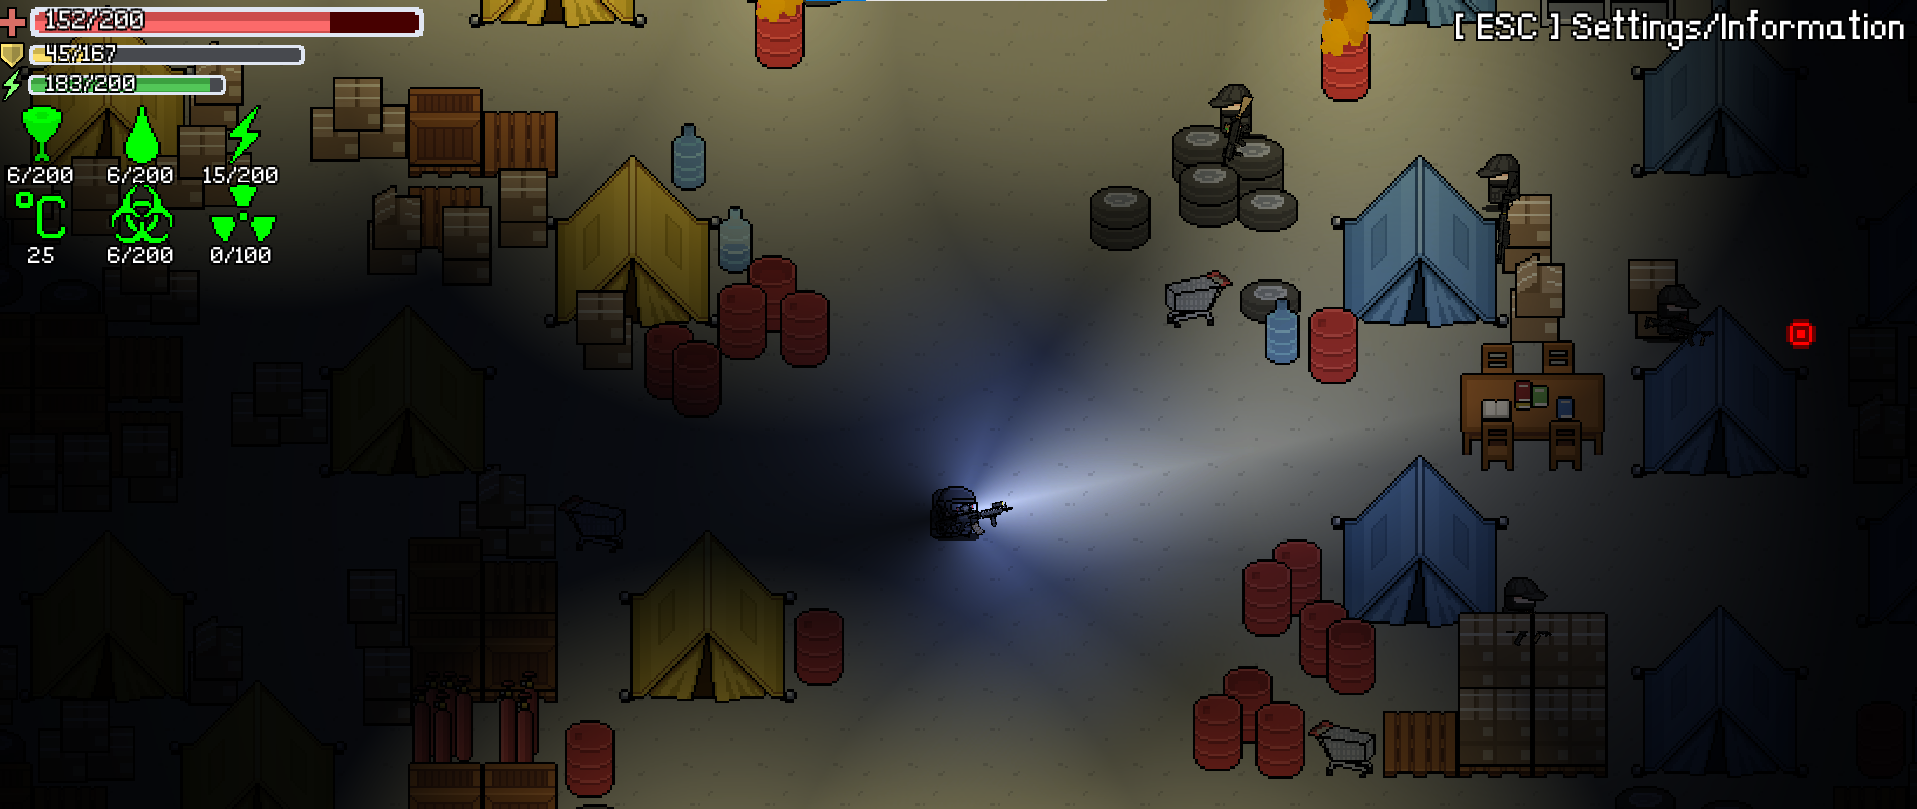
Upon dropping into the map, you’ll want to head towards the Military Base, marked in yellow font on the map. The military base has two possible entrances: above and below. My usual approach route is from below. Upon reaching the entrance, be cautious as entering the building will spawn 4 zombies around you. If you kill them using non-suppressed weapons, the boss will slowly make his way towards you.
Once you’ve dealt with the zombies, start shooting upwards because he is coming. You’ll want to retreat a bit outside, you cannot let the boss get too close to you.
The boss has two types of attacks.
One attack involves dropping a C4 explosive on his current location.
If you get hit, you’ll take a significant amount of damage, and it’s quite likely to result in instant death.
Another attack involves him throwing grenades in all directions. While they don’t inflict as much damage as the C4, they still deal high damage, so you must dodge them.
It is recommended to stay as far away from him as possible. This allows you to avoid his C4 and better dodge his grenades.
The best strategy is to snipe him from afar, but finding a sniper scope can be challenging. Therefore, the most viable strategy is to maintain a medium to long distance where you can barely see him and keep shooting at him while dodging his grenades.
The boss is quite well armoured so AP ammo is quite efficient against him, he also has quite a lot of health points. It usually takes between one and two stacks of 5.56mm TB ammo to kill him. Do be careful after he dies because he may place down a C4 and you wouldn’t want to die right after killing the boss.
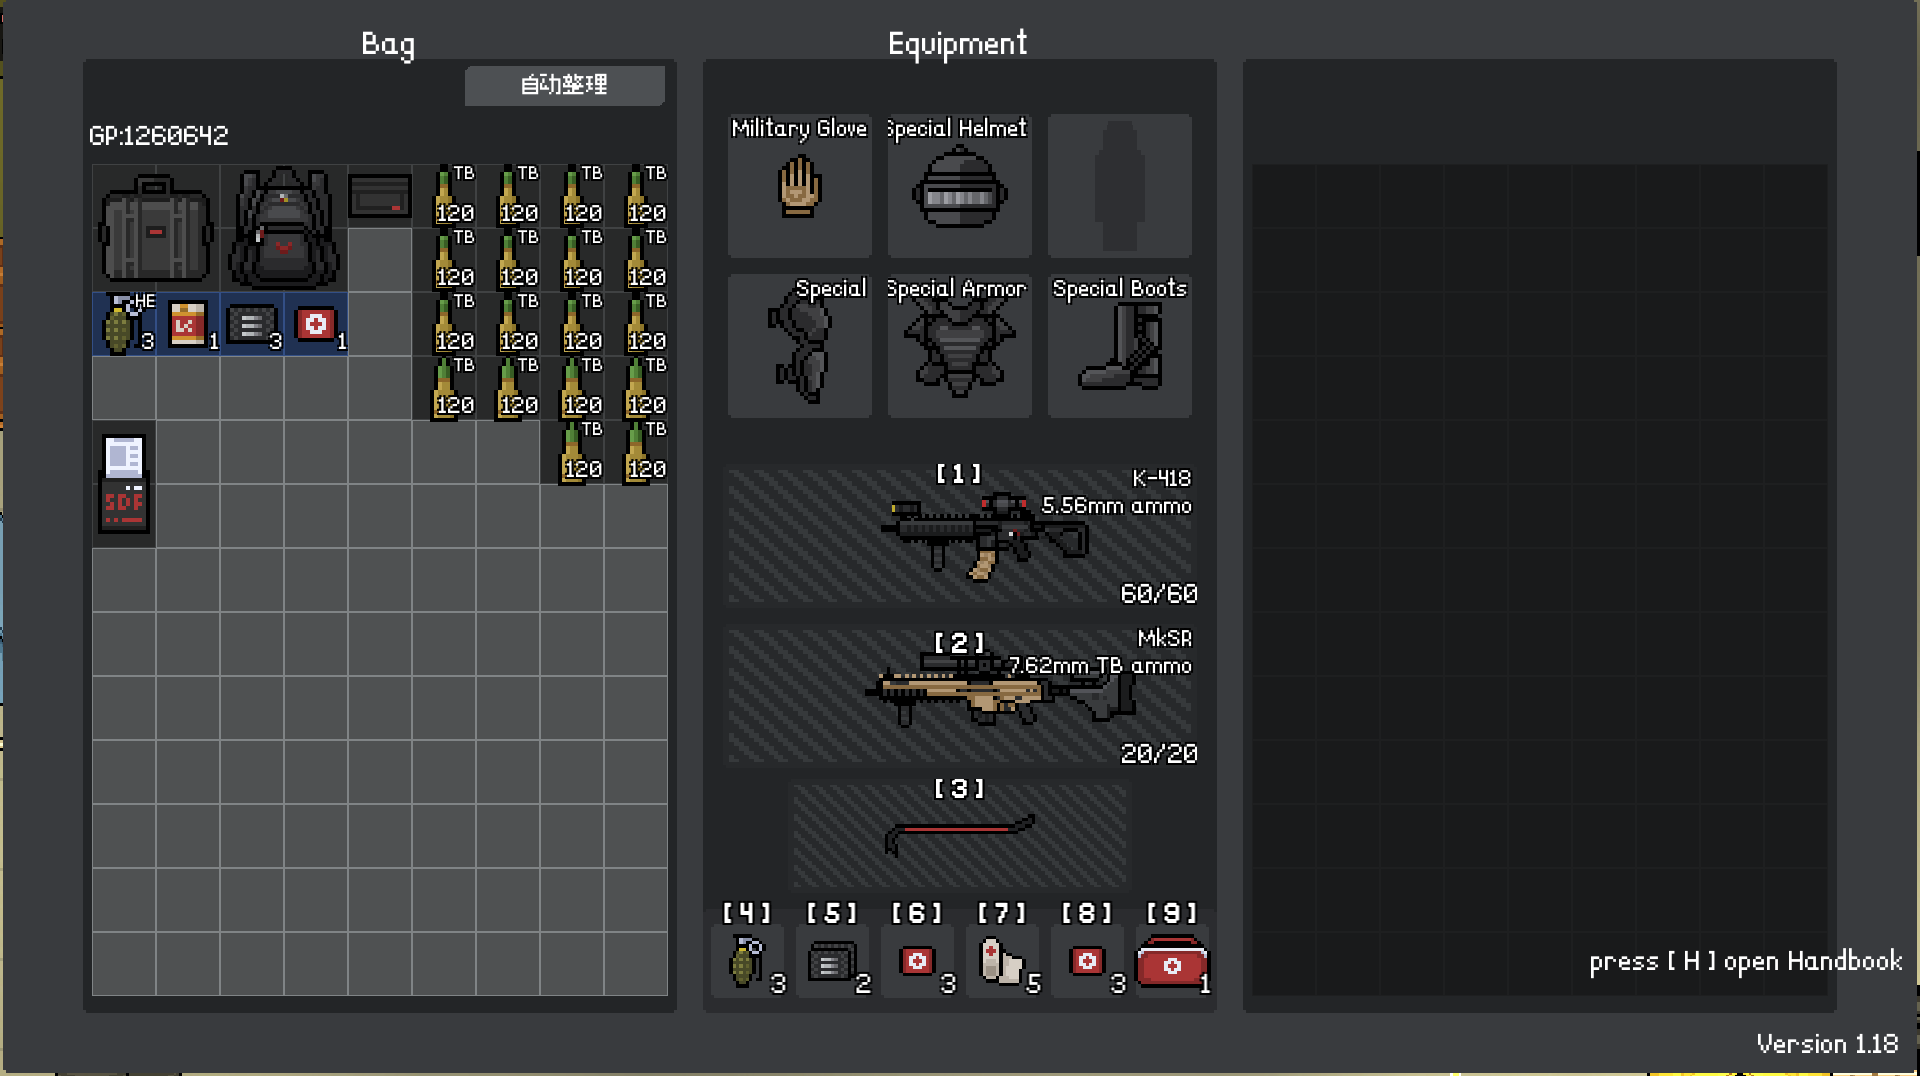
The boss will drop the items you can see in the image bellow.
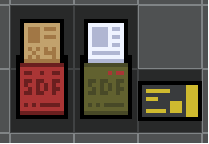
The black keycard on the right is used to unlock the military base’s barracks where you can find most of the good loot. The barracks will contain lots of weapons, attachments and ammo.
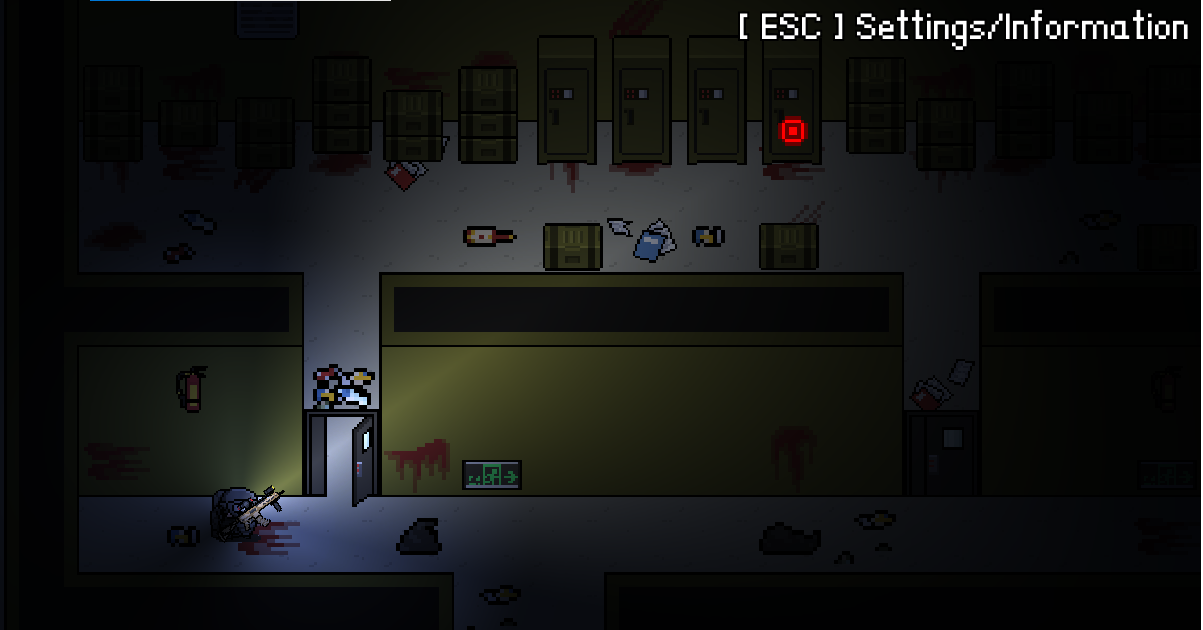
There are 2 barracks, one on the left and one on the right. They can be easily noticed as they have black doors.
You are able to purchase the black keycard from the black marketer for the cheap price of 350000 GP, but it is quite rare for him to sell it. It is very much worth it as the loot inside can be sold for a high price if you have enough space for all of it.
It is very profitable to do this raid when having 2 black keycards for both barracks.
You may also bring some car keys and expensive car keys for opening the military trucks outside the military base; they can hold some good weapons, military backpacks, and weapon cases.
Heroic Difficulty Boss
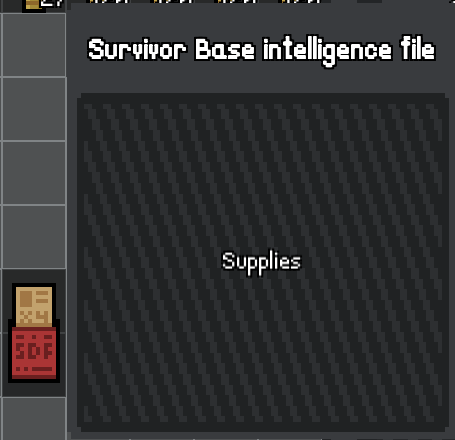
For entering the Heroic difficulty you will require Survivor Base Intelligence File. As mentioned in the previous sections, it is a single-use item.
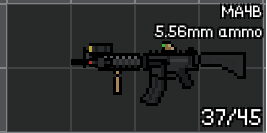
For the main weapon I replaced the APCR with the MA4B as it is a better assault rifle. As for the secondary weapon I left it the same but you may replace it with the Mk-SR which you can find at the Hard difficulty which is much better than the SVB-Dr.
Differently to the previous bosses, this difficulty’s boss is actually human. Upon dropping in the map, you will begin heading towards the Survivor Camp, which is marked on the map with yellow font. The survivor camp will be filled with human npcs that will shoot you on sight. At the entrance to the camp you will find 2 guards, they may move around because of zombies spawning around them.
The normal npcs will not deal much damage to you but it is still highly recommended to snipe them from afar. The base itself will be full of human npcs but they should be fairly easy to deal with. It is a good strategy to lure them outside the base by firing your gun making them follow the gunshots. Once they are outside, you can snipe them.
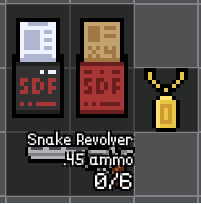
Inside the base will be a General looking npc using a revolver, he is the boss for this difficulty. He will do more damage than regular npcs but nothing too scary. On death he drops the following items.
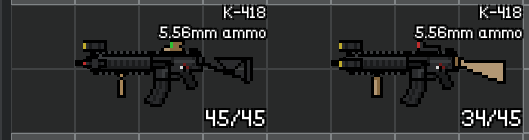
If you get in the line of sight of the boss, he will spawn 2 Spec Ops NPCs that will quickly deal a lot of damage if you are not careful.
The best way to deal with the Spec Ops NPCs is to run away and snipe them from long distances.
They deal a lot of damage quickly, so don’t let them get too close and kill them as fast as possible. You should get your bulletproofs in case you take a lot of damage.
While they are quite hard to deal with, they will drop 2 K-418’s which are better than the MA4B, so it is worth dealing with them.
You can avoid the boss spawning the Spec Ops by sniping the boss from far away,
but you will not be able to get the K-418’s they drop. Once every NPC is clear, you are free to loot the whole base. The base contains loot from multiple buildings, including medical, restaurant, tool store, gun store, clothing store, etc…
Hellish Difficulty Boss
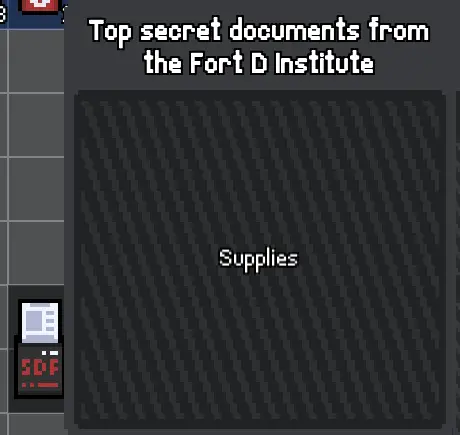
For the Hellish difficulty, you require Top Secret documents from the Fort D Institute
You will also require an Induction IC Card (Red) in order to access the boss’s building. The card can rarely be found on the heroic and hellish difficulties inside safes. You may also rarely find them at the black marketer at the price of 500000GP. For dealing with the boss itself, you will only require 1 card, but if you want to unlock all the loot inside the laboratory, you will need 3. I don’t usually go for the loot inside as it is mostly chemicals which can only be used for crafting.

For this difficulty, I recommend using the K-418 as a main weapon as you will require to deal lots of damage to this boss, which you can get in Heroic difficulty. As a secondary weapon, you will need to have a DMR that can quickly deal lots of damage from long distances as there will be soldiers inside the D Laboratory that can quickly deal lots of damage, and you need to conserve your health and armor for the boss itself. One of your best choices is the Mk-SR, which can be found in the previous difficulties.
For this boss, I recommend a bare minimum of 10 stacks of ammo, but I would always bring at least 12 stacks. I took 12 stacks of 5.56mm TB ammo and 6 stacks of 7.62mm TB ammo, but it is highly recommended to bring HP ammo as well for the 30% damage increase. HP ammo can easily be bought at the black market but can be quite expensive.
I also always prepare an emergency bag with more ammo, first aid kits, and bulletproof insets in case my ammo runs out or I need to recover my health or armor. It is always better to be prepared. For this boss, I recommend bringing anywhere from 5-10 Stacks of Bulletproof Insets and 2-3 Stacks of first aid kits. How much ammo you prepare in case of emergency is at your own discretion.
It is highly recommended to have a scope for this boss in order to deal with the soldiers inside the base from long distances as they can deal a lot of damage.
While the scopes are quite rare, you can find them on Heroic and Hard difficulties.
You should equip them on your Mk-SR for this raid.
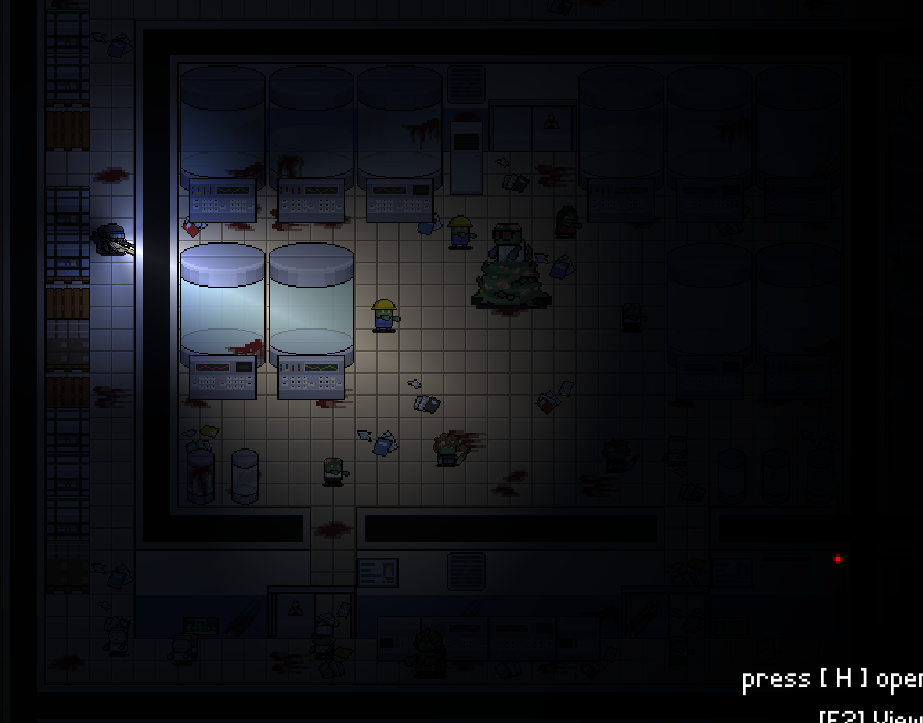
So upon entering this Hellish difficulty, it is highly advised to go straight for the boss. It would be quite difficult to defeat the boss while a zombie wave is occurring. As you enter D Laboratory, you will need the Induction IC Card (Red) in order to enter it.
Upon entering the red door, you will find hallways going in a spiral around the boss room. In these hallways, you will find soldiers. As mentioned before, they deal a lot of damage, so snipe them from a distance. If they are in a bad position to be sniped, you can always lure them with gunshots. There are around 10 soldiers in the whole laboratory.
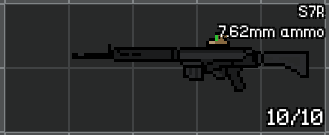
The soldiers will always drop either MA4B’s or S7R’s which can be sold for good money if you have space for all of them.
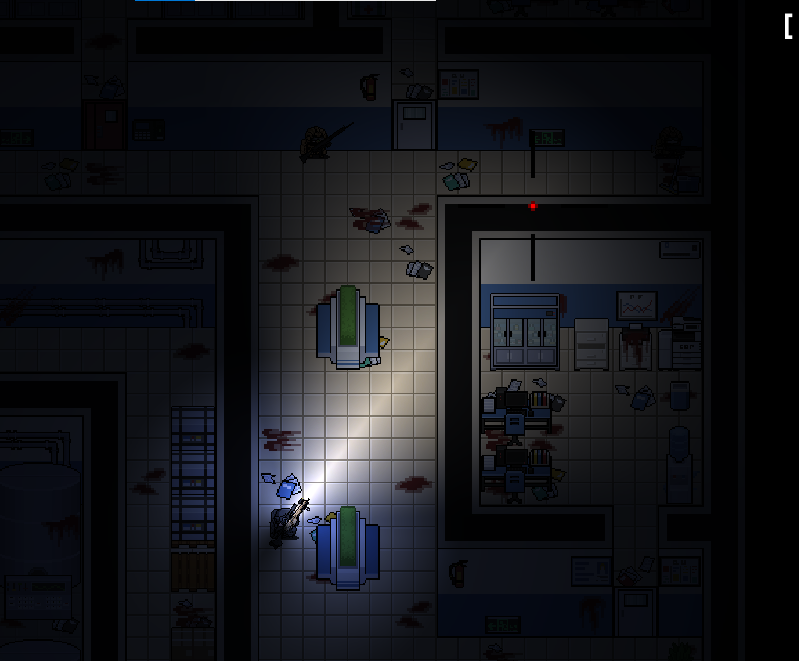
Above your first encounter with the soldiers, you will find an office room with 2 office desks. It is recommended to loot them for wooden keys. You could always bring one yourself but these desks will most times have wooden keys in them.

The reason you need the wooden key is for opening a room with some good loot in it as you proceed further in the laboratory.
As you make your way across the soldiers, you will finally reach the boss room.
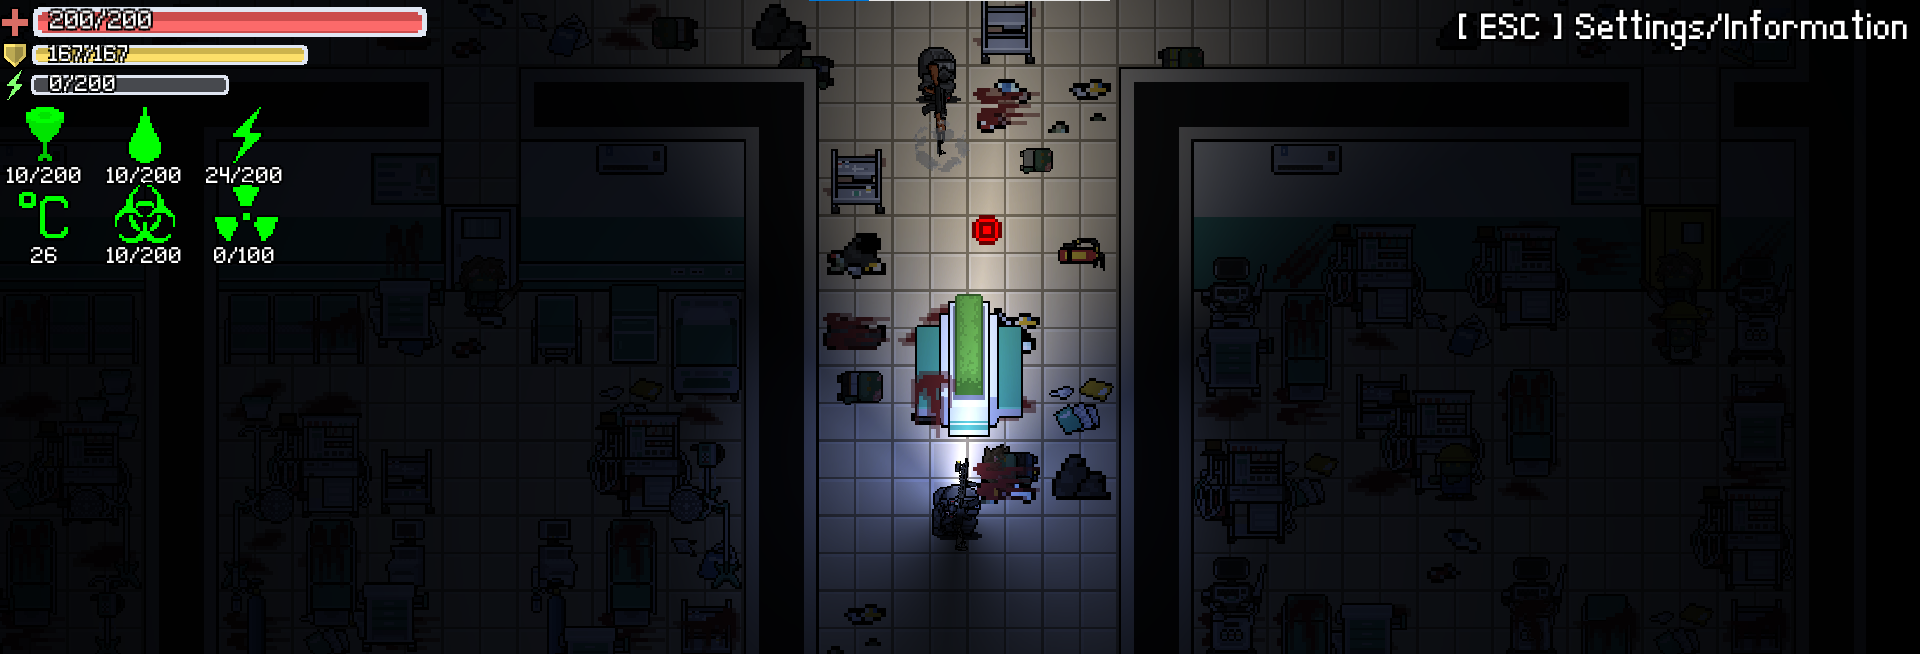
In the boss room, there will be zombies. You should always fully recover your armor and health before entering the boss room and be aware of how much ammo you have left. You will require around 4 stacks of TB ammo just for the boss itself.
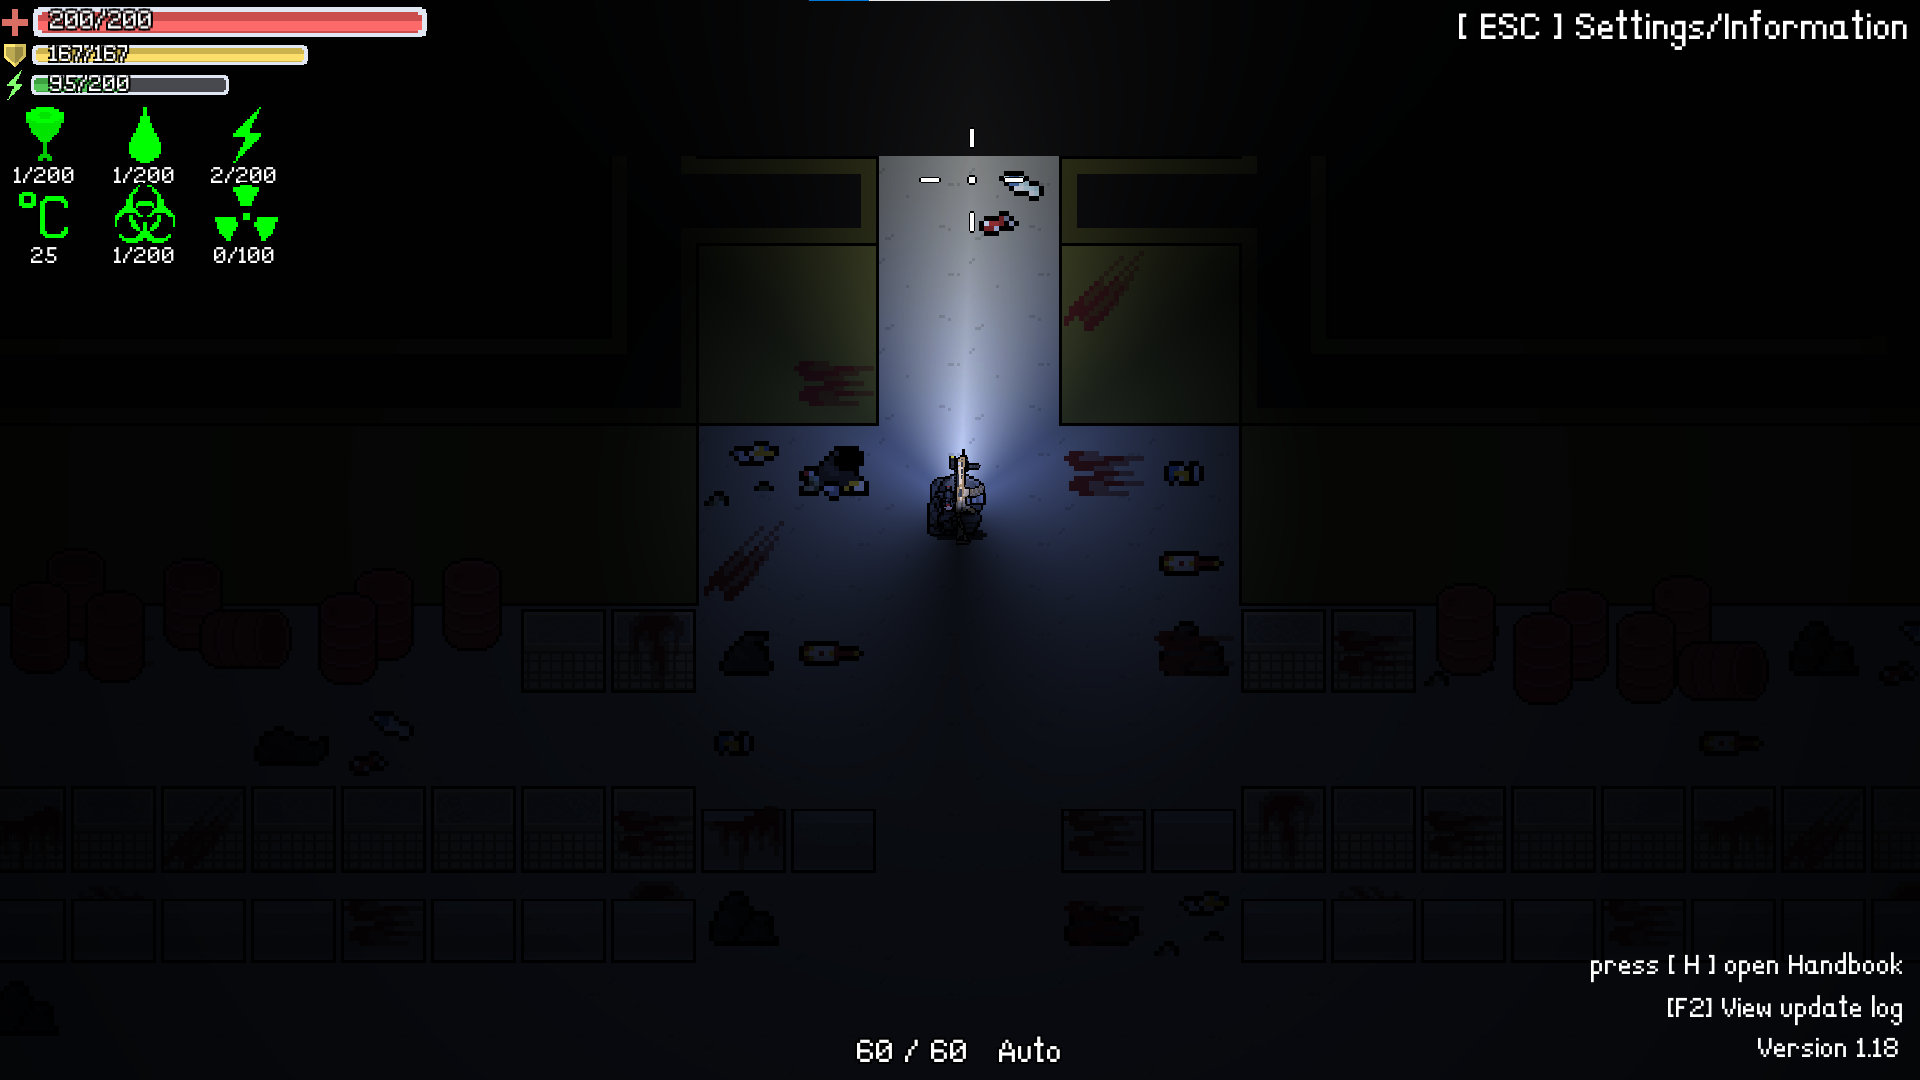
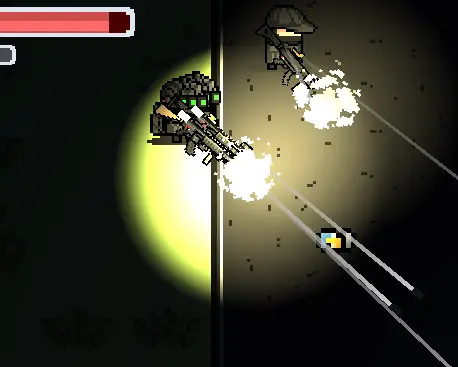
Upon engaging the boss, he will launch slow-moving balls of poison at you, that is his only attack type. They deal a lot of damage if they hit you, so by all means avoid it. As he attacks, he will also spawn zombies. The zombies will spawn at his location and they are randomized, meaning any type of zombie can be spawned, even the big armored one. If his attack hits anything, it will drop a layer of poison on the ground which will damage you if you step on it. And yes, I did take that hit head-on just to screenshot it.
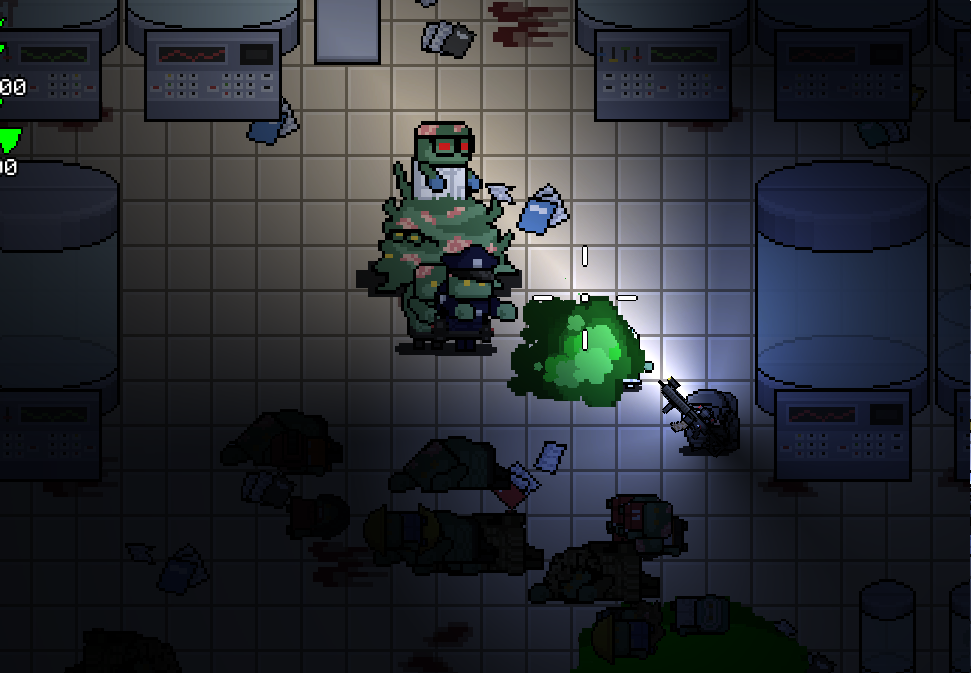
The best strategy I recommend is getting inside the boss’s room and dodge his attacks. As it is an open area you can quickly dodge them.
Use your K-418 to quickly deal large amounts of damage. The boss is extremely tanky so do account for that. As mentioned before, bringing HP ammo will let you deal 30% more damage so it can be very useful to bring some.
Upon killing the boss, it will always drop a document from either Heroic or Hellish difficulties and a diamond. There is a chance for the boss to drop Induction IC Card (Red), but as I was unlucky, it didn’t drop one. Now you should be free to either explore the rest of the map or loot the laboratory itself. Do be aware of your remaining ammo reserves and your health and armor, zombie waves on Hellish difficulty are quite difficult to deal with and consume a lot of ammo.
In Hellish difficulty, you may find better weapons like the MK-84 and the GSR28 which are much better than the weapons found in Heroic.
That is all the main bosses for the current version of the game. Congratulations if you have reached this point.
But my guide doesn’t end here as there are still mini-bosses to defeat.
Mini-bosses
Starting from normal difficulty, two mini-bosses will start spawning at specific locations.
They are both humans and they will drop unique or rare weapons for the current difficulty.
The weapons they drop will differ from one difficulty to another.
They spawn at both the Hospital and the Supermarket.
Supermarket Boss
The Supermarket boss can be found in the upper area of the supermarket.
You can identify him by his helmet with white stripes.
He will often be accompanied by other humans which will shoot you on sight. He shouldn’t be too hard to deal with.

On the Normal difficulty he will drop an APCR
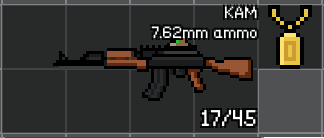
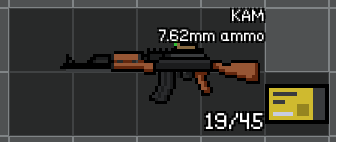
On the Hard difficulty he will drop a KAM
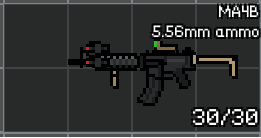
On the Heroic difficulty he will drop a MA4B
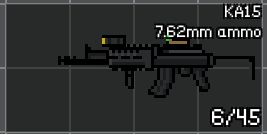
On the Hellish difficulty he will drop a KA15
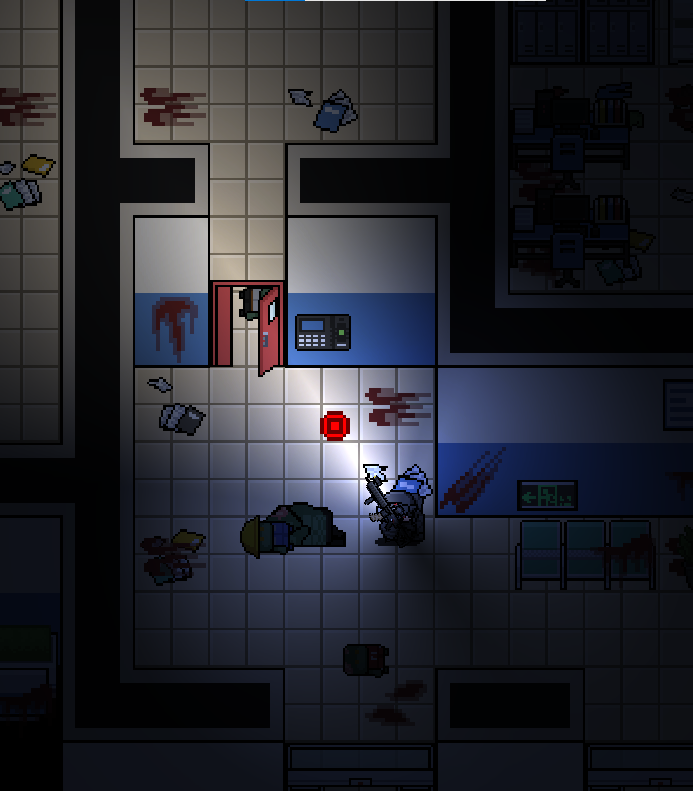
Hospital Boss
The Hospital boss can be found in the upper area of the hospital. He will be by himself and will shoot you on sight.
Depending on the difficulty you are he will drop a different weapon. He has a chance to drop a yellow keycard for the hospital’s yellow doors.
On the Normal Difficulty he will drop a KAM
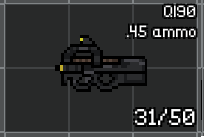
On the Hard Difficulty he will drop a QI90
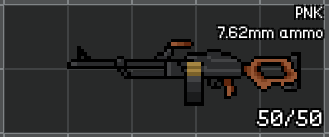
On the Heroic Difficulty he will drop a PNK
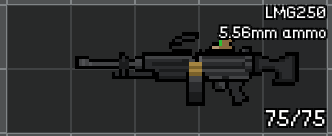
On the Hellish Difficulty he will drop a LMG250
The LMG250 is amazingly good since it uses 5.56mm ammo, it can reach a max capacity of 150 bullets if you equip an ammo box attachment and you can get it to have no recoil if you equip it with a bipod. It also does more damage and has more firerate and regular 5.56mm rifles.
A disadvantage is that you will have to repair it quite frequently.