If you aren’t quite sure where to start with Overcrowd (or would just like some general gameplay advice), here are 10 tips to help you dive into the game.
Tip 1: Don’t skip the tutorial
It’s worth your time and will give you a handle on the game’s base mechanics.
Tip 2: Consider Trying Easy Mode First
This game can be very challenging…in a good way! But challenges can quickly become overwhelming if this is your first time playing. Consider trying your first couple of stations on easy mode so you can get comfortable with the game mechanics before moving on to normal mode.
Tip 3: Your Staff Will Make or Break Your Station
Having well-trained staff (who have access to lots of tools) will ensure a smooth-running, high-rep station. Here are a few things to know about the staff:
- You can carry your staff over from station to station (hired staff can be found in the “off-shift” tab in the staff menu). This allows you to level up staff and build up an efficient team to help you run your stations.
- You can only hire up to 9 staff in the station network, so choose staff qualities well (however, it is possible to fire staff if you want).
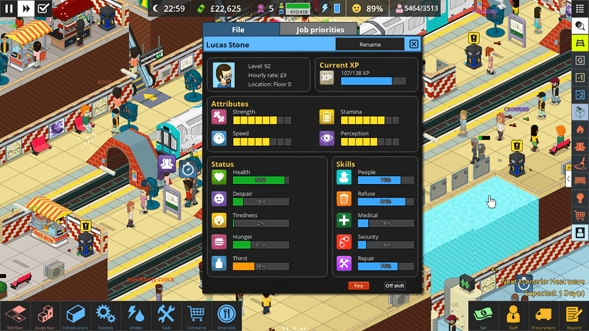
- Staff members get experience points from completing jobs. Once they have enough experience points, they will be able to level up. However, in order for the staff to actually level up, you need to go into the staff member’s file tab (right-click on the staff member’s image) to choose which skill area you want to level up. If you don’t do this, the staff will not level up. (See tip #4 below for more info about skill areas.)
- You need to supply an adequate number of tools for your staff. If a staff member requires more of a certain tool, the red text will appear near the staff member with the name of the tool they require. When a staff member goes on break, they take their tools with them, so it is usually necessary to provide more than one of each tool in the tool room for other staff members to access.
- Don’t forget to prioritize staff jobs (1 = high priority, 2 = medium priority, 3 = low priority). This is done in the staff member’s “Job Priorities” tab which you can access by right-clicking on the staff member’s image at the top of the screen (or by clicking on the staff button in the bottom right corner of the screen). Ensuring that different staff have a high priority on different jobs will ensure that your station runs efficiently (i.e. having someone with a high priority on medical tasks, another person with a high priority on safety tasks, etc.). I recommend putting “pick litter” on high priority for most (if not all) of your staff as litter will be your constant enemy during the game.
- Staff need breaks! Make sure to build a staff room early on in the station so your staff can rest and recover.
Tip 4: Staff Skills
Each staff member has four different skill areas they can level up: Strength, Stamina, Speed, and Perception. Below is a description of what each skill area does:
- Strength – this allows staff to carry more tools at the same time. Most staff start out with the ability to carry one or two tools. As staff level up in this area, they will be able to carry three and then eventually four tools at the same time.
- Stamina – this determines how long it takes a staff member to recover after carrying out a task (or failing to carry out the task) before being able to carry out the next task.
- Speed –this determines how quickly the staff move around the station.
- Perception – this defines the limit of the staff member’s perception of jobs that need to be completed around the station. The radius of perception originates from the staff member’s flag point (this can be moved). The larger the staff member’s perception, the more problems/jobs they are able to detect.
Tip 5: Keep an Eye on Station Reputation
- You lose the station if your reputation falls to 0%.
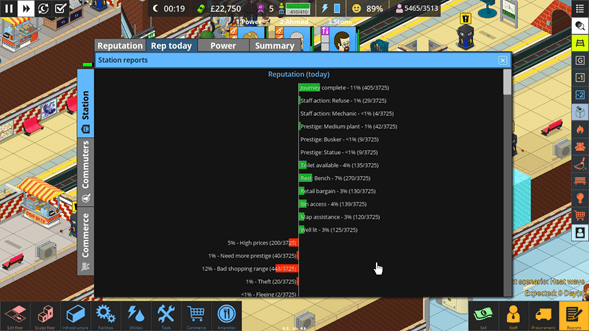
- Check the station report (it is available by clicking on the percentage next to the smiley face in the bar across the top of the screen but the daily report will also pop up on the screen at the end of each day). This will help you see where you are gaining and losing rep in your station. (see screenshot)
- Sometimes a situation may be occurring in your station that is causing you to lose a lot of rep very quickly. The game does not notify you of rep loss (besides the percentage at the top of the screen) – you will only get a notification if your rep falls below 20%. If this is happening, pause the game and find out where the problem is that is causing the rep loss. Sometimes it is throughout the entire station (i.e. high litter) or sometimes it is happening in one specific area. If it is happening in one area, consider installing an alarm and using it to evacuate people from the area. This will hopefully allow you to get a handle on the situation and stop the rep from continuing to drop.
Tip 6: Don’t Neglect the Procurement Tree
Procurement is how you level up your station. In Zone 5 stations (the first stations you have access to in the game, and also the smallest), you will start out with the most basic procurement but as you move into bigger stations, more procurement will become available (via bonds) and this will allow you to upgrade things around your station. Additionally, as soon as something on the procurement tree becomes available, commuters will start demanding it and if you don’t provide it in your station, you may lose some rep %.
Tip 7: Rooms
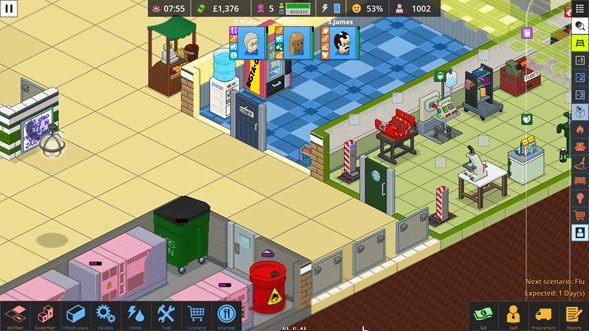
There are four types of rooms that you can put in your station – tool room, utility room, staff room, and control room.
- I have found that the best layout for the rooms is 3 tiles wide by however many tiles long as you need and place the door at the end of the room (see screenshot).
- Rooms cannot be moved, they can only be sold (once all objects have been removed/sold from the room). But if you need to relocate a room, first create a new room and then move the objects from the old room to the new one, before selling the old room. (Tip – move objects at nighttime because you won’t lose rep % for moving them as you do during the day.)
- You can easily expand rooms by adding on more tiles (this will also force you to re-designate where the door goes in the room, which is a convenient way of changing the location of the door in the room without having to completely re-do the room). I always try to leave some space at one end of my rooms (especially the tool and utility rooms) to allow for expansion later into the station.
Tip 8: Prepare for Scenarios
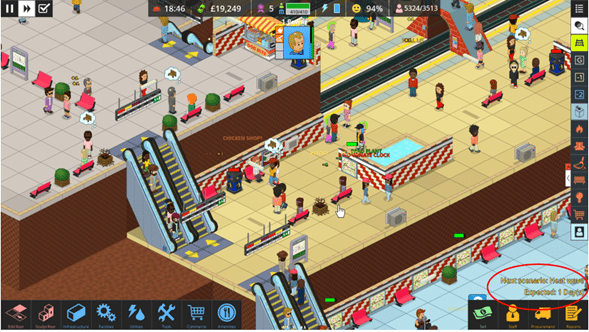
In the bottom right of the screen, you will occasionally see a memo about an upcoming scenario, along with how many days you have to plan for it. Use that time to make sure you have enough tools, staff, and other things (i.e. trash cans, fans, etc.) around your station to be ready for the scenario.
Tip 9: Money Trouble
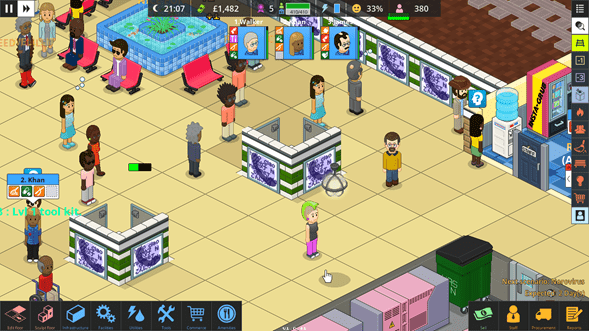
- When you first start the station, the money will be a bit tight. Make use of ads to earn money. Feel free to cover your station with them, and watch the money flow in! Tip: if you don’t have much wall space to place ads, create pillars by selling one tile of the floor.
- Also, take advantage of the tiles that are given to you when you first start the station. If you are able to work them into your initial design, perfect! But if you don’t need them right away, right-click and drag to sell them and get some free money to use elsewhere.
Tip 10: You can’t build tracks on top of each other – but that’s part of the challenge
Don’t let this turn you off of the game! Overcrowd is in part a puzzle game. Part of the challenge of each station is figuring out how to make everything fit. (Also, if you see gray tiles or tiles that look like water, these are in the station to add to the puzzle aspect, since you cannot construct on these tiles.)
