Dive into Patch Quest and ace the achievements with this detailed guide! I’ve got your back on the 100% completion journey. Crush every challenge, snag all 27 achievements and learn some useful tips along the way.
Introduction
Introduction
Hi, and welcome to my Patch Quest 100% achievement guide <3, I noticed that there weren’t any achievement guides so I decided to create my own, if you like this please give it a thumbs up and all that stuff. I apreciate any sugetions.
Have in mind:
Completition difficulty: medium (some anoying and hard achievements).
Time necessary: high (I got a near 100% in 50+ hours but I wasn’t focused just enjoyed it).
Categories:
First of all, there are 27 achievements in this game, I separated them into 2 different categories based on what they are related to. So, we have:
– Main game achievements: you get them by getting to a certain point in the story or doing something in the main campaign.
– Challenge achievements: this ones you get in the challenges the game offers, not in the main game.
Main Game Achievements pt1

The easiest one, just comple your first run.

Sounds harder than it actually is, if you are having trouble you can change the difficulty in the pause menu. But you’ll probably get it just by playing.
Tip: save your monster shield skill to escape or evade tricky situations, and use your skill points to purchase your own ability of clearing projectiles to use while dismounted (flashbulb)  .
.

Every time you clear one of the 17 dungeons you unlock a shortcut  , you get a treasure and the possibility to tame a golden-crown monster. And you also open a shortcut after entering a cave
  .
.

Also called king sized monsters  . You can tame one during the third phase of any danger room, in corridors if you have 10+ surges, and in the last room of every dungeon
  . Note that you need to circle around them three times with your lasso.
After that, go to the pause menu and in the Quest section click “send to base”.

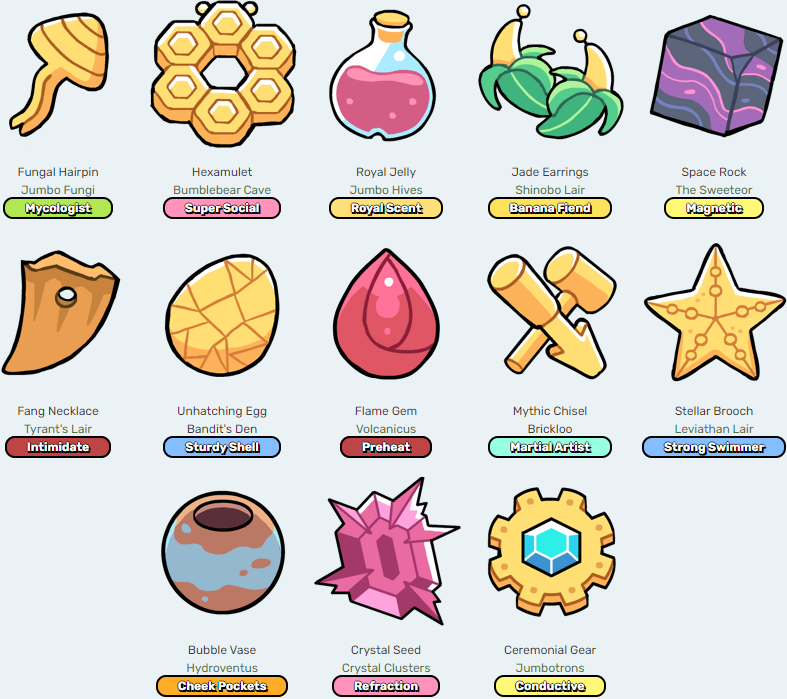
For this one make sure to equip some of this useful items and charms:
- Royal Jelly trincket: gradually summon allied Bee critters.

- Sunset Idol: gradually summon allied Moth critters.

- Critter Converter charm: defeated hostile critters will become allies.

- Web Shooter charm: whenever you use an attack skill, spawn some allied spiders.

- Hive Keeper charm: when you reload, gain some allied bee critters.

- Left Behinds: when you defeat a monster, spawn some allied flies.

I highly recomend going to a place like the critter danger room  in the Sticky Thicket (or any other place with that fly symbol), there you’ll get it quite fast.
Remember: you can also grab critters with your lasso.
Others: you can check this guide by DrunkenDucks for more details.

Now, if you want to get this achievement you need to survive for a while, so some experience is adviced.
First as soon as you star (when you have three charm options to choose) choose Regeneration , if it’s not one of the options restart, because this charm gives you +20 hearts (total of 50 HP). After this when choosing charms make sure to be on the lookout for one called Bonus Heart
  , since it gives +30 hearts (total of 80 HP).
How do you get the remaining 45 HP? Well, in addition to those charms you get more HP by– Actually I don’t remember 🙂 if someone knows please let me know.

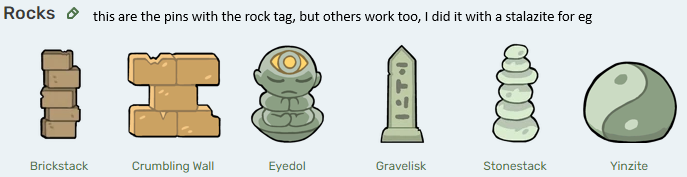
Exactly the same as the next one, but instead of a rock you need to plant a shiny pin. It can be whatever you want. Trust me, planting pins isn’t a waste since they give you charms so just place the first shiny you get.

You unlock the ability to plant pins in the map as soon as you complete your first dungeon, once you are able to do this grab one of the many rock pins an place it in one of the empty plots.
Note that this must be done in the same run.

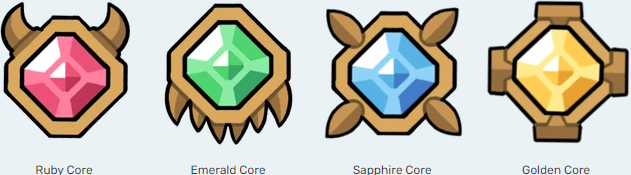
There are four (4) crystal cores in the game, each one is in one of the four (4) far corners of the map, and to get them you need to kill a main boss(harder than what you’ve encountered so far).

Just go to the cavern under your basewhen PAC tells you to (after getting one crystal core), at the end of the corridor you’ll find the crown of the last Patchlantis King, once you grab it the credits roll and indicate the “end”, although it clearly isn’t :).

For this ending you must have all the four (4) crystal cores I mentioned before, again, there’s one in each far corner of the map. Once you’ve them all, PAC tells you to go to the cavern below your base, do so and unlock the door.
Once inside you’ve to go all the way to the right to the room with this pin symbol  , there’s a computer you’ve to interact with, doing so will corrupt PAC. Then fight against a combination of all the gollems, after defeating it your pets save you and let you fight against PAC where you hopefully win,that finally trigers the ending and the credits, succesufully achieving the “real ending”.

In order to get this achievement you need to get to the max XP level of 20 and have unlocked every skill, sounds like a lot but you get there fast. In order to gain XP collect new pins (doesn’t matter if you plant them).


Very simple, you know when you’re crossing corridors and in a random room you get ambushed by monsters? Well, instead of killing them or dealing any damage at all just grab your lasso and tame one or two. The rest are going to run away.

Do this at the beggining of the run (run == quest), just go to one side of the map and using shortcuts or just walking go to the other three. Make sure to step in each of the four biomes or go through one room/corridor to make sure you get it.
Main Game Achievements pt2

To be an honored archeologist simply grab every single treassure (2 legendary treasure, 4 crystal cores, 13 idols, and 13 trinkets), there are a total of 32 treassures, this requires you clear every one fo the 17 dungeons, defeat 11? bosses and trigger both endings (since grabbing a piece of treassure is what triggers them).


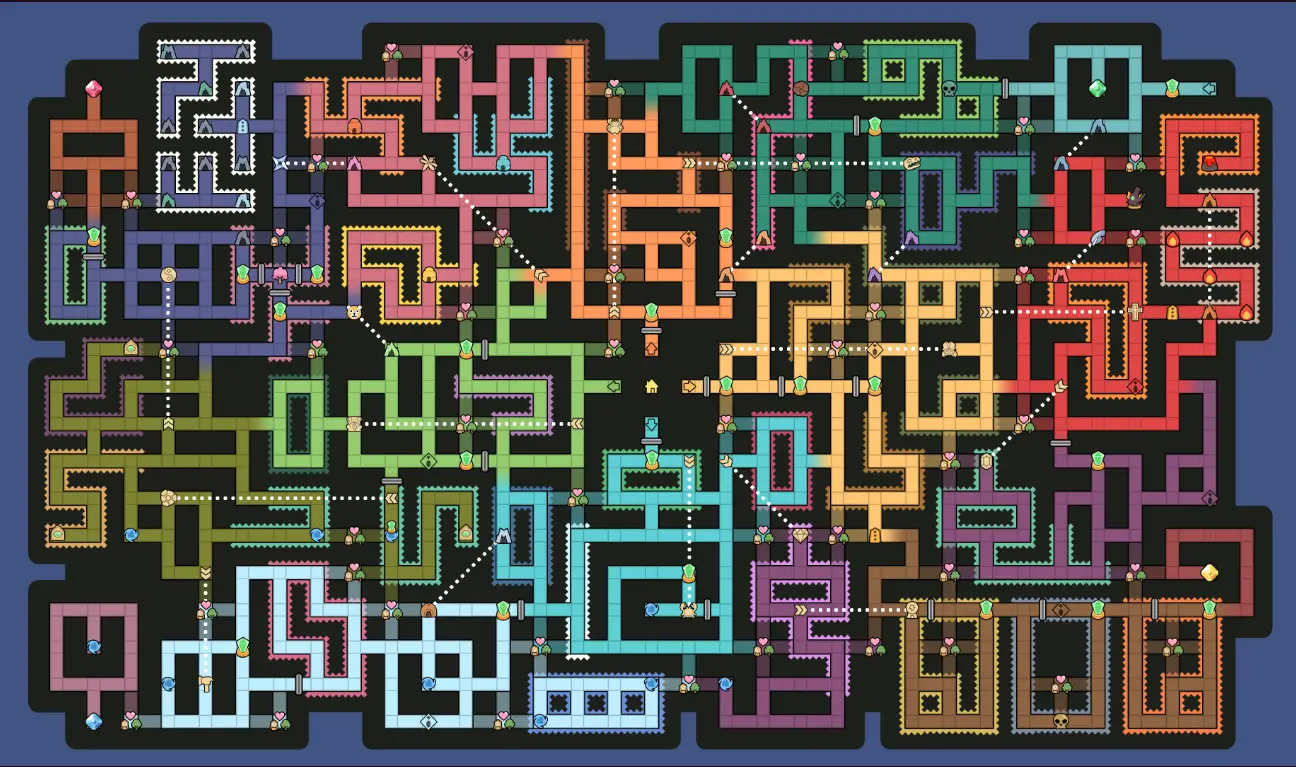
Revealing the entire map takes some time and by that point you probalby completed the story mode, so if you are far from story completition just ignore this for now and have fun (in the picture below ignore the corridors or rooms with less opacity).

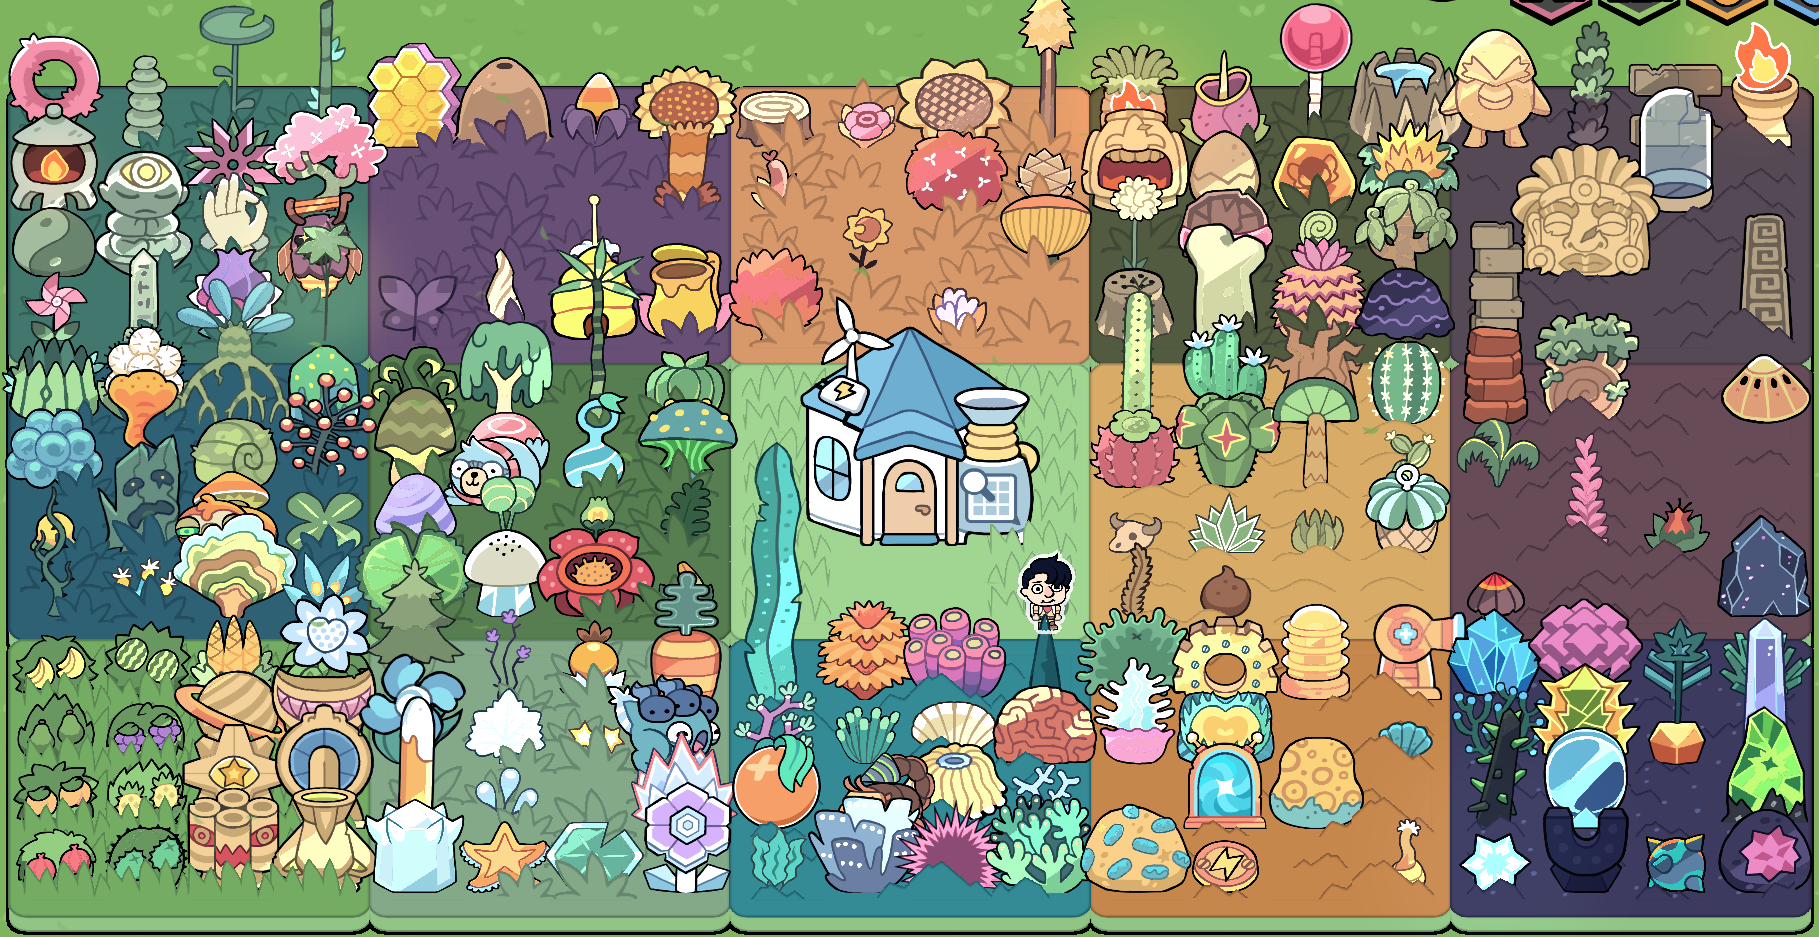
If I’m not mistaken there are 13 themed patches that you can recreate in your base, these are: jungle, hills, desert, coast, swamp, hive, zen, glacier, fossil, volcanic, crystal, rust, and dungeon.
To get to 14 zones in your base you’ll have to have a duplicate since the common patch doesn’t count.

Asuming you already have a pet (tamed monster you sent to your base) get next to it and you’ll see a list of items it wants to be confortable (like specific pins or biomes), successfully doing that does most of the work, now you just need to pet it every time you get to the base. You’ll see his hearts start getting yellow and his level increases up until 10.

There are like 76 monsters including the “variations” that you’ll have to ride in order to get this achievement, so preactice patience beforehand. Below I copied the same list of monsters that you may find in the wiki page.
Tip: if you can’t find a monster in it’s biome check the sub-zones.


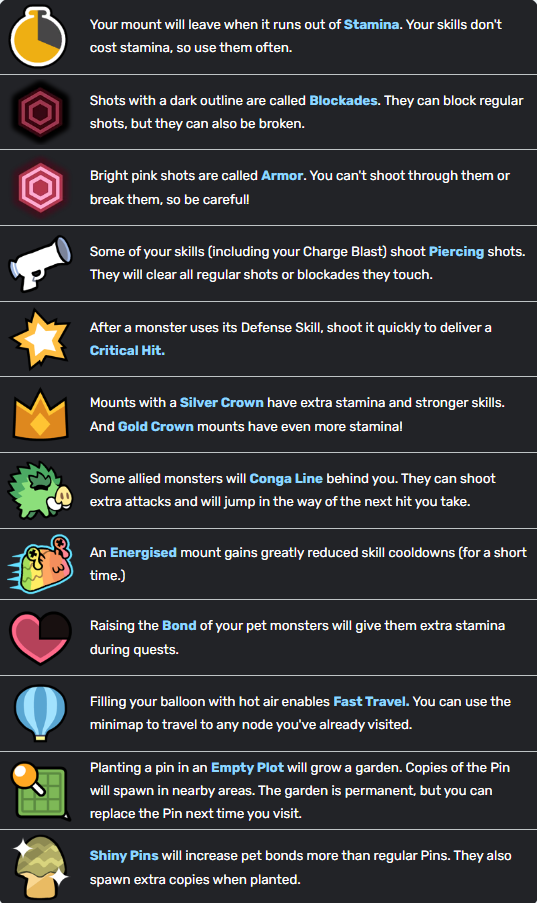
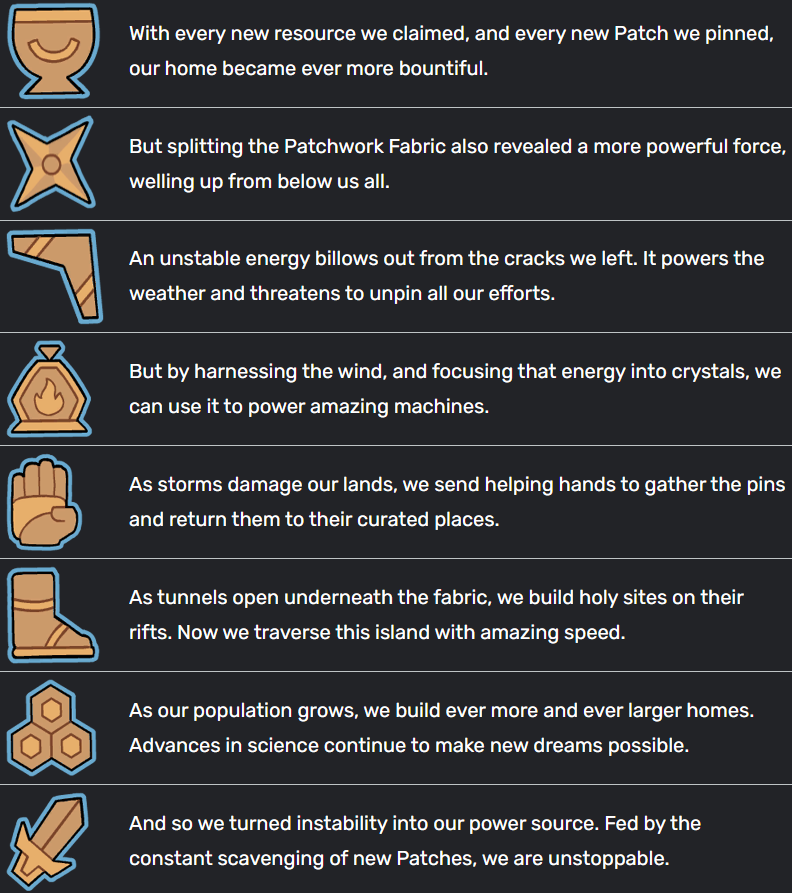
The different notes in the game are given doing specific tasks, so here is how to unlock them:
- PAC’s Guide: by completing the tutorial.
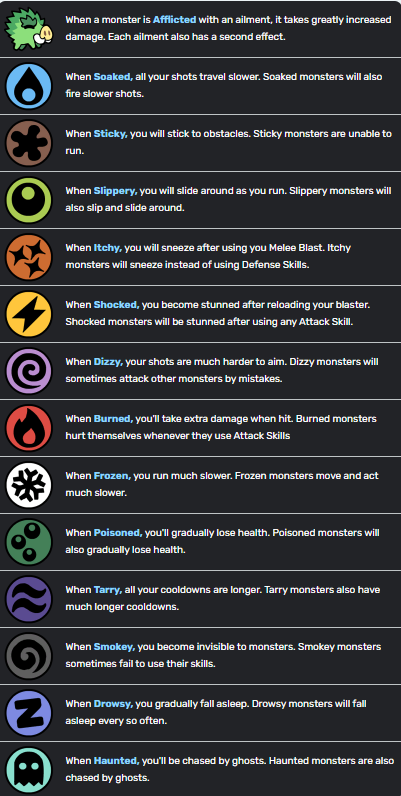
- Ailments: when the player or a monster is afflicted by them.
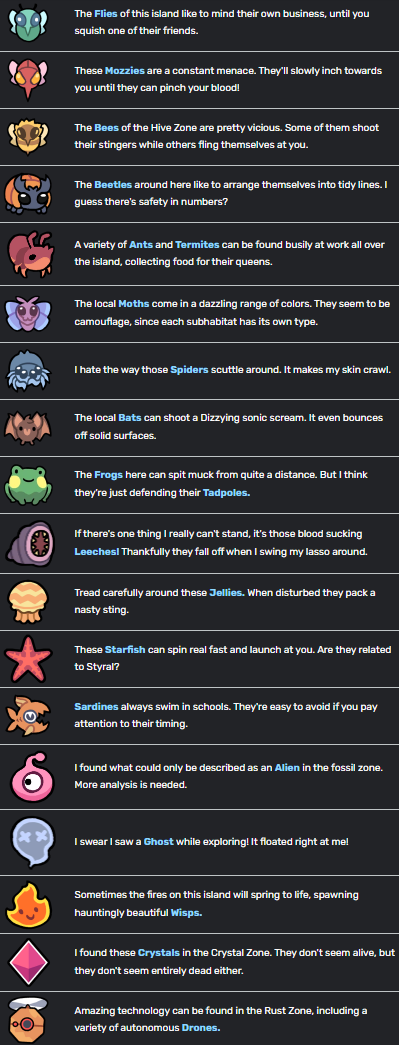
- Critters: when you have them as allies, with the lasso or any means.
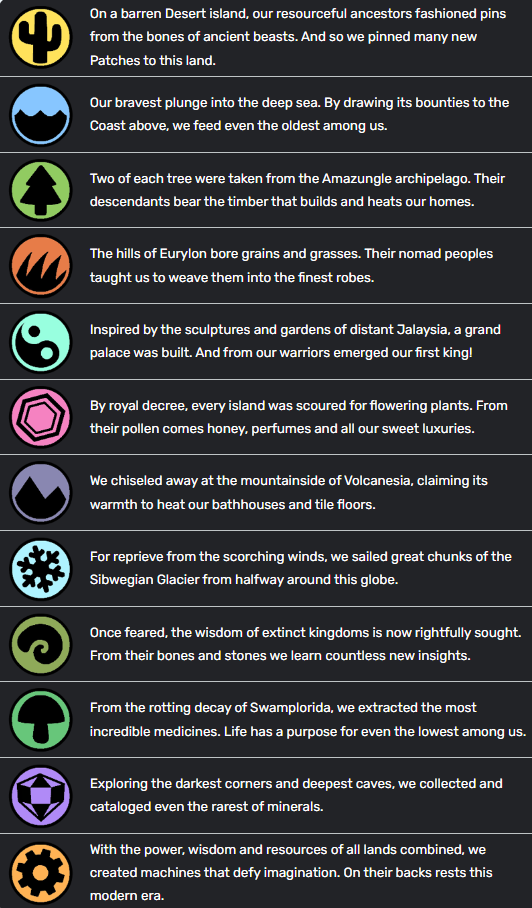
- Origins: by interacting with lorestones, there’s one in every habitat.
- Golems: after you beat one of this mini bosses.
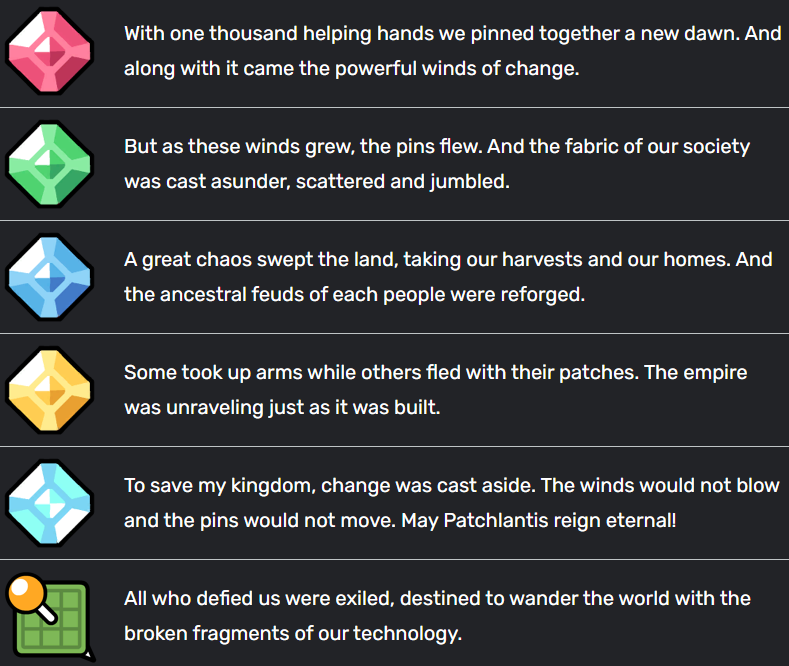
- The Calamity: after interacting with special lorestones in each corner and in the Control Chamber.
Below are all the notes:

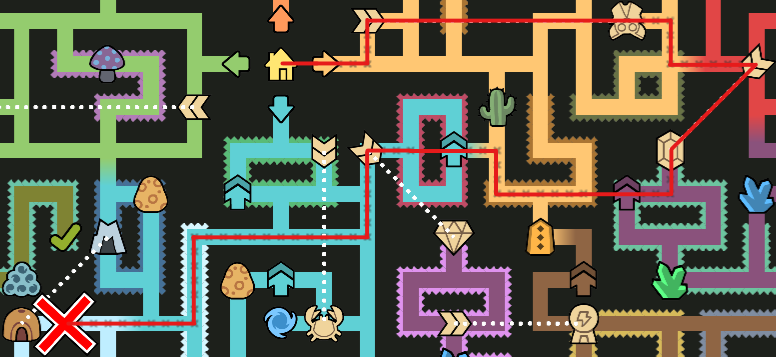
This is the path I took for this achievement, it’s easy to do you can plant the first volcanic pin you see, I chose a volcano tho because I’m a big troll.

Note that you can’t ride any monsters in the entirety of the run, if you’re playing with someone else it aplies to them too. It’s not hard just boring, since you’re slower and have less attacks, I did it in the easiest difficulty and with casual mode on to make sure I got it first try.

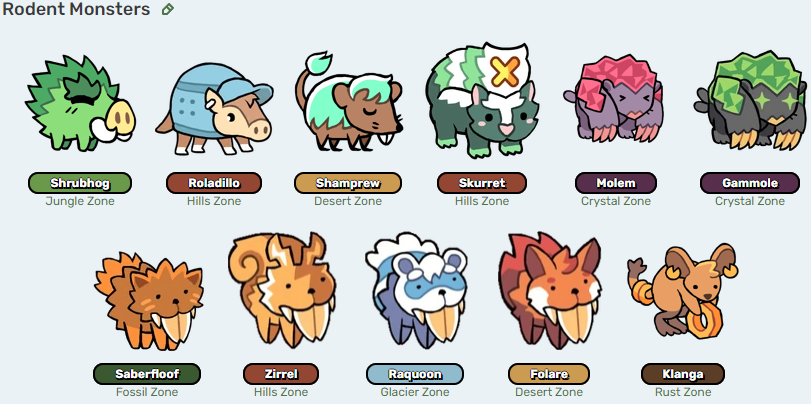
Another of the annoying achievements but not quite as the next one, for this one you’ll need to send to your base every monster type.
Luckily there’s no need to get every monster variation just one of each kind (example image below).
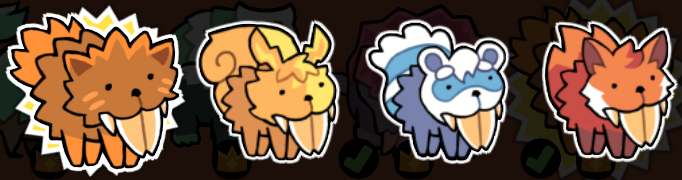
Remember: you can check Bestiary achievement for the full monster list and locations.

This is the third most rarest achievement in the game but don’t let that fact scare you. It isn’t because of difficulty, it has to do with RNG, sometimes rare pins don’t spawn on a quest.
Tip: check sub-zones too not only the main biome.


Challenge Achievements (Work In Progress)
The challenges are like quick levels with modifiers to test your skills in the game.

Quite easy, just complete one of the challenges in the difficulty you prefer.

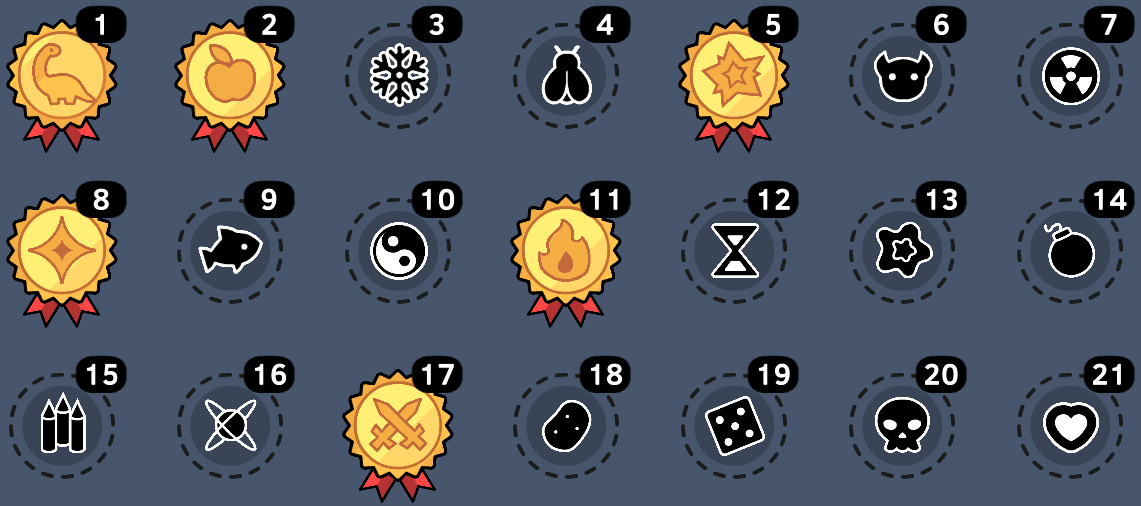
Okay, so this is where it gets hard, really hard. In order to complete this achievements you’ll have to complete each of the 21 challenge levels on the hardest difficulty (if you wish to kill two birds with one stone), and here you don’t have any of your skills, pets or treasures.
Note: the final boss in every challenge has two phases.
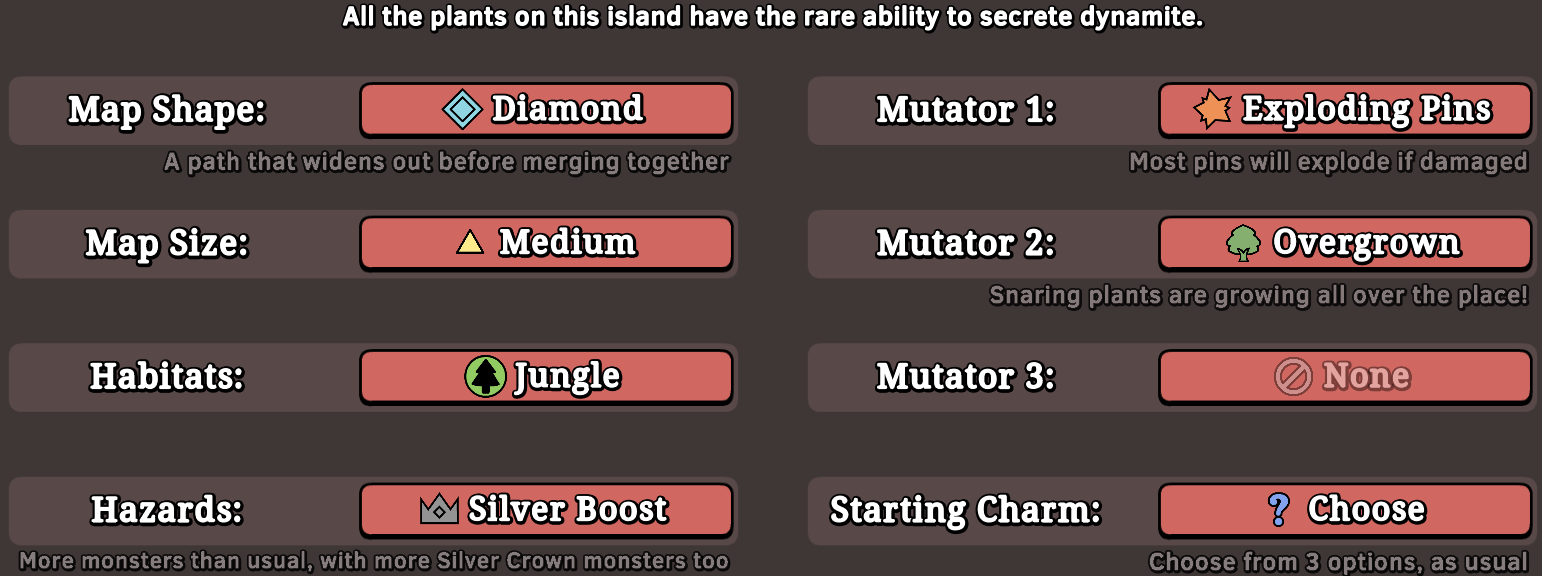
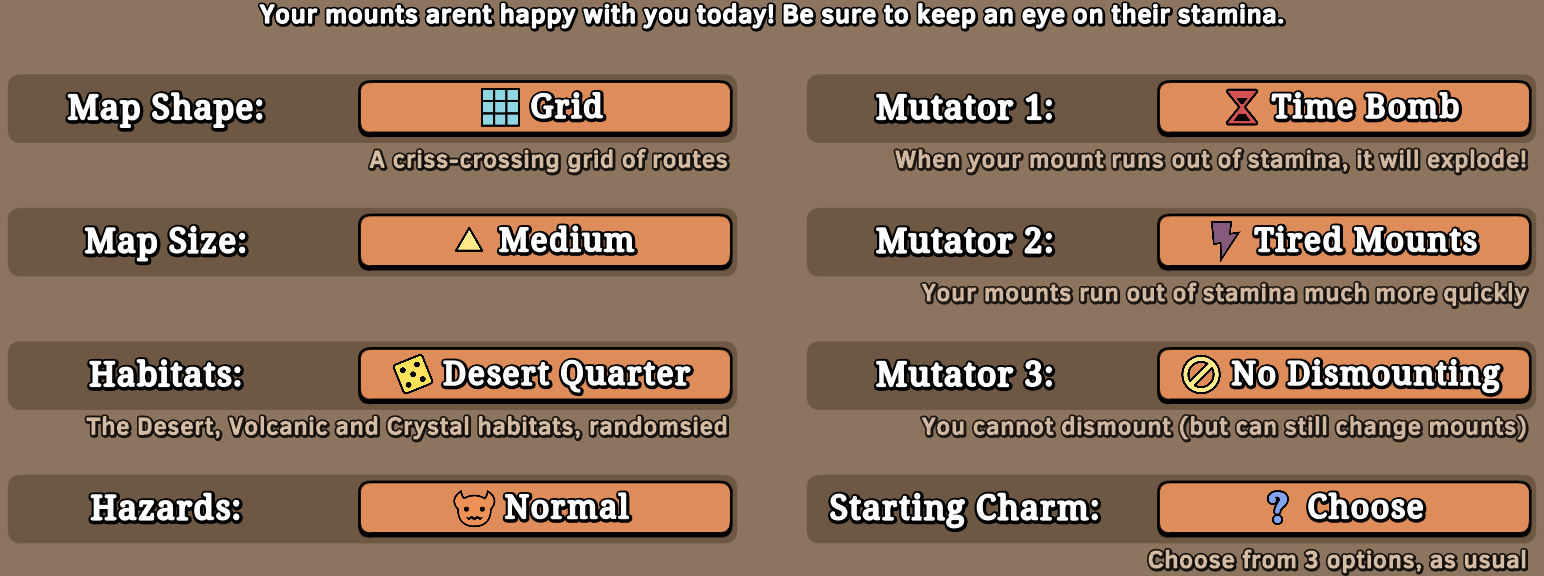
Below, I listed the challenges in order with their respective characteristics. Additionally, I’ve included the difficulty I personally assigned to each and some useful tips:
1. Supersize Me
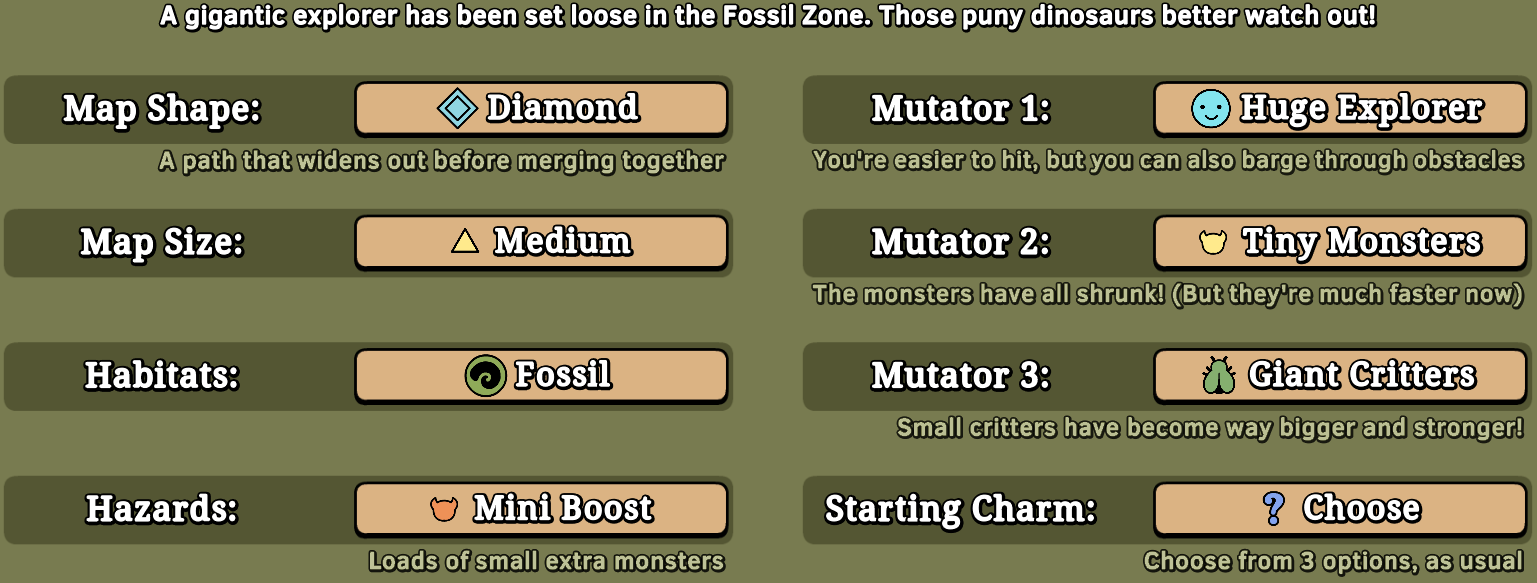
- Tip: use critter charms.
- Difficulty: easy.
2. Smoothie Science
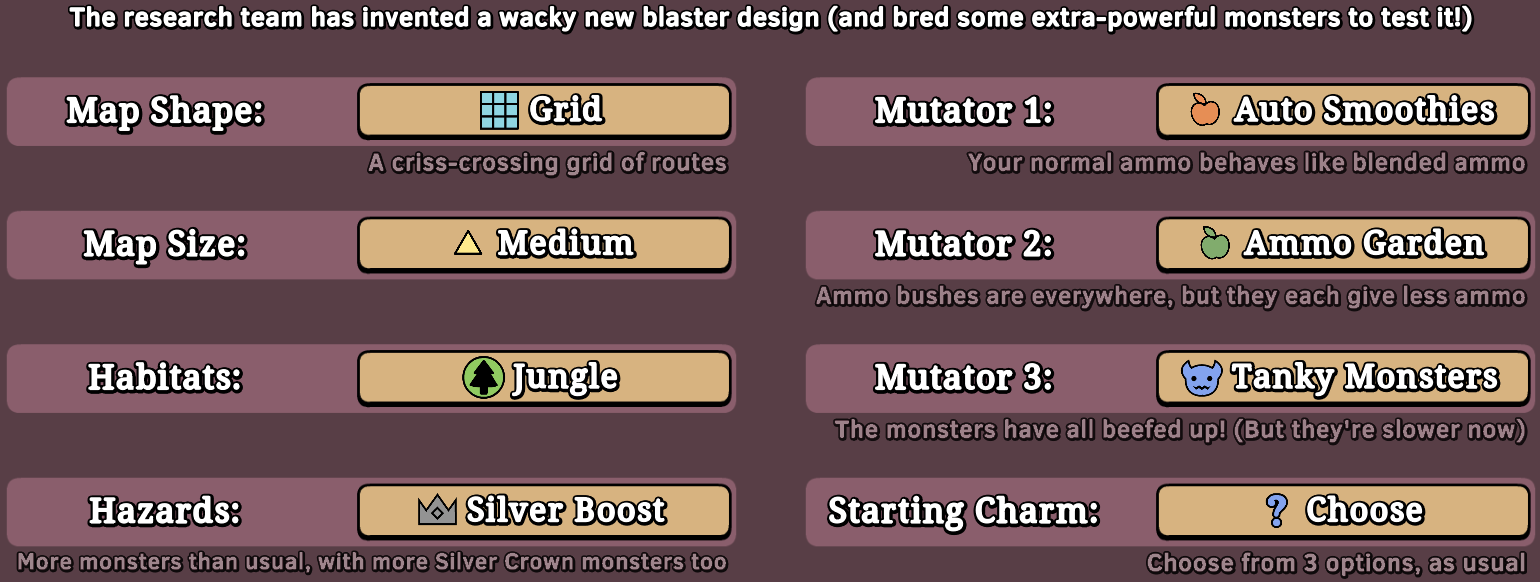
- Tip: be fast.
- Difficulty: easy.
3. Pinball Machine
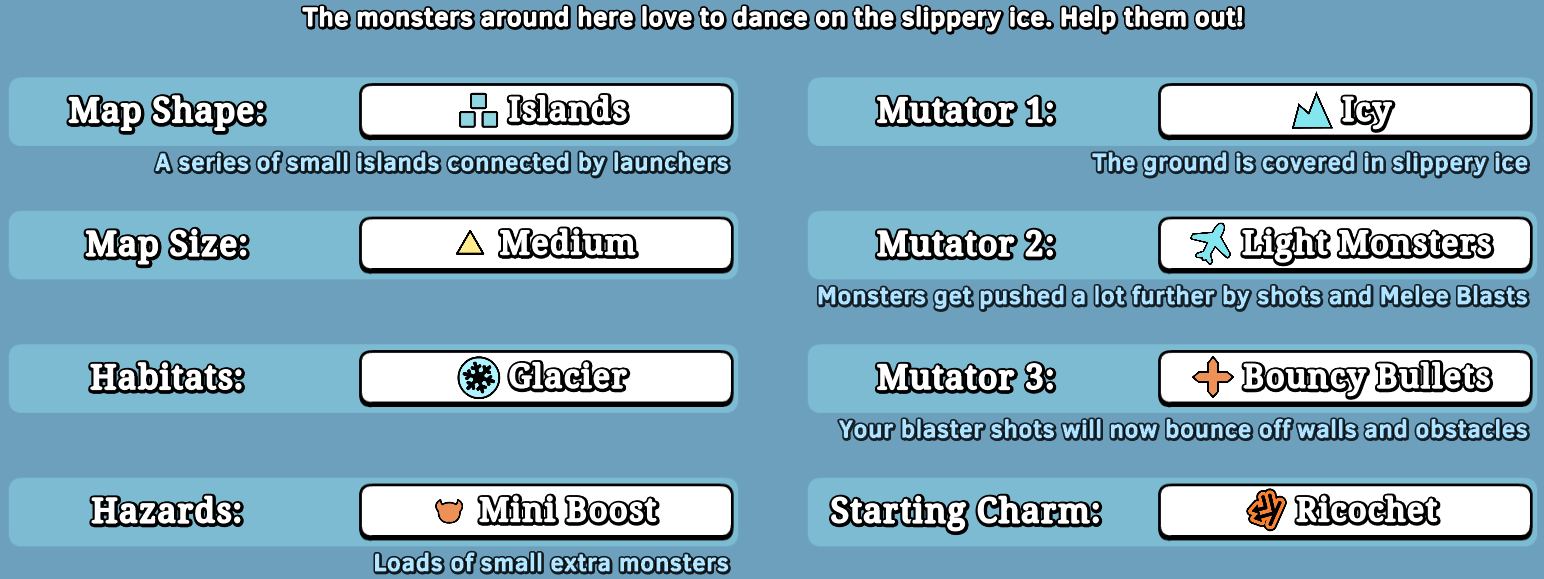
- Tips: be carefull, prioritize shield and dodge upgrades.
- Difficulty: hard.
4. Honey Season
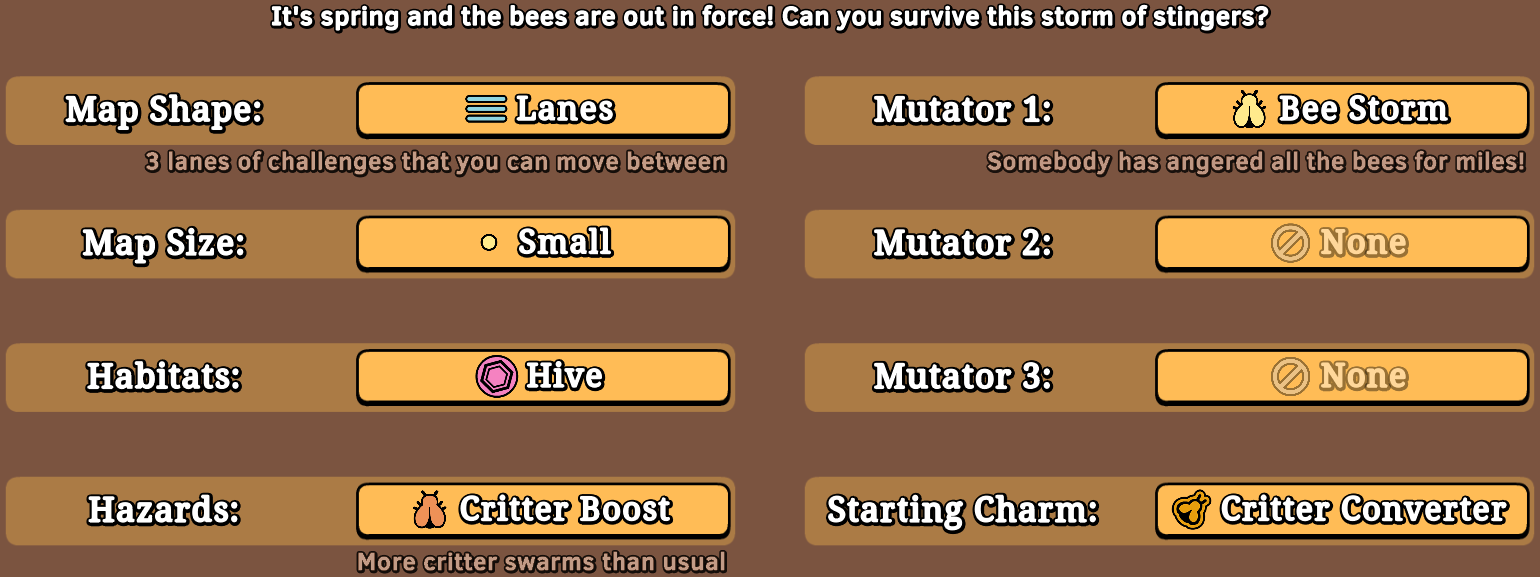
- Tip:
- Difficulty:
5. What Could go Wrong?
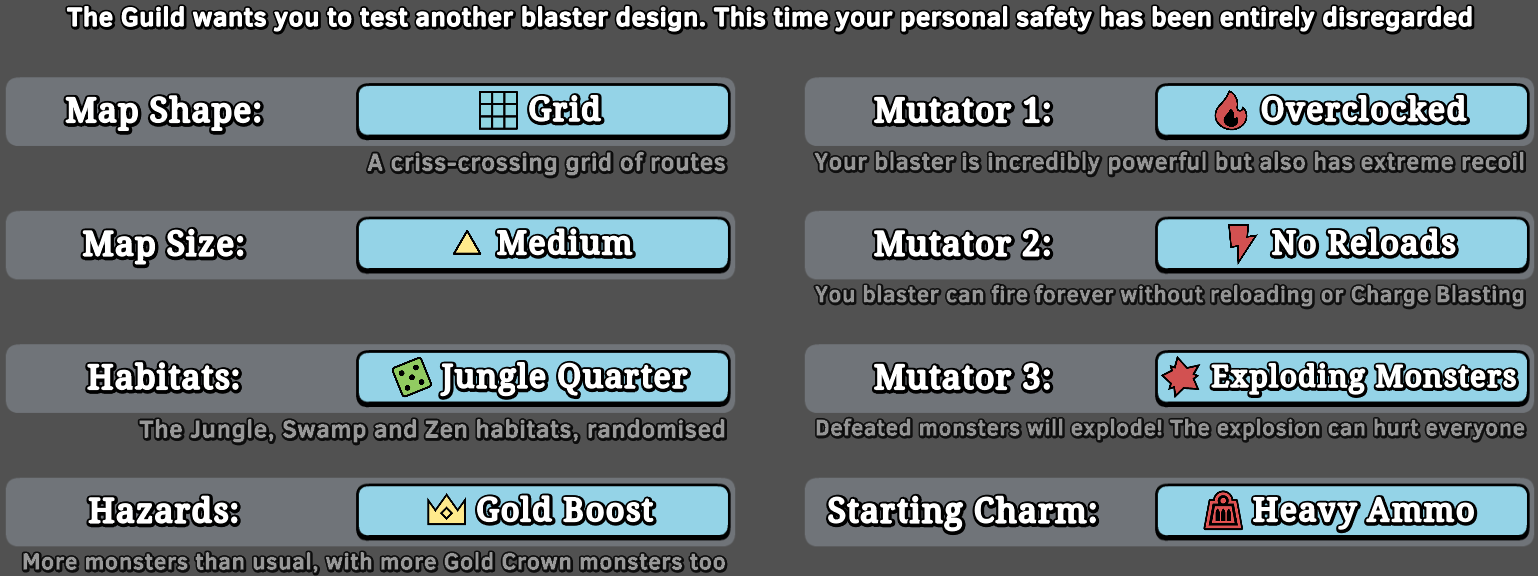
- Tips: abuse the ammo since the extra recoil is minimum, and deal with one monster at a time.
- Difficulty: easy.
6. Mount Whisperer
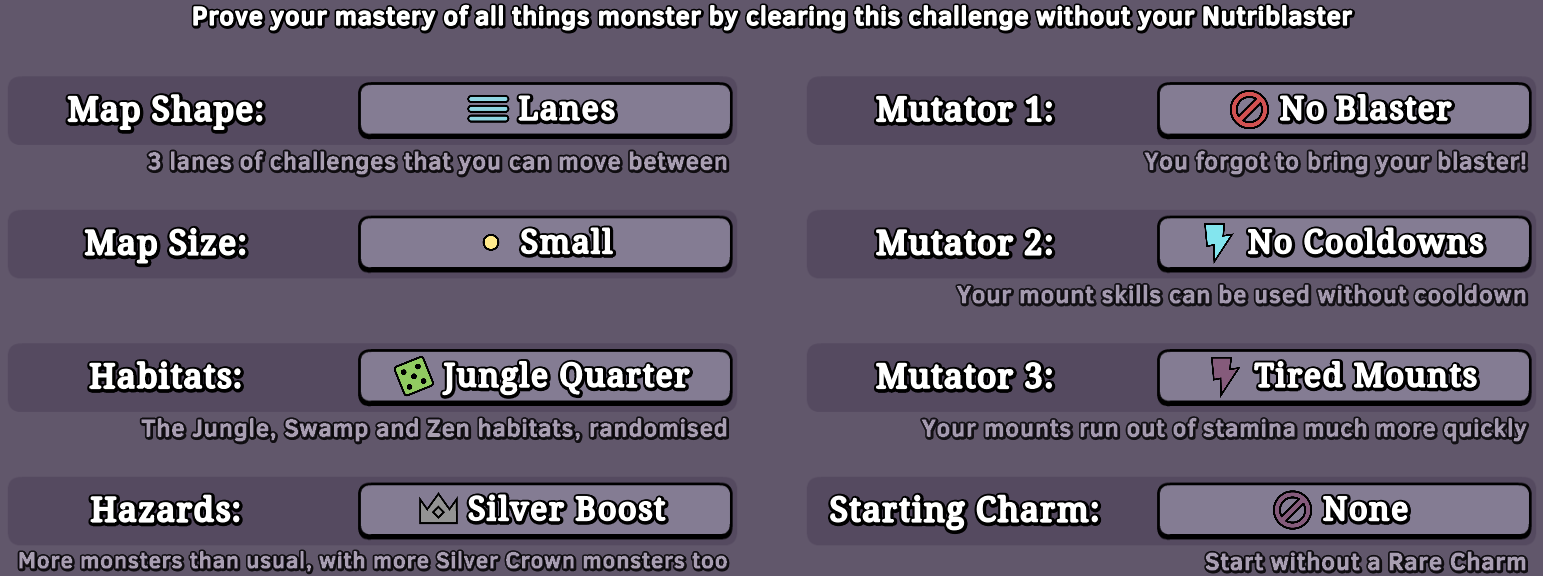
- Tip:
- Difficulty:
7. Mutant Swamp

- Tip:
- Difficulty:
8. Charmaggedon
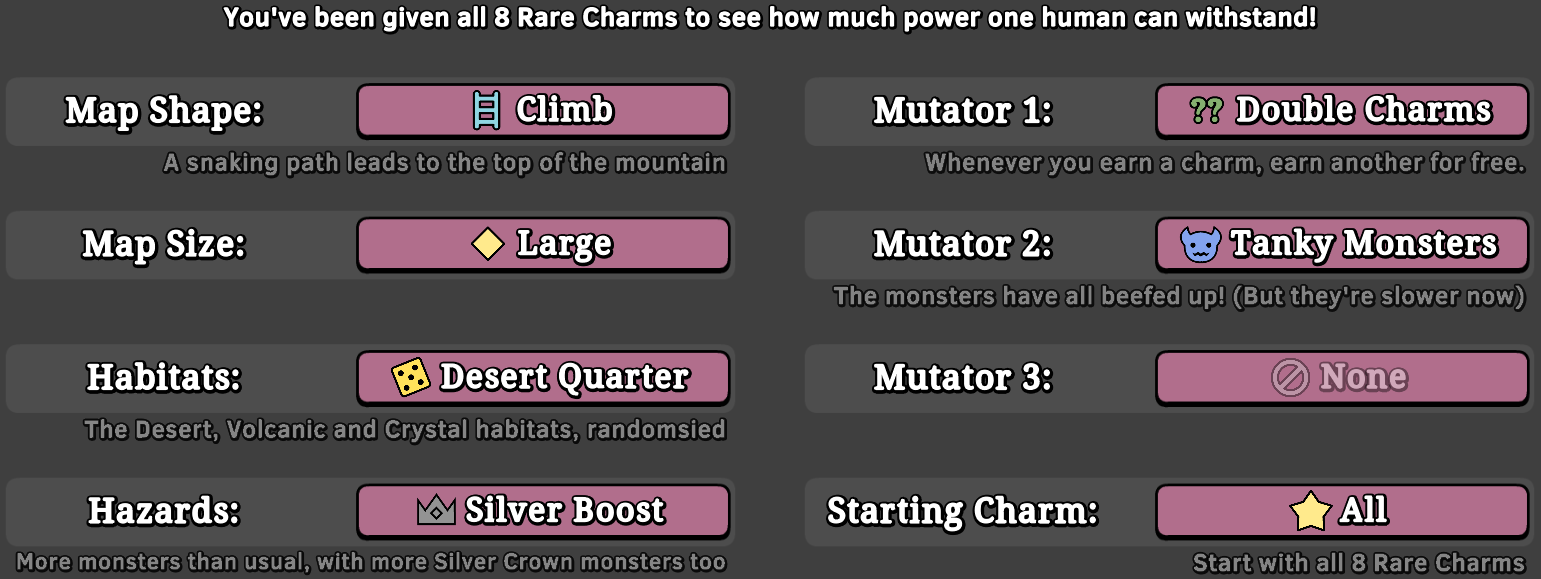
- Tip: nothing to say, you’re overpowered.
- Difficulty: easy.
9. High Tide
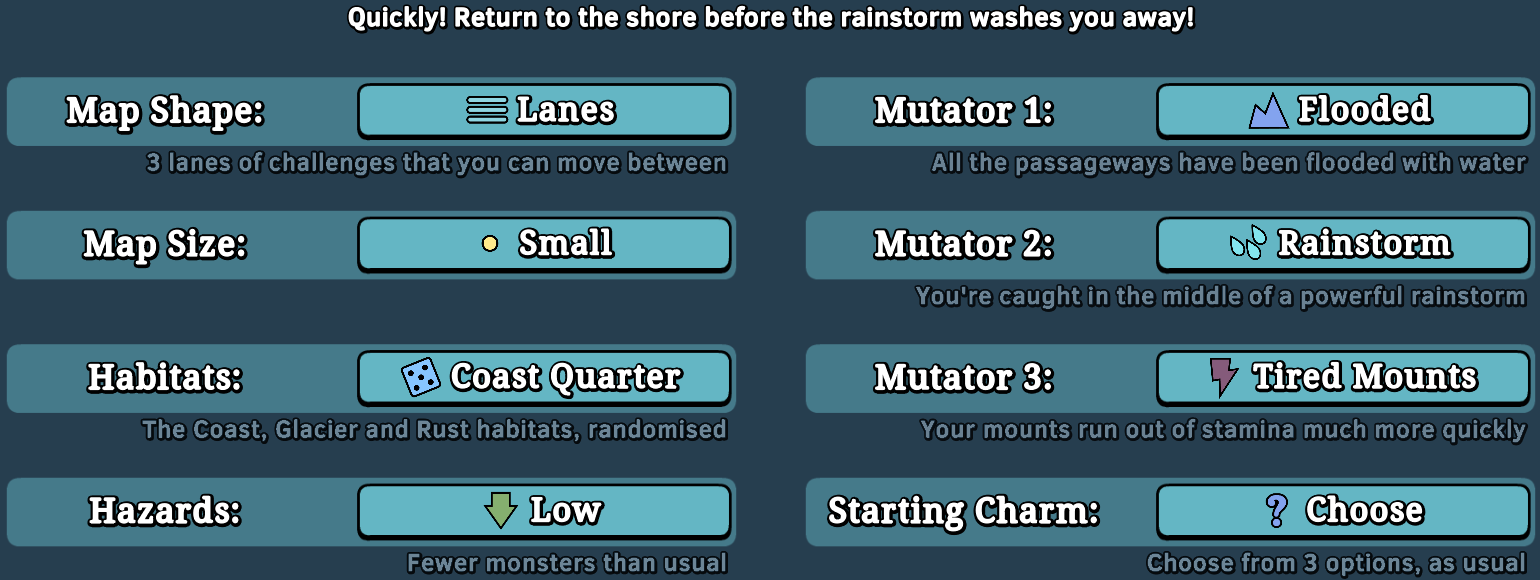
- Tip:
- Difficulty:
10. Ninja Trial

- Tip:
- Difficulty:
11. Hot Headed
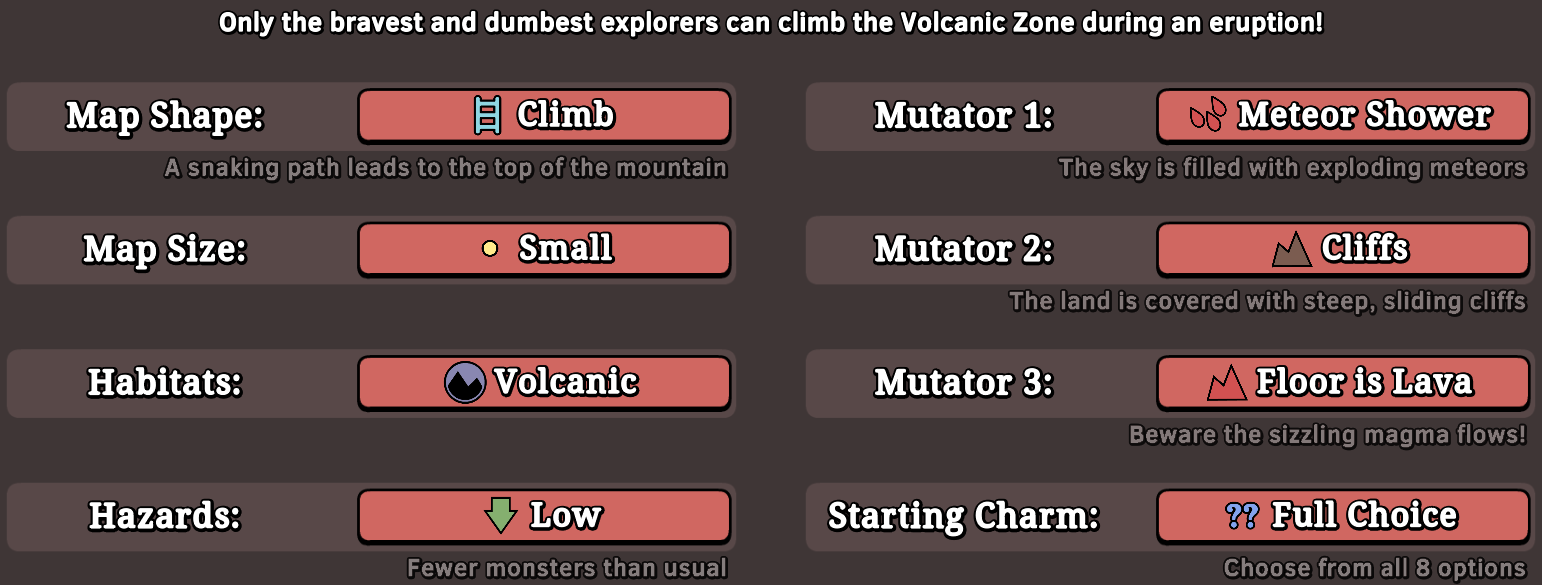
- Tips: speedtun it, there’s barely any monsters just don’t get hit by the meteorites and you’re good. I chose Regeneration.
- Difficulty: easy.
12. Time Wrap
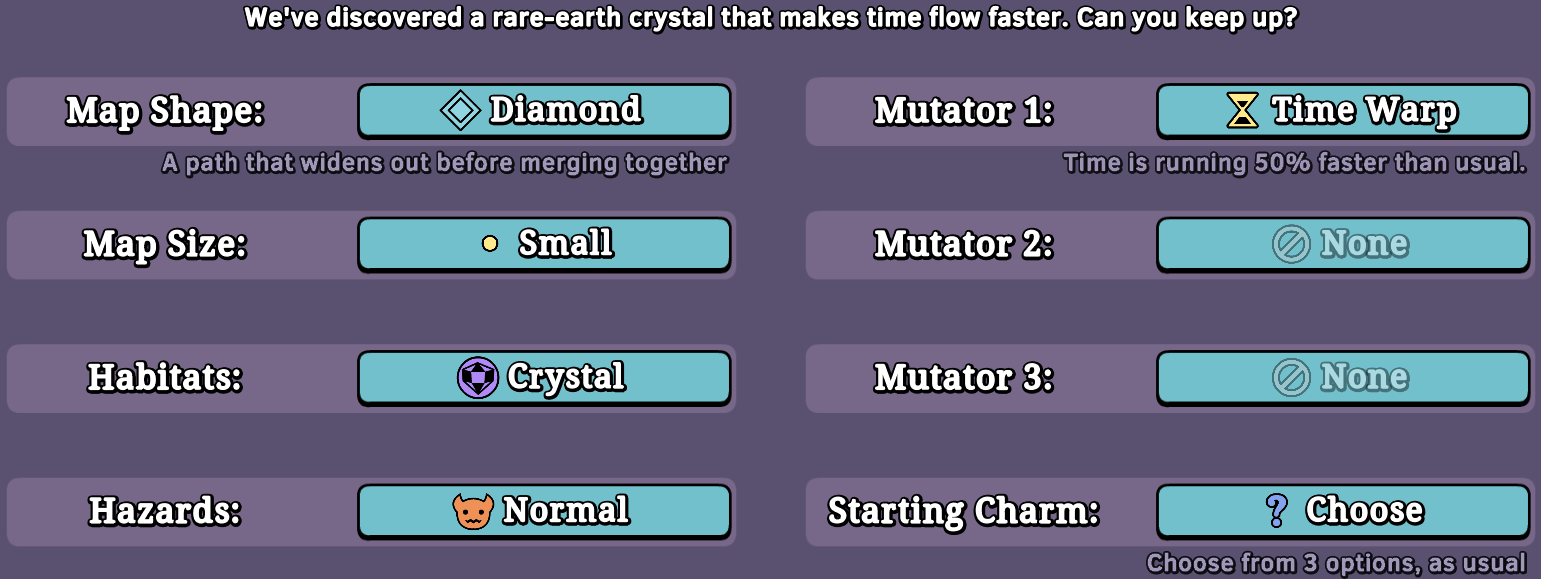
- Tips: complicated to keep up with the projectiles so keep your distance, make sure to use your monters’s shield/dodge skill often. Golems are specially hard here so learn their attacks, homing ammo is useful.
- Difficulty: medium.
13. Gelatin Storm
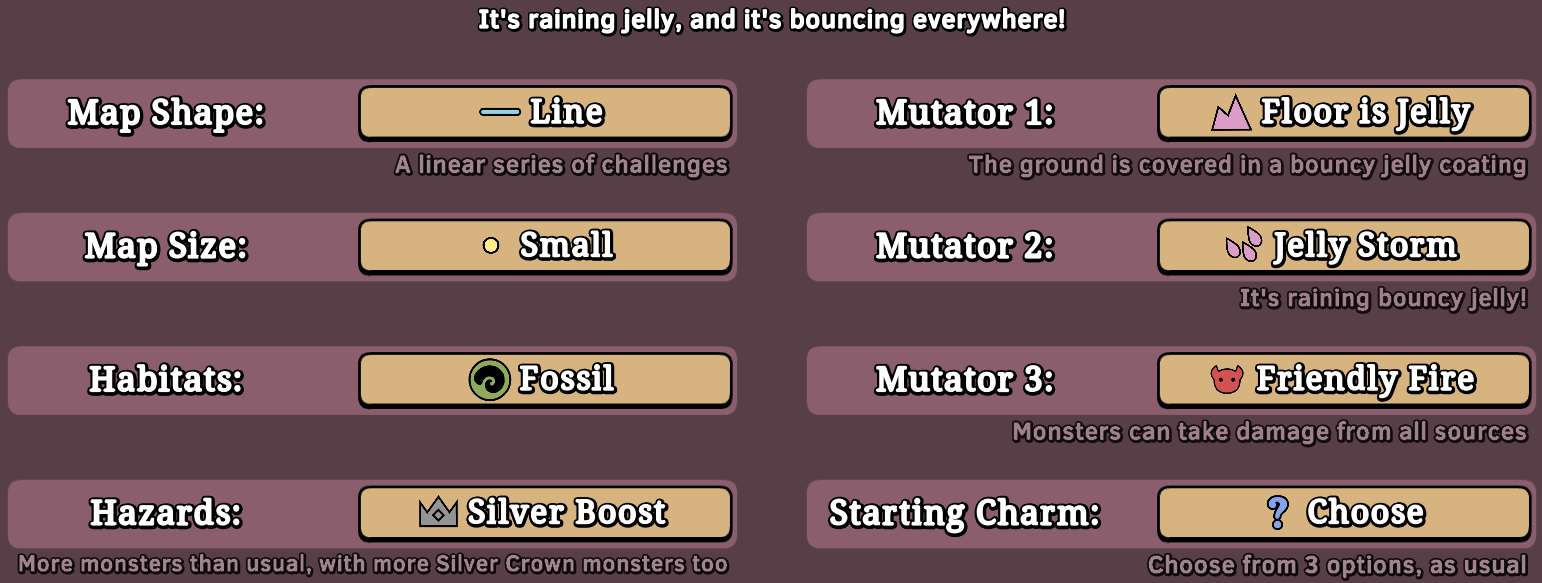
- Tip:
- Difficulty:
14. Don’t Touch That!
- Tip:
- Difficulty:
15. Think Fast!
- Tip:
- Difficulty:
16. Equal and opposite
- Tip:
- Difficulty:
17. Power-up Gauntlet
- Tip: it’s not worth it to circle around, every time you clear a danger room you earn health (between 20 to 50) and a ton of stuff.
- Difficulty: easy.
18. Hot Potato
- Tip:
- Difficulty:
19. Jumble Sale
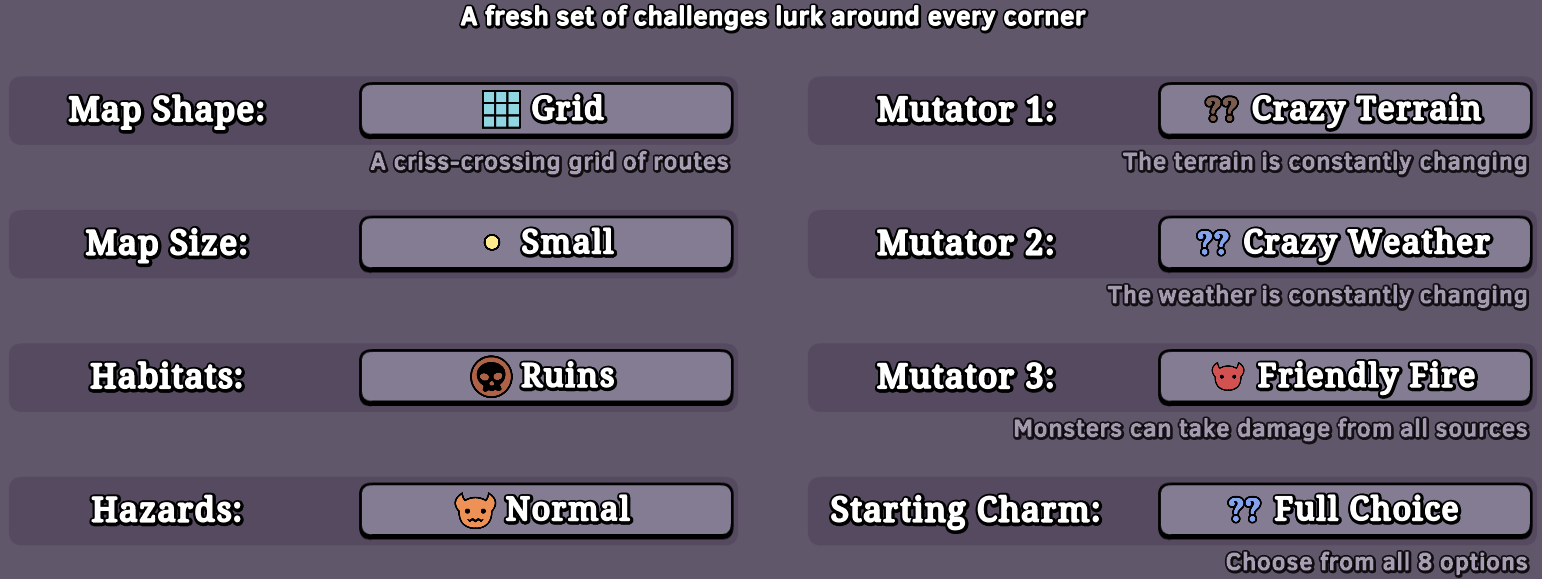
- Tip:
- Difficulty:
20. Boss Rush
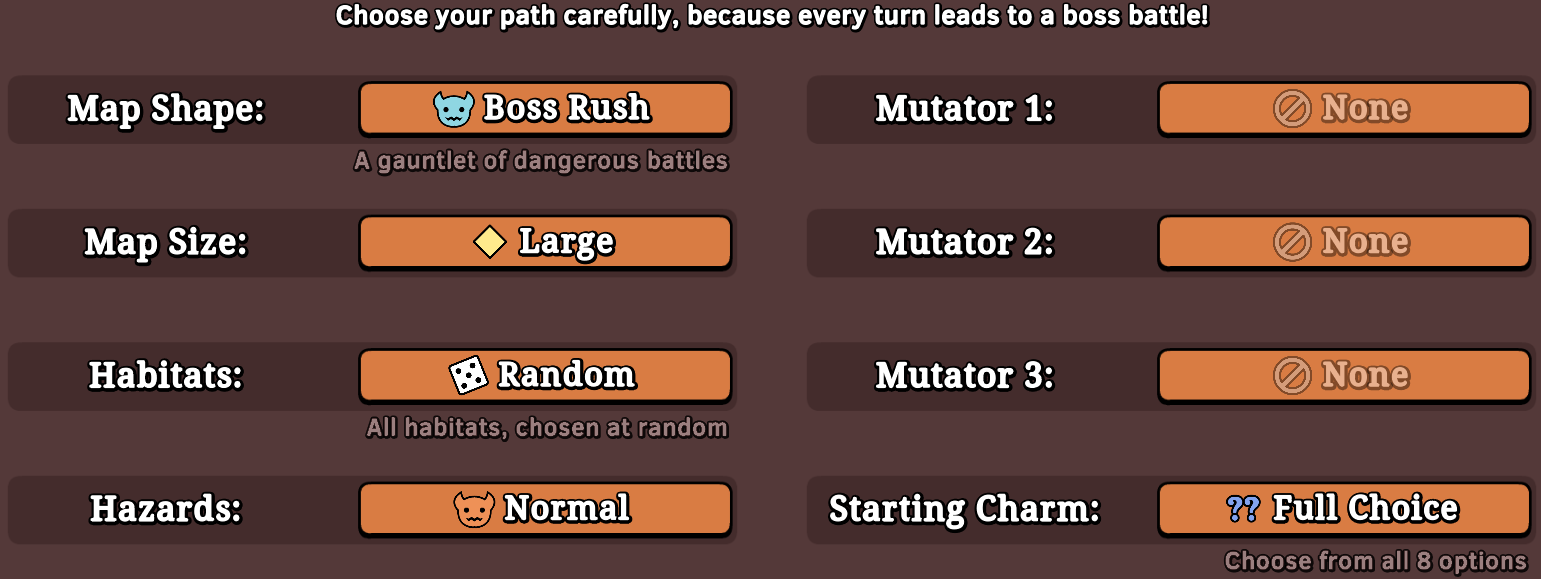
- Tip:
- Difficulty:
21. Perfectionist
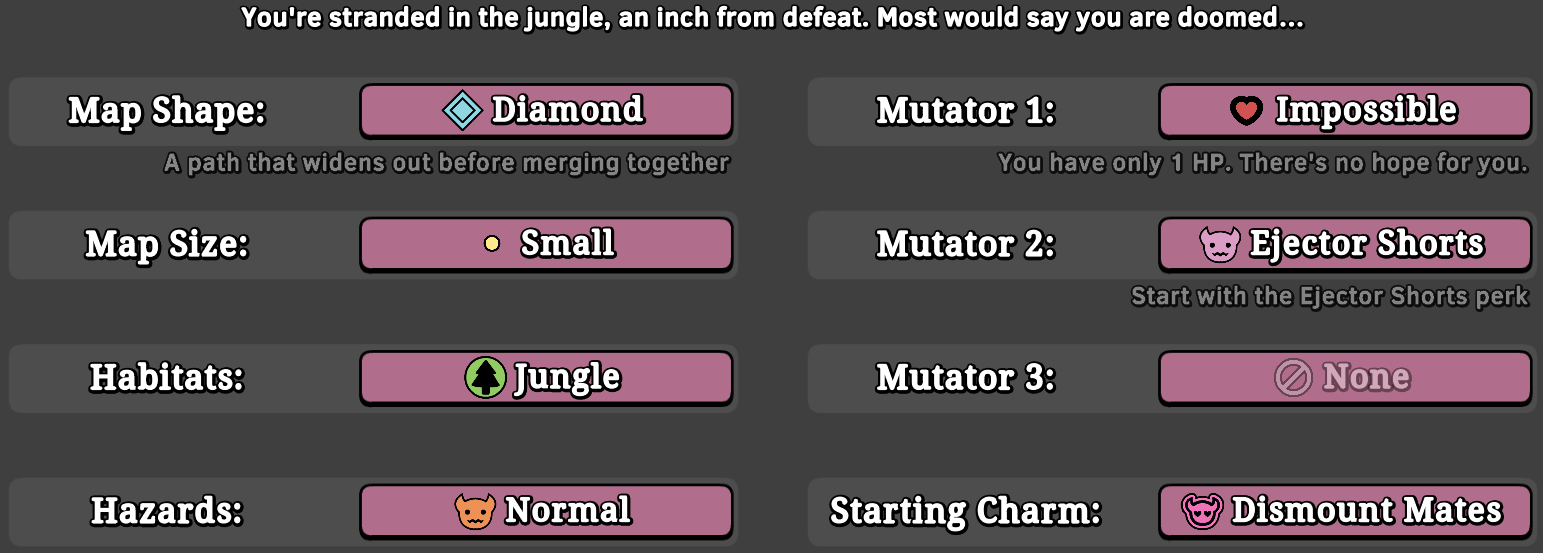
- Tips:don’t stay still go around in circles, always have a mount so you’ve a second chance, and take your time.
- Difficulty: hard.