Are you one of the new players of Surviving the Aftermath? If so, here are the Surviving the Aftermath controls to help you get started in the game. You can change the following default Surviving the Aftermath keybindings by going to Settings > Key Bindings.
Surviving the Aftermath Controls
- W – Pan Up
- S – Pan Down
- A – Pan Left
- D – Pan Right
- R – Rotate Right (Building Mode)
- Q – Rotate Camera Left
- E – Rotate Camera Right
- B – Build Menu
- Space – Pause Game
- M – World Map
- 1 – Normal Speed
- 2 – Fast Speed
- 3 – Fastest Speed
- C – Center Colony
- Y – Research Menu
- H – Tutorials Menu
- J – Radio Menu
- U – Statistics Menu
- T – Trade Menu
- O – Overlay Menu
- L – Toggle Last Used Overlay
- G – Milestone Menu
Note that you can find many unassigned actions in the game, which you can assign your desired shortcut keys. Some of these actions are Rotate Left (Building Mode), Speed Up, Speed Down, and more. Go to Settings > Key Bindings section to assign desired keys.
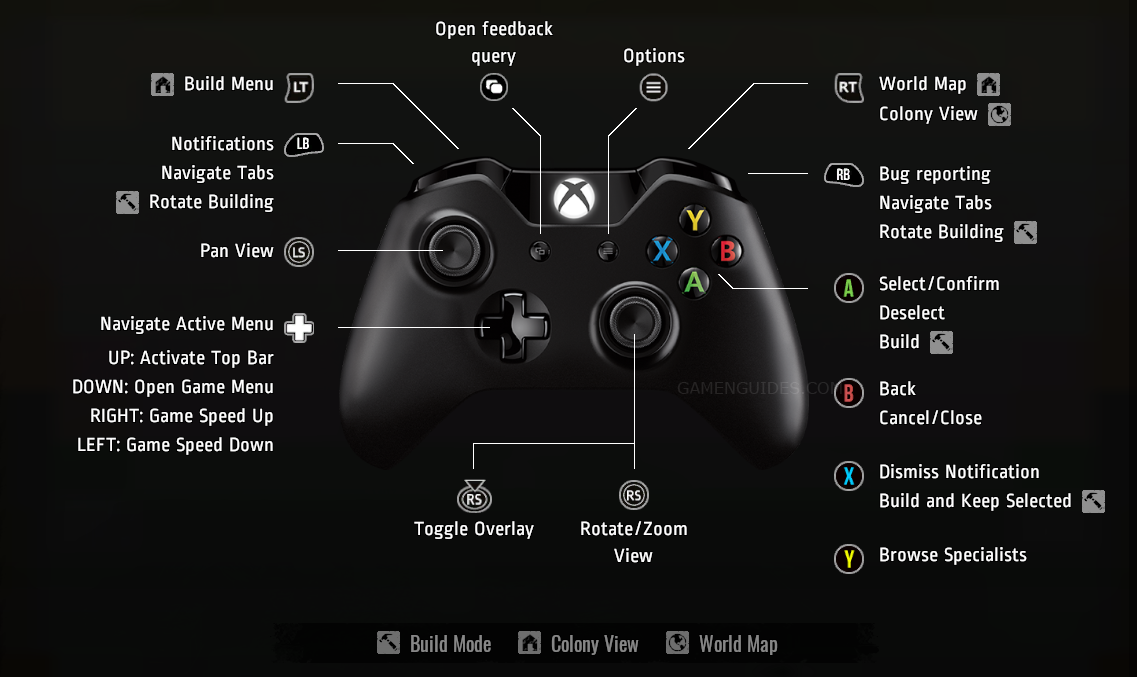
In addition to the keyboard controls, the game also features full controller support. Below is the default button keys that you need to know:

Is the controller screenshot above not working? Here’s the text version of the Surviving the Aftermath controller bindings.
- LT – Build Menu
- LB – Notifications / Navigate Tabs / Rotate Building
- Left Stick – Pan View
- D-Pad Up – Activate Top Bar
- D-Pad Down – Open Game Menu
- D-Pad Left – Game Speed Down
- D-Pad Right – Game Speed Up
- Right Stick – Rotate / Zoom View
- R3 – Toggle Overlay
- View Button – Open Feedback Query
- Menu Button – Options
- RT – World Map / Colony View
- RB – Bug Reporting / Navigate Tabs / Rotate Building
- A – Select / Confirm / Deselect / Build
- B – Back / Cancel / Close
- X – Dismiss Notifications / Build and Keep Selected
- Y – Browse Specialists
And this is everything you need to know about Surviving the Aftermath keyboard and gamepad controls. Let us know in the comments if we missed any actions.


