This guide will be showing you how to unlock all achievements in Tales of Vogar – Lost Descendants. At the same time, this page also covers the full game walkthrough and help you easily beat the game.
Tips
- Don’t be afraid of using spells/skills. Healing crystals are abundant.
- Always upgrade your gear. You can sell items that has “May be valuable to some merchants” in its description to afford everything.
- Do not use your money to rest at an inn. Again, healing crystals are abundant. Use your remaining money for healing items instead to make battles easier.
- It’s possible to finish the game without items, although you might need to save scum a lot on some fights.
Introduction
The prologue is pretty straightforward. You just need to read the story and do normal attack for all battles.
Jakam
The enemy, Angry Bee, will be down with two normal attacks. Your objective here is to pick up the log on the northwest corner, branches on the northeast corner, and leaves in front of the tree next to where you get the branches. Once you are done, head to the east exit to set up your tent.
After the cutscene, you’ll shortly find another enemy in your path. Just follow what Jane says and use Fire on the Angry Bee to kill it in one hit. Note that you can use Meditate to recover some MP if you need it. Enter the cave.
The next battle will be with Bats. They will be down with Fire in two hits, so keep on using them. Feel free to use Jane’s Blessing if you need MP. Otherwise, just let Jane Meditate since her normal attack is too weak. Once you are done, head to the exit for another cutscene.

I’m going on an adventure!
Finish the Intro
Chapter 1: Who am I?
Crossroad
Glen will join your party. Before leaving the prison, interact with the pouch on the table to get 200 Gil. There will be 2 Rats in the next screen. Unlike Ascan and Jane, Glen’s Concentrate will give an ATK buff for 2 turns and as a physical attacker, he can take out the Rats in two hits. You’re free to either use skills or just do normal attack this time. I myself do the latter to preserve MP, although there will be a healing spot soon if you need it.
Once you finish the battle, interact with the prison door to the north. You’ll be informed of a special mechanism behind a lantern. It’s the lantern to your right. Enter the secret passage.
Yep, you can jump over the small ledge by pressing either Z (keyboard) or A (controller). Jump and fight the Bats. Since we have Glen this time, you can do normal attack with Ascan and Glen to beat the Bats in two turns. Open the chest next to it to get 3 Potion, 1 Ether. Interact with the door with the vines to the north to reveal an exit, but don’t enter there yet. Head to the east exit instead to find a healing crystal and recover your health. Exit through the door that was covered by the vines before.
After the long cutscene, head to the east exit. The path is straightforward here. Enter the cave and kill the Bats like usual, then open the chest to get 2 Antidote. Follow the path to another cave to find Spiders. The enemies are a bit tougher this time, so make sure you cast Fire with Ascan and since it can counter, don’t let Glen attack if he is in low health.
Exit the cave. There is an Angry Bee here, but unlike the ones you fought before, this one is tougher. It also resists Fire, so just let Ascan do normal attack and use Glen’s Concentrate to boost his attack. You’ll reach Port Lewes in the next screen.
Port Lewes
Talk to the sailor near the exit to find that he lost a key to the captain’s quarter. After that, find a boy and a girl near the bridge (which actually leads to a ship). Agree to play hide and seek. The girl is hiding in the inn. While you are in the area, interact with the piano for an achievement.

Hit the keys
Play some tunes on the piano in Port Lewes.
The boy’s location is a bit tricky, you need to go upstairs, and then head all the way to the west. He’s located behind the boxes. Talk to the boy near the bridge afterward. Yes, this key is the one that was being searched by the sailor, but don’t talk to him yet.
Make sure to get ready for the next journey. You won’t be going back to this area. Feel free to sell all of your drop items and upgrade your gear before moving. You can sell any items that are labeled as “May be valuable to some merchants” to afford all of the gear upgrades for your party members.
Remember the sailor that we talked to before? Talk to him again and give him the key. Enjoy the unwinnable battle.

Well that was fun
Finish Chapter 1.
Chapter 2: Building an Army
Hideout
Open the chest to get 5 Antidote, 5 Eye Drop, 5 Herb. Exit to the world map and enter the tower in the northwest corner of the region.
Swamp around the Tower
Don’t worry, Wolf’s poison won’t persist after the battle ends. Use Ascan’s Fire and Glen’s normal attack to beat them all. Save before each fights, they can kill you. The last battle, 2 Wolves, might require some luck to beat. You might want to use Glen’s Blade Slash to reduce the enemy number as quickly as possible.
Tower of the Witch
Even though you are meant to step on the red tile, step on the non-red tiles to fight some Skeletons for EXP. These Skeletons are weak, so don’t worry. Just use Ascan’s Fire and Glen’s normal attack for it. You just need to fight 2 of them before getting recovered completely.
Vogar
Now, you will have a lot of objectives. You are free to do it from whichever order you want, although I’ll explain it in a certain order here.
Go to the world map and head to the building to the south to talk to Vincent. You’ll need to go to Lunaris afterward. It’s located northwest of the Hideout. Enter the house in the southeast corner and talk to the person. You’ll get your carpenter. After that, enter the house in the southeast corner to find a letter. The cave is located in the northeast corner of the map. However, don’t go there yet. There is a house in the town that houses drunken soldiers. Attack them for EXP – they are weak to Fire attacks. Head inside the cave afterwards. There is a healing crystal, so use it to recover your party members. DON’T TALK TO CATHY YET. Cathy is standing on the northwest side. Talk to the man next to her and give him two potions by talking to him twice for an achievement.

Good Samaritan
Help the people in need.
Save before talking to Cathy. There will be a difficult battle. Use Ascan’s magic attack and Glen’s Retribution + Blade Slash combo to beat them. Any element is fine since they don’t have any weakness and resistance. Use the healing crystal again to heal your party and exit the town afterwards. Oh, and feel free to come back to this healing crystal whenever you need to recover your health.
Return to Vincent’s house and recruit him. After you are done, return to the world map and head to the farm to the south of Vincent’s house. Talk to the man, which is actually the smith you are looking for. However, you need to cure the farm owner in the bed first before you can recruit him. Talk to the farm owner to figure out that you need a plant to cure him. Luckily, we need to clear the mines anyway. Enter the mines to the west of Hideout.
The mines is the house of Orcs, which is weak to Ice attacks. Kill him with Ascan’s Ice and Glen’s Concentrate + normal attack in two turns. The Rosmarin plant is located in the southwest corner of the map, the only green plant in the dungeon. Proceed killing all 5 Orcs in the area for your other quest. There is also a chest containing 2 Potion to the northwest corner of the map. The other 5 Orcs will be downstairs in the southeast corner of the map. This floor also has a chest containing 2 Eye Drops on the southwest corner of the map. Exit to the world map once you have finished exploring everything.
Enter the forest to the southeast. The Willowisps are weak to Thunder, so use Ascan’s Thunder and Glen’s Concentrate + normal attack to kill them. Once you finished killing all 6 Willowisps, you’ll have to face Behemoth. It’s weak to Ice. Use Ascan’s Ice and Glen’s Concentrate + Retribution + Blade Slash to kill it. Interact with all graves to take all Suspicious Stones. You can use it on the big slab to the northeast corner. Note that you must interact with the slab for each of the Suspicious Stones that you have. You’ll be rewarded with Rune of Dark Magic and an achievement for your trouble. This rune will teach Ascan Mental Fury skill. I find it not worth it since you’ll learn it later on.

Rune-tastic
Find the hidden rune in Braedon Forest.
Exit to the world map and head to the house that houses the carpenter. It’s the south house from Vincent’s if you forgot about it. Give the Rosmarin to the man lying on the bed.
There will be a minigame after the cutscene. All you have to do is to press the direction button that was shown on the screen. It will get faster on the second stage, and you need to press the opposite direction on the third stage.
Hideout
Open the chest north from the table to get 2 Phoenix Feather. Don’t forget to gear up by talking to Ayden, the blacksmith. Again, you can sell any items that are labeled as “May be valuable to some merchants” to afford all of the gear upgrades for your party members. If you are an achievement hunter, don’t forget to buy the SakaiJi for an achievement.

Tsushima sends their regards
Buy the SakaiJi.
Save your game and go to Lunaris.
Boss: Mace Mercenary, Greatsword Mercenary, Swordmage Mercenary
Glen can take on Swordmage Mercenary first. She’s weak to physical attack. Glen’s Concentrate + Retribution + Blade Slash combo will take care of her.
Ascan will take on Greatsword Mercenary first. She’s weak to Thunder.
You can direct all attacks to Mace Mercenary next. I used Glen’s Concentrate + Blade Slash and Ascan’s Thunder for it, but you can just do anything you like.
As for Jane, you can use her Encourage skill in between Blessings.
The Chase
Save before approaching Jane and Glen on the exit to the world map. There will be a minigame followed with 2 battles with 2 Soldiers. Ascan can use any magic attack and Glen can use Concentrate + normal attack 2x combo. Don’t forget to use Jane’s Encourage at the first turn.
After that, you’ll catch the wagon, following with a boss fight.
Boss: Corrupted Soldier
Guess what? You can only hit it with Jane’s healing spells (or Glen’s bleeding effect from his normal attack). However, the boss can do some nasty confusion and silence attacks. You have two options here: 1) use items to remedy the status ailments or 2) relying on RNG and reset everytime Jane got either status ailments. Jane can kill it with Blessing in 5 turns. Having the Ring of Will bought in the Hideout equipped to Jane to prevent the confusion can help the RNG to some extent too. Note that I already tried to do the second option and it works after a lot of retries. Just make sure you start the battle with full HP. You can heal from the menu after loading your save that was triggered before the boss fight. I don’t recommend it unless you are hell-bent on not using any items like me, though.
Hostage Camp
Head to the camp northwest of where you are. Once you are in control of Jane, do not move or interact with the horses whenever the soldier is facing your way. Note that you can only interact with the horses from their front side. After that, you’ll go with Glen. You need to go to the northeast corner of the map while not being seen by the guards. However, you can only do this by circling around the northwest side. The guards can only see until a certain distance, so use it to your advantage. Here’s a short video to help you out if you are having trouble with it. Note that I skipped a chest on the west side, that one contains 2 Phoenix Feather, 2 Potion, 3 Silence Bomb.
Open the chest containing 1500 Gil and interact with the glittering object. Save.
Boss: Lab Experiment
It’s weak to water, deal high physical attack and has the same physical and magical defense stat, meaning that you can use either to beat it. Sometimes, it will break down, which makes it unable to do anything unless it casts Repair. Watch out for its Blade Dance; you might need to rely on RNG to survive it.
Ascan can spam Water.
Jane can spam Encourage and Blessings / Healing Wave.
Glen can spam Concentrate + Blade Slash combo.
Elinmyll
The Hideout sell some gears with ice protection now. Feel free to buy and equip it to your party members. Once you’re done, head to the world map and enter the town in the snowy region to the far south.
Chamber of Trials
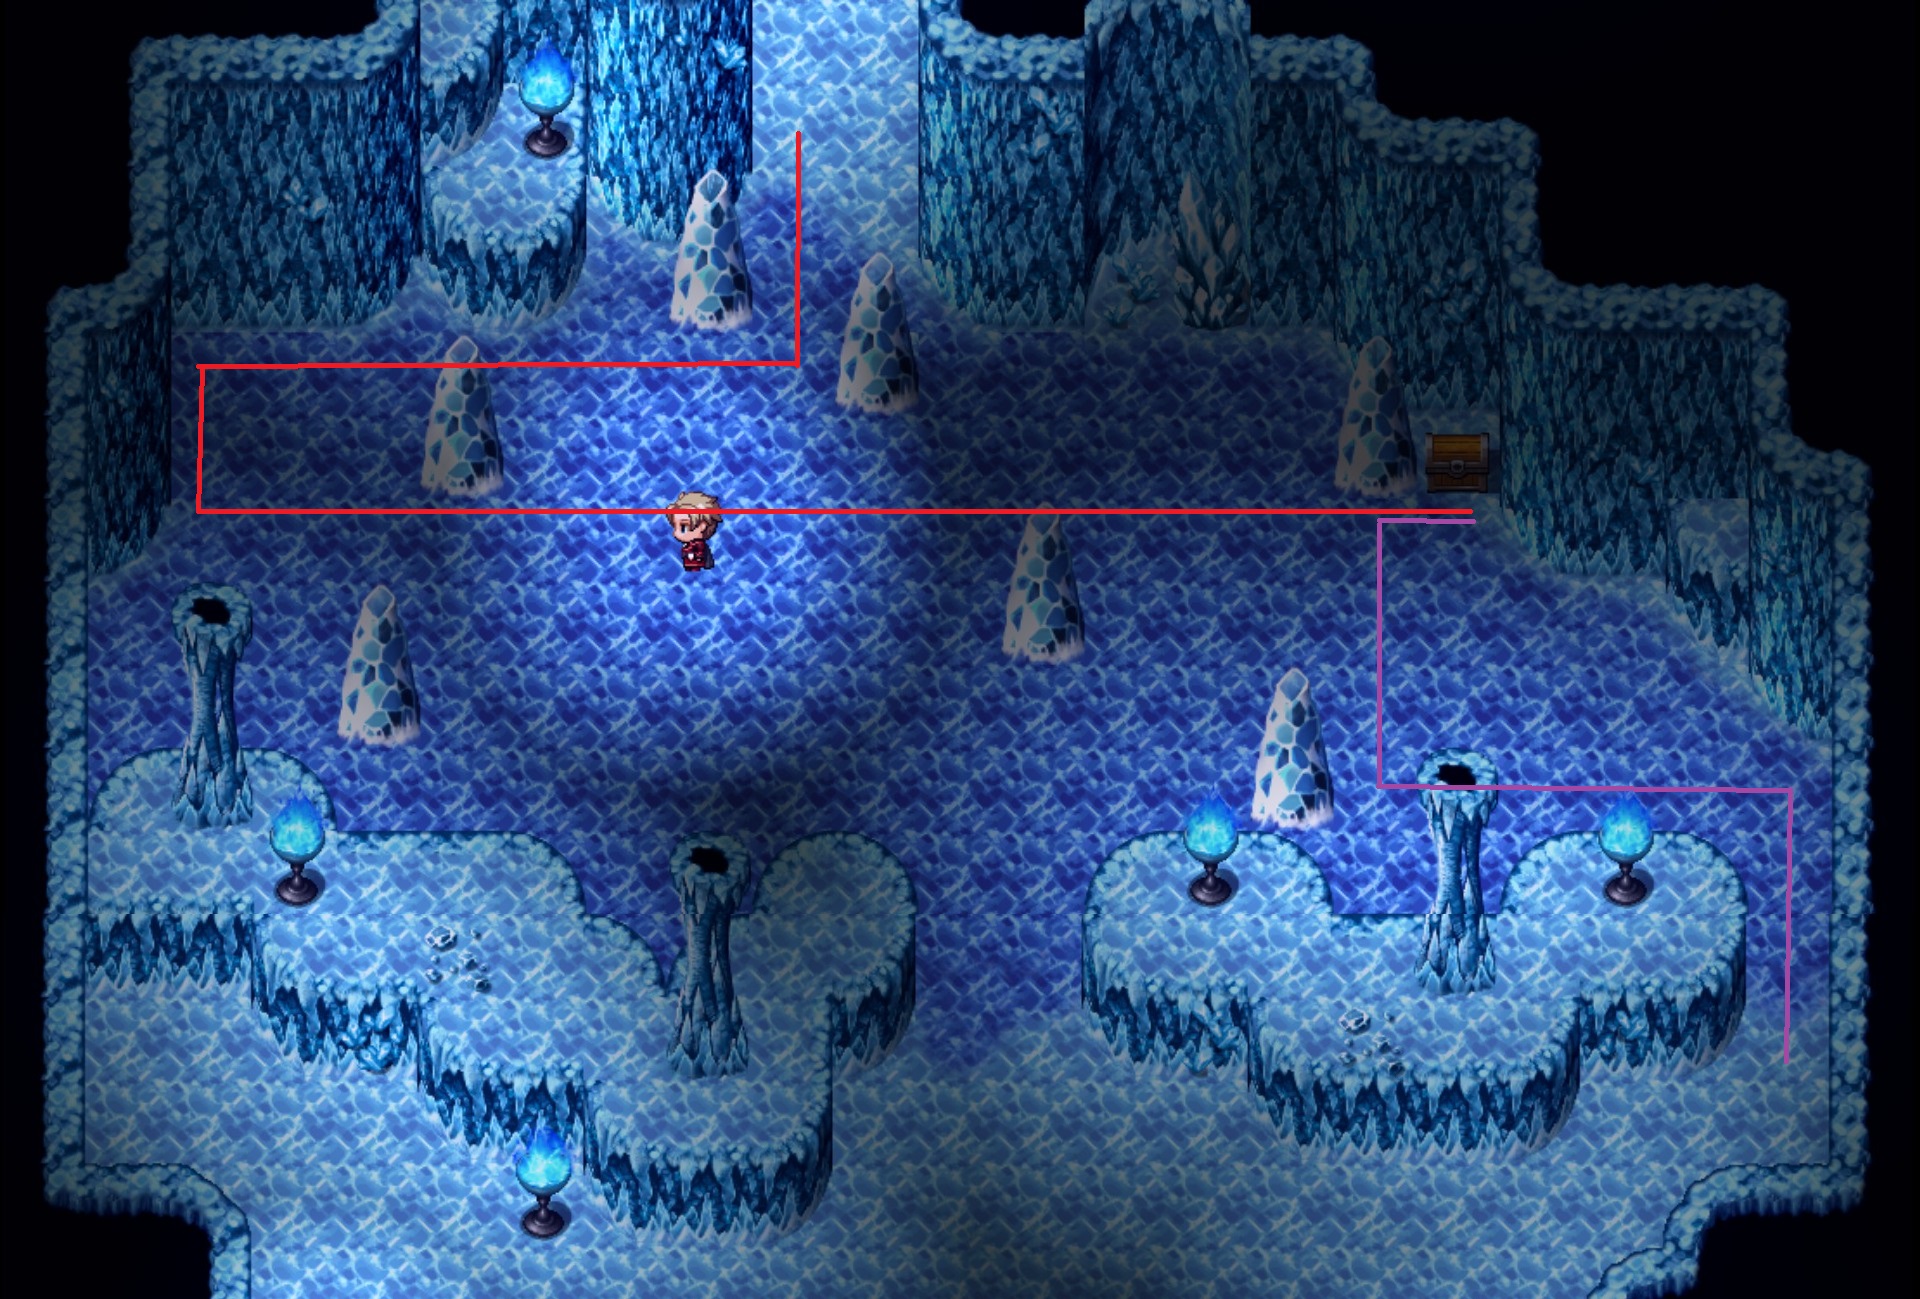
Keep on heading north until you see a chest to the northeast corner. Open it to get 5 Potion, 1 Ether and head upstairs.
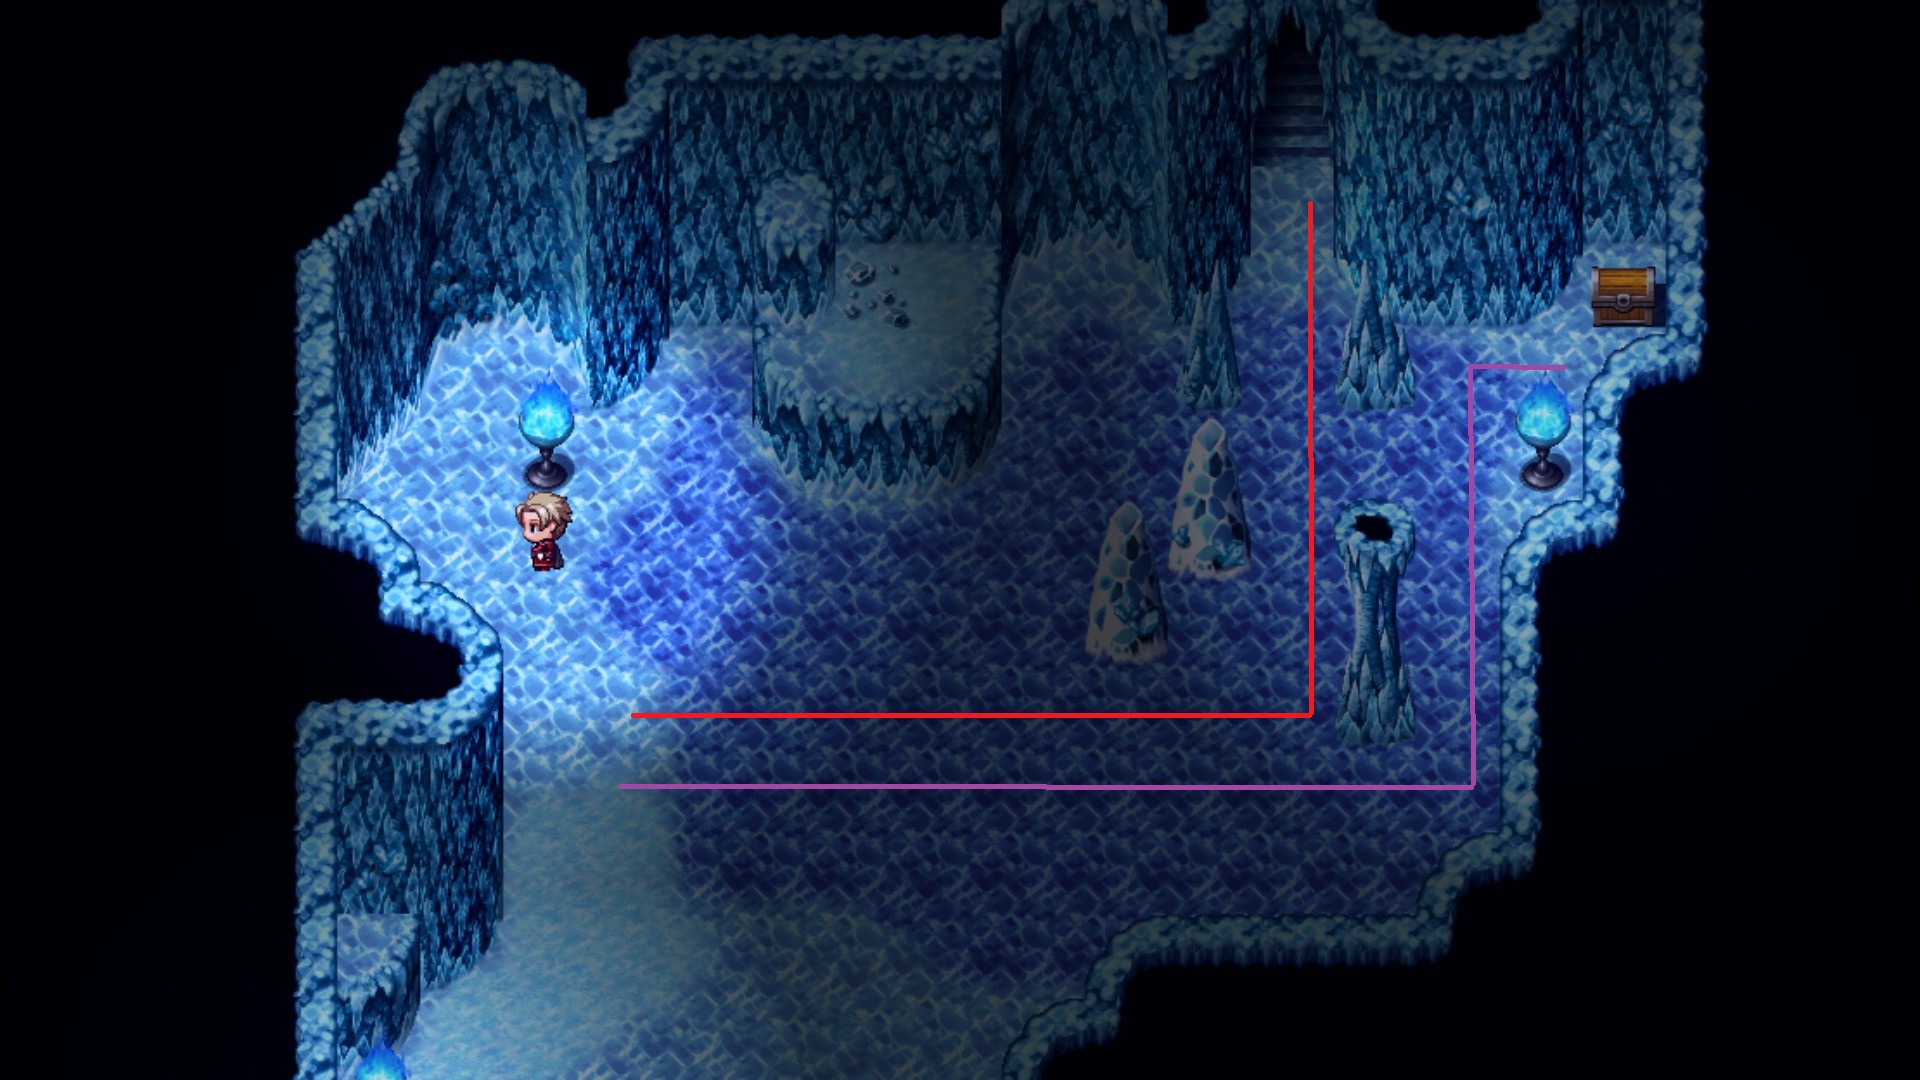
More puzzles! Open the chest to get Elder Rod.
Interact with all crystals to the north for a cutscene, then inspect the big door. You need to break the seal. Interact with the crystals in the order of:
- red -> blue -> green -> yellow
- red -> yellow -> green -> blue
- yellow -> red -> green -> blue
- green -> blue -> yellow -> red
Another crystal will appear. Interact the crystals again in the order of: red -> blue -> green -> yellow -> white to reveal two chests containing Winter Cape, Ring of Will, 1 Elixir, and an achievement.

They’re not rocks, they’re minerals
Solve the hidden riddle in the Ice Shrine.
Save before you enter the big door. Make sure you are prepared. The Elder Rod that you got before was better than the one Ascan currently equipped, for example. Also, equip the Winter Cape if you didn’t buy it from the blacksmith in Hideout. Go to the door once you’re ready.
Boss: Iceiathan
If it’s not obvious already, it’s weak to Fire. Iceiathan will spawn walls sometimes. Use these spells to counter it:
Water Wall: use Thunder
Ice Shield: use Fire
Lastly, use Channeling to heal or recover your status ailments if needed.

Wow, I love this game!!!
Finish Chapter 2.
Chapter 3: Revenge
Don’t forget to equip Staff of Wisdom to Jane. Interact with the map to get 2 Phoenix Feather. Talk to everyone. Here are their locations:
- Talis – Revolution Base
- Vincent – Revolution Base
- Dylan – Revolution Base
- Jane – Dylan’s House
- Glen – Inn
- Cathy – Inn Second Floor
Talking to everyone will net you an achievement.

Chatterbox
Talk with every ally before the final battle.
Once you are ready, talk to Dylan to proceed with the story. If you talk to everyone, you’ll also get 2 Elixir, Ring of Haste, and morale boost as a bonus. You are free to choose anyone for the final battle, but choosing Glen and Dylan will net you 100% achievement completion in one run. I advise you to take at least Glen or Jane so you can have an easier time with the battles.
If you choose anyone other than Glen and Jane, you’ll get an achievement.

Curiosity
Choose other team members than Glen and Jane for the final battle.
If you choose Glen and Dylan, you will be able to sneak past through the guards for another achievement. Once you got past through the stealth section, head to the west exit to find the 3 mercenaries and a chest. Open the chest to get 2 Elixir.

Snaaaaaaake
Sneak your way through the castle and open the chest.
Make sure you are spotted by the mercenaries as well. They will go to the east exit after the cutscene. Follow them for another achievement. Note that this won’t be available in some party combination (eg: Vincent and Cathy, Jane and Talis).

Mercenaries everywhere
Find a way so that the Mercenaries join the battle on the castle grounds.
If you choose other party members, you might have to battle the guards to continue. Feel free to skip all of those fights in the hallway if you want; they can be hard in some party combination. As for the mercenaries and the chest, some party combination won’t be able to trigger it, so if nothing is happening, you don’t have to worry about it.
Save and approach Alastar to the north.
Boss: Alastar
Ascan: Mental Fury + any spell
Jane: Encourage + Blessing / Healing Wave
Glen: Concentrate + Blade Slash
If you have other party members, they also can do some support.
Dylan: sleep for 3 turns
Vincent: ATK, DEF, and MDEF debuff for 4 turns, blind for 5 turns
Cathy: party fully healed, DEF, MATK buff for 4 turns
Talis: initial damage to Alastar
Save before heading to the south exit.
Boss: Ragnor, Alastar
Ragnor is weak to Ice and physical attack.
Alastar is weak to physical attack and not weak to any element.
You can’t kill Ragnor, but Alastar’s barrier will only broke if you reduce Ragnor’s HP to 1. Once you do, Ragnor will keep on casting Break Out, and once it succeed, Alastar will get another barrier again. You need to repeat the process of reducing Ragnor’s HP to 1 after that.
Ascan: Mental Fury + any spell
Jane: Encourage + Blessing / Healing Wave
Glen: Concentrate + Blade Slash
If you have other party members apart from Jane and Glen, they also can do some support like in the previous fight.
Congrats for beating the game!

You did it!
Thanks to your efforts, Vogar is safe again.
After the epilogue, the credits will roll. You should get an achievement for it, but if you don’t just load any of your save file and open the credits from the menu.

Be a good lad
Watch the credits.