This explains the new logistic system in easy terms.
Getting Started
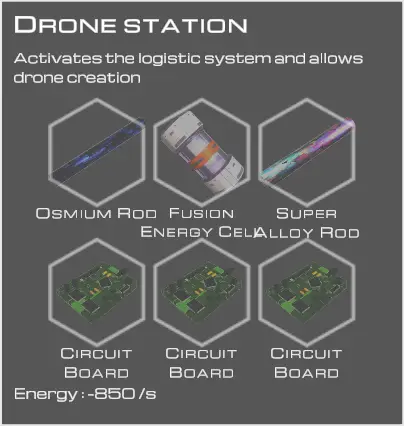
For the logistic system to function you need a drone station.
You can build it anywhere you like, and having only one is enough for a start.
The drone station has 3 screens.
- The one on the left is the local inventory. This is where drones are stored when they don’t have anything to do.
- The center screen permits crafting of drones
- The right screen shows current statistics, including all inventories taking part in the system as well as drone information
As a bare minimum, you want to craft one drone. Currently, only the tier 1 drone exists, suggesting that more faster/better drones are added in the future.
Adding inventories to the system
f you have a port with at least one drone, you’re ready to set up the logistic system.
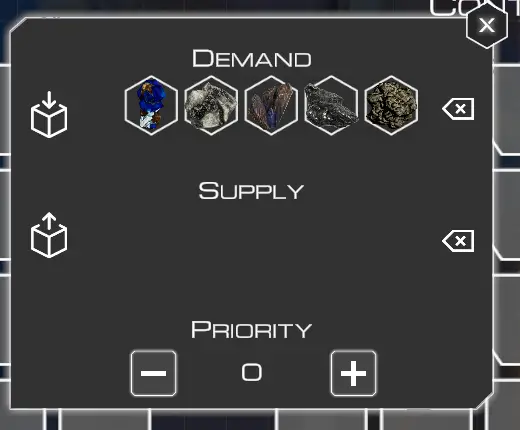
Supported inventories will have a new cogwheel symbol below the icons for sorting and moving. Clicking on that symbol opens a small window where you can set demand and supply, as well as configuring the priority
Demand is items you want to move into this container. Normally you store only one item type per container, but you can add multiple entries. You add an item by clicking on the cube with the arrow pointing towards it. On the right side of the item list is a button to clear it.
It’s not possible to remove individual items, but only to clear the entire list as of this writing
This is the list of all items that this inventory supplies to the logistic system. Most often you set this on your miners, and there you want to add all items it mines. For T1 and T2 this is at least:
- Cobalt
- Iron
- Magnesium
- Silicon
- Titanium
Plus any special items it may mine based on the location such as iridium or osmium for example
The priority tells the network how to handle situations where multiple inventories request the same item. A higher number means a higher priority. In other words, a chest that requests iron with a priority of 2 is getting filled first before any iron requests with priority 1 or lower are taken care of.
Priority and T1 + T2 miners
If you have a T3 miner unlocked already this is not very interesting, as it comes with filter capabilities to only mine a specific item, but T1 and T2 miner will also mine undesirable items you must occasionally get rid off to free up their inventory.
Storage area
Build yourself a storage area in a convenient spot. Build a storage cabinet for each resource item (iron, cobalt, magnesium, etc), and set up a demand for the logistic system for that specific item.
Set the priority to 1 (It is zero by default)
Trash
Your drones will stop picking up items from the miners once the storage cabinets get full. This can cause problems if you have a miner in a location to mine rare resources, for example Osmium. If your iron cabinet is full, the iron will no longer be picked up from the miners and eventually eats up all their storage slots.
To solve this, build one or two cabinets that demand the 5 basic items (Cobalt, Iron, Magnesium, Silicon, Titanium). Leave the priority at zero
These cabinets will now only get filled once all level 1 or higher cabinets get their requests fulfilled. Place a shredder next to the trash cabinets and occasionally dump their inventory into it. Note: The shredder can also be set up for logistics, but will not shred automatically.
Automated crafting
Requests for automated crafting should have a priority of 2 or higher. More details in the next chapter.
T3 miners
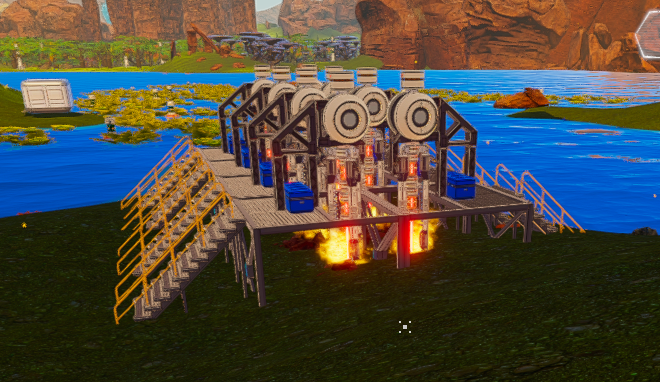
If you have only T3 miners you do not need the trash area, but setting up T3 miners for the basic 5 resources is kind of wasteful in regards to material and power. You may opt to using T3 only for the region specific miners (Iridium, Uranium, Osmium, Zeolite, Sulphur) and have T1 miners for the basic resources. Personally I prefer 8 T1 miners close to the main base for a steady supply of the basic materials. Don’t forget to set them up as supply
Automated crafting
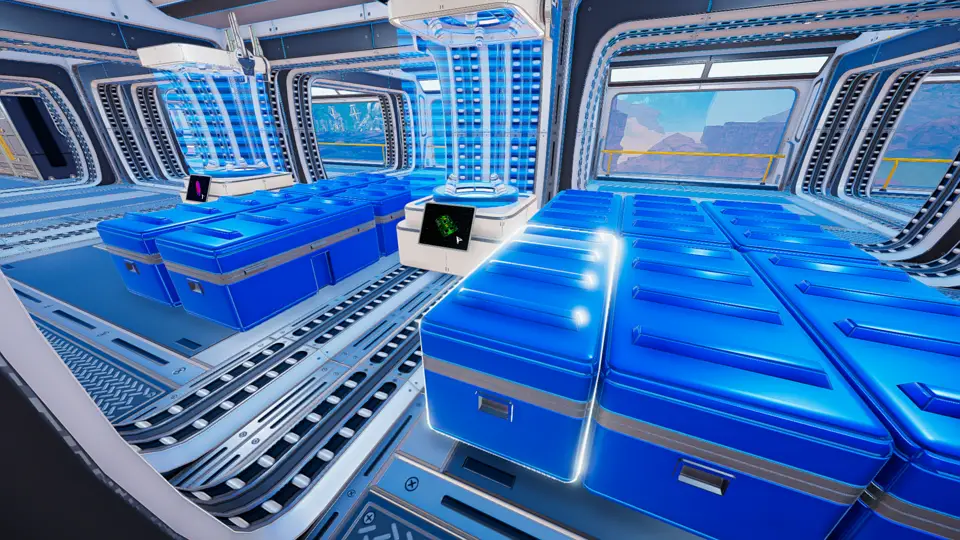
The logistic system makes automated crafting machines really useful. Before the addition of drones you had to strategically place them with all their resources in reach, but you no longer have to do that.
The image shows two machines making pulsar quartz and circuit boards. Each one has chests next to them that request the resources needed to craft them. A setup like that can be anywhere on the map.
Simply build a small living compartment in a convenient location, build the automatic crafting machine there, and fill it with as many chests as there are items in the recipe, then in each chest, demand one of the recipe items.
Do not forget to set the automated crafter as a supply
Doing it this way removes a lot of clutter from your main base, as everything can now be automatically crafted offsite, and simply delivered to your main base, or yet another crafting site.
Condensed materials
Drones are somewhat slow, and thanks to the lossless recycling mechaic, it’s most efficient to store iridium, uranium and osmium in the form of rods. If you need the individual raw materials for a recipe, either request them in a crafting shack as explained above, or feed the rod into a recycling machine to get the 9 ores out of it.
Simply build an automated crafting machine next to a miner and tell it to make rods, then configure the machine to supply the rods, and the miner to supply the raw material.
(I deliberately excluded the super alloy because it also requires aluminium)
Limitations of drones
Drones cannot “harvest” items. In other words, if the item is not in an inventory slot, it cannot be picked up. This includes algae and most food you grow. A notable exception are honeycombs as they spawn in a proper inventory slot.
However, the automated crafting machine can harvest items. Instead of harvesting algae manually to have them automatically crafted into bacteria samples in your main base, simply build the autocrafter near your algae fields, and export the bacteria samples from there.
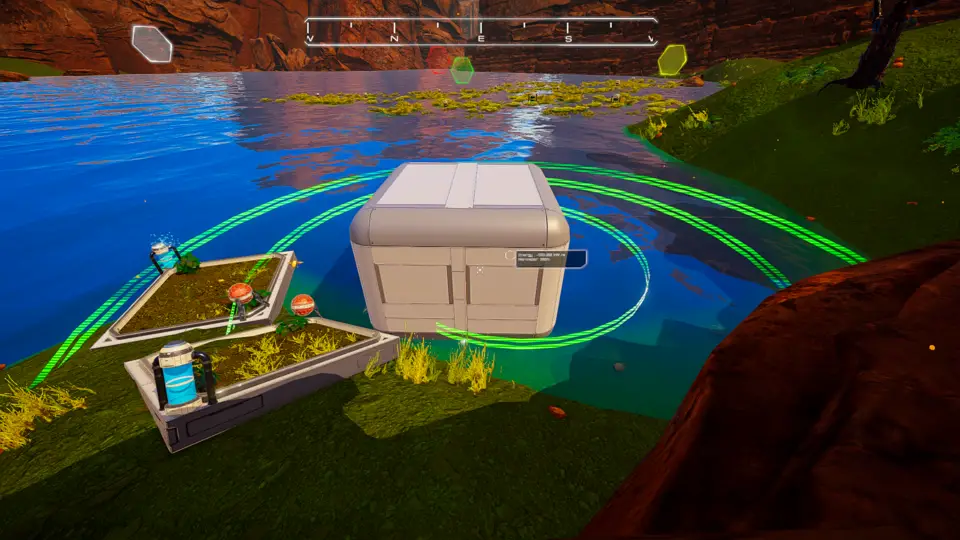
This image shows a living compartment that contains an automated crafter and a chest. The chest requests honeycombs. The two fields produce beans. The autocrafter makes this into high quality food, that then is brought up to the main hub.
The outermost green circle is the maximum reach of the autocrafter.

