This is a full achievement guide for this game, including all achievements descriptions, screenshots, loadouts, maps and anything else I can think of that would be helpful. This game just came out of EA, so this guide is a work in progress; I will be updating it consistently!
Intro
The achievements in this game are based on the badges, which are earned by in-game tasks, using equipment, dealing with enemies, and using equipment. Most can be earned through normal gameplay, but a few require a little bit more effort.
If you earned badges during the EA, you will receive achievements right away once you interact with the terminal.
Badges – RIG

Mechanophiliac
Acquire the “Mechanophiliac” badge.
This badge is for using your rig 100 times.
There are 4 rig types. I recommend not worrying about the meta, and just picking what works with your playstyle. After enough trials, you’ll get this without trying, but if you’re trying to farm to get it faster, the X-RAY rig is probably the fastest way to go.
STUN

BLIND

HEAL

X-RAY

Badges – COLLECTION

Big Saver
Acquire the “Big Saver” badge.
You get this badge for collecting 15 evidence documents. The evidence spawn all around the map randomly. If you play enough, you might start to recognize some spawn locations, but mostly you’ll find them just paying attention to your surroundings. The X-RAY rig  does reveal their locations, so if you’re having trouble you can try using that.
Badges – COOP

Crowd Control
Acquire the “Crowd Control” badge.
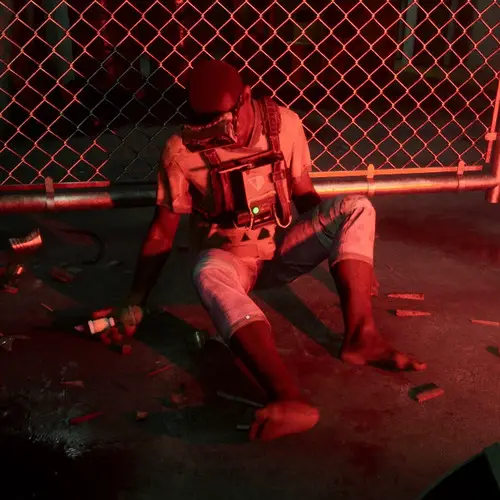
You get this badge helping teammates by kicking 50 enemies. There are multiple times when you have an opportunity to do this. When someone runs past an enemy in a hiding spot, when they are down an being executed, and when a larger enemy is in an attack animation, like Mother Gooseberry with her drill. If you play with randoms and lower level people, you’ll probably have more opportunities to do this, but if you have an efficient and knowledgeable team you can just farm it intentionally.

Sawbones
Acquire the “Sawbones” badge.
You get this badge reviving or helping up a friend 50 times. When a teammate loses all their health they go down. Hold E to help them up. Using a syringe to revive them also counts toward progress. Just like the last one, it’ll go faster with less experienced teammates, but can be farmed too.

Together We Are Strong
Acquire the “Together We Are Strong” badge.
This badge is for performing 50 coop moves. Coop moves are like breaking down the heavily boarded door (2-person. Just always go for these when you start a trial with others, and you’ll get it eventually.
Badges – TRIALS

Can’t Touch This
Acquire the “Can’t Touch This” badge.
You get this badge taking no damage during a Trial 10 times.

Glutton for Therapy
Acquire the “Glutton for Therapy” badge.
This badge is for completing 25 Trials. Just play enough and you’ll get this easily. You can always repeat one of the shorter missions like ‘Sabotage The Lockdown’, and ‘Cleanse the Orphans’ if you want to farm it quicker.
Badges – DEBUFF/DAMAGE

Get Down
Acquire the “Get Down” badge.
This badge is for getting knocked down 50 times. This is another one you’ll naturally get over time. If you’re really good at the game, and don’t find yourself being downed enough, just farm for it with a friend and a low level ex-pop.

Hemophiliac
Acquire the “Hemophiliac” badge.
You get this badge losing 10,000 health points. You’ll get this over time with anough play, but you can farm it by getting tons of medicine and just allowing yourself to be hit, then healing. Rinse and repeat. Include the healing rig for more healing opportunities.

Vision Quest
Acquire the “Vision Quest” badge.
This badge is for spending 600 seconds in full psychosis. Lots of things give you psychosis, door traps, traps in medicine cabinets and toolboxes, and the Pusher. The tough thing about this achievement is most people will seek an antidote as soon as they are in full psychosis, so your progress towards this will be slow. If you’re doing easier trials, you can always try to outlast your psychosis instead of using an antidote.
Badges – MAP

Anger Issues
Acquire the “Anger Issues” badge.
You get this badge breaking down 50 locked doors. Locked door occur on every map. I recommend getting the prescription ‘Doors Basher’ to break door in only 2 hits, since you’ll be using it frequently.

Chicken in a Pot
Acquire the “Chicken in a Pot” badge.
This badge is for using 100 hiding spots. Every map has hiding spots, unique to its terrain. Some include barrels, under desks, lockers etc. There is a perfect amp if you are actively going for this badge called ‘Hide and Heal’ which instantly gives you a bracket of health when you enter a hiding spot. If you use the healing rig, or find yourself not taking a lot of damage, you could use ‘Hide and Breathe’ which gives immediate stamina recovery in a hiding spot.

Sleight of Hand
Acquire the “Sleight of Hand” badge.
This badge is for unlocking 100 containers. To unlock containers you need a lock-pick. They are consumed on use, but are found somewhat what commonly throughout the trial. If you are lucky enough to get a Confidential Room (door unlocked by two buttons pressed concurrently), you can get the master key, which is a lock-pick that doesn’t get consumed, and doesn’t do the skill check mini-game. If you get this item, make sure to unlock every container in sight.

Trigger Happy
Acquire the “Trigger Happy” badge.
You get this badge by disarming 50 door traps. You can only dismar a door from one side, if you’re at the wrong side you can only open it while crouched. You’ll know you’re on the right side, because there will be a battery you can interact with to disarm it.
Badges – ITEMS

Bamboozler
Acquire the “Bamboozler” badge.
This badge is for distracting 50 enemies with throwables. Throwables include bottles and bricks. For this badge, you just need to use these items as a distraction, not hit them directly. Bottles are better for this because they are less effective with direct hits, but noisier.
Bottles
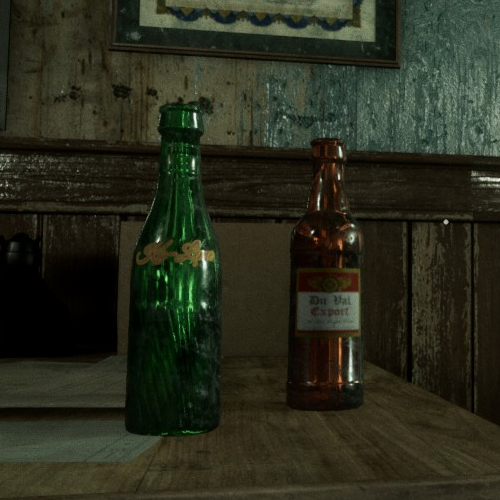
Bricks

Bullseye
Acquire the “Bullseye” badge.
You get this badge for headshotting 50 enemies. This is easiest done an stationary, unaware ex-pops. That’s technically a waste of items unless you need to safely pass them, but I find plenty of throwables in normal trials. If you feel like you could use more, use the amp ‘Recycle’ for used health bottles becoming a throwable item.

Major League Player
Acquire the “Major League Player” badge.
You get this badge for hitting 100 enemies with throwables. Again, bottles and bricks are the main items for this achievement. Throwables are consumed when you hit an enemy, so you’ll need to be keeping an eye out for more. I recommend the amp ‘Strong Arm’ to make all throwables have a stroger effect when you hit an enemy.

Breathe In
Acquire the “Breathe In” badge.
This badge is for using 100 antidotes. Antidotes can be found around the map on surfaces, often in the hands of dead reagents, and in first aid boxes. If you go into full psychosis, a nearby location will be given to you.
Antidote

Hypochondriac
Acquire the “Hypochondriac” badge.
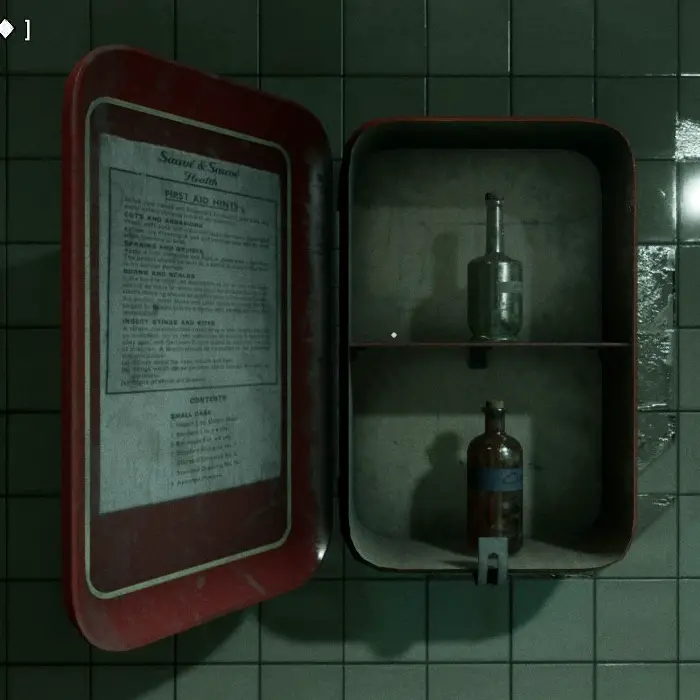
This badge is for consuming 200 medicines. I suggest you don’t use the healing rig until you have this badge, if you want to get it done in a timely manner. You’ll end up relying on using your rig instead of the item. These are often found in first aid boxes on walls and surfaces (Small, Large), on various surfaces throughout the map (Small), in the hands of dead reagents (Small), and in the Confidential Room (Large).
Medicine in a First Aid Box

Power Surge
Acquire the “Power Surge” badge.
This badge is for using 100 batteries. Batteries (Small, Large) recharge your night vision goggles, and can be found in technical boxes (Small, Large, in the rigs of dead reagents (Small only), and in the Confidential Room (Large).

Speed Freak
Acquire the “Spreed Freak” badge.
This badge is for using 50 adrenalines. This gives you a speed boost and unlimited stamina for running, jumping, and bashing for a short time. It can be found in first aid boxes, surfaces, and in the hands of dead reagents. I found myself getting this badge later because I would pick up an adrenaline, and then try to save it for the right time and never use it. If you’re like me, I suggest just using them immediately when you find them.

Toastmaster
Acquire the “Toastmaster” badge.
You get this badge using 50 rig rechargers. Rig rechargers immediately make your rig usable again, and are one of the rarer items. They can be found in technical boxes and in the Confidential Room.

Hoarder
Acquire the “Hoarder” badge.
This badge is for collecting 1,000 items. You could easily do this achievement with no effort. If tend to not use items too much, you can still pick them up and give them to teammates. I personally over-use the throwables when I find a lot of them.
Badges – TIME SPENT
All these achievements can be earned through normal gameplay, if you just play enough.

Hunchback
Acquire the “Hunchback” badge.
You get this badge spending 3,600 seconds crouched. This will come with time, but if you want a build that encourages this behavior, use the amp ‘Night Crawler’. It makes your crouch walk faster, and improves your night vision goggles battery.

Marathoner
Acquire the “Marathoner” badge.
This badge is for spending 3,600 seconds running. Again, this will come with time. There is an amp ‘Noise Reduction’ that makes you a quieter runner, and prescriptions ‘Speed Boost’ and ‘Endurance’, that increase your run speed, and make it less demanding stamina-wise, respectively.

Slip and Slider
Acquire the “Slip and Slider” badge.
You get this badge spending 120 seconds sliding. You need the prescription (Tier 1) ‘Slide’. I highly recommend this one, ad you can skirt noise traps mid chase, without slowing down. A single slide doesn’t last very long, so get into the habit of sliding as you run, even without being in chase.

Tapetum Lucidum
Acquire the “Tapetum Lucidum” badge.
This badge is for spending 3,600 seconds in night vision. This is another one that took me longer than the others. the amp ‘Night Crawler’ can help with your battery consumption while crouched. If you don’t find yourself crouching much, you can use the amp ‘Battery Charger’ for a gradually recharging battery when not in use. The prescription ‘Battery Extension’ also extends battery life.