This will cover how the game works, what you can expect out of the game and of course, early-game walkthrough along with some tips to avoid icky traps that this game likes to play on its users.
Introduction
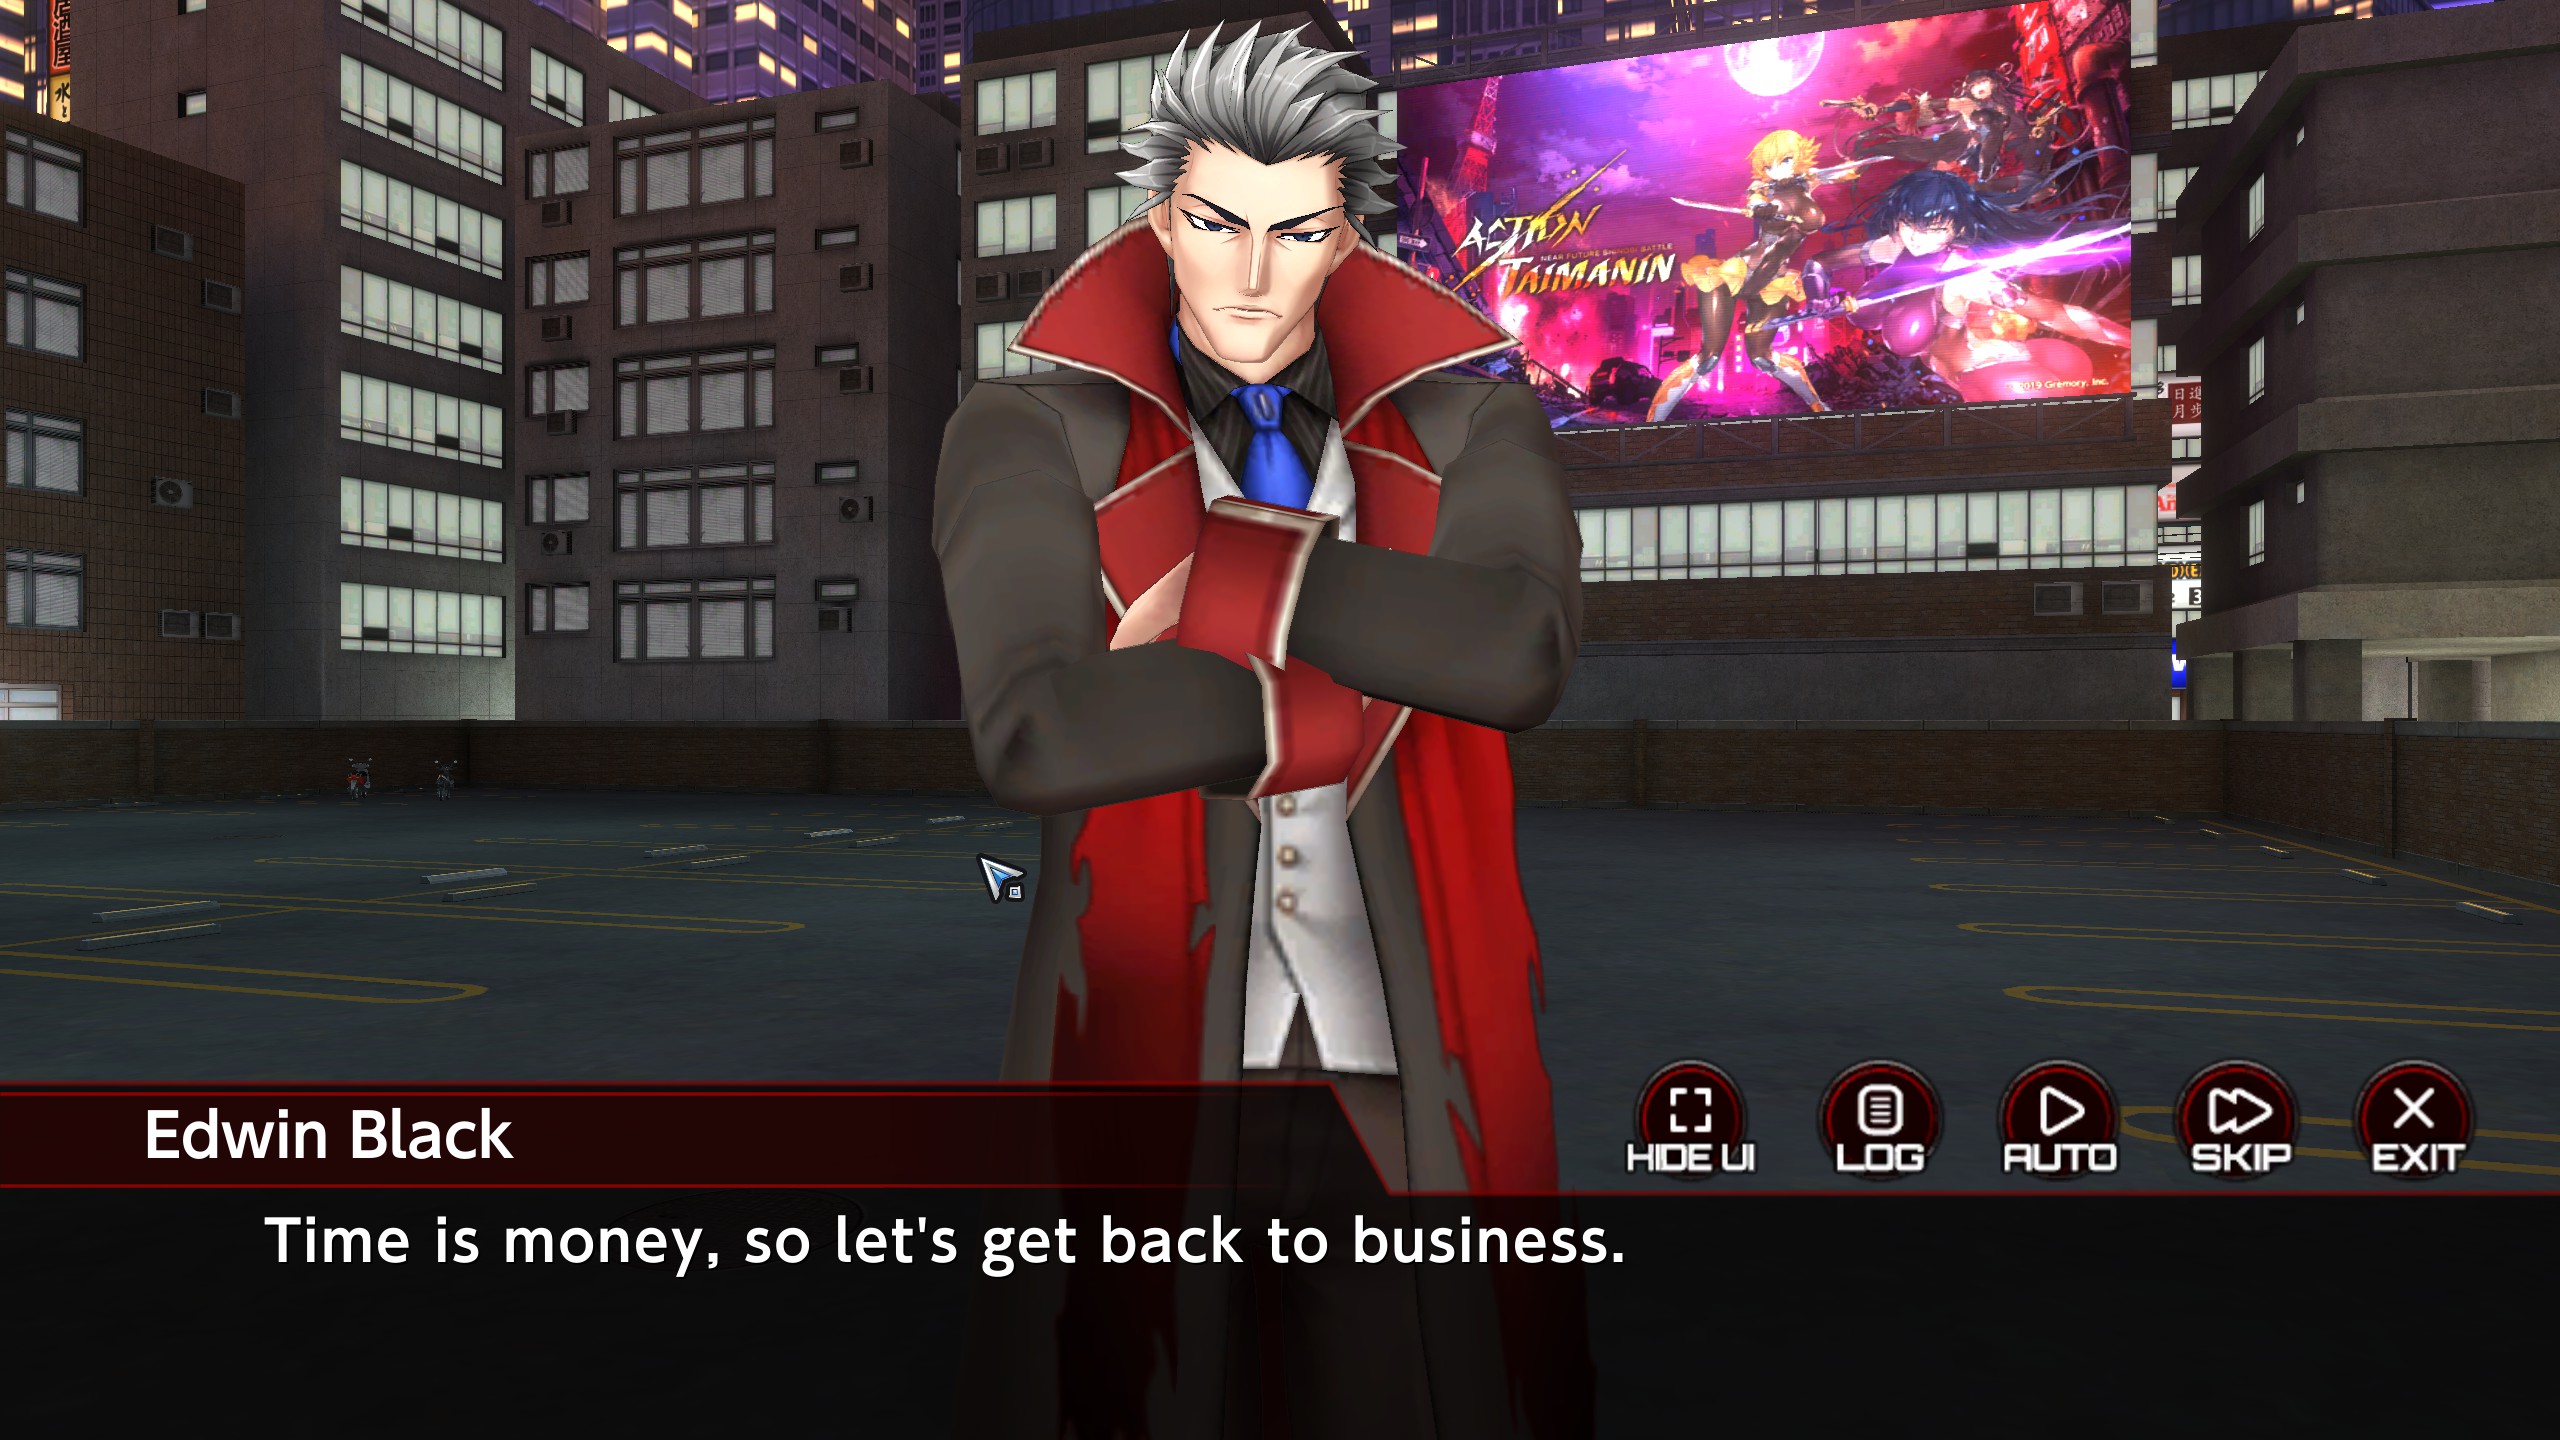
So, you decided to install this game. You’re either a huge fan of the Taimanins who are usually stuck with plumbing and janitorial duty finally being able to fight or just like the world this game presents. Either way, this guide is here to help you get started and get a grasp on how this game works and ultimately how to navigate through it.
Remember. This game makes it no secret that it wants your money.
How Pay to Win is this?
Blatantly. This game will shove deals in your face when you level up, your characters leveling up, whenever you login, and of course the ever-limited gacha tab.
There’s also really predatory deals made to tempt you to spend money due to how it only happens once. Guide below details them.
The only time you’ll see whales would be at the leaderboards and at the Arena. Once you get past Gold as those are actual teams they paid to get to that level. Everything before that are just bots.
That said, you can play this game as a F2P just be prepared to grind and get used to dealing with timewalls.
Is F2p even possible?
As detailed earlier, its going to be painful. The reason for that is that the monetization is built around leveling your characters and making them worthy to fight in the Arena, the Tower and VR (Boss mode).
And the company has taken steps to tempt you every time you level up your character. They’ll offer you the in-game funny money in the form of gems as well as materials for ascension. From levels below 70, they’re materials you can grind for reliably. But once you get at level 70, that is when they’ll start offering you materials you can only get in the aformentioned Arena. Which makes the proposition tempting.
This will be further detailed in the level up section.
But that said, you characters below level 70 can at least reliably take on easy and normal content. Storymode or events. Just be prepared to watch your character get abused in the process.
Getting Started
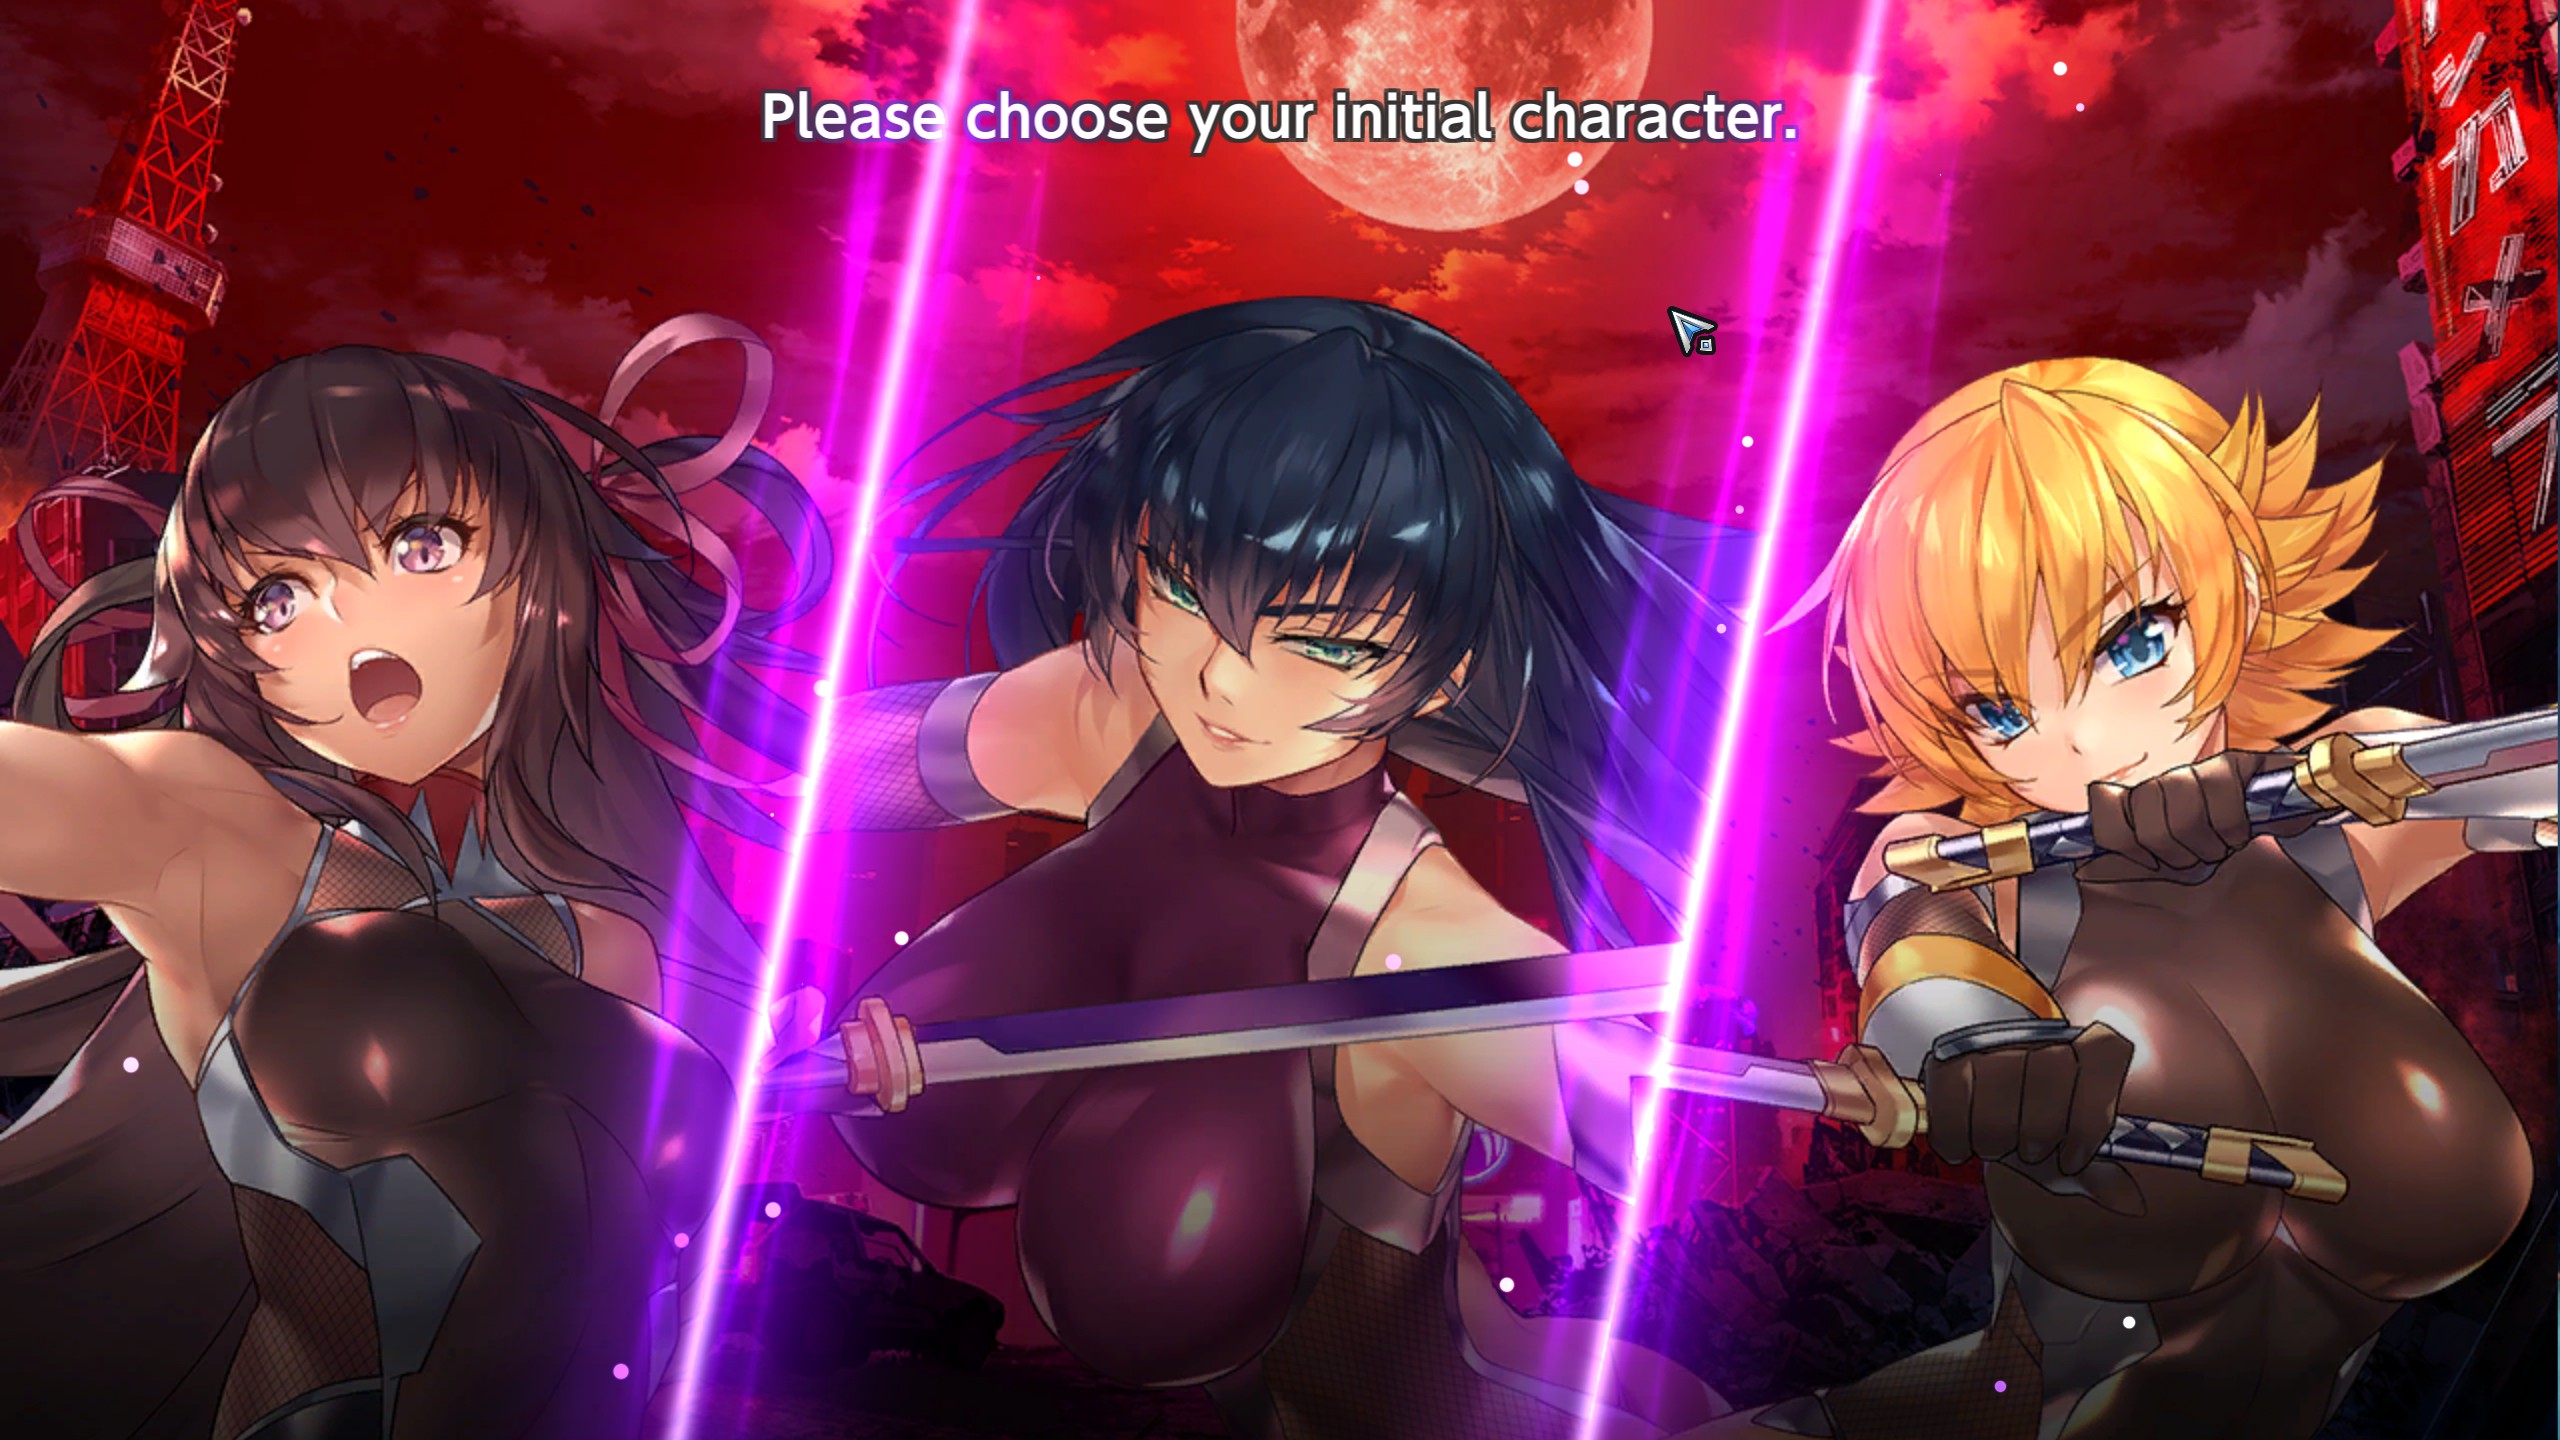
At the very beginning, you get to choose which Taimanin you start with. From left to right, its Yukikaze, Asagi and Sakura.
Asagi is the all rounder and comes with useful tricks to slow down time. Yukikaze is the shooter and she deals consistent range damage and there’s Sakura who attacks using summons and likes getting in your face.
Pick your favorite Taimanin and don’t worry about the ones you didn’t get to pick because they can be bought in-game for about 800 gems each.
First steps
So you picked your ninja and did the basic tutorial stuff right down to the obligatory gacha hook. Cool.
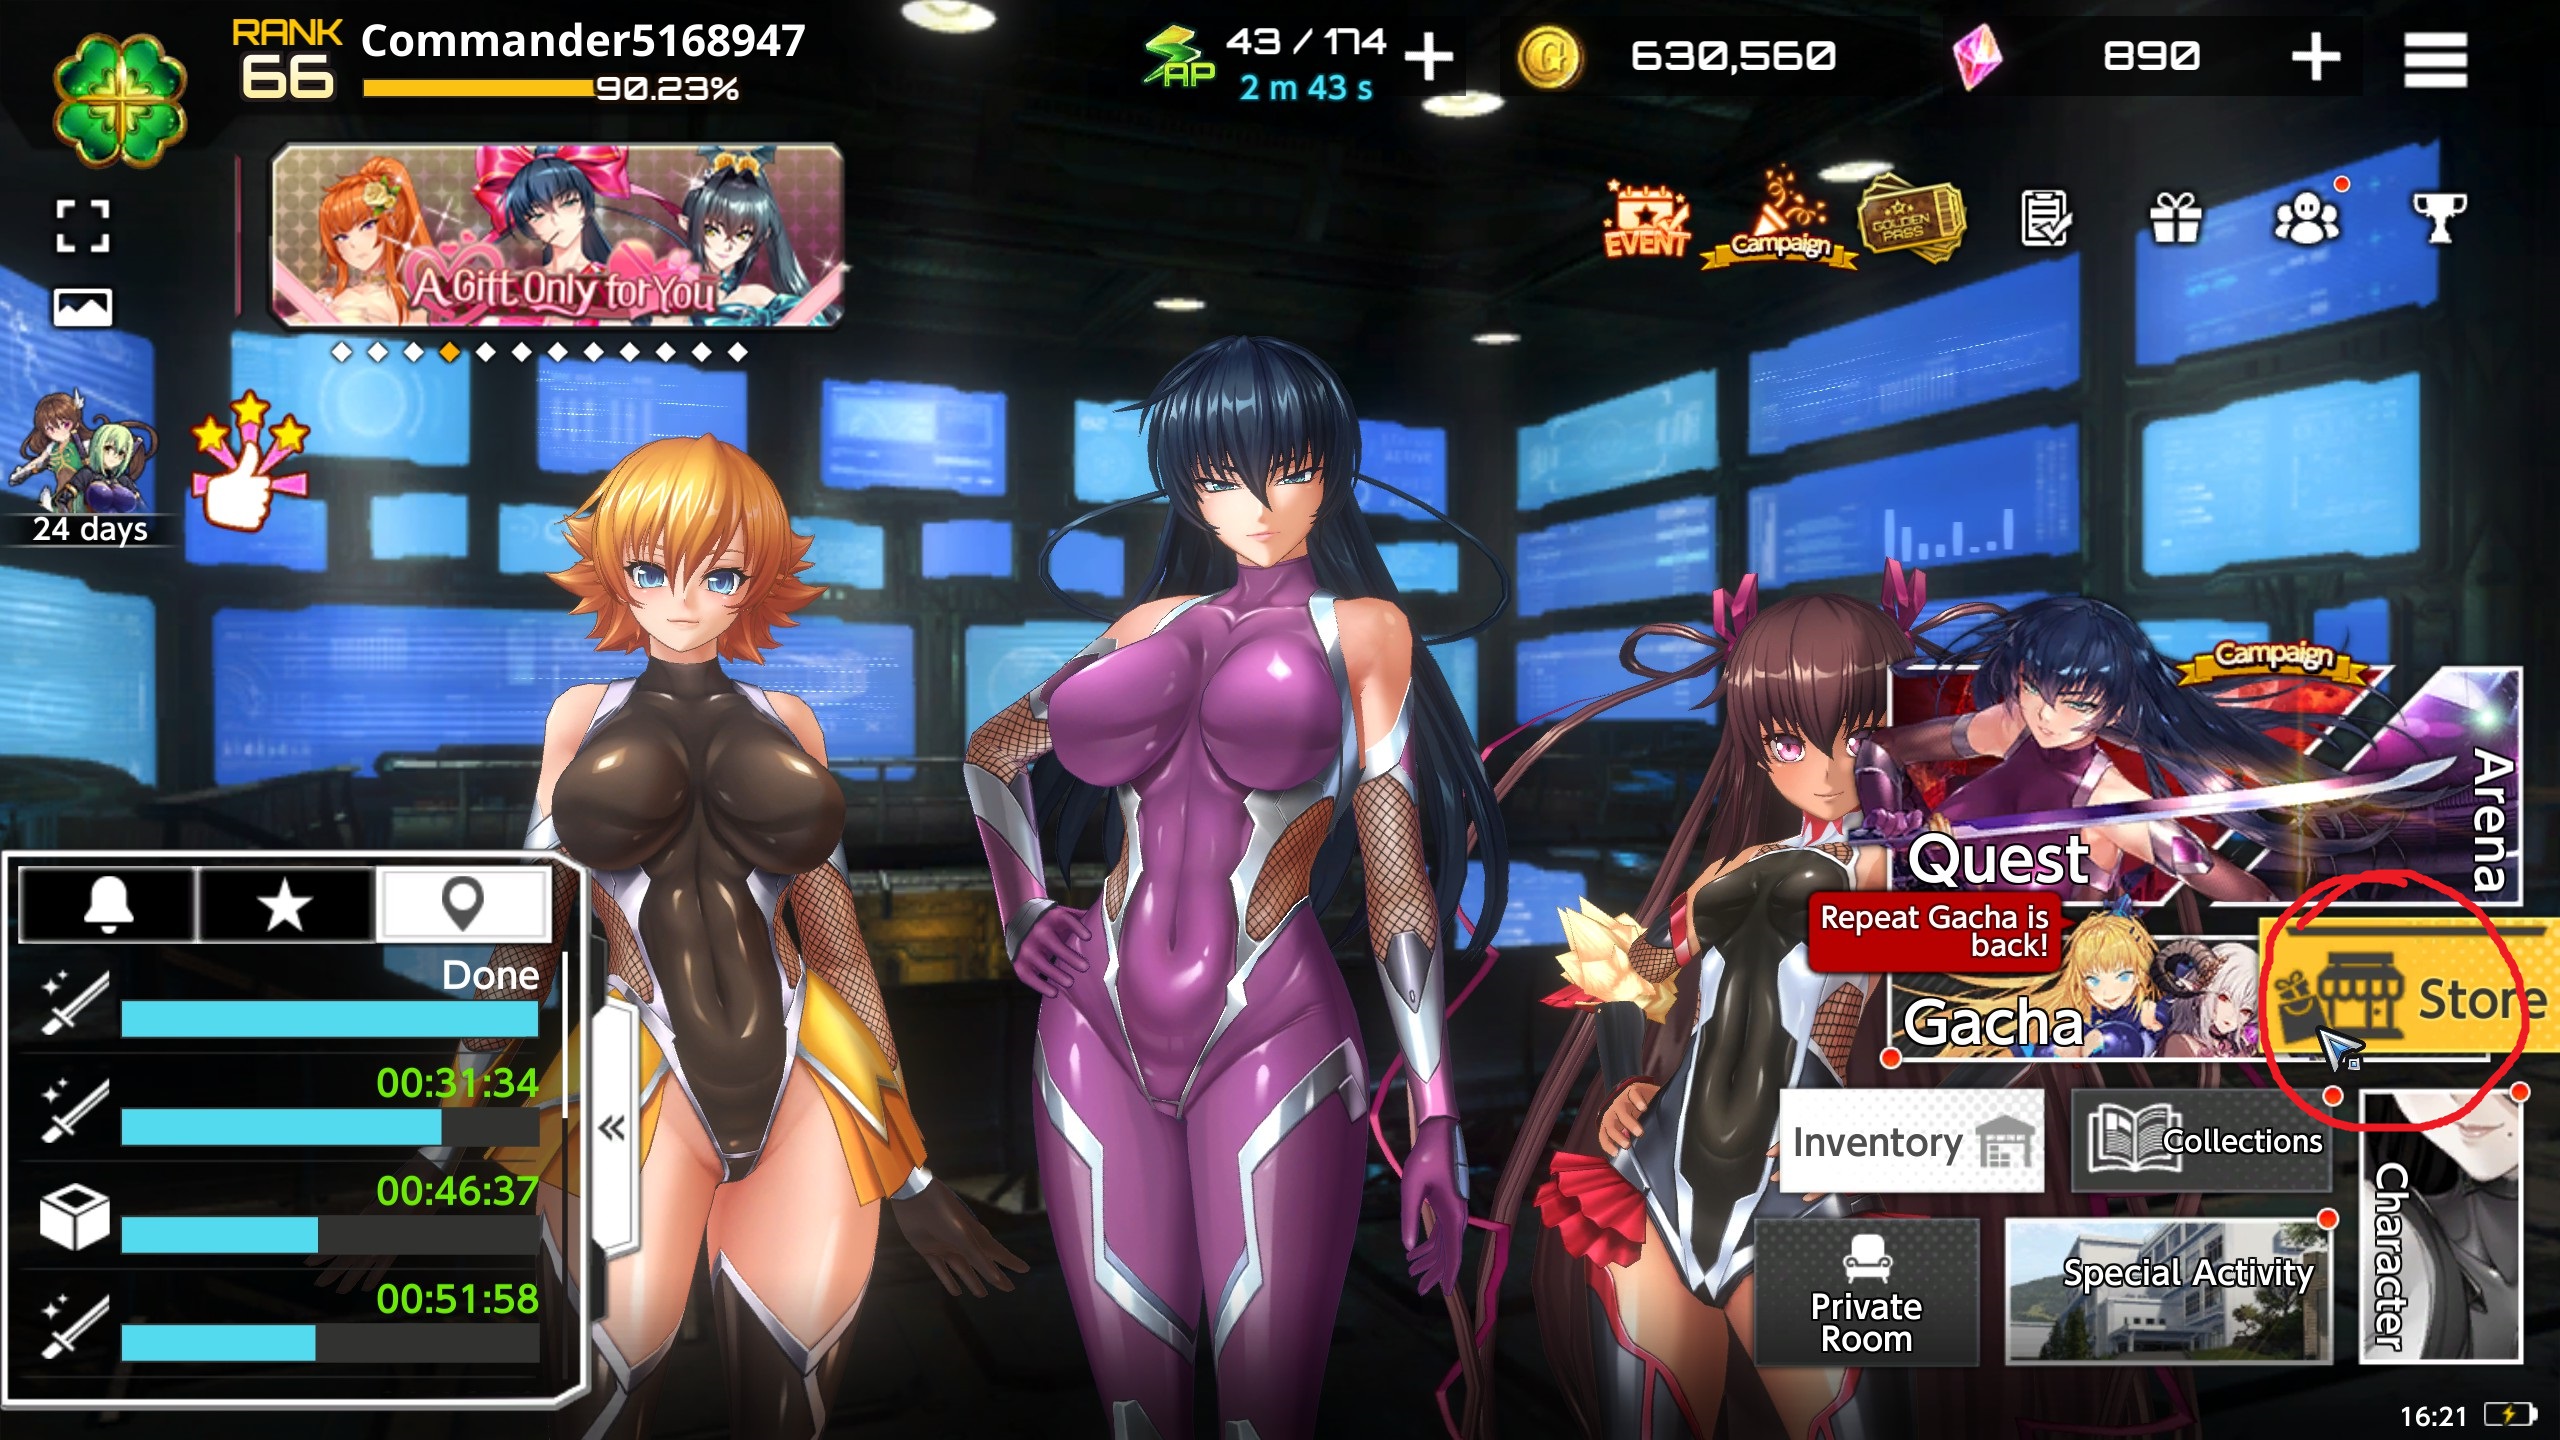
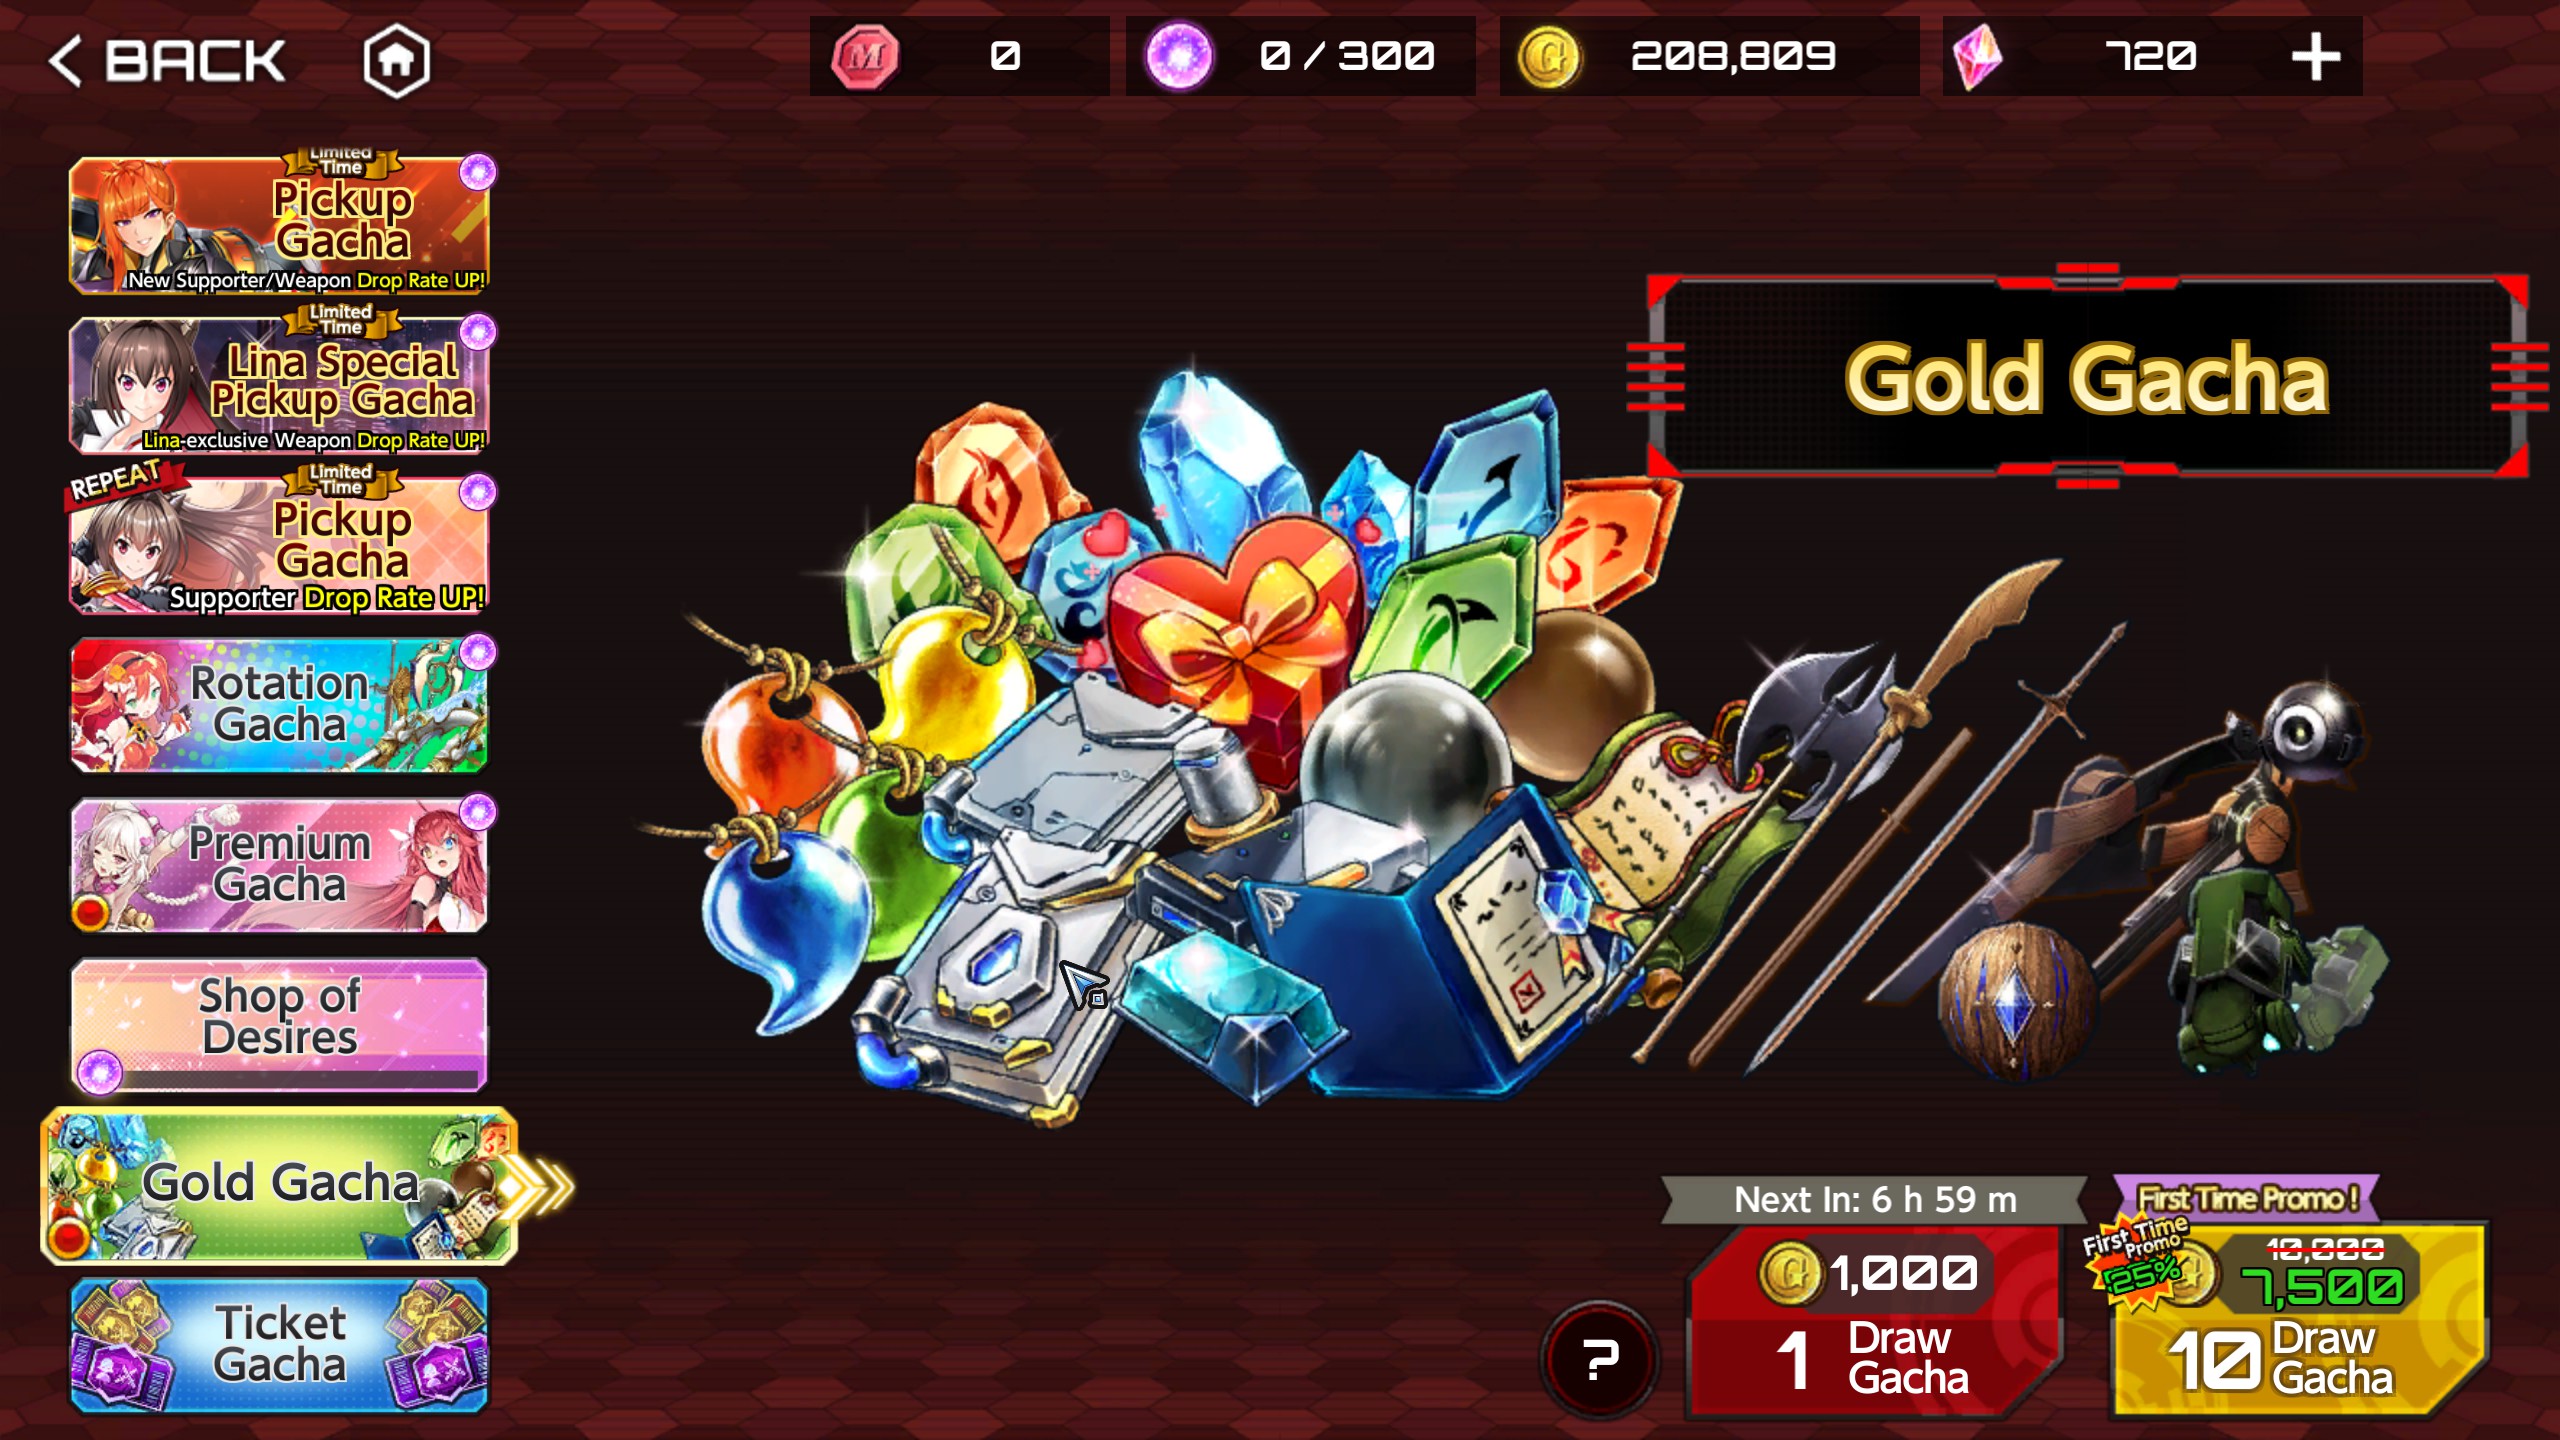
The first thing you should do is head straight to the store > packages > limited time and hit the free packs. Can’t go wrong with that. These refresh weekly and monthly so keep an eye out for it.

Then, head to gacha > gold and hit the freebies. These refresh daily.
Now for easy free gems. First, click this.
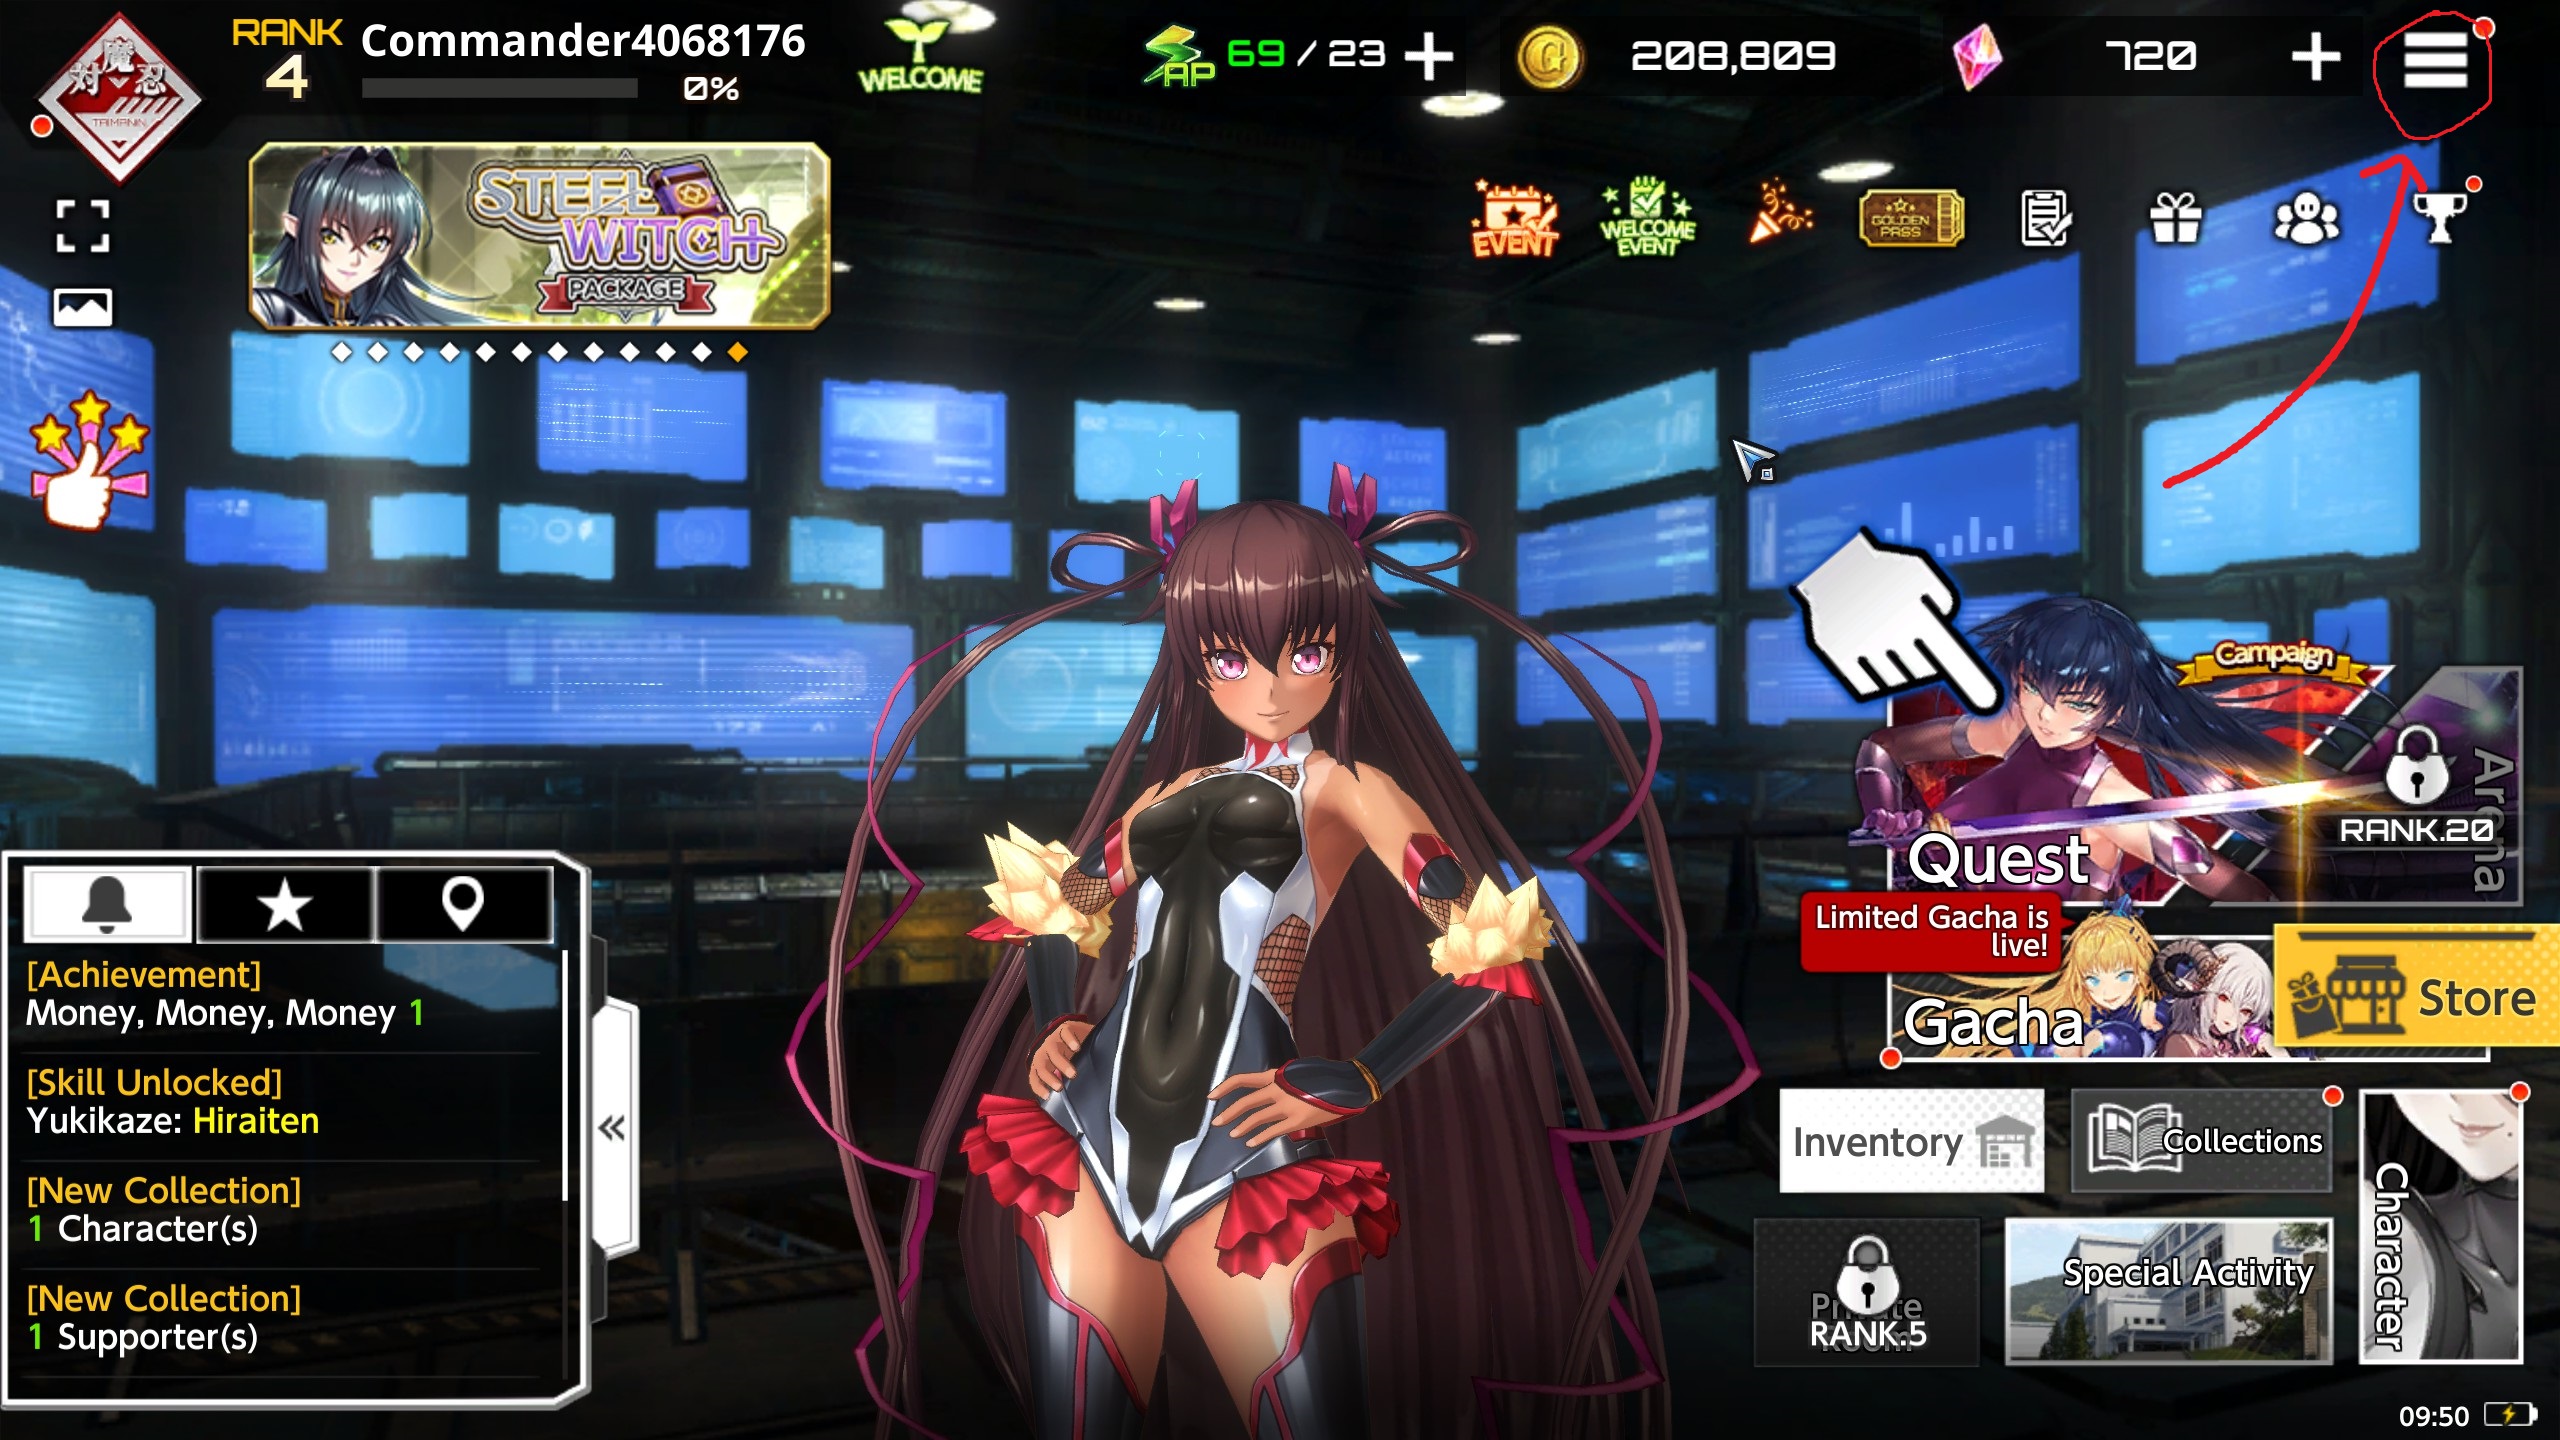
Then head straight to manage account. And you should see an option to link account and link code. Set up the code and collect your gems.

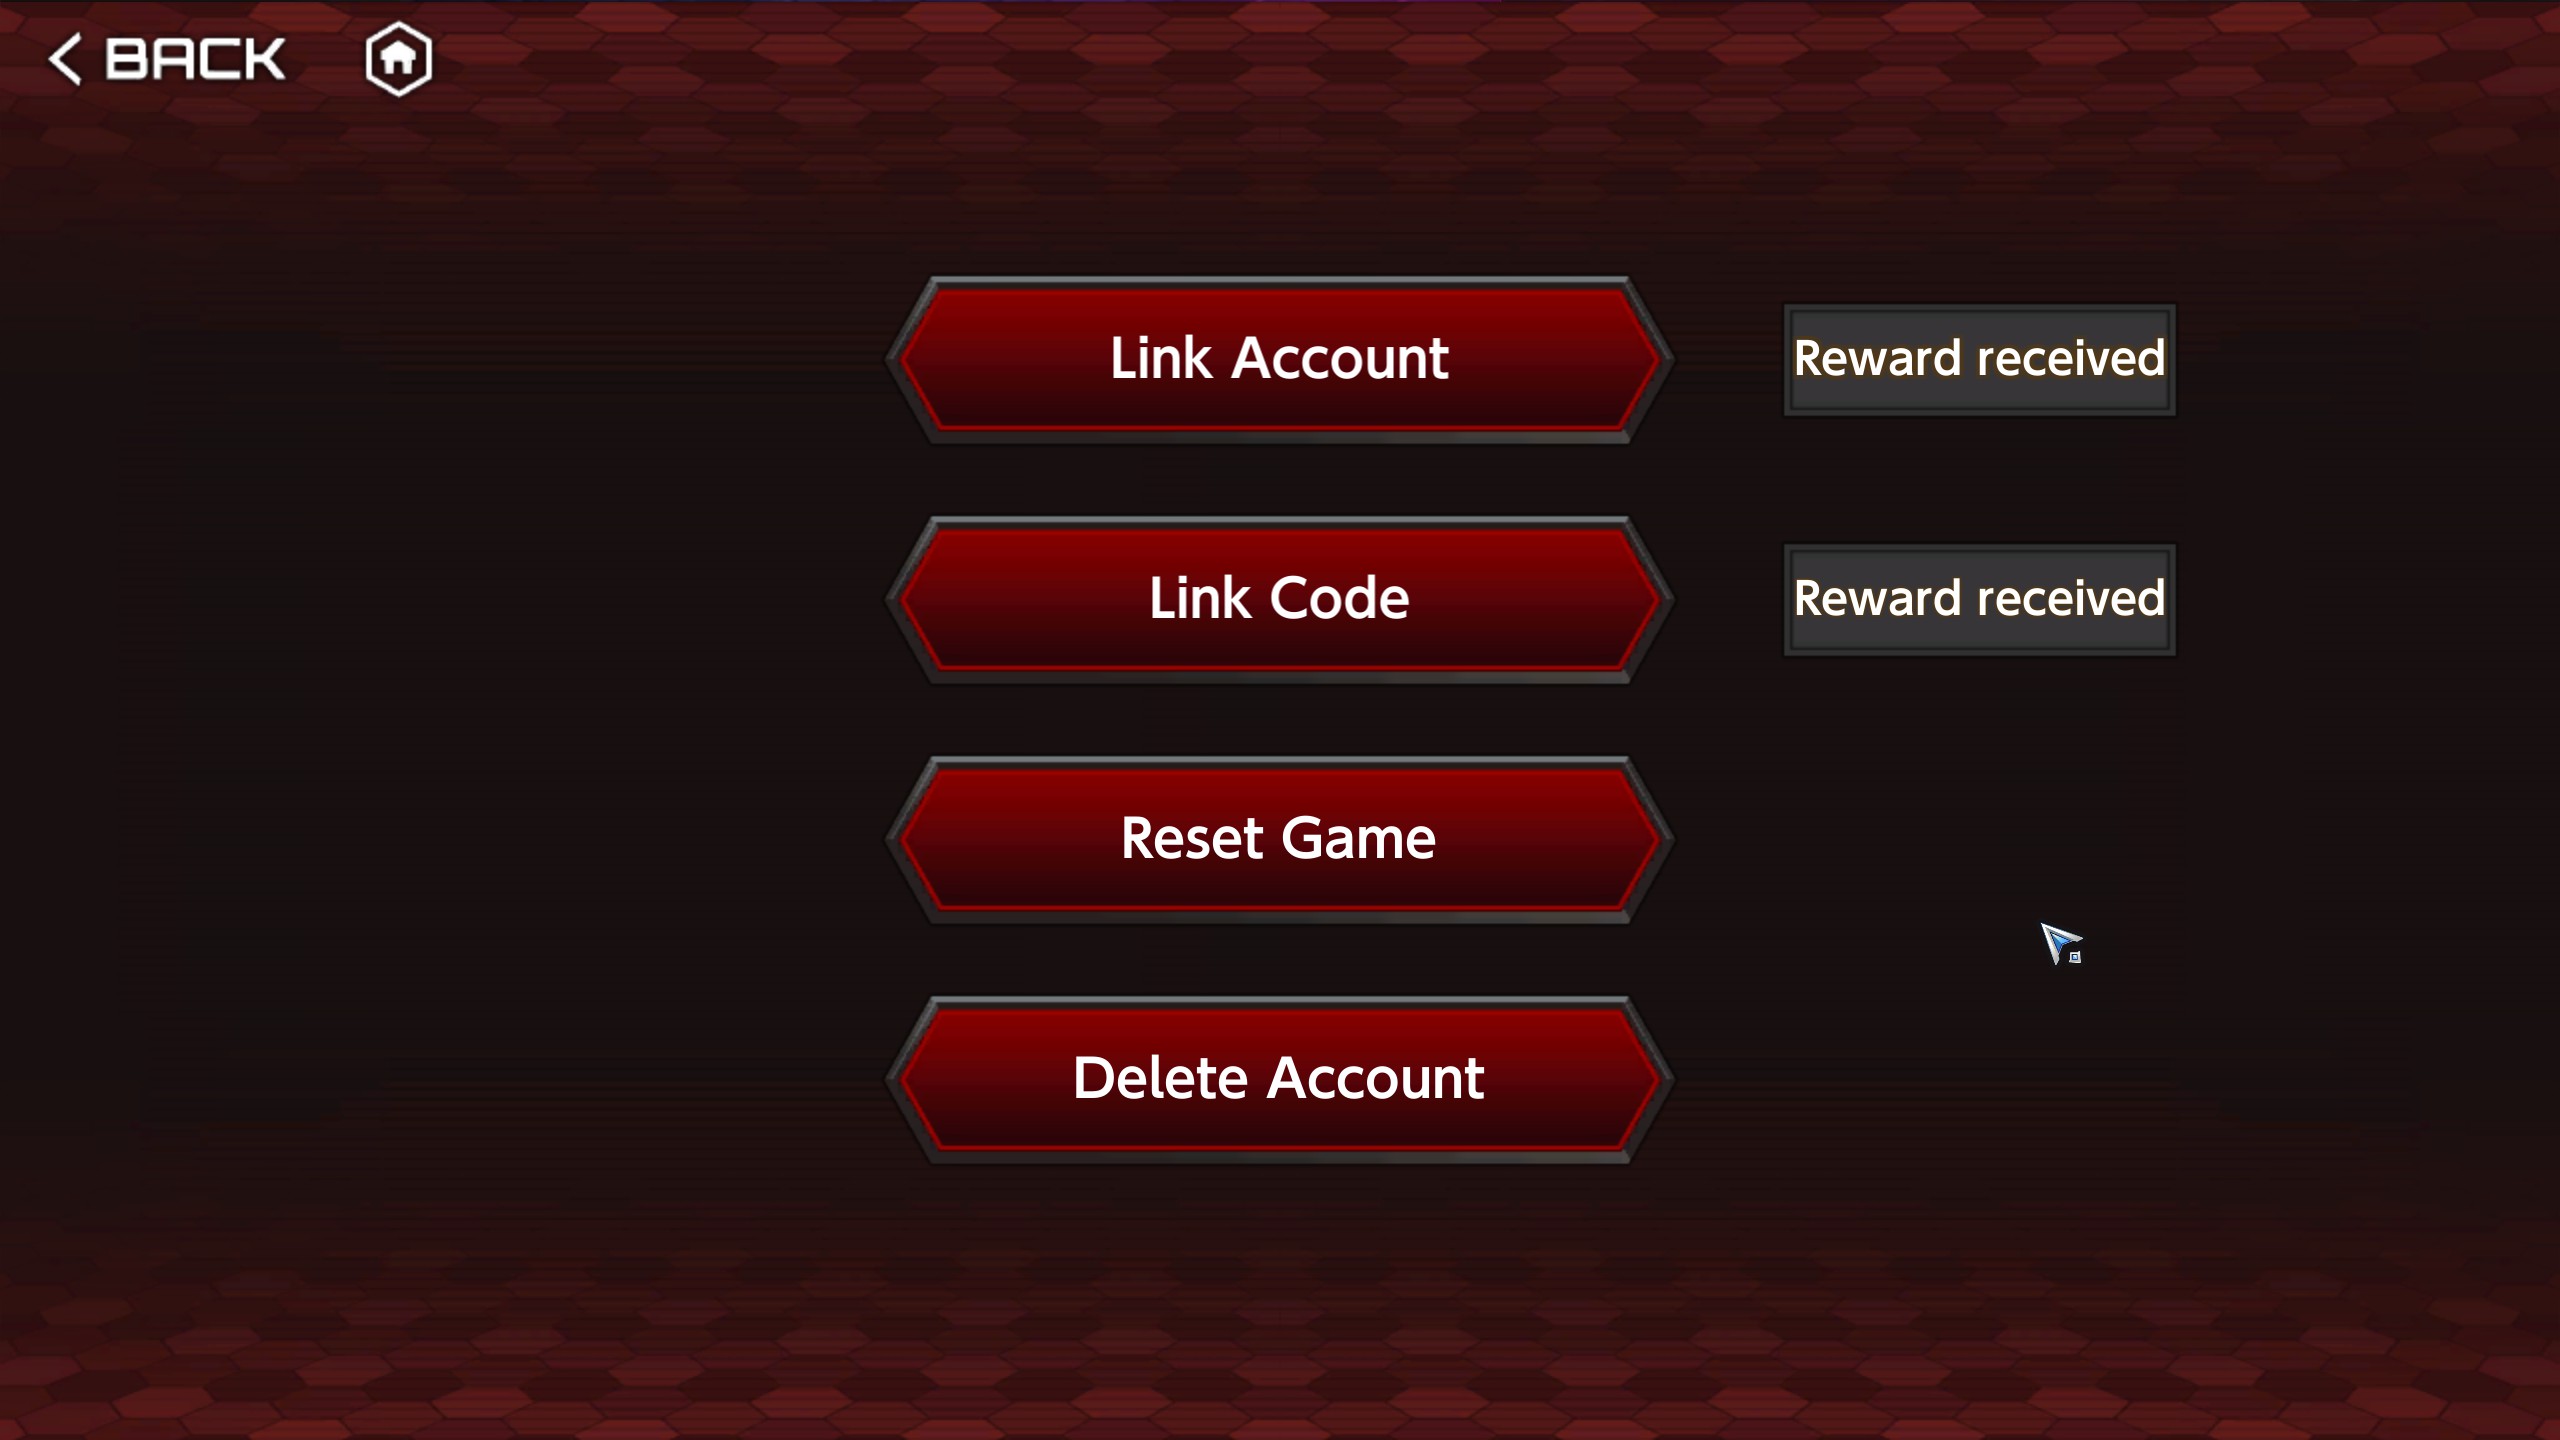
Note that if you decided to uninstall this game and re-install it, this game will outright forget the login. The code is there so you save your login and hopefully, didn’t make the mistake of buying something and not saving your Link Code and Password only to lose it all after one uninstall.
Early game
So you’ve gotten your Taimanin as well as the starting freebies like the 2x SR supporter voucher, the welcome weapon ticket as well as a few starting gems. Do yourself a favor. Do not spend them immediately. Being able to pick SR supporters is a rare chance because the default way of getting them would be through the gacha. Same goes for the weapons.
You’ll need to plan out who you want first and start building around them. Refer to this guide.
Note that it doesn’t have the newer characters. But it is still a handy guide on how to build your characters.
Also, most characters cost 1200 gems with some costing around a 1000.
So I highly recommend you spend some time in storymode to grind up your gems until you have 1,200 gems. And once you do… refer to the next section.
Your first 1.2k
So who to choose? Like it or not, some characters handle way better than others. But if for some reason, you already have someone you wanted to play as… feel free to ignore this section of the guide. Otherwise, keep reading.
For me, there’s only two choices for your first 1.2k gems. Astaroth or Emily.
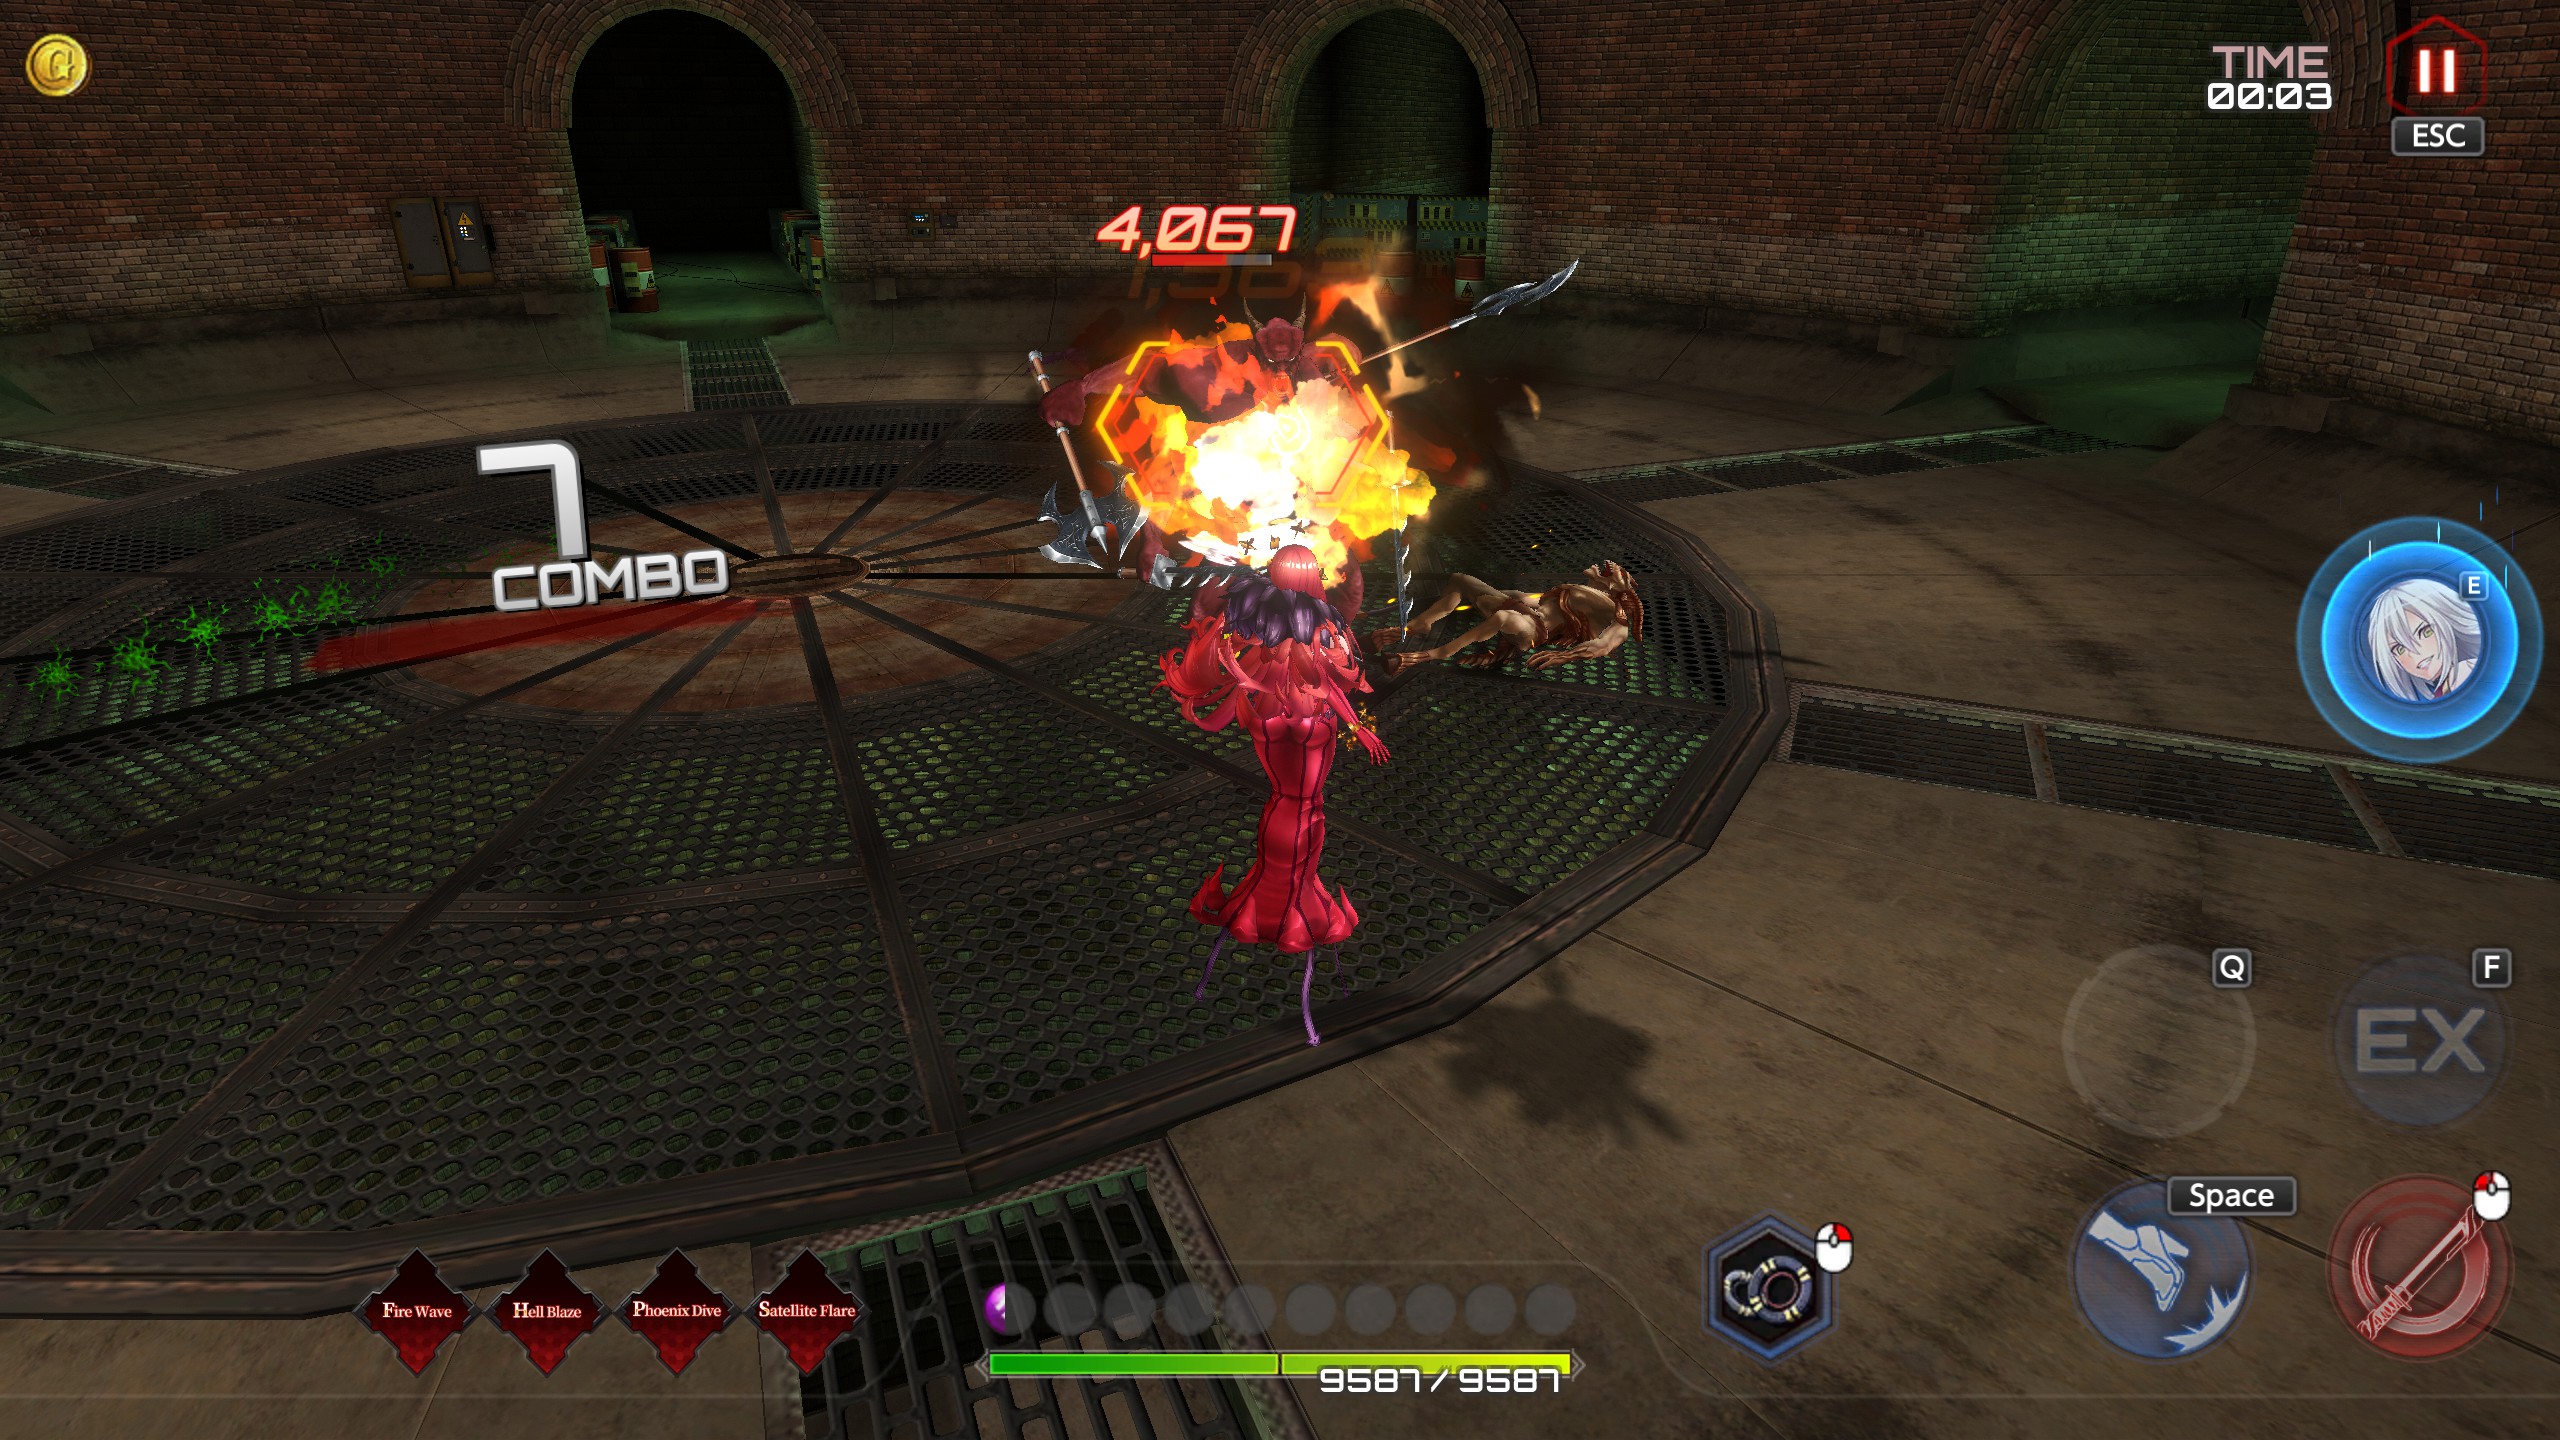

Astaroth is an amazing DPS ranger/crowd control. Easy to handle, high damage, comes with AOE abilities, mobile and very, very flexible. Her basic attacks come in high-damage short range or consistent long range fireballs. Both do not slow her down at all. Astaroth excels in cleaning out entire rooms.

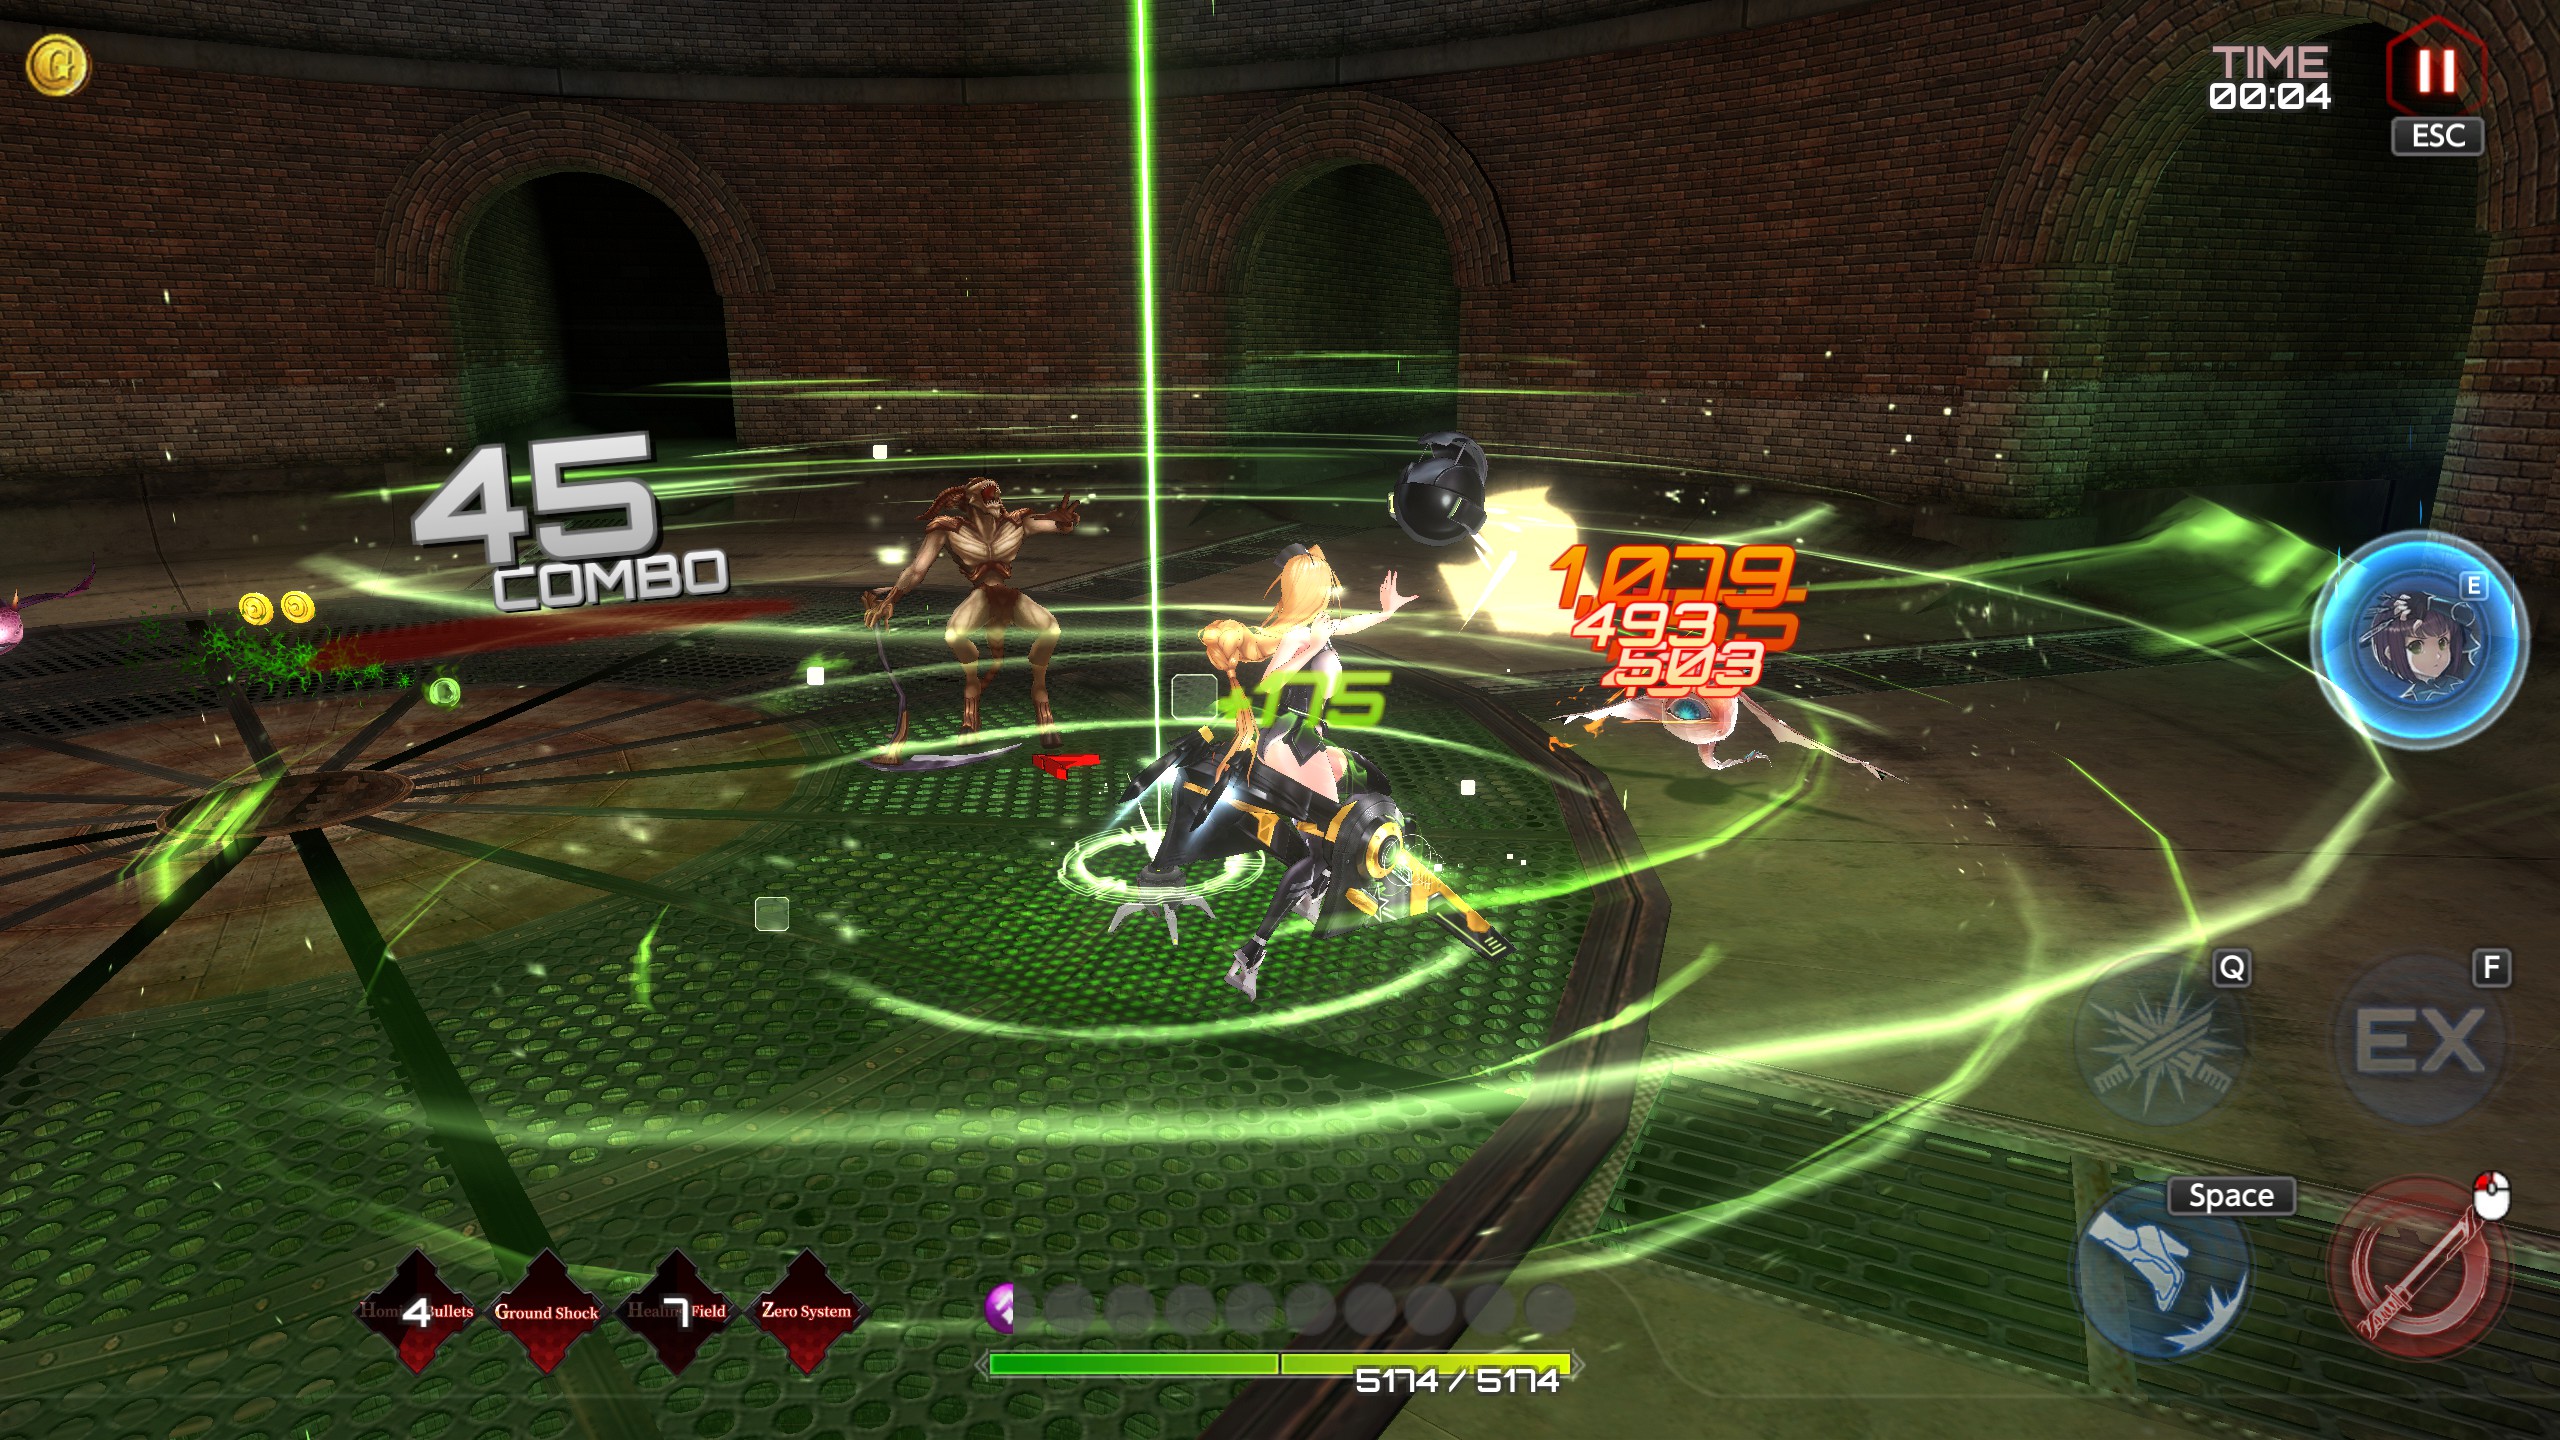
Emily, much like Astaroth is also a ranger. Except her basic attacks slow her down but she comes with a heal that extends to her allies. What also helps is that she has a mode where she fires at her enemies consistently. While she is terrible early-game, she becomes an absolute monster late-game once you’ve gotten her properly geared up and lowered her cooldowns.
So pick your poison. Strawberry or Vanilla.
The Daily Grind
In most gacha games, there are dailies where you are expected to do. Fight X amount of enemies, collect the parts, you know the drills.
But this one is odd as the only ‘dailies’ you have is the welcome one and the event campaign one. Once those are gone, all you’re left with are your weeklies.
There’s also of course, events. Those tend to yield the most resources to help you improve your character, supporters and weapons. So don’t hesitate to grind those.
Once that’s done, that leaves you with grinding up your characters so they can eventually take on hard mode. And maybe the Arena’s Tower and VR mode.
Now how does strength work in this game? It goes by:
-Character levels (Just beware most of the predatory monetization shows up here)
-Improving character skills
-Equipping weapons, leveling, ascending and gearing them
-Equipping supporters and leveling them
-Support formation
-School bonuses
I’ll be detailing this in the next few sections.
Leveling up (And its dangers)
Leveling up. You know how it works. Take down enough bad guys and your character gets stronger.
But what makes it particularly dangerous in this is the fact that you are nickel and dimed every step of the way.
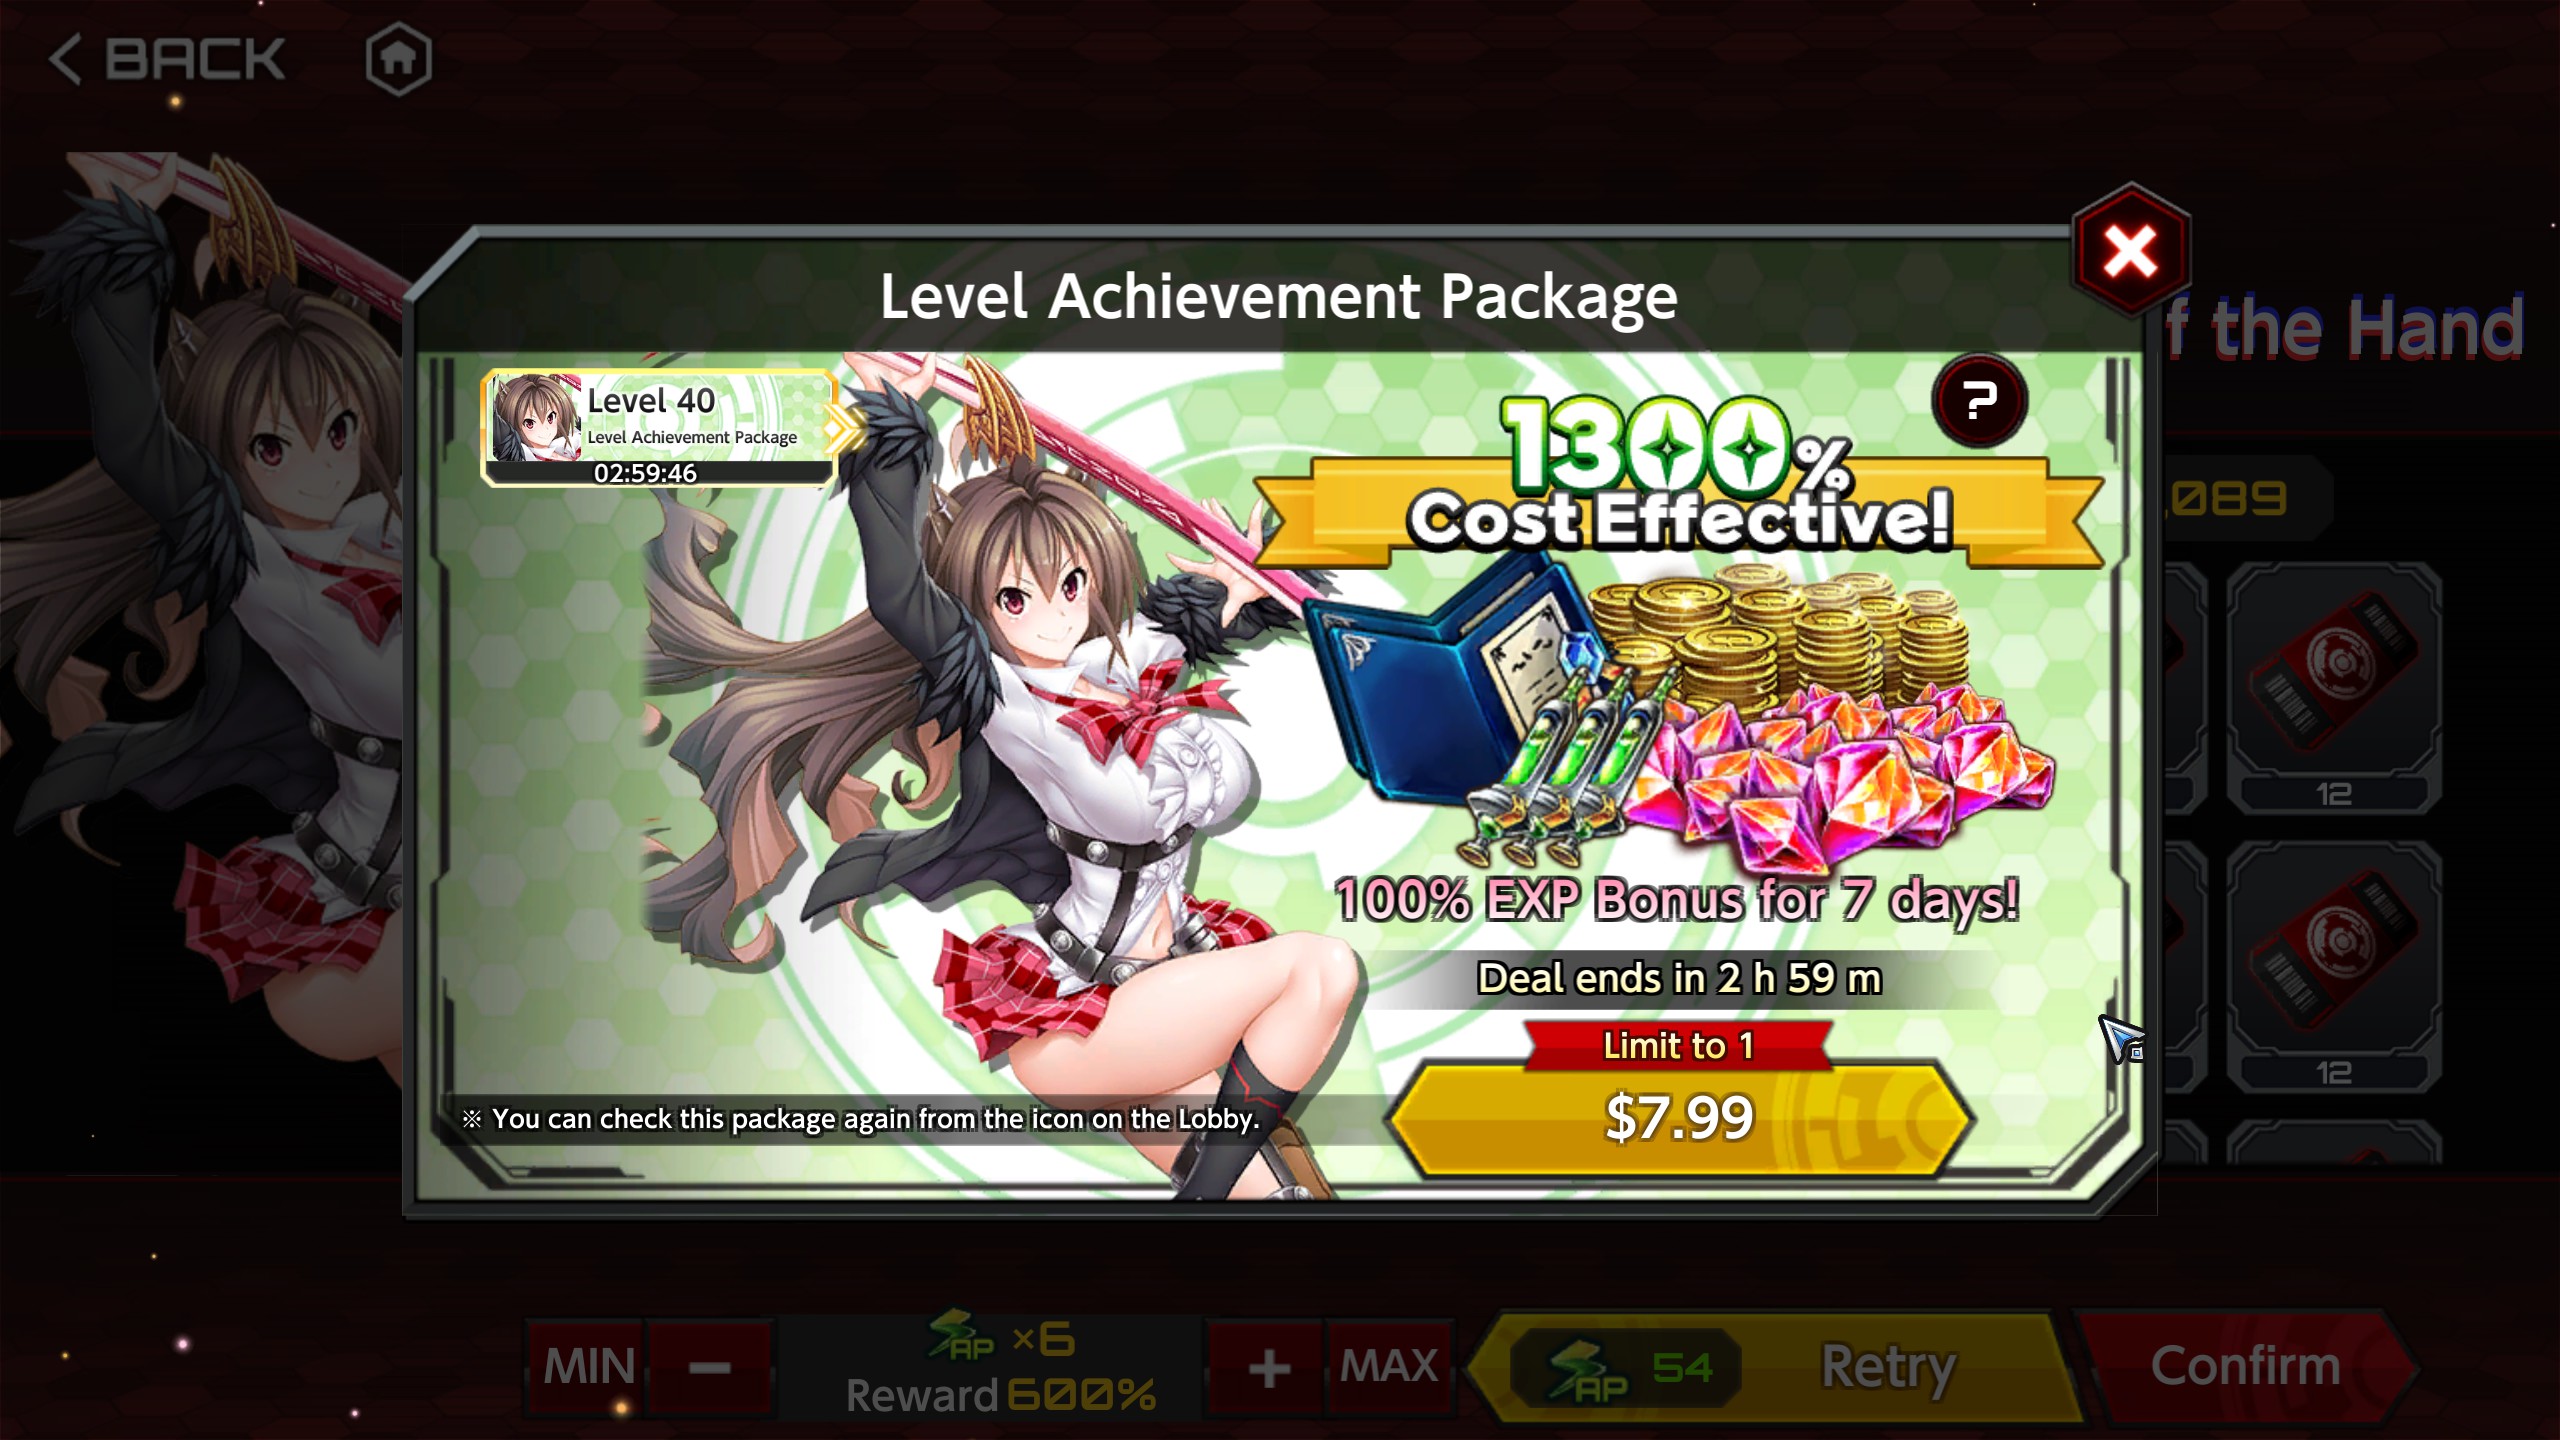
You’d get something like this each time your character hits max level for that star. Again, the guide below details it.
What makes this particularly predatory as detailed by the guide is that it only happens once, its limited to three hours and the deals get even more painful past Level 70 as those start offering endgame materials. Stuff you can only grab in the endgame area aka the Arena.
So unlike in most games where you want to level up everybody, here you only level up your most favorite as it only requires 1 good character to beat hard mode and battle arena up until the end of Gold rankings.
Also its to keep you from burning through one-time deals. Unless of course, you care little about that and just want to play with your favorite team as an F2P.
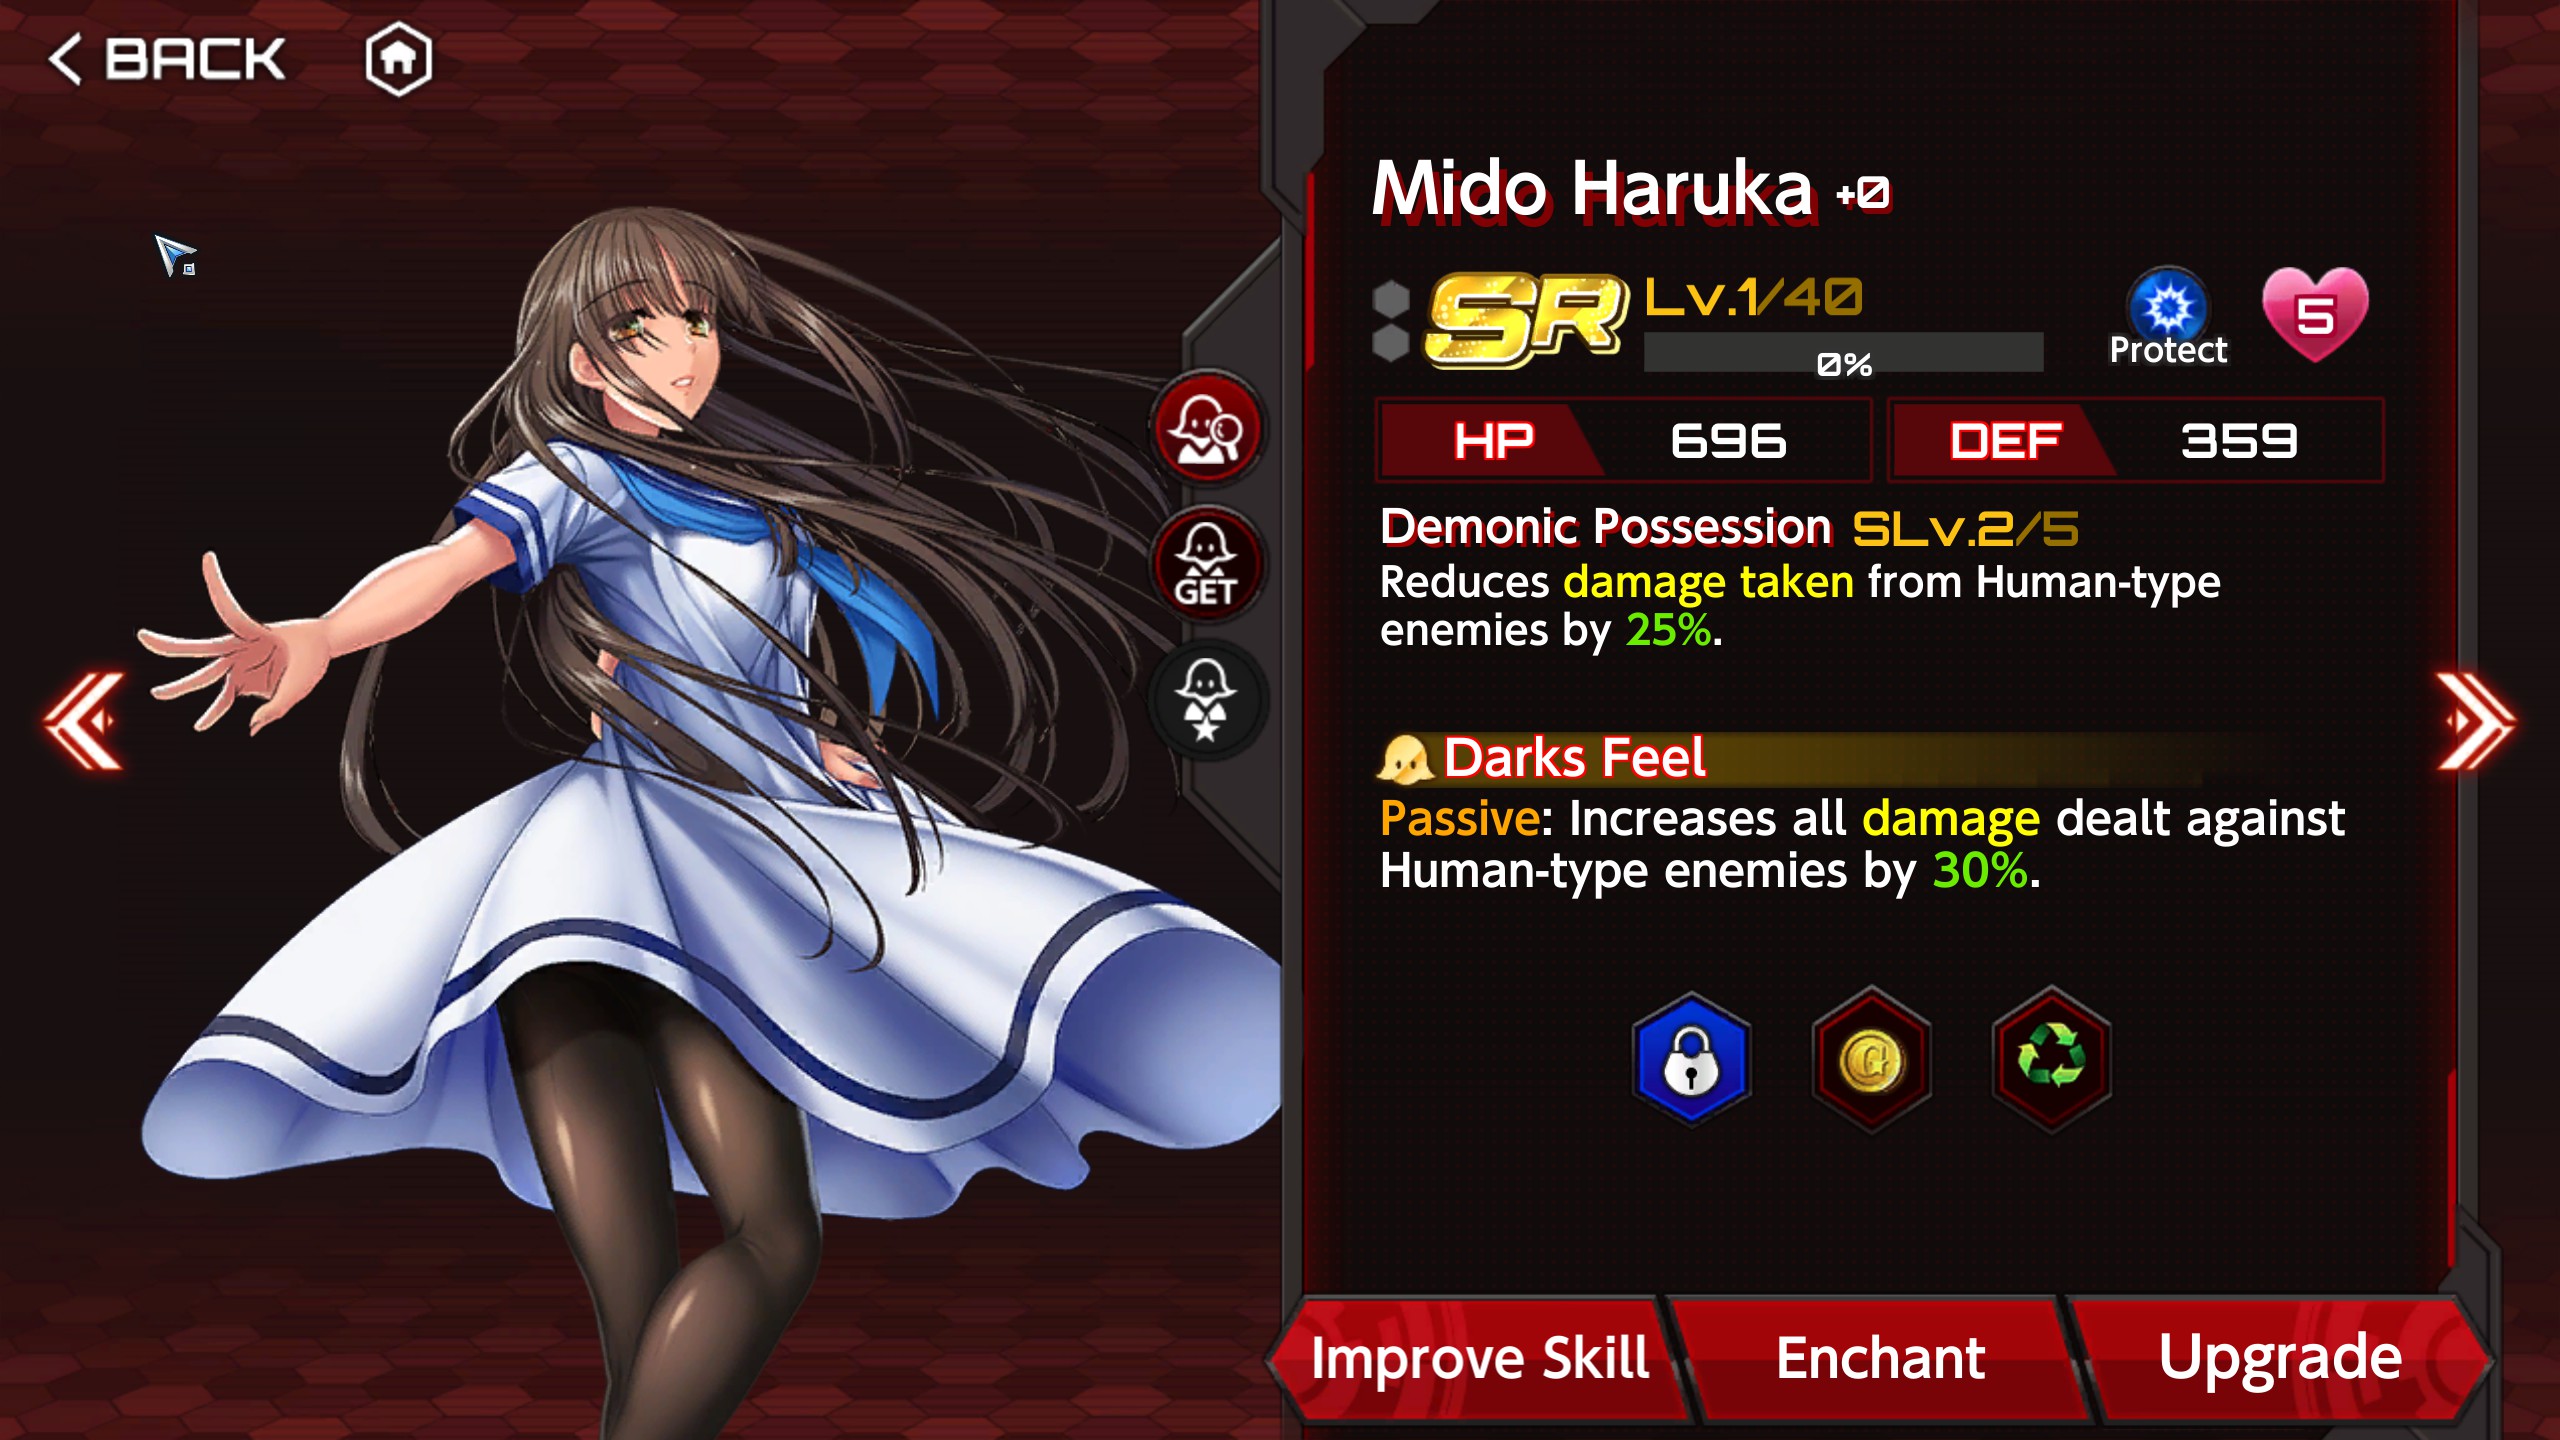
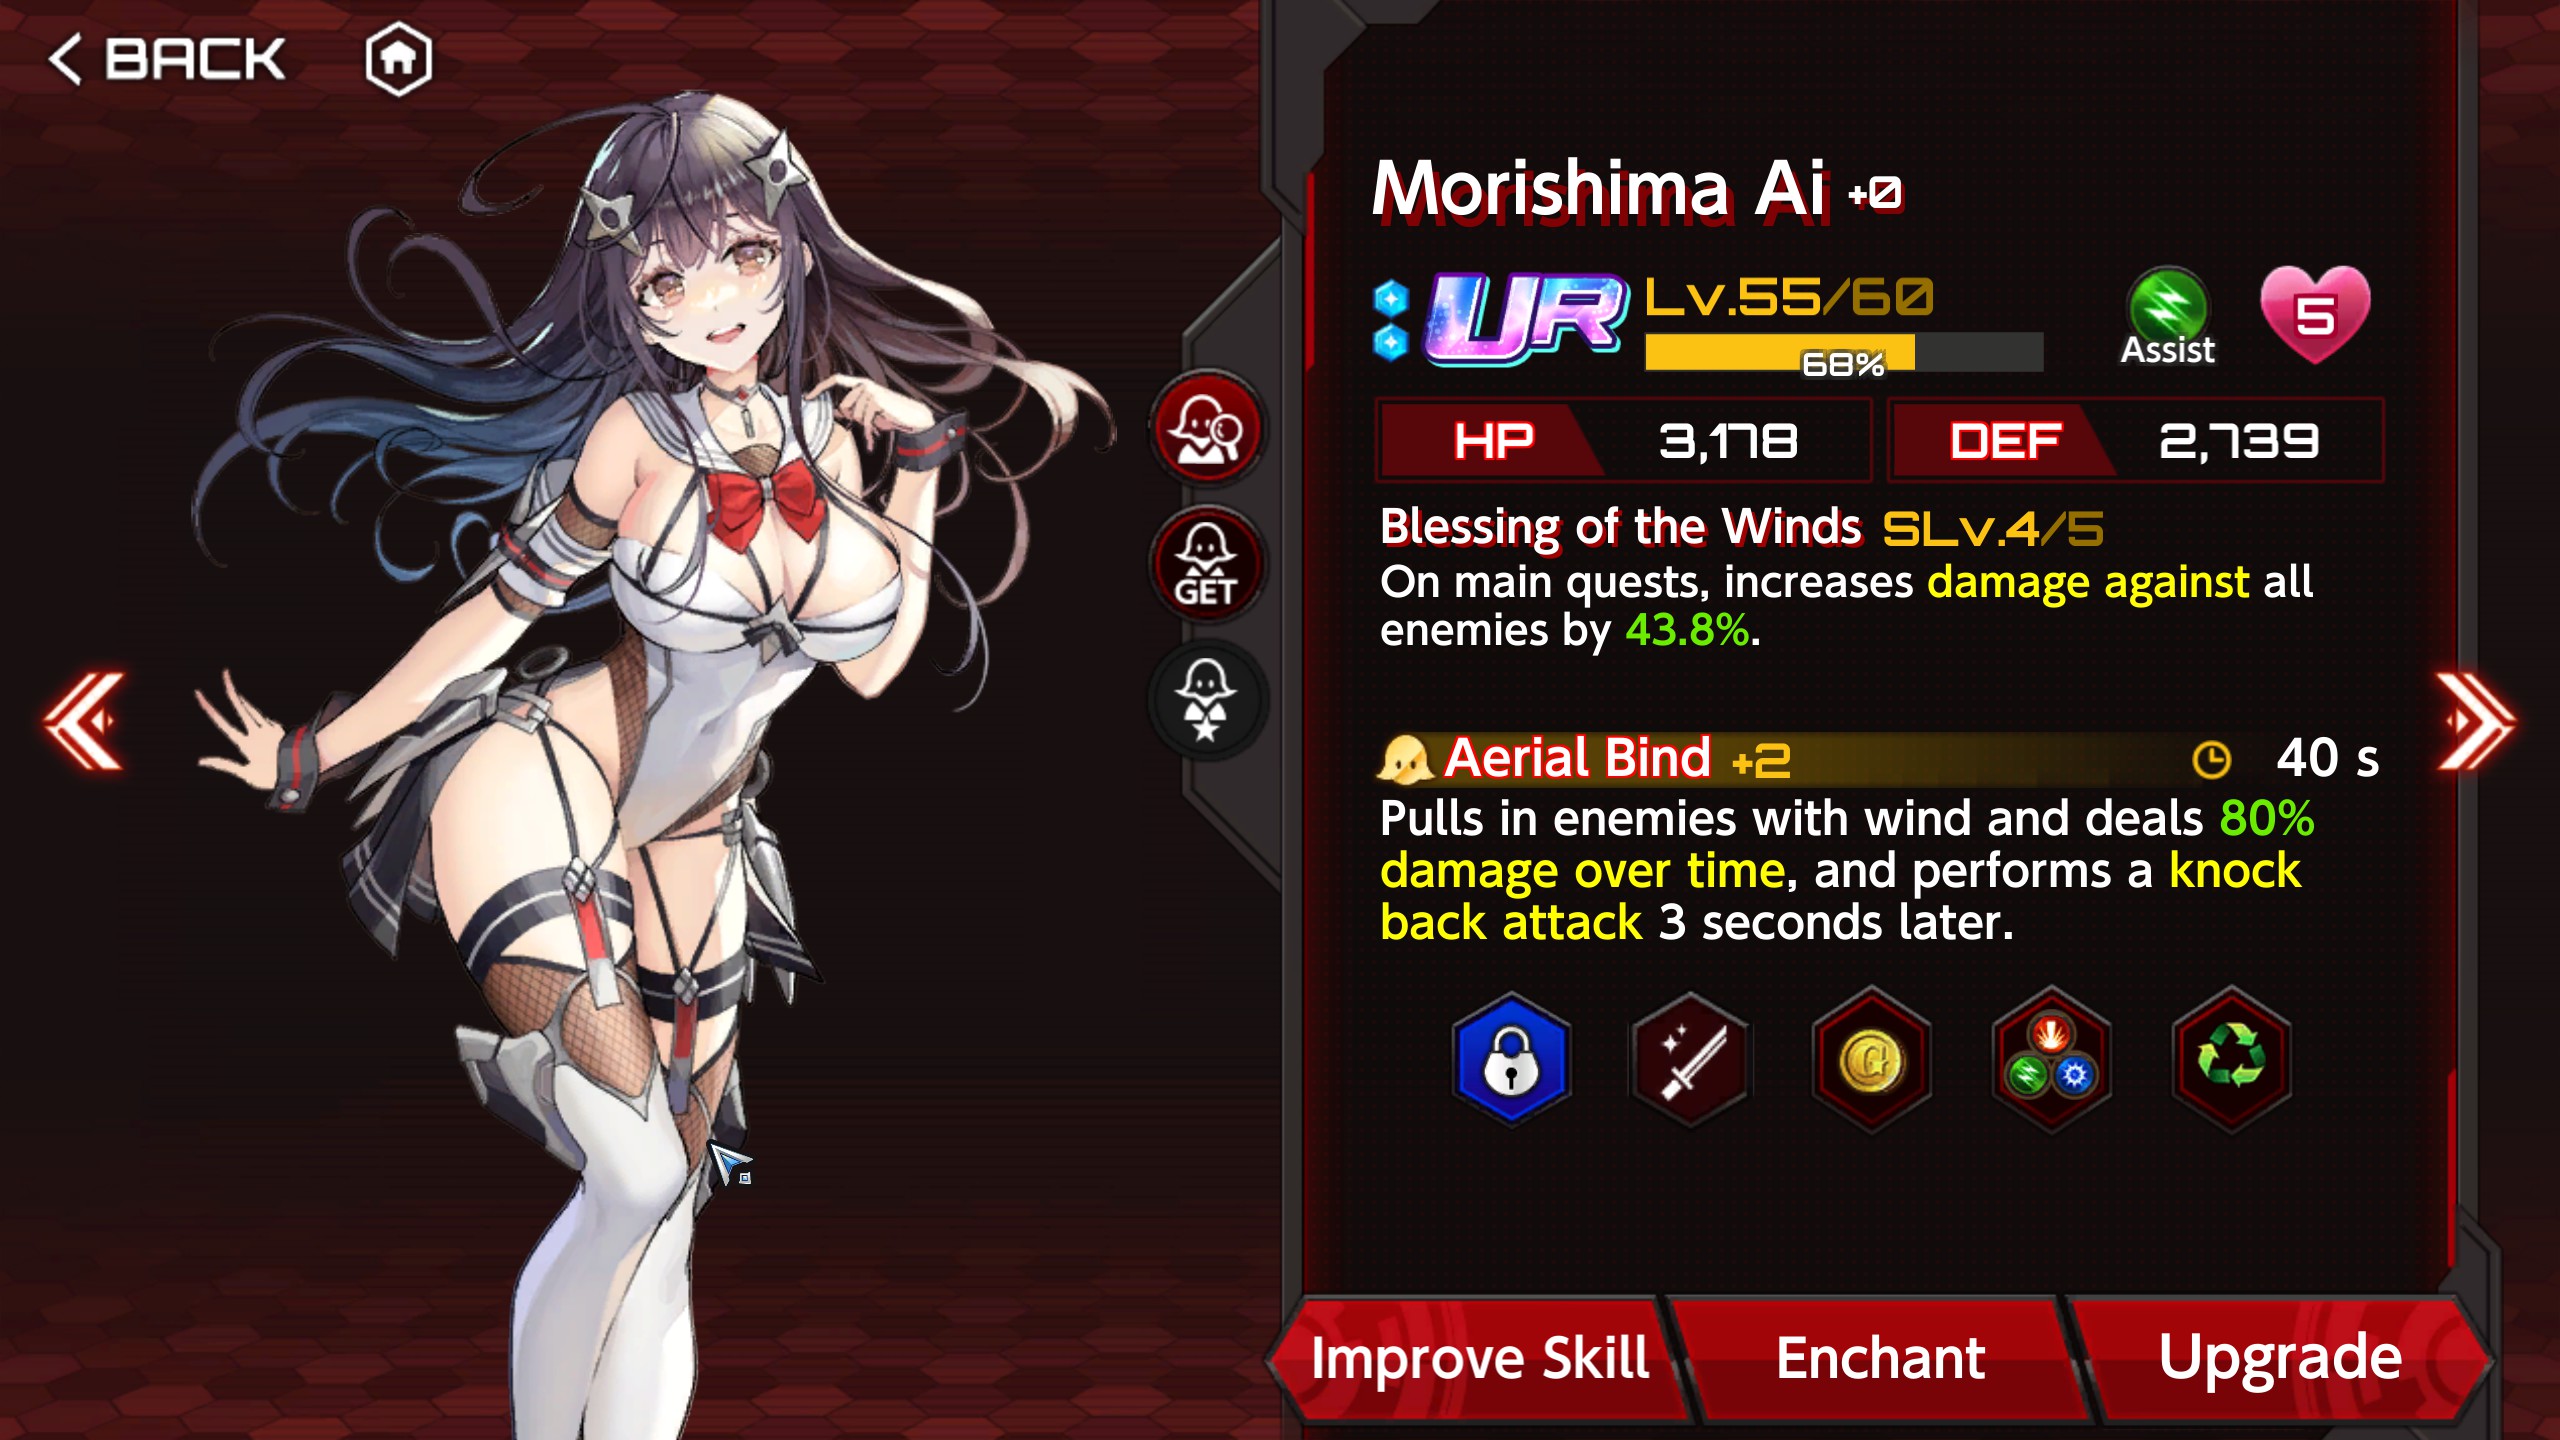
Leveling Skills
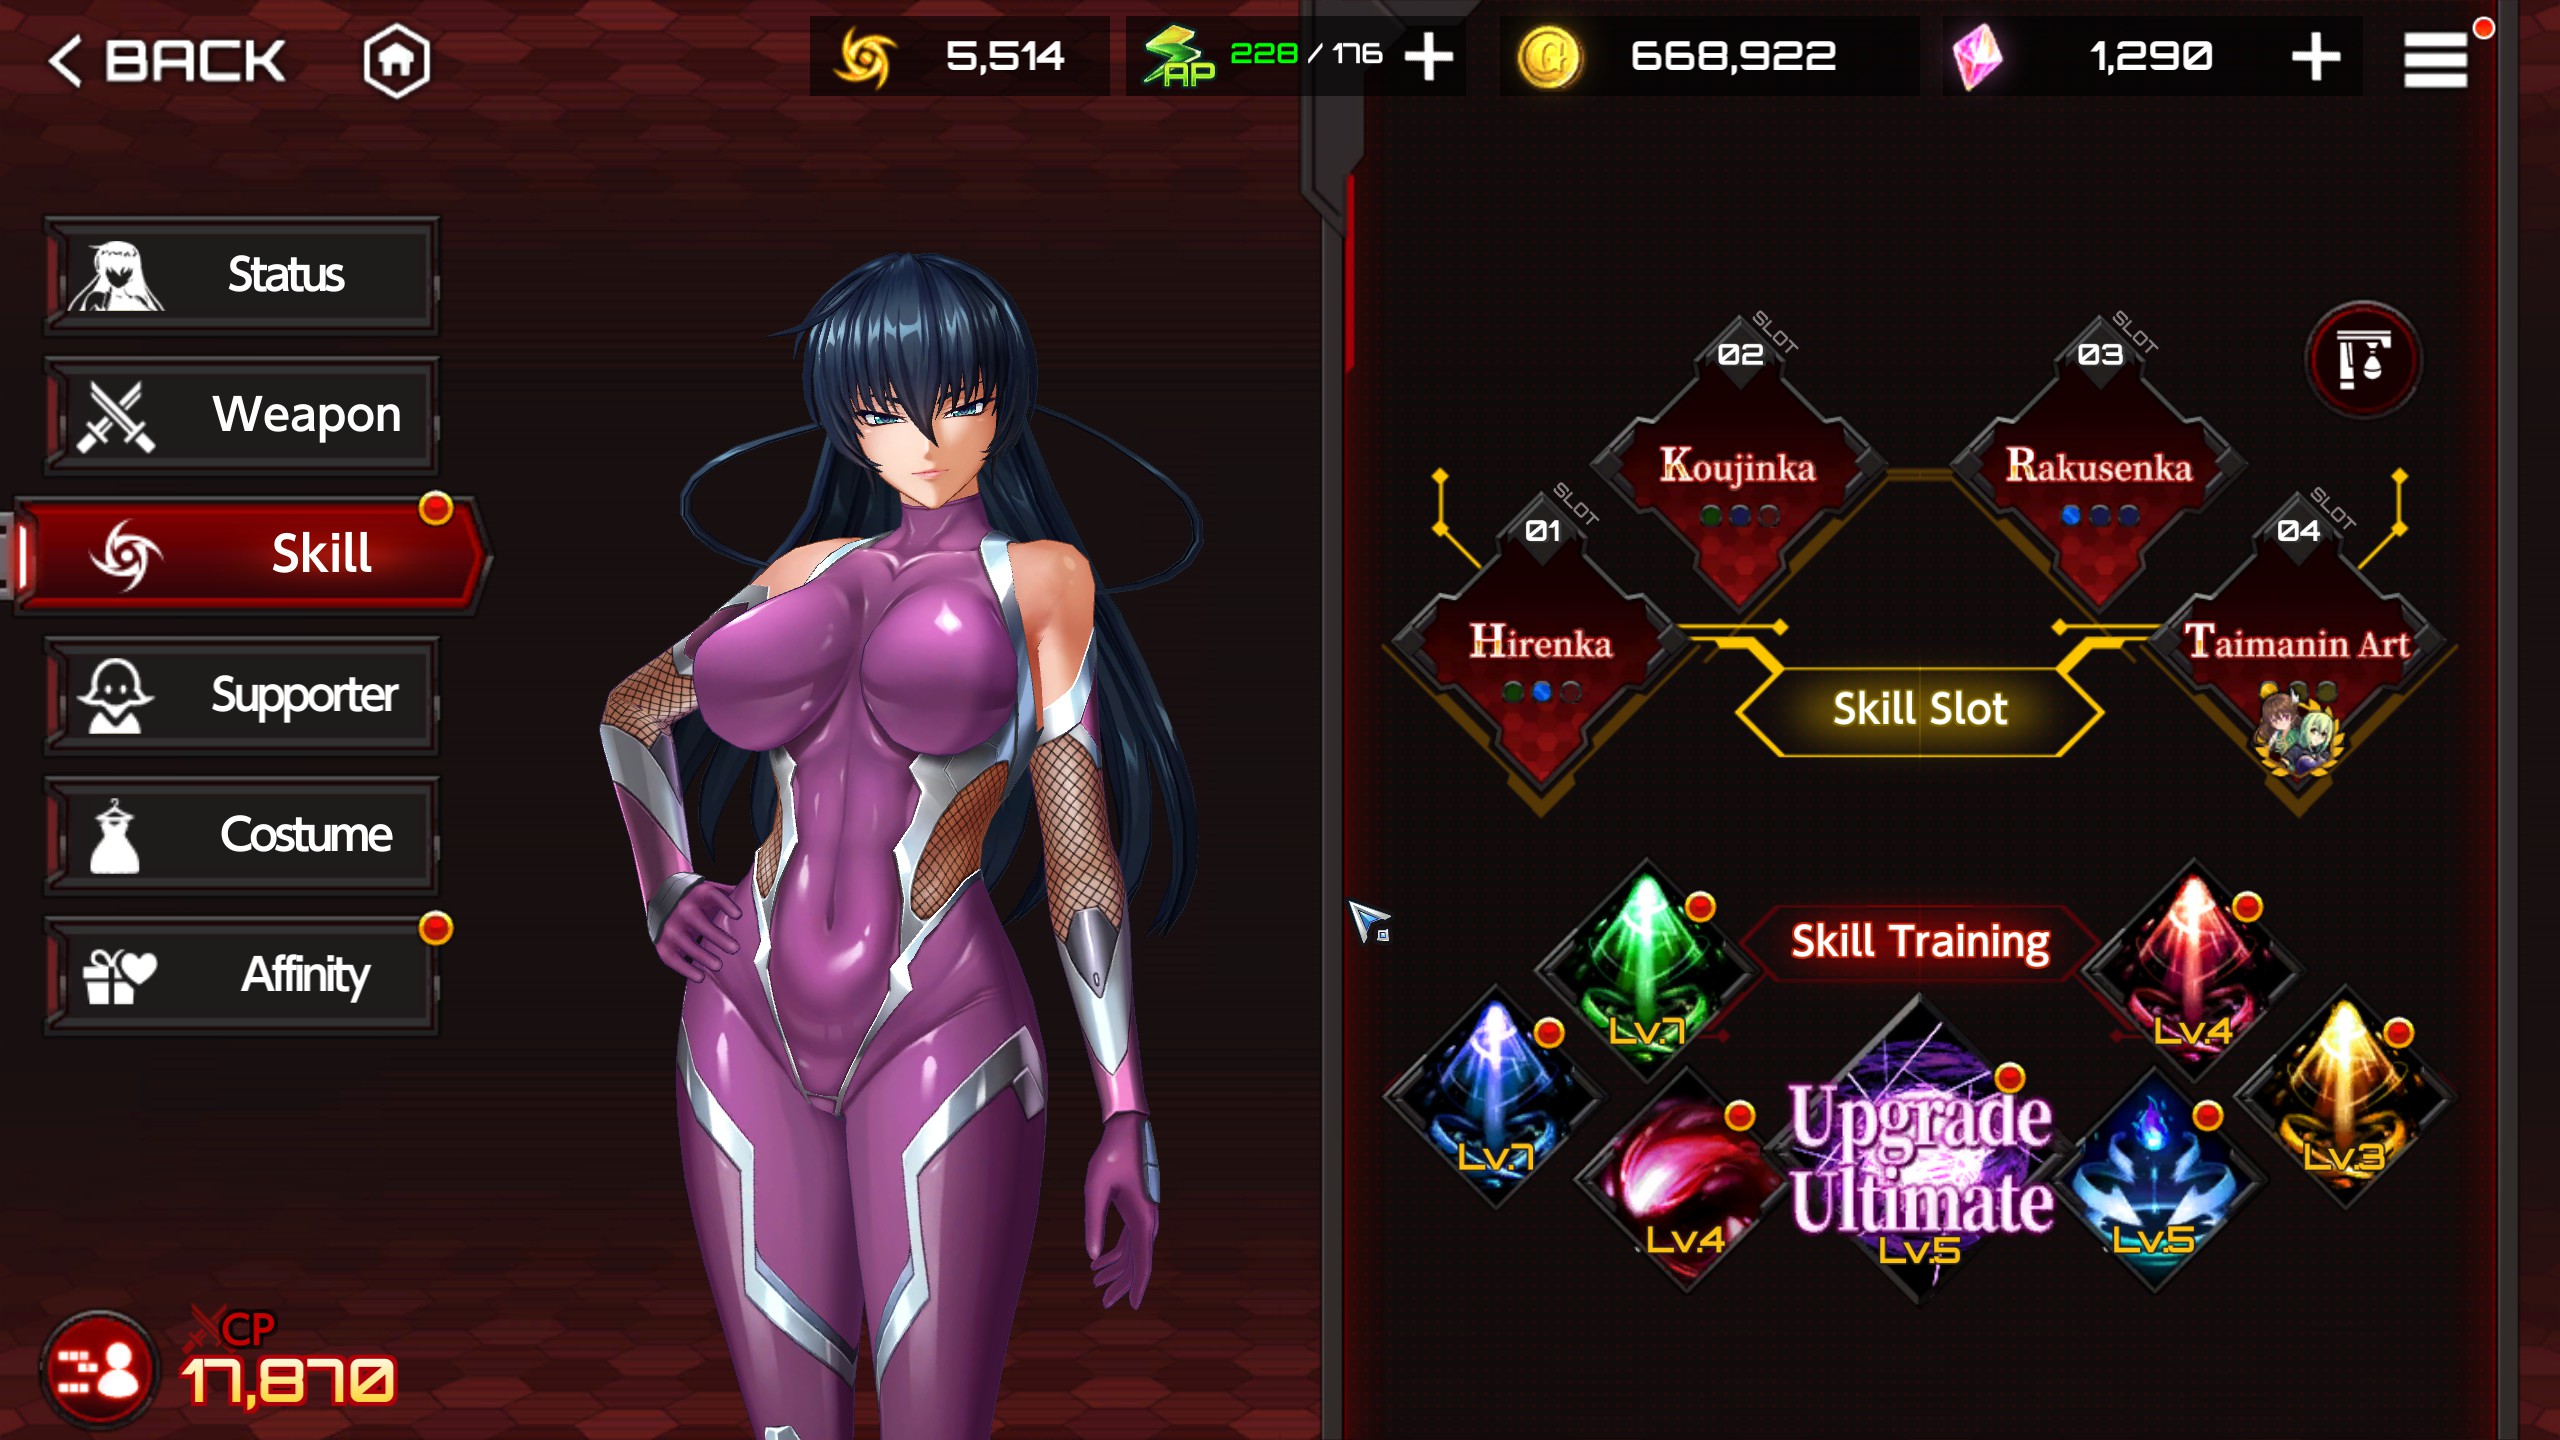
So this section deals with the types of abilities your character can use in-game as well as improving overall performance by leveling the attributes beneath the skills. And they are…
Health, Defense, Ability Power, Attack Power, Ultimate damage, Cooldowns and Critical damage.
To level them up, you need skill points and gold. The amount you can level up skills however is tied to the level of said character.
You gain gold and skill points through quests. Alternatively, you can gain skill points through the School.
Also if you have noticed on the screen, there is a fourth skill slot but has a weird design on it. That is a skill slot that is tied to a monthly subscription. It is locked if you don’t have that subscription. You don’t need 4 skills to beat the game as this game was originally built around 3 slots but added the 4th one for money purposes.
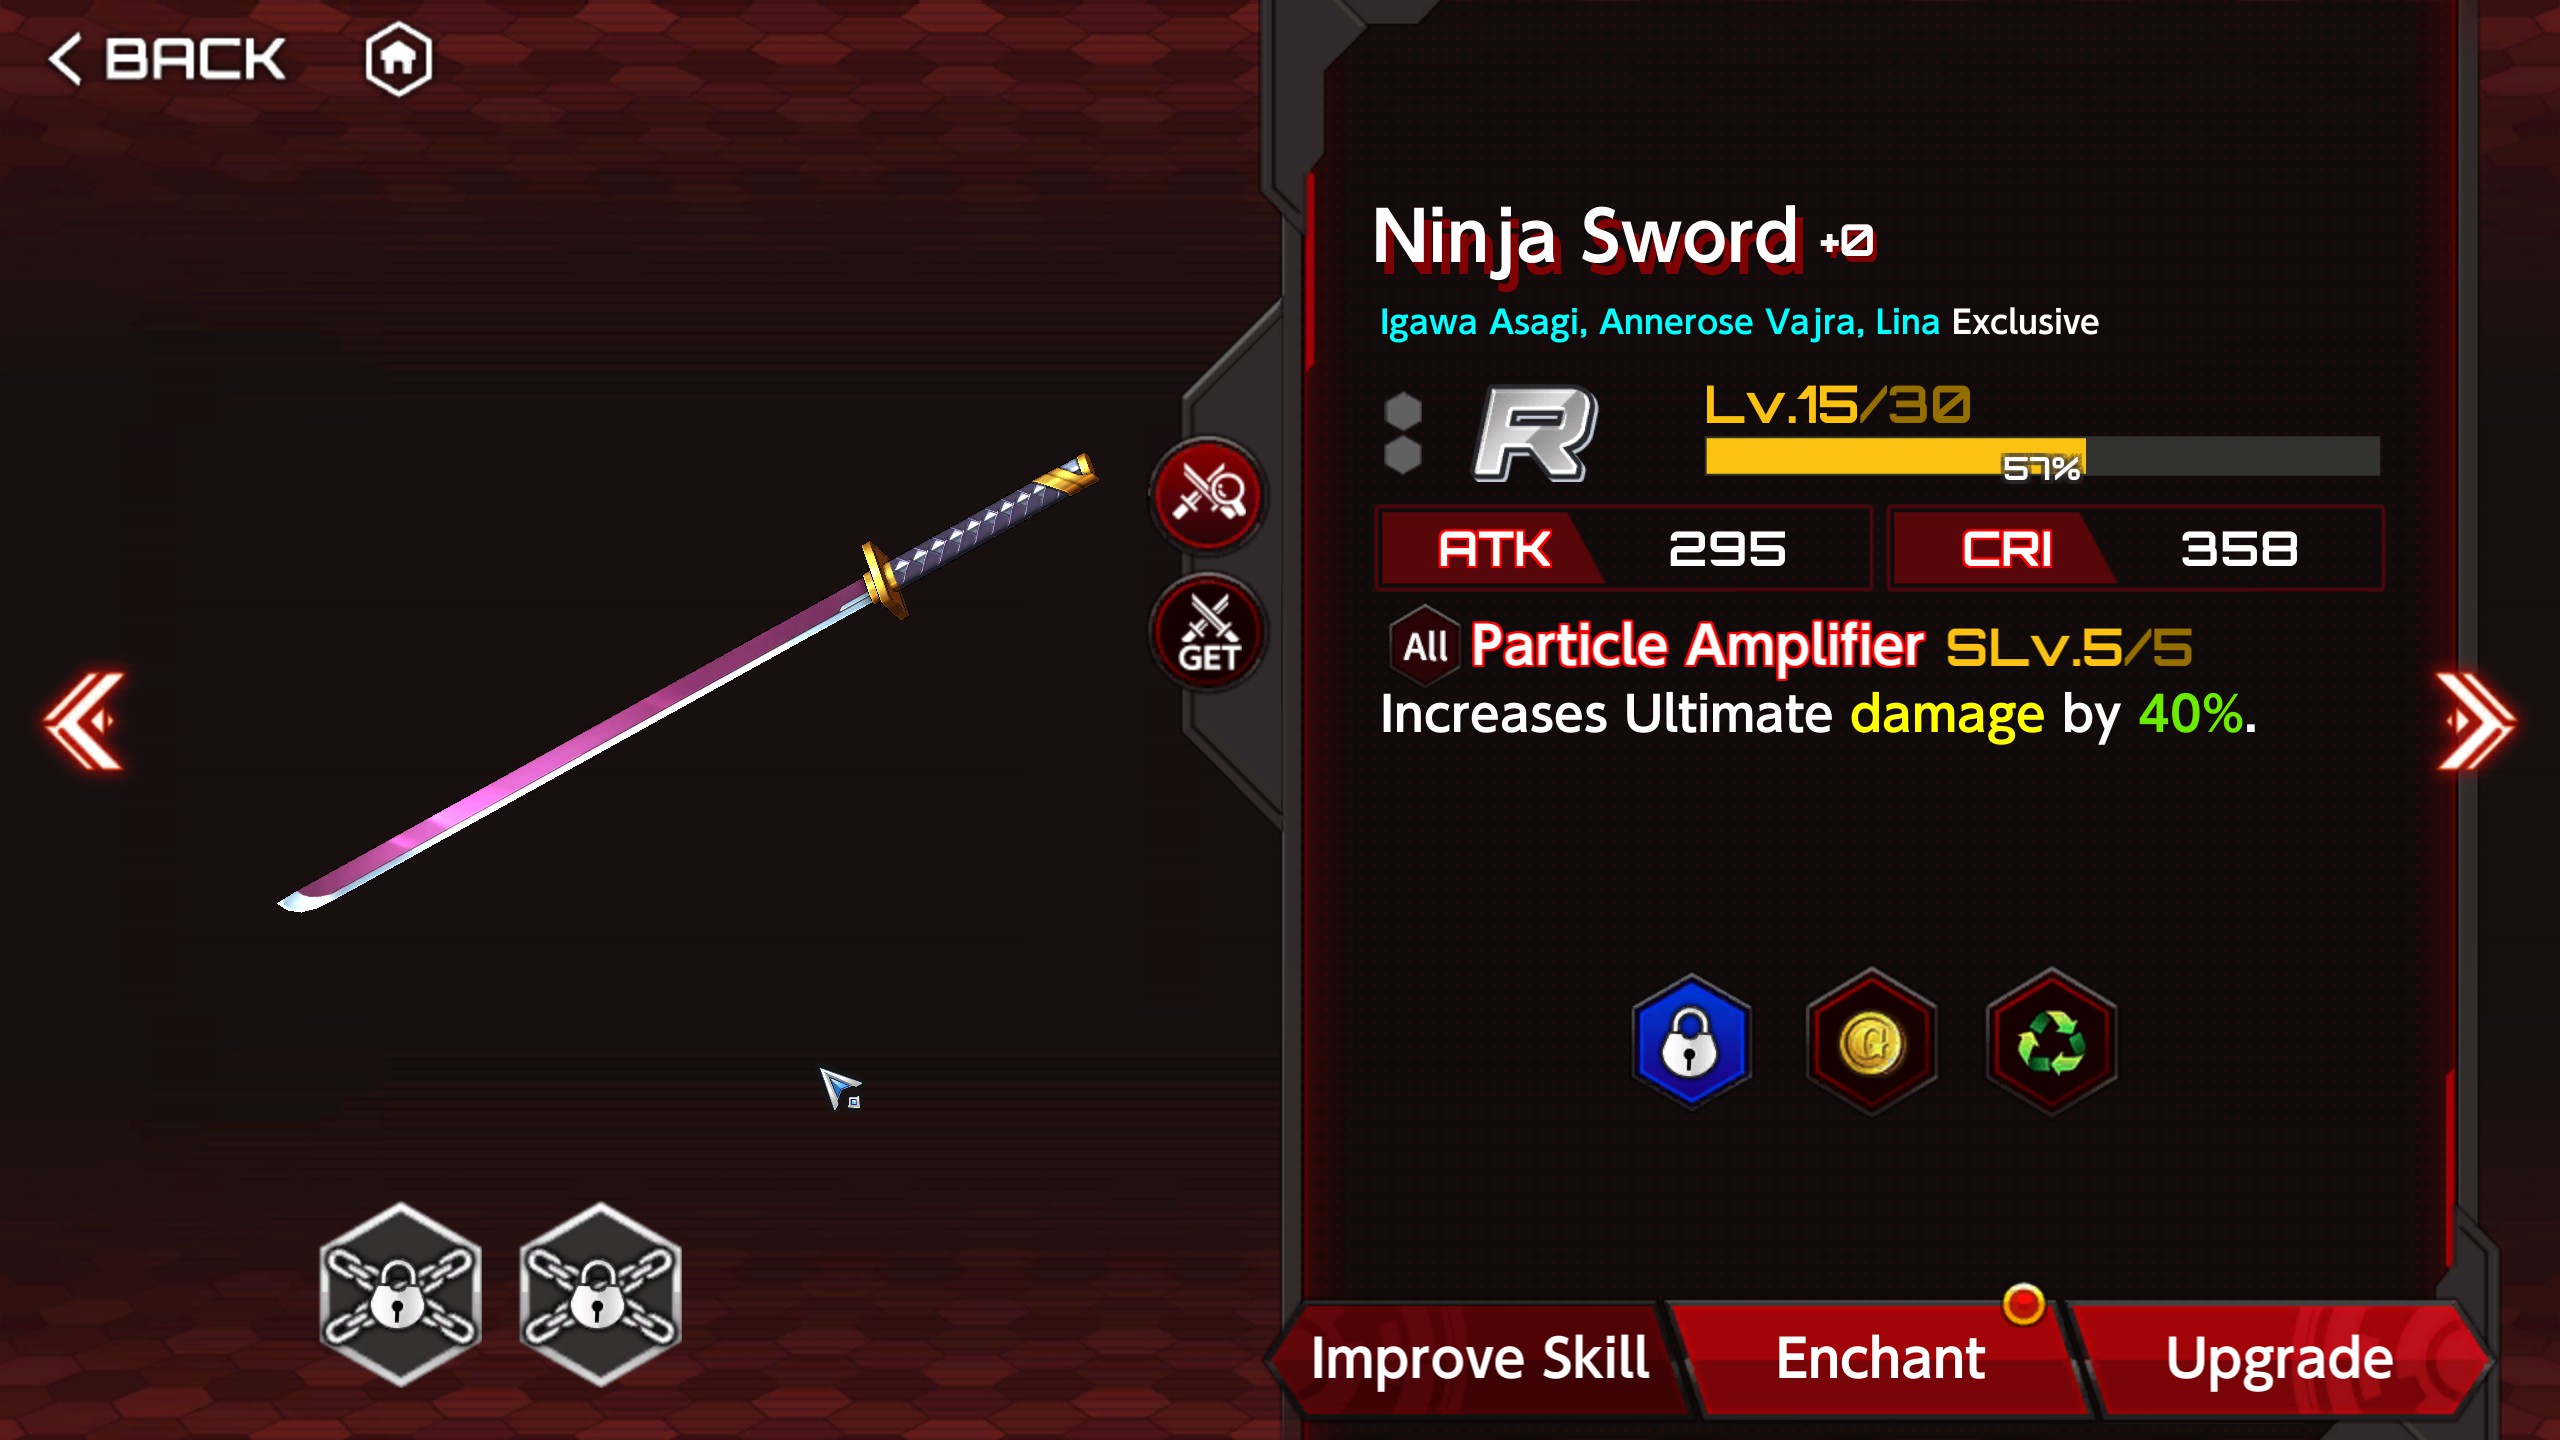
Weapons!
So along with skills to boost your character with, there’s weapons too.
Rarity unfortunately determines overall power especially when leveled up. All weapons can be leveled and ascended except for wood quality. Those are just there to farm for stardust. That’s gonna be detailed later.
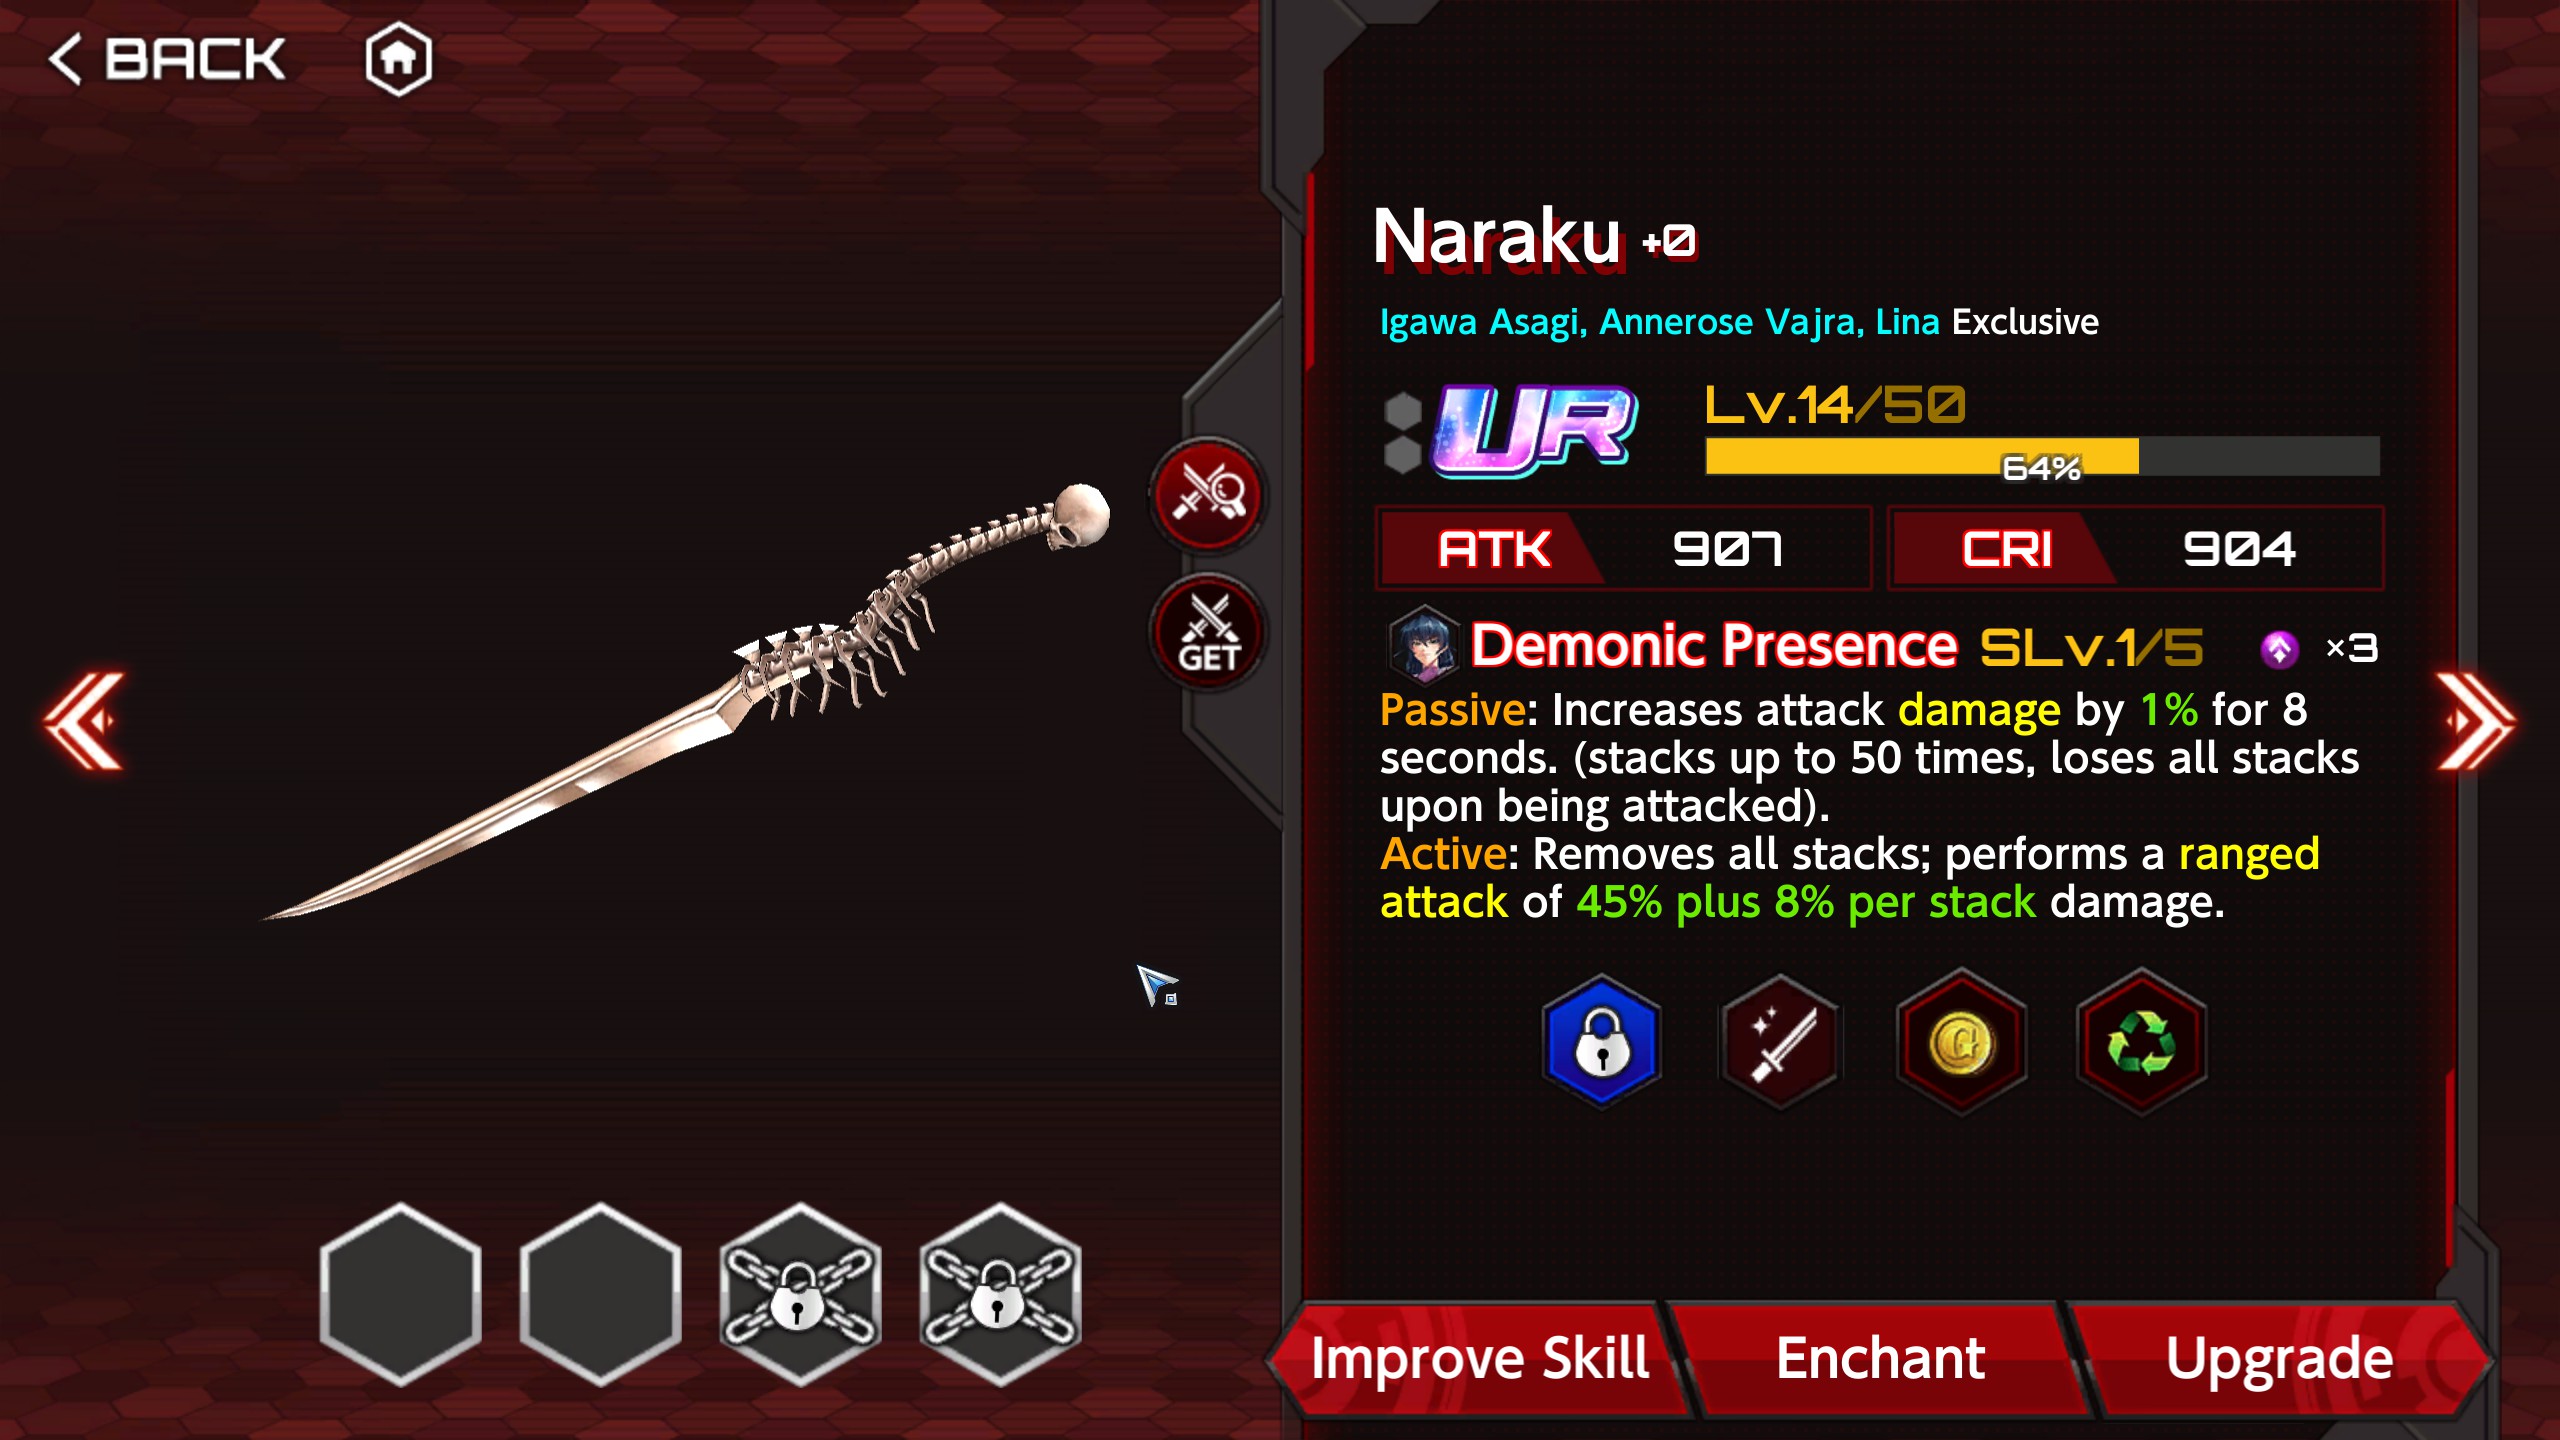
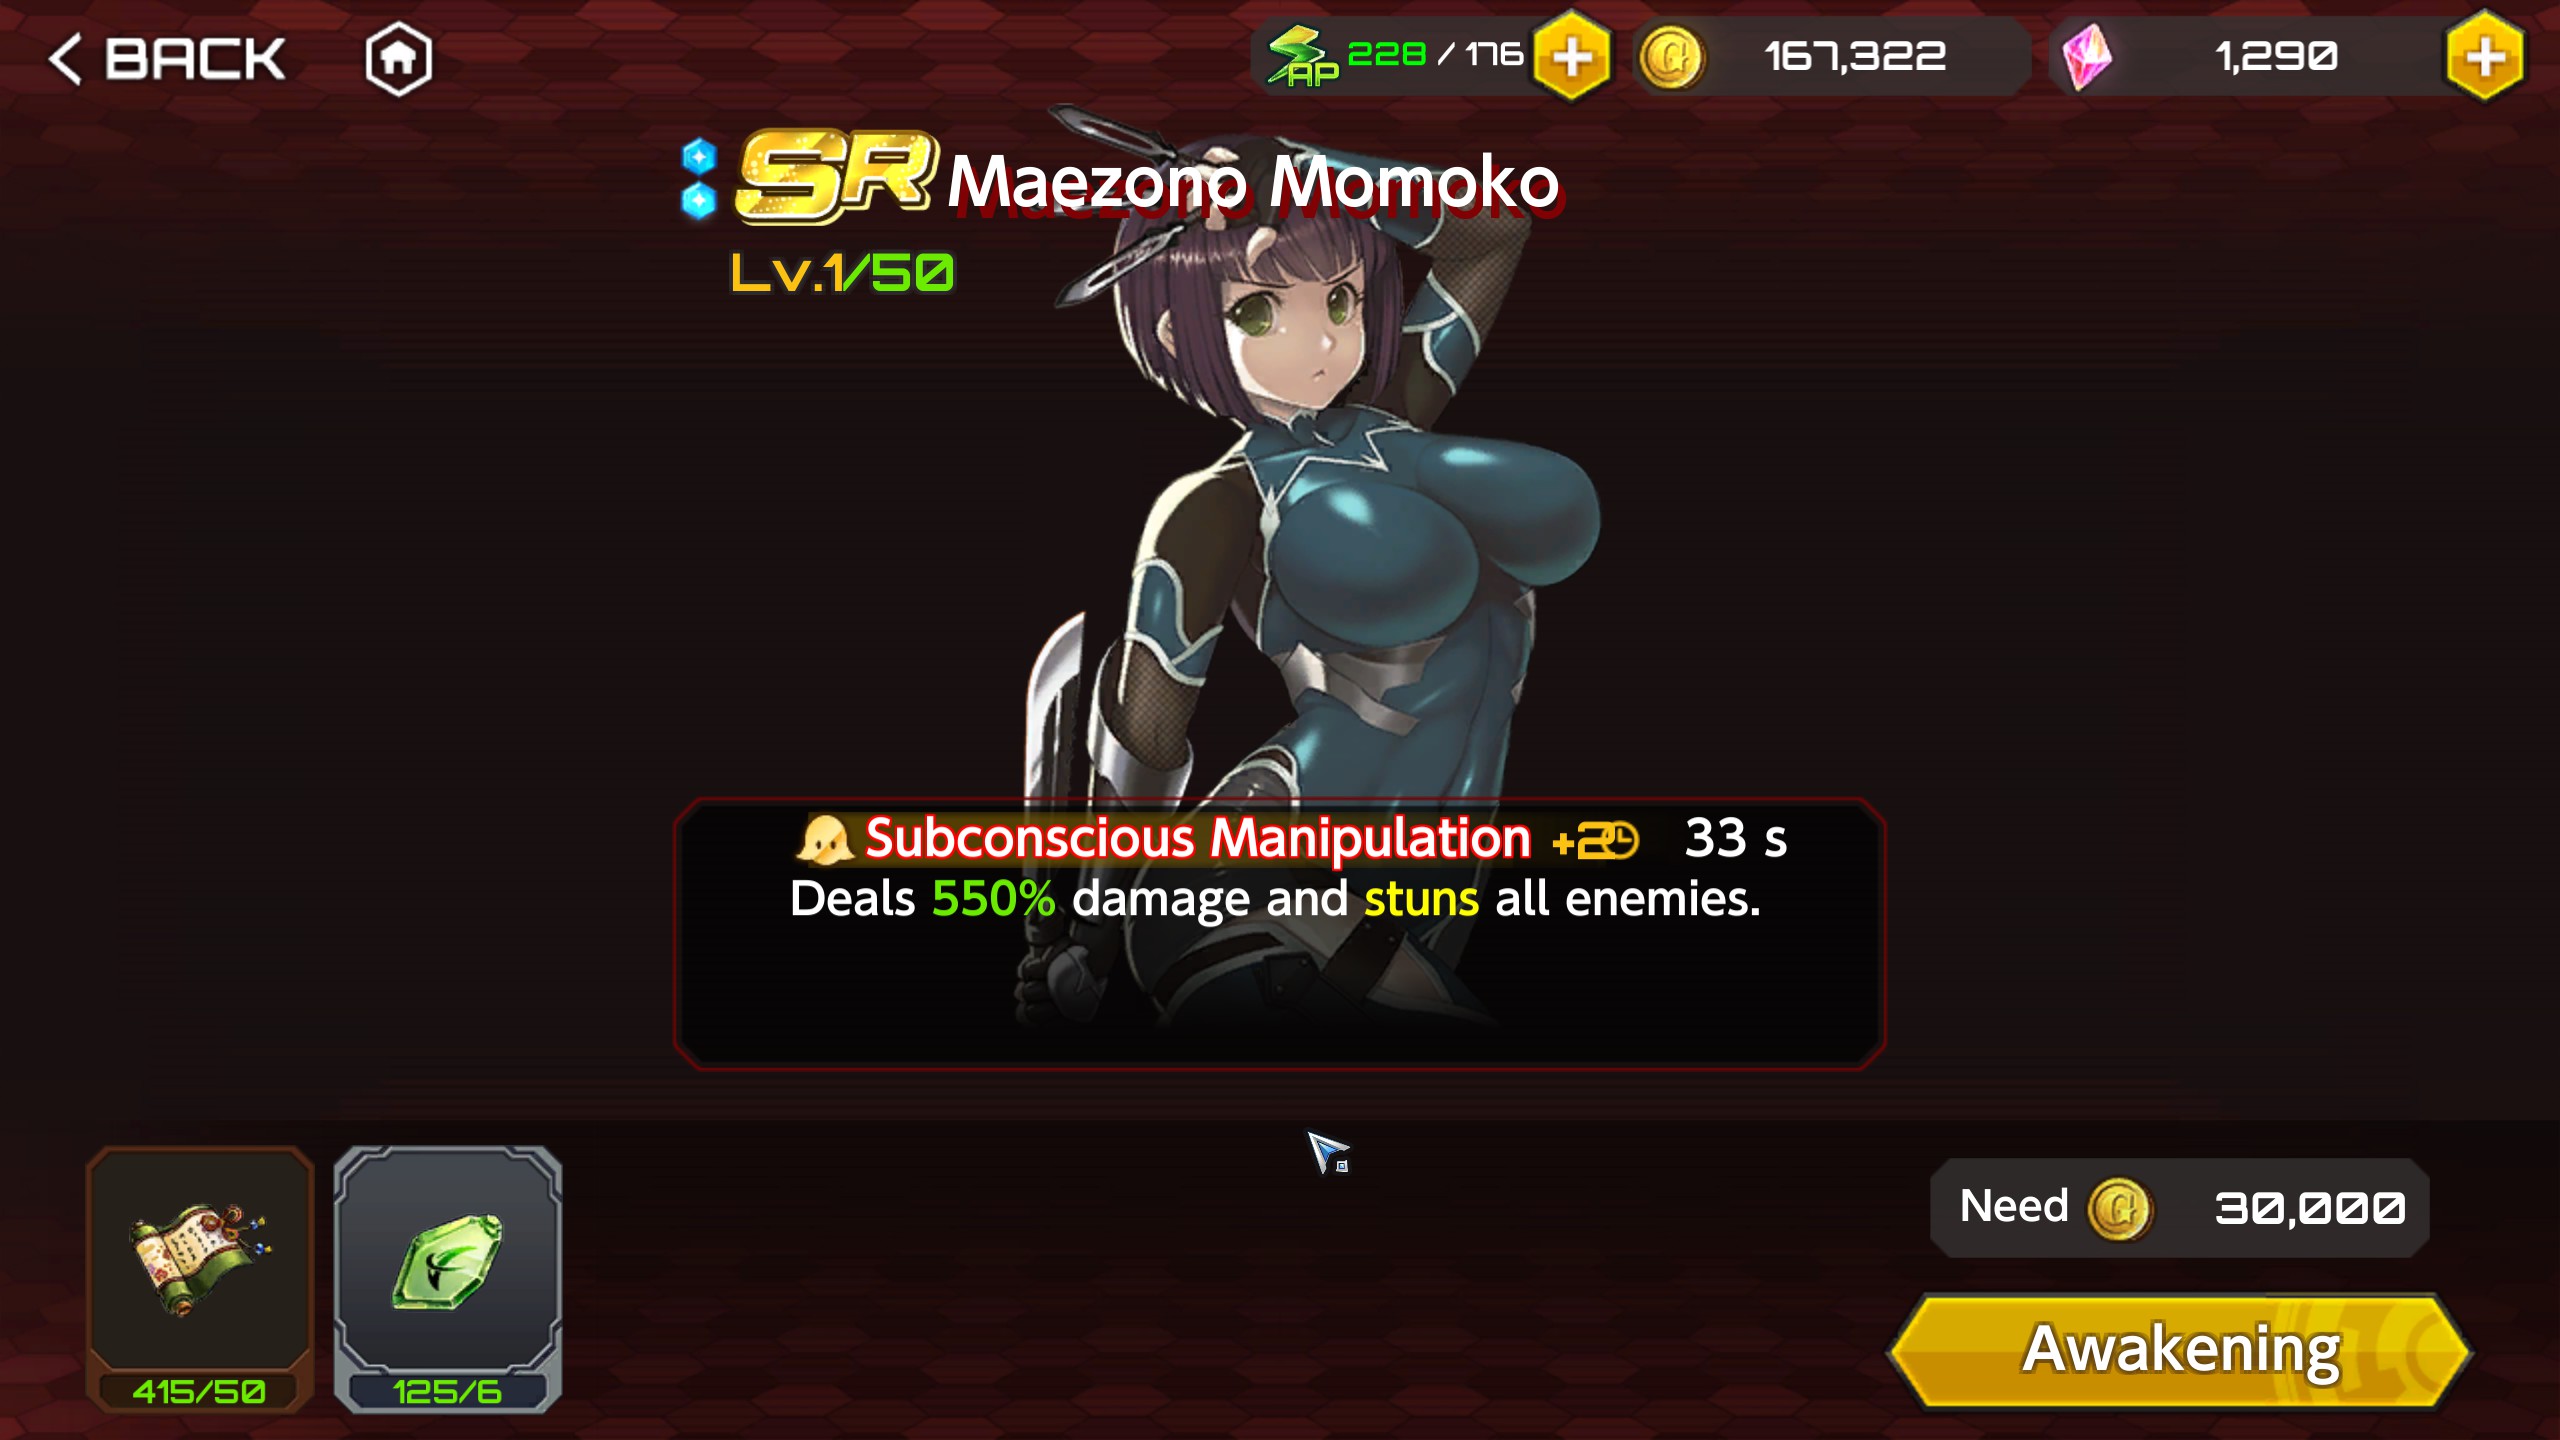
UR comes with a passive effect and an active effect. Comes with 4 slots for magatama to be equipped. Magatama are not only stat boosters but can come with effects. More next section.

SR is just a passive effect. 3 slots.
R gets a basic passive effect. 2 slots.
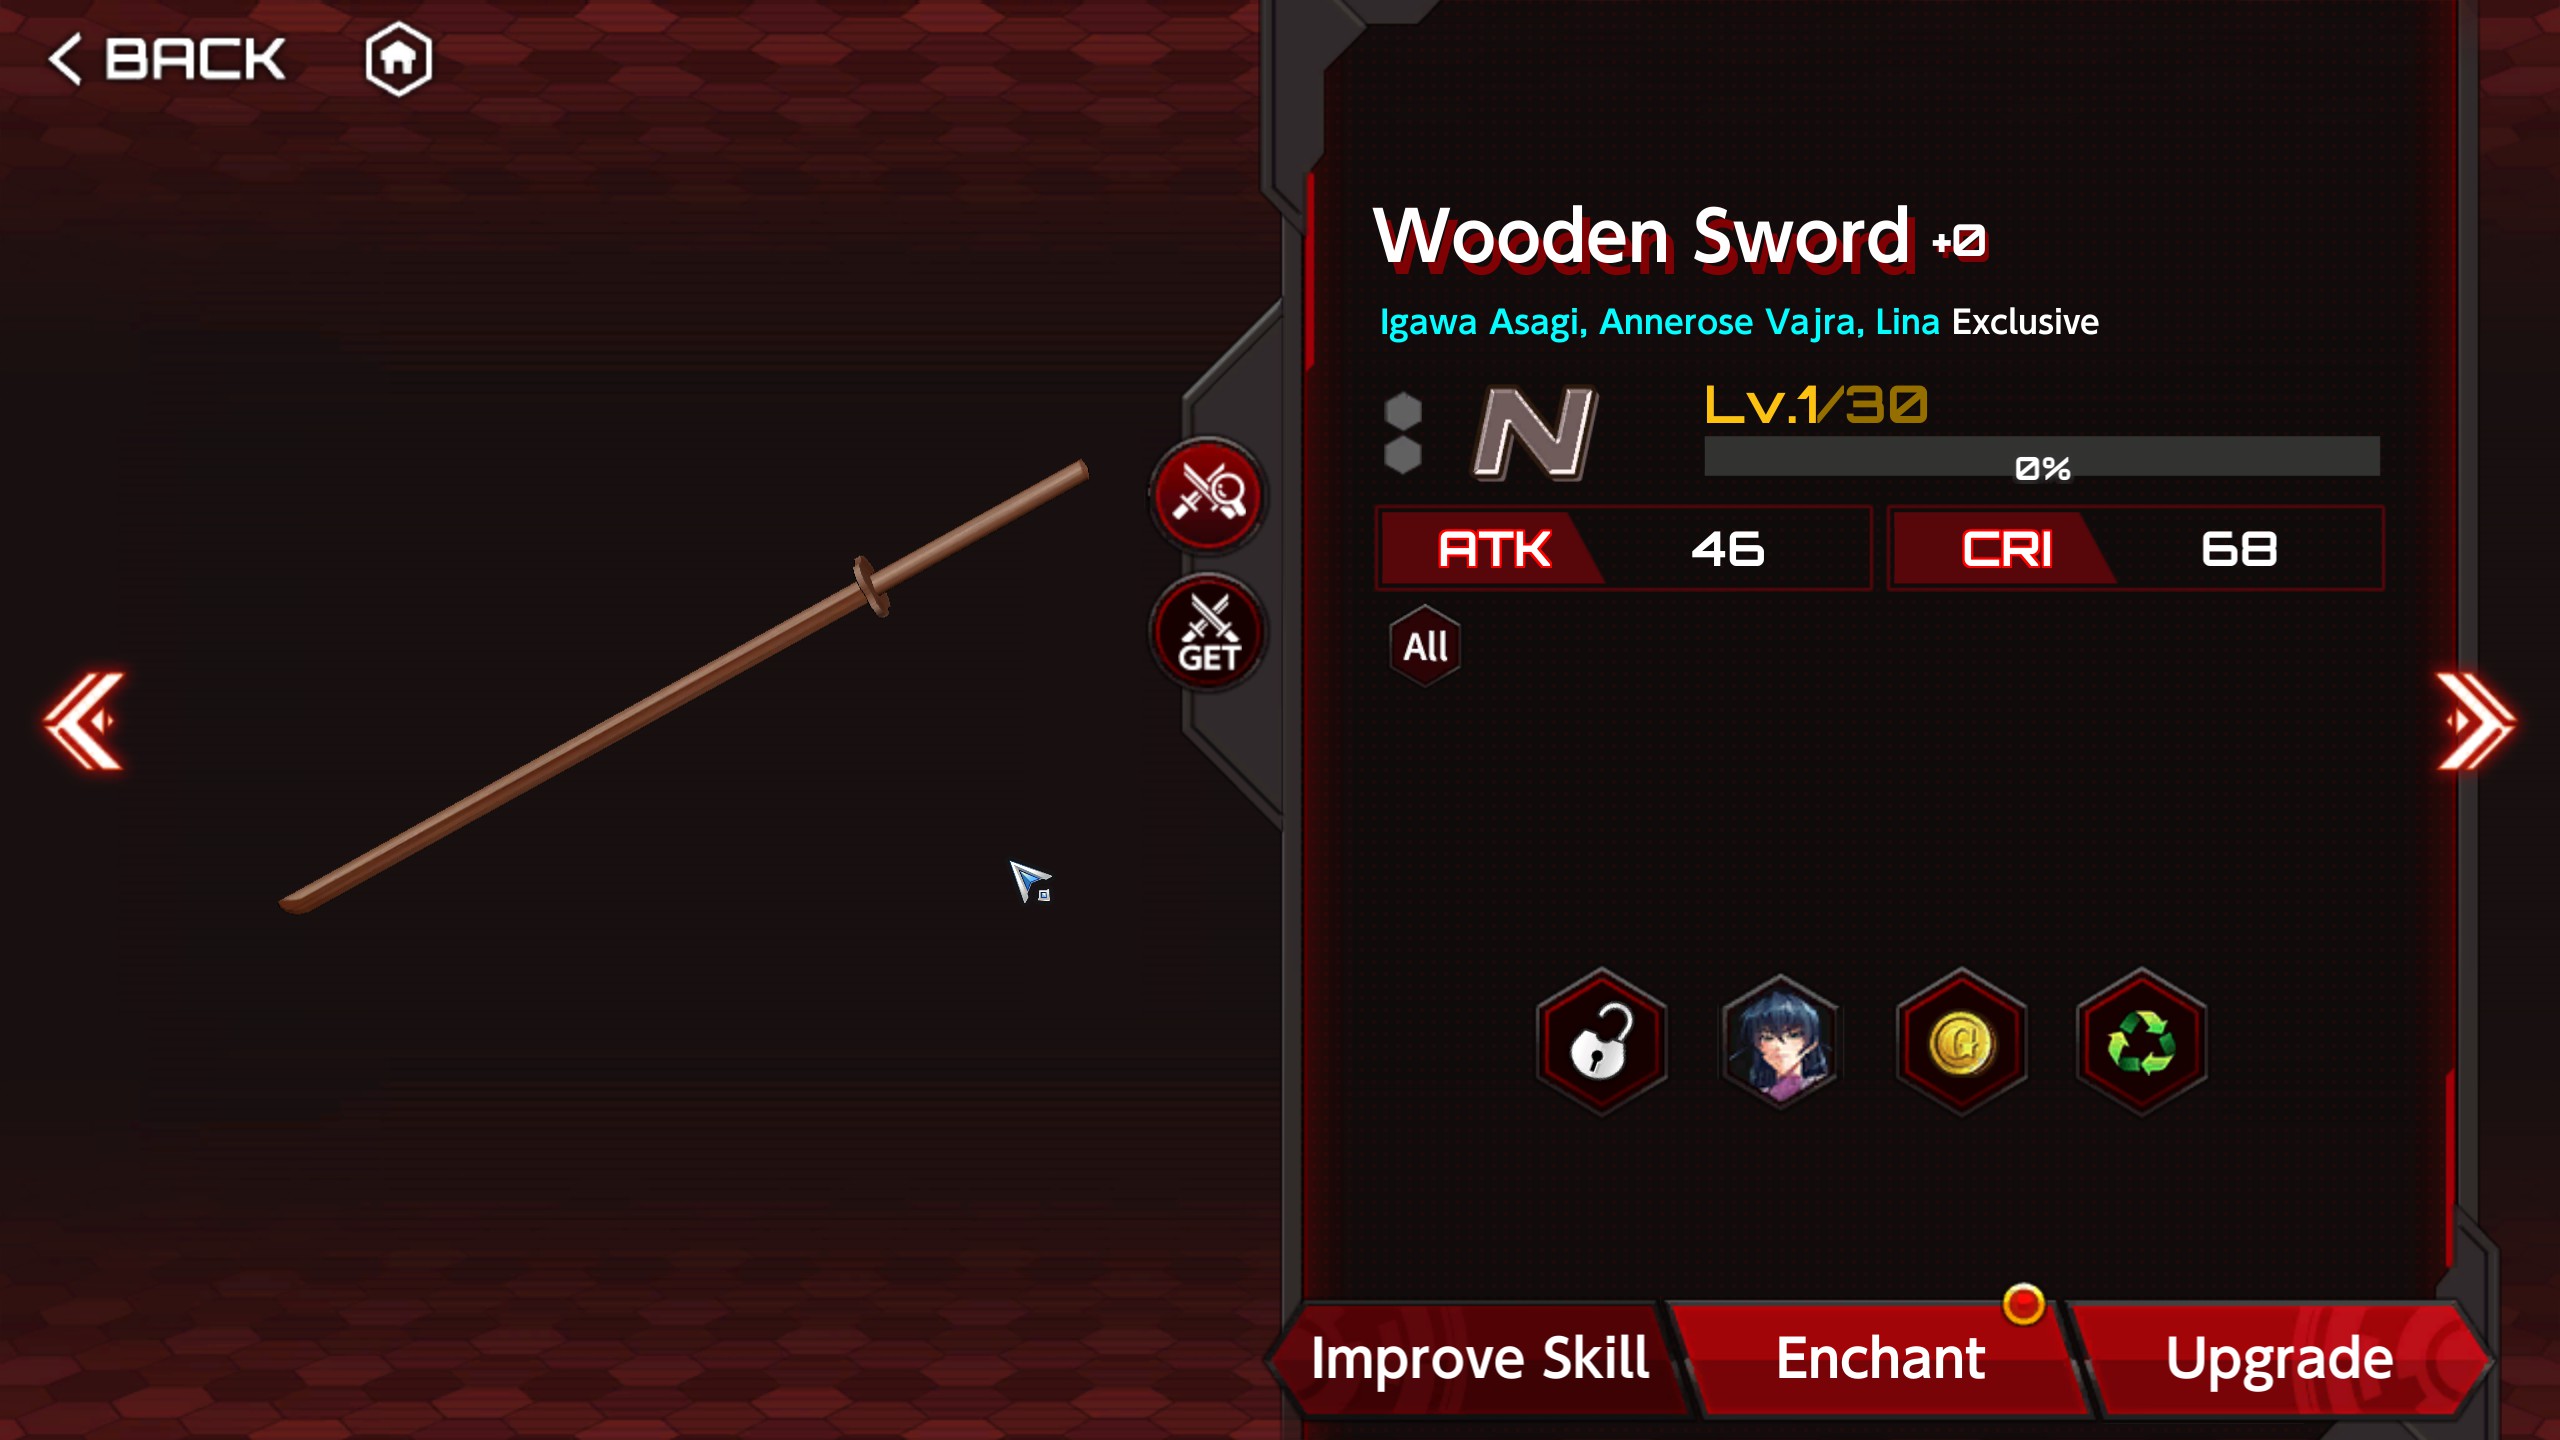
N gives you nothing.
Weapons – Magatamas!
Magatamas are little slottables that you can get through time attack, the gold gacha, vouchers and the arena tower and VR mode.

The nifty thing about these little guys is that to level them up, you only need to consume other magatamas. As for the materials required to give them effects via “polish”, that requires an item that can only be obtained either through events or the School.

The cost required to polish a magatama increases each time you use it. The effects are randomized. Pic below is an example of another magatama that has all its slots filled out.

Another thing of note is that magatama effects can be re-rolled and it costs 2 shiny beads each time. And once you’ve maxed out your magatama, you can ascend it to the next class.
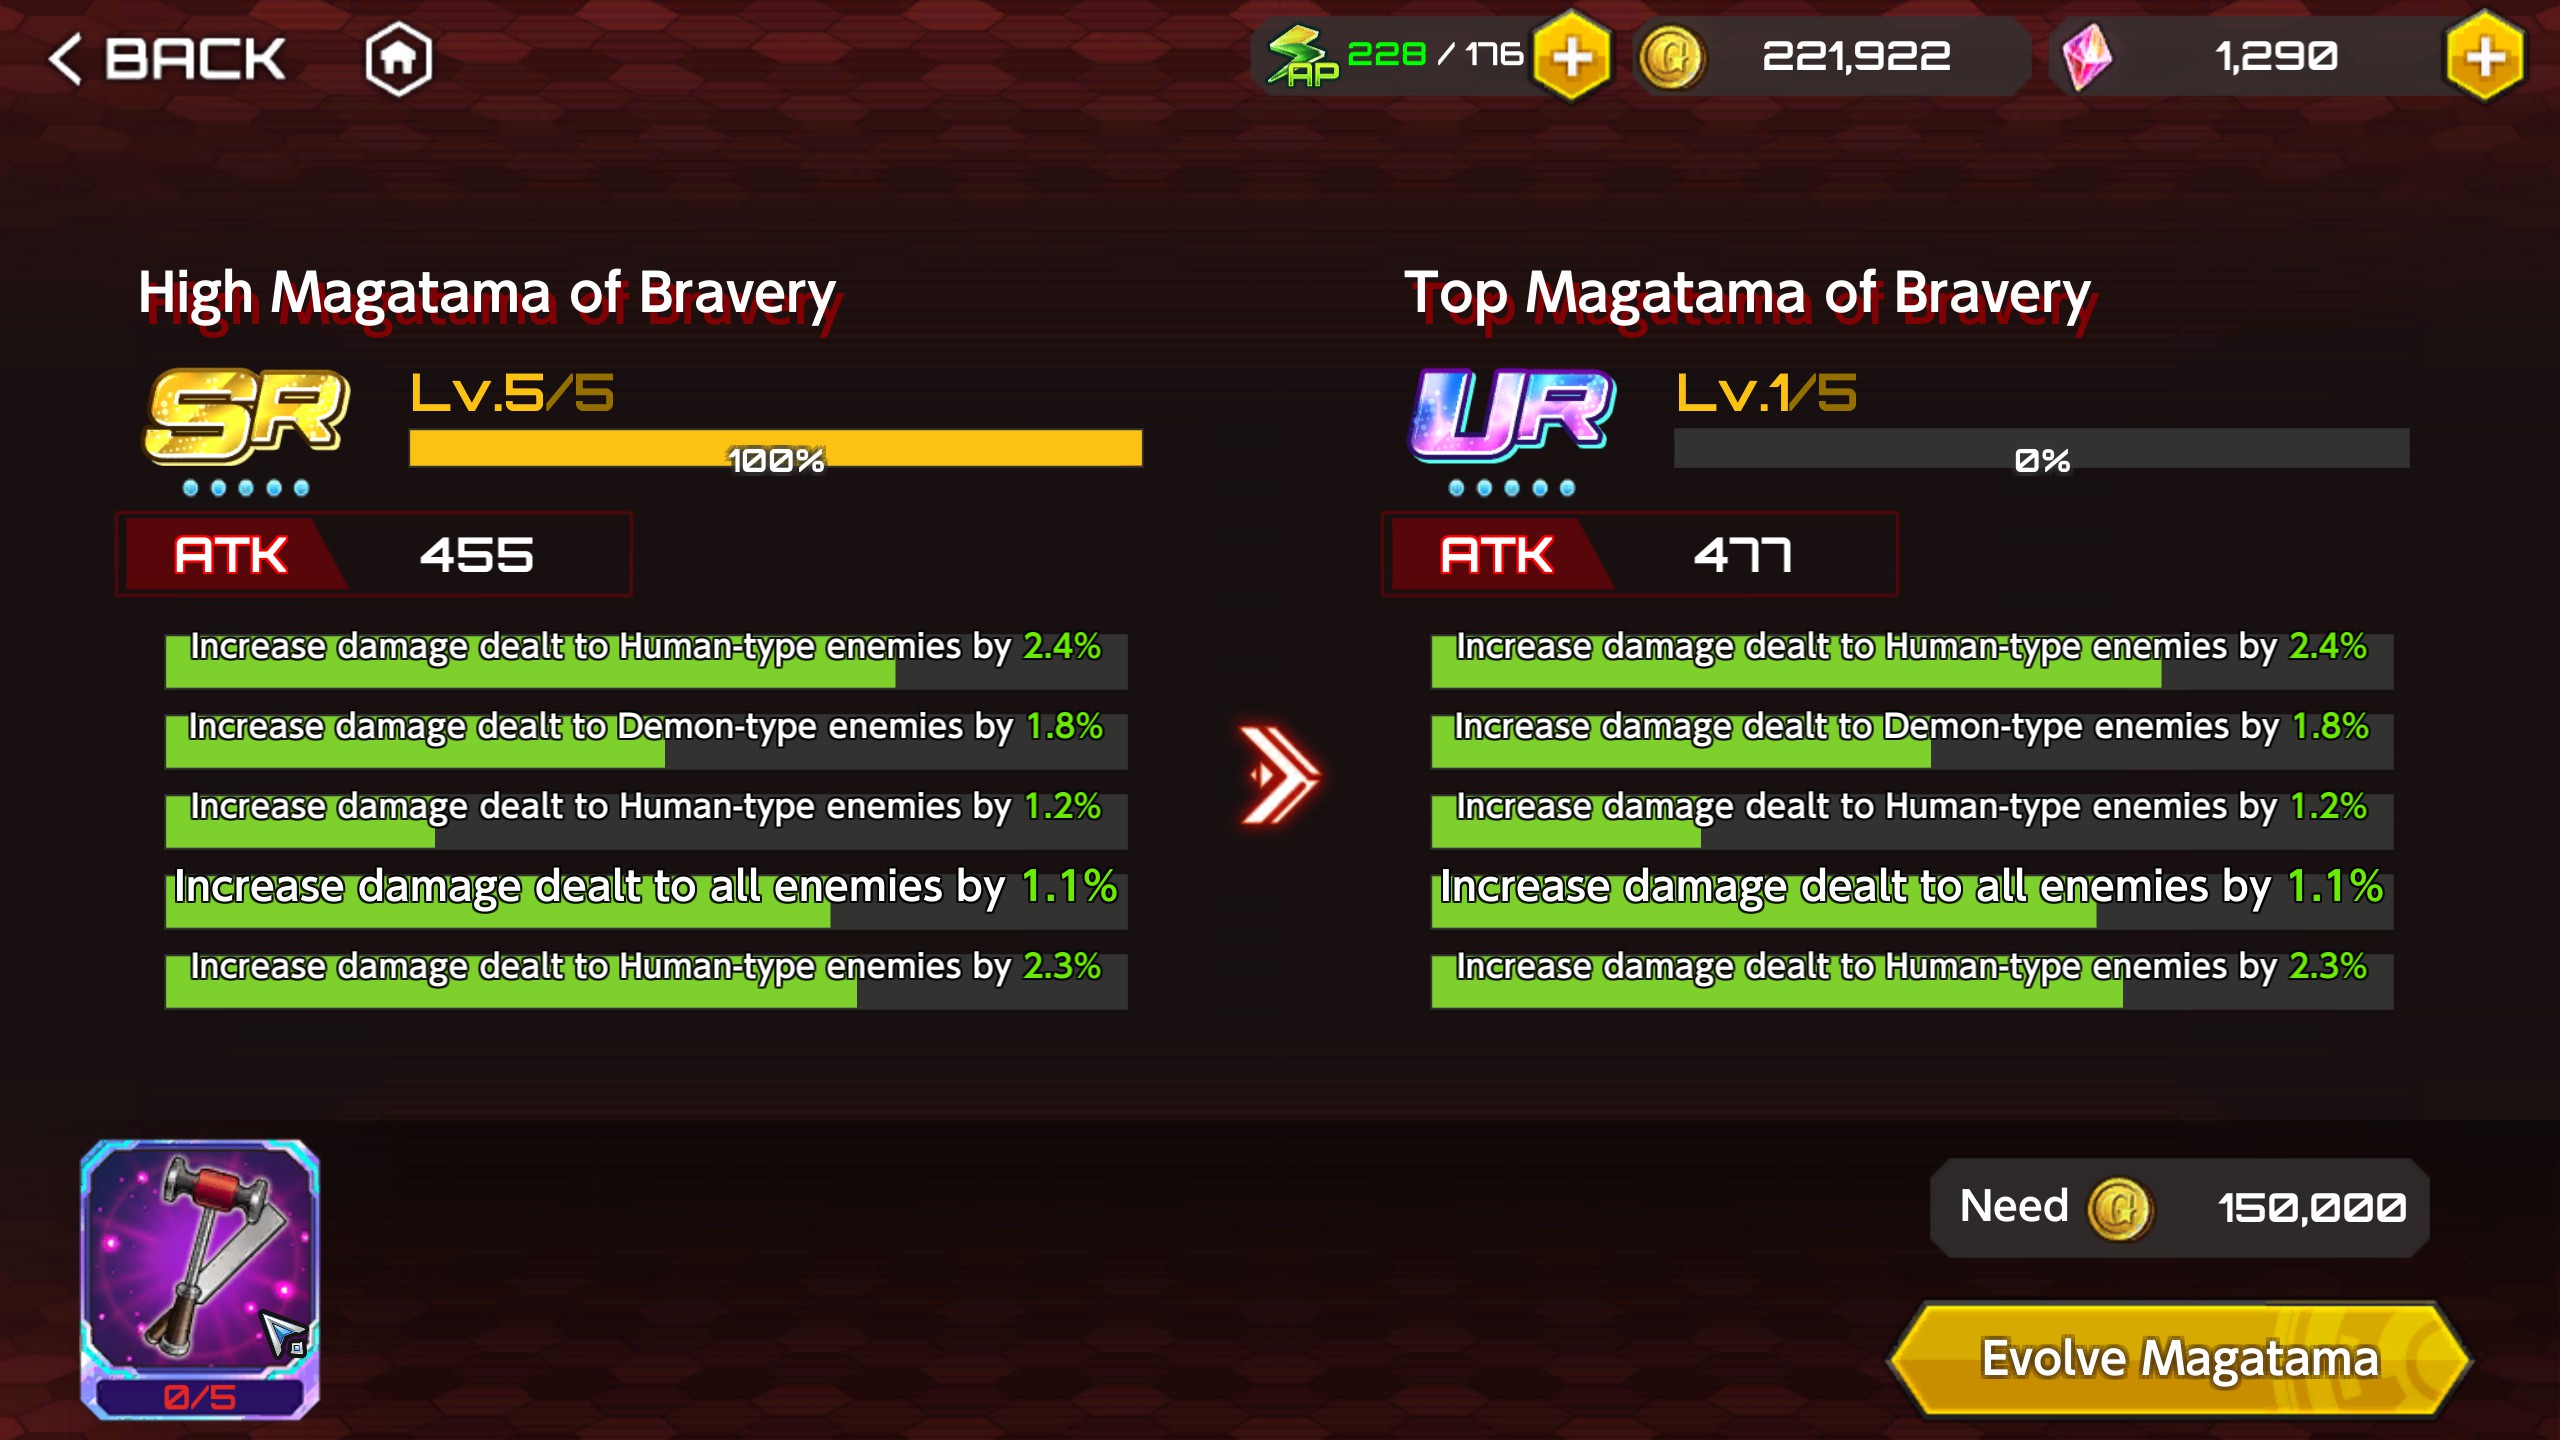
Which requires a polishing tool that corresponds with the type of magatama you are using.
Supporters!
And so we get to supporters.

Much like weapons, supporters can be leveled and ascended. The rarer it is, the more effects they have.
Also, the more materials required to ascend your supporter. With URs requiring a cube to ascend the same way your character ascends a star level.

But what makes supporters special compared to weapons is that they can be equipped by everyone as well as assist in School activities.
Now, the other thing to know about supports is that they actually level up with affection as well. Affection increases either through assisting a school activity in progress or by being equipped by your character as they do a mission.
And when they’re maxed in affection, you can look at them in collections and get extra gems. There is also a special scene but that only applies to SRs and URs. Rs get none because they aren’t voiced.
Supporter Formation
Supporter Formation

This peculiar menu is accessed either through characters with this button.

Or before any deployment under the character selection.
Now, the only other reason you want to improve supporters is to have them be used in supporter formation.
Supporter formations actually add a general buff for your characters. To have a formation accessible, you need to have the corresponding supporters and have them maxed out in affection to equip said formation. You don’t have to equip that particular combo on your character to get the effect.
The other section corresponds with how many weapons unlocked you have to unlock a slot. Unlocking slots will cost either gold, materials, gems or all three.
And once unlocked, you can slot in any weapons you’re not using to add increased damage to your character(s).
The last section is affection. These are buffs your characters can have if that character has their affection maxed out for you. And as you can tell… I have no love unlocked just yet.
The School Overview
And now we get to the biggest section of them all. The School. Gosha Academy. This place serves as the base of your Taimanins, Robots, Cyborgs and Demons as well as your supporters. This place provides buffs, materials for crafting, crafting in general, improving weapons, characters and skills. You’re gonna want to get comfortable in using this place because it is pretty helpful especially once you tuned it right.
We’re going to go through each and every section of this place, how it works and at the end, which should you improve first.
The Academy is divided into 3 floors. Gosha Academy, Secret Base B1, Secret Base B2.
All of these floors have one thing in common.
Each section is upgradeable. Upgrading each section requires money and materials.
The amount of slots unlocked at each section determines how many characters you can slot each time.
On some facilities, the level of your character directly affects the effectiveness of that facility. For example, on the ATK buff facility, the higher level ones would yield a higher buff. In a mining facility, more materials may be extracted.
Finally, once you slot in the characters and get the process started… it cannot be stopped unless you have the proper material to do so.
Note that at the start, most of the facility is closed off to you. They’ll unlock once you go through the ranks. Also, the materials used to improve the facility is quite hefty. This guide will give you a rundown on which to prioritize after the tour.
Floor 1 – Gosha Academy
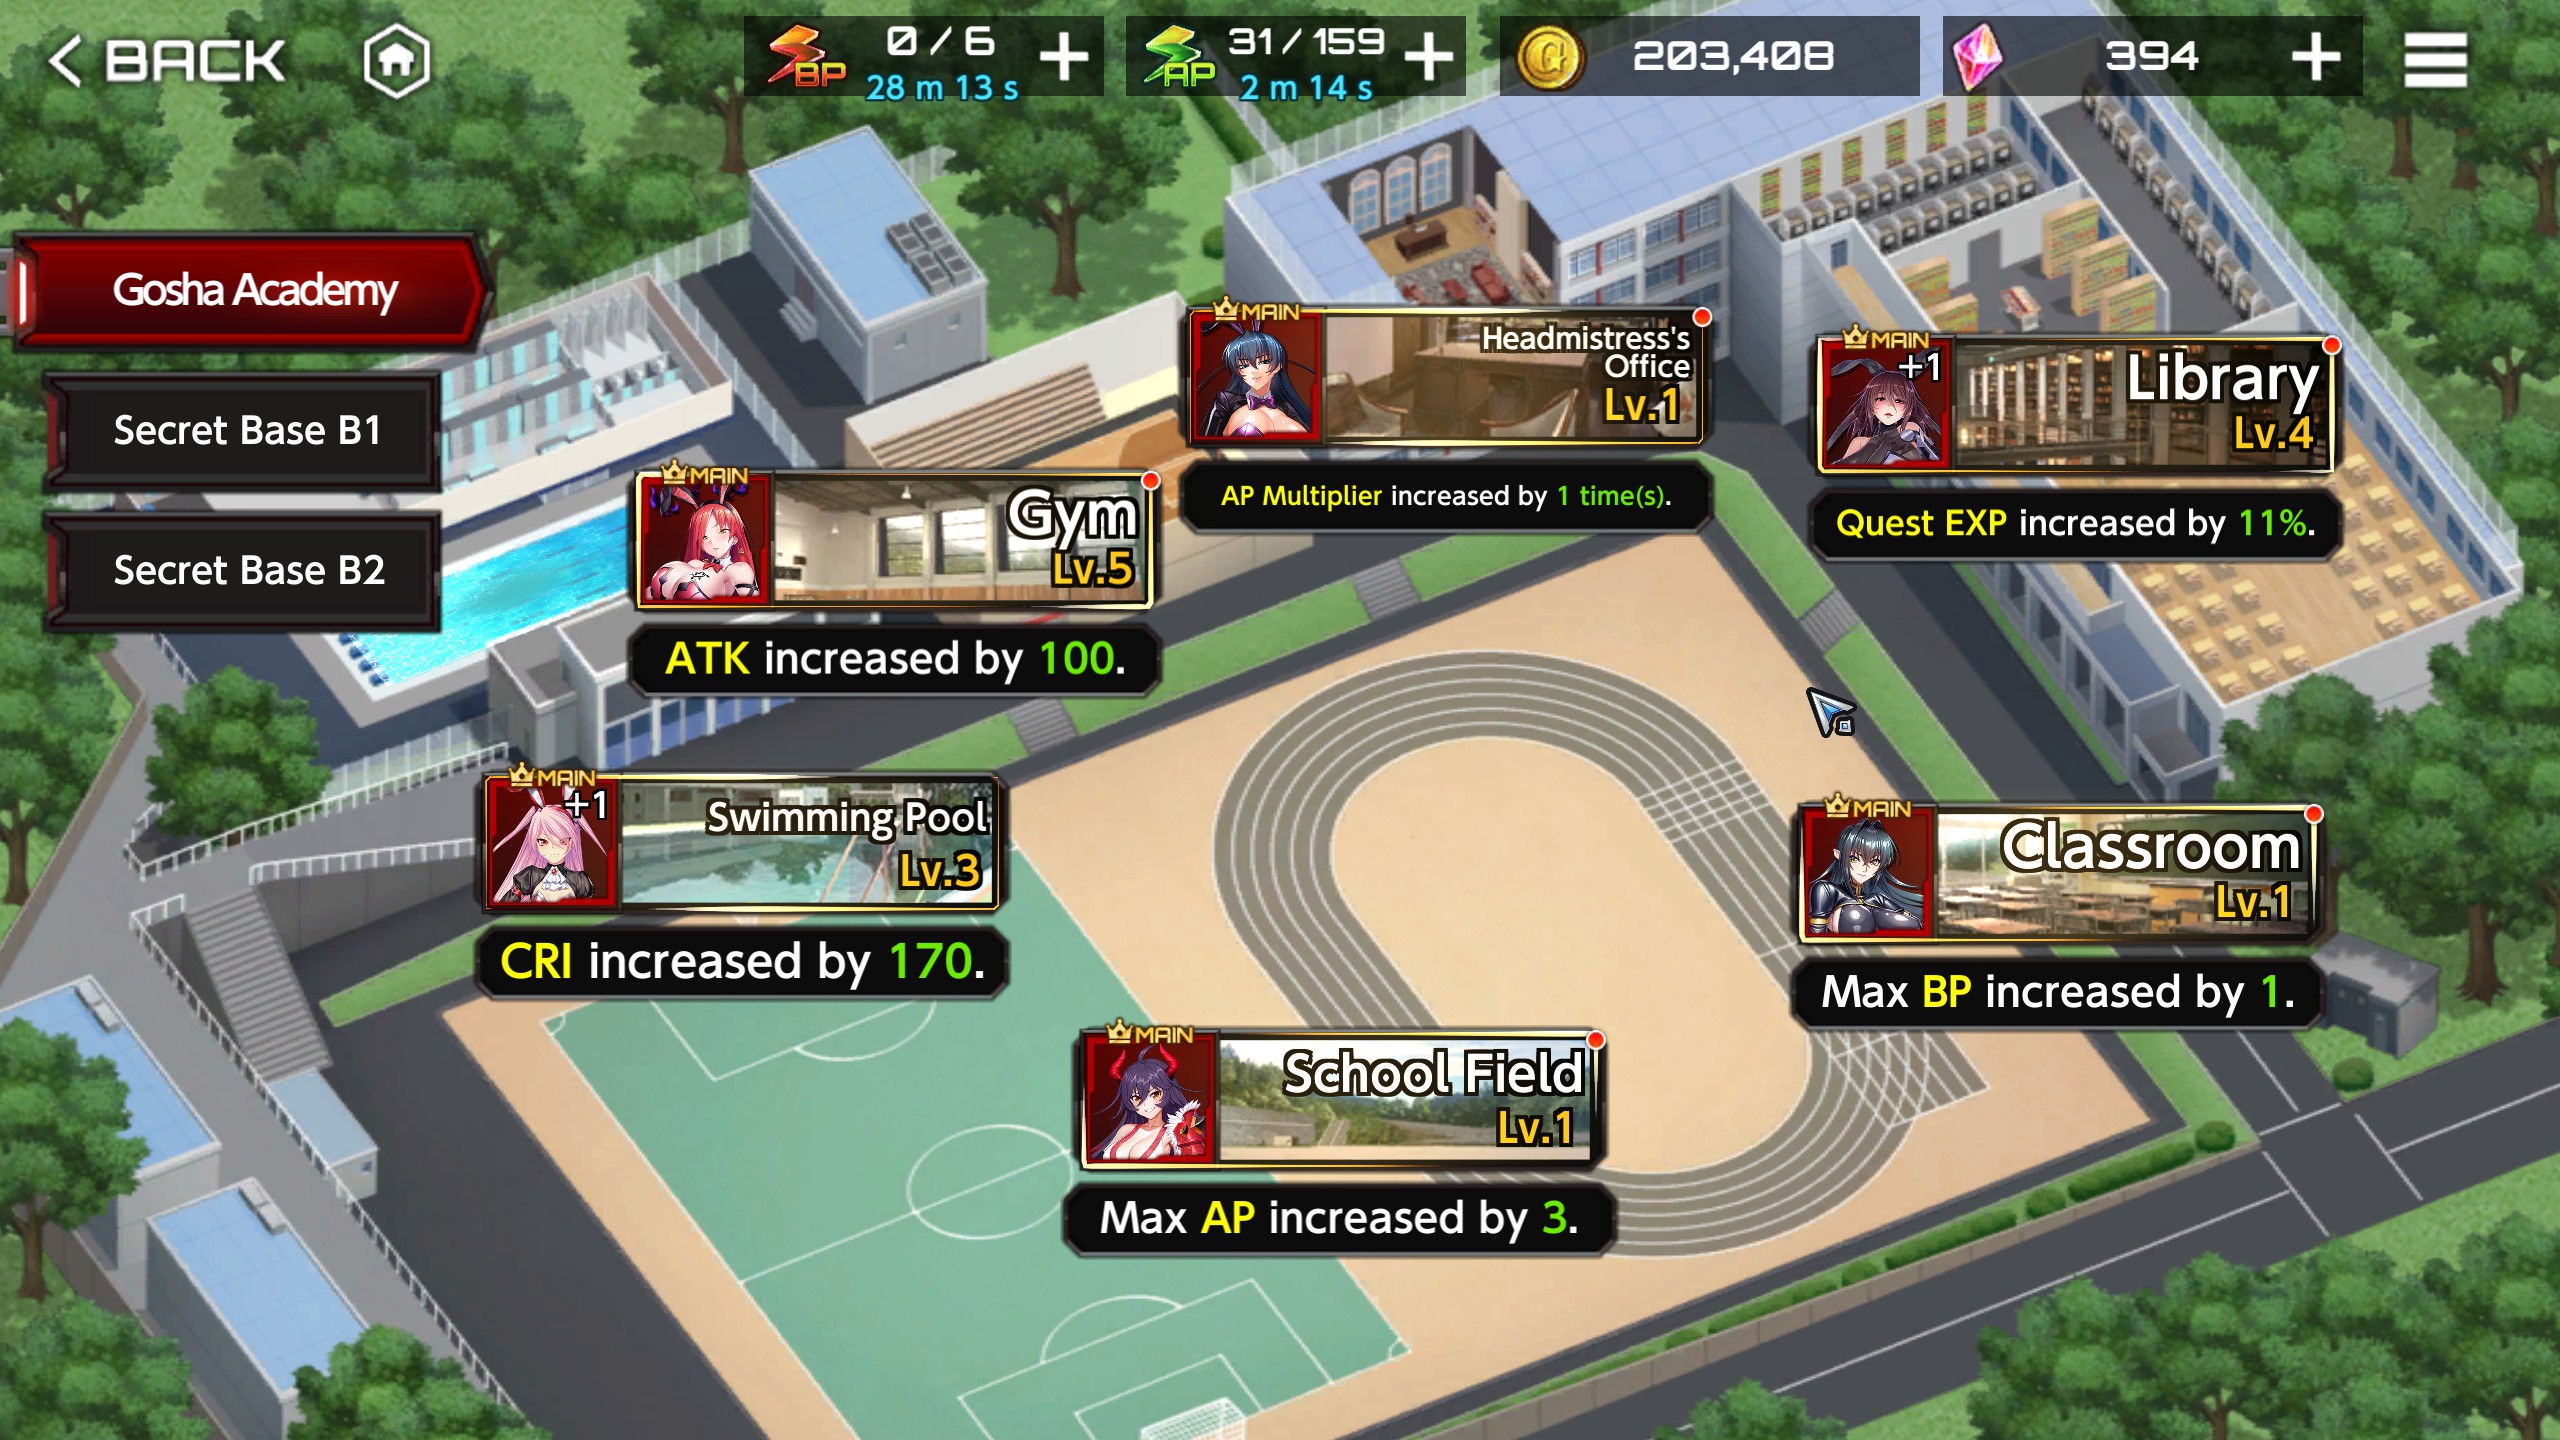
If your first thought upon seeing this floor was “Hey, this is where I can improve the stats of my characters!” That is sadly not this floor.
This floor’s purpose is to give temporary buffs for your characters. That is all. Moving on.
Floor 2 – Secret Base B1
Welcome to the Gosha Mines, Taimaninnn~!

That’s what this floor is. Its for obtaining materials depending on the
miner character slotted in.
Here’s the rundown of each facility.
Kiryu’s Laboratory yields Blank Emblems. Which is used to craft the Emblem Kit which in turn is used as ascension materials for a character.
Gear Modification Room yields beads which are used to improve magatamas.
Infirmary yields potions used for Arena’s VRMode Aka Boss mode.
Hot Spring yields extra BP and BP restoratives when collected.
Lounge Yields AP and AP restoratives.
Now onto the last section…
Floor 3 – Secret Base B2
Here it is. The beating heart of the base. This is the section where you’ll wind up using alot.
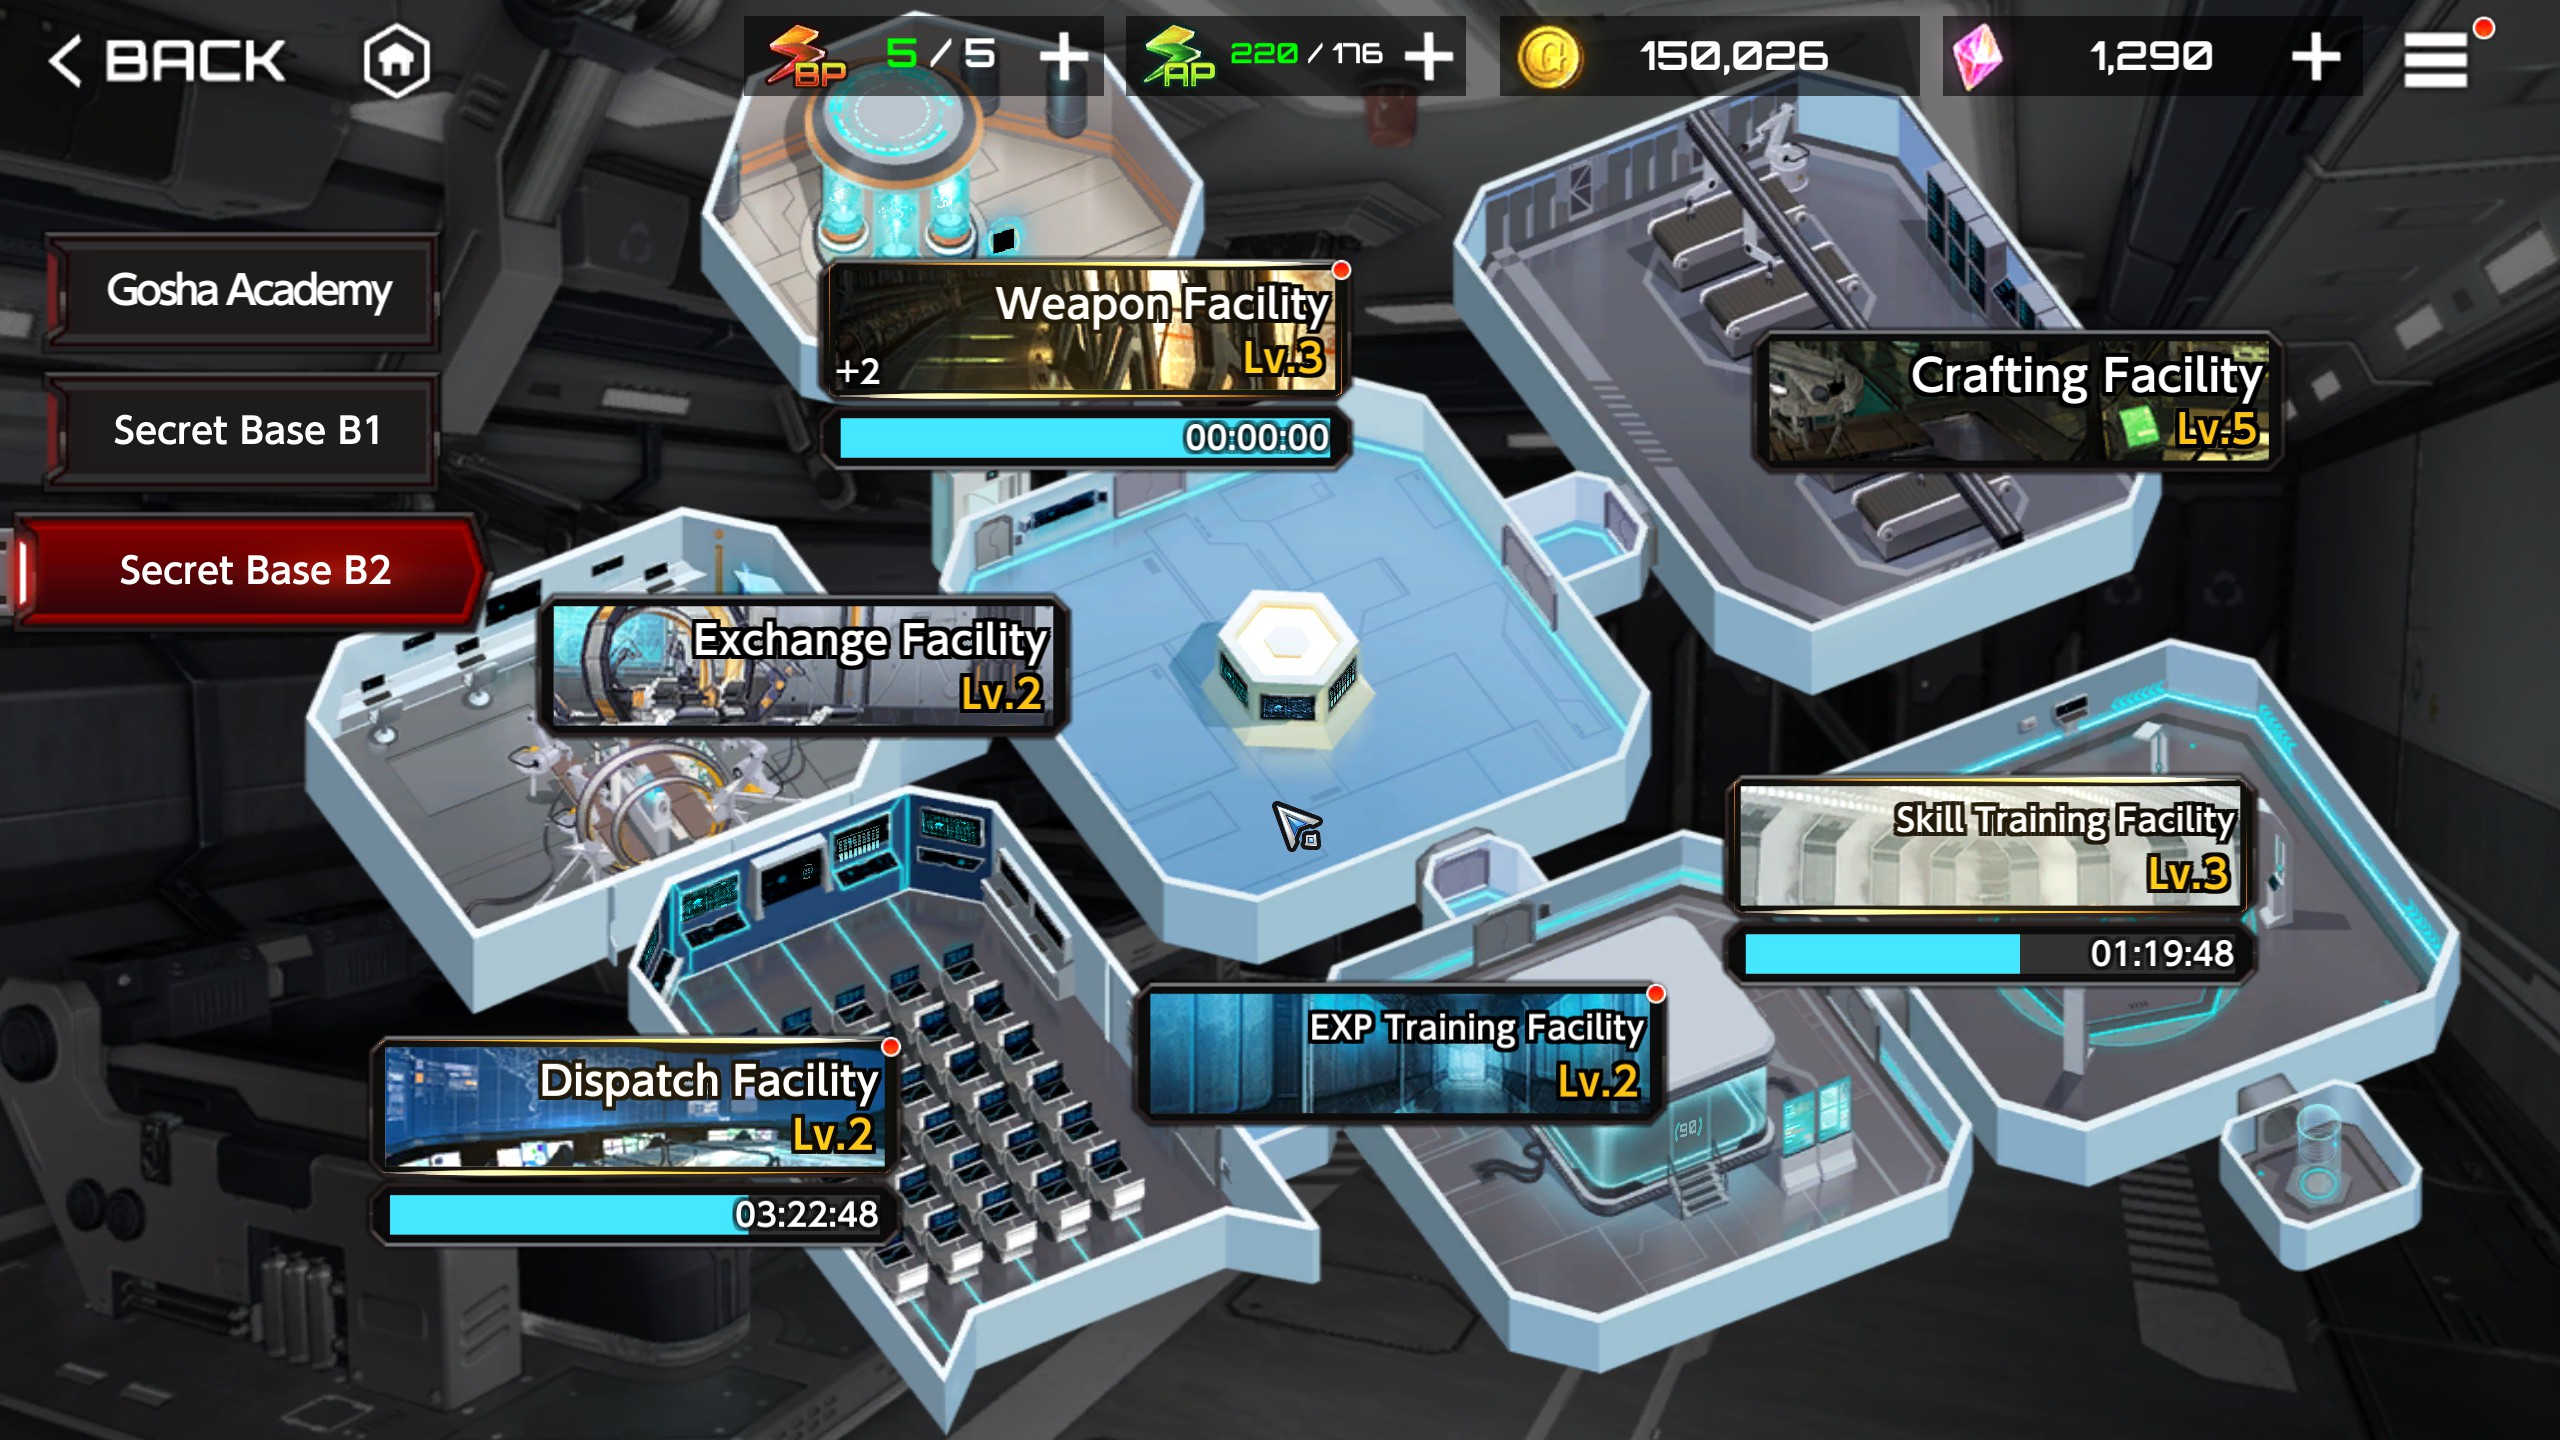
As this section directly improves everything. This is also the only section where extra supporters really count as they can directly affect whatever they’re slotted in. As slotting in a supporter reduces the time required for the work to be done.
Here’s the rundown of each section.
Exchange Facility is the gambling terminal. Put in 2 things in it. Be it supporters or weapons of a certain rarity and trade if for a new one. With a very abysmal chance of getting someone or something better out of it.
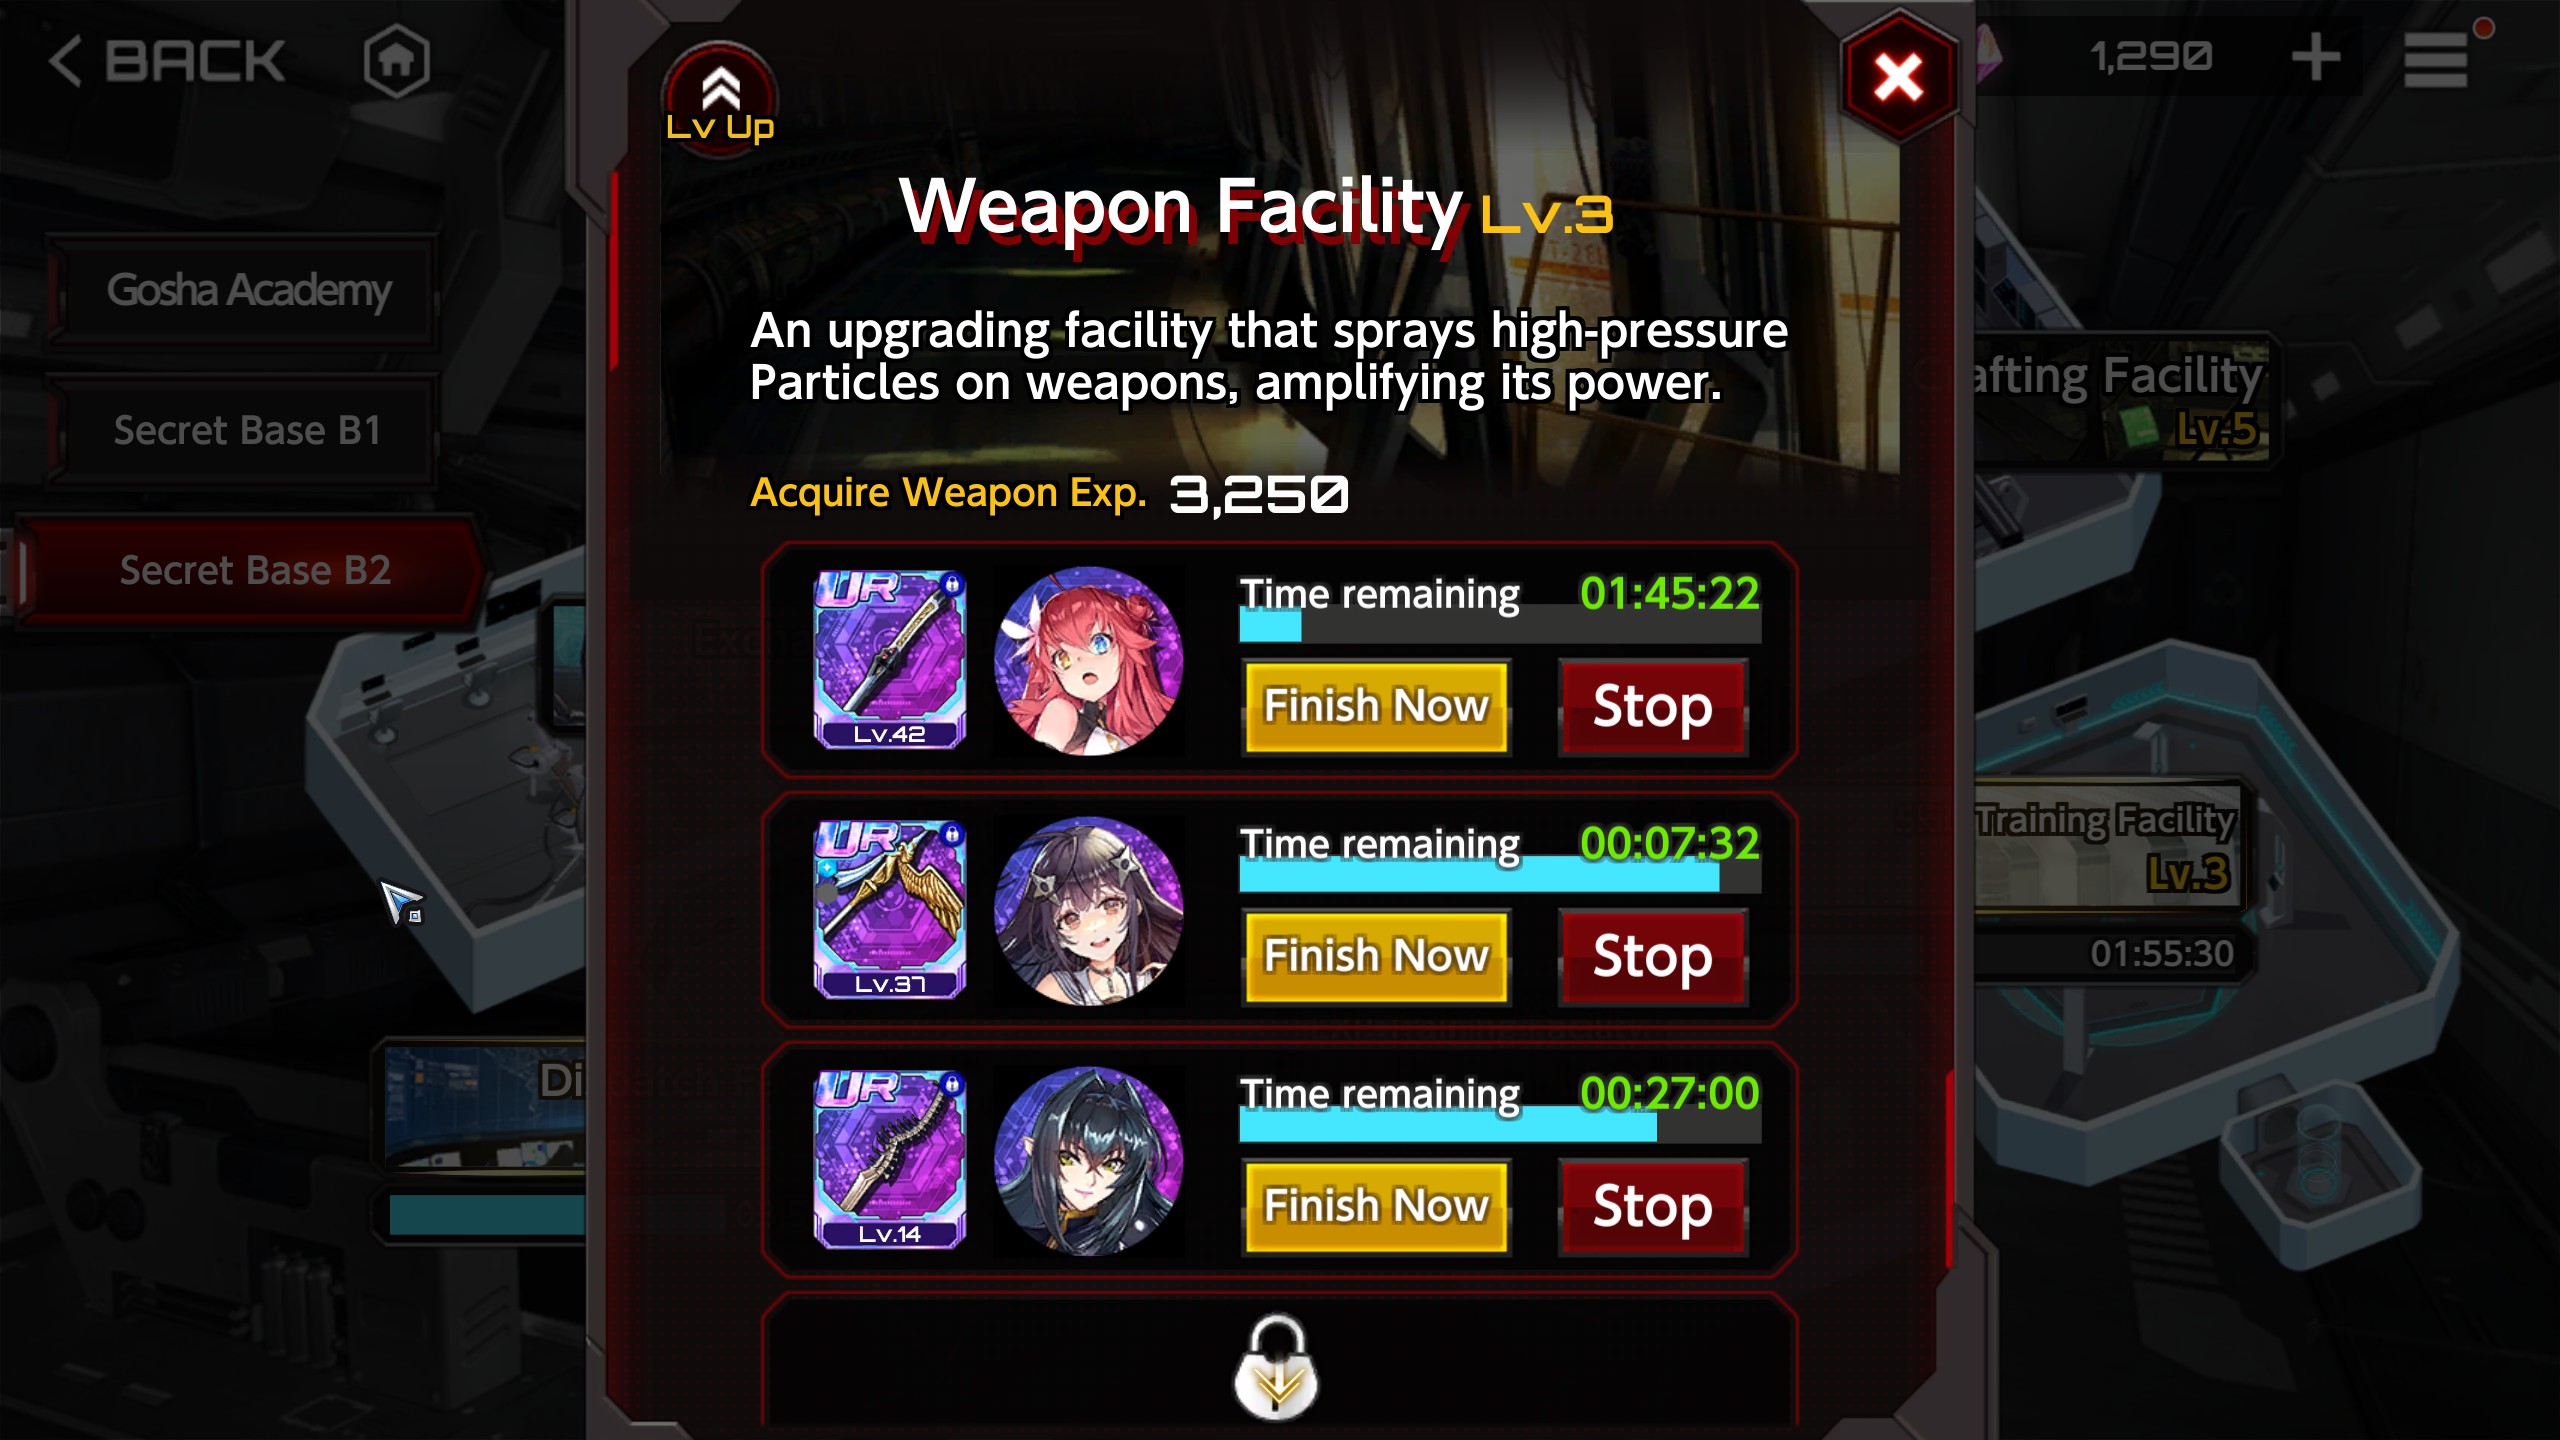
Weapon Facility is where you can slot in weapons where they can be leveled up over time. This place is amazing as it saves you gold and materials when you use it. The other catch is though that once you slot in a weapon, you cannot use it until the process is done. Hope you have a backup weapon for your character once you’ve put that weapon in the shop. Also, it only covers leveling, not ascending as that is still a different story however. But that is lessened by the next one…
Crafting Facility is easily the most crucial part of the base. This section lets you craft materials used for leveling, ascending and improving. Also, it has craftable costumes for your characters as well. Max out if possible because it is that helpful.
Skill Training Facility is a section where you can slot in your characters to gain skill points.
EXP training Facility is as the name suggests, for improving character levels… But the amount it gives is miniscule in comparison to just taking that character in a mission and having them clear it. Also, again, max leveling characters in this game is what triggers the one-time deal prompts. Use at your own risk.
Dispatch Facility is where you can slot in your supporters to collect materials. Each job requires at least 1 UR supporter and the rest can be anyone to get started. Its a place for extra supporters with no work to do some work.
The School – Overview
For the short version, the sections you want to improve are:
Crafting > Weapon > Dispatch > Gear = Kiryu > Mission > Infirmary > Everything else
Crafting is a must because it lets you craft materials to help your character reach endgame. Max if possible.
Weapons because free levels for weapons is always handy. But going all-in is foolish as you’ll run into the issue of so many slots, not enough weapons. Level until you have 2 slots.
Dispatch. Free materials over time but at the cost of being able to use that supporter you just sent out. 2 slots.
Gear Modifcation is great because free beads to improve magatamas with. Max if possible as you’ll find yourself running out of beads many times.
Kiryu Laboratories is crucial for one reason. The blank emblems are used to craft character emblems which is then used for costumes and character ascension. Crucial especially when trying to breach to endgame.
Infirmary isn’t a top priority assuming your F2P. But its nice to have just so you can build up potions for the day you decide to challenge the Arena. But if you’re a whale, you’d want to max this immediately because they’ll give you potions so your favorite character can challenge VR mode after getting their ass kicked.
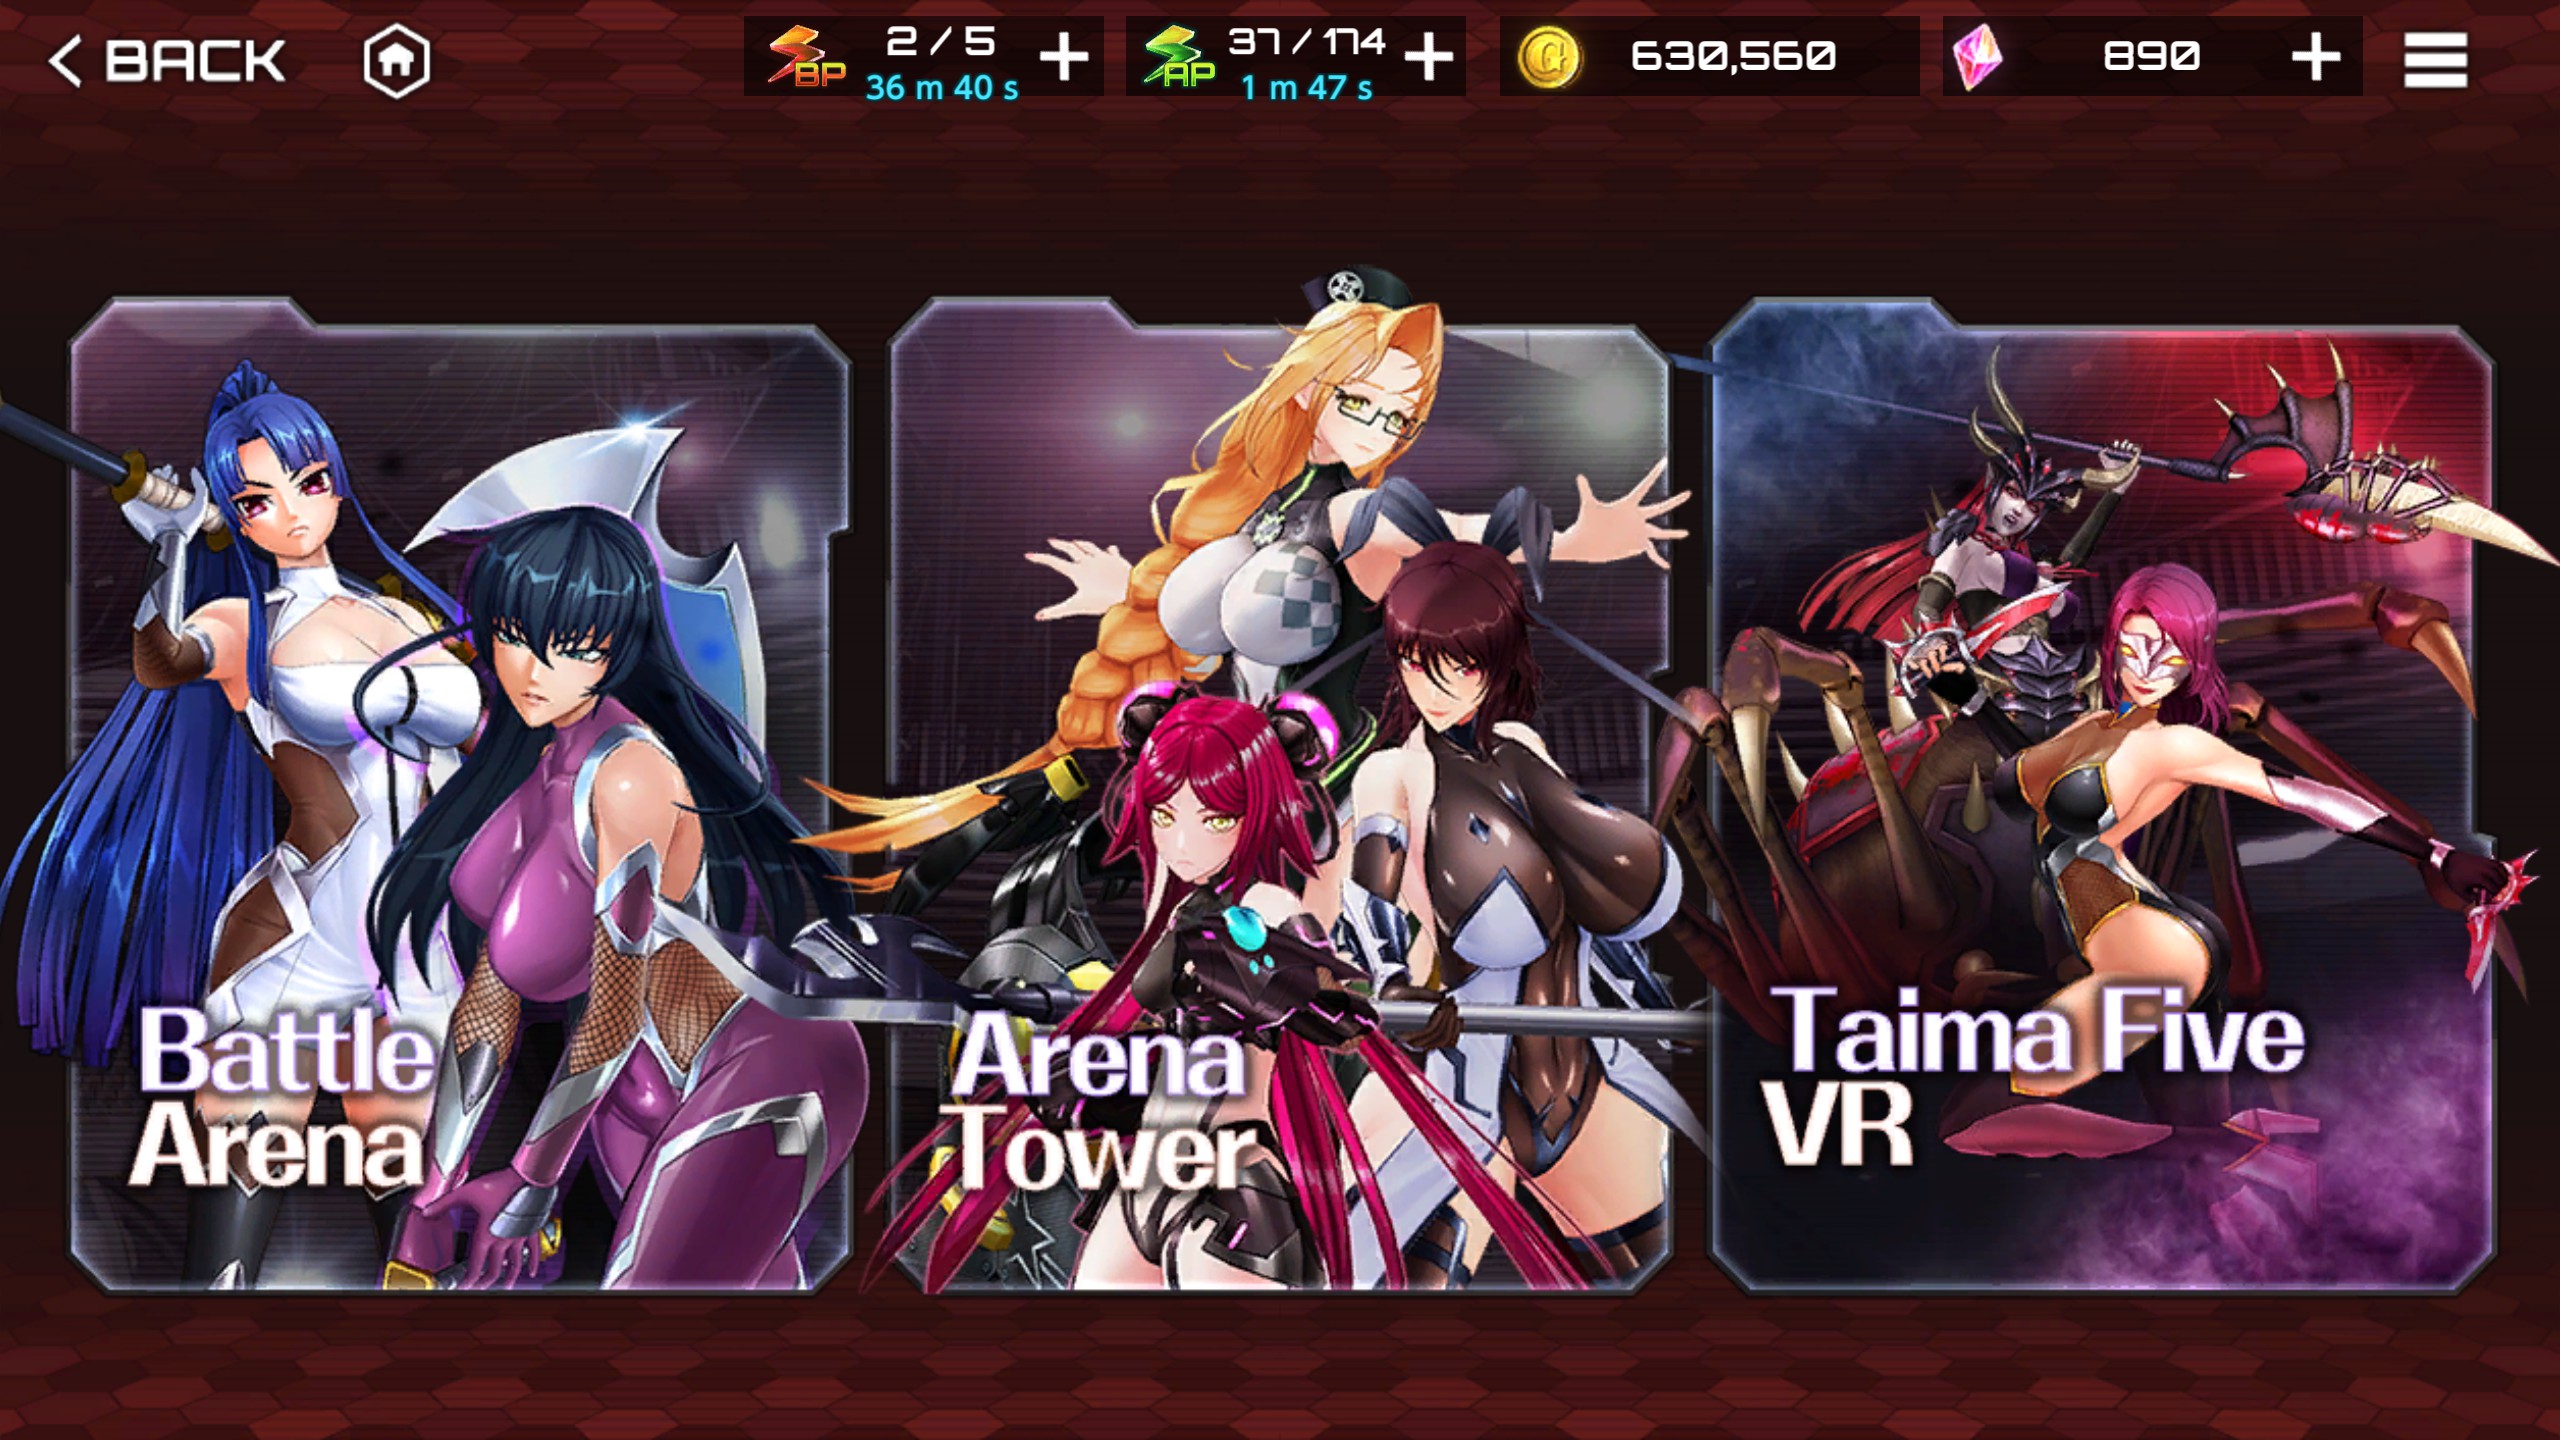
The Arena – Battle Arena
So we finally come to this. The “Endgame”. Well sort of. The section that is definitely endgame are the Tower and VR Mode aka Taima Five VR.
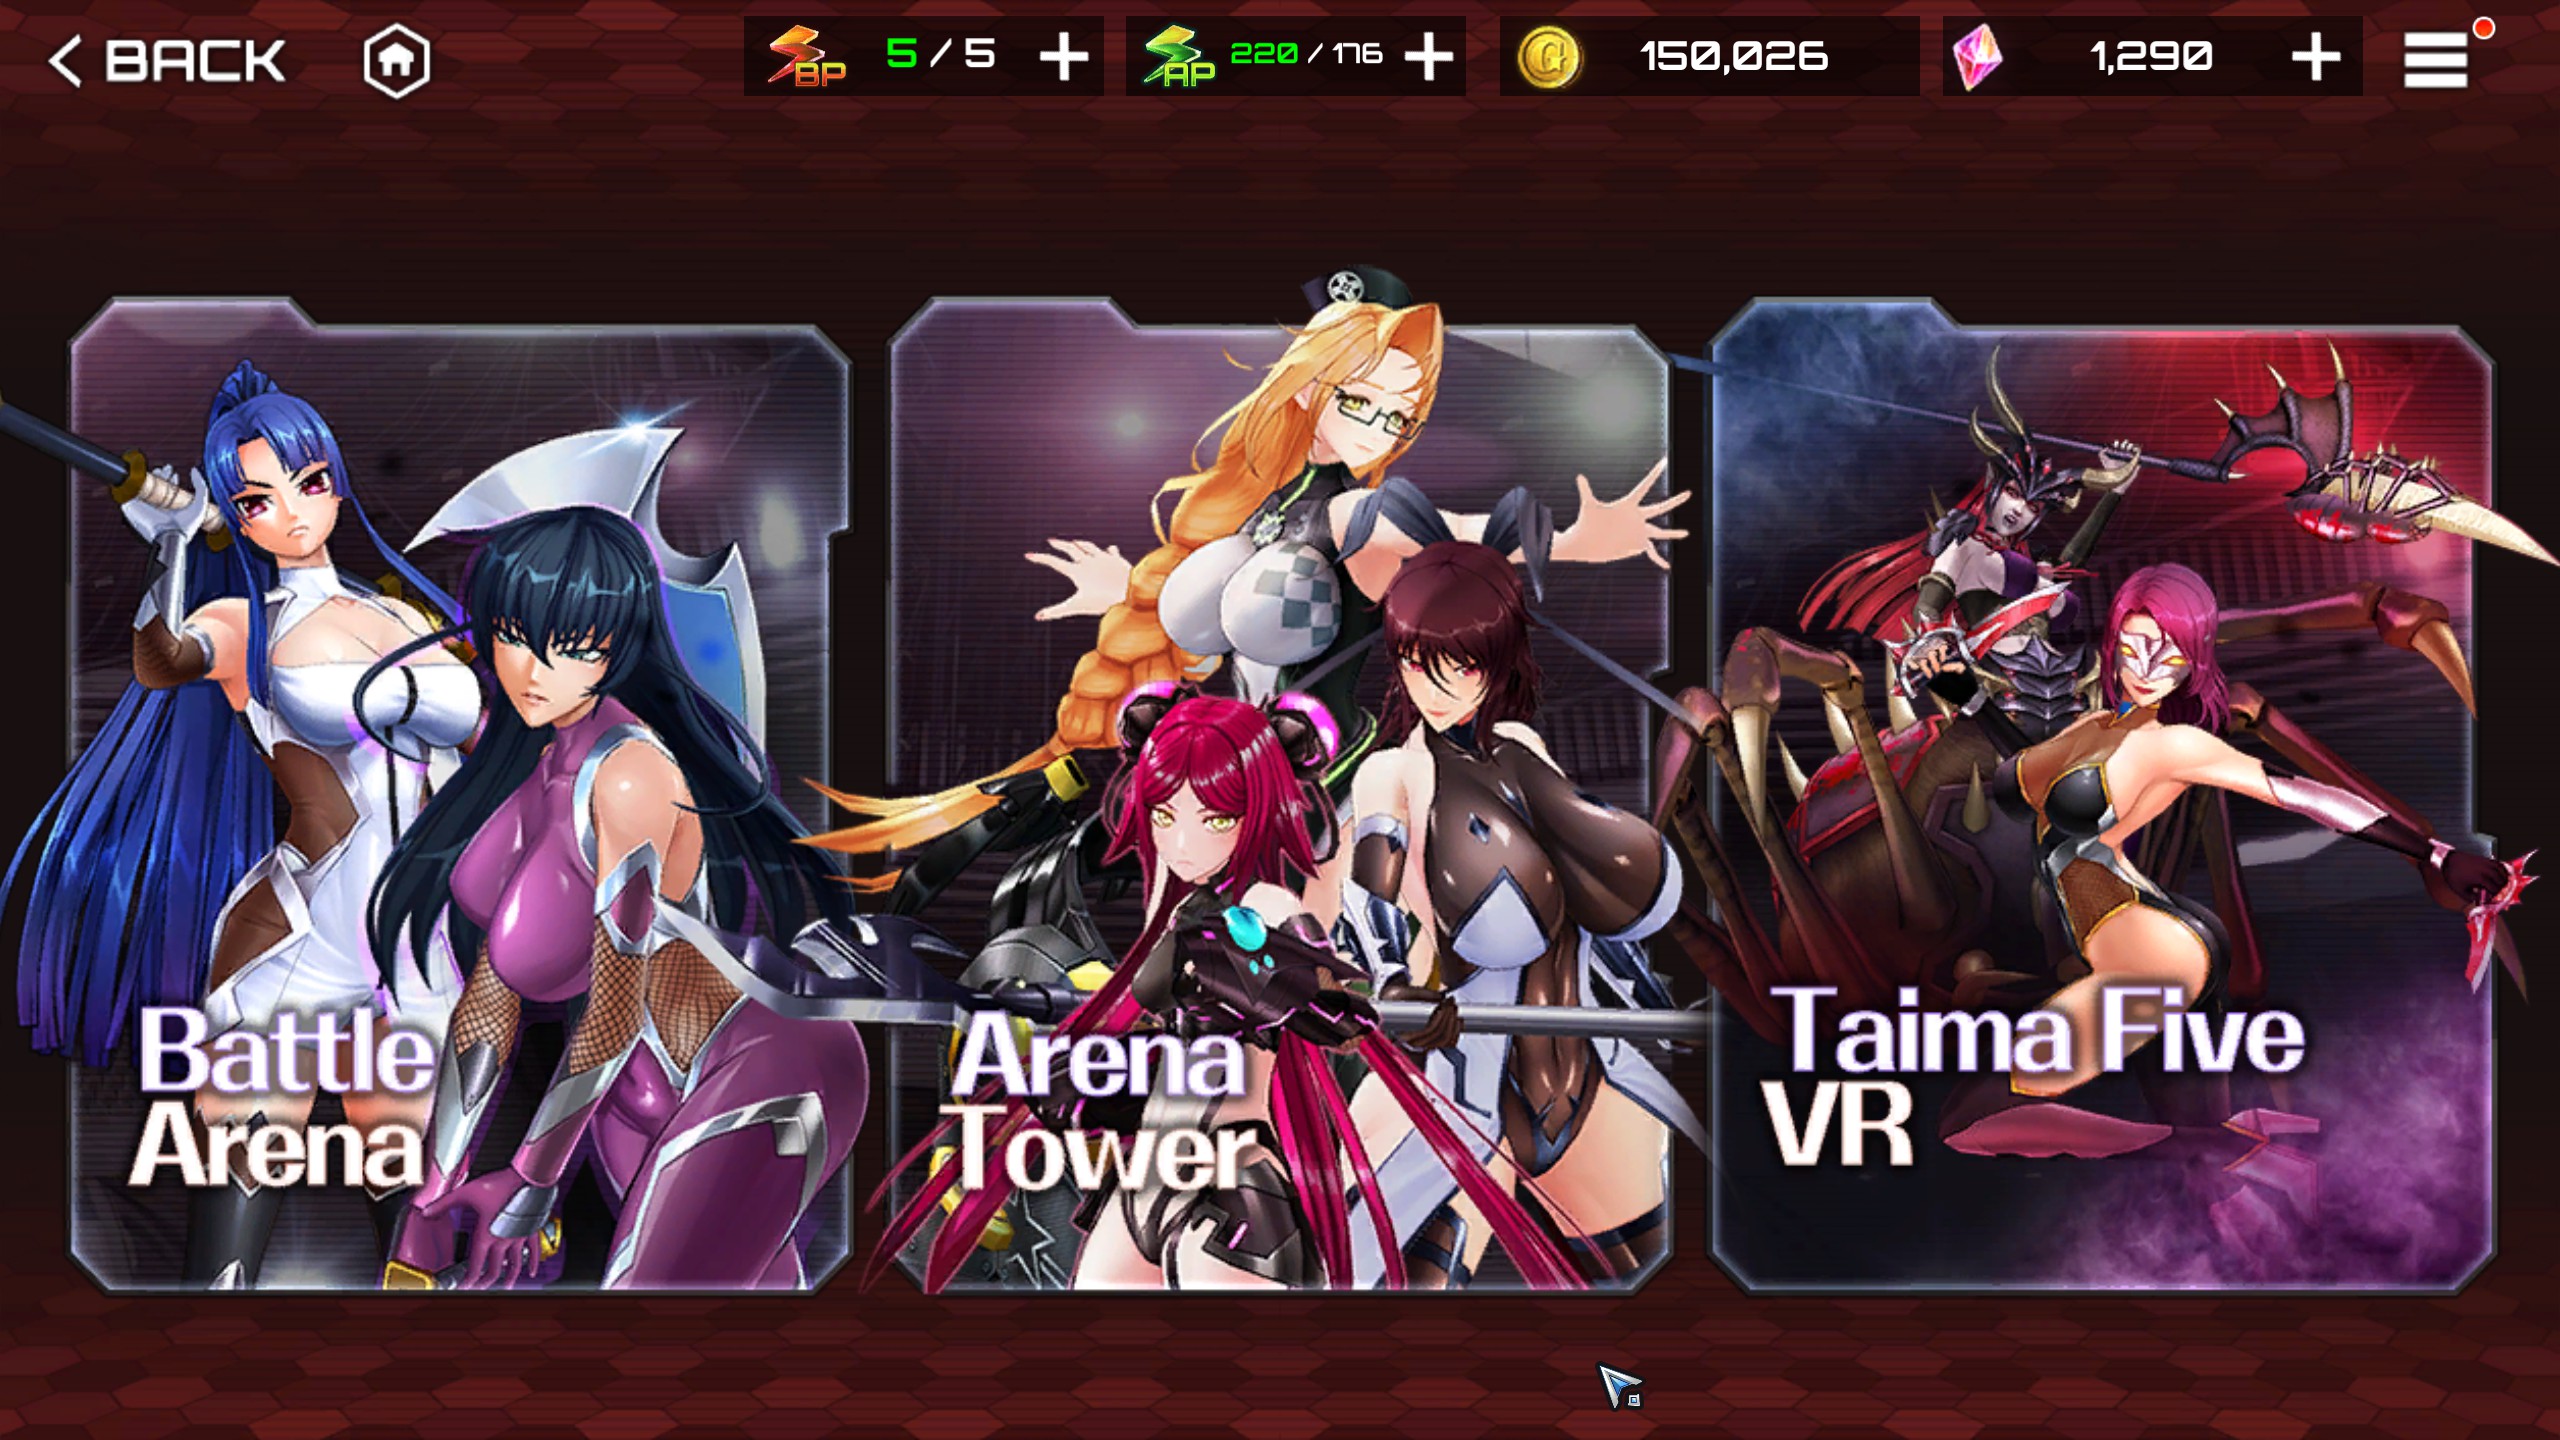
This is more or less whale territory. Especially the last two.

The first one, Arena, surprisingly isn’t total whale land. And that’s because it comes with four brackets.
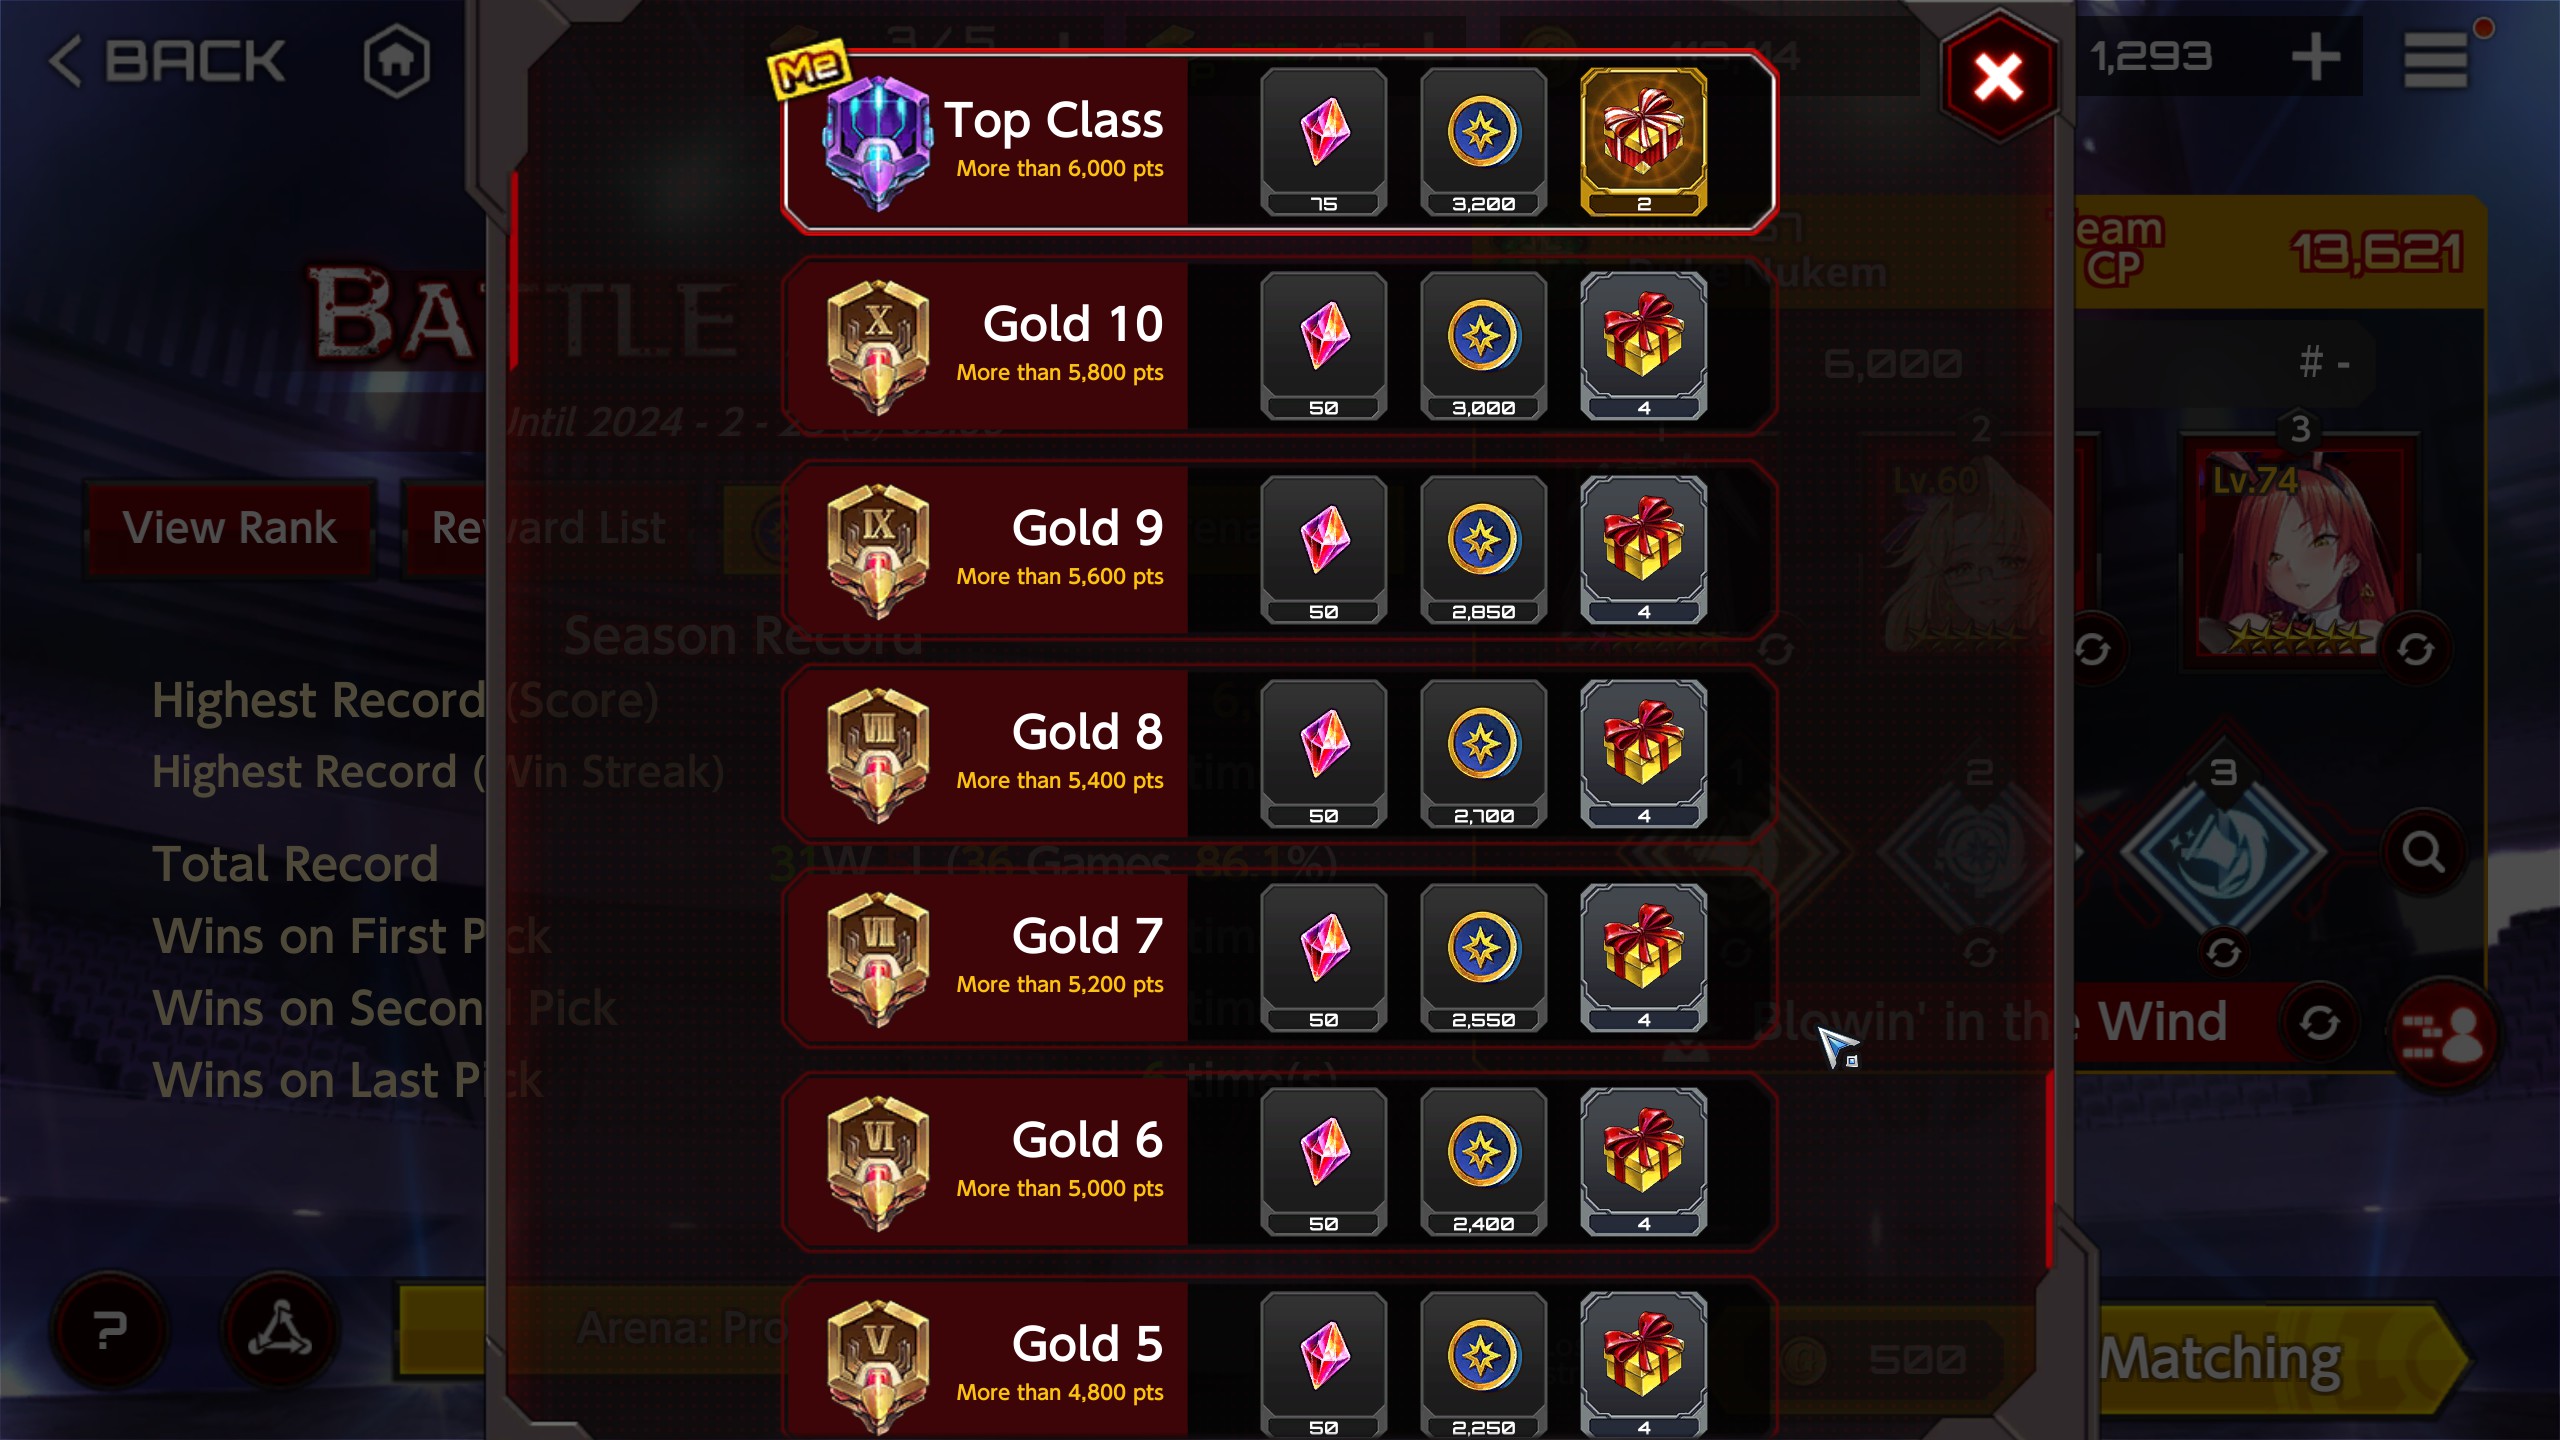
Bronze, Silver, Gold and Top Level.
Arena works through autobattling. The first three brackets is bot land. They are leveled accordingly and a character in their 60s with attacks that are erratic and reliable can push through until you reach the top. But once you enter Top Level. Its Whale land. Enjoy watching your characters get destroyed by someone’s bigger bank account.
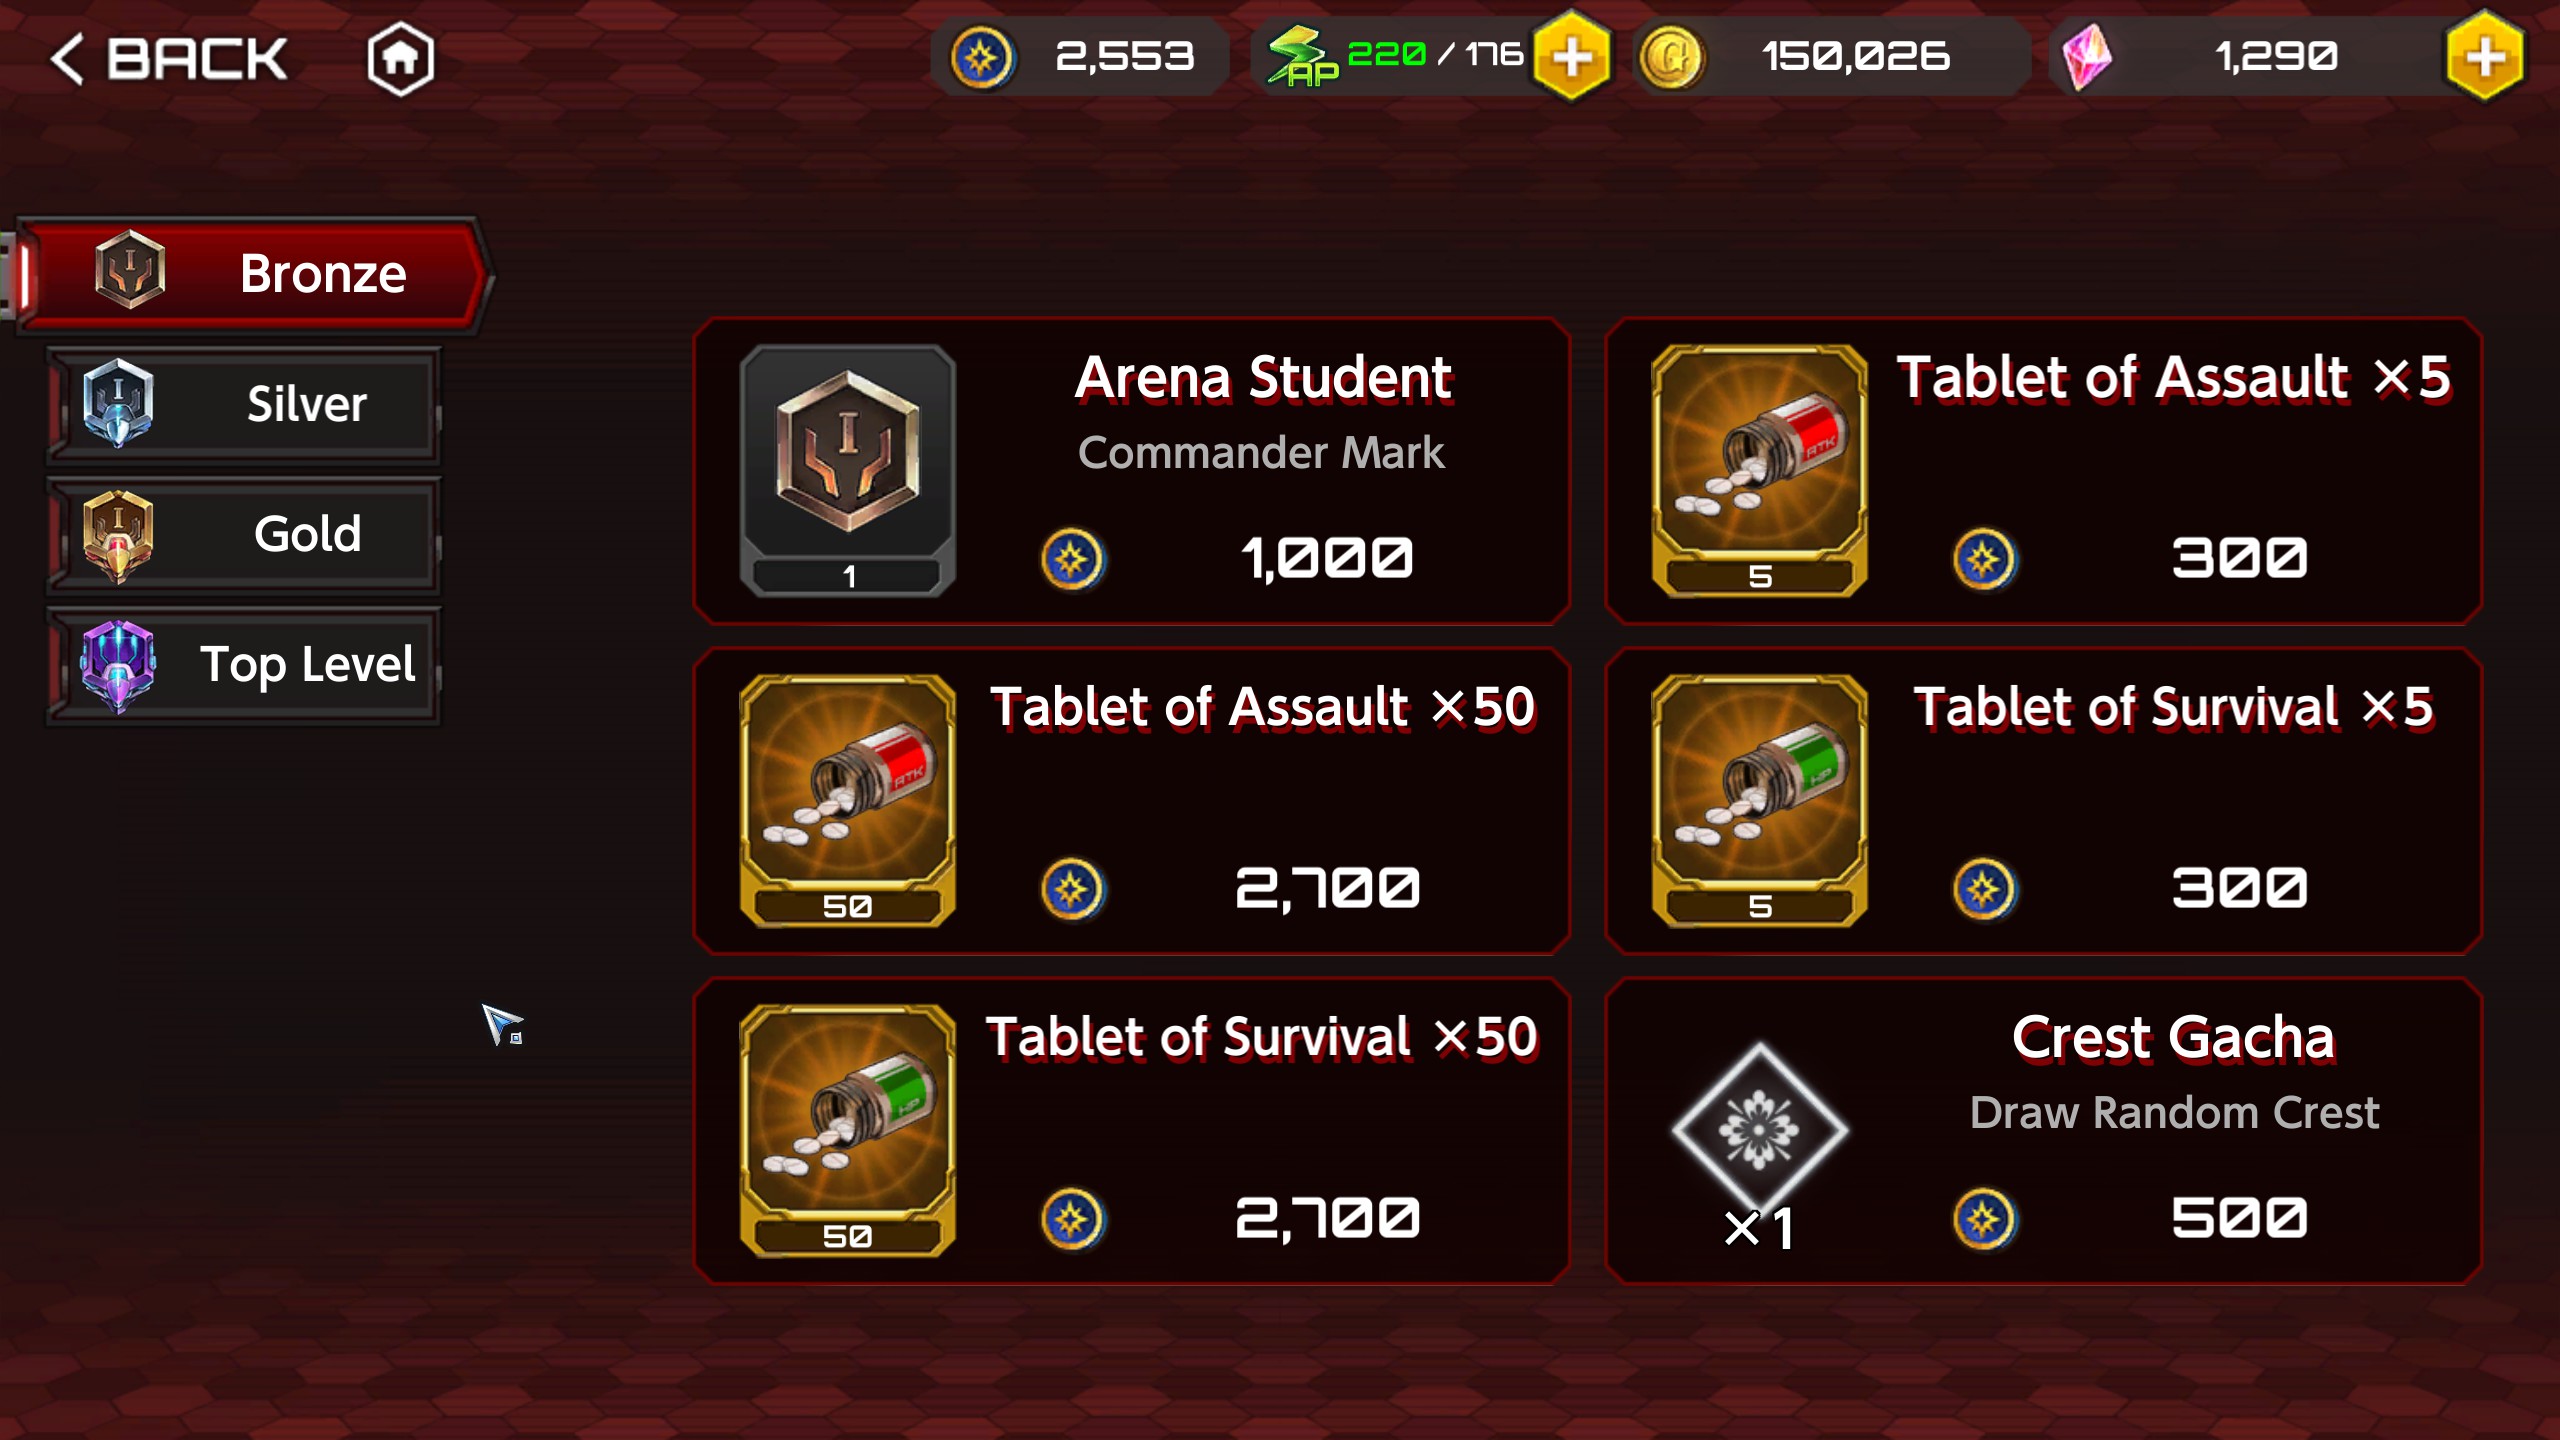
That said though, the only reason you’d want to grind for Arena coins are to either get yourself a UR weapon with the points or an ascension material.

Also, the prizes you’d get for climbing the Arena at least are somewhat worth it.
The Arena – Tower
This section is about scaling a tower with better and better prizes as you burn through it. Here’s the catch though. The enemies here will destroy you unless your characters are either whale-tier or close to it.

It works the same as X-Dive (before it died) with how it works. You’ll face may different types of enemies each floor.
Moving on.
The Arena – VR Mode / Taima 5 Vr
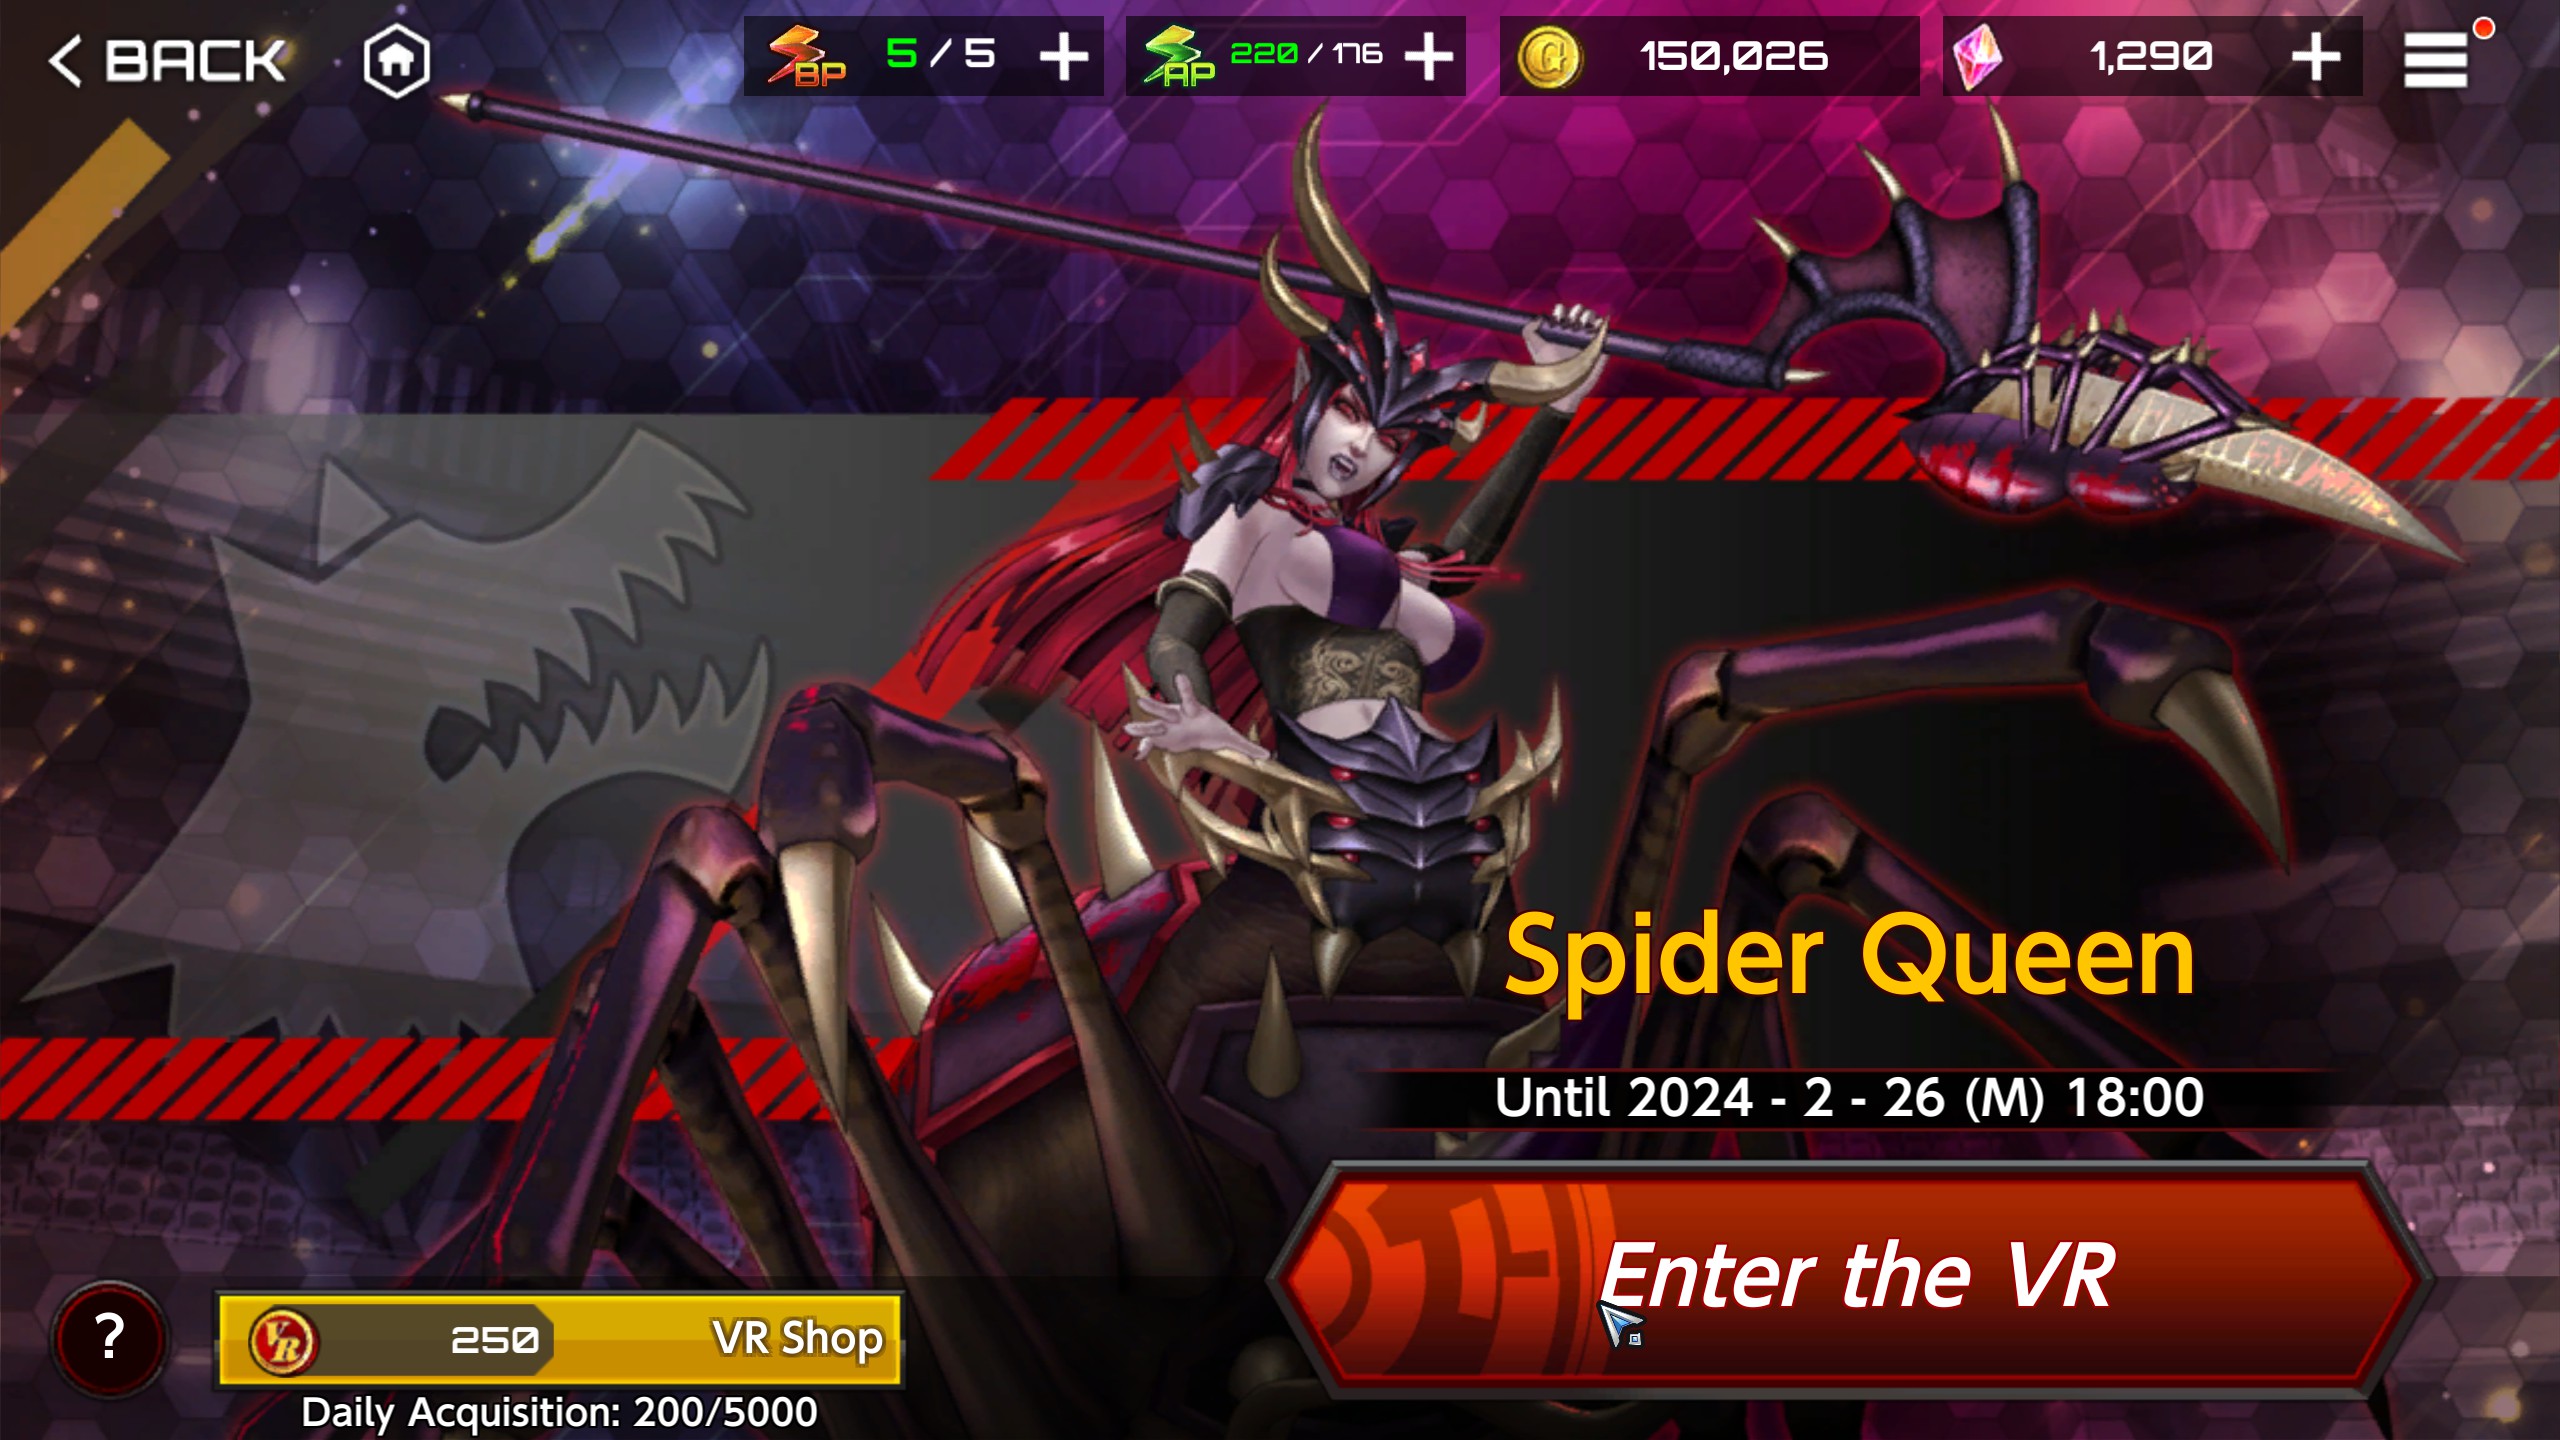
This mode comes with different bosses that change per week. But the overall power you need to properly clear this needs to be either whale tier or close to it.
However, unlike the other modes, which drops a miniscule amount of coins when getting destroyed, this one drops 50 VR coins. Which if you have enough BP and characters to throw at the mode, you can reliably farm a crystal fragment which is a necessary component to craft an ascension crystal and eventually breach endgame.
General Tips and Conclusions
-Focus your efforts on one character. One properly leveled character can easily beat the entire game. (Astaroth being the greatest example). Also it makes leveling up items and supporters much, much easier as you’re only focusing one one and not stressing yourself out in trying to max out everybody. Also, it lessens the impact of the 3-hour deals when you do.
-Don’t stress if you can’t take on harder content. A lot of those are for whales and even then, this game has stagnated for 4 years. The endgame is taking on the Tower and collecting outfits that is all. Just enjoy what the game for what it is. Hentai characters allowed to do non-Hentai stuff for once. Especially when you remember the source material.
-Remember that everything here is geared towards taking money from you. Especially leveling up characters past 40 when the deals get sweeter. And this gacha stands above so many others with how predatory it is. This time, you’re the ninja stuck in that dungeon fixing plumbing. Except you can control the dungeon itself.
-Don’t hesitate to game the system itself. As everything is out to extract from you, find ways around it and exploit it to your advantage. Don’t let a message box or a pretty banner tell you what to do. Make your own experience.
As I am still going through this game, I definitely don’t have everything here. I’ll update as soon as I get to that. Hope you found this guide useful.
Extra – Stardust farming
Stardust. A requirement for certain items.
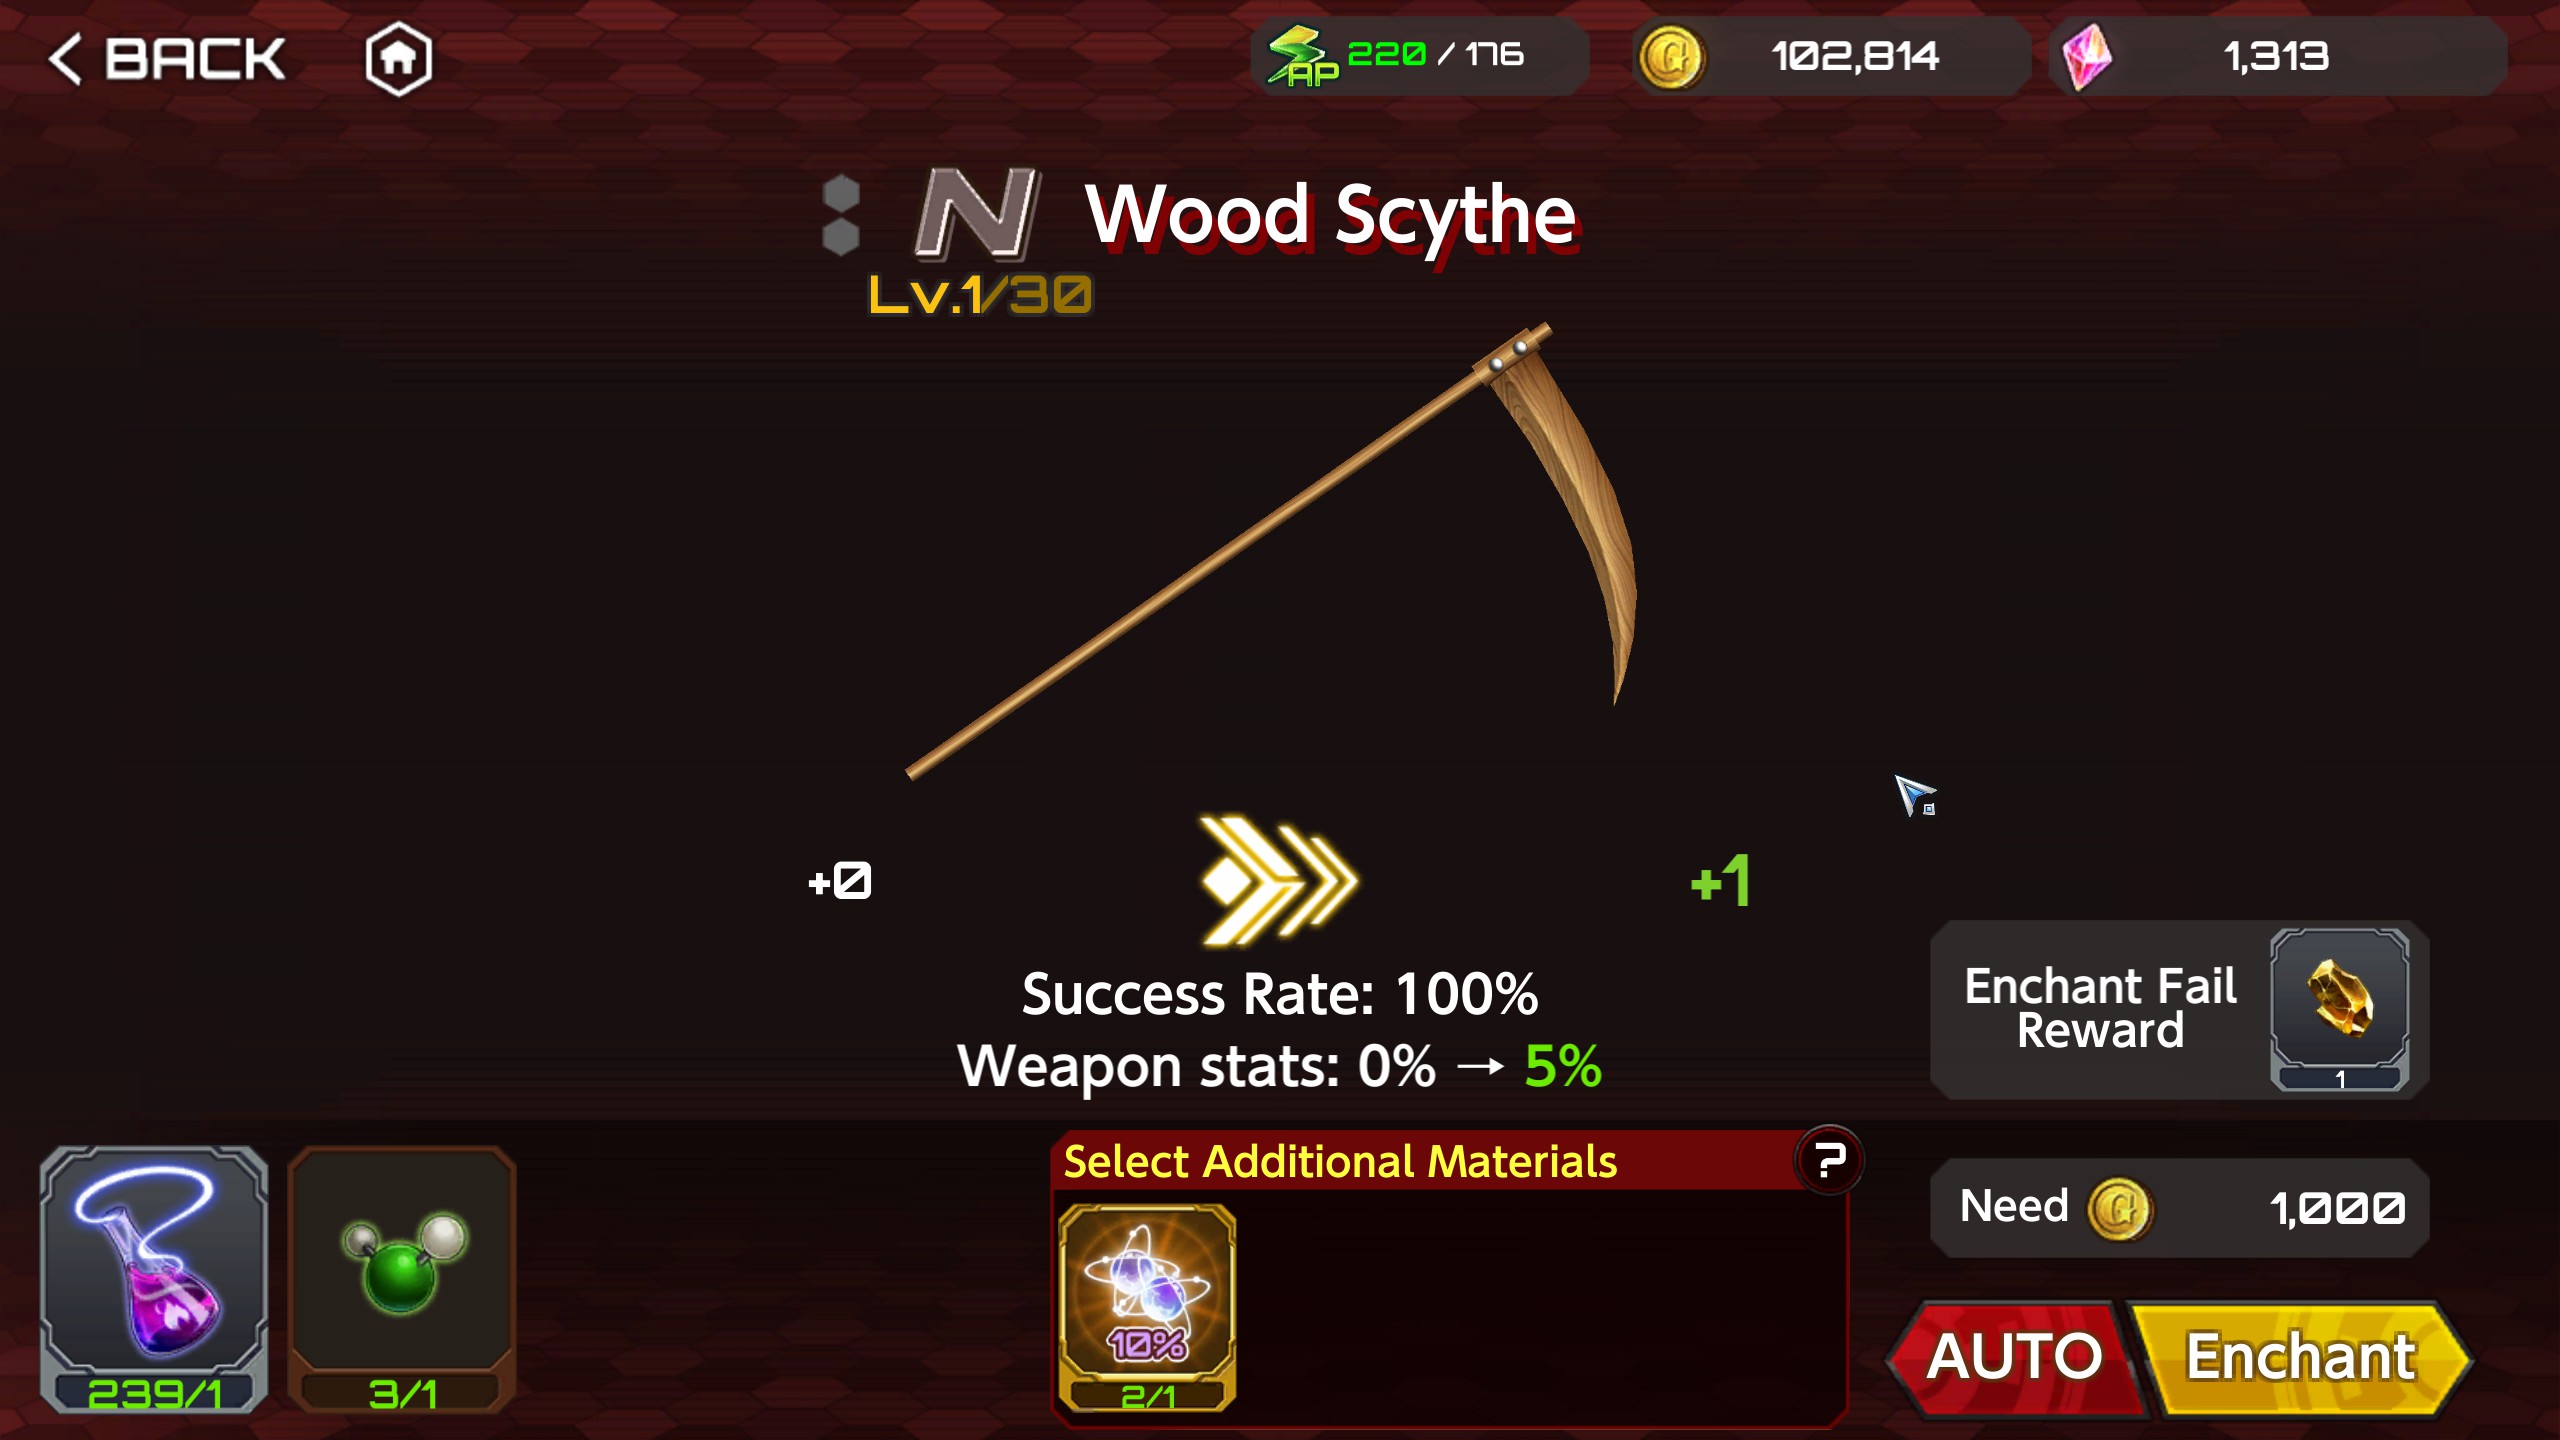
An easy way to farm them would be to spend your gold on the gold gacha, get a bunch of N weapons, recycle them, and then try to enchant a N weapon to a high enough level so you can actually fail hard. There’s also the added benefit of getting the material required for enchanting supporters.

Stardust is used for making complete stardust and then enchant chance boosters.
Extra – Send in the clones
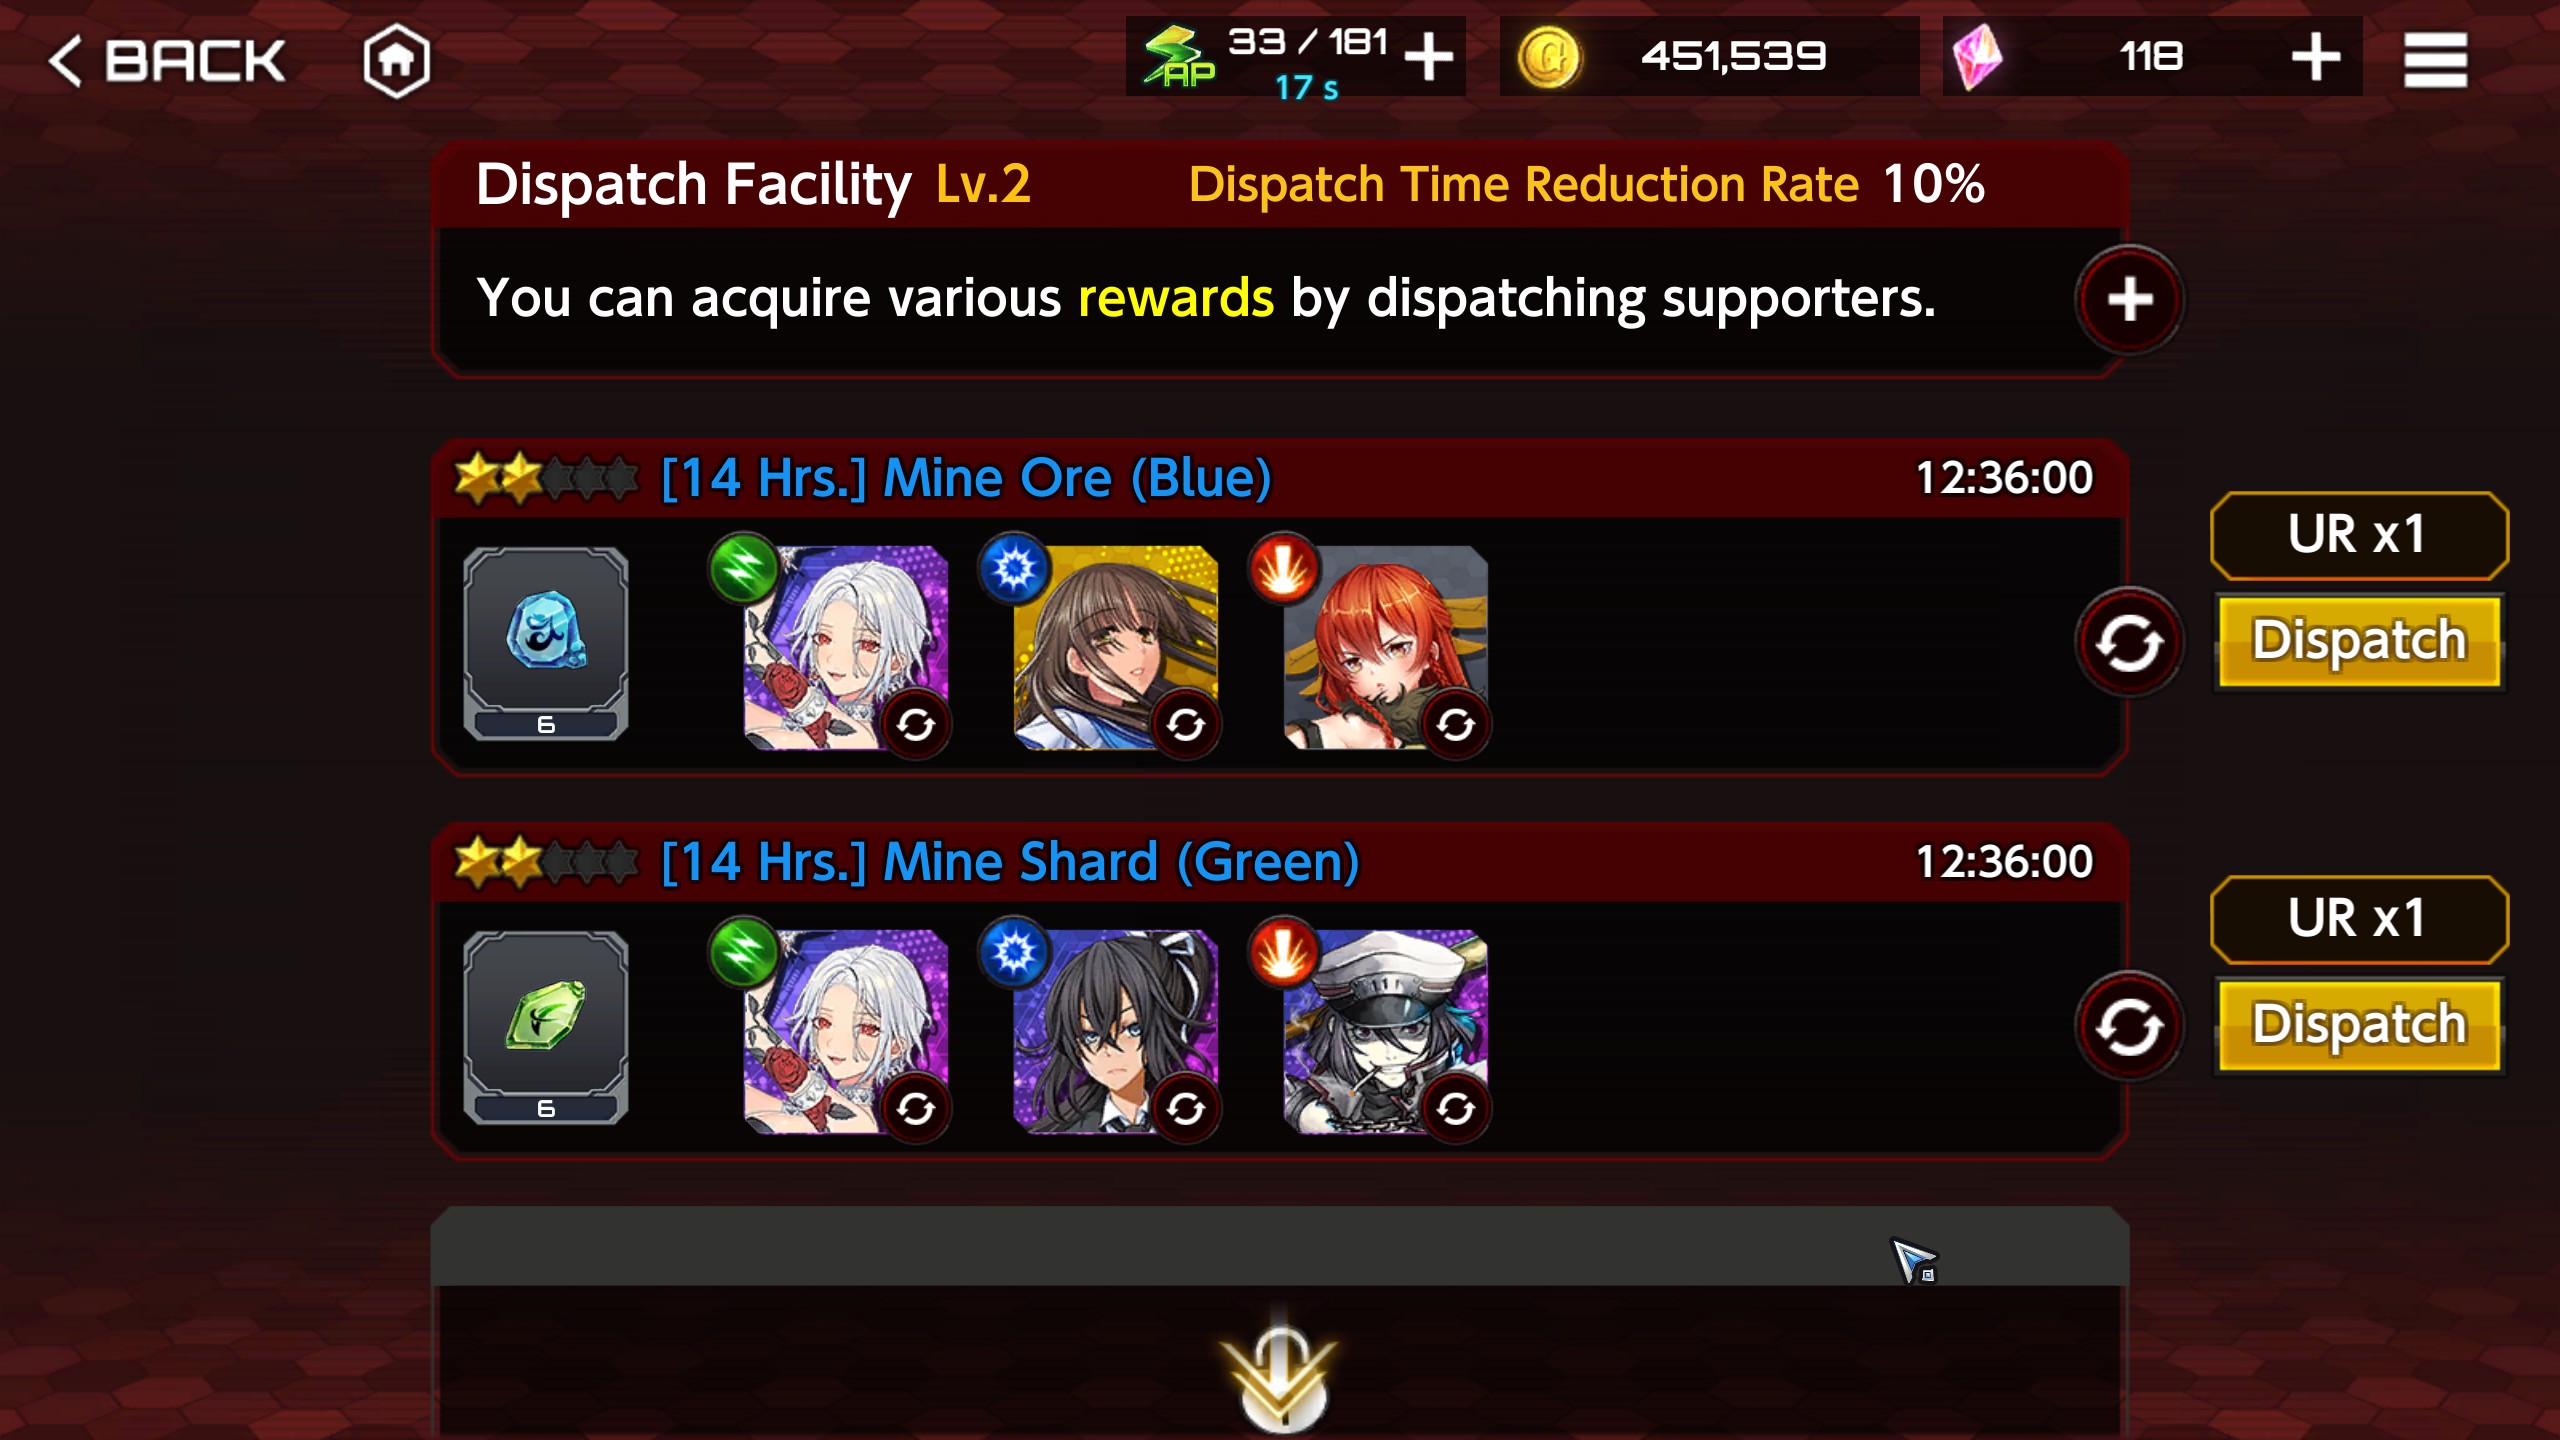
Getting supporters in general is rough. You have to roll the regular gacha for a chance of one and the really good ones require either luck or whaling. This is especially rough when you want supports to be sent out for materials or lowering the timer for producing something.
This is why I’d advise to not simply merge your duplicates right off the bat. Reason for this is because those duplicates can be put to work in your base instead.
The only time you should merge duplicates is when you need that supporter’s ability to be stronger to be used by your characters.